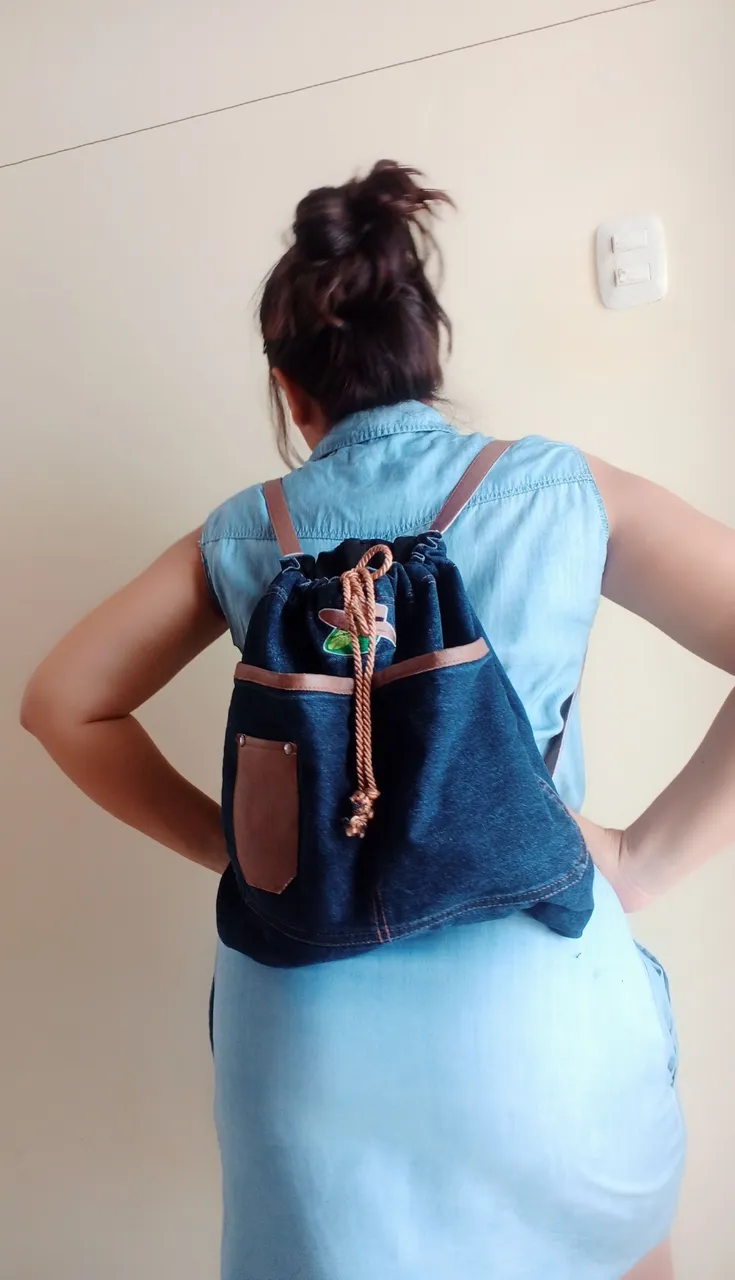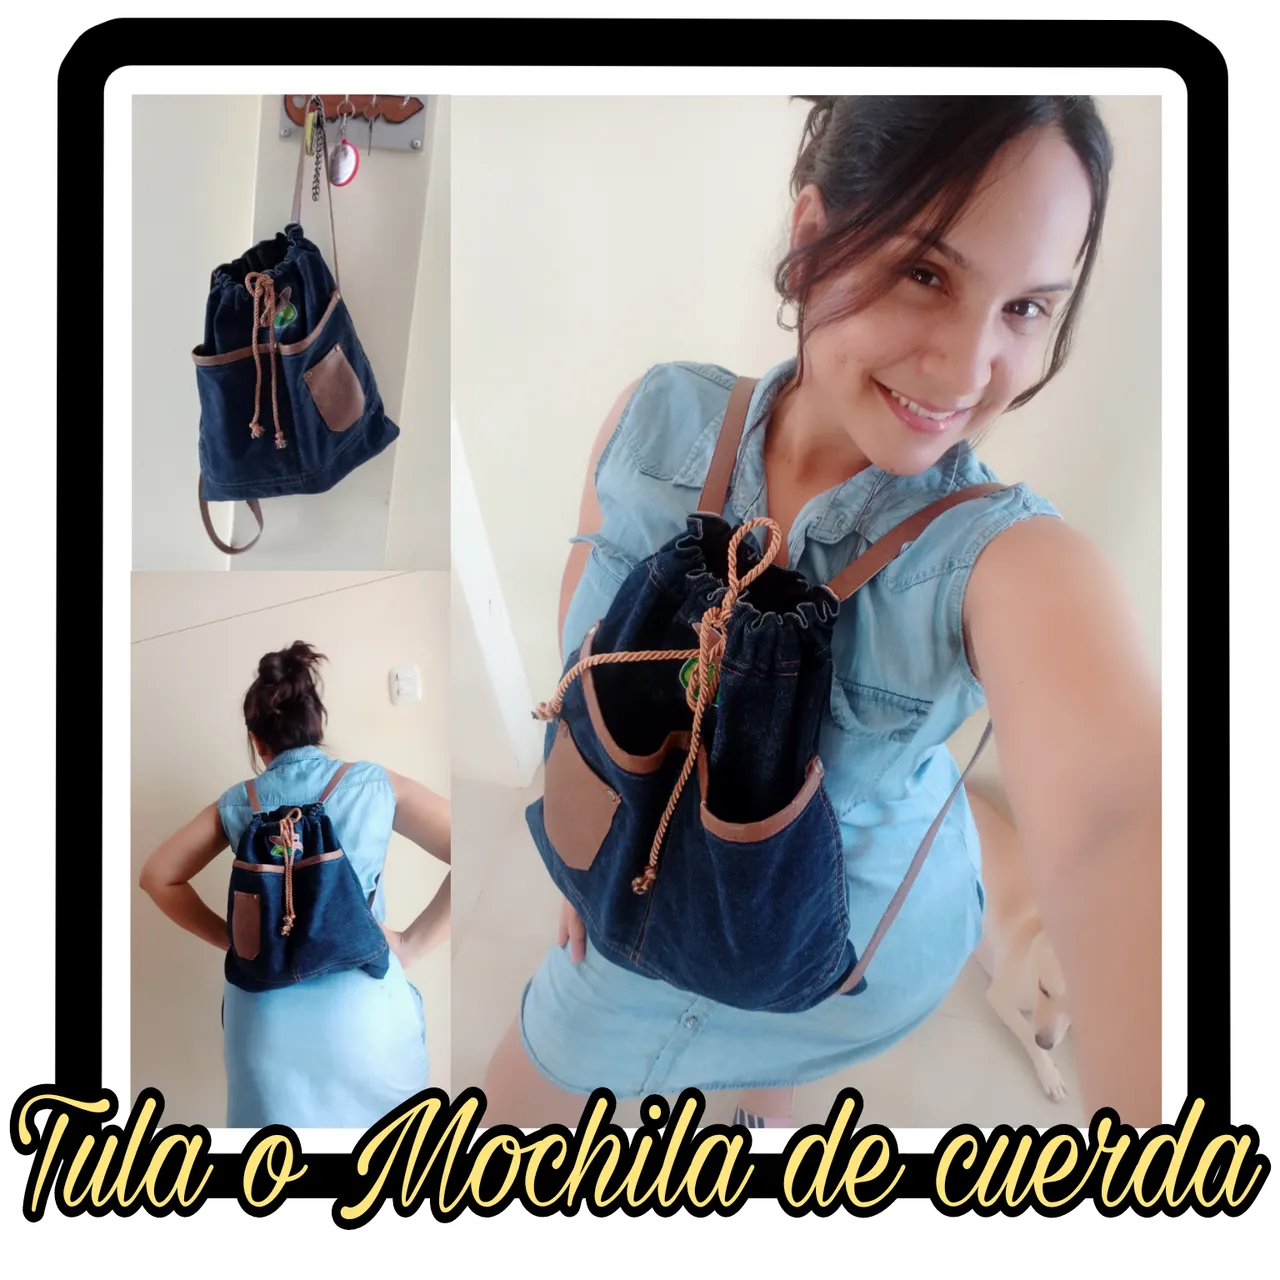
Feliz y bendecido día mis apreciados amigos de la colmena #Needleworkmonday, qué alegría volver a saludarlos, quiero contarles que hoy les traigo un proyecto de costura fabricado con material reciclado, se trata de la confección de una Tula o mochila con cuerda, partiendo desde un delantal rectangular. Este delantar, tuve muchas veces intenciones de tirarlo, pero por el color que tenía y por los acabados, me llamaba mucho la atención y siempre decía: en cualquier momento lo voy a utilizar para algo; y pues, si, se dio la oportunidad de usarlo, dije: voy a realizar una mochila con este delantal y aquí te muestro cómo la hice.
Happy and blessed day my dear friends of the #Needleworkmonday hive, what a joy to greet you again, I want to tell you that today I bring you a sewing project made with recycled material, it is the making of a Tula or backpack with rope, starting from a rectangular apron. This apron, I had many times intentions of throwing it away, but because of the color it had and the finishes, it called my attention and I always said: at any moment I will use it for something; and well, yes, I had the opportunity to use it, I said: I am going to make a backpack with this apron and here I show you how I did it.

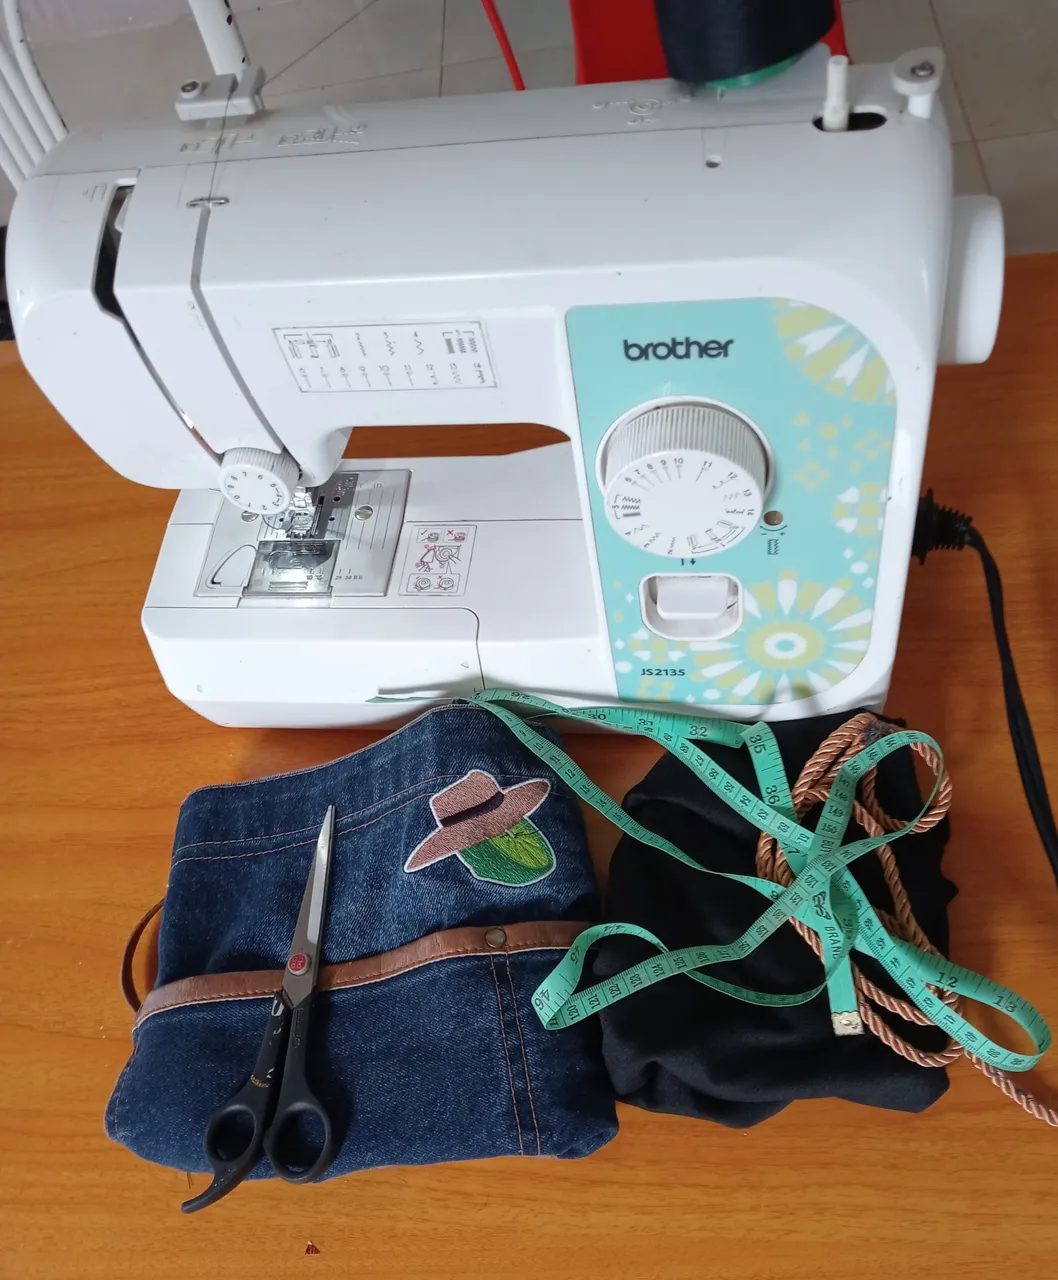
- Delantal de tela jeans reciclado.
- Tela negra para forro.
- Cordón dorando.
- Máquina de coser.
- Tijeras.
- Cinta métrica.
- Recycled denim apron.
- Black fabric for lining.
- Gold cord.
- Sewing machine.
- Scissors.
- Measuring tape.

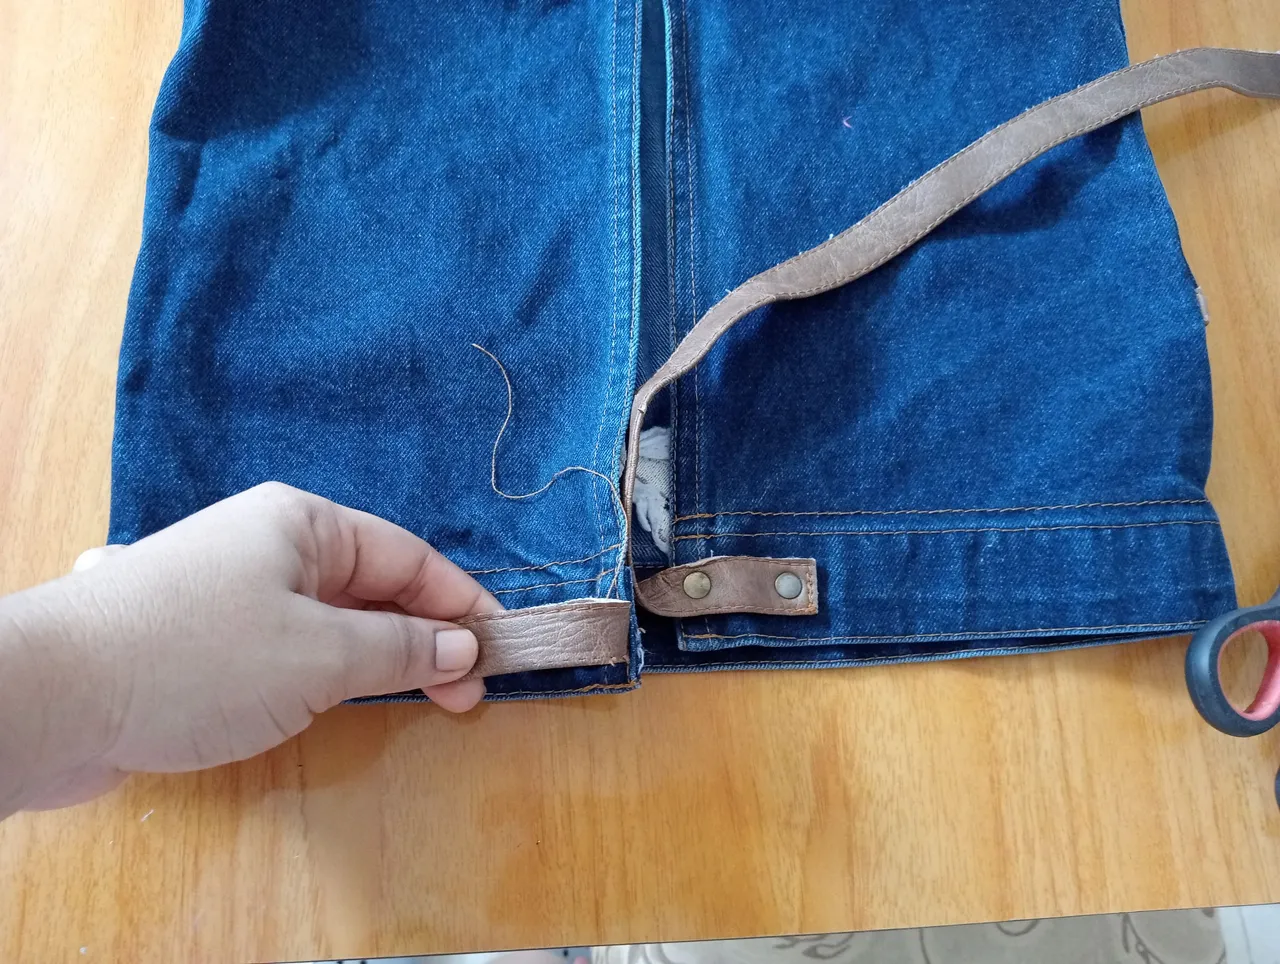
Para la confección de estatula o mochila lo que hice fue conservar casi toda la estructura del mismo ya que sus acabados son muy bonitos entonces lo primero que realicé fue retirar las dos tiras de semicuero que son las que permitía sujetarse o amarrarse el delantal por la parte de atrás.
For the making of the backpack, what I did was to keep almost all the structure of it, since its finishes are very nice, so the first thing I did was to remove the two semi-leather strips that allow the apron to be fastened or tied at the back.
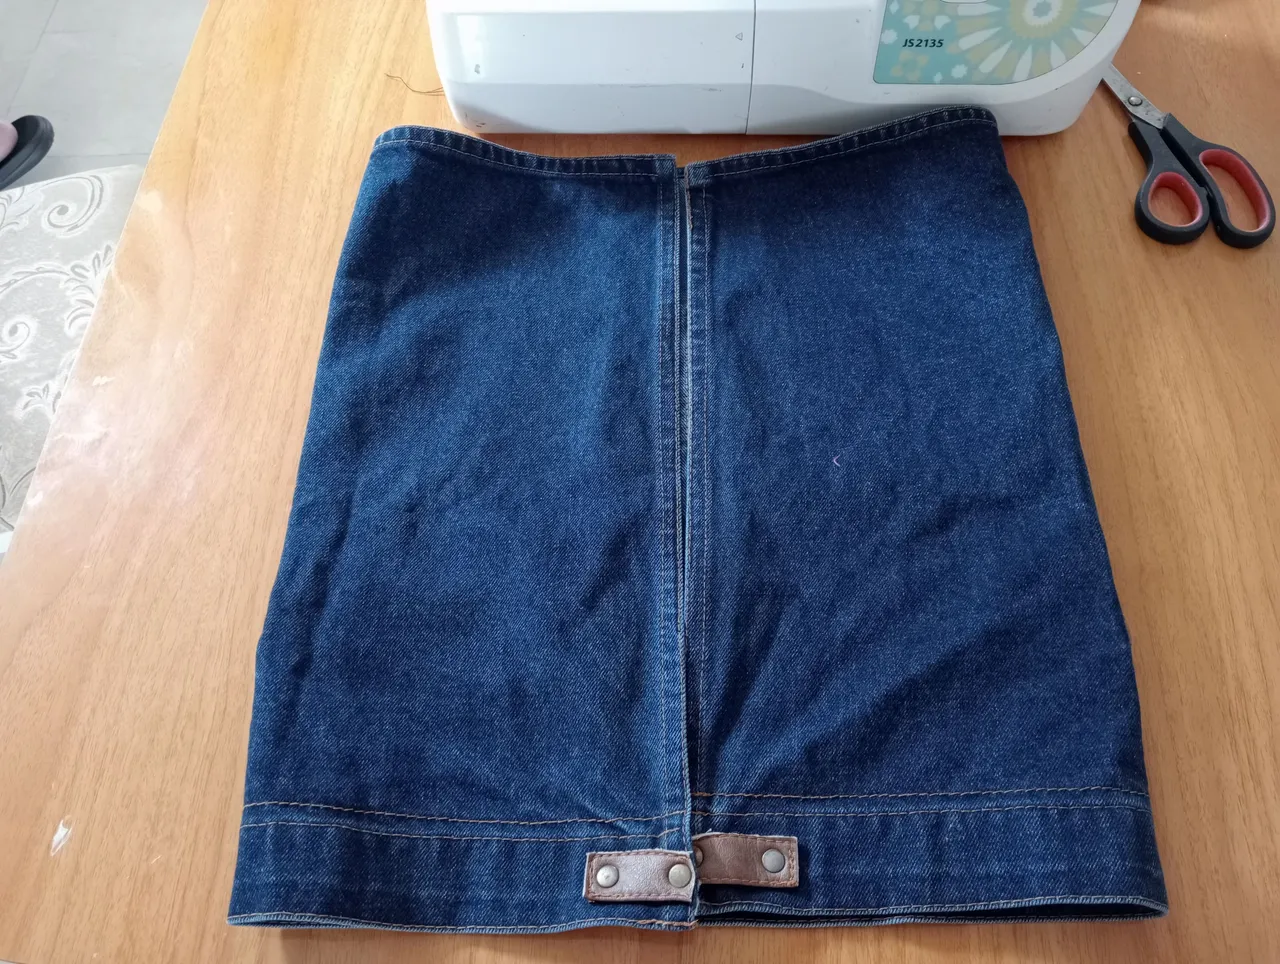
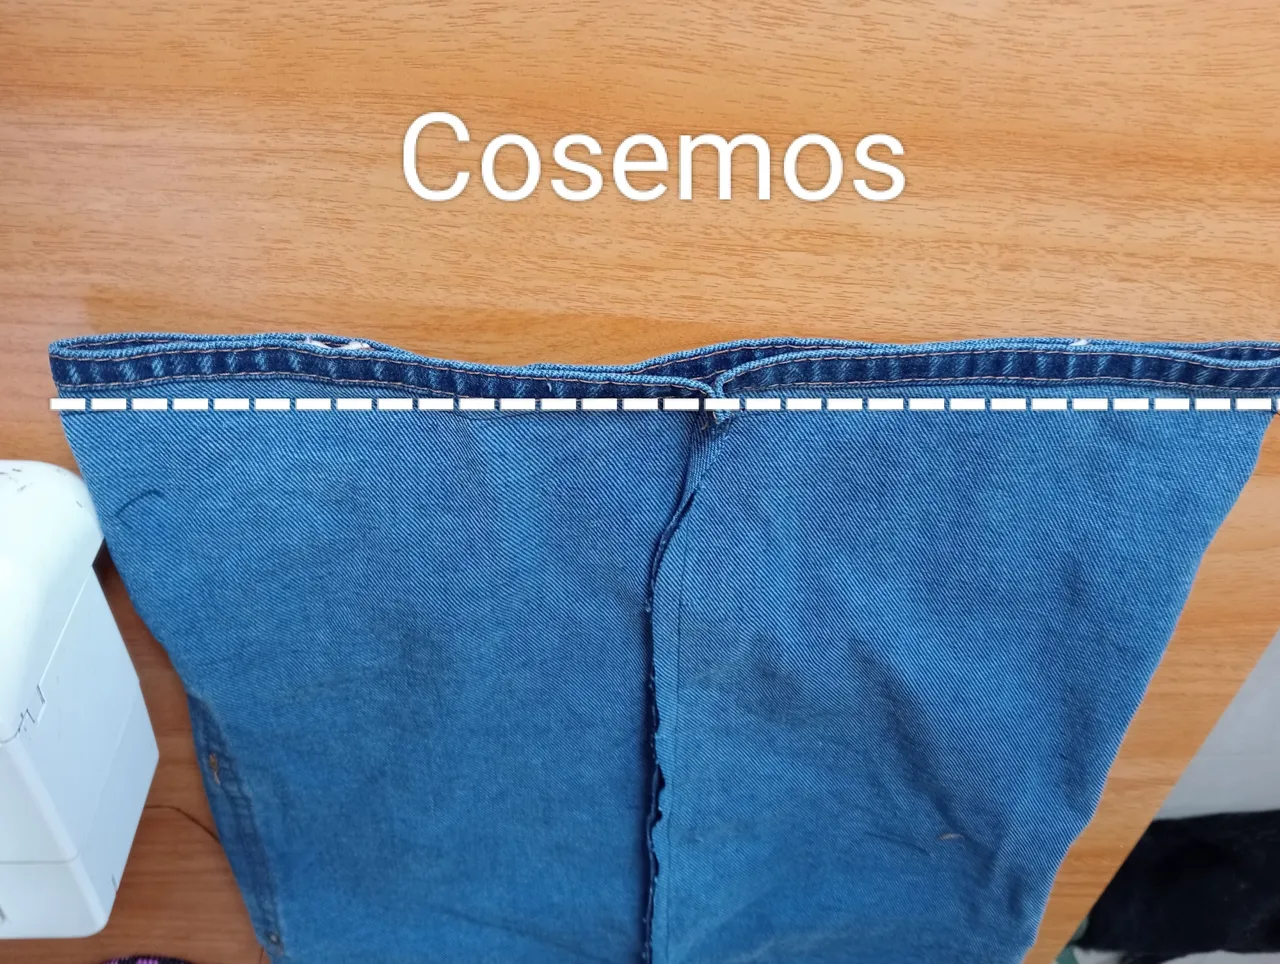
Después que retiré las dos tiras de semicuero, procedí a coser los extremos del delantal en el centro; colocando derecho con derecho.
After I removed the two strips of semi-leather, I proceeded to sew the ends of the apron in the center; placing right sides together.
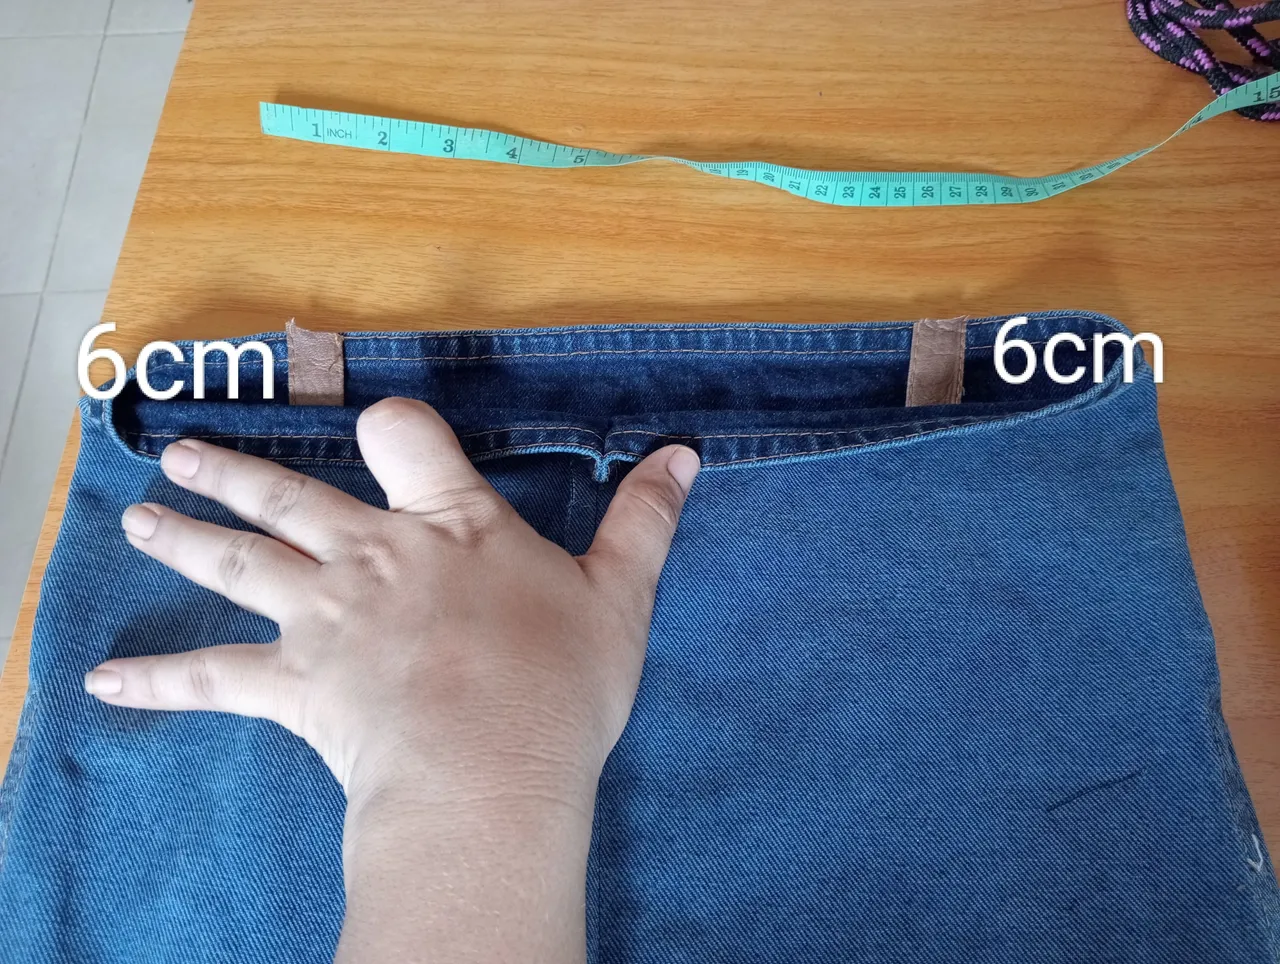
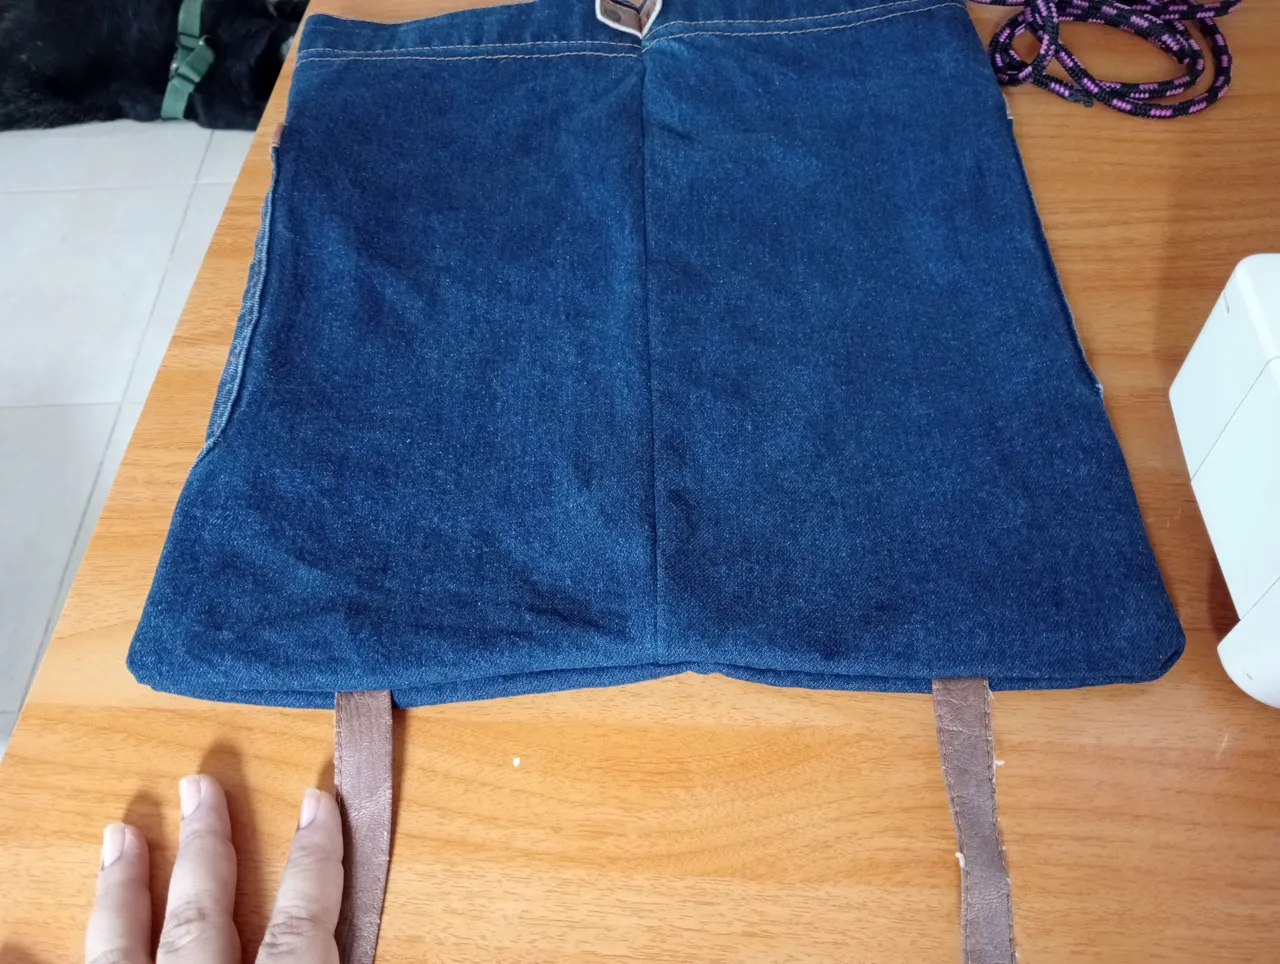
Luego utilicé las dos tiras de semicuero y las coloque dentro de las orillas inferiores del cilindro que se formó cuando cosí los extremos, estás las coloqué dejando 6 cm de espacio después de los laterales.
Then I used the two strips of semi-leather and placed them inside the bottom edges of the cylinder that was formed when I sewed the ends together, leaving 6 cm of space after the sides.
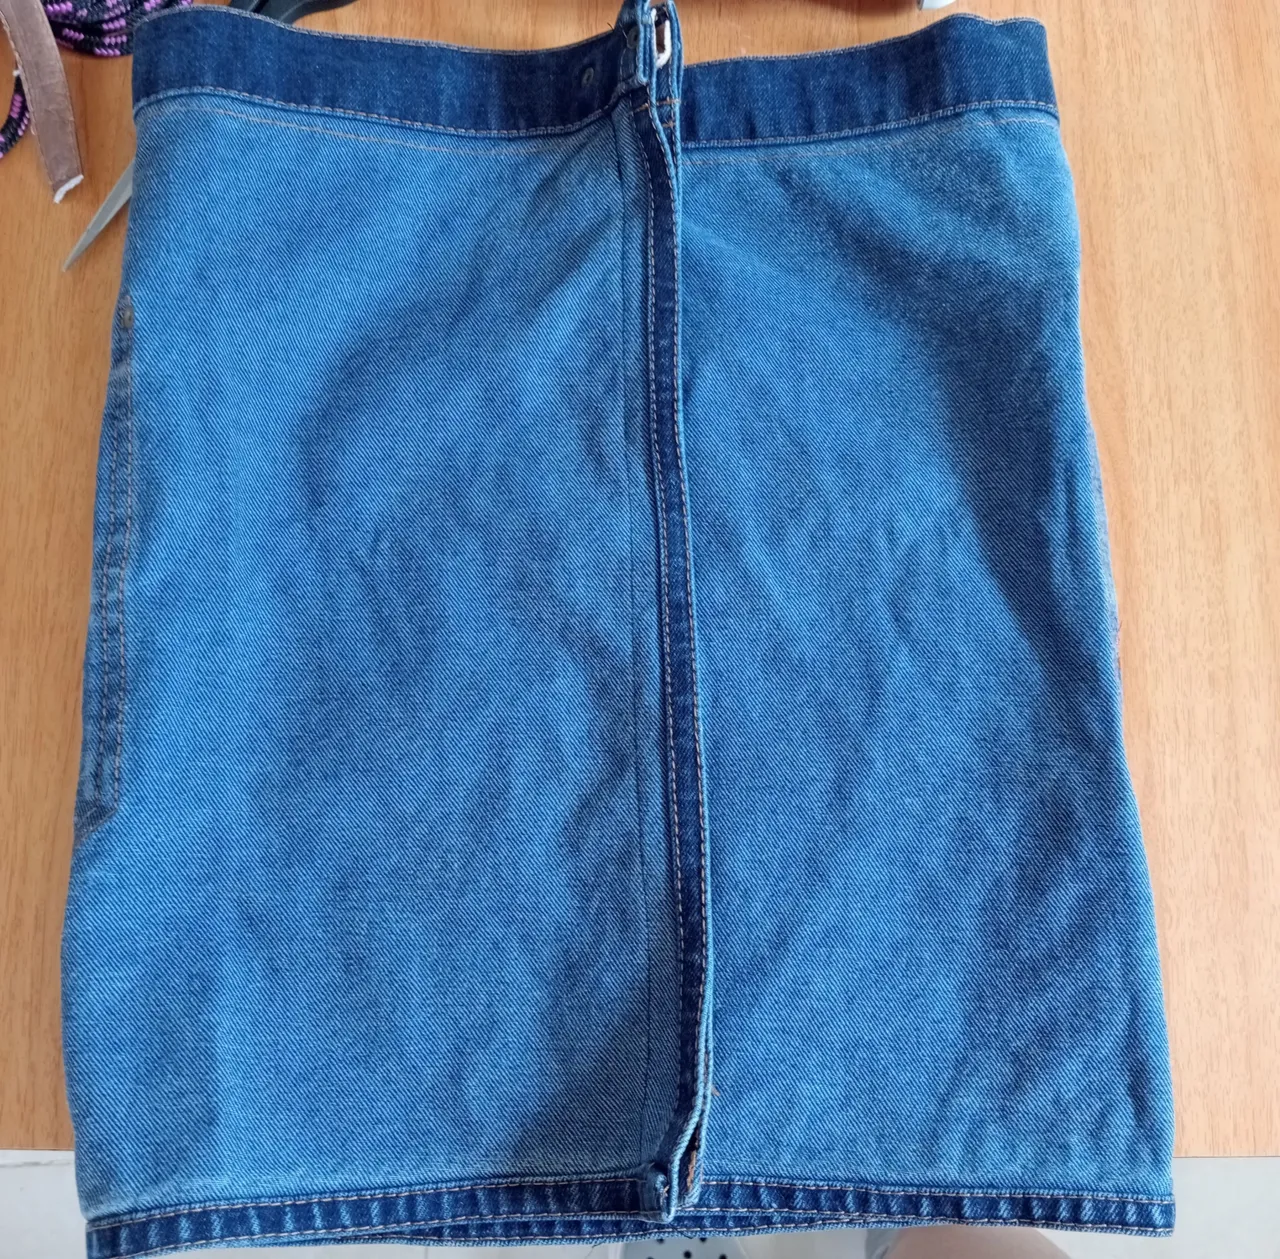
Pasamos costuras y desdoblamos.
We pass seams and unfold.
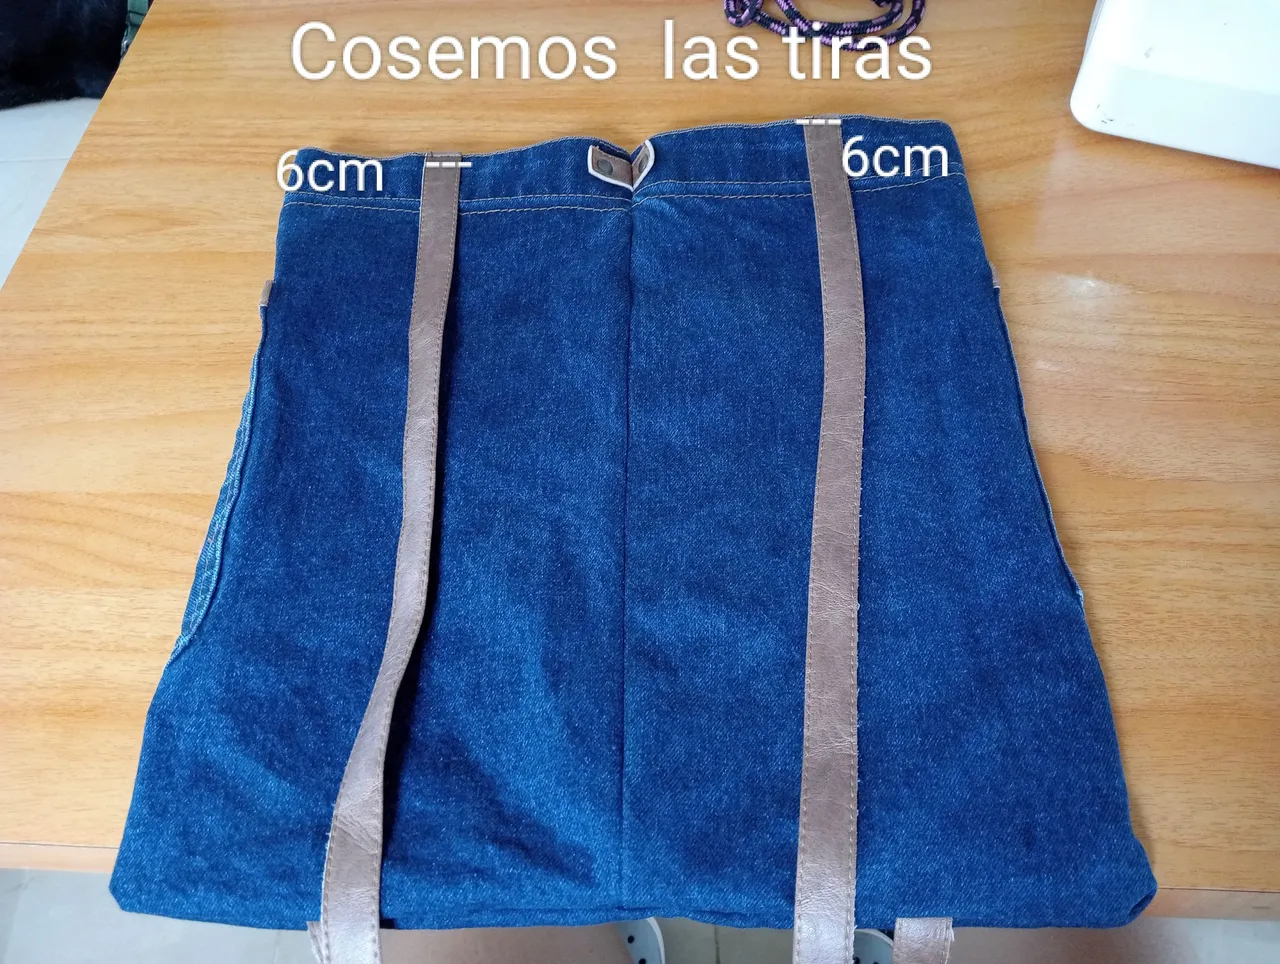
Posteriormente cosemos las puntas de las dos tiras por el borde superior del saco que se formó al coser la parte de abajo, de igual manera dejando 6 cm de distancia de cada lado.
Then we sew the ends of the two strips along the upper edge of the bag that was formed when sewing the bottom part, in the same way leaving 6 cm distance on each side.
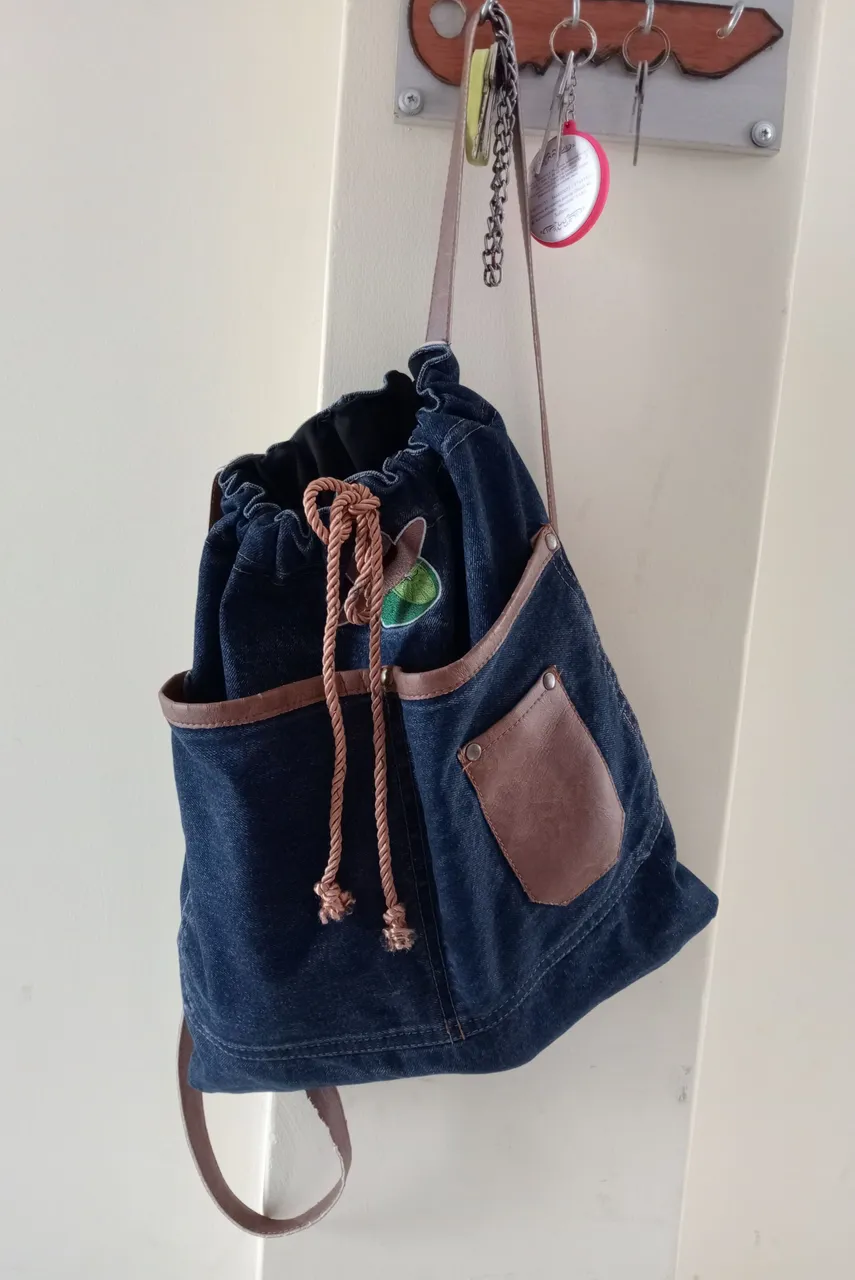
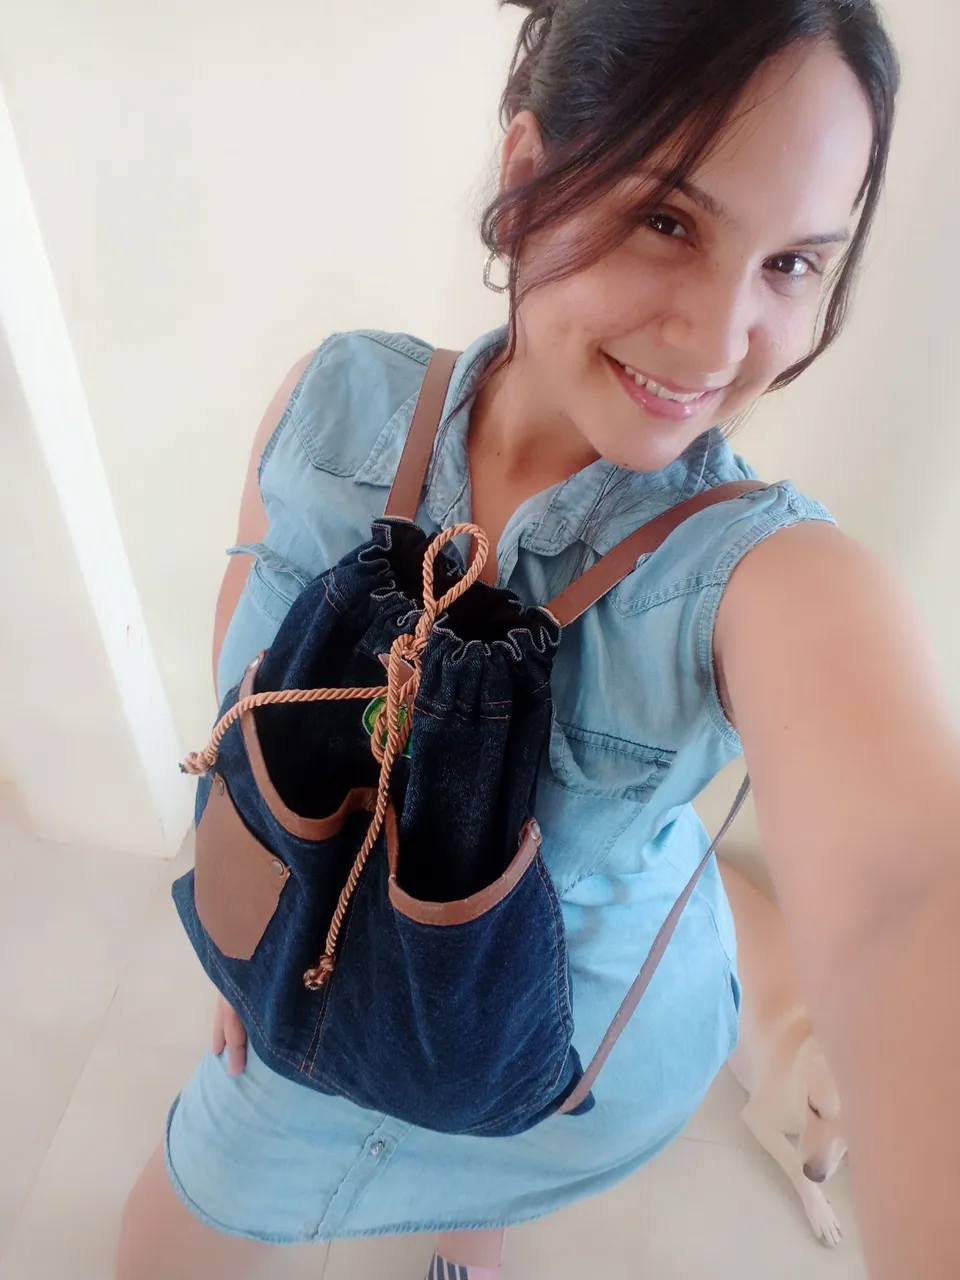
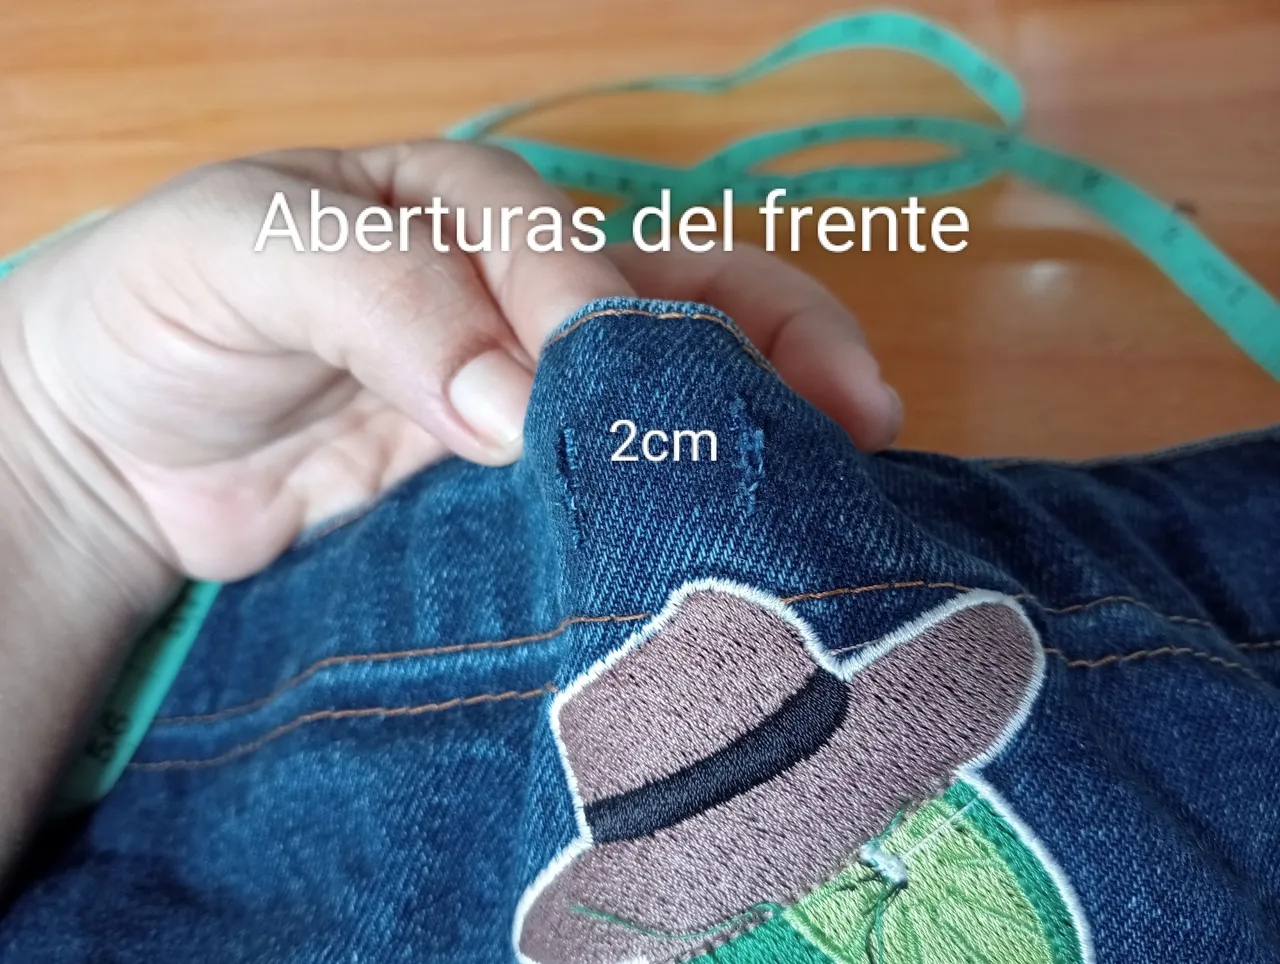
Como les comenté en un principio, quise usar al máximo todos los detalles que posee este delantar, es por ello que hice dos aberturitas en cada lado de la costura que realicé cuando uní los extremos, para pasar por allí el cordón dorado; estas dos aberturas también la hice en la parte del frente de la Tula, específicamente en el centro, dejando 2 cm de distancia entre ellas.
As I mentioned at the beginning, I wanted to use all the details that this trimming has, that is why I made two little openings on each side of the seam that I made when I joined the ends, to pass through there the golden cord; these two openings were also made in the front of the Tula, specifically in the center, leaving 2 cm of distance between them.
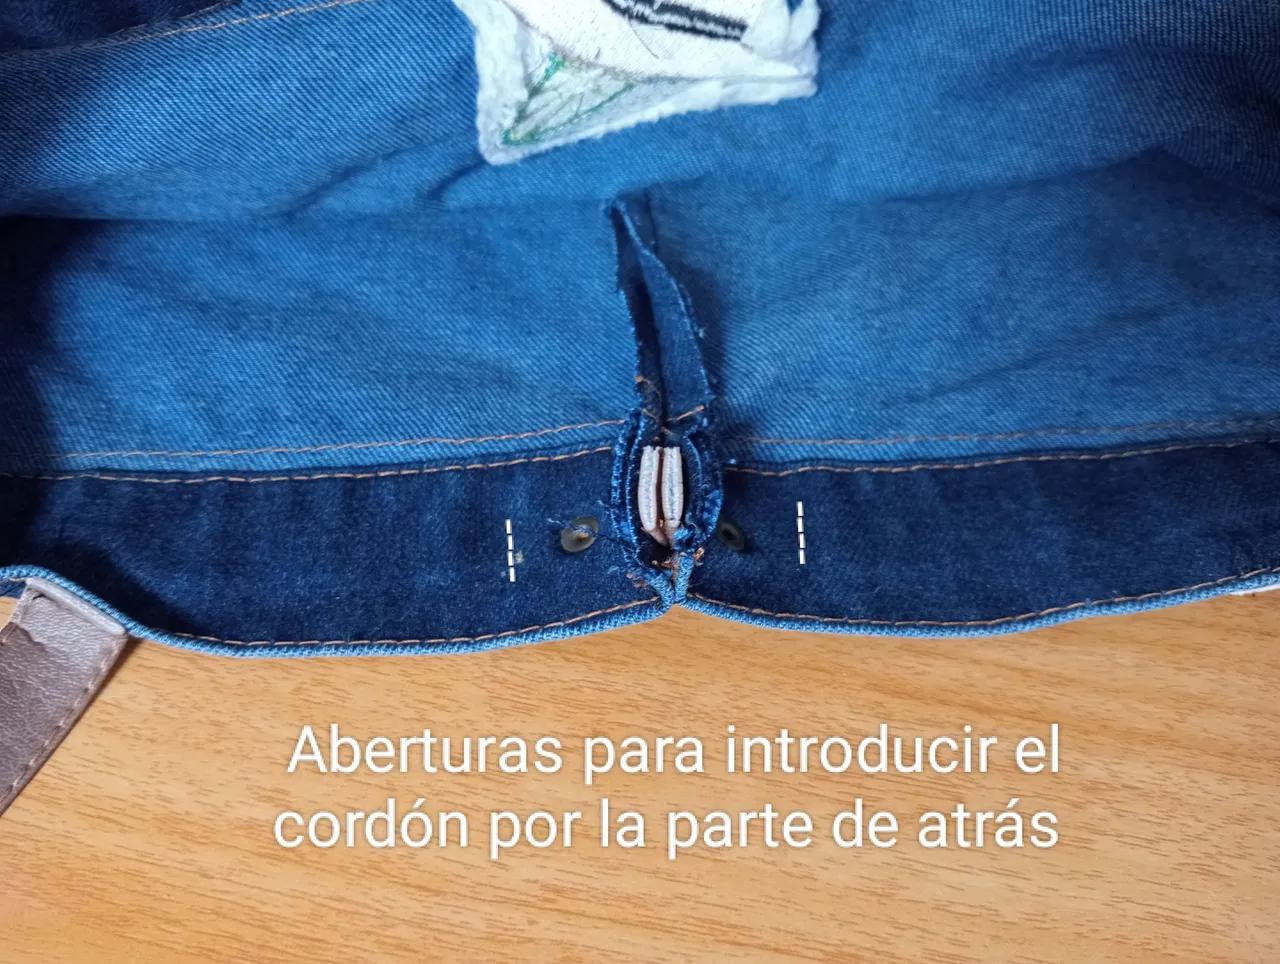
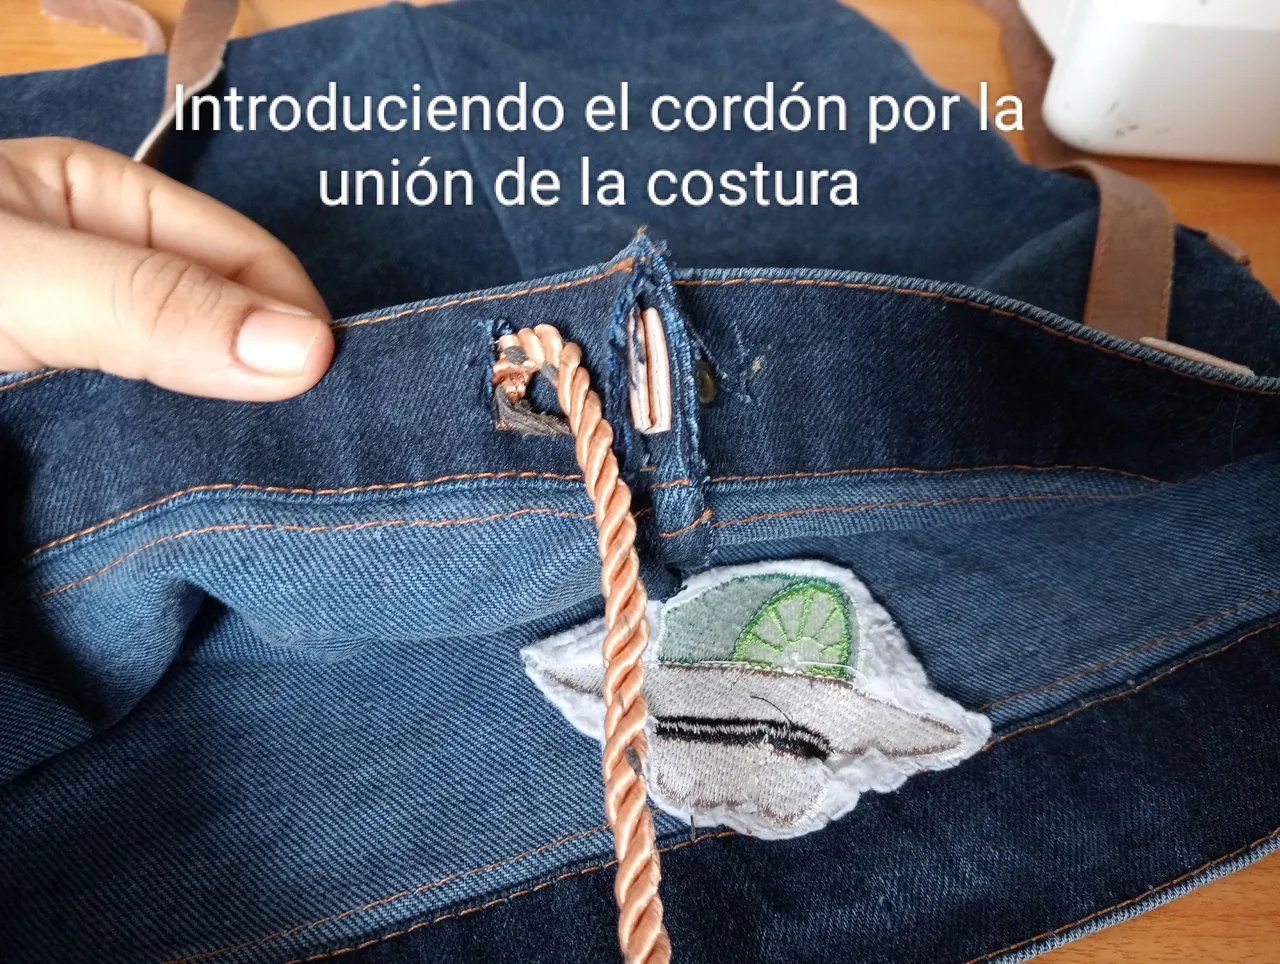
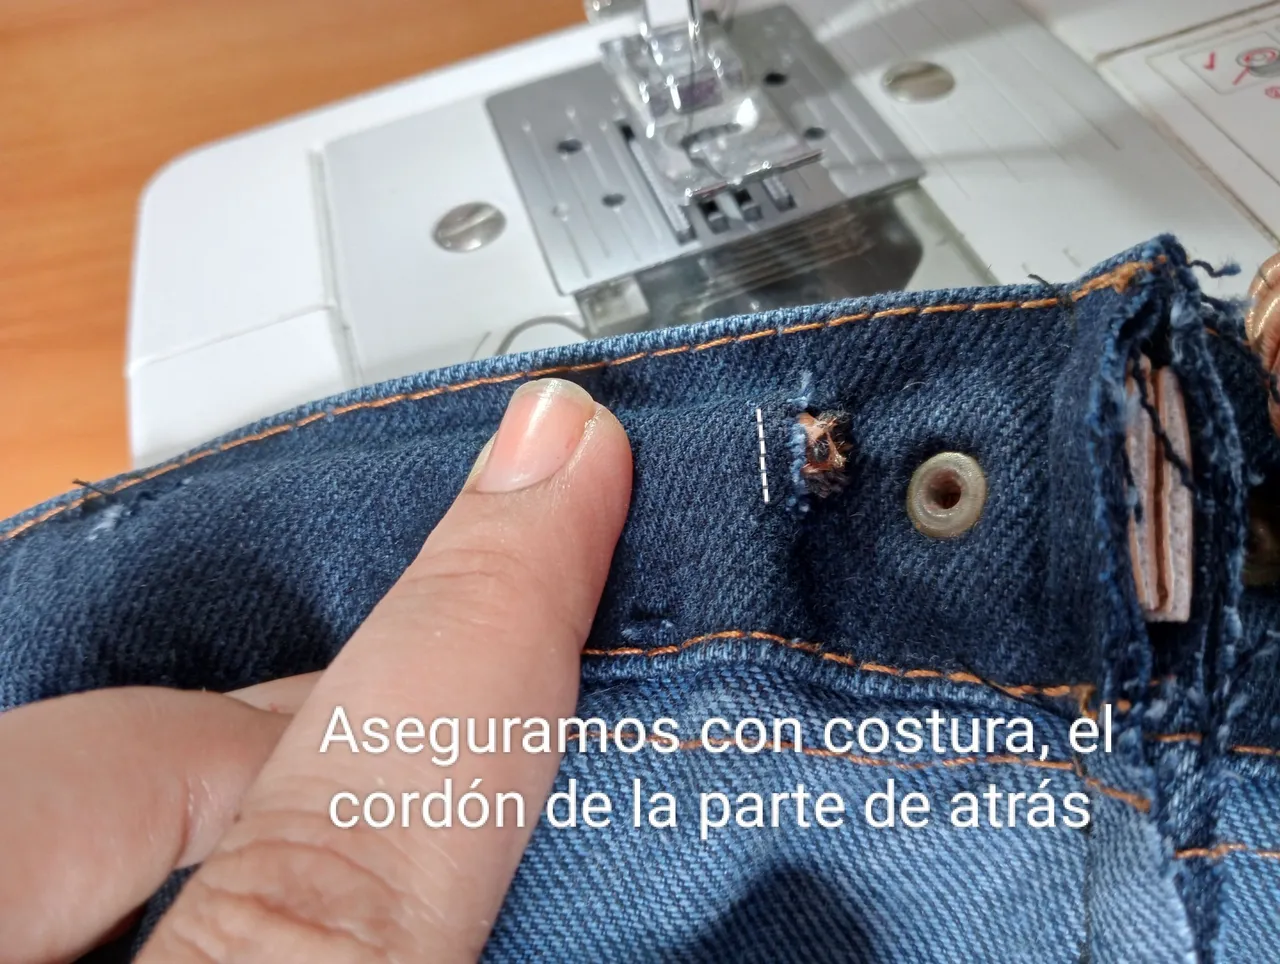
Una vez que realicé las aberturas procedí a introducir por la parte de atrás el cordón dorado y sacarlo por la parte de el frente, lo que hice en la parte de atrás fue asegurar con costura el cordón para que no se soltara al momento de fruncir o cerrar la Tula.
Once I made the openings I proceeded to introduce the golden cord in the back and take it out through the front part, what I did in the back part was to secure the cord with stitching so that it would not come loose at the moment of gathering or closing the Tula.
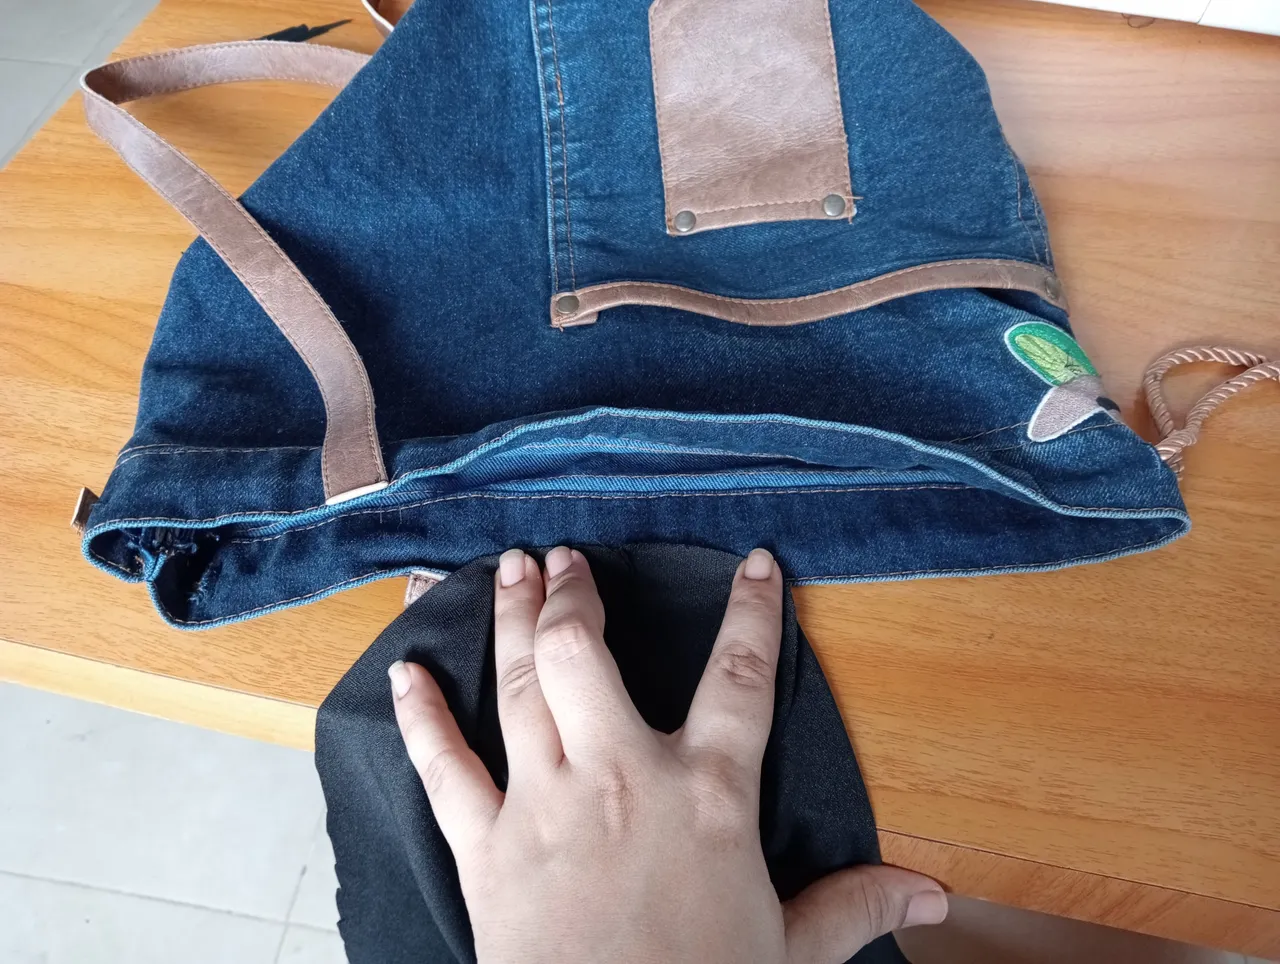
Después que asegure los cordones, procedí a realizar el forro de la Tula, usando las mismas medidas a excepción de que el forro tiene un centímetro más de tela en la parte superior para poder coser la orilla con un mejor acabado.
After securing the laces, I proceeded to make the lining of the Tula, using the same measurements except that the lining has one centimeter more fabric at the top to be able to sew the edge with a better finish.
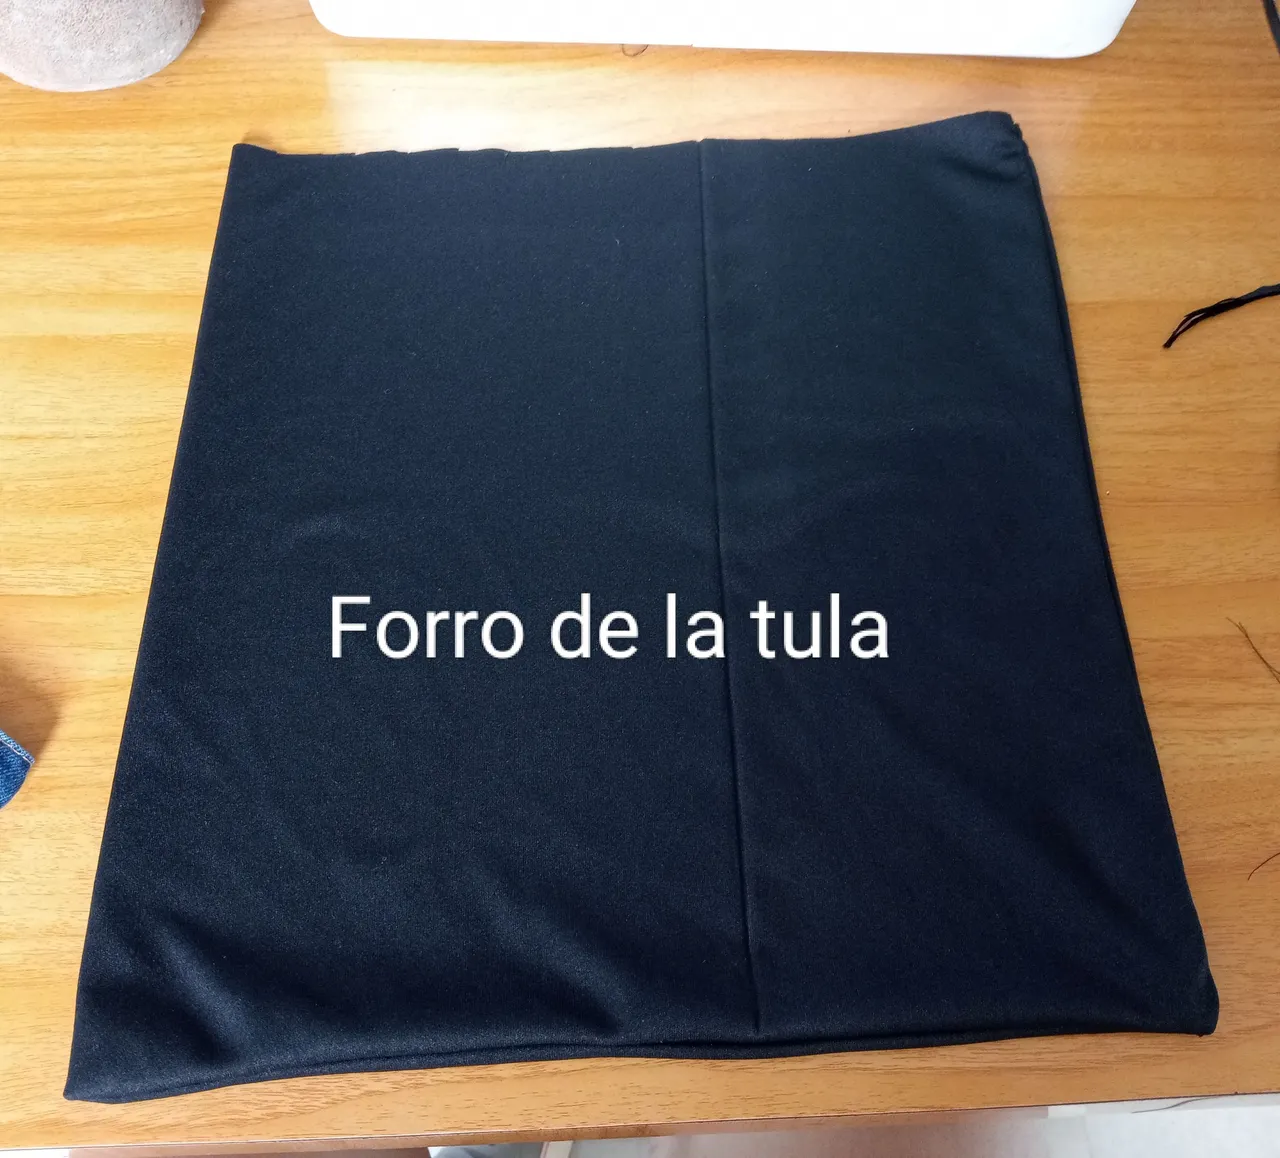
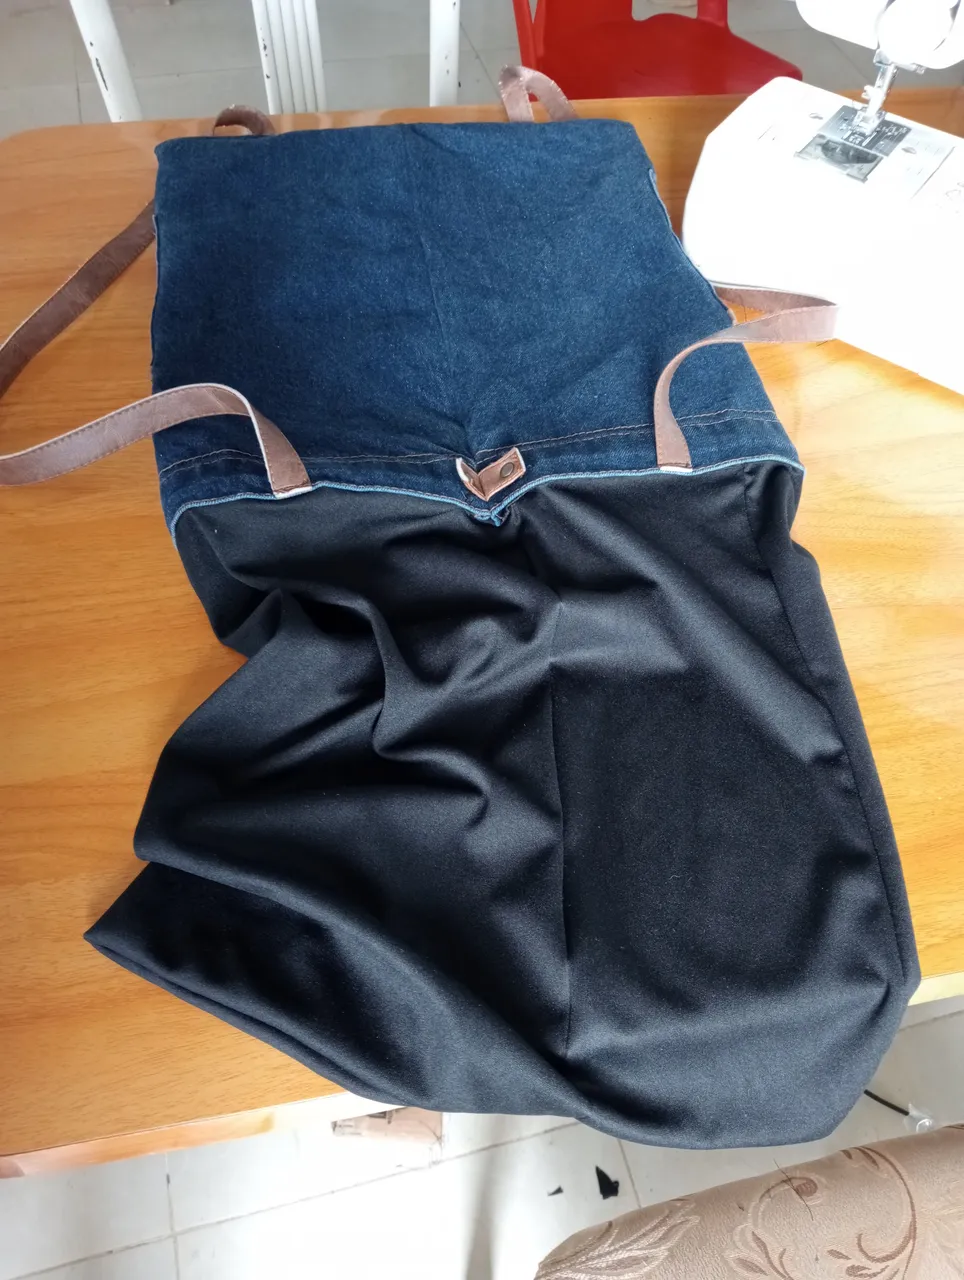
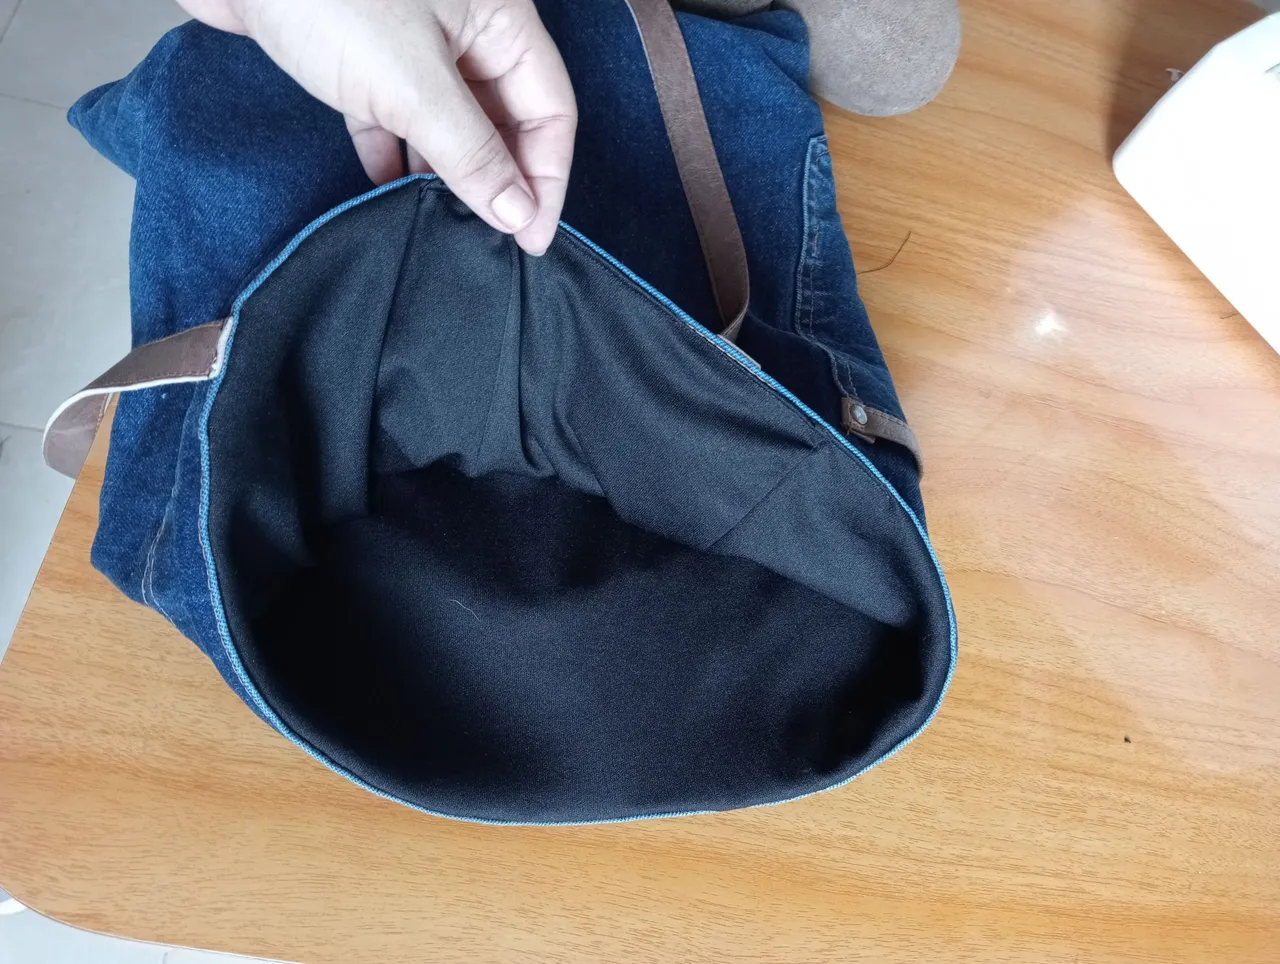
Cuando terminé el forro, cosi las orillas de este con las orillas superiores de la Tula, dejando el forro por fuera, para que al momento de meterlo no se vean costuras.
When I finished the lining, I sewed the edges of the lining to the top edges of the Tula, leaving the lining on the outside, so that when I tucked it in, no seams would be visible.