| Crocheted acorns for the Christmas tree. | Bellotas a crochet para el árbol de navidad. |
|---|---|
Happy blessed needlepoint Monday. I am most pleased to be able to share with you this small but very cute project. It is my first Christmas tree ornament this year. They are crocheted acorns and although they are more typical of the fall season I think they would look very nice on the tree because of their similarity to the typical pine cones. | Feliz y bendecido lunes de agujas. Me complace sobremanera poder compartir con ustedes este pequeño pero muy lindo proyecto. Es mi primer adorno de este año para el árbol de navidad. Son bellotas hechas a crochet y aunque son más típicas de la temporada de otoño pienso que se verían muy bonitas en el árbol por su similitud con las típicas piñas de los pinos. |

I confess that I wanted to make some pine cones before the acorns, but in a store I saw that they sell the real pine cones, they are beautiful, good size and also very economical and I plan to buy them, because it would be better than making them in terms of time and budget, but I will not stay with the desire to crochet my Christmas tree and the acorns will be part of the decoration. | Les confieso que quería hacer unas piñas antes de las bellotas, pero en una tienda ví que venden las piñas auténticas, son hermosas, de buen tamaño y además muy económicas y tengo pensado comprarlas, pues me saldría mejor que hacerlas en cuanto a tiempo y presupuesto, pero no me quedaré con las ganas de invadir de crochet mi árbol de navidad y las bellotas serán parte de la decoración. |

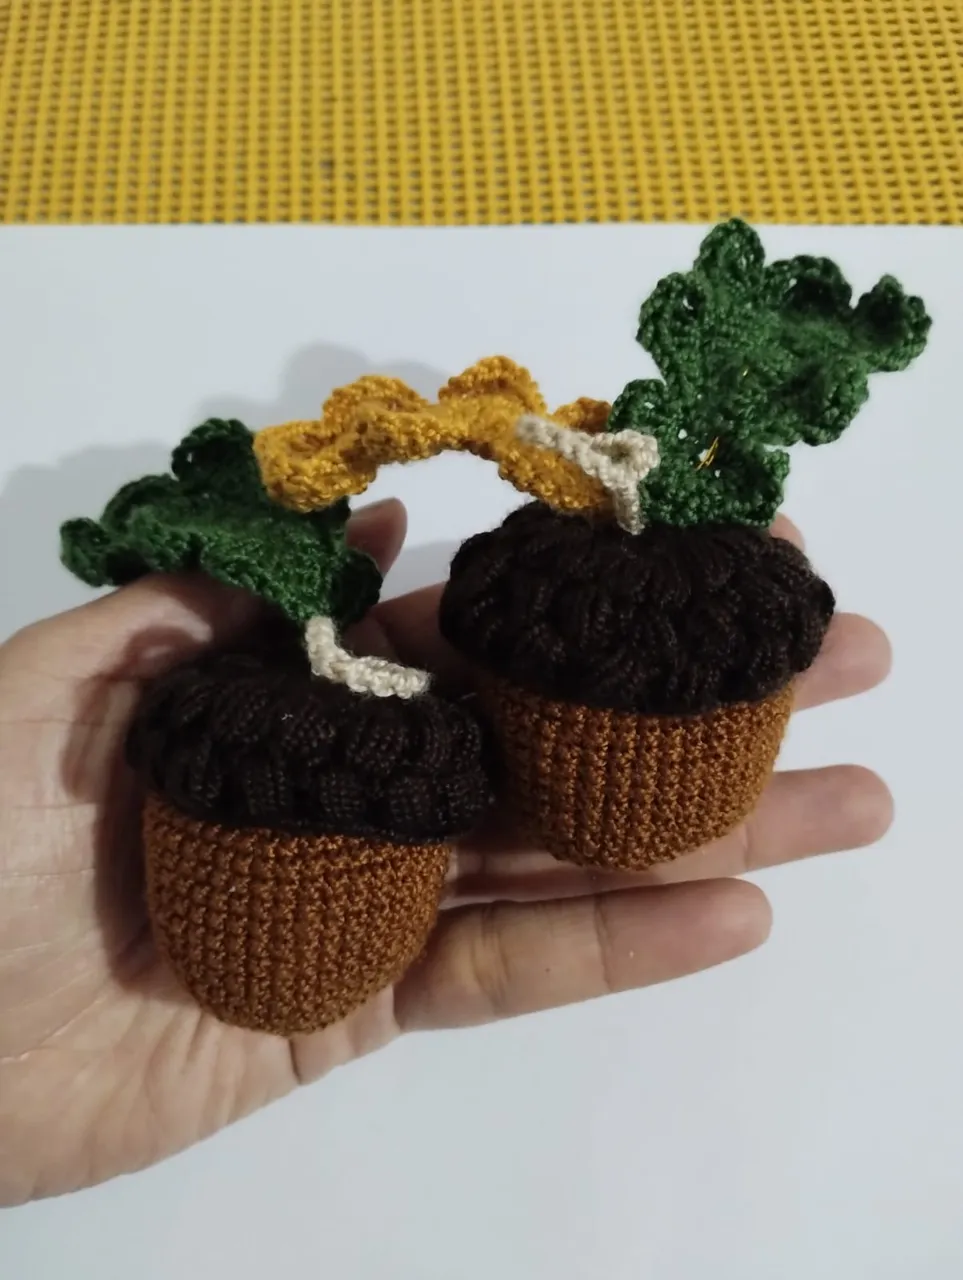
The good thing is that it goes fast. I calculated about half an hour for each complete piece, including the leaves. So, as a good accountant I need about 6 hours to complete the 12 units. On the other hand, I want to place them in pairs so that they have more presence. | Lo bueno es que se avanza rápido. Calculé una media hora por cada pieza completa, incluyendo las hojas. Así que, como buena contadora necesito unas 6 horas para completar las 12 unidades. Por otro lado, quiero colocarlas en pareja para que tengan mayor presencia. |
Now I tell you the process. It is very simple. They are just ovals with a kind of cap. The rounded part I will call the base, it is made starting from 6 single crochet stitches on a magic ring, advancing in multiples of 6 until we reach the 7th row where we will get 42 single crochets. We continue until the 17th row without increases and from there we make the decreases first every 5 stitches, then every 4 and so on until we have 6 stitches available. Fill in and close the figure. | Ahora les cuento el proceso. Es muy sencillo. Son solo óvalos con una especie de gorro. La parte redondeada la llamaré base, se realiza partiendo de 6 puntos bajos sobre un anillo mágico, avanzando en múltiplos de 6 hasta llegar llegar a la vuelta 7 dónde obtendremos 42 puntos bajos. Seguimos hasta la vuelta 17 sin aumentos y a partir de allí realizamos las disminuciones primero cada 5 puntos, luego cada 4 y así hasta llegar a tener 6 puntos disponibles. Rellenos y cerramos la figura. |

The upper part we work with puff stitches. First we knit 8 puff stitches in a magic ring. Each stitch is separated by a chain stitch. We close with a slip stitch. In the next row we knit two puff stitches in each chain stitch available from the previous row, in this row we leave one stitch between each puff stitch and when we complete the row we get 16 puff stitches. The next two rows are done in the same way, without increases and we have the complete top. | La parte superior la trabajamos con puntos puff. Primero realizamos 8 puntos puff en un anillo mágico. Cada punto está separado por un punto de cadena. Cerramos con un punto deslizado. En la siguiente vuelta realizamos dos puntos puff en cada punto de cadena disponible de la vuelta anterior, en esta vuelta déjanos un punto de separación entre cada punto puff y al completar la vuelta obtenemos 16 puntos puff. Las siguientes dos vueltas las realizamos de la misma manera, sin aumentos y ya tenemos la parte superior completa. |

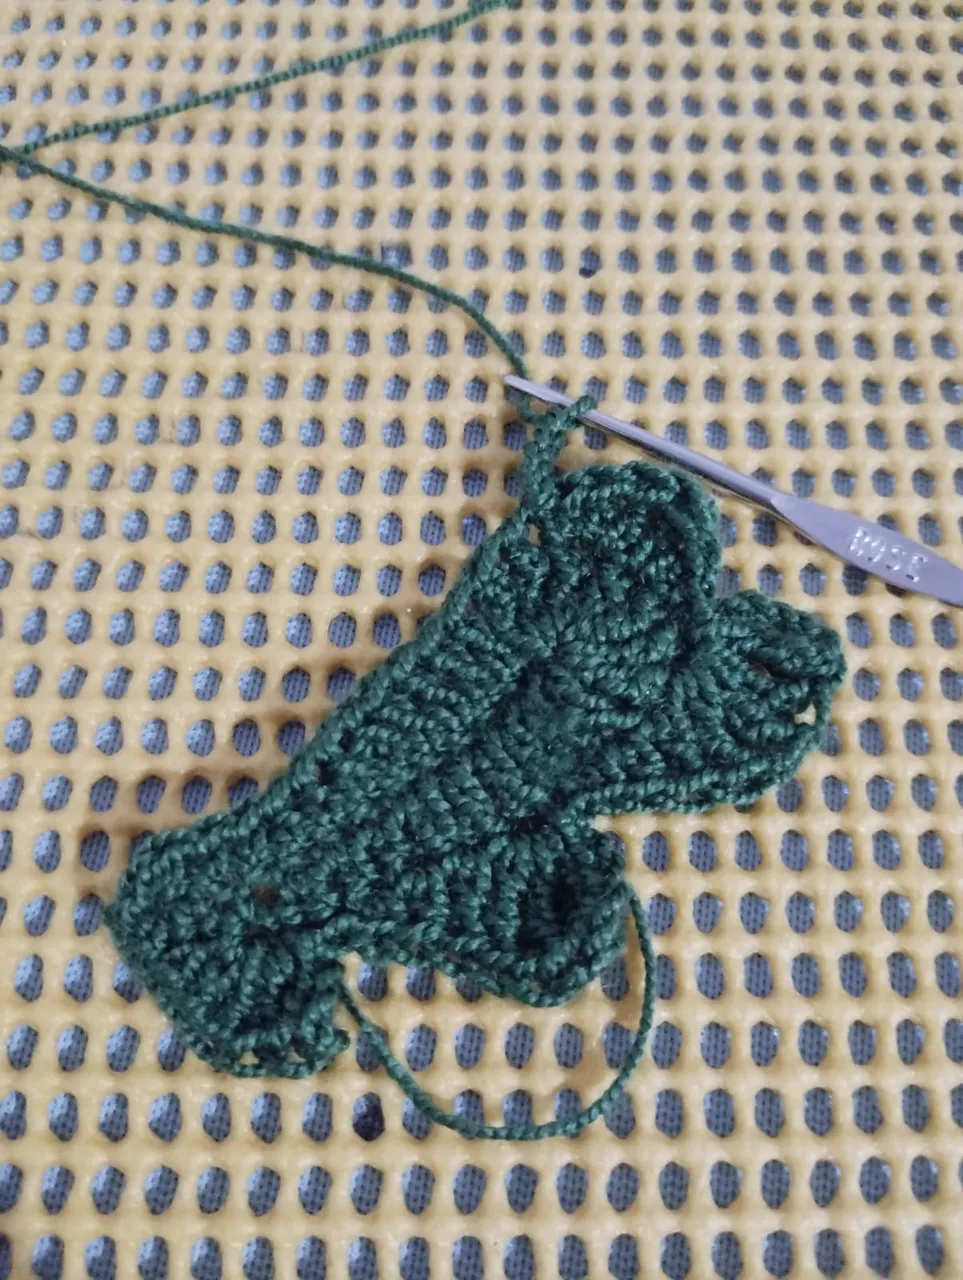
The leaves have a little bit of care. And I say careful because I have learned that in crochet is simple, we just have to be well concentrated and count the stitches even if we do not like to count as in my case, but there are times and if not all, it is very necessary to count. First we make 13 chains. We leave one stitch without knitting and in the next one we knit 3 single crochets, 3 medium high stitches, 1 medium high extended stitch, 4 high stitches and in the last stitch we knit 8 double high stitches. Knit the same amount of stitches back through the base chain. Close with slip stitch. | Las hojas tienen un poquito de cuidado. Y digo cuidado porque he aprendido que en el crochet es sencillo, solo debemos estar bien concentrados y contar los puntos aunque no nos guste contar como en mi caso, pero hay ocasiones y si es que no en todas, es muy necesario contar. Primero realizamos 13 cadenas. Déjanos un punto sin tejer y en el siguiente tejemos 3 puntos bajos, 3 puntos medios altos, 1 punto medio alto extendido, 4 puntos altos y en el último punto realizamos 8 puntos altos dobles. Tejemos la misma cantidad de puntos de regreso por la cadena base. Cerramos con punto deslizado. |

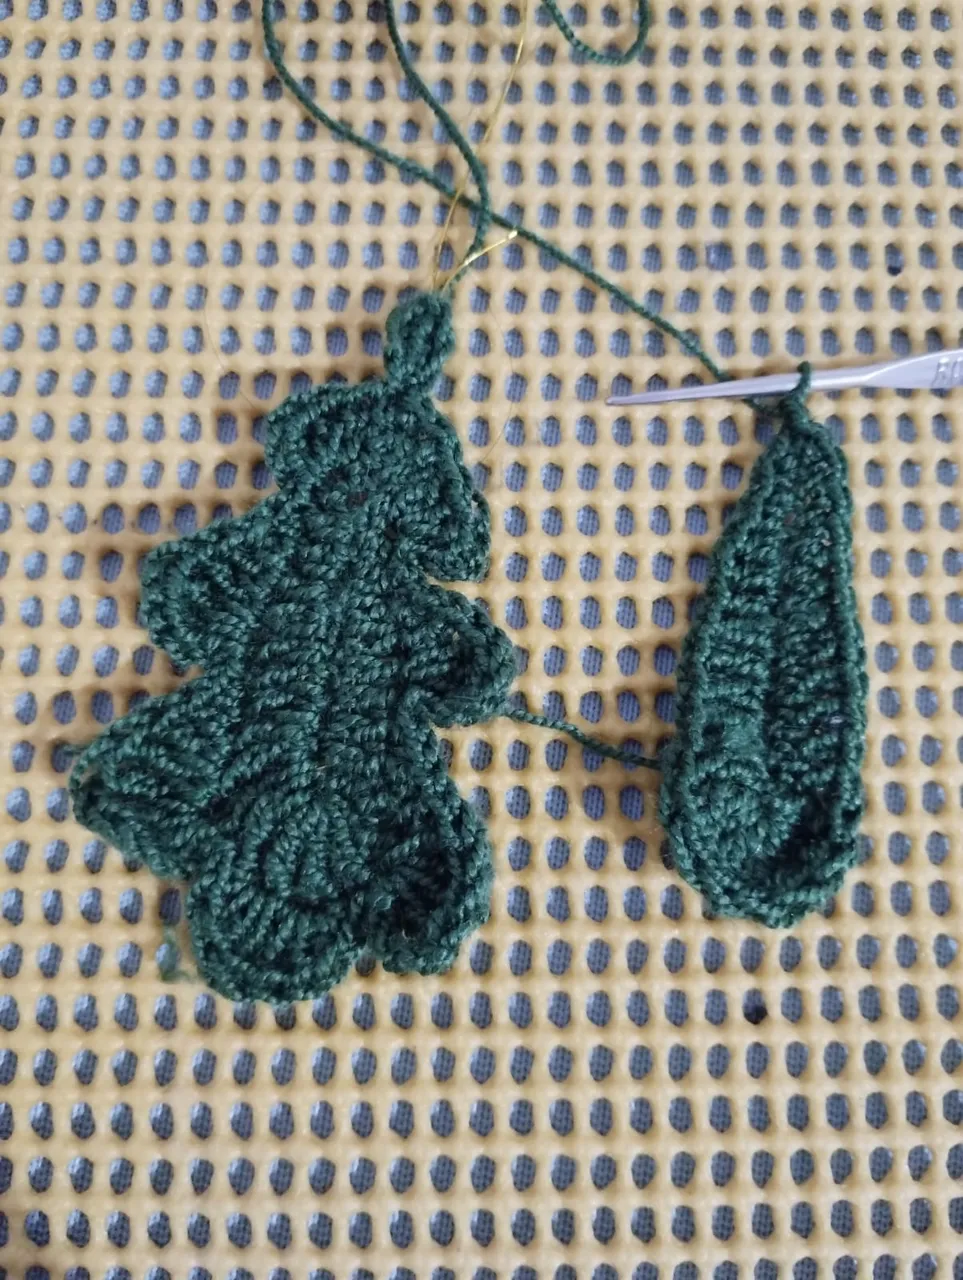
We start the second row with a chain and a single crochet and skip the next stitch to knit 3 double crochets together, three chains in the air and 1 slip stitch in the same stitch. In the next stitch we knit a slip stitch, 1 single crochet, 1 half double crochet, 1 double crochet and in the next stitch 3 double crochets in the same stitch. We carry 3 chain stitches and fix them with a slip stitch. We repeat this last pattern in the following stitches. And on the tip of the leaf we work 1 single crochet. 1 high stitch, and two double high stitches. We repeat the pattern back on the other side of the leaf. | Comenzamos la segunda vuelta con una cadena y un punto bajo y saltamos el siguiente punto para tejer 3 puntos altos juntos, tres cadenas al aire y 1 punto deslizado en ese mismo punto. En el siguiente punto realizamos un punto deslizado, 1 punto bajo, 1 punto medio alto, 1 punto alto y en el siguiente 3 puntos altos dobles en el mismo punto. Llevamos 3 puntos de cadena y las fijamos con un punto deslizado. Repetimos este último patrón en los puntos siguientes. Y en la punta de la hoja trabajamos 1 punto bajo. 1 punto alto, y dos puntos altos dobles. Repetimos el patrón de regreso por el otro lado de la hoja. |
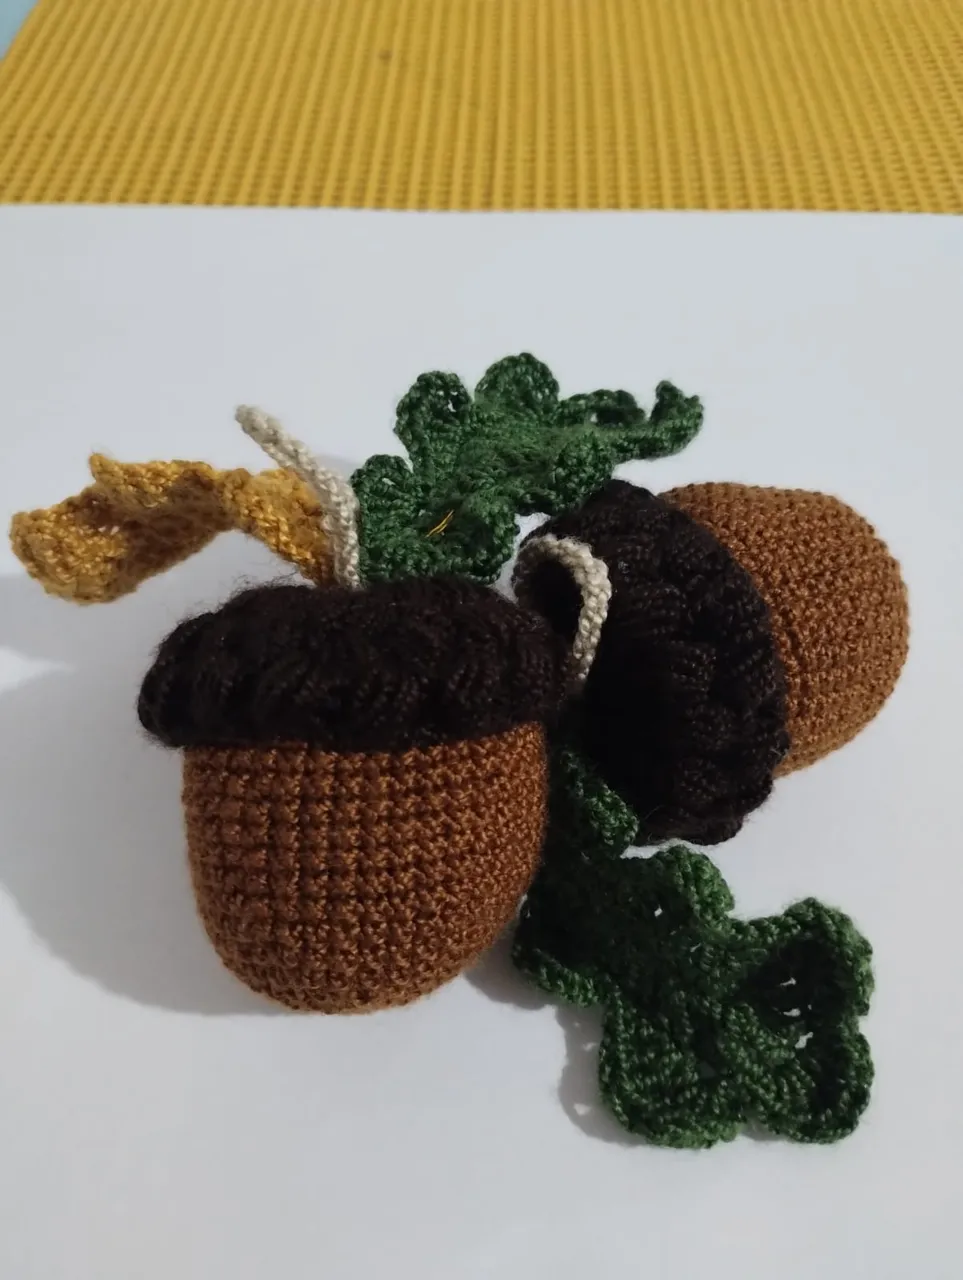
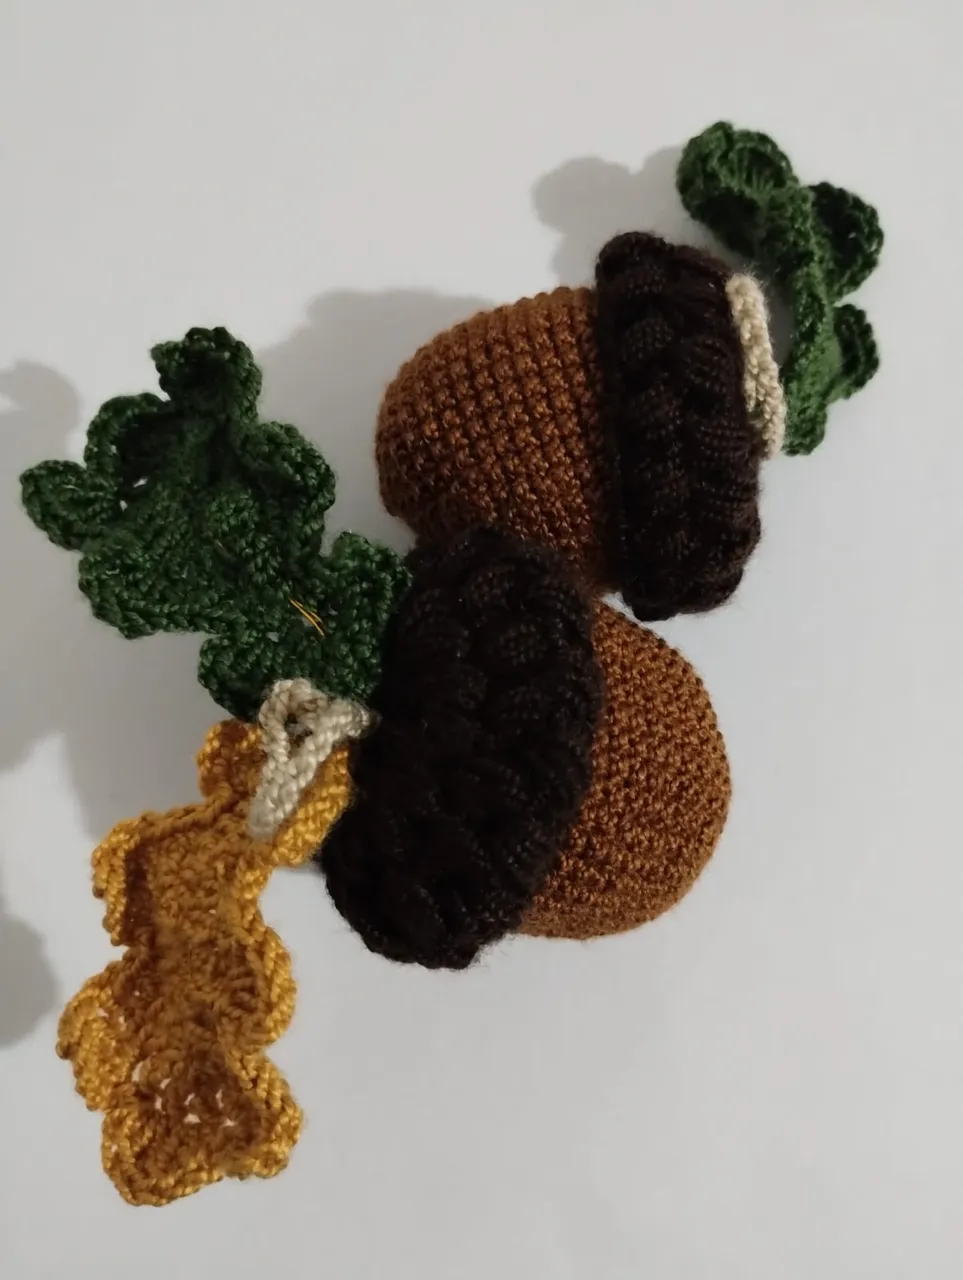
It was time to assemble everything and this is my favorite part, I helped myself with some liquid silicone to assemble the bellora and the leaves with a few stitches. I put some thin wire on the leaves to give them more structure since they tend to fall off since they are a little big. | Llegó el momento de ensamblar todo y es mi parte favorita, me ayude con un poco de silicona líquida para armar la bellora y las hojas con unas puntadas. Coloqué alambre delgado en las hojas para darle más estructura ya que al ser un poco grandes tienden a caerse. |

This is the first pair of acorns. I have five more to go and I still have a little bit of work to do, but I loved the result and have enough motivation to keep going. I bid you farewell and thank you for your company in this publication. A thousand blessings. | Este es el primer par de bellotas. Me faltan cinco y me queda un poquito de trabajo por realizar, pero amé el resultado y tengo suficiente motivación para seguir adelante. Me despido y les agradezco su compañía en esta publicación. Mil bendiciones. |

Imágenes editadas en: inshot
Fotos tomadas con MOTOROLA G 32
Images edited in: inshot
Photos taken with MOTOROLA G 32