 Edited on Canva
In my previous post, I shared with you my 1st, 2nd, and 3rd orders of rose bouquets. I also showed a pattern of a rose that I used in the 2nd and 3rd bouquets. However, the pattern of the realistic design of a rose that was used for the 3rd order wasn't revealed yet, as there was a sad story behind this crocheted realistic rose flower bouquet.
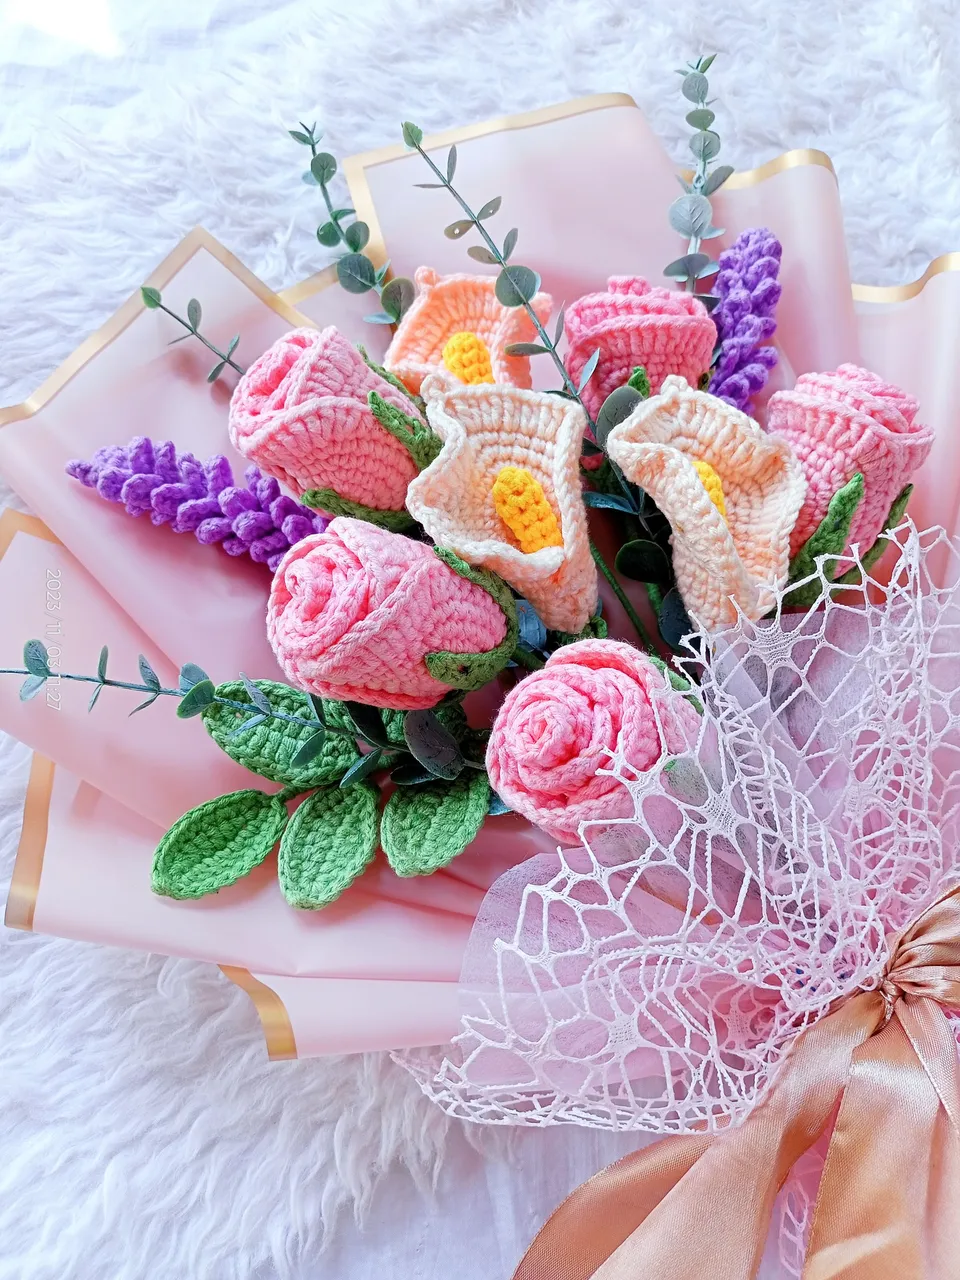
One day, I received an inquiry from a customer with whom I had transacted before. She had ordered it on behalf of her friend. She sent a picture of a rose bud and calla lilly bouquet (the one I showed you on my previous post) for inspiration.
I wasn't sure if I could make one just like the one in the picture because I hadn't tried it before. Later, I was happy to find pictures that included step-by-step instructions.
I followed how those petals looked and eventually made small and big petals together with the rosehip and sepals. I then started to attach every petal and, lastly, the rosehip with sepals with the use of stick glue. I was grateful that time, looking at the finished rose bud I made. I was satisfied.
I also looked for some pictures of Calla Lily and later figured out how it was done.
Me and the customer had agreed on the amount of the bouquet. And just like before, I asked her for a down payment, to which she agreed and sent me 50% of the amount of the bouquet.
Down payments are very important for online businesses like mine to avoid scams.
Her remaining balance plus the shipping fee for the item will be on a COD (cash-on-delivery) basis through Shopee (an e-commerce platform that lets you shop and sell online). This kind of setup gives the customers the assurance that my small business is legit and that they will only pay the other 50% when the item arrives.
I had finished the flower bouquet, feeling grateful for the output. I was confident that my client's friend would surely like it. I take pictures of it and send them to the client. She had expressed her approval, and I was happy.
We agreed to send the flower bouquet to her friend's location, with the 50% balance to be paid upon receiving the bouquet.
 IMG20230820092555_01
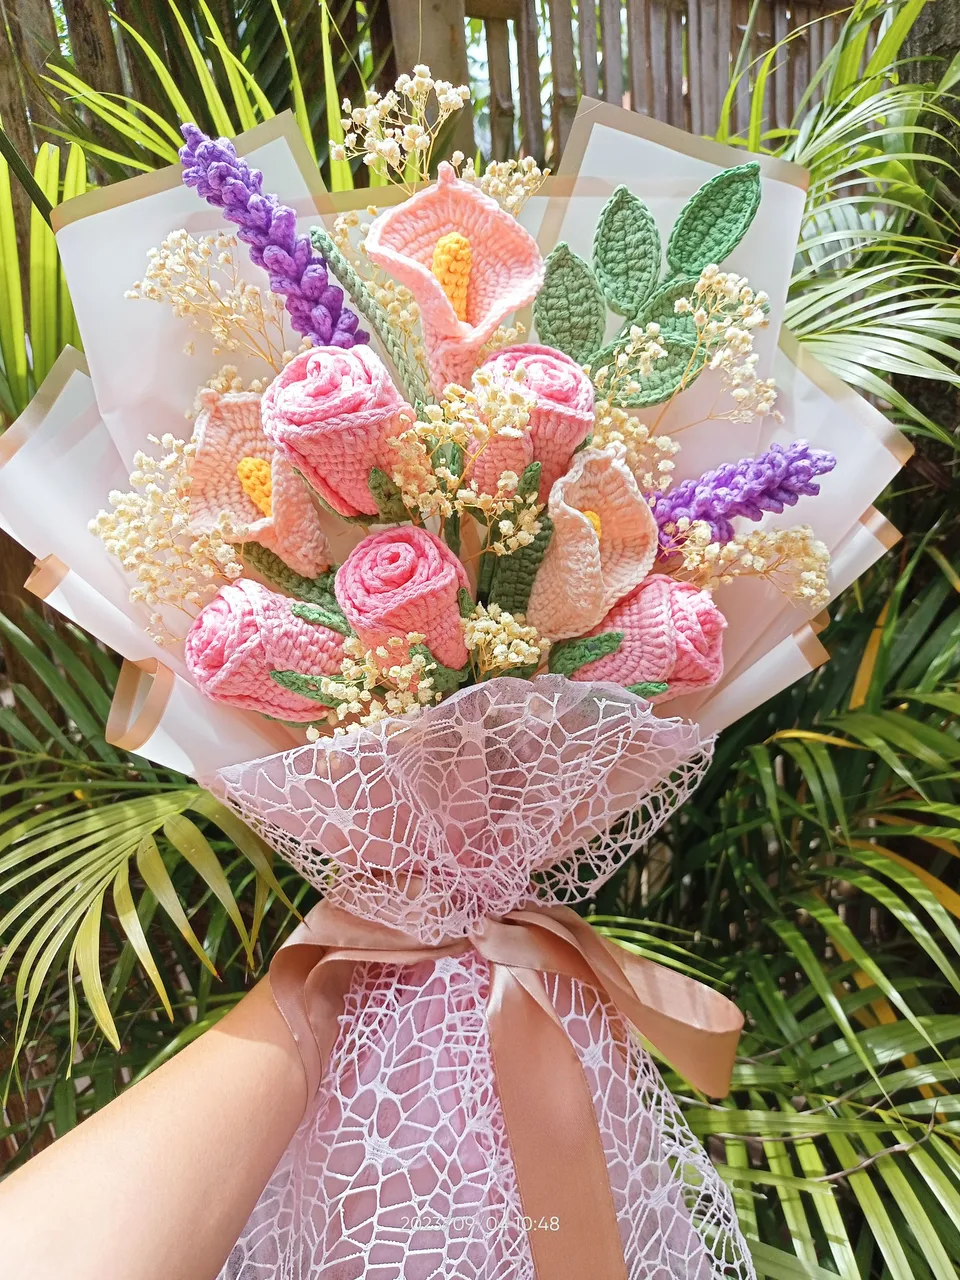 IMG20230904104827_01
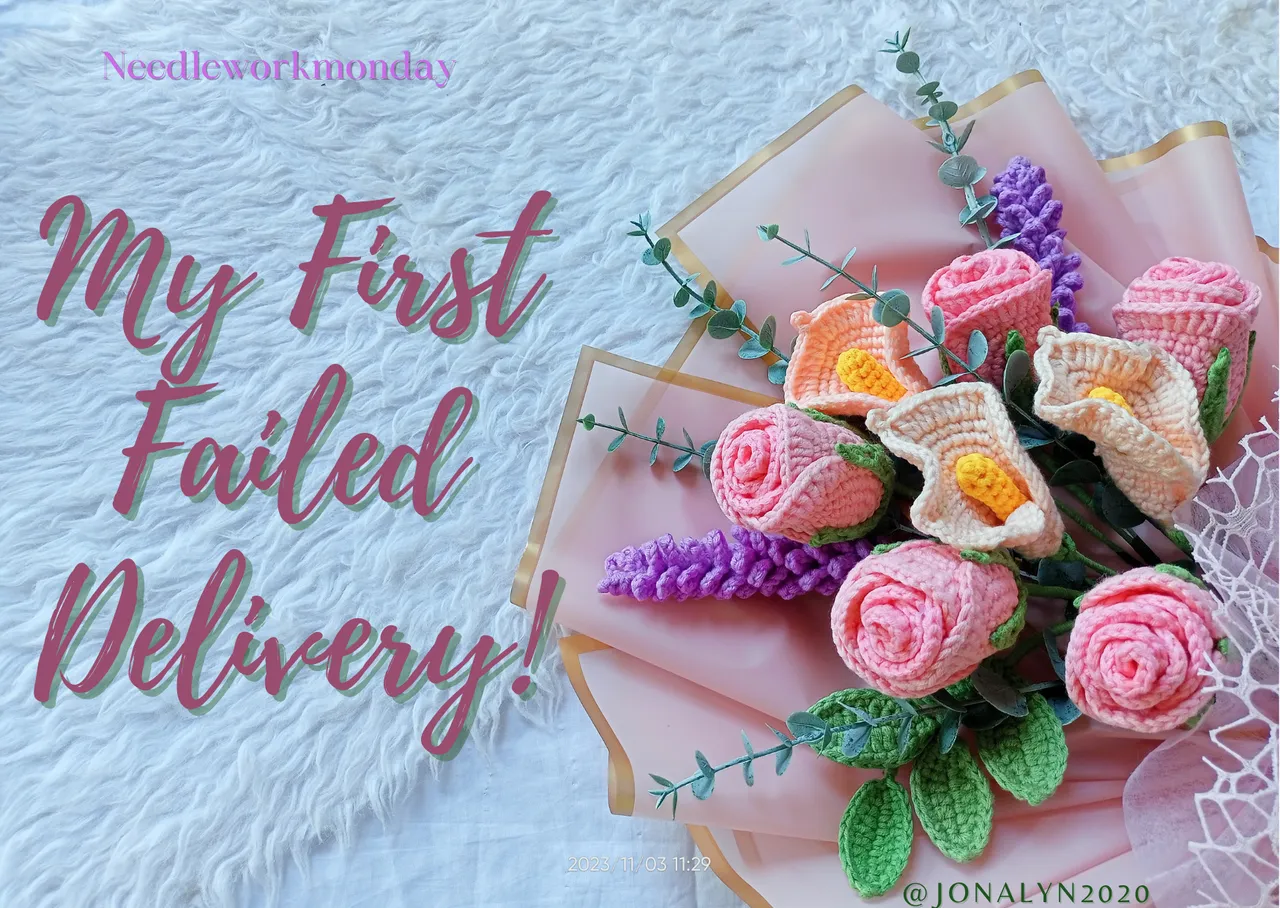
I packed the flower bouquet in a box. Actually, I doubled the box because I didn't want the flower bouquet to crash as it would travel a long way.
The Shopee app had posted the day-to-day update of the flower bouquet that I sent. I waited 10 days before it reached its destination, but noticed that the first day of delivery was not successful due to the customer's unavailability. I was reluctant to believe that she would receive the parcel the next day of delivery. As the couriers will try to deliver parcels three times, if not possible, on the first and second attempts,
When I checked the app in the evening of the second delivery day, I discovered that the delivery had failed. I got in touch with my customer, and she informed me that no one could receive the package at their house and that her friend could not accept it because she was at school. She also mentioned that their neighbors are quite far away.
And on the third day, after three attempts at failed delivery, the package would be returned to me. I was very disappointed at the time since I believed the customer would love it but had never made any move to receive the package.
I felt so devastated at that time, knowing it was my first failed delivery.
Days went by, and the parcel was returned to me. Since they had paid the down payment, they would undoubtedly get in touch with me again.
My client then contacted me, asked for forgiveness, and informed me that her friend would like a second delivery.
But I told them that she had to compensate for the first failed delivery, which she agreed to do but paid after a certain number of weeks. After paying, they requested a delivery schedule.
Prior to sending the parcel, I checked on the flower bouquet, and everything was fine except for the dried baby's breath that had some mold after months of being there.
I decided to rearrange the bouquet and use the artificial leaves that I had ordered online so that I wouldn't be worried about them withering.
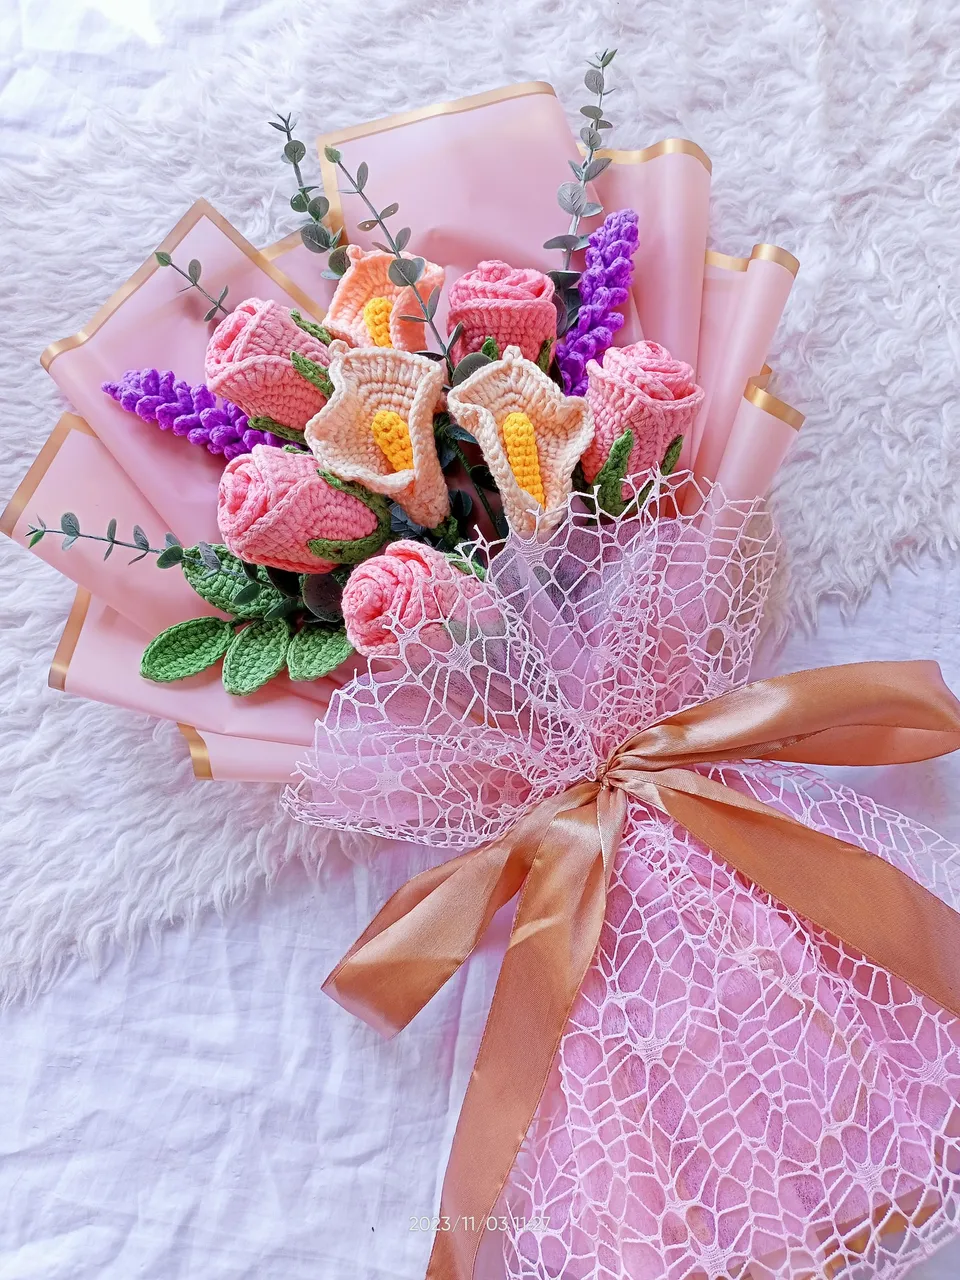 IMG20231103112718_01
After I had wrapped the flower bouquet, I took another set of pictures and sent them to my client. She loved the second look of it compared to the first one, with which I agree. I then packed it with new boxes, as the first was damaged.
 IMG20231103112800
The second delivery was successful, and my client's friend had received it.
The good thing about what had happened was that I was able to level up the look of the flower bouquet without worrying about it withering. I will surely use the artificial leaves in my next flower bouquet, but I am still unsure whether to continue using the dried baby's breath. They are surely beautiful with my flowers too, but they are a little expensive and still have a life span compared to the artificial leaves that are cheaper in price and could last for years, just like my crochet flowers.
Realistic Rose Pattern
 Edited on Canva
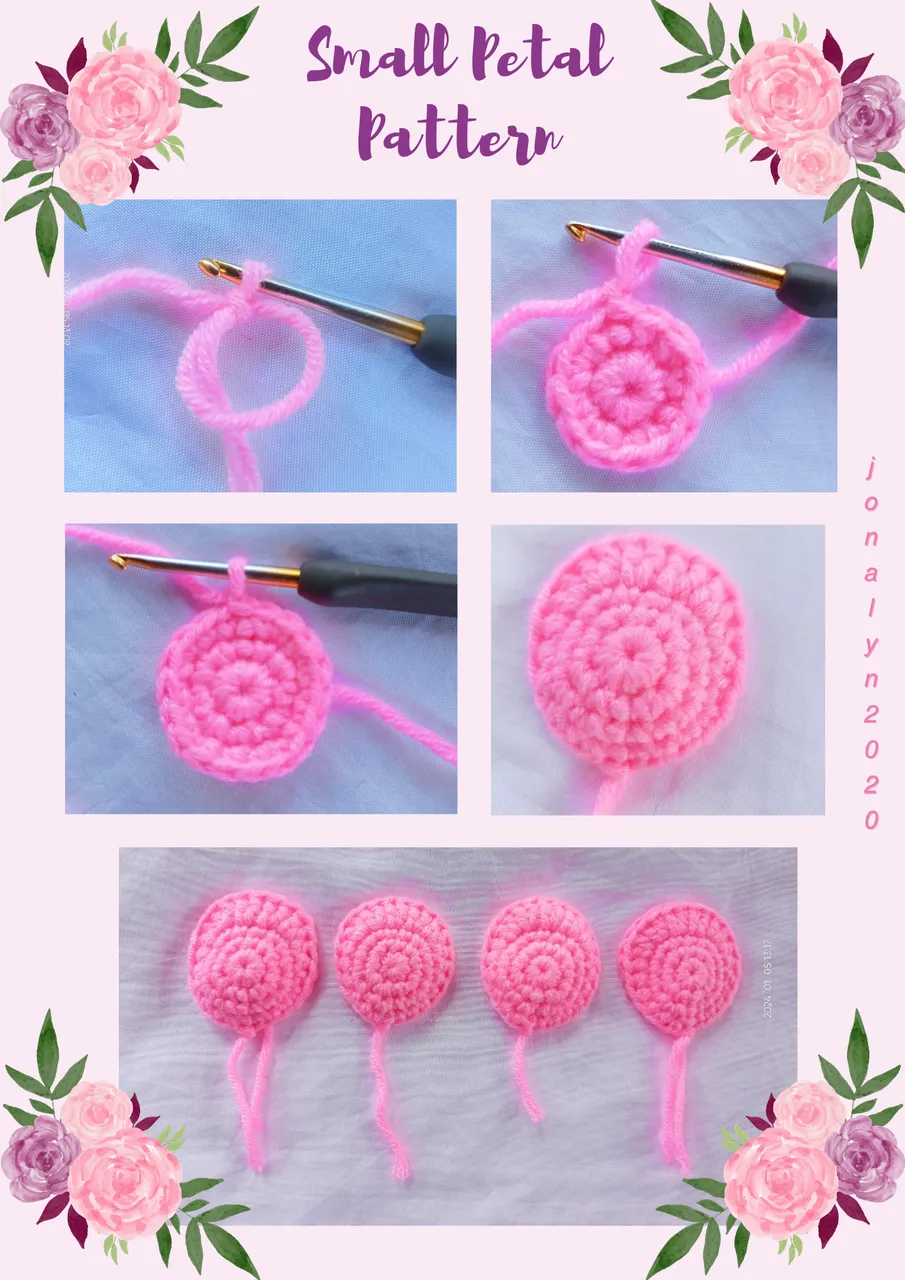
SMALL PETALS PATTERN (4 pieces)
- Magic ring
- R1 - chain 1, SC9, slip stitch (ss)
- R2 - chain 1, SC1, SC2, SC1, SC2, SC1, SC2, SC1, and ss.
- R3 - chain 1, SC1, SC1, SC2, SC1, SC1, SC2, SC1, SC1, SC2, SC2, and ss.
- R4 - chain1, 4SC (1 SC each stitch), 3HDC (half double crochet), 2DC on 5 consecutive stitches, 3HDC, 3SC, and ss. Lock and cut the excess yarn.
 Edited on Canva
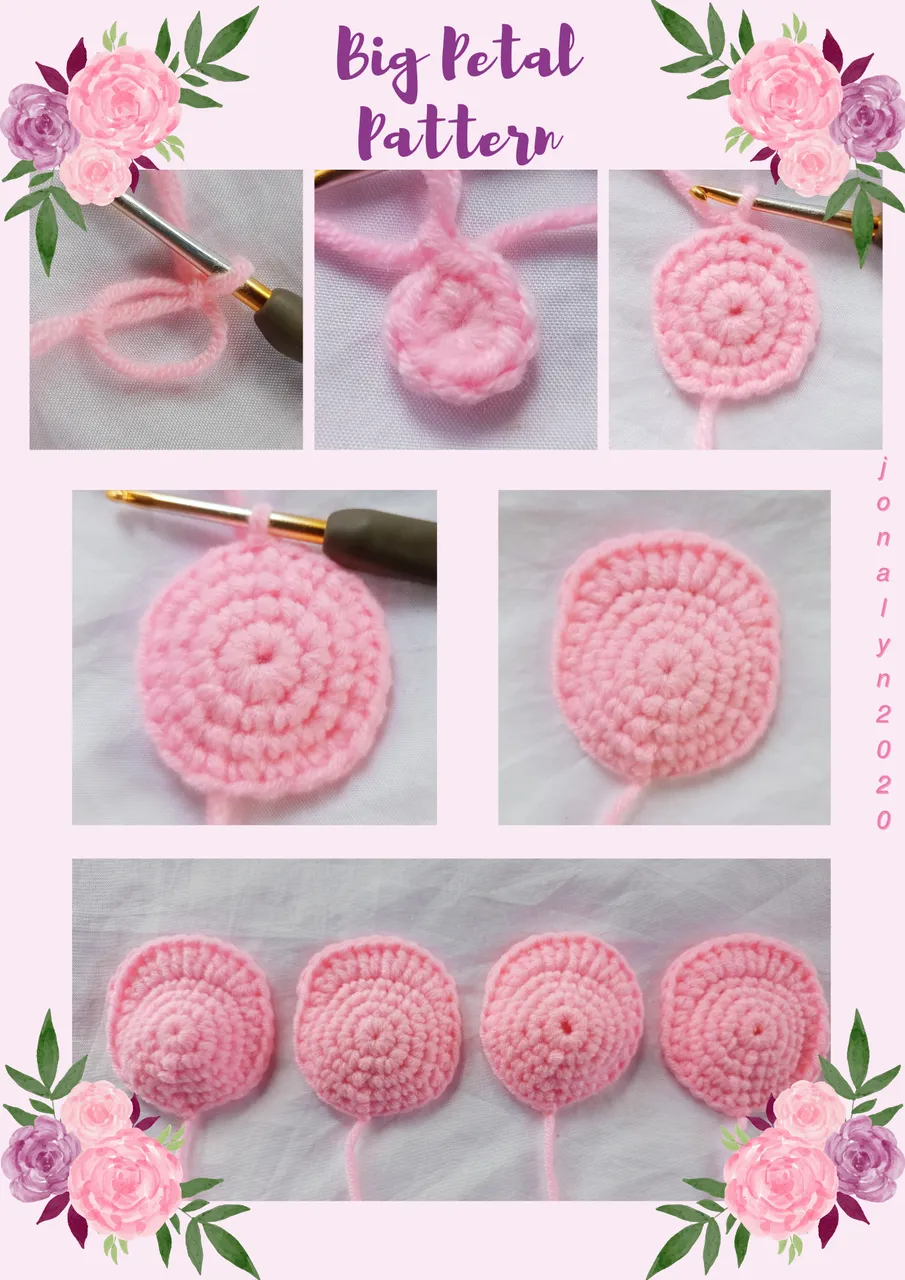
BIG PETALS PATTERN (4 pieces)
- Magic ring
- R1 - chain 1, SC9, slip stitch (ss)
- R2 - chain 1, SC1, SC2, SC1, SC2, SC1, SC2, SC1, SC2, SC1, ss.
- R3 - chain 1, SC1, SC1, SC2, SC1, SC1, SC2, SC1, SC1, SC2, SC1, SC1, SC2, SC2, ss
- R4 - chain1, SC1, SC1, SC1, SC2, SC1, SC1, SC1, SC2, C1, SC1, SC1, SC2, C1, SC1, SC1, SC2, SC1, SC2, ss.
- R5 - chain1, 4SC (1 SC each stitch), 5HDC (half double crochet), 2DC on 6 consecutive stitches, 5HDC, 3SC, and ss. Lock and cut the excess yarn.
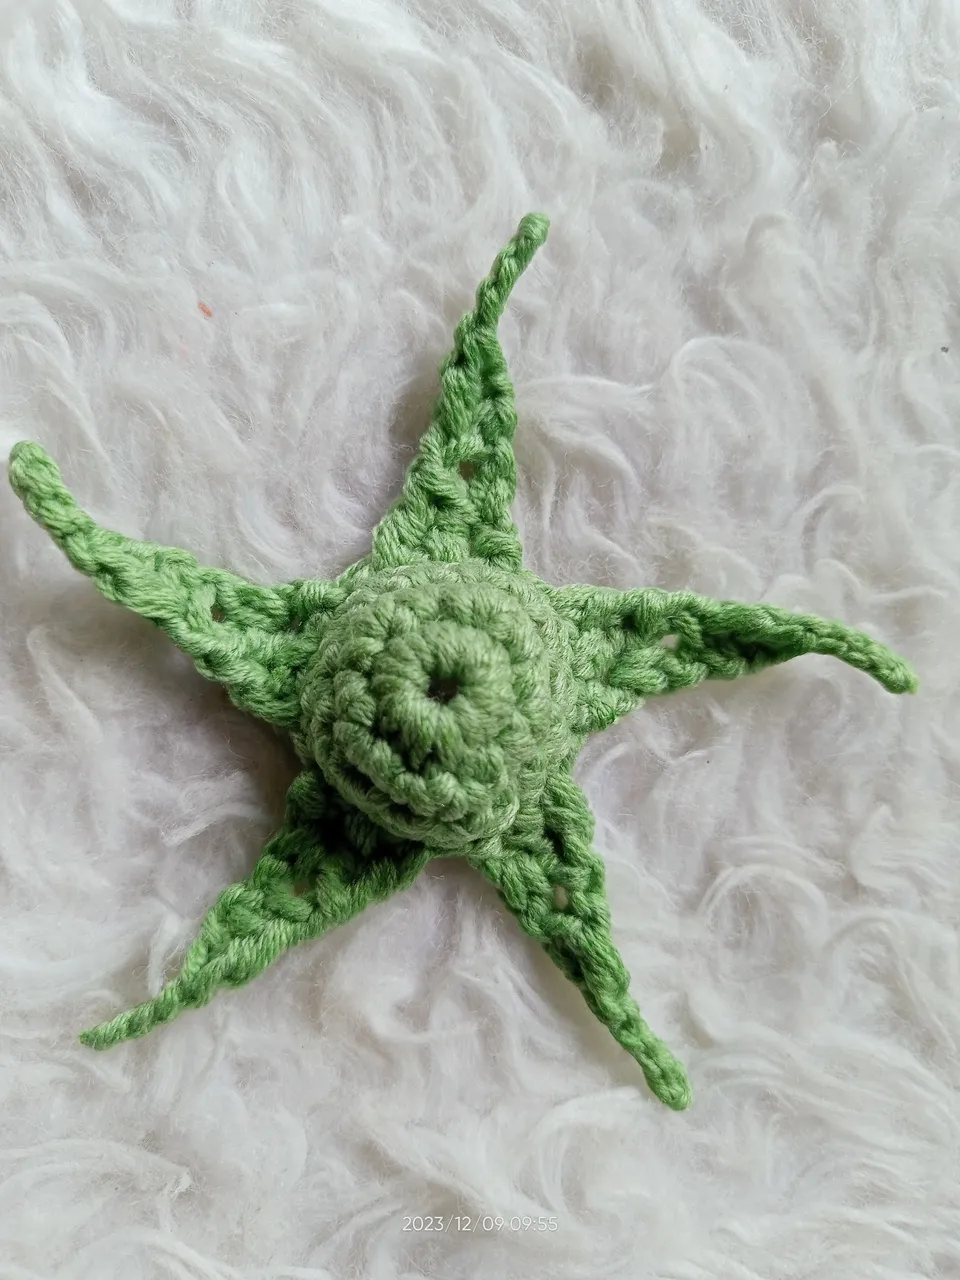
As for the rosehip and sepals pattern, they are found in the previous post.
 IMG20231209095551_01.
Now let's assemble them!
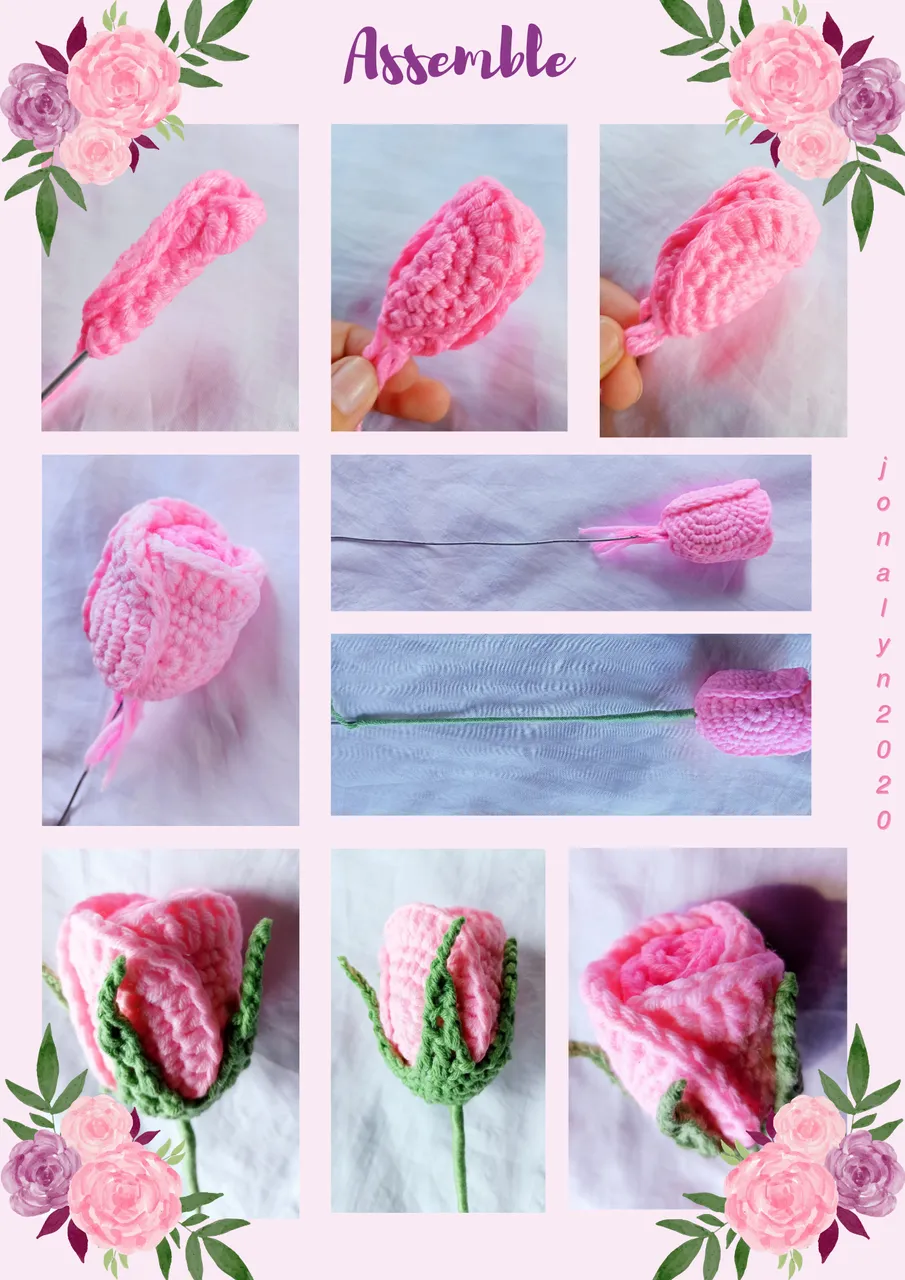 Edited on Canva
First, wrap one of the small petal around the wire with the use of a glue stick, and continue sticking the 2nd, 3rd, and 4th petal on to it and the 4 big petals.
Then, wrap the wire with the green yarn, and finally, put the rosehip with sepals on the bottom of the rose bud.
You can refer to video tutorials on YouTube on how to assemble them appropriately, especially if it's your first time.
As you have noticed, the one I made first (top picture that I delivered to the customer) was really a rose bud while on the picture below looks like a rose bud about to bloom.
 Edited on Canva
I used the same pattern, but the way I put some glue sticks on the petals differs. On the top picture, I put so much glue stick on every side of all the petals, making it stick closely, while on these eight crochet rose buds, I only put a little glue stick on the lower part of the big petals, so it looks like it's about to bloom.
 Edited on Canva
I want to make a dozen of these crochet rose buds, arrange them, and wrap them into a bouquet. I will try to find time sharing it here after I'm done with it. 😘 This will be one of the many bouquets that I will be presenting on Valentine's Day.
I hope you like today's tutorial, and I will be very pleased if anyone could use it. Thank you, and God bless everyone.
@jonalyn2020 😘😘😘
Kung nagustuhan mo ang aking sinulat ngayon, pakipusuan mo naman. 😍😉

For orders, please message me or visit these links.
To God Be The Glory