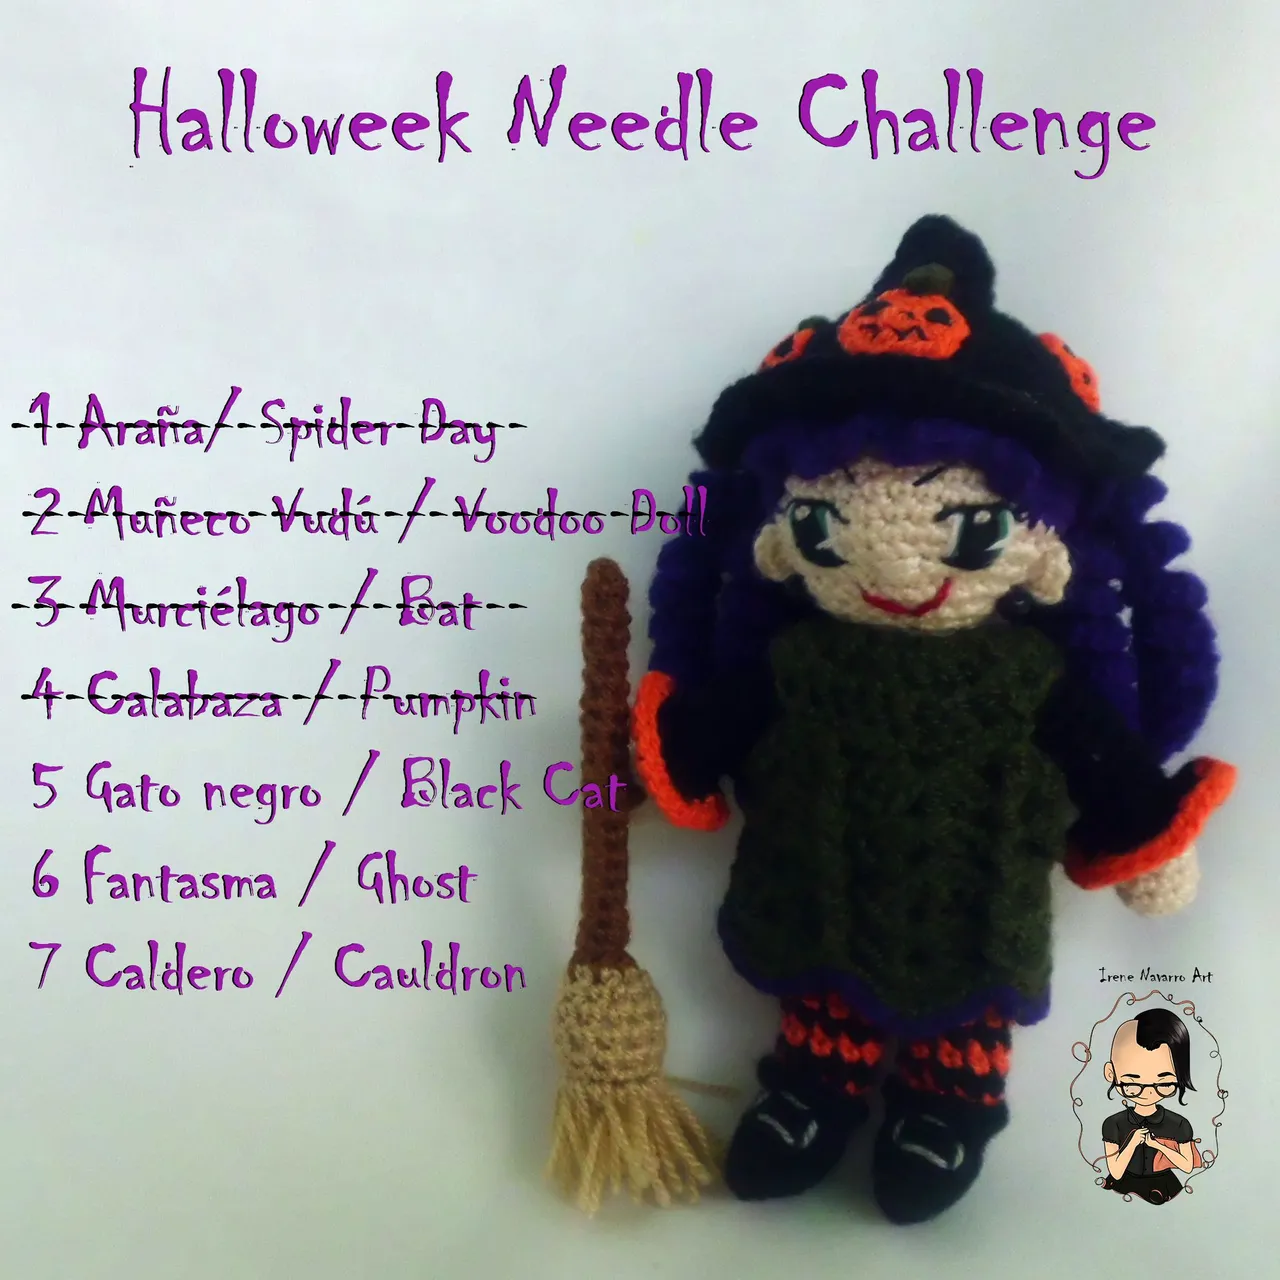
Saludos, es mi cuarto día del reto Halloweek Needle Challenge, cada día me sorprende mas las constancia de las trabajadoras de aguja que han unido a mi reto, algunas de ellas han tenido grandes dificultades de tiempo , con sus rutinas de trabajo además de las crisis porque la mayoría de ellas son venezolanas, por otro lado se que una de ellas que está fuera del país ha tenido problemas de salud y eso no la ha detenido, estoy realmente conmovida porque aun bajo toda esa presión han publicado de manera diaria hasta ahora, desearía tener premios para todas, pero todas estarán participando por los 7 Hive que estaré entregando el día después de Halloween, las bases del reto están en el post. El día de hoy corresponde Calabaza de mi lista.
Greetings, it is my fourth day of the Halloweek Needle Challenge, every day I am more surprised by the perseverance of the needle workers who have joined my challenge, some of them have had great time difficulties, with their work routines in addition to the crises because most of them are Venezuelan, on the other hand I know that one of them who is outside the country has had health problems and that has not stopped her, I am really moved because even under all that pressure they have published daily until now, I wish I had prizes for everyone, but they will all be participating for the 7 Hive that I will be delivering the day after Halloween, the bases of the challenge are in the post. Today corresponds Pumpkin from my list.
Cuando me enfrenté al reto de tejer la calabaza pensé que me gustaría hacer una calabaza estriada, había visto algunas referencias por internet pero nunca me había atrevido a hacer una, recordé a un querido profesor de estética del arte en la universidad, quien es sus recurrente clases sobre filosofía y algunas veces leyendo las Cartas de Seneca entre otros textos, nos hablaba de “pararse sobre hombros de gigantes”, que es un metáfora muy válida cuando tomando la base de conocimientos adquiridos por otros podemos desarrollar nuestros propios descubrimientos, es por ello que recordé que a principio de mi incursión en el crochet solía ver videos de la señora Esperanza Rosas de la página Tejiendo Perú , ella en gran parte me motivó a tejer con mas constancia a crochet, porque desde pequeña yo solo tejía en dos agujas, al revisar su página me encontré con la sorpresa que ella había compartido un tutorial de una calabaza estriada, por lo cual decidí seguir su pasos para mi primer intento.
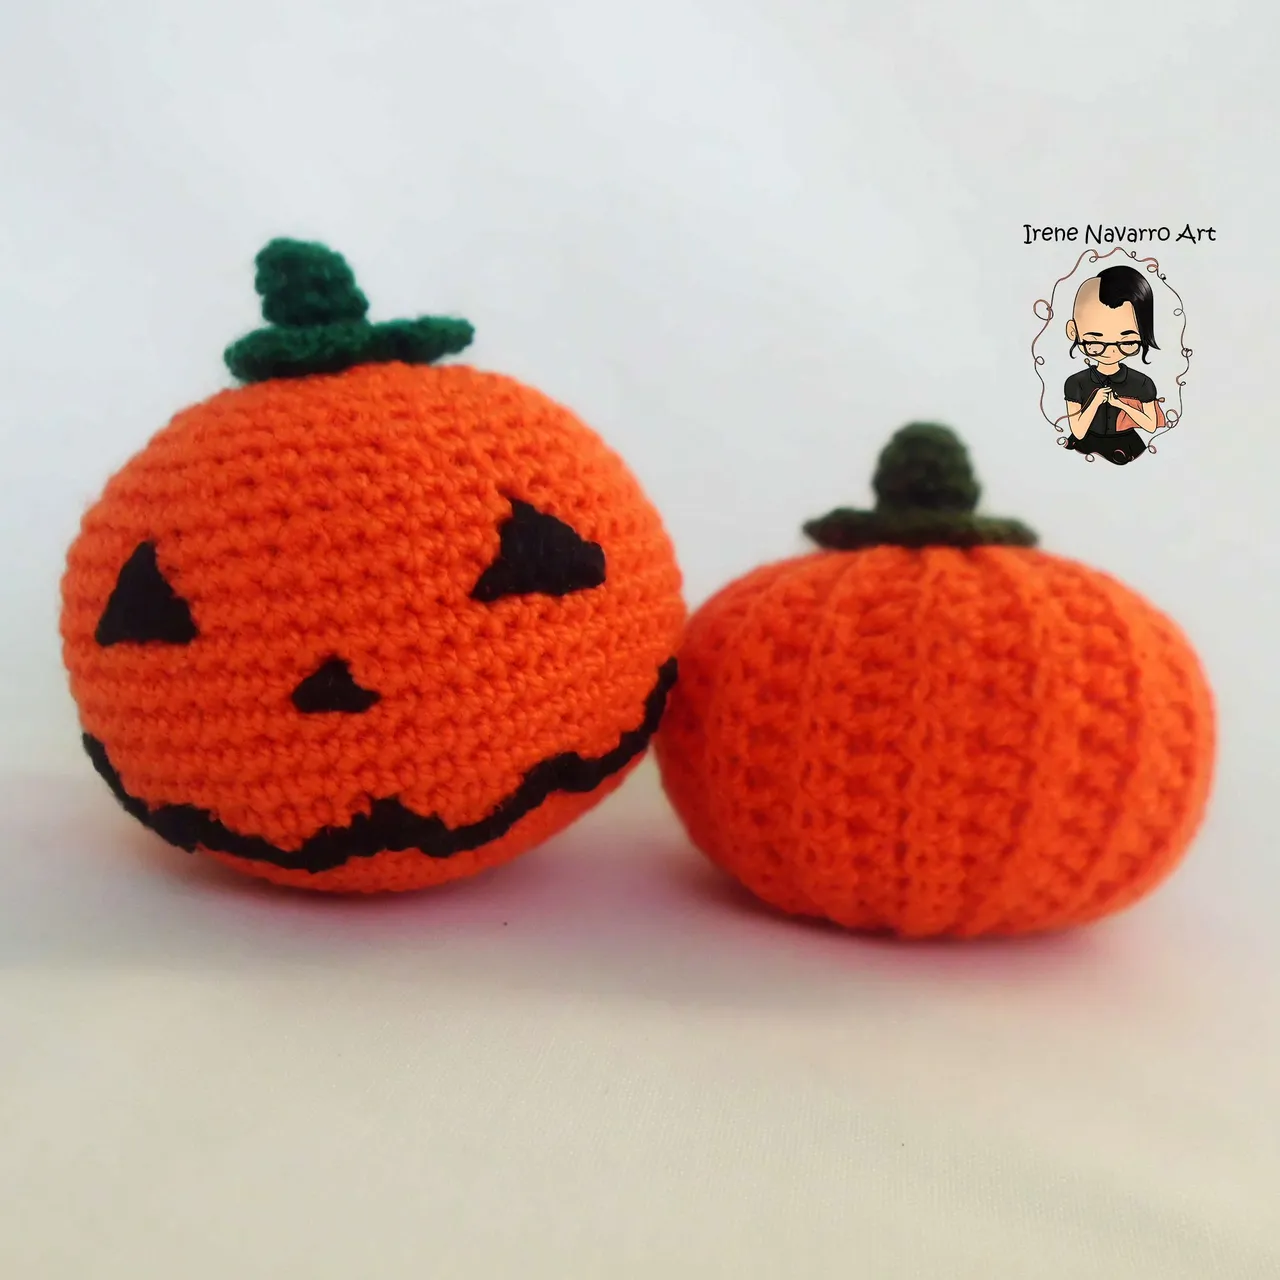
Not one but two pumpkins….
When I faced the challenge of weaving the pumpkin I thought that I would like to make a fluted pumpkin, I had seen some references on the internet but I had never dared to make one, I remembered a beloved professor of art aesthetics at the university, who is his recurrent classes on philosophy and sometimes reading the Seneca Letters among other texts, he spoke to us of “standing on the shoulders of giants”, which is a very valid metaphor when taking the knowledge base acquired by others we can develop our own discoveries, that is why I remembered that at the beginning of my foray into crochet I used to watch videos of Mrs. Esperanza Rosas on the page Tejiendo Peru, she greatly Part of it motivated me to crochet more consistently, because since I was little I only knit on two needles, when I checked her page I was surprised that she had shared a tutorial on a striated pumpkin a, so I decided to follow in her footsteps for my first attempt.
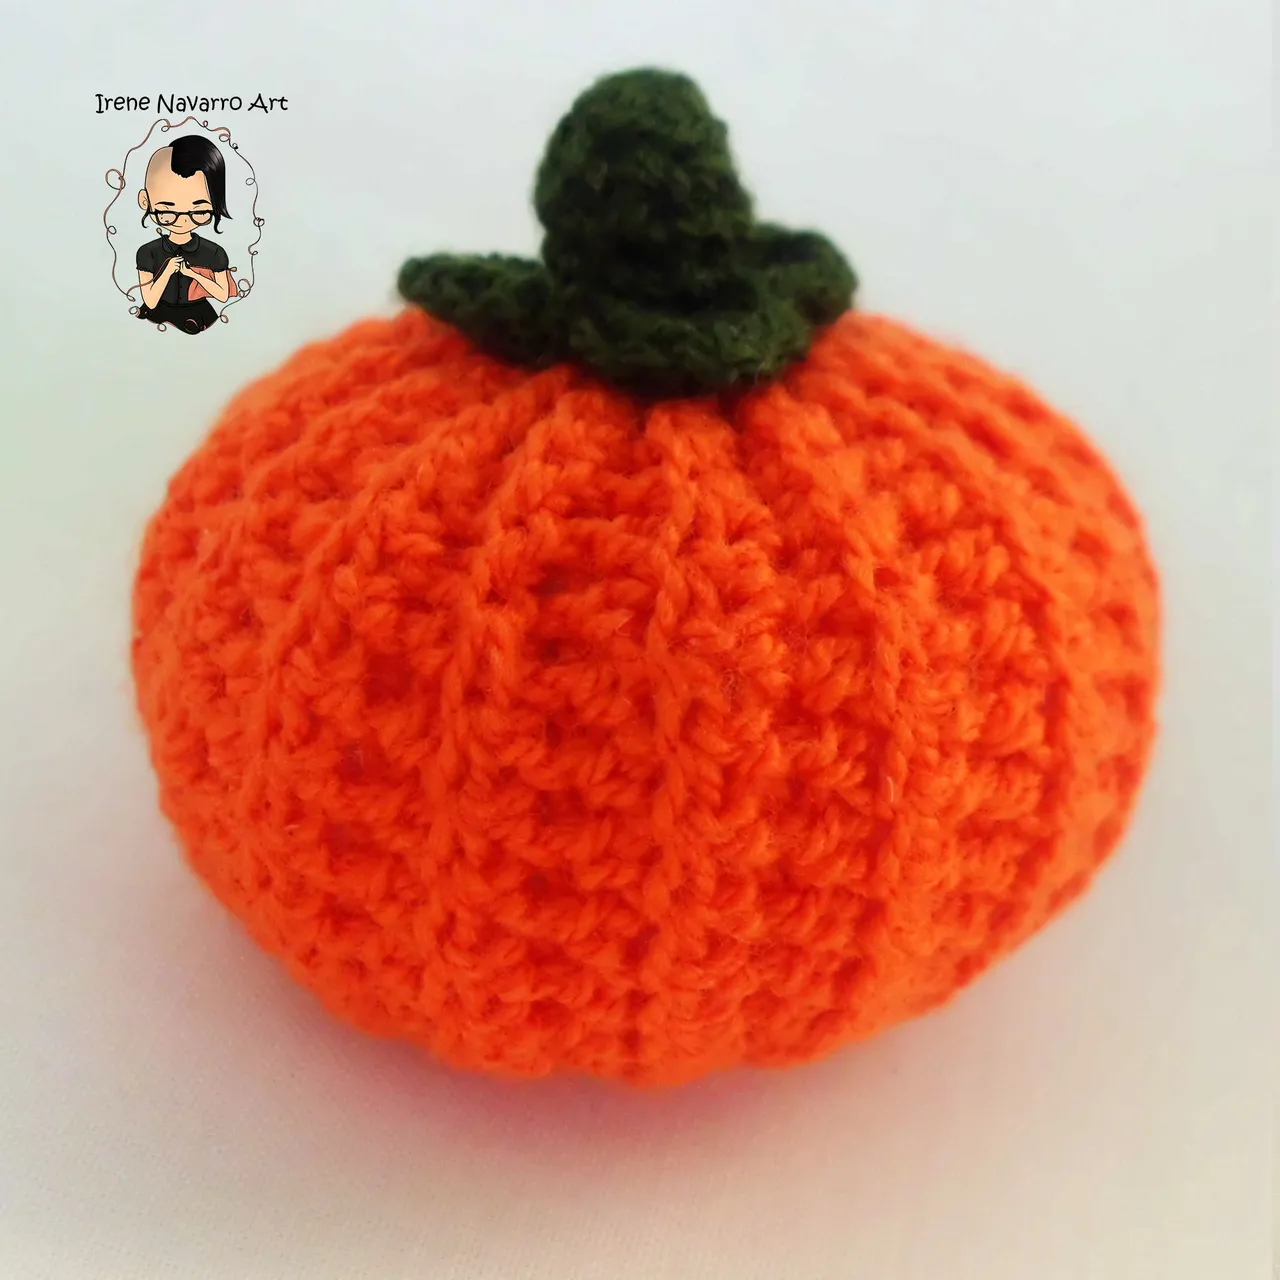
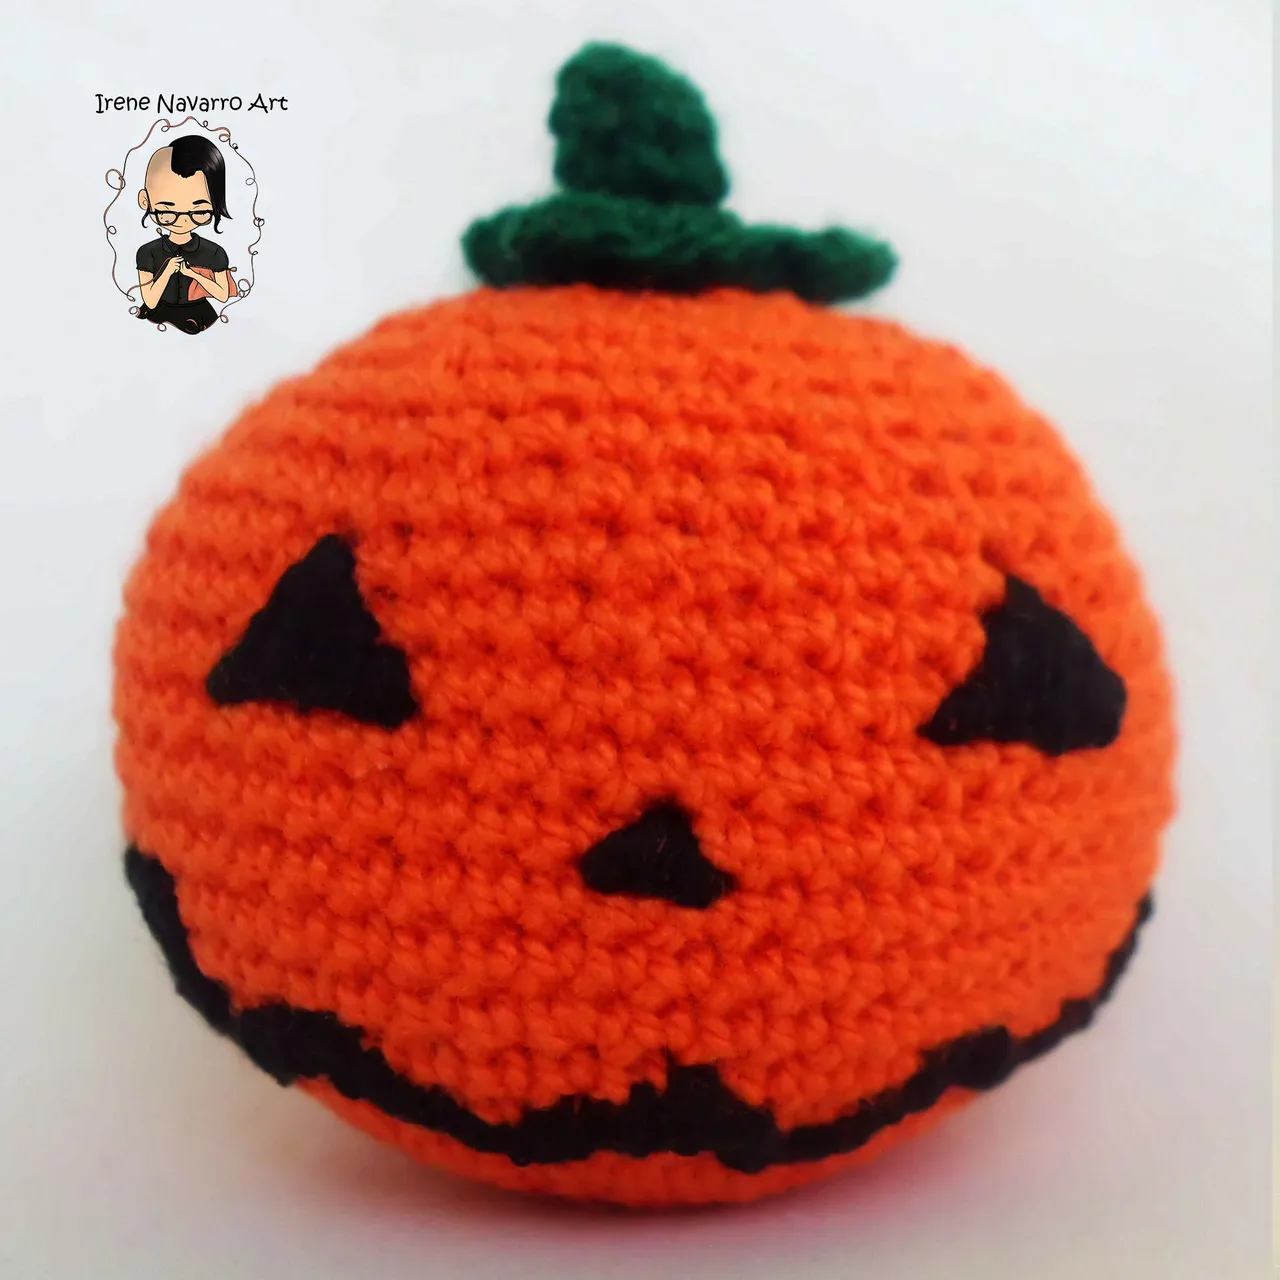
After obtaining said pumpkin, I felt that I did not want to make their eyes and mouths like Halloween lanterns, it gave me the feeling that it would look better to keep it that way, it reflects more naturally and it occurred to me that it could serve as an ornament in the kitchen and not necessarily for Halloween, so I decided to make another pumpkin but one that was not striated and I made this one its stem and its face, then finally I decided to place the same type of stem with a different color from the previous pumpkin and I ended up with two pumpkins that together seem to me to look better. Here I share the step by step for both the fluted pumpkin designed in the giant Mrs. Esperanza, a great mentor, and the Halloween pumpkin designed completely by me, I hope you like it.
Materiales / Materials
- Hilo acrílico naranja y verde
- Crochet # 4 (1.25mm)
- Relleno de fibra antialérgica
- Aguja e hilo negro de coser.
- Aguja de ojal grande
- Tijera
- Orange and green acrylic yarn
- Crochet # 4 (1.25mm)
- Anti-allergic fiber filling
- Needle and black sewing thread.
- Large buttonhole needle
- Scissors
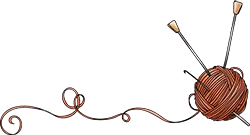
Calabaza estriada / Striated pumpkin
Con hilo naranja hacer 19 cadenas
1 Ronda: 2 puntos deslizados, 2 puntos bajos, 11 medios puntos altos, 2 puntos bajos, 2 puntos deslizados.
2 – 3 Ronda: 2 puntos deslizados, 4 puntos bajos, 7 medios puntos altos, 4 puntos bajos, 2 puntos deslizados.
4 Ronda: 2 puntos deslizados, 2 puntos bajos, 11 medios puntos altos, 2 puntos bajos, 2 puntos deslizados.
Hacer ocho veces la secuencia de las primeras 4 rondas, para en total llegar a 32 rondas.
With orange thread make 19 chains
1 Round: 2 slip crochets, 2 single crochet, 11 half double crochet, 2 single crochet, 2 slip stitch.
2 - 3 Round: 2 slip stitches, 4 single crochet, 7 half double crochet, 4 single crochet, 2 slip stitch.
4 Round: 2 slip crochet, 2 single crochet, 11 single crochet, 2 single crochet, 2 slip stitch.
Do the sequence of the first 4 rounds eight times, for a total of 32 rounds.
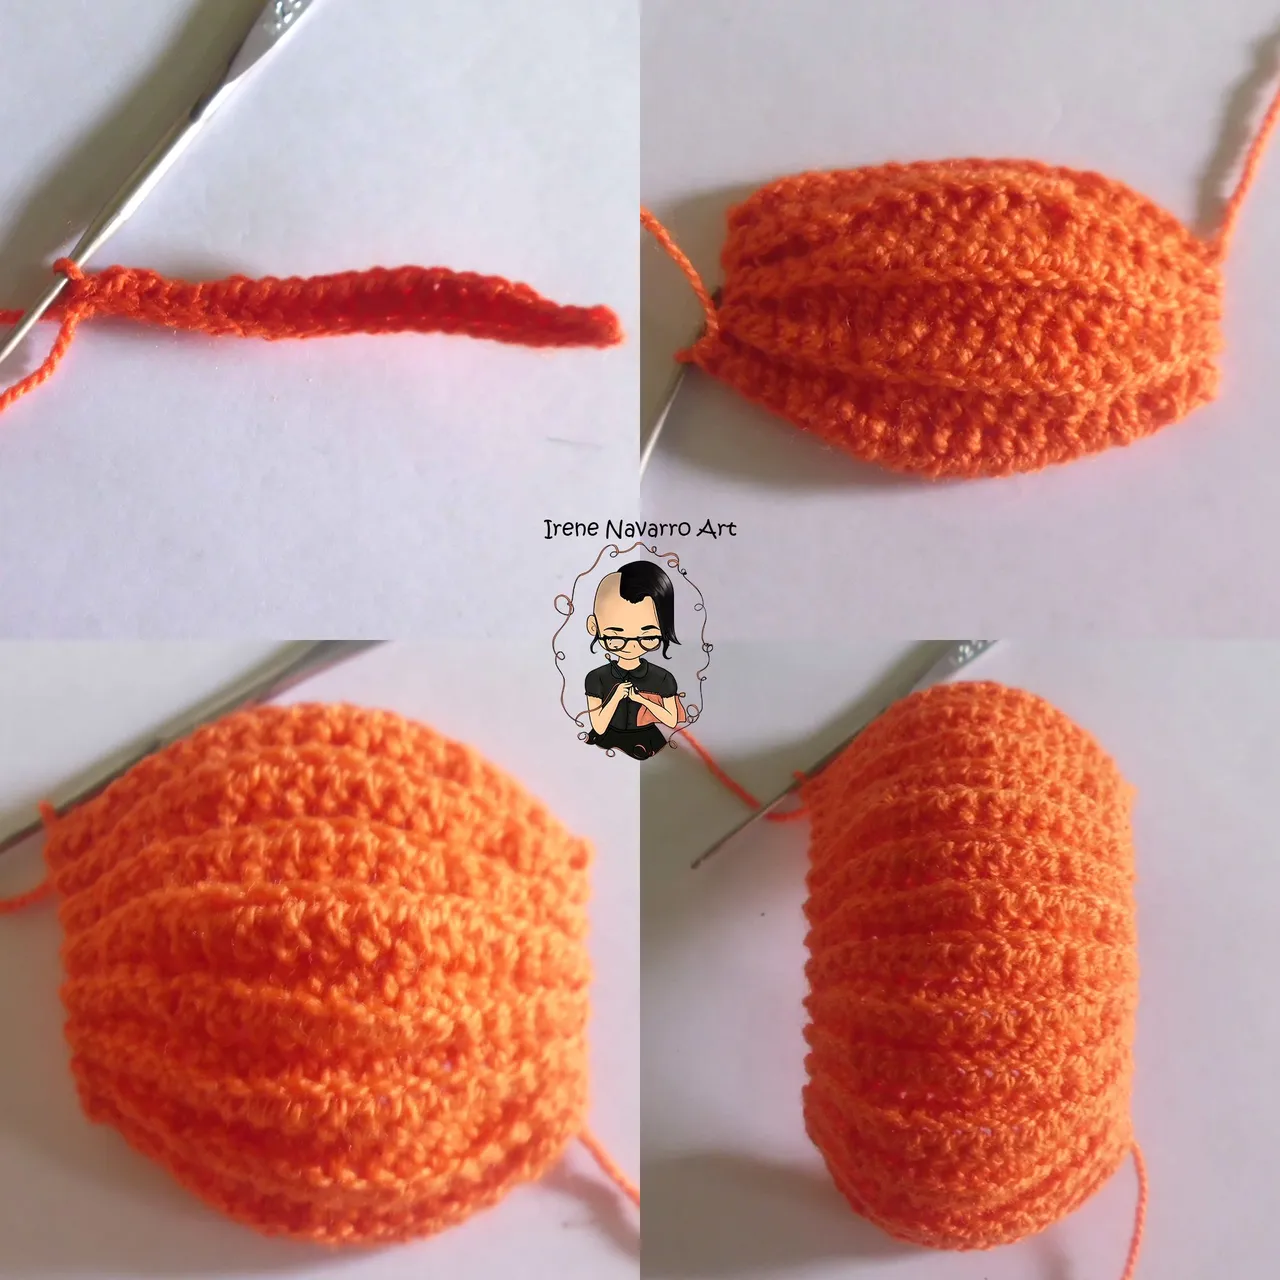
Unir el inicio con el final haciendo puntos deslizados. Lugo pasar una aguja con hilo del mismo por todos los bordes para cerrar la parte de abajo, rellenar con fibra y cerrar la parte de arriba de la misma forma.
Join the beginning with the end by making slip stitches. Then pass a needle with thread of it around all the edges to close the bottom, fill with fiber and close the top in the same way.
Calabaza lisa / Smooth Punpkin
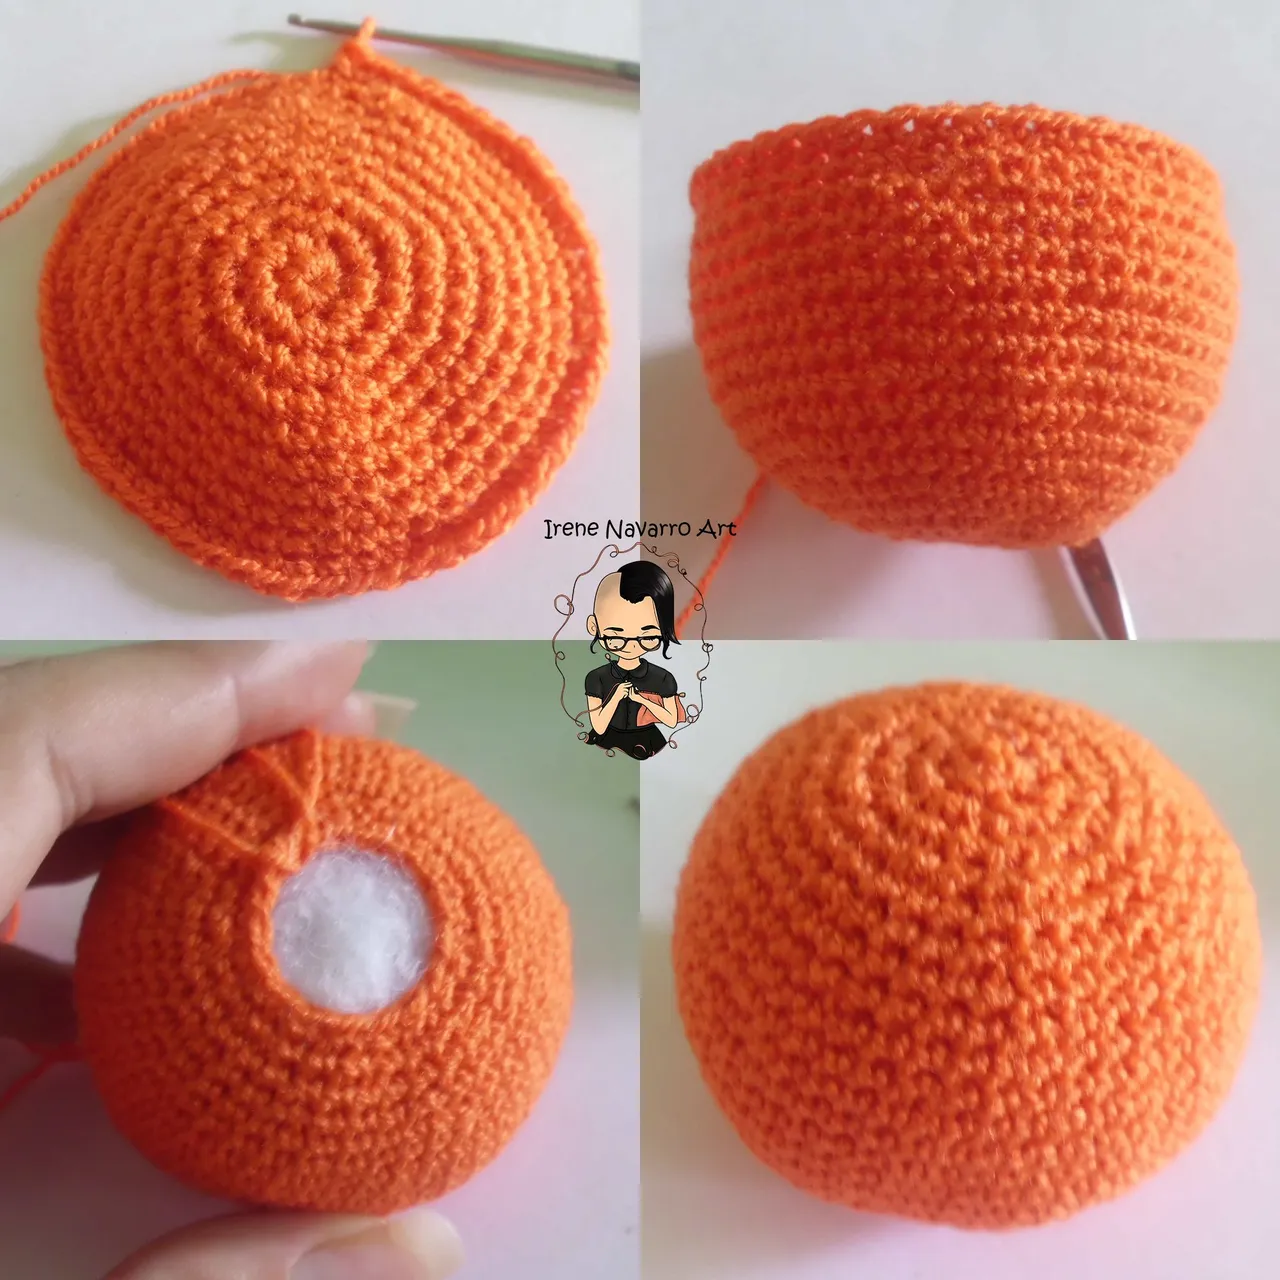
Con hilo naranja hacer 8 puntos bajos en un anillo.
1 Ronda: 8 aumentos. Total de puntos (16)
2 Ronda: (1 punto bajo, 1 aumento) x 8. Total de puntos (24)
3 Ronda: (2 puntos bajos, 1 aumento) x 8. Total de puntos (32)
4 Ronda: 32 puntos bajos
5 Ronda: (3 puntos bajos, 1 aumento) x 8. Total de puntos (40)
6 Ronda: 40 puntos bajos
7 Ronda: (4 puntos bajos, 1 aumento) x 8. Total de puntos (48)
8 Ronda: 48 puntos bajos
9 Ronda: (5 puntos bajos, 1 aumento) x 8. Total de puntos (56)
10-15 Ronda: 56 puntos bajos
16 Ronda: (5 puntos bajos, 1 disminución) x 8. Total de puntos (48)
17 Ronda: 48 puntos bajos
18 Ronda: (4 puntos bajos, 1 disminución) x 8. Total de puntos (40)
19 Ronda: 40 puntos bajos
20 Ronda: (3 puntos bajos, 1 disminución) x 8. Total de puntos (32)
21 Ronda: 32 puntos bajos
22 Ronda: (2 puntos bajos, 1 disminución) x 8. Total de puntos (24)
23 Ronda: (1 punto bajo, 1 disminución) x 8. Total de puntos (16)
24 Ronda: Rellenar con fibra. Hacer 8 disminuciones.
25 Ronda: 4 disminuciones. Cerrar con un punto deslizados y esconder la hebra por dentro.
With orange thread, make 8 single crochets in a ring.
1 Round: 8 increases. Total Stitches (16)
2 Round: (1 single crochet, 1 increase) x 8. Total stitches (24)
3 Round: (2 single crochets, 1 increase) x 8. Total stitches (32)
4 Round: 32 single crochets
5 Round: (3 single crochets, 1 increase) x 8. Total stitches (40)
6 Round: 40 single crochets
7th Round: (4 single crochets, 1 increase) x 8. Total stitches (48)
8 Round: 48 single crochets
9 Round: (5 single crochets, 1 increase) x 8. Total stitches (56)
10-15 Round: 56 single crochets
16 Round: (5 single crochets, 1 decrease) x 8. Total stitches (48)
17 Round: 48 single crochets
18 Round: (4 single crochets, 1 decrease) x 8. Total stitches (40)
19 Round: 40 single crochets
20 Round: (3 single crochets, 1 decrease) x 8. Total stitches (32)
21 Round: 32 single crochets
22 Round: (2 single crochets, 1 decrease) x 8. Total stitches (24)
23rd Round: (1 single crochet, 1 decrease) x 8. Total stitches (16)
24 Round: Fill with fiber. Make 8 decreases.
25th Round: 4 decreases. Close with a slip stitch and hide the strand inside.
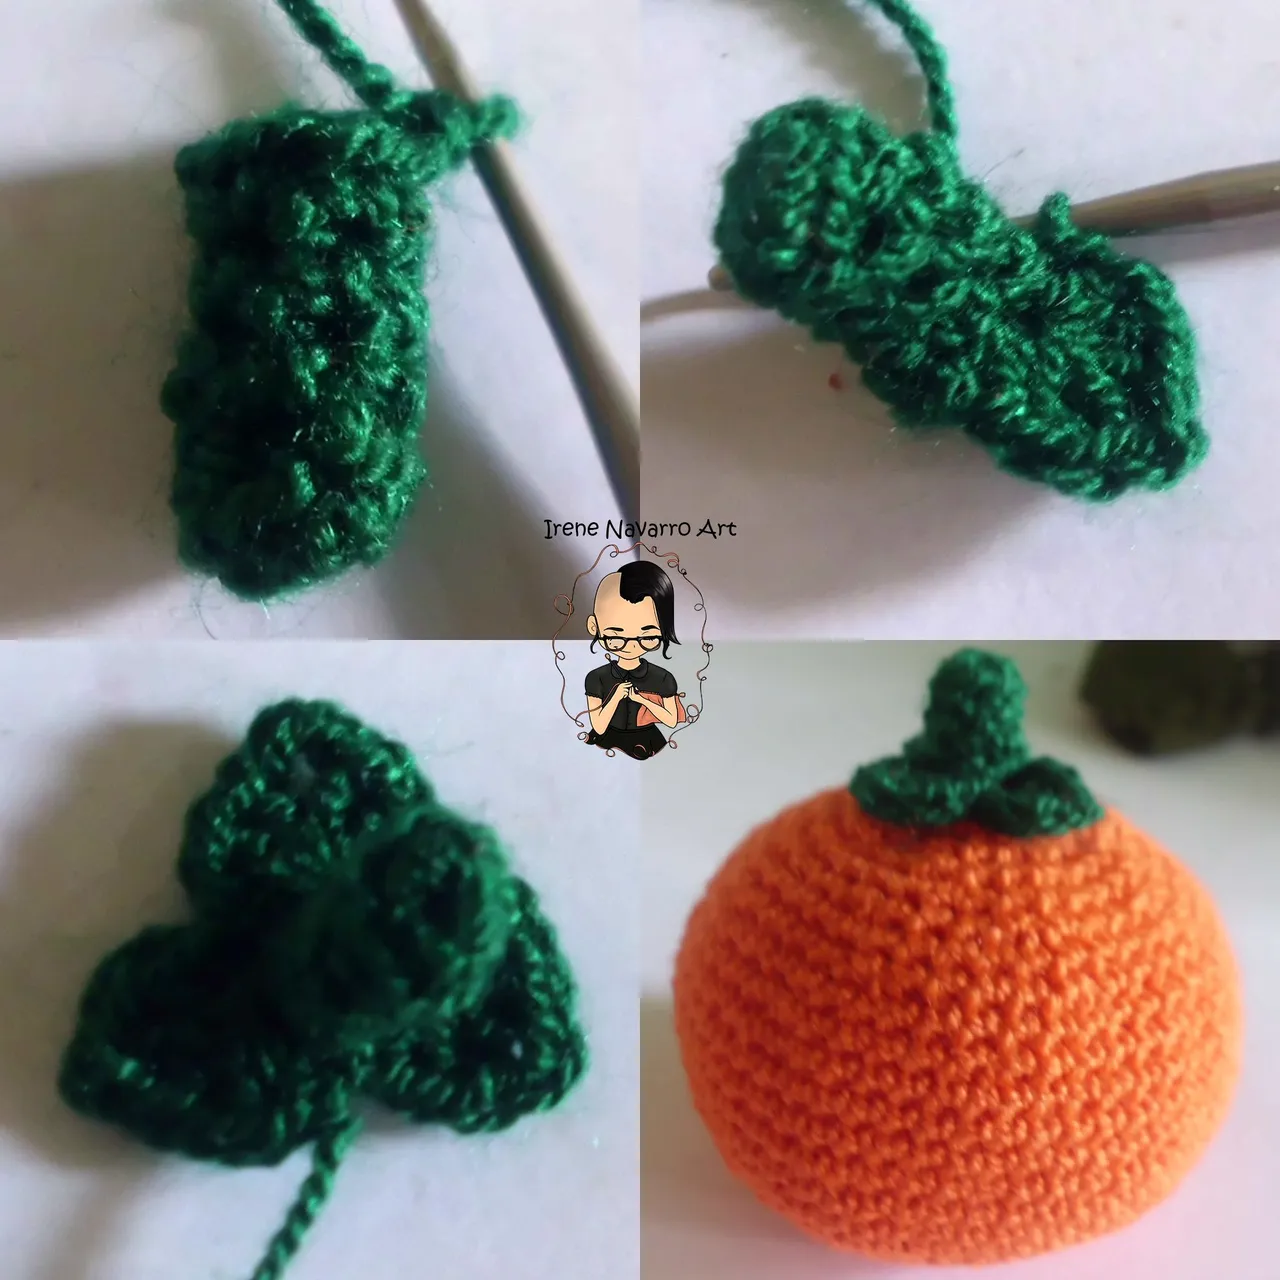
Tallo / Stem
Con hilo verde hacer 6 puntos bajos en un anillo.
1 Ronda: Tomando solo el lado de atrás del punto hacer 6 puntos bajos.
2-4 Ronda: 6 puntos bajos.
3 Ronda: tejer juntos 1 medio punto alto y 1 punto alto, hacer dos cadenas, tejer juntos en el mismo punto 1 punto alto y 1 medio punto alto. Hacer 1 punto deslizados en el siguiente punto. Repetir tres veces.
Cerrar con un punto deslizado, dejar una hebra larga para coser a la calabaza.
With green yarn, make 6 single crochets in a ring.
1 Round: Taking only the back side of the stitch, make 6 single crochets.
2-4 Round: 6 single crochets.
3 Round: knit 1 half double crochet and 1 double crochet together, make two chains, work together in the same stitch 1 double crochet and 1 half double crochet. Make 1 slip stitch in the next stitch. Repeat three times.
Close with a slip stitch, leave a long strand to sew to the pumpkin.
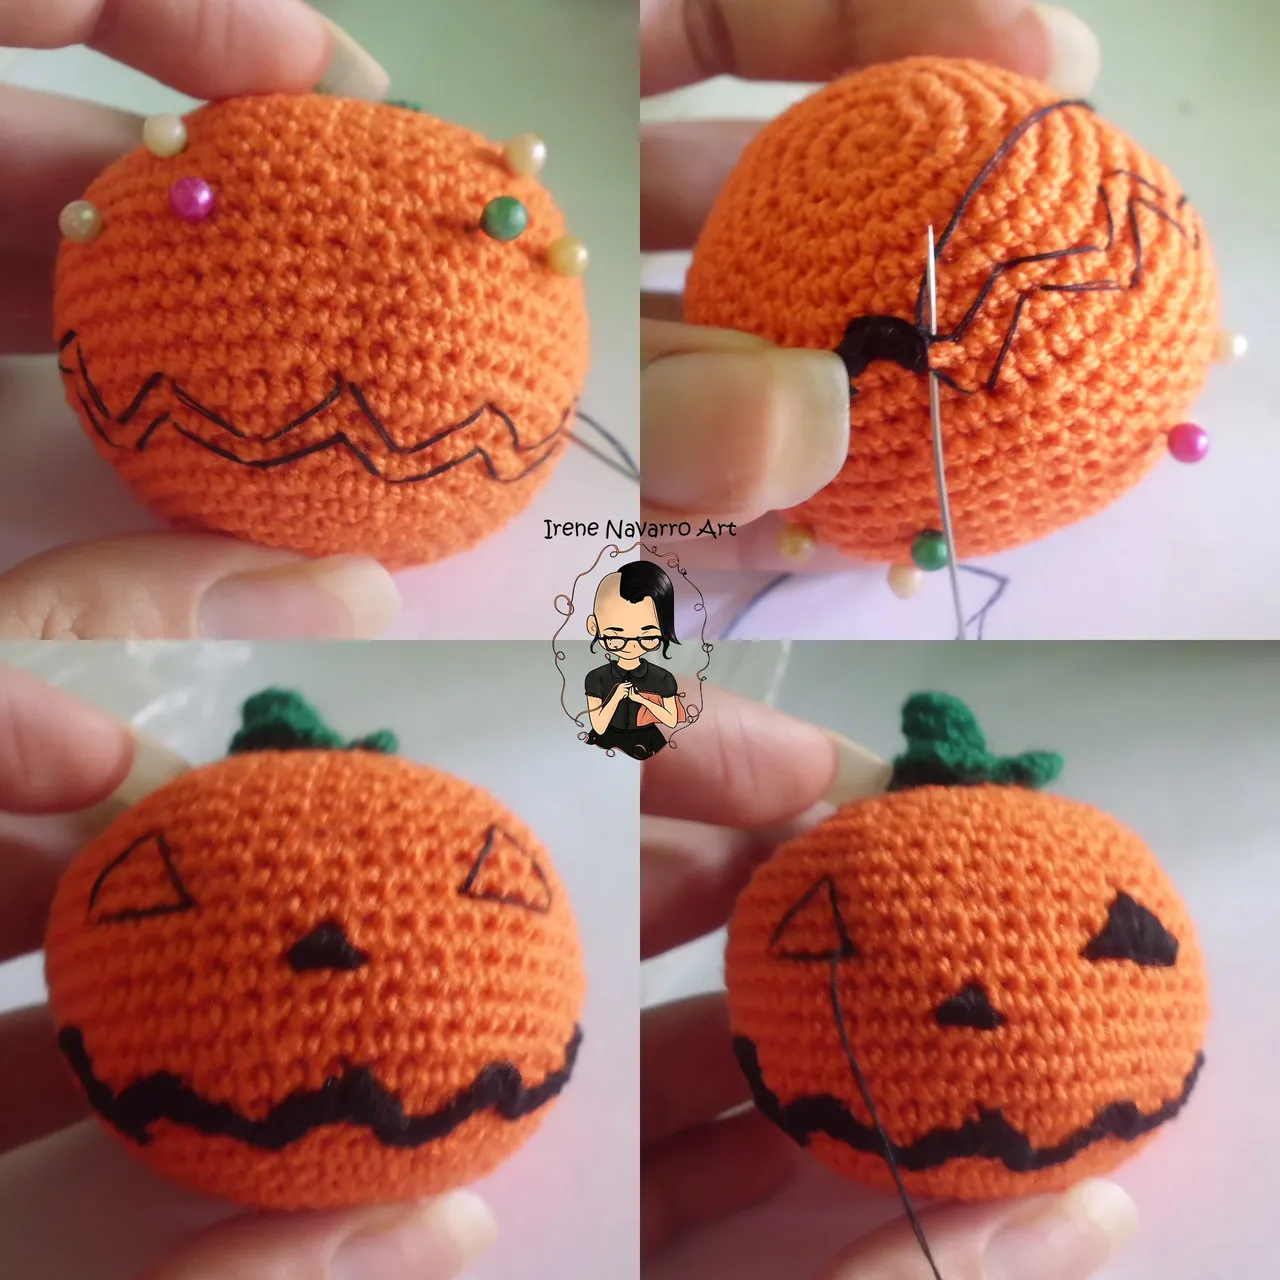
Detalles / Details
With black sewing thread the eyes, nose and mouth should be embroidered, for this I recommend previously marking with pins the location of said details.
Resultado/ Result
Imágenes tomadas con cámara Casio QV-R100 y editadas en Adobe Photoshop Cs6
Images taken with Casio QV-R100 camera and edited in Adobe Photoshop Cs6
Invítenme un Café/Support Me on Ko-Fi
Si te gusta mi contenido y quieres apoyarme a seguir dibujando, pintando, escribiendo y tejiendo puedes invitarme un Ko-fi en el enlace que les dejo aquí abajo, les recuerdo que es fácil, se usa Paypal y Tarjeta. ¡Muchas gracias a todos!
If you want to support my art you can also make donations for the value of a coffee (Ko-Fi) this uses Paypal, it is simple and with it I will be able to continue knitting and buying materials to create and share my publications

https://ko-fi.com/irenenavarroart

Espero les haya gustado. Les invito a leer mis próximas publicaciones y siempre estaré dispuesta a responder sus preguntas y comentarios, también pueden seguirme y contactarme en cualquiera de mis redes sociales. ¡Muchas gracias!
I hope you liked it. I invite you to read my next publications and I will always be willing to answer your questions and comments, you can also follow me and contact me on any of my social networks. Thank you!