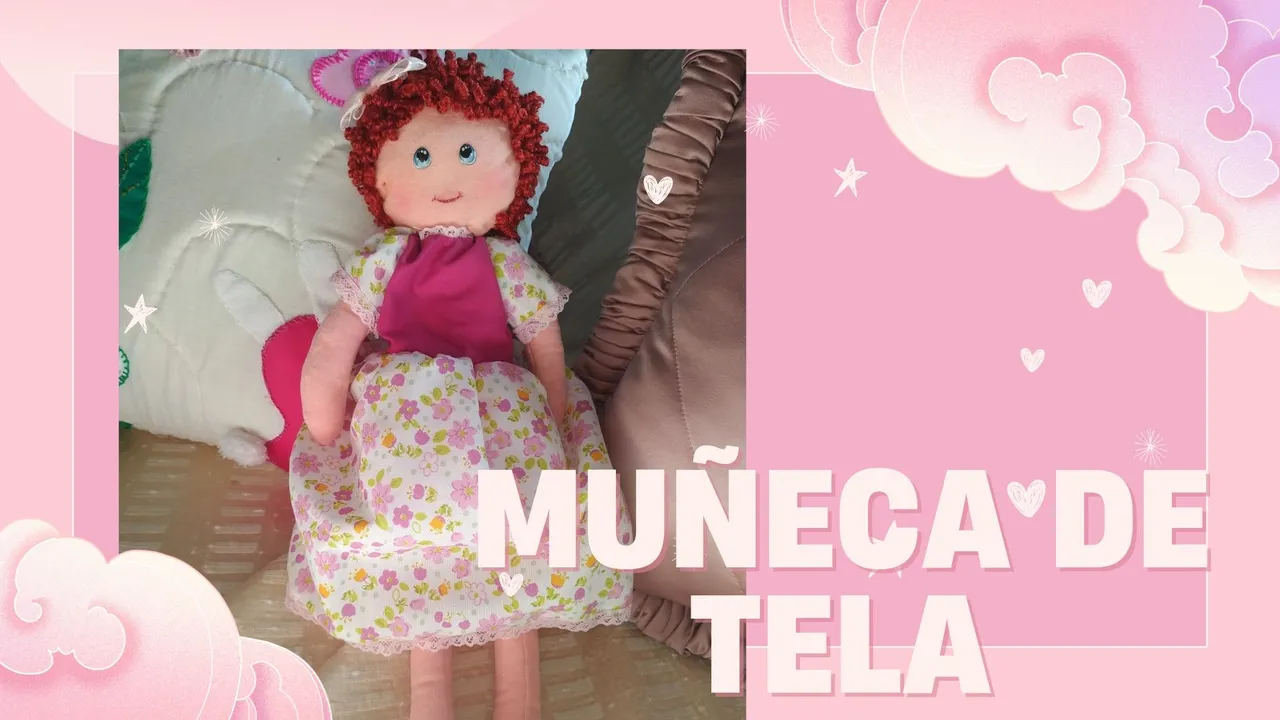

¡Feliz martes, queridos amigos de Hive! Hoy quiero compartir con ustedes un hermoso proyecto para #Needlework.
Se trata de una muñeca de tela, un juguete muy tradicional para niñas, que se elabora con retazos de tela. Estoy segura de que muchas de nosotras tuvimos una de estas en algún momento, y al hacerla, recordaremos esos tiempos.
Para crear esta encantadora muñeca, necesitaremos los siguientes materiales.

- Tela rígida color rosado/beige.
- Relleno.
- Hilo.
- Moldes para el cuerpo y cara.
- Lana para el cabello.
- Aguja.
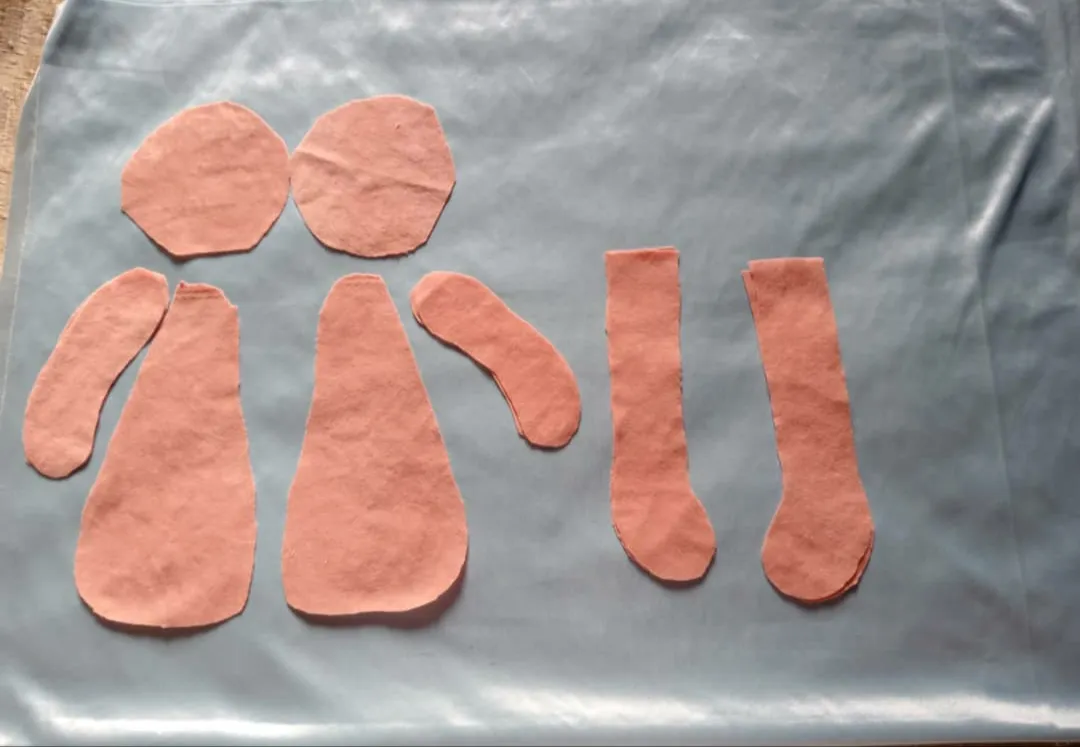
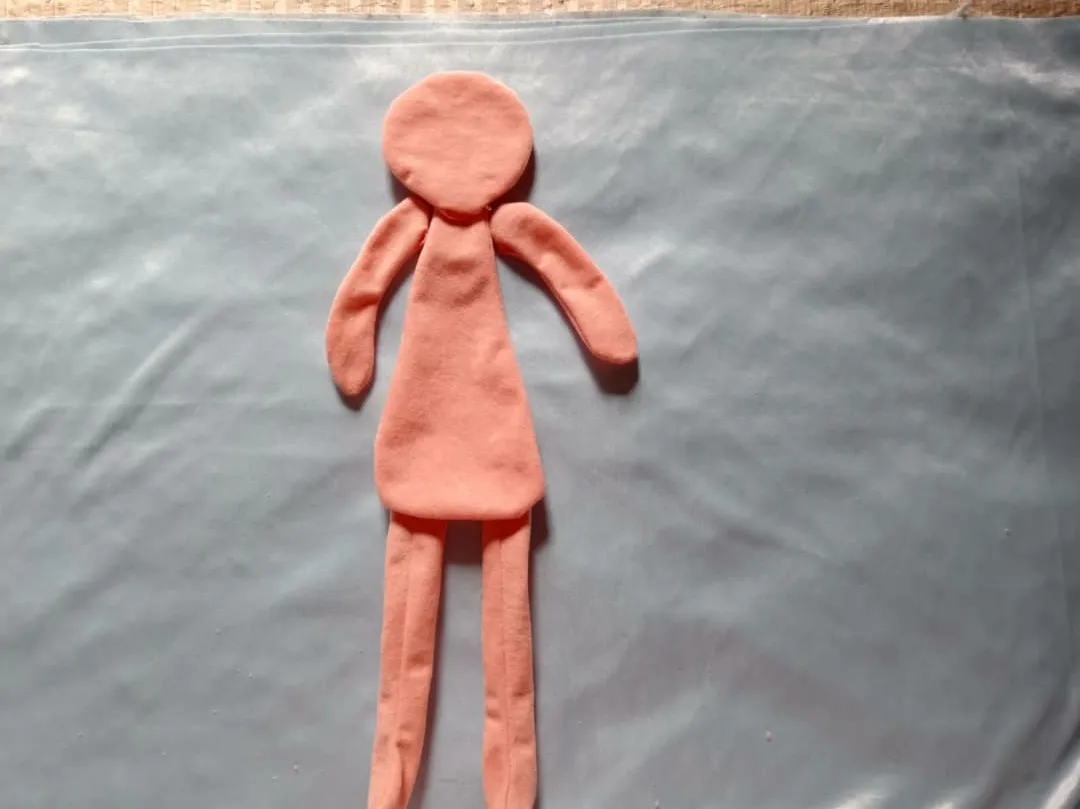
Como primer paso debemos cortar la forma de la muñeca según el molde, tanto el cuerpo como la cara de la misma.
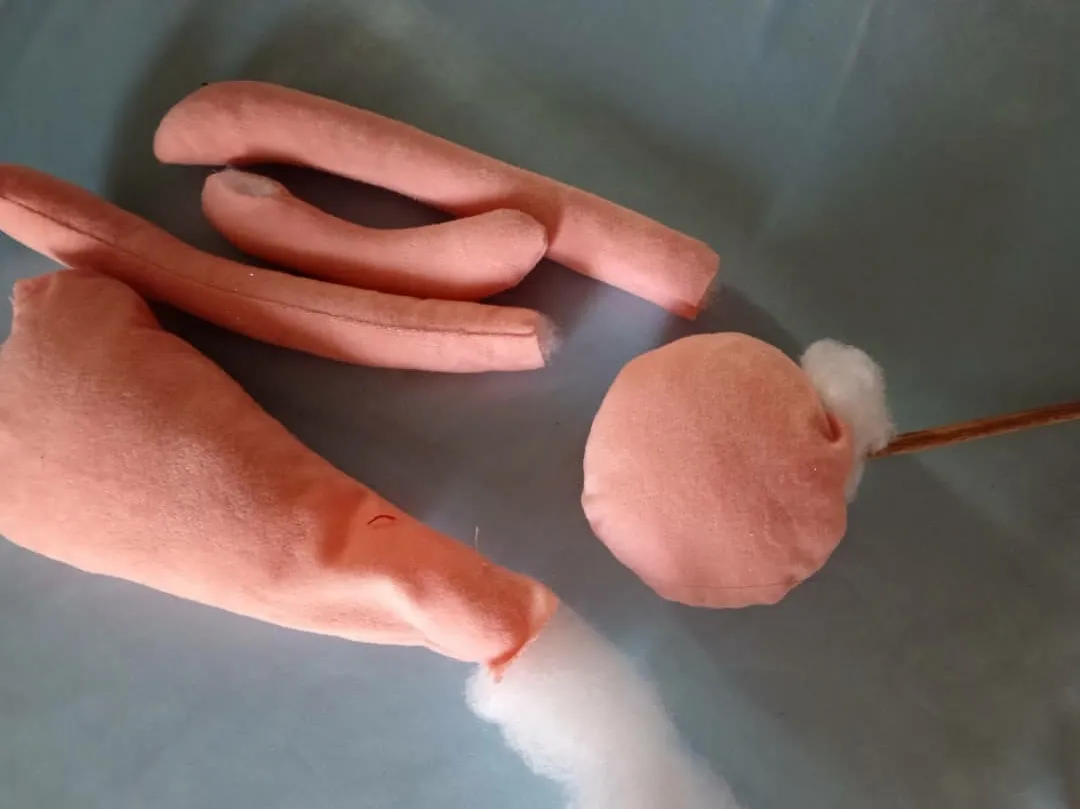
Continuamos armando y uniendo todas las piezas (brazos, piernas, cuerpo, cabeza).
Las vamos a rellenar con algodón sintético para que quede de la siguiente manera.
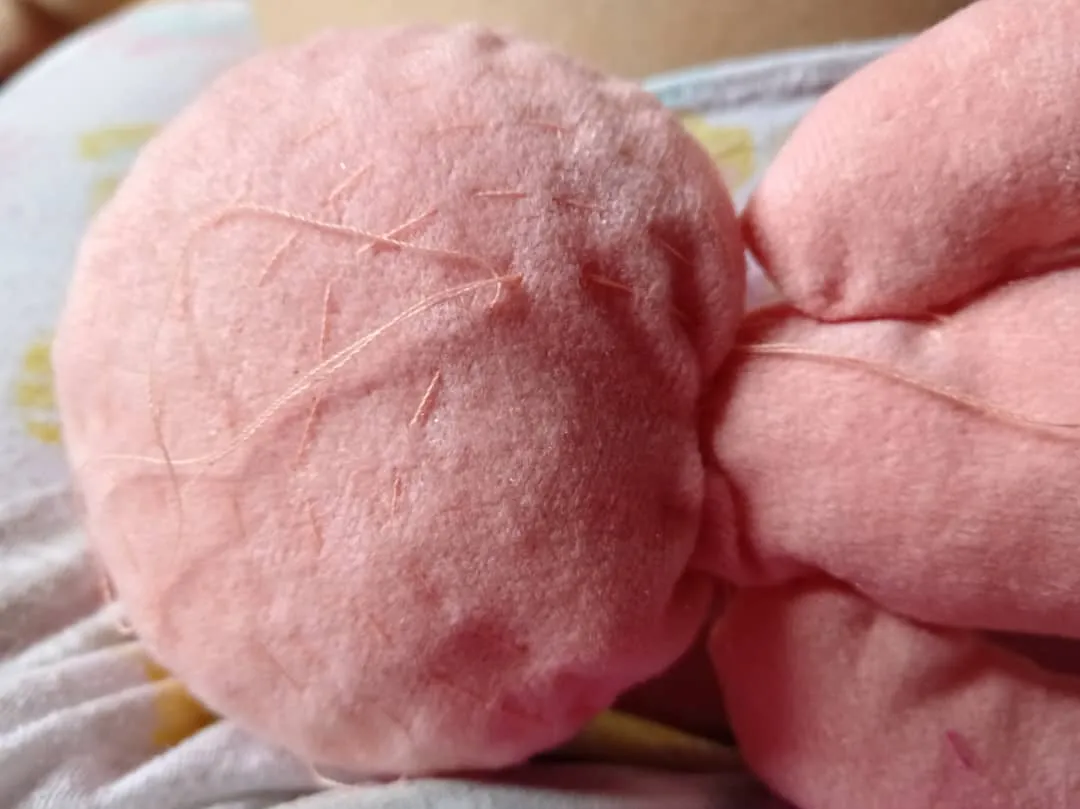
En el caso de la cara o la parte de la cabeza, cuando ya se encuentre rellena se le pasa costura manual con puntada corta, esto lo haremos por todo la parte trasera/posterior, la parte de la frente de la cabeza y también los laterales.
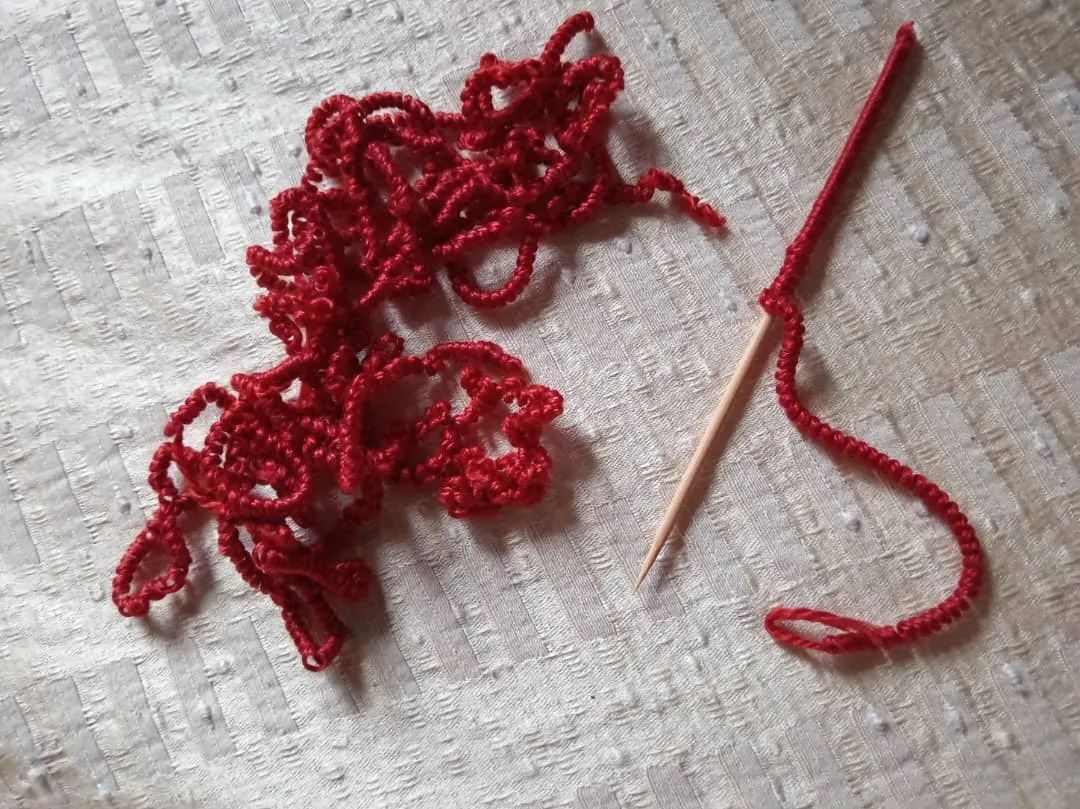
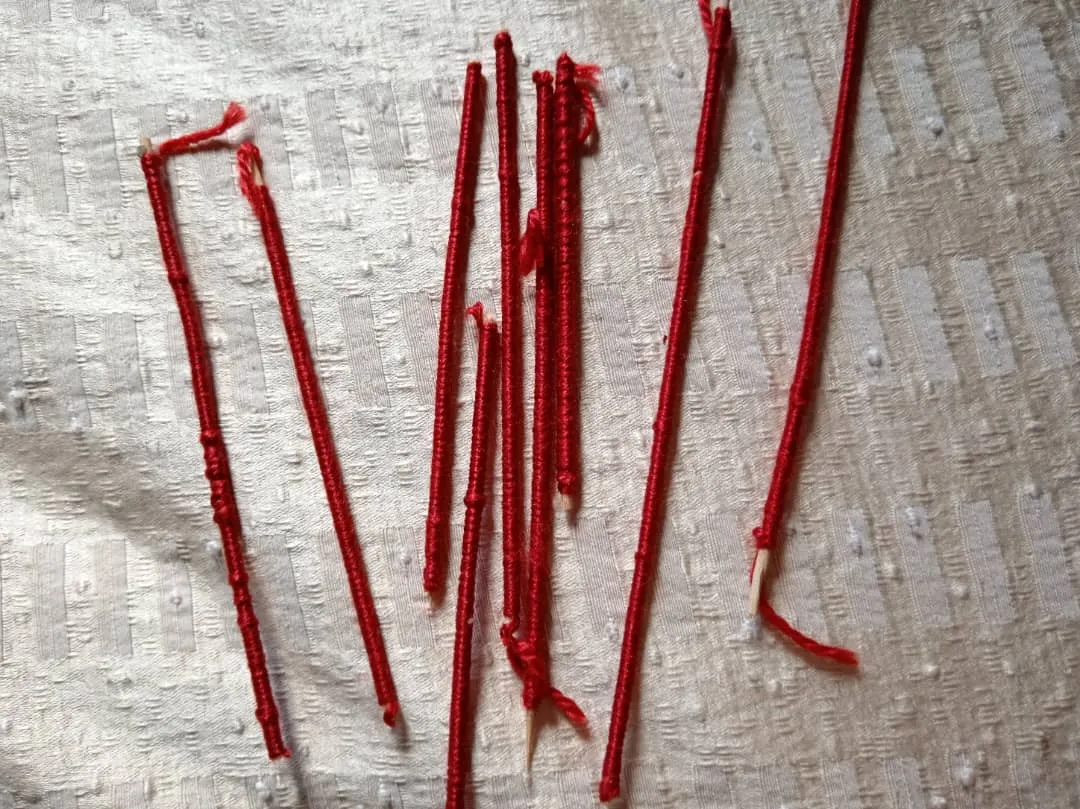
Vamos a hacer el cabello de la muñeca con ayuda unos palitos de brochetas. Se enrolla o envuelve todo el palo con la lana, y repetimos tantas veces veamos necesario para completa el cabello.
En mi caso se usó una madeja de lana por ser cabello corto pero si querés cabello largo se utiliza más.
Luego en una olla con agua hirviendo se agregan todos los palitos enrollados con lana y se deja hervir por aproximadamente media hora. Luego de esto, se saca del agua y se deja secar toda la noche.
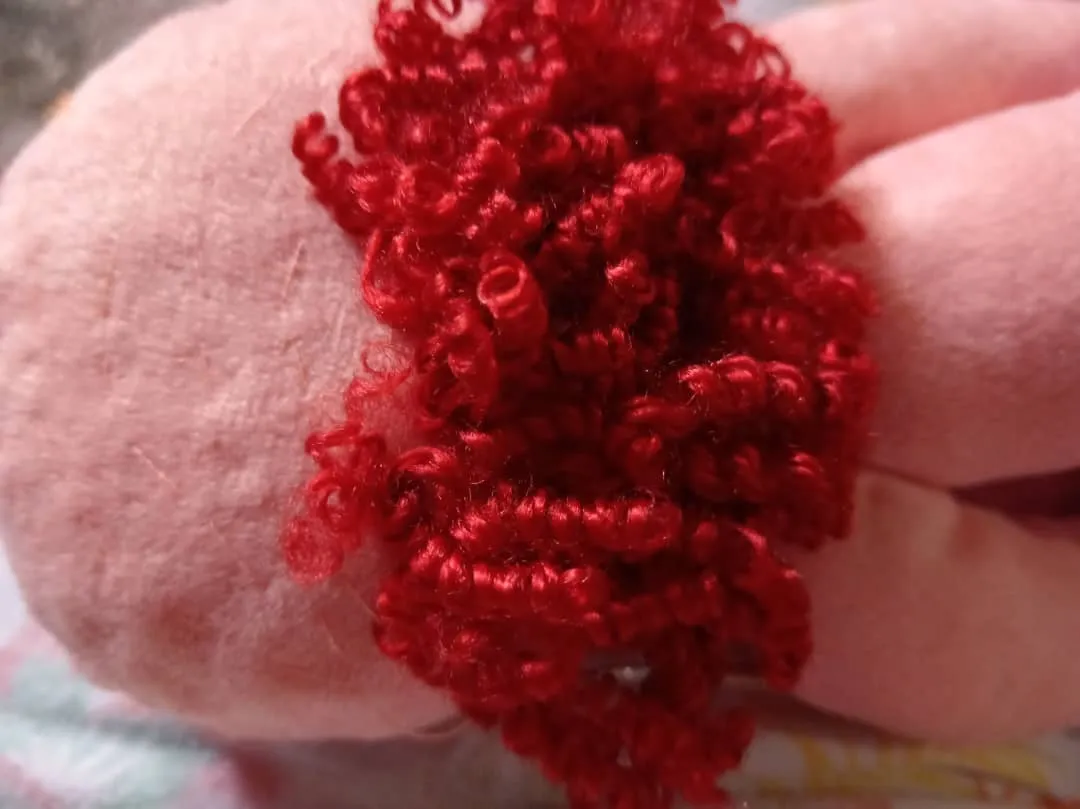
Al día siguiente se desenrolla del palito y nos quedará en forma de rulos.
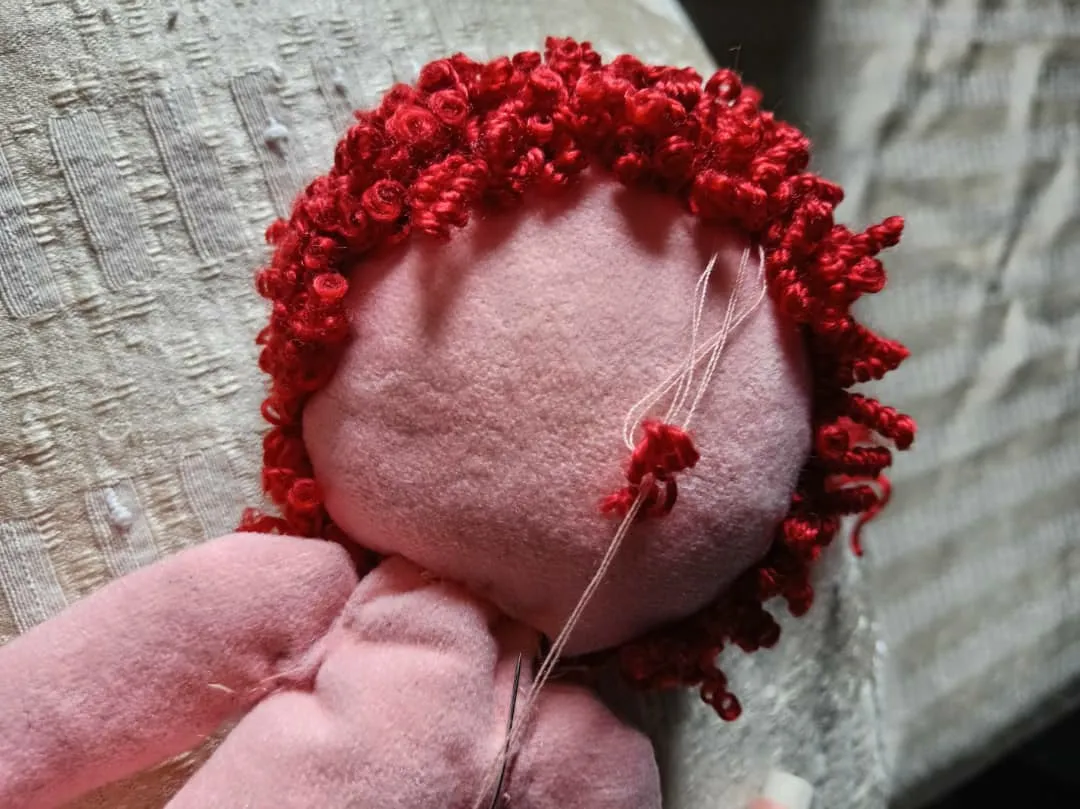
Al desenrollar cada lana, se corta del largo deseado y se va introduciendo en la costura que se hizo en la cabeza de la muñeca anteriormente. Esto se hace uno por uno hasta forrar la parte trasera, la parte frontal y los laterales.
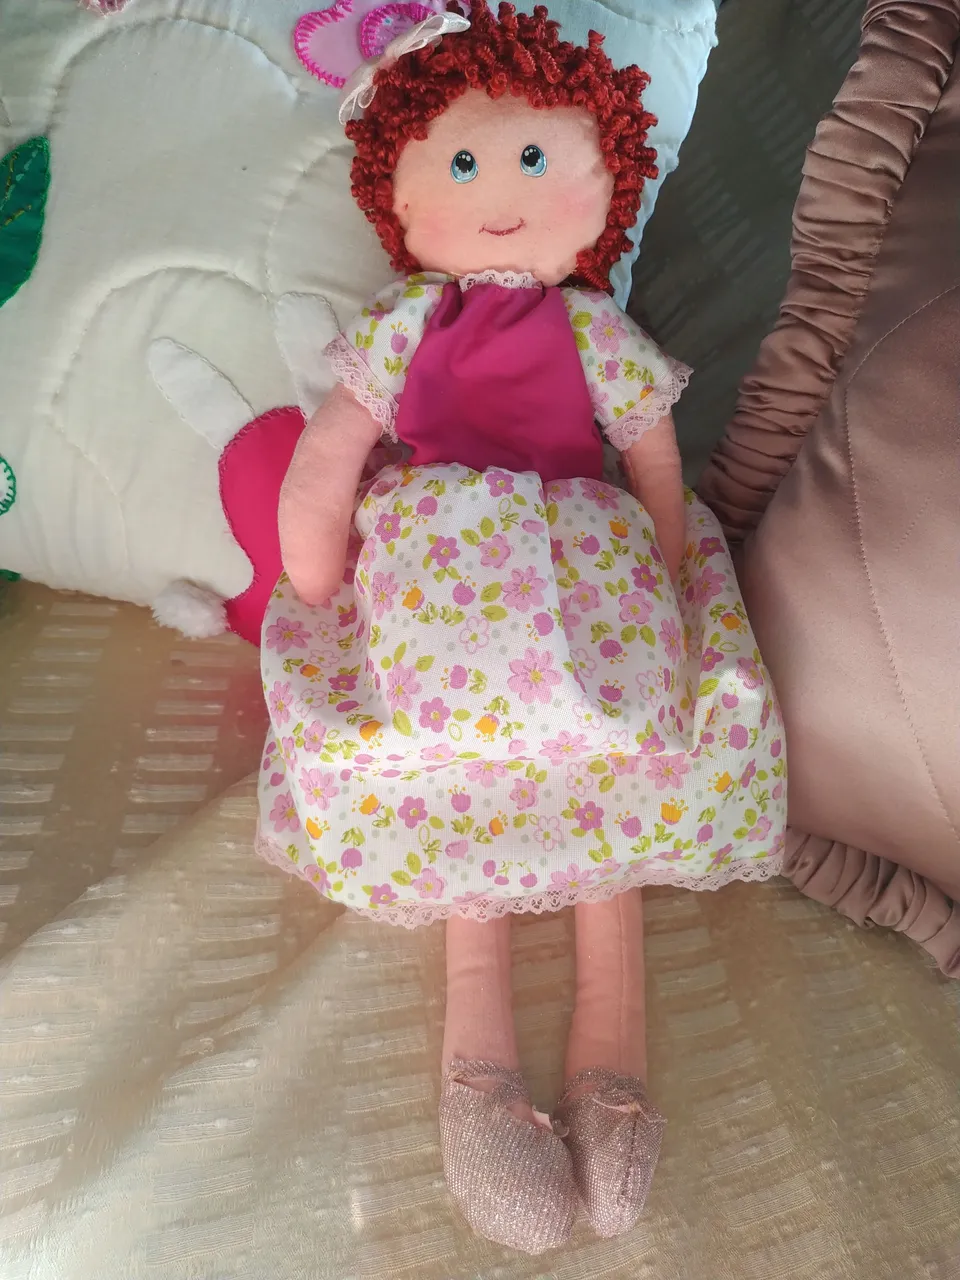
Unimos la cabeza al cuerpo cociendo muy bien desde la parte trasera del cuello para que quede fija.
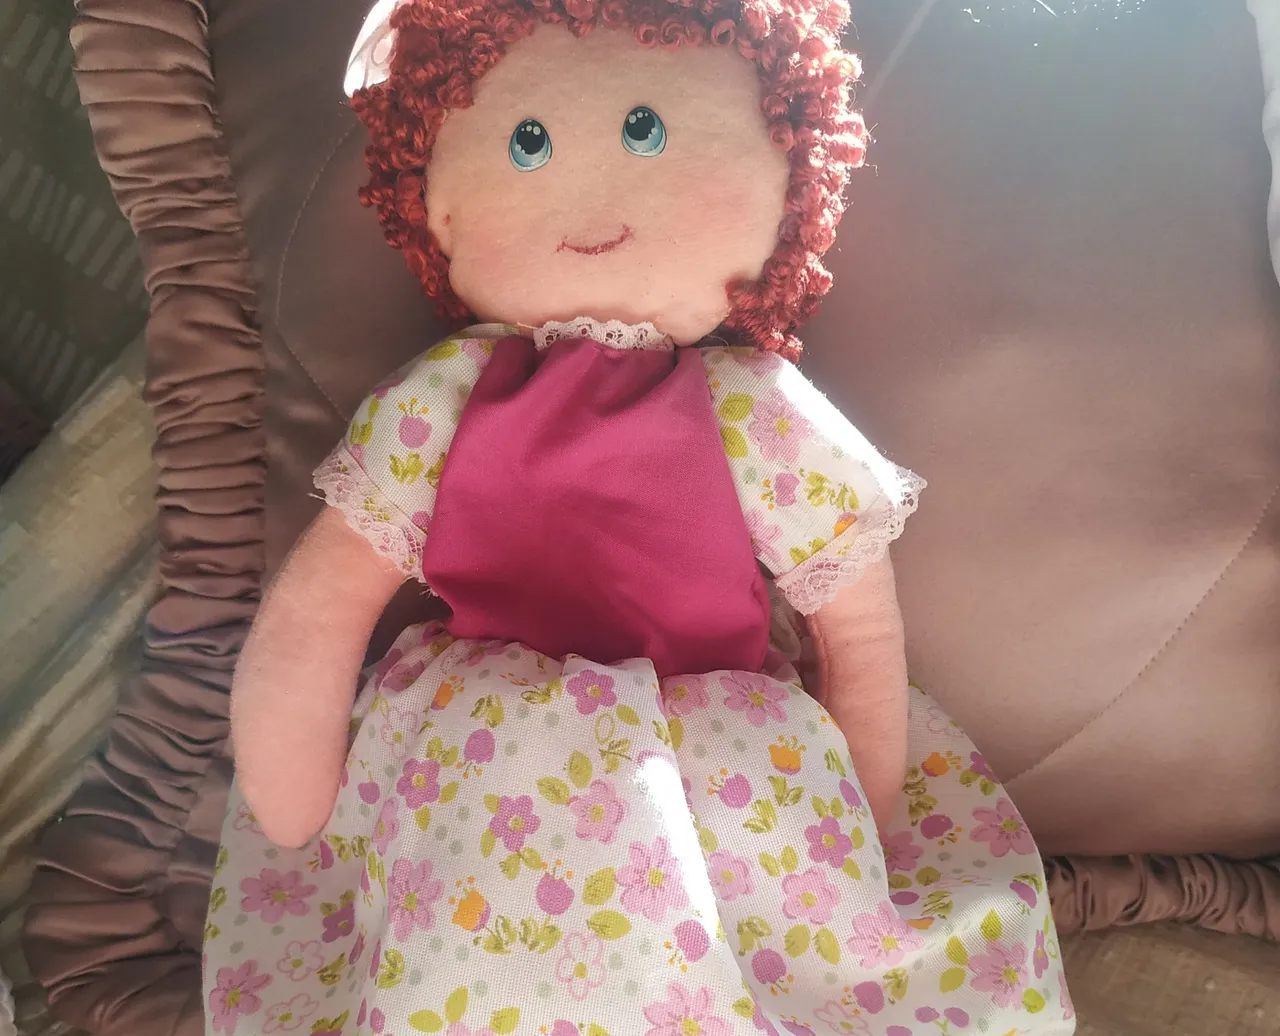
Se termina de hacer el rostro pegando los ojos y decorando la sonrisa con hilo color rojo.
Por último y para culminar, le confeccioné un calzón, un vestido y unas zapatillas rosa brillante.
Debo decir que disfruté mucho haciendo esta linda manualidad. Puedes hacerla para decoración o incluso tienes un lindo regalo que es muy original.
Hasta aquí mi proyecto del día de hoy, les deseo que tengan un feliz día y noche.

Happy Tuesday, dear friends of Hive! Today I want to share with you a beautiful project for #Needlework.
This is a fabric doll, a very traditional toy for little girls, which is made from scraps of fabric. I'm sure many of us had one of these at some point, and by making it, we will remember those times.
To create this lovely doll, we will need the following materials.
- Rigid pink/beige fabric.
- Filling.
- Thread.
- Molds for the body and face.
- Wool for hair.
- Needle.
As a first step we must cut the shape of the doll according to the mold, both the body and the face of the doll.
We continue assembling and joining all the pieces (arms, legs, body, head).
We are going to fill them with synthetic cotton so that it looks like this.
In the case of the face or the part of the head, when it is already stuffed, it is sewn by hand with a short stitch, this will be done all over the back/back, the front part of the head and also the sides.
We are going to make the doll's hair with the help of some skewers. We roll or wrap the whole stick with the wool, and repeat as many times as we see necessary to complete the hair.
In my case I used one skein of wool for short hair but if you want long hair use more.
Then in a pot with boiling water add all the wool rolled sticks and let it boil for about half an hour. After this, take it out of the water and let it dry overnight.
The next day it is unrolled from the stick and it will be in the form of curls.
When each wool is unrolled, it is cut to the desired length and inserted into the seam that was made in the head of the doll previously. This is done one by one until the back, front and sides are lined.
We join the head to the body by sewing it very well from the back of the neck so that it is fixed.
The face is finished by gluing the eyes and decorating the smile with red thread.
Finally and to finish, I made a pair of panties, a dress and bright pink slippers.
I must say that I really enjoyed making this cute craft. You can make it for decoration or even have a nice gift that is very original.
So much for my project today, I wish you a happy day and night.
Fotos tomadas de mi teléfono Xiaomi Redmi Note 6 Pro y mi teléfono Honor X8a || Photos taken from my Xiaomi Redmi Note 6 Pro phone and from my Hobor X8a phone.
Fuente del editor de imágenes || Image editor source