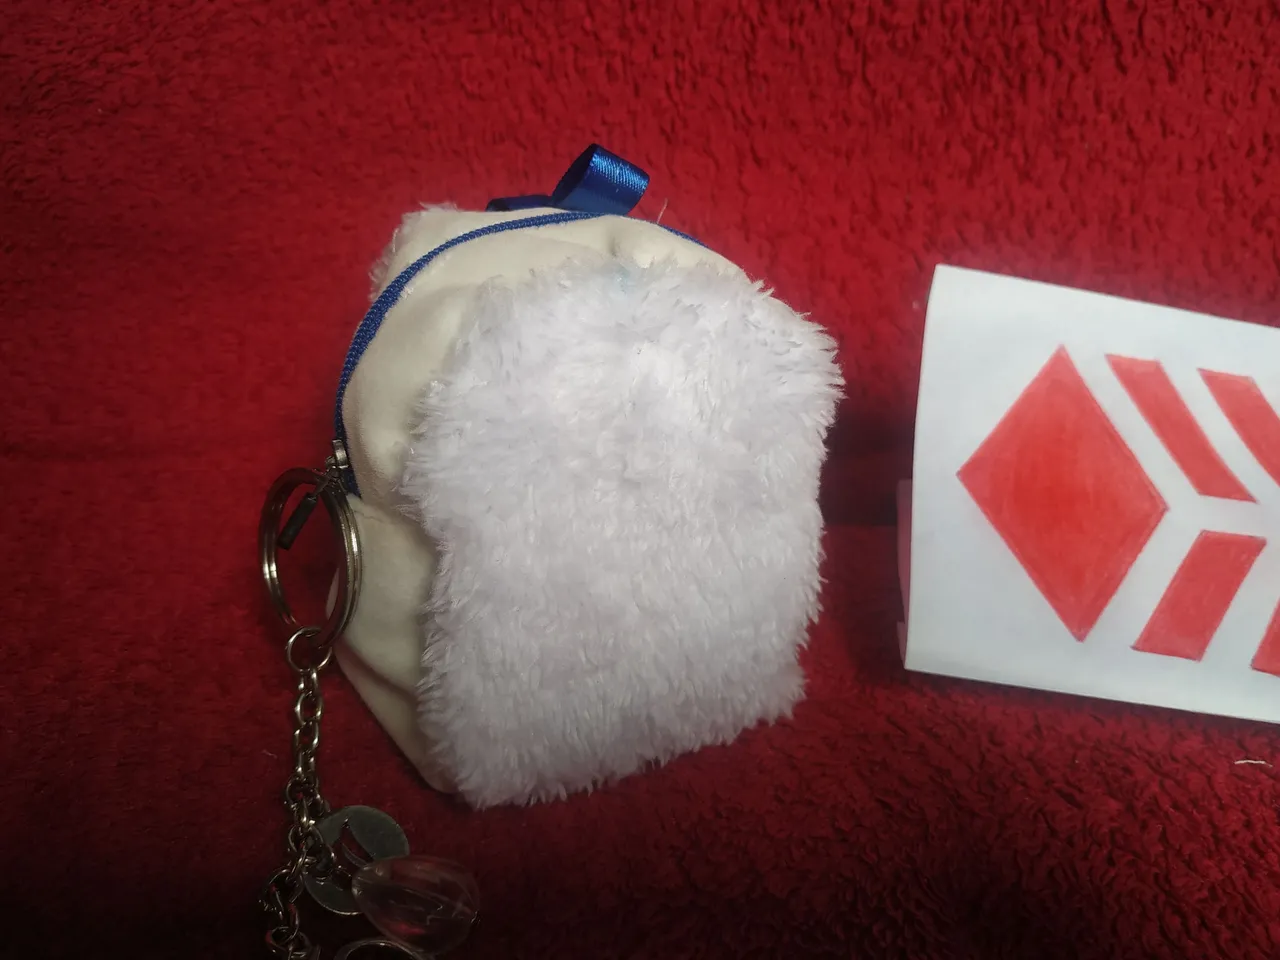
Hola a todos, linda comunidad de @NeedleWorkMonday el día de hoy traigo una idea genial y muy bella, es este hermoso mini bolso que nos sirve como monedero, yo lo uso desde hace un tiempo, se ve tierno y es muy eficaz ya que nos olvidamos de nuestra cartera porque a pesar de su pequeño tamaño, nos sirve para llevar nuestro dinero, tarjetas e identificación cuando vamos a hacer compras cerca de nuestra casa o ir al supermercado.
Hello everyone, nice community of @NeedleWorkMonday today I bring a great idea and very beautiful, is this beautiful mini purse that serves as a purse, I use it for a while, it looks cute and is very effective because we forget our wallet because despite its small size, it serves to carry our money, cards and identification when we go shopping near our home or go to the supermarket.
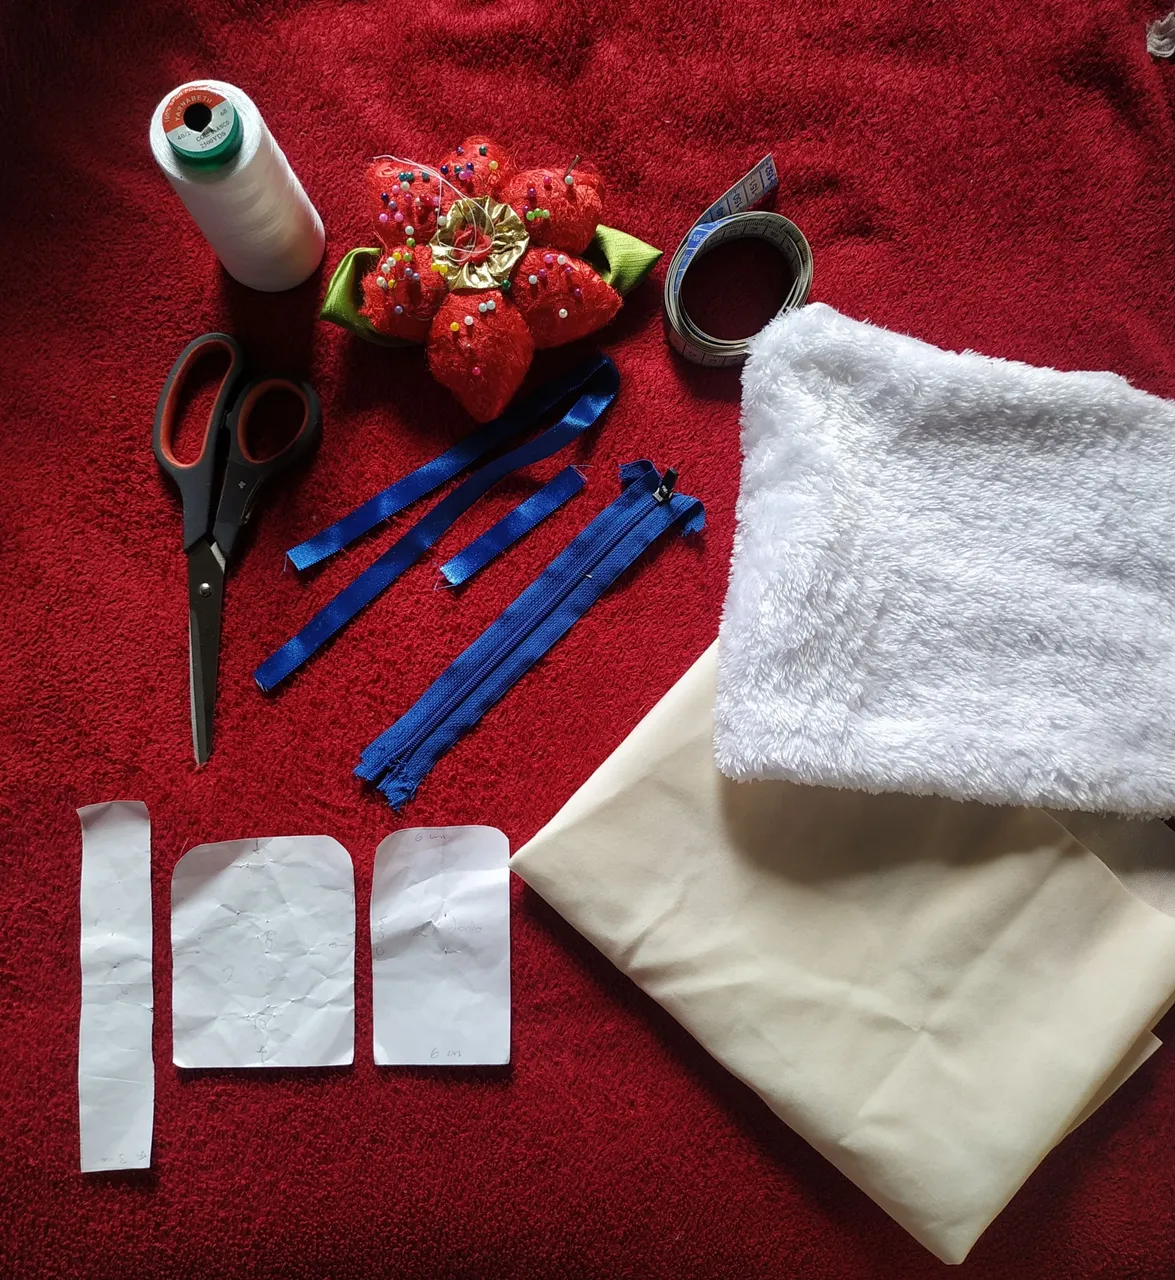
MATERIALES
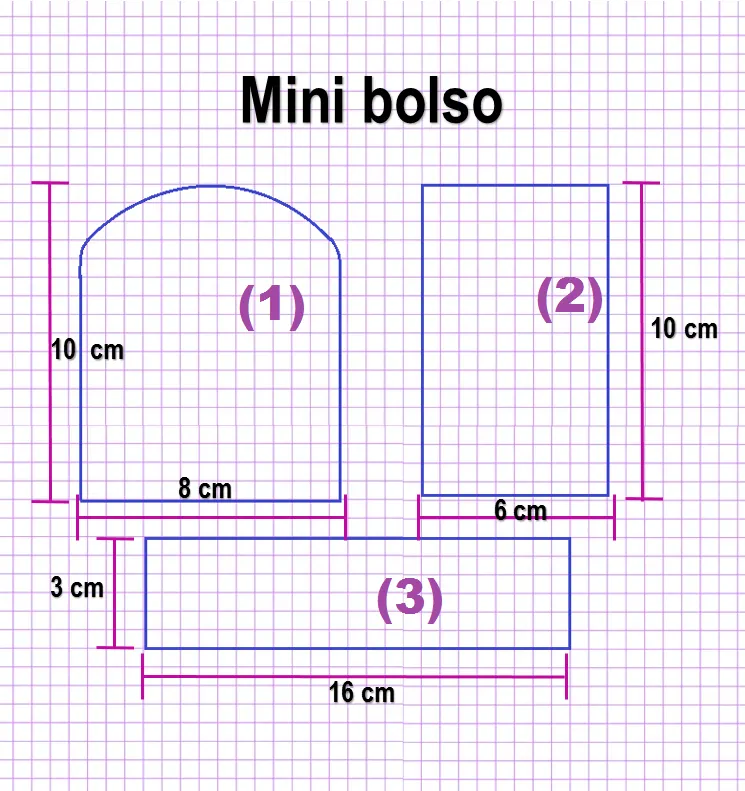
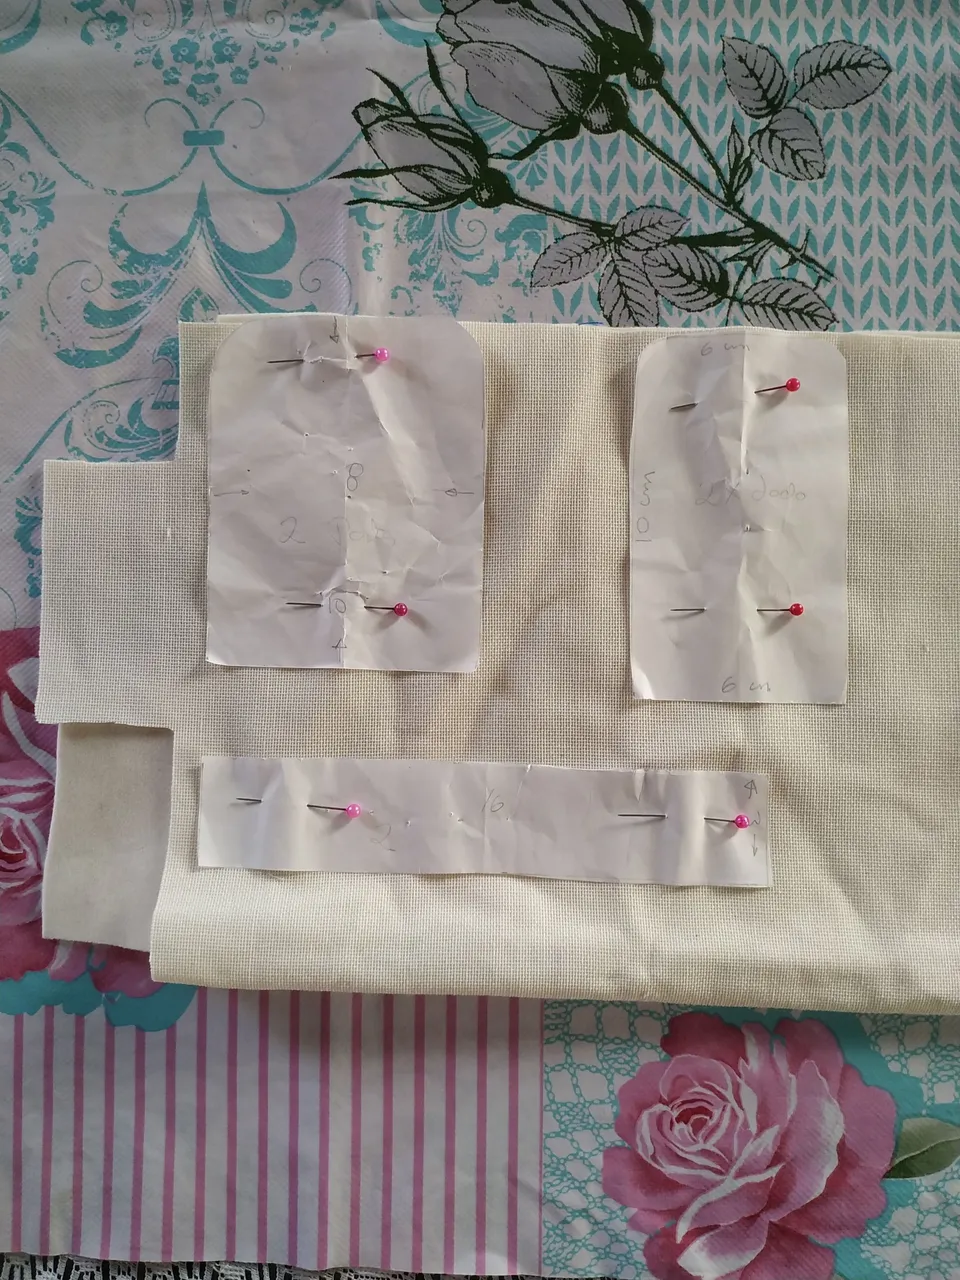
Patrones (ver más abajo en la foto).
Tela tipo peluche 20 cm x 20 cm.
Tela sintética (rígida) 40 cm x 40 cm.
Cierre o cremallera de 15 cm.
Cinta de 20 cm y de 5 cm.
Hilo, tijera, alfileres y cinta métrica.
MATERIALS
Patterns (see below in the photo).
Plush fabric 20 cm x 20 cm.
Synthetic fabric (rigid) 40 cm x 40 cm.
Zipper or zipper of 15 cm.
Ribbon 20 cm and 5 cm.
Thread, scissors, pins and measuring tape.
PROCEDIMIENTO
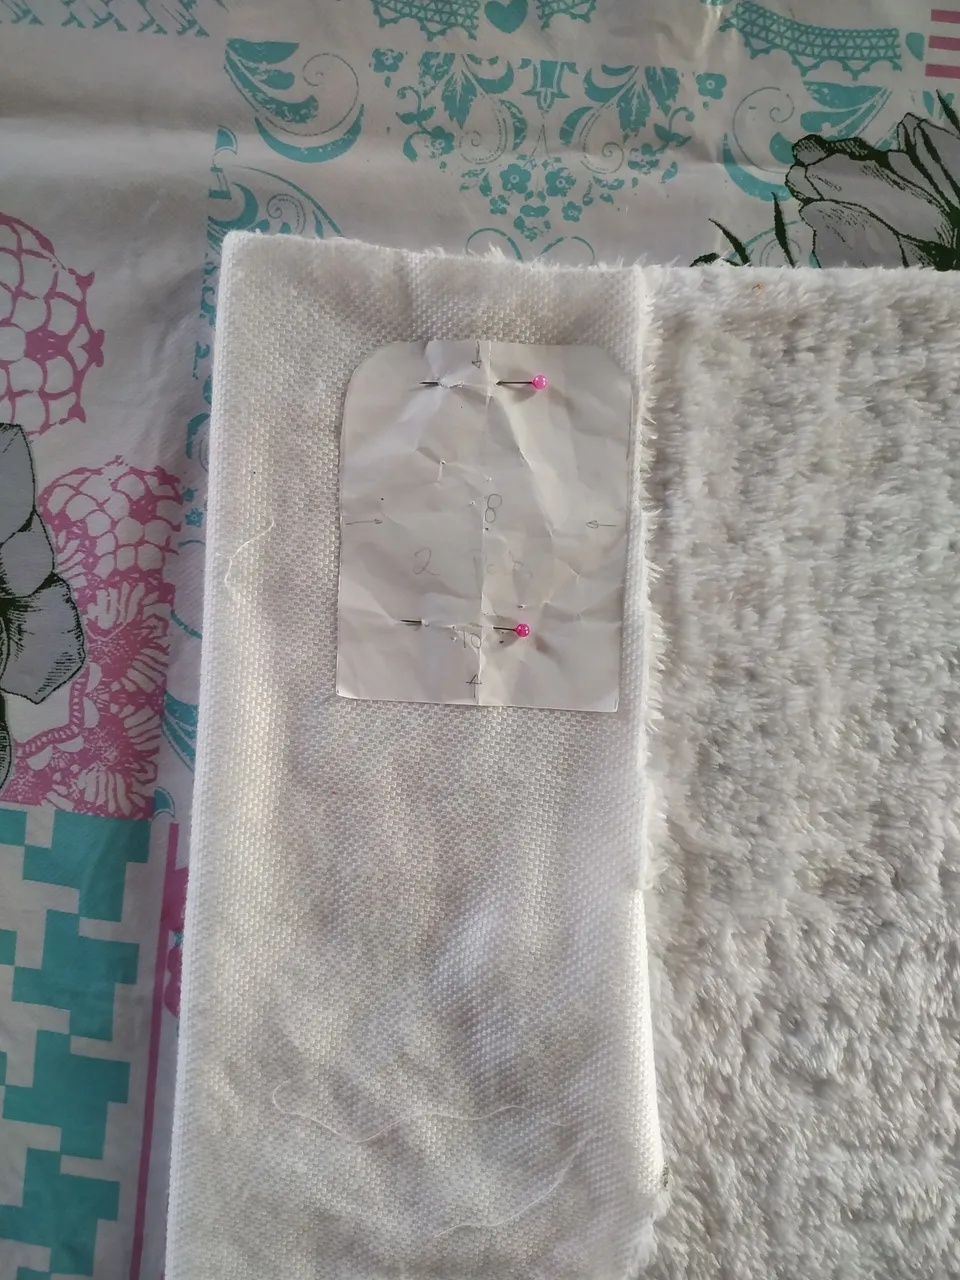
Hacemos los patrones, tomando de referencia la foto anterior para empezar a trazarlos en la tela. Empezamos con la tela tipo peluche y colocamos el molde (1) sobre la tela ajustándolos con unos alfileres para que al momento de cortar no se nos mueva, lo repetimos para que nos queden 2 de estos.
PROCEDURE
We make the patterns, taking the previous photo as a reference to start tracing them on the fabric. We start with the plush fabric and place the mold (1) on the fabric adjusting them with pins so that when we cut it does not move, we repeat it so that we have 2 of these.
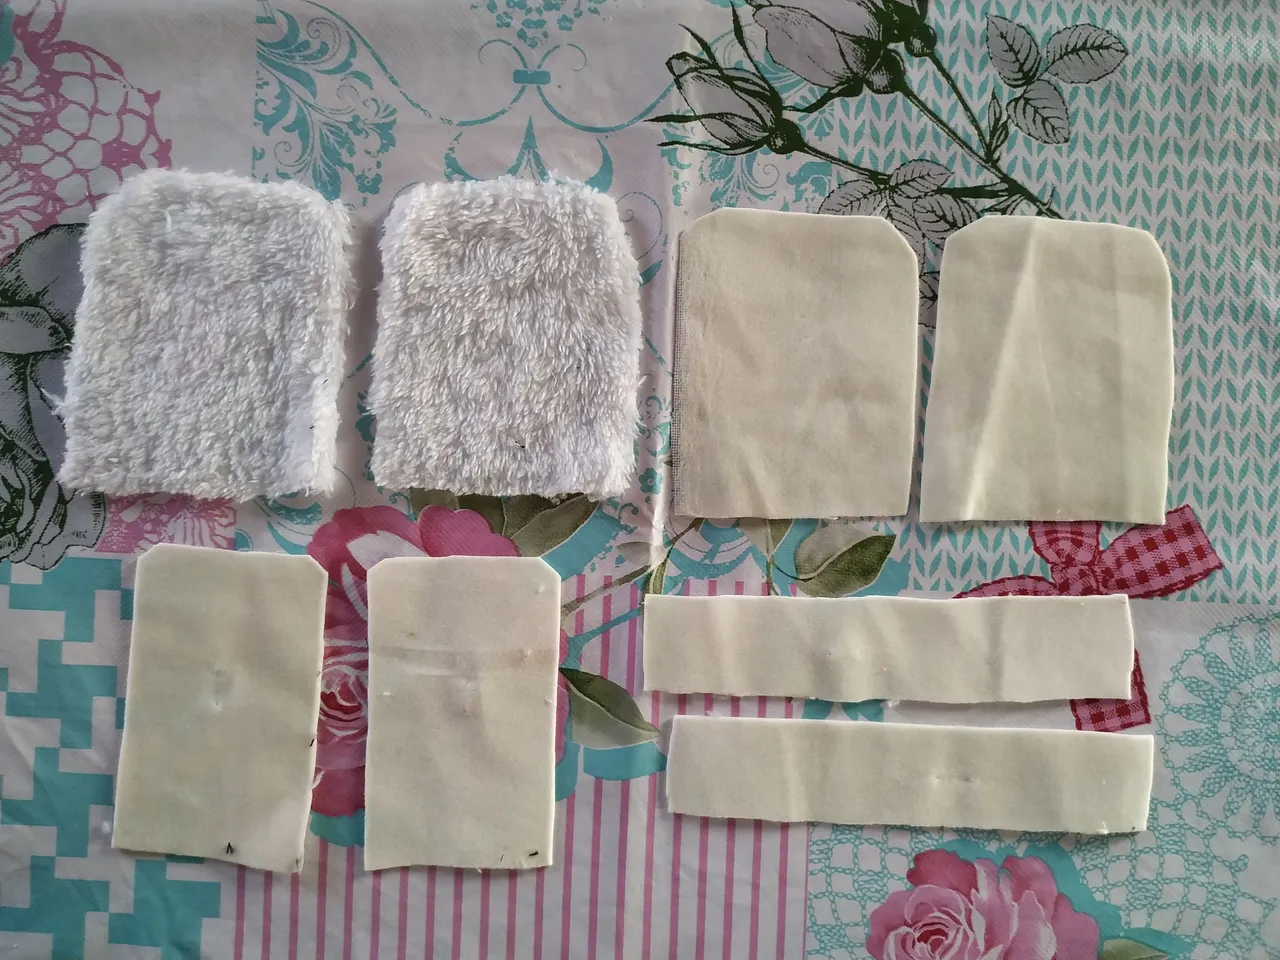
Luego sobre la tela rígida, colocamos los tres patrones con la tela doble, los ajustamos con unos alfileres y cortamos para que nos queden seis piezas, dos de cada una.
Then, on the rigid fabric, we place the three patterns with the double fabric, adjust them with pins and cut so that we have six pieces, two of each.
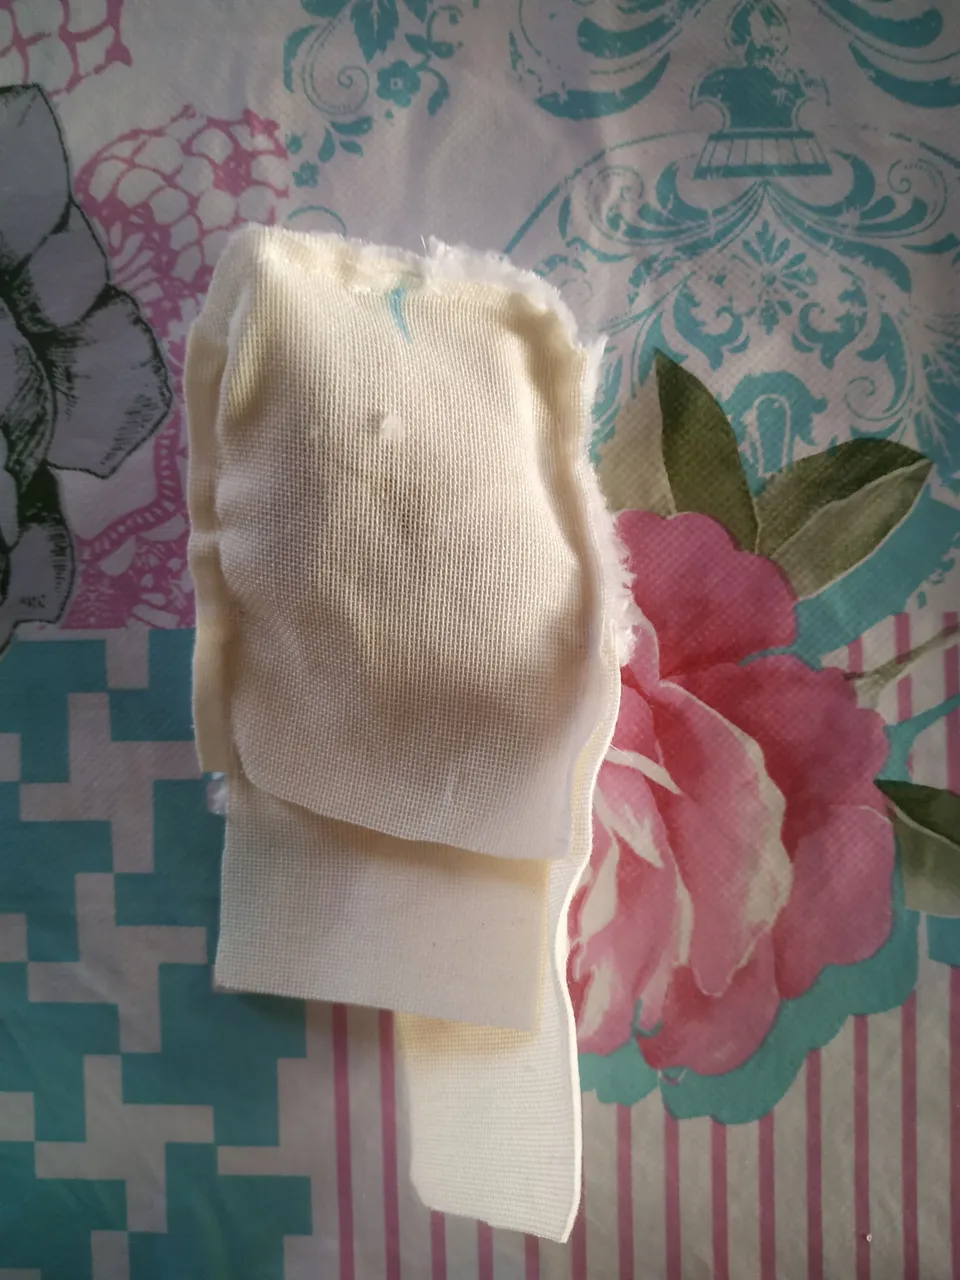
En total debemos de tener estos cortes de tela.
In total we should have these fabric cuts.
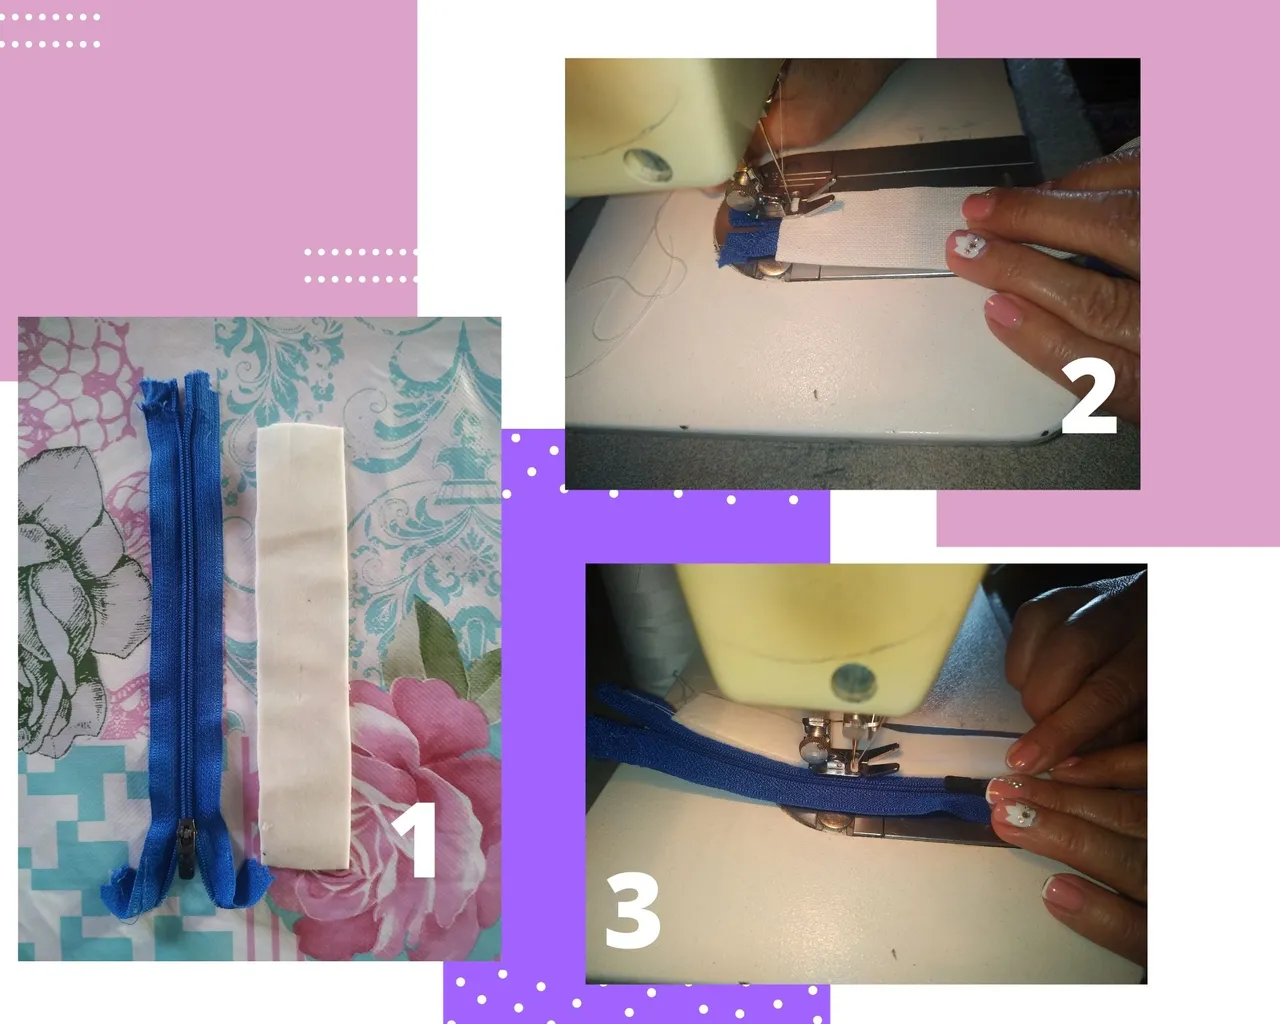
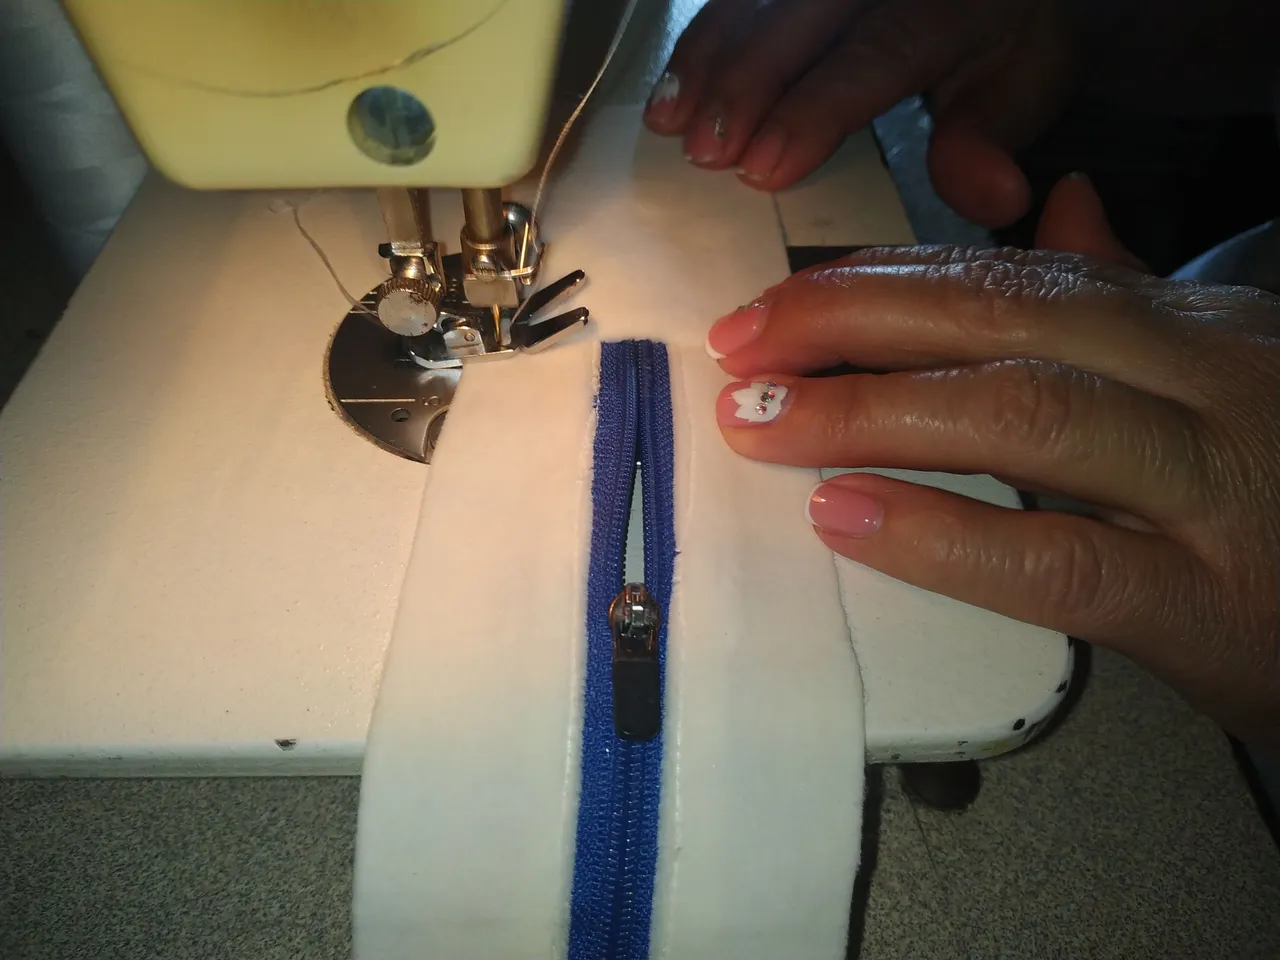
Ahora vamos a tomar una de las piezas cortadas de nuestro patrón (3) y lo vamos a coser a un lateral de nuestro cierre, colocando encima de nuestro cierre con la parte delantera de nuestra tela con el frontal de nuestro cierre, pasamos costura y rematamos como se muestra en la foto.
Now we are going to take one of the pieces cut from our pattern (3) and we are going to sew it to one side of our zipper, placing it on top of our zipper with the front of our fabric with the front of our zipper, we sew and finish it off as shown in the photo.
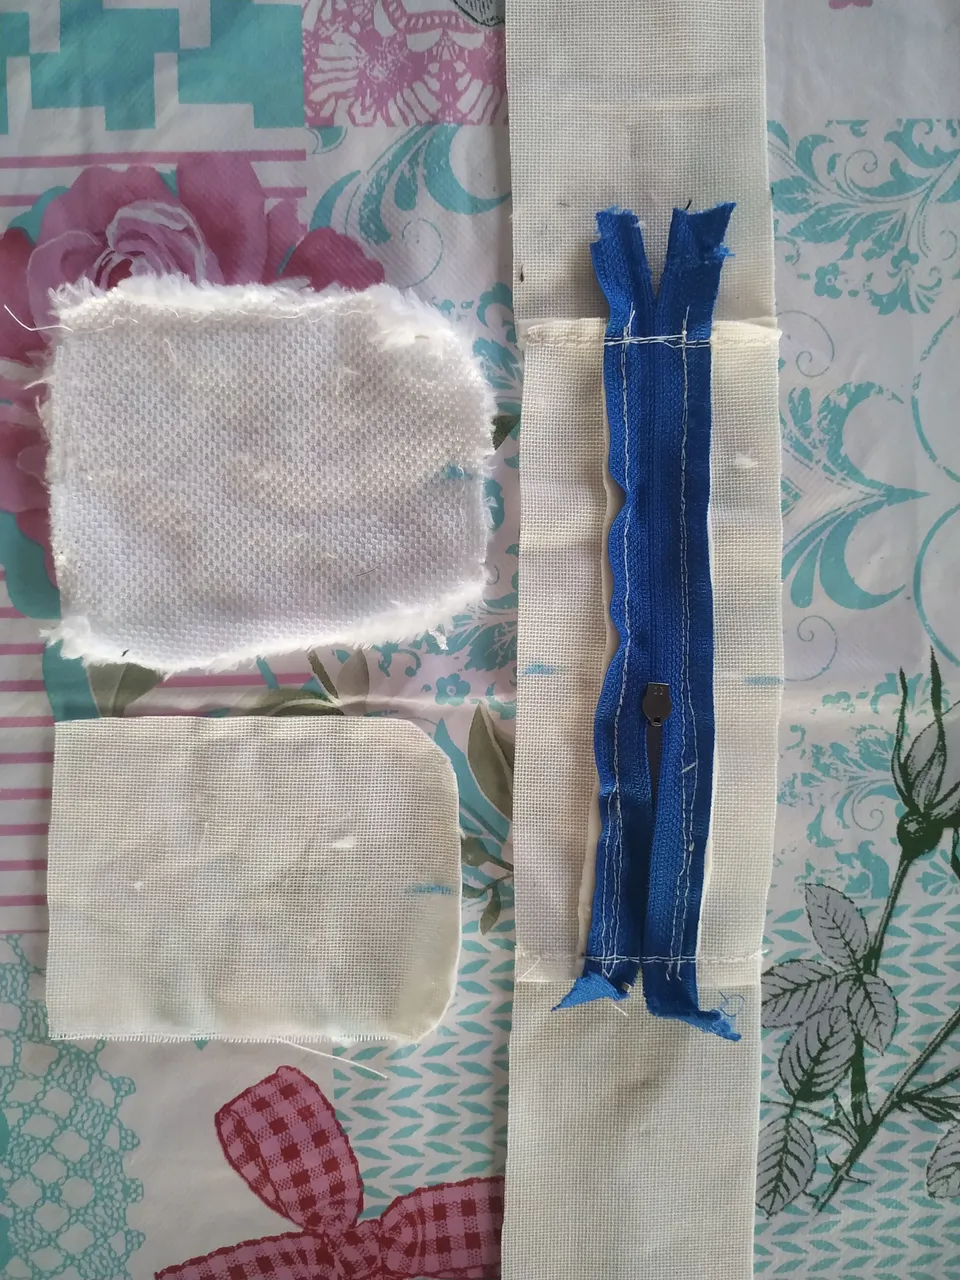
Hacemos lo mismo con el otro lateral del cierre y nos queda de esta manera
We do the same with the other side of the zipper and it looks like this
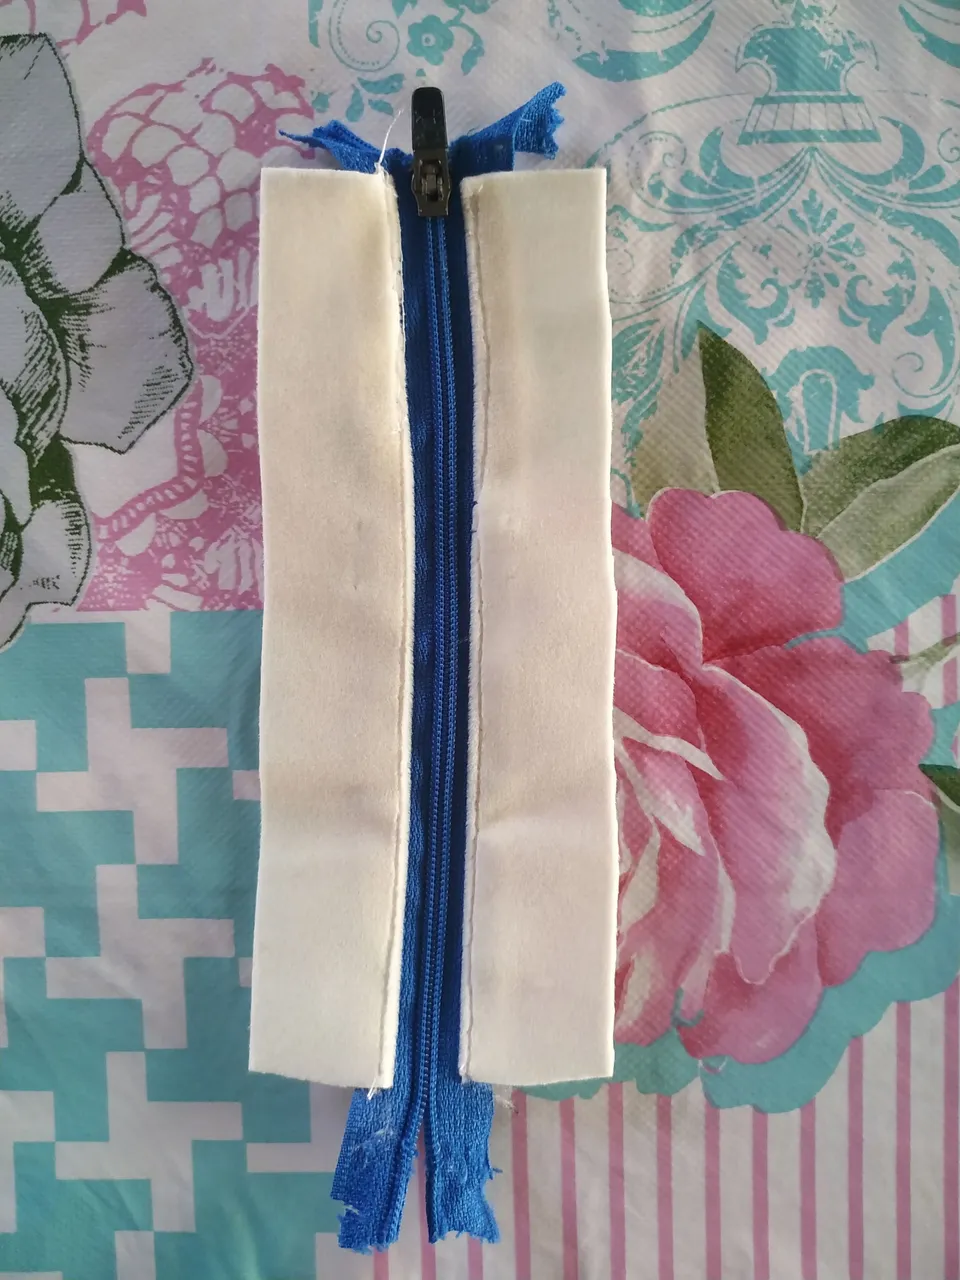
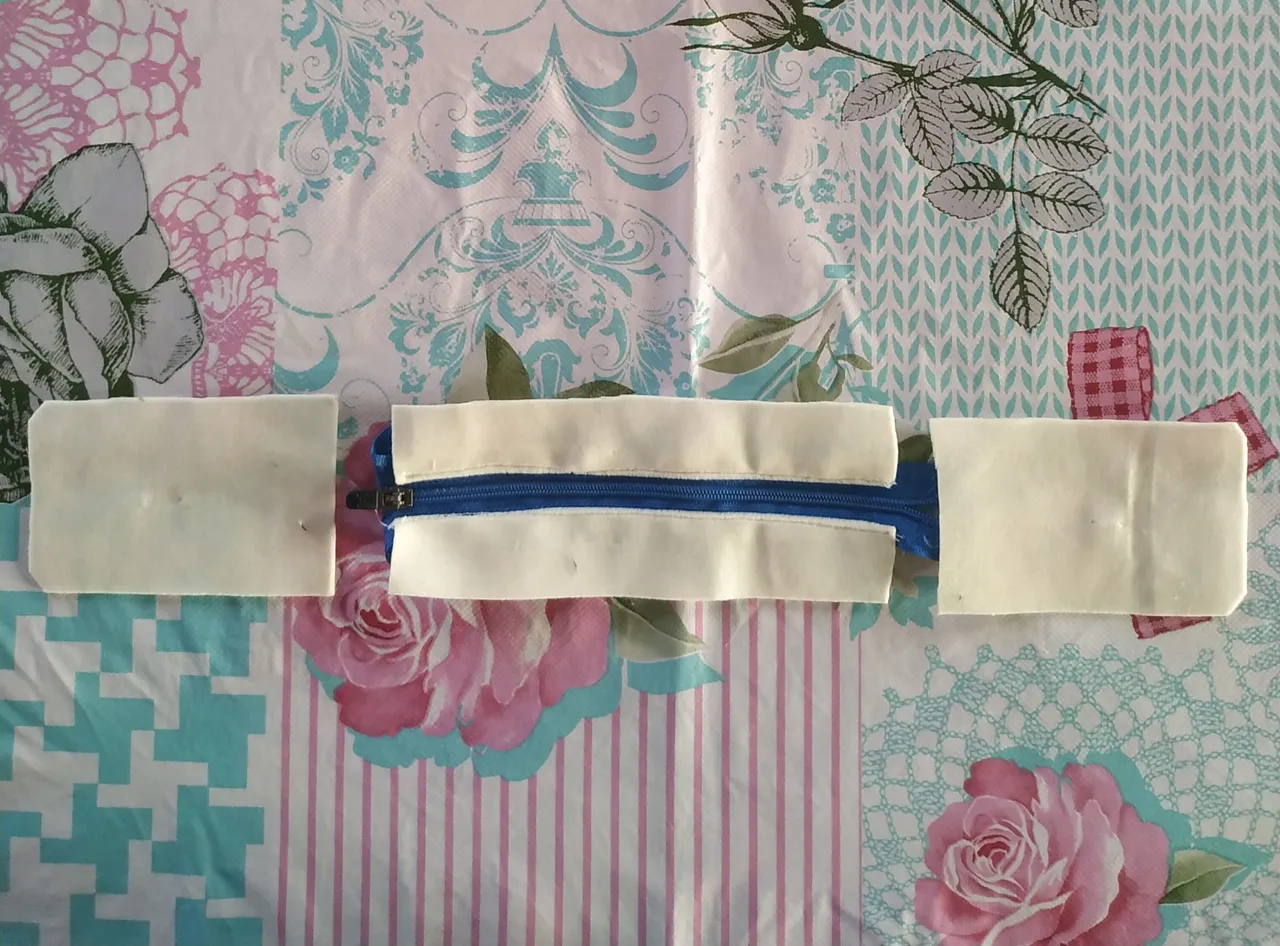
Vamos a tomar las piezas del patrón (2) y para coserlas a cada lado del cierre como se muestra en la foto, debemos tener cuidado para que la costura que se haga no obstruir la abertura del cierre.
We are going to take the pattern pieces (2) and to sew them to each side of the zipper as shown in the photo, we must be careful that the seam that is made does not obstruct the opening of the zipper.
Teniendo esto listo, tomamos el cierre de revés y le haremos dos marcas en todo el medio de el con una tiza o color. Y hacemos lo mismo con dos piezas de nuestro molde (1) (una de tela de peluche y una tela rígida).
Having this ready, we take the back zipper and we will make two marks in the middle of it with a chalk or color. And we do the same with two pieces of our mold (1) (one of plush fabric and one rigid fabric).
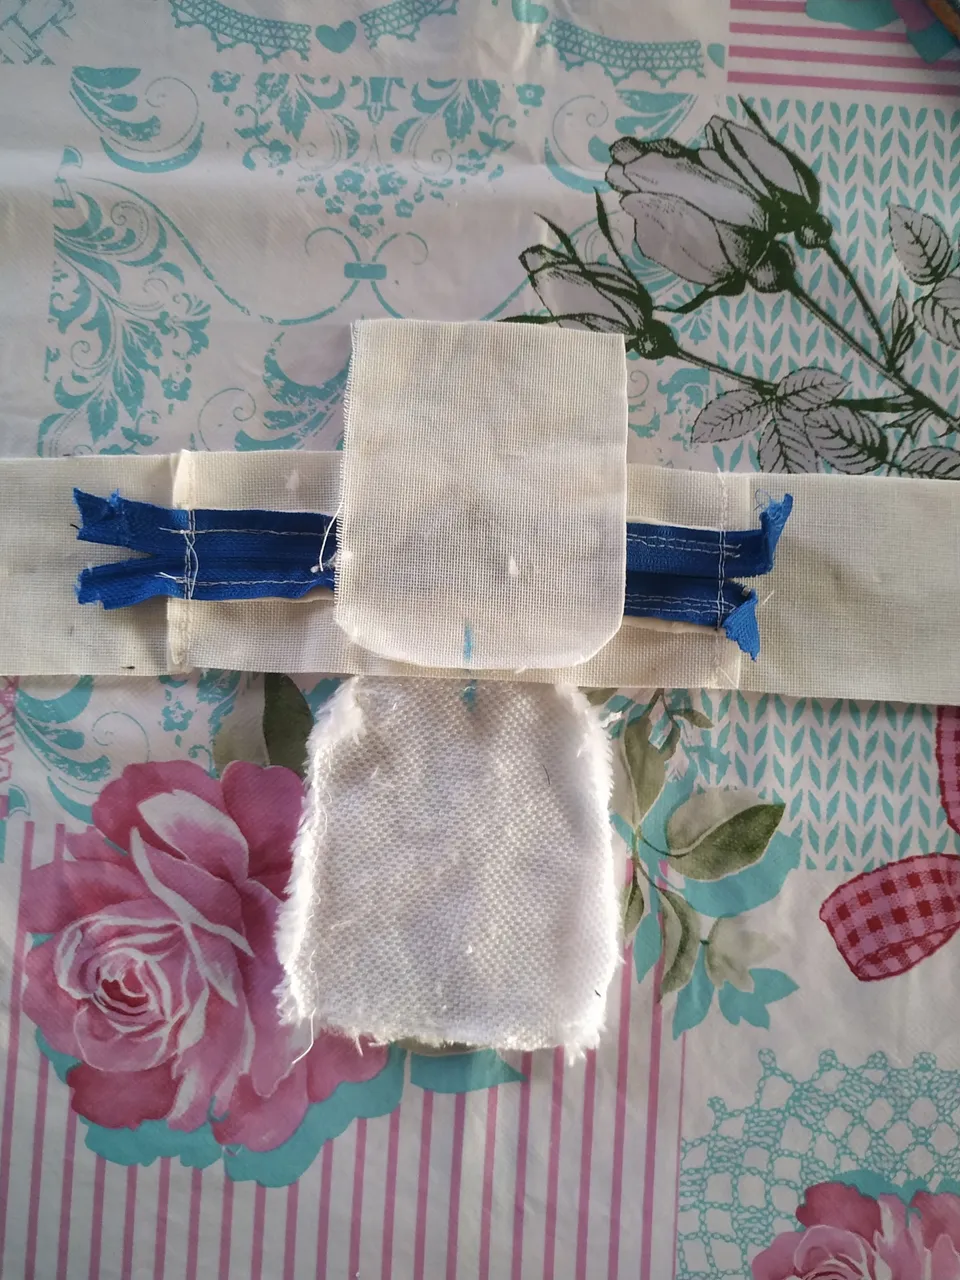
Colocamos las piezas de esta manera (todas por el lado de revés).
We place the pieces in this way (all on the reverse side).
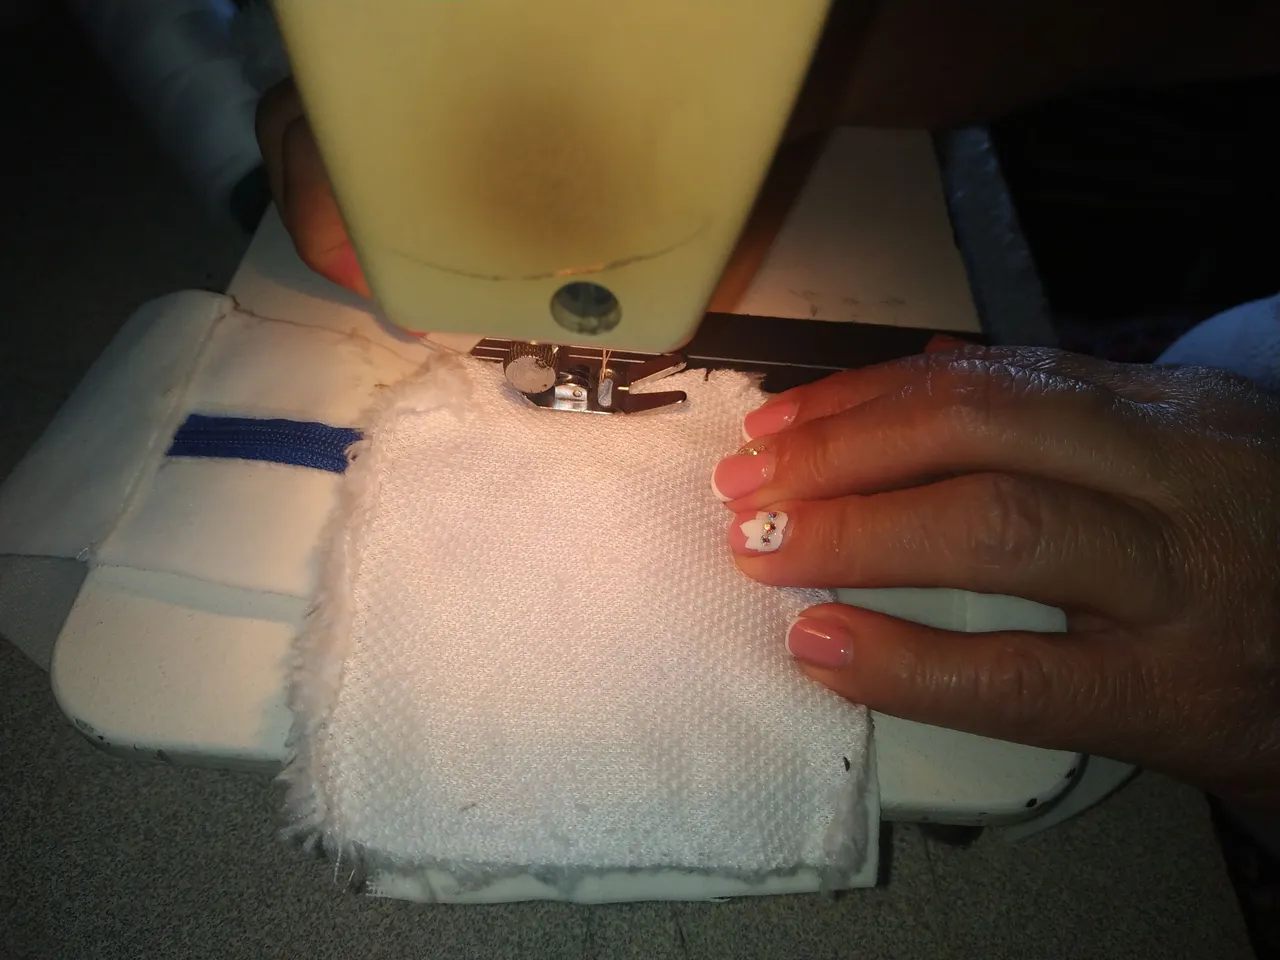
Procedemos a pasar costura recta por todo el orillo de nuestra pieza. También podemos pasar costura con la overlock.
We proceed to pass straight stitching along the entire selvedge of our piece. We can also stitch with the overlock.
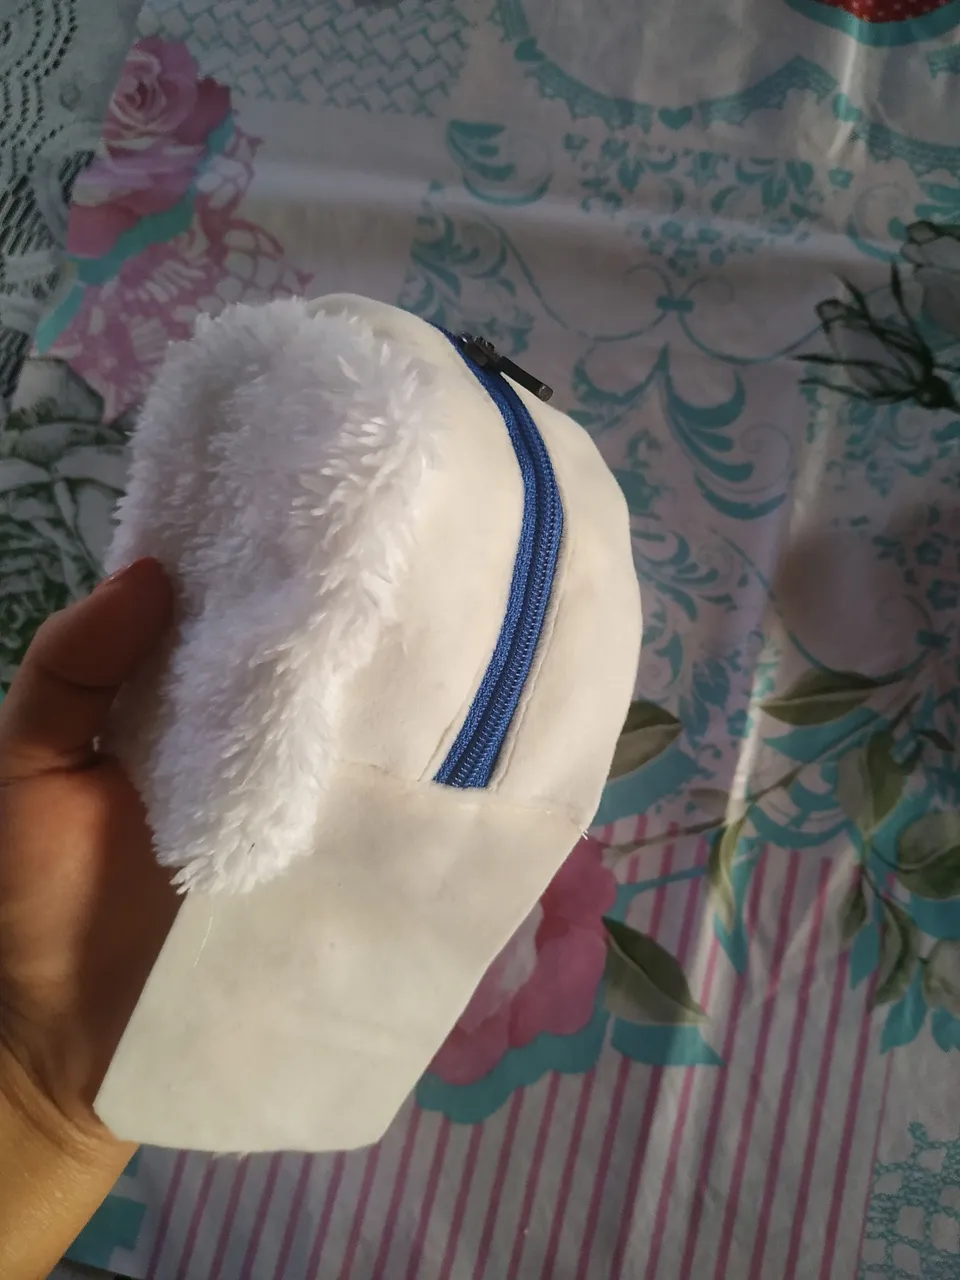
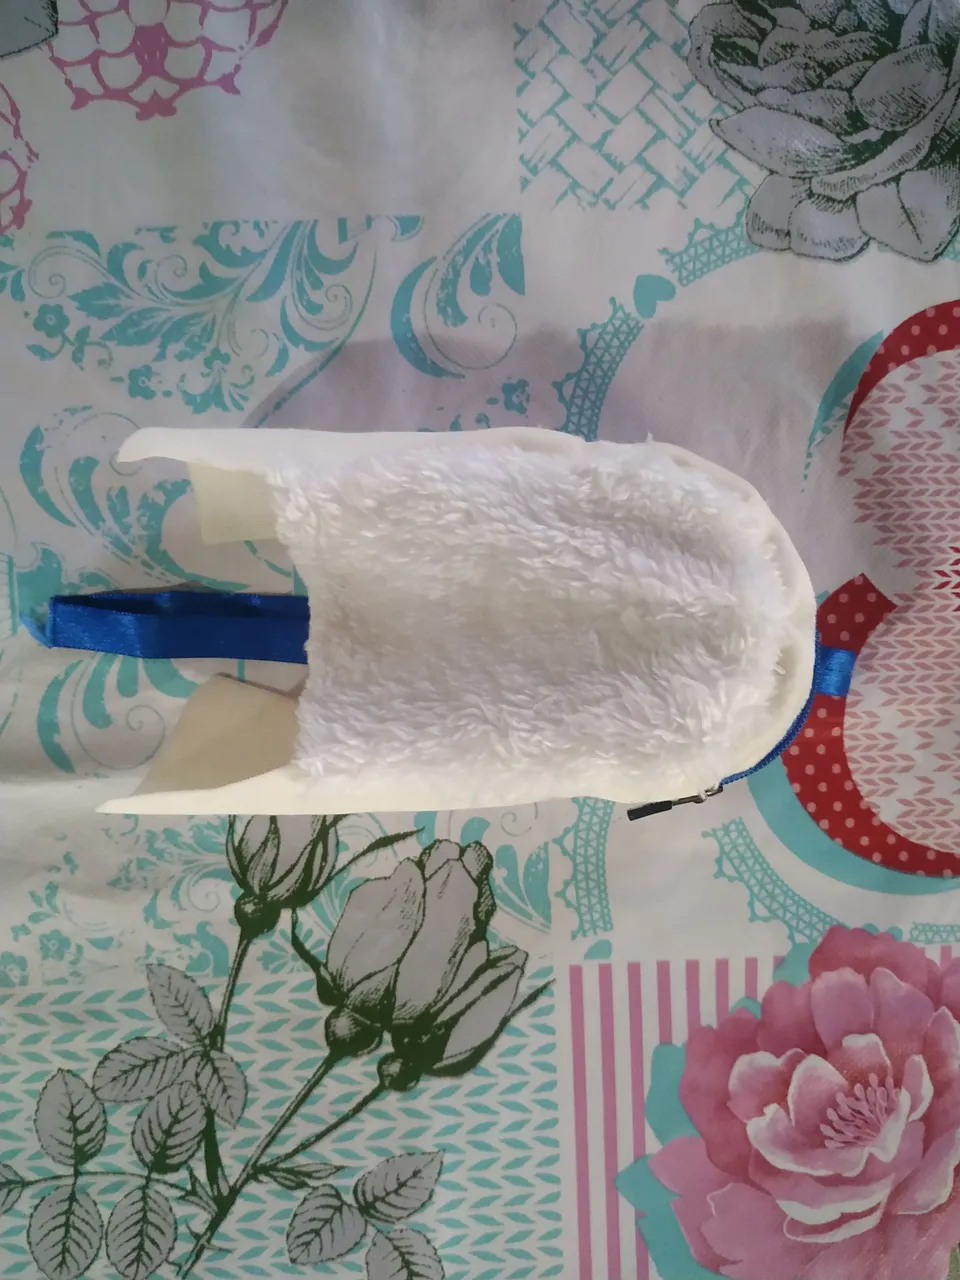
Cuando terminemos nos va quedar por el lado interior del bolso, así que le damos vuelta y vemos que ya va agarrando forma nuestro bolso.
When we finish we will be left on the inside of the bag, so we turn it over and we see that our bag is already taking shape.
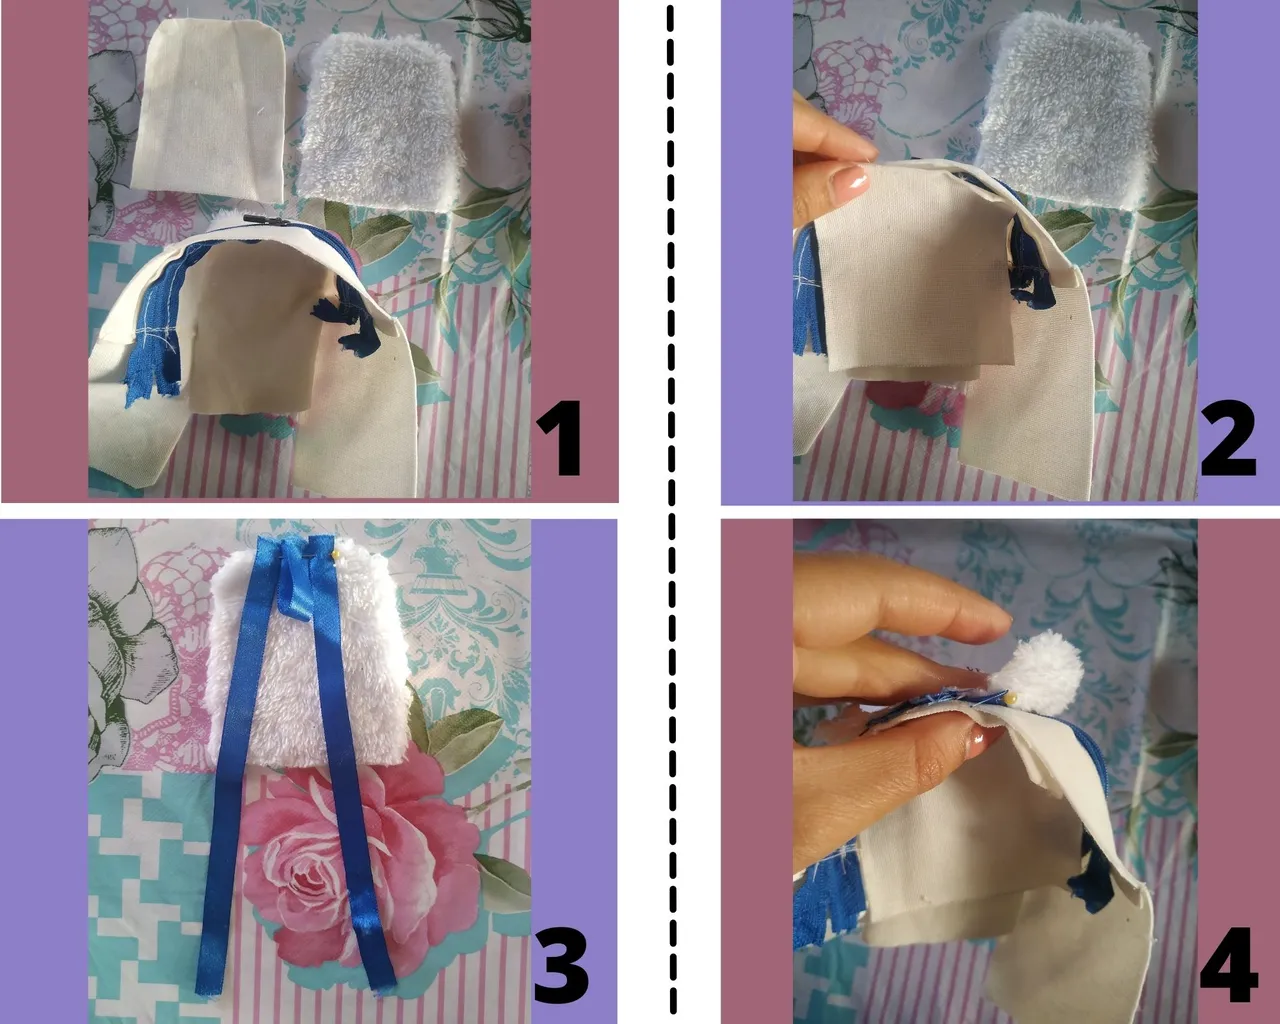
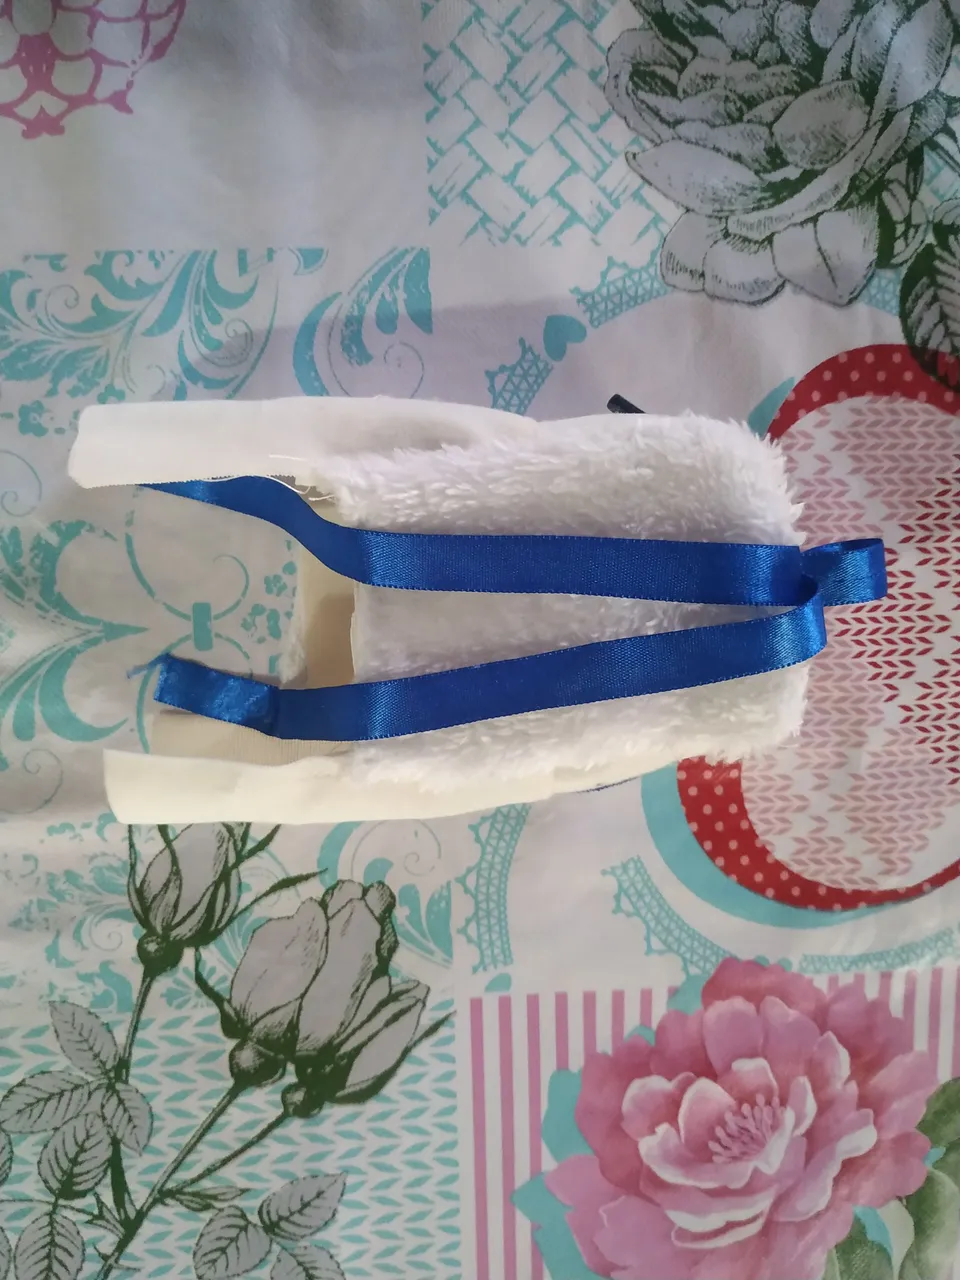
Ahora, volteamos el bolso para hacer el mismo procedimiento anterior uniendo las piezas que nos quedan (foto 1). En este caso vamos a unir las cintas en nuestra tela de peluche con un alfiler, estas serán las asas del bolso (foto 3). Unimos las tres piezas y llevamos a coser (foto 4).
Now, we flip the bag over to do the same procedure above joining the remaining pieces (photo 1). In this case we are going to join the ribbons on our plush fabric with a pin, these will be the handles of the bag (photo 3). We join the three pieces and sew them together (photo 4).
Cuando terminemos, volvemos a voltear la pieza y nos queda de esta manera.
When we finish, we turn the piece over and it looks like this.
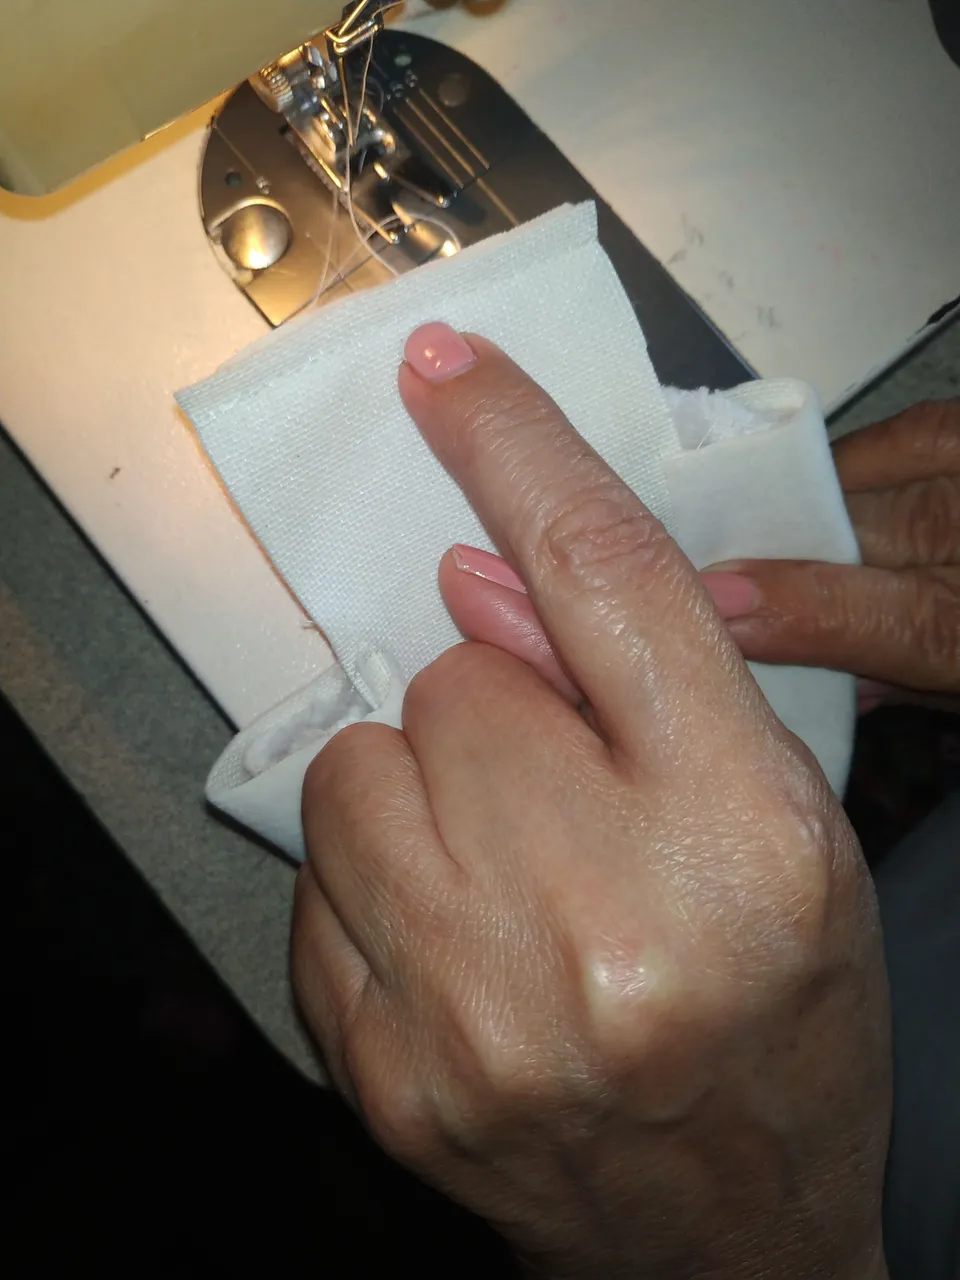
Como ven, va a sobresalir dos piezas a los laterales estas las vamos a unir y coser.
As you can see, two pieces are going to stick out to the sides and we are going to join and sew them together.
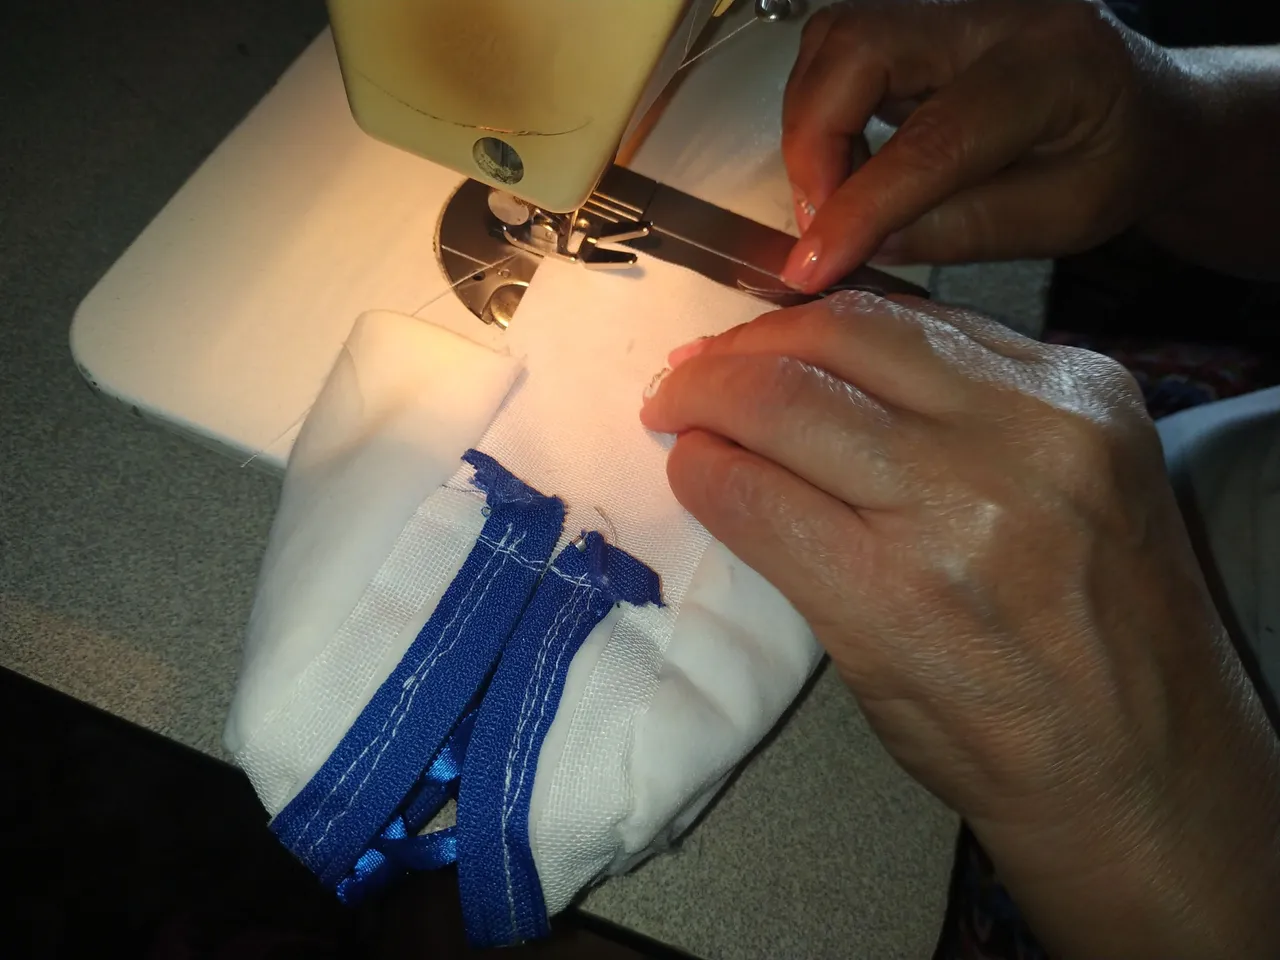
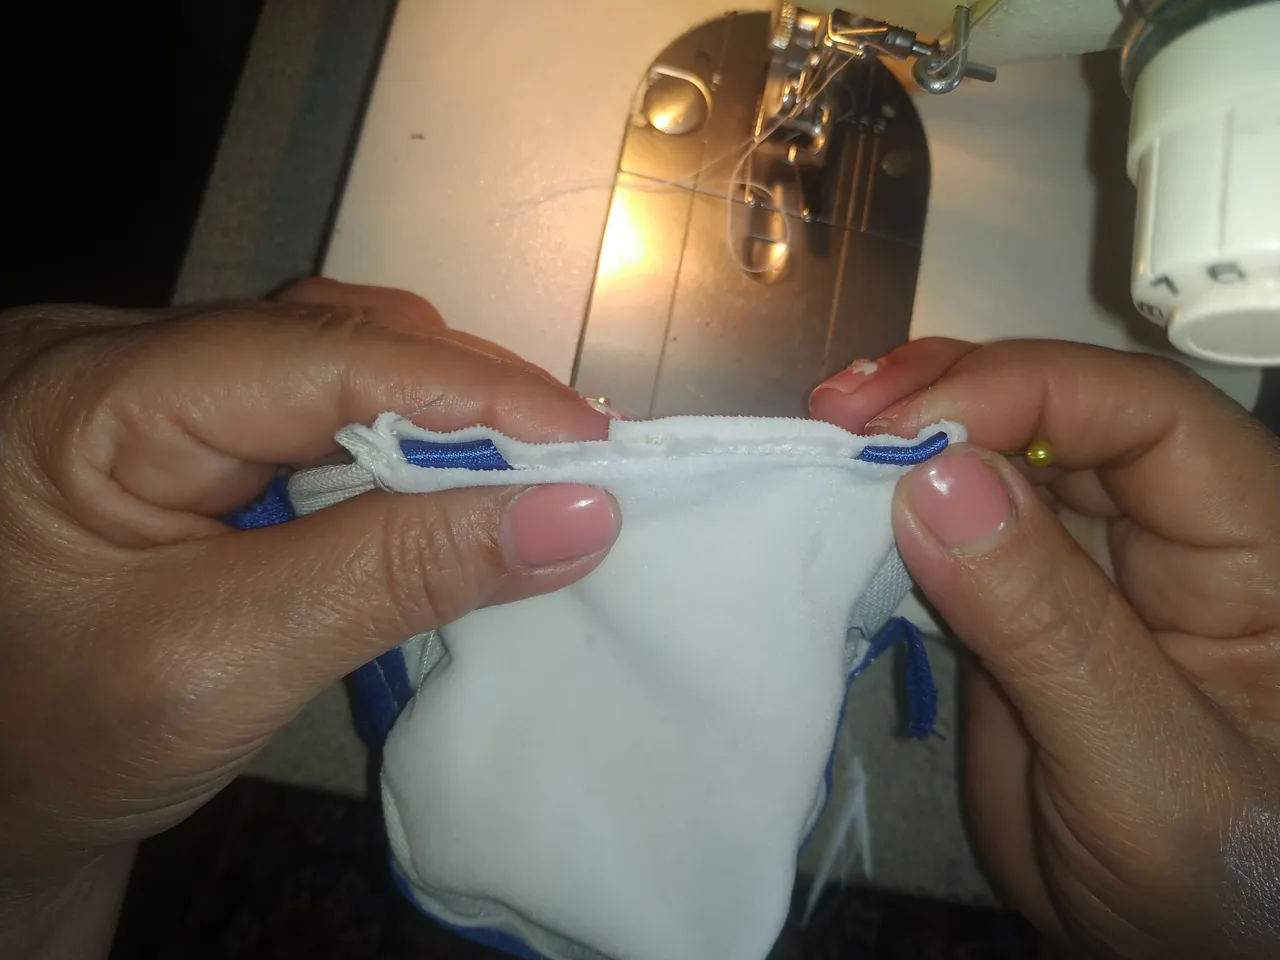
Luego, cosemos por todo alrededor de nuestra base para que quede como un cuadrado, tomando en cuenta también coser las cintas, que deben de quedar en la unión de las dos telas.
Then, we sew all around our base so that it looks like a square, taking into account also to sew the ribbons, which should be at the junction of the two fabrics.
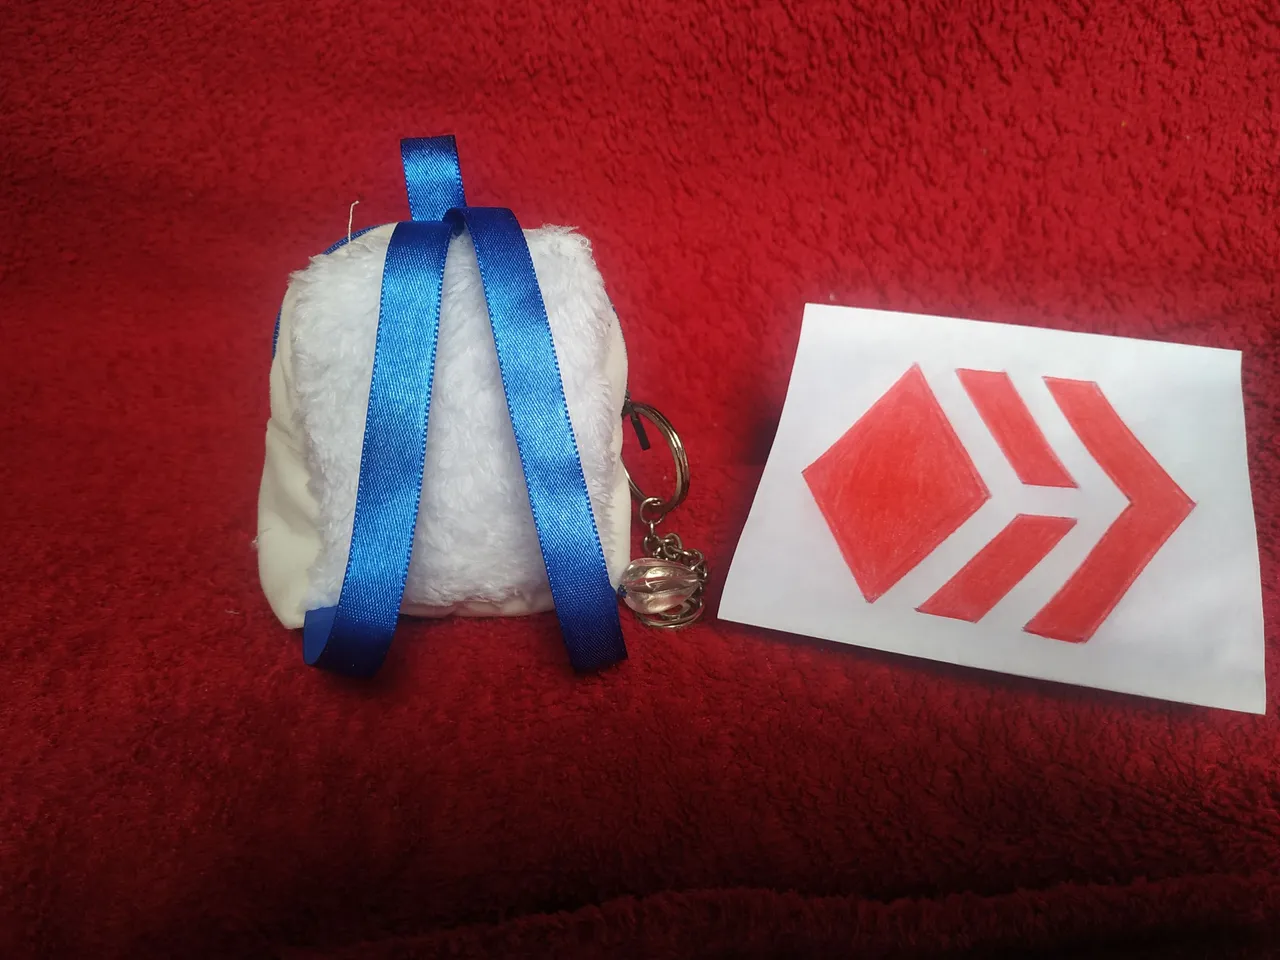
Y listo, este es el resultado.
And that's it, this is the result.
PARA TENER EN CUENTA:
La tela que usamos tipo peluche puede ser reemplazada por cualquier tela que prefieran.
La tela para los costados y parte trasera debe ser rígida y firme para que el resultado sea una pieza estable. (Puedes usar tela especial para hacer bolsos, de tapicería o loneta)
La cita utilizada puede ser reemplazada por la que tengas en casa, puede ser de raso, poliéster, cinta de tela, fibra sintética.
TO KEEP IN MIND:
The plush-type fabric we use can be replaced with any fabric you prefer.
The fabric for the sides and back should be stiff and firm so that the result is a stable piece. (You can use special fabric for making bags, upholstery or canvas).
The used date can be replaced by the one you have at home, it can be satin, polyester, fabric ribbon, synthetic fiber.
Espero se animen a hacer este hermoso bolso, que también sirve como regalo para tu hija, sobrina, nietas, hermanitas y van a quedar encantadas. Les invito a comentar si tienen alguna duda.
¡Que tengan feliz día y noche!
I hope you are encouraged to make this beautiful bag, which also serves as a gift for your daughter, niece, granddaughters, sisters and they will be delighted. I invite you to comment if you have any questions.
Have a happy day and night!

Fotos tomadas desde mi teléfono Xiaomi Redmi Note 6 Pro / Photos taken from my Xiaomi Redmi Note 6 Pro phone.