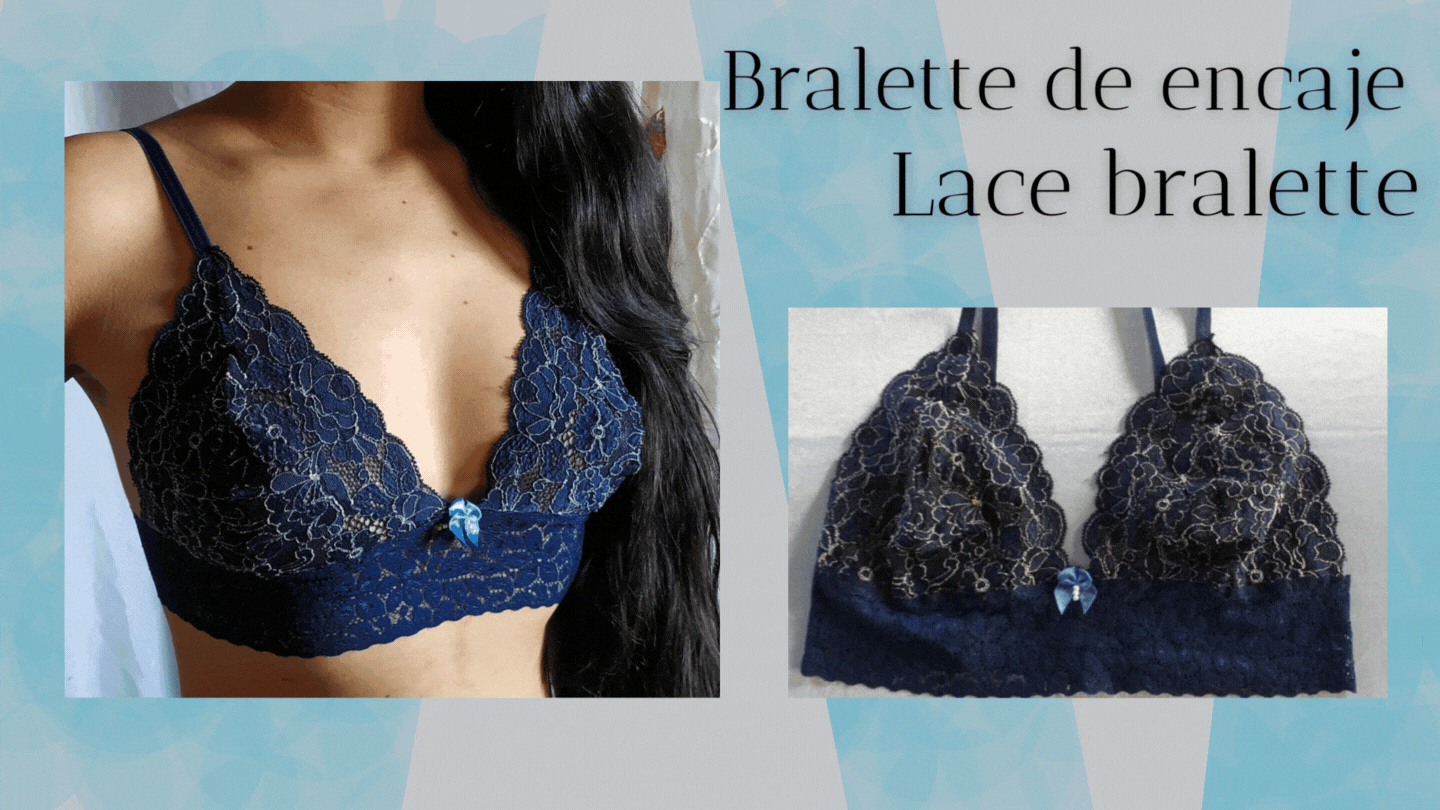
Feliz martes, bendecida semana para todos y para los que integran la querida comunidad de #NeedleWorkMonday. Hoy les traigo el paso a paso de cómo elaborar un bello bralette en color azul marino de dama.
Happy Tuesday, blessed week to all and to those of you in the beloved #NeedleWorkMonday community. Today I bring you the step by step on how to make a beautiful bralette in navy blue lady color.
Editado en Canva || Edited in canva

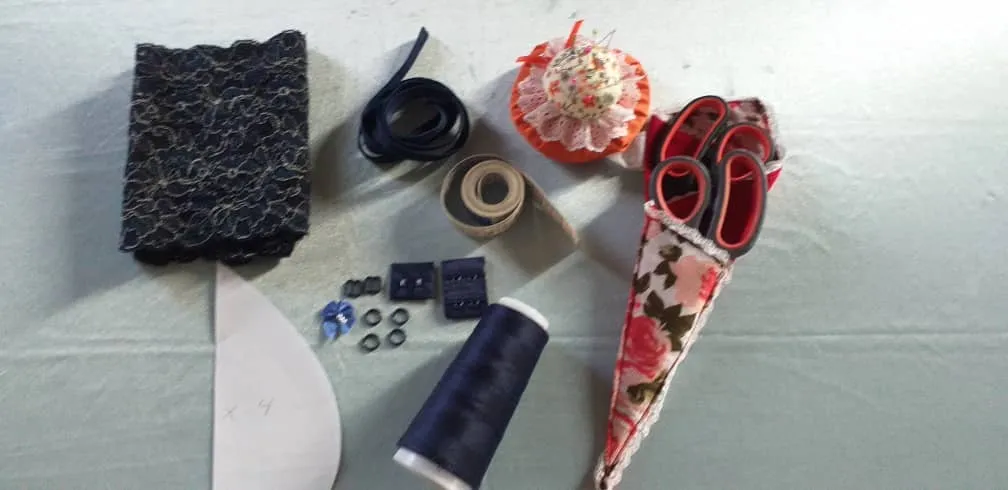
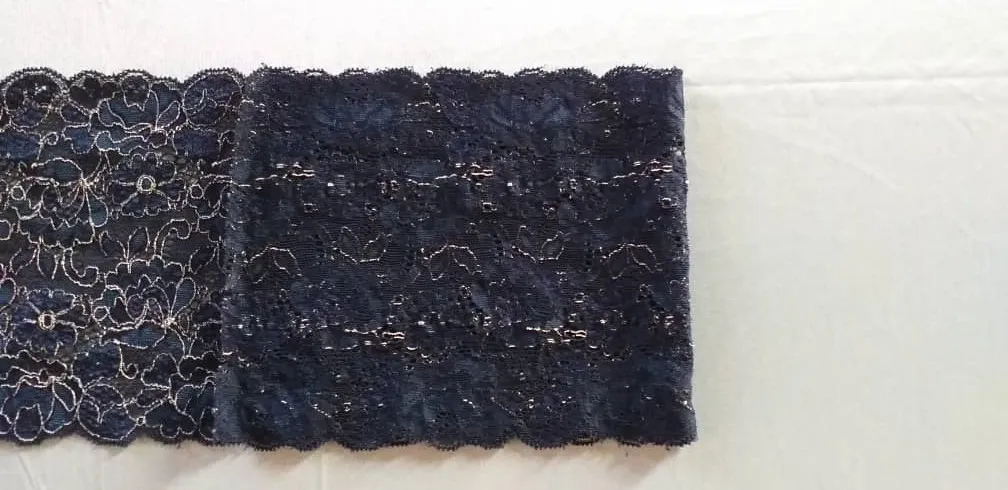
- Encaje elástico de 20 cm de ancho.
- Encaje de 4 cm de ancho.
- Elástico o tira de brasier de 1 cm.
- Lazo decorativo.
- Hilo.
- Alfileres.
- Aguja.
- Cinta métrica.
- Tijeras.
- Patrón.
- Elastic lace 20 cm wide.
- 4 cm wide lace.
- Elastic or bra strap of 1 cm.
- Decorative bow.
- Thread.
- Pins.
- Needle.
- Measuring tape.
- Scissors.
- Pattern.

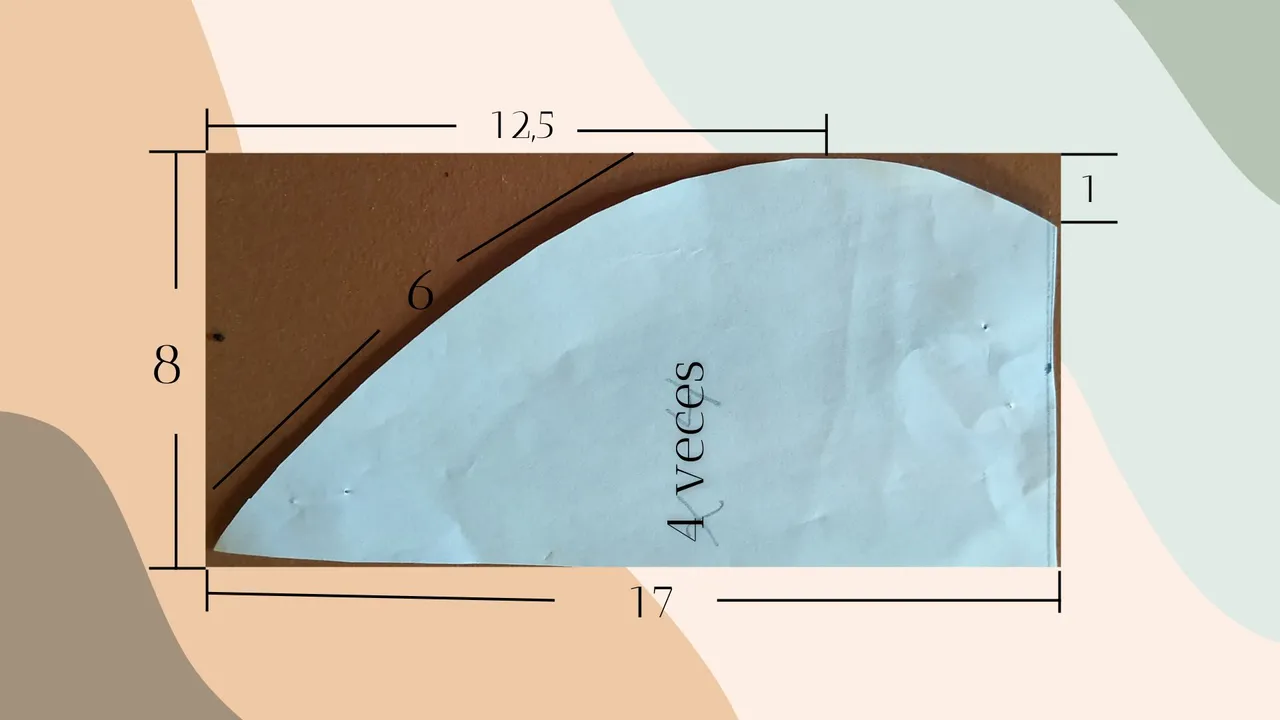
Les enseñaré cómo elaborarlo luego de tener listo nuestro patrón, para ello les dejare al final de la publicación el link de donde saque la idea para poder hacerlo, es un vídeo muy bien explicado para que sepan cómo hacer el molde de copa desde cero.
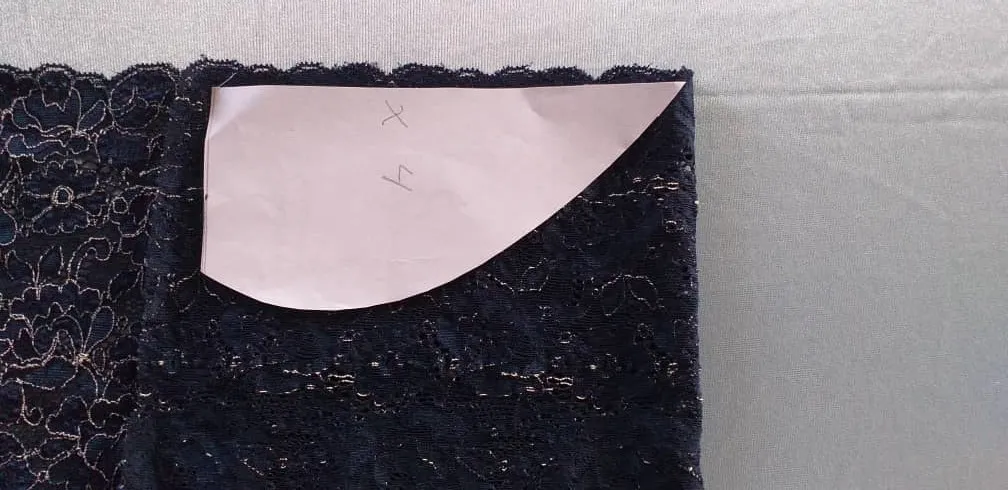
No obstante aquí les dejó la foto del patrón ya listo para talla S o 32.
I will show you how to make it after we have our pattern ready, and I will leave at the end of the public the link where I got the idea to do it, it is a very well explained video so you know how to make the cup mold from scratch.
However here is the photo of the pattern ready for size S or 32.
Editado en Canva || Edited in canva
Cómo primer paso, doblamos a la mitad nuestro encaje elástico derecho con derecho hacia adentro.
As a first step, we fold in half our elastic lace right side in.
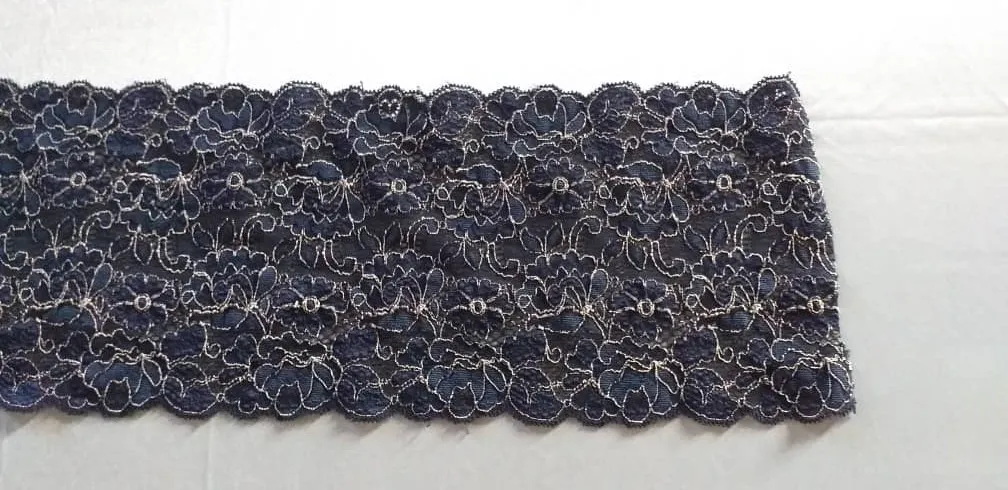
Sobre el encaje colocamos el patrón y recortamos para que nos salgan 4 piezas.
We place the pattern on the lace and cut it out so that we get 4 pieces.
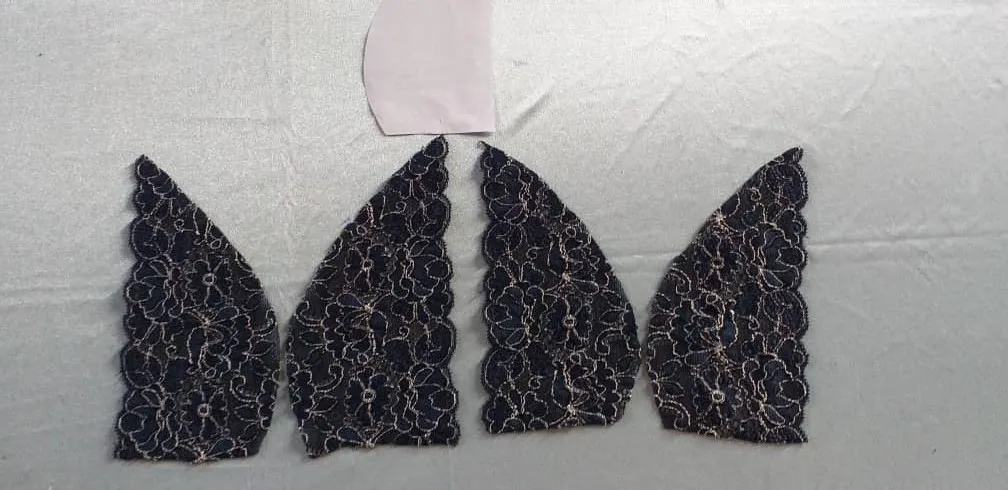
Cómo ven cada pieza tiene una parte recta y una parte curva, vamos a unir de a dos piezas por la parte curva y nos ayudamos con unos alfileres antes de coser.
As you can see, each piece has a straight part and a curved part, we are going to join two pieces by the curved part and help us with some pins before sewing.

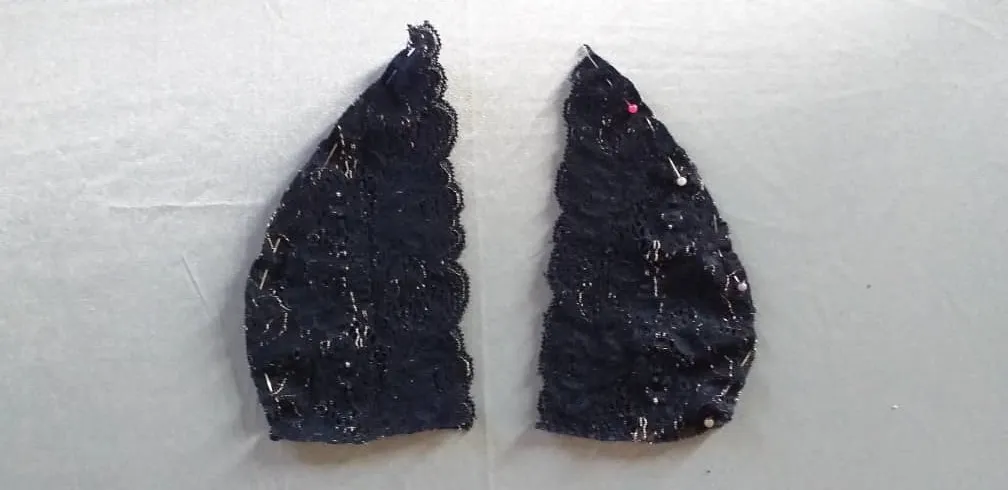
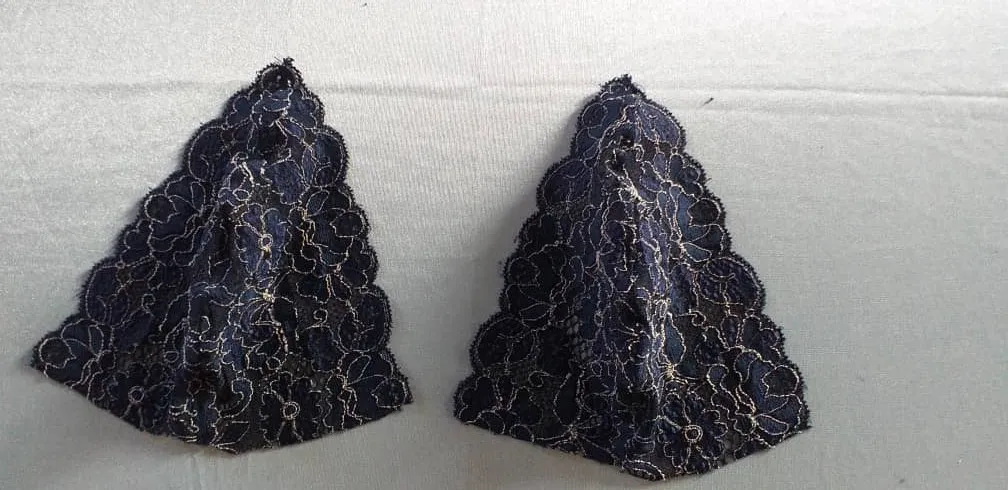
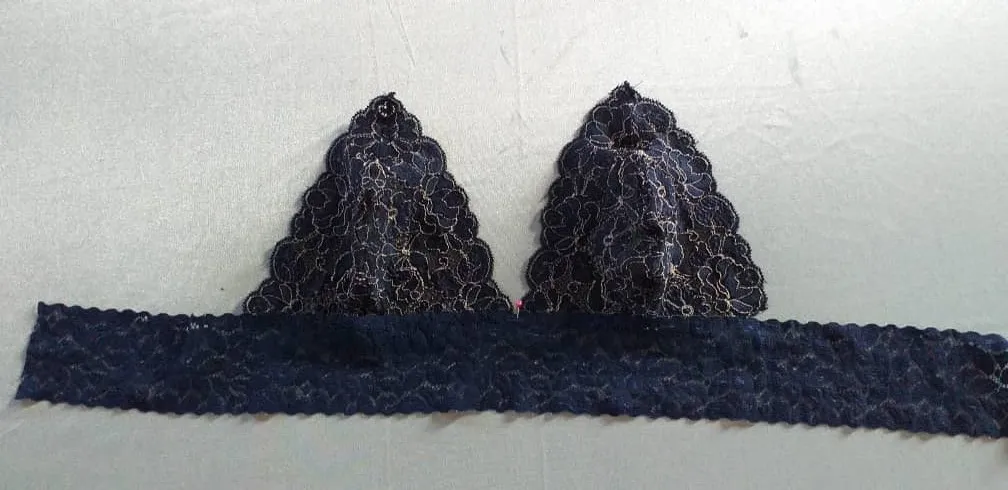
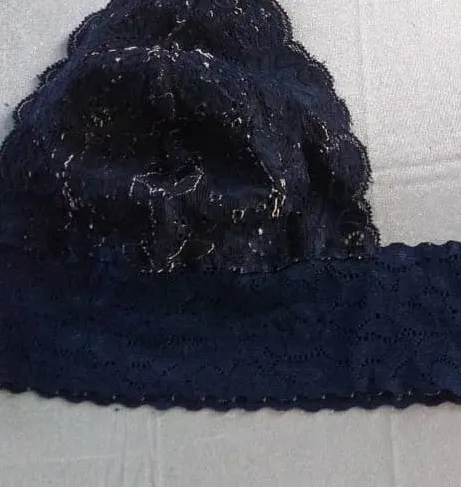
Pasamos costura y nos deben de quedar las dos copas.
We sew the seam and we should have the two cups.

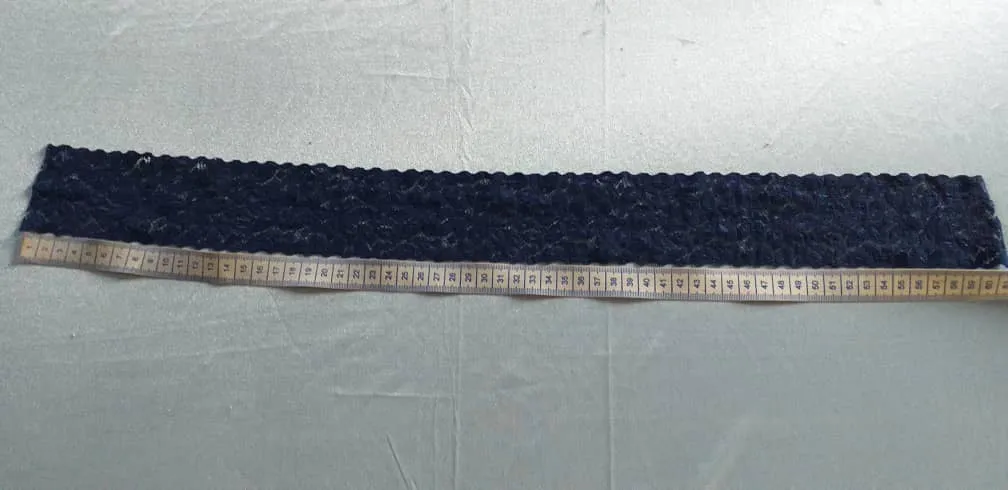
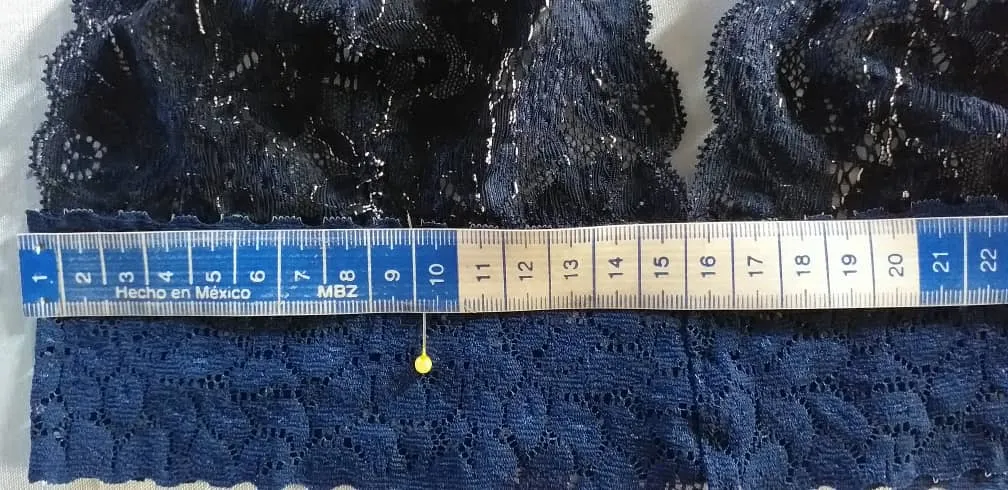
Tomamos el encaje elástico de 4 cm de ancho y cortamos una tira de 60 cm de largo.
We take the 4 cm wide elastic lace and cut a 60 cm long strip.
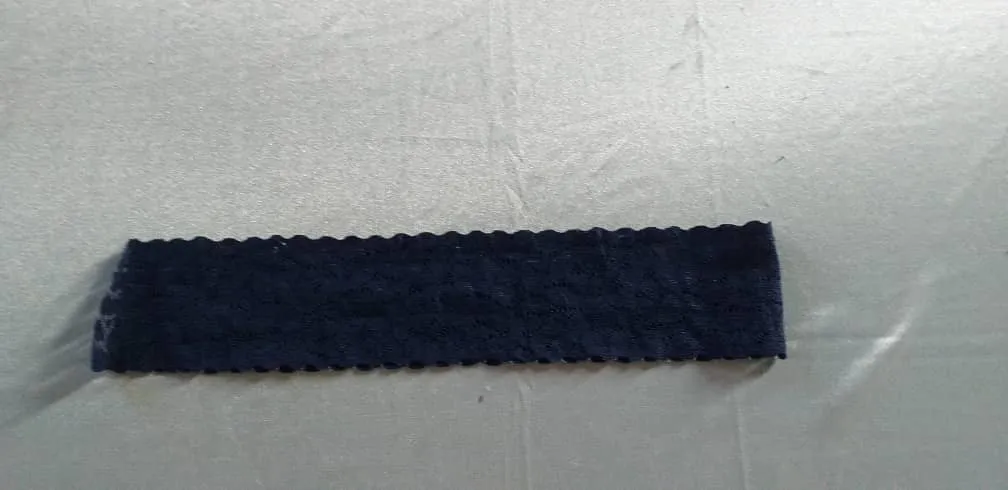
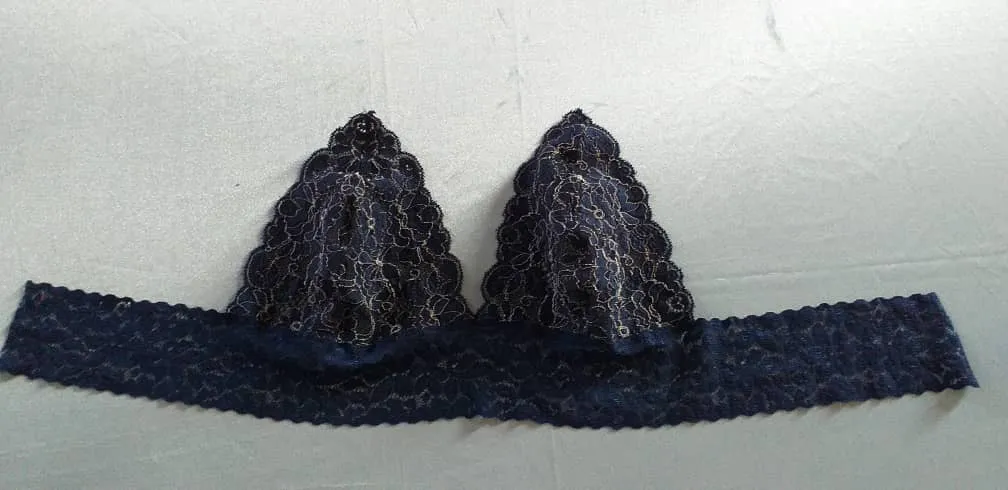
La doblamos a la mitad, para saber cuál es el centro y colocamos un alfiler para marcarlo.
Al tener el centro marcado vamos a colocar ambas copas de manera que queden centradas y con la misma distancia a ambos lados.
We fold it in half, to know which is the center and place a pin to mark it.
Once the center is marked, we will place both cups so that they are centered and with the same distance on both sides.
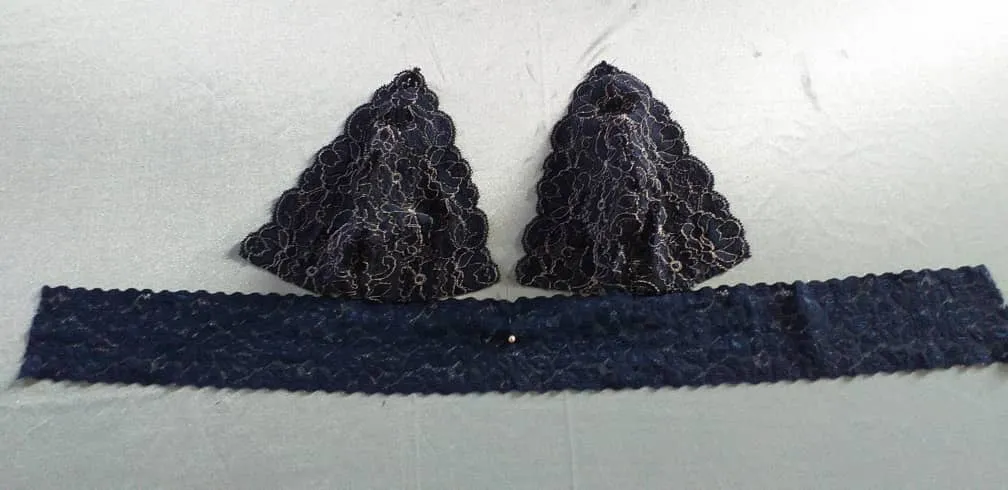
Ajustamos las copas al elástico y luego cosemos.
We adjust the cups to the elastic and then sew.
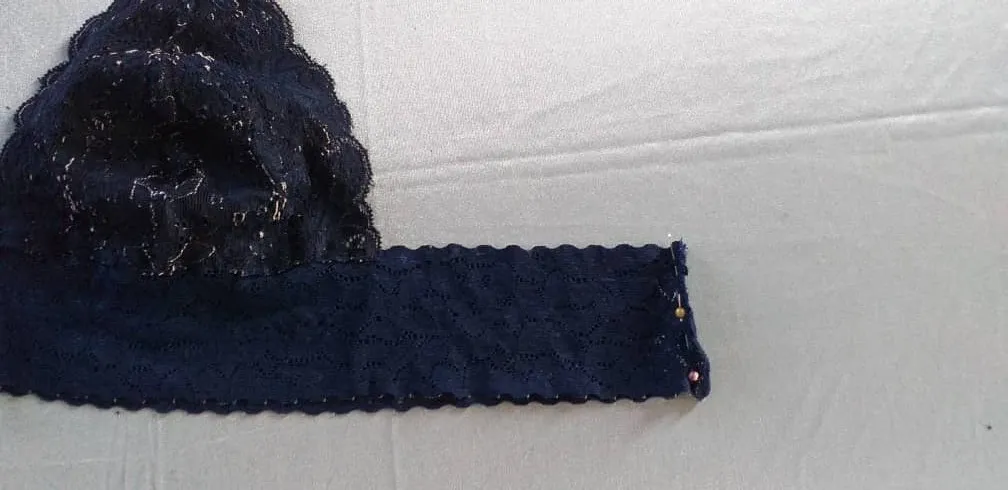
Luego unimos en la parte de la espalda del elástico con costura de zig zag.
Then we join at the back of the elastic with zig zag stitching.
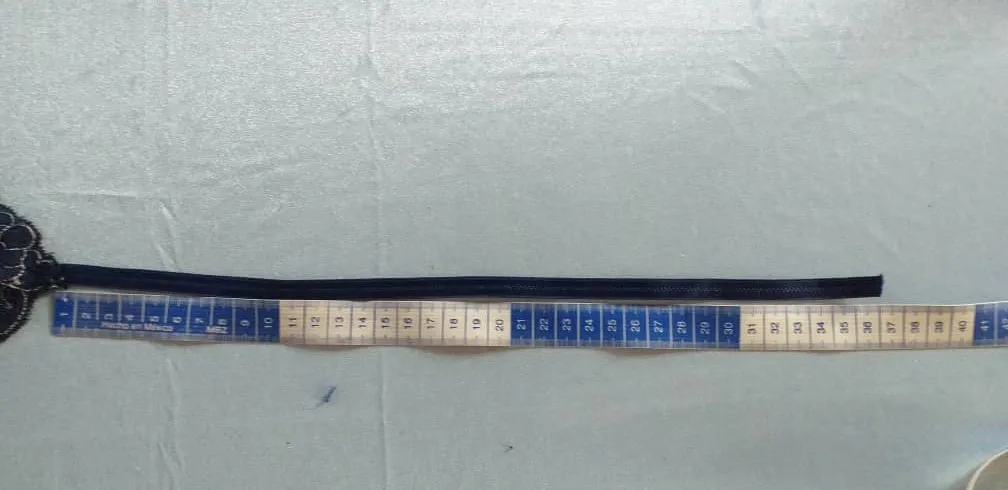
Tomamos el elástico de 1 centímetro de ancho y cortamos dos tiras de 36 cm cada una.
We take the 1 cm wide elastic and cut two strips of 36 cm each.
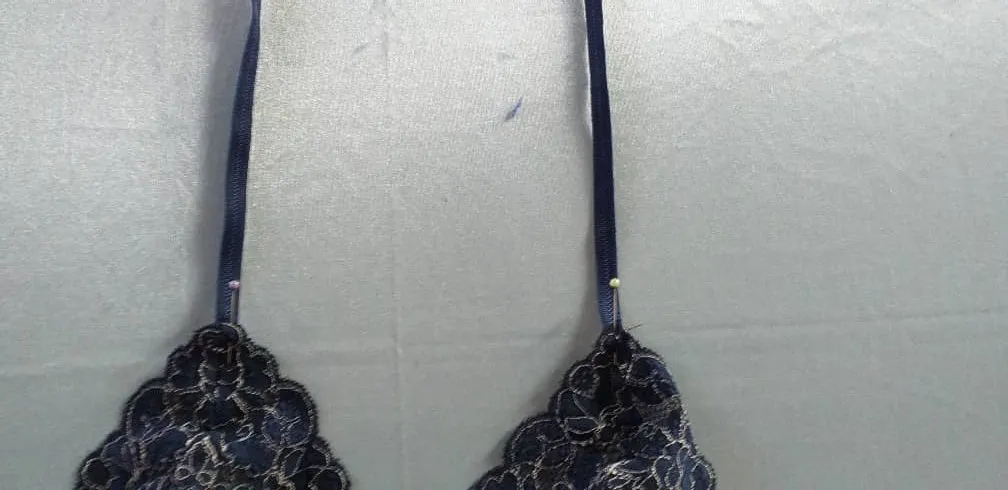
Las unimos en el delantero a la parte superior de la copa y en la parte de la espalda vamos a medir nueve centímetros del lateral y unimos con ayuda de un alfiler.
We join them at the front to the top of the cup and at the back we will measure nine centimeters from the side and join with a pin.
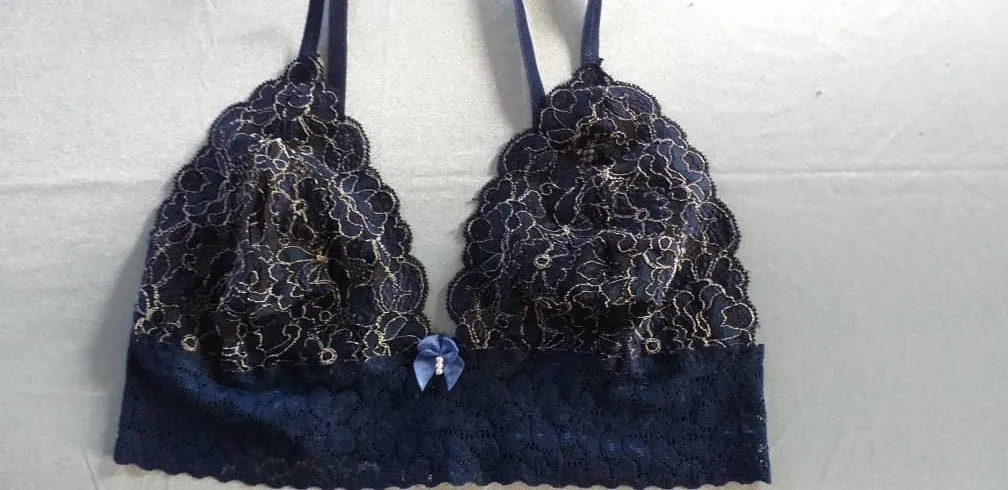
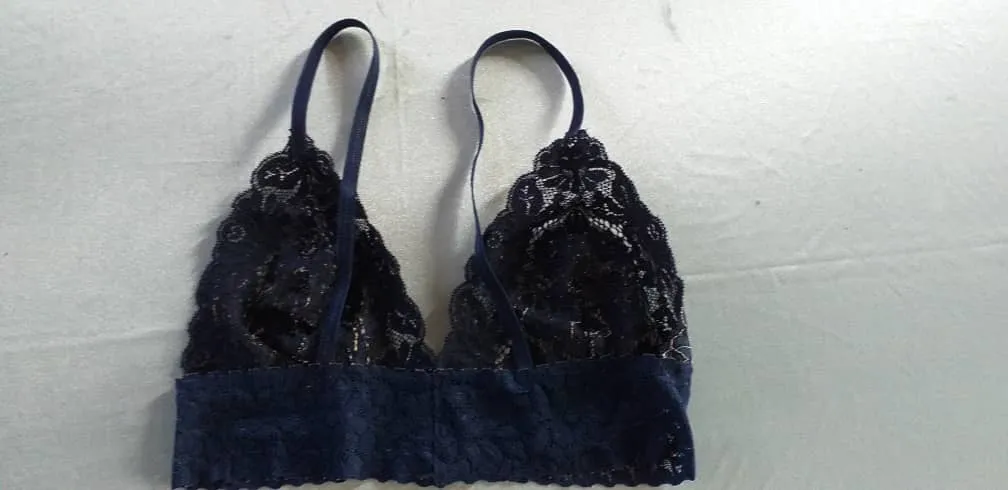
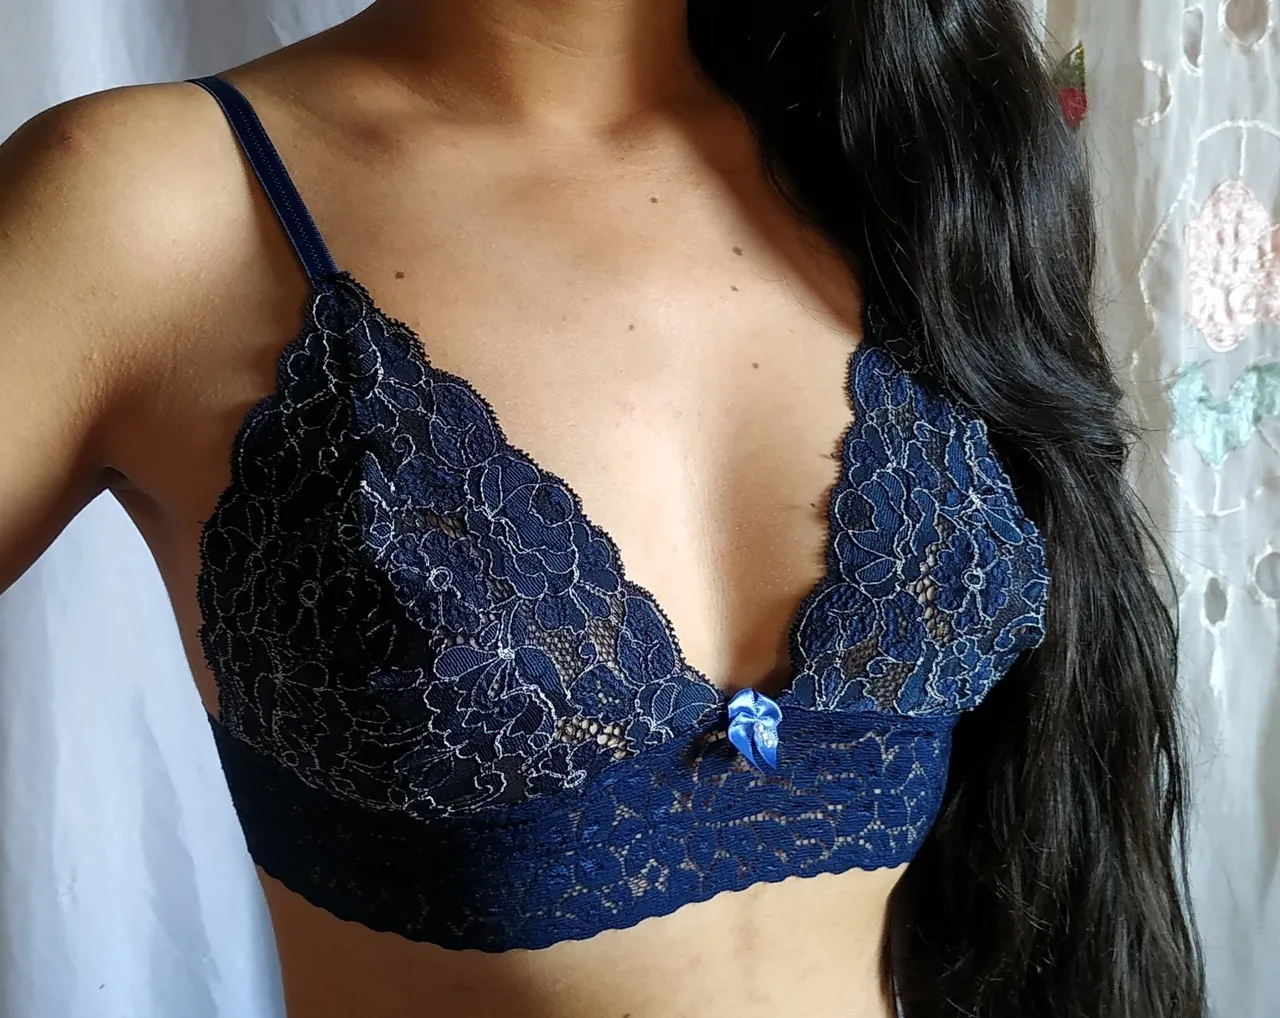
Cosemos y por último le colocamos de manera opcional un lazo en la parte delantera del bralette.
Con esto tendremos listo esta bella prenda.
We sew and finally we optionally place a bow on the front of the bralette.
With this we will have ready this beautiful garment.
Editado en Canva || Edited in canva
Fotos tomadas de mi teléfono Xiaomi Redmi Note 6 Pro y mi teléfono Samsung J4 plus || Photos taken from my Xiaomi Redmi Note 6 Pro pone and my Samsung J4 plus phone.
Fuente del editor de imágenes || Image editor source