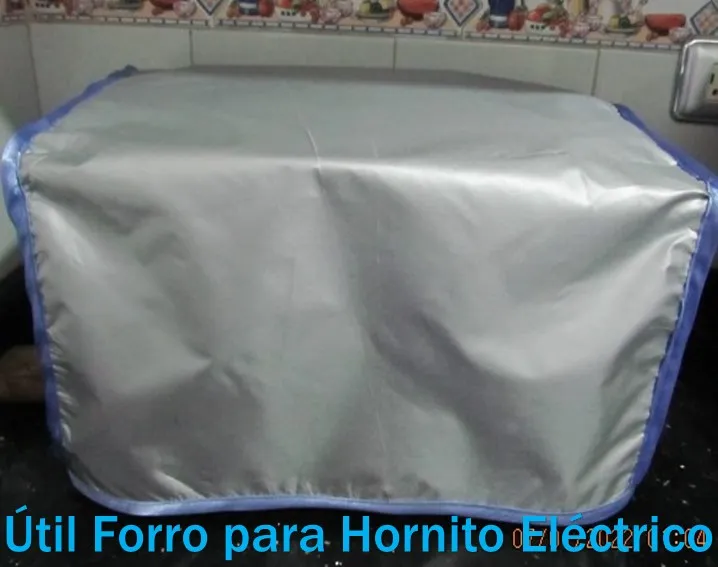
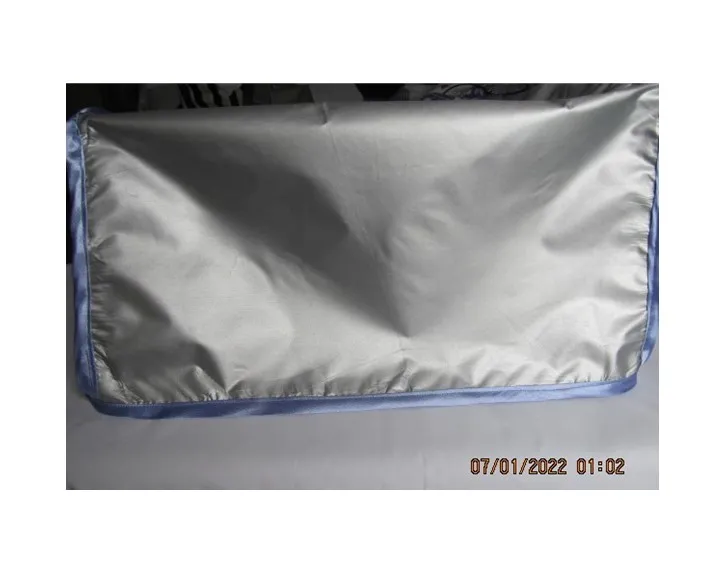
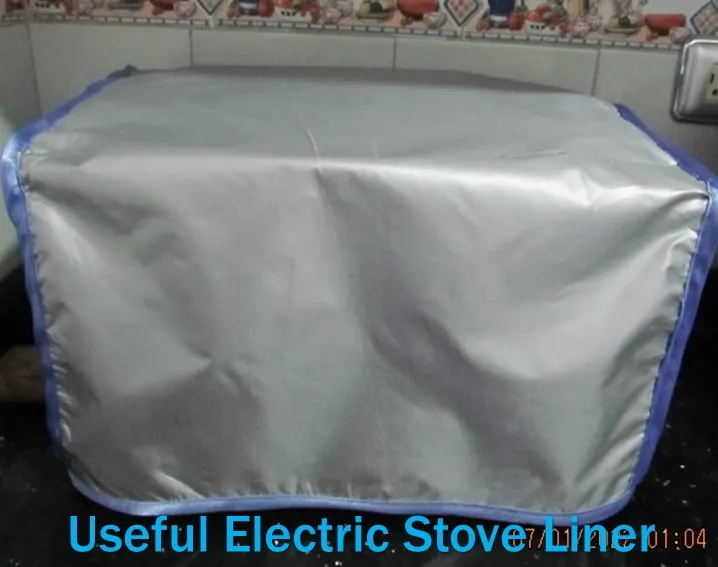
Buenas estimados amigos de esta comunidad de hermosos proyectos, hoy les traigo un útil forro para el hornito eléctrico, pero que también puede servir para un microondas, sobre todo cuando estos pequeños equipos no están empotrados y entonces los vapores de grasa de la cocina y el polvillo que siempre no falta, este forro nos sirve para protegerlos; este era un proyecto que tenia algún tiempo esperando por mí, ya que la tela la tenía de otro trabajo que había realizado hace algún tiempo.
Por fin me decide a realizarlo porque realmente sentí la necesidad de proteger el hornito de los vapores y el polvillo; por lo cual les voy a indicar los materiales y el paso a paso para que puedan realizarlo.
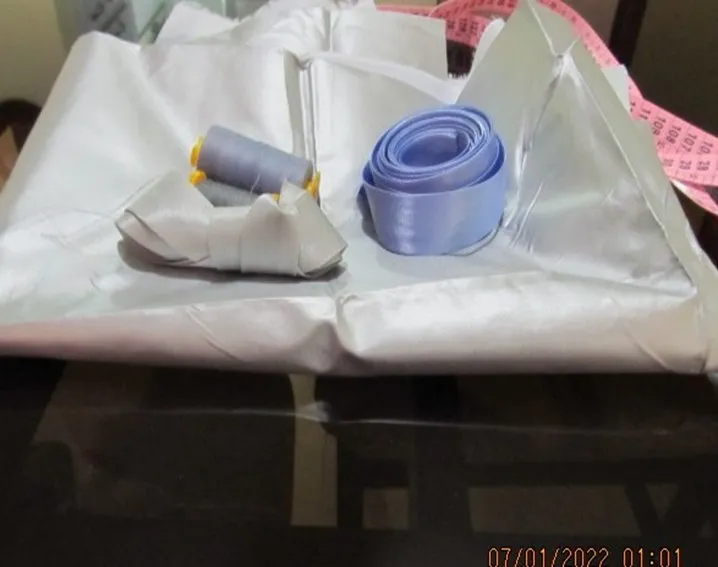
Materiales
Tela para el forro
Sesgo de Razo
Hilos
Cinta Métrica
Tijera
Máquina de coser
Procedimiento
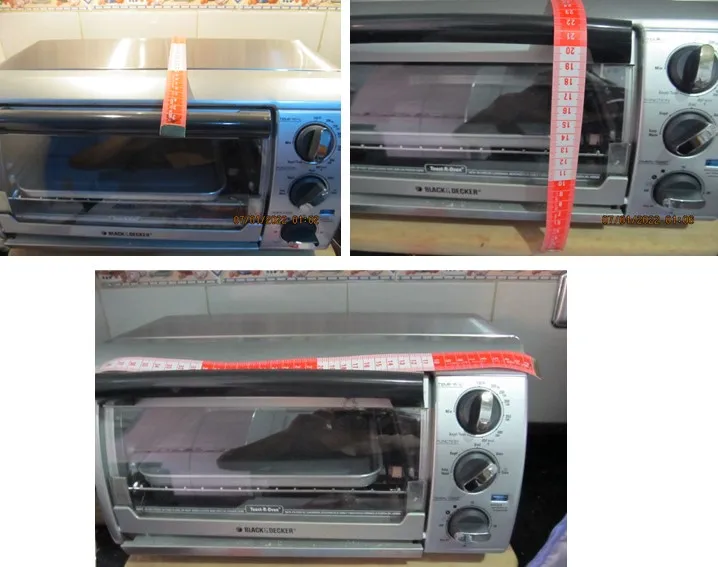
Paso 1
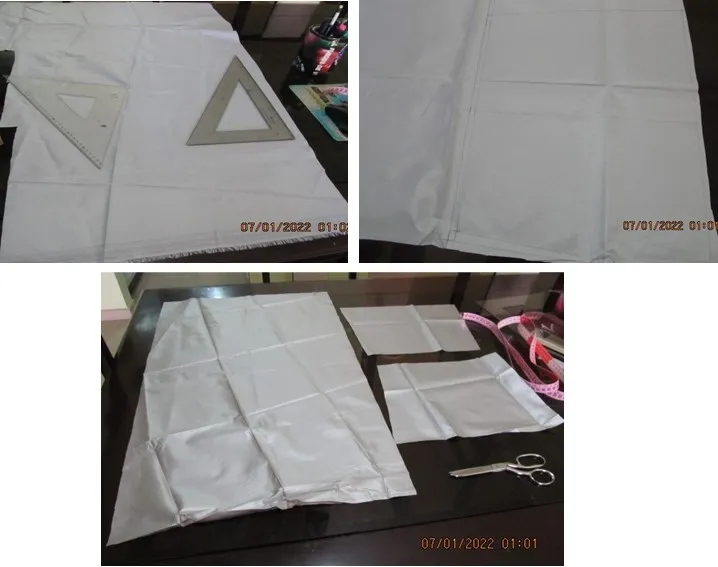
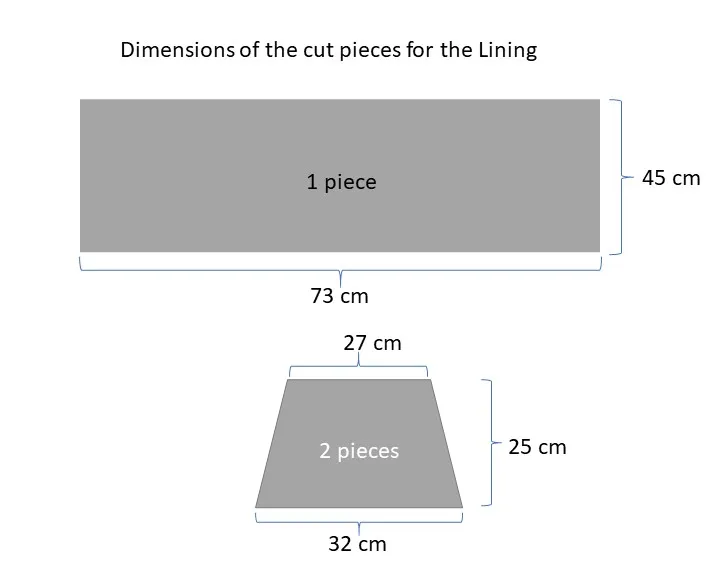
Tomar todas las medidas del equipo.
Paso 2
Como es una tela aluminizada, los trazos los realice directamente sobre la tela, de acuerdo a las medidas obtenidas.
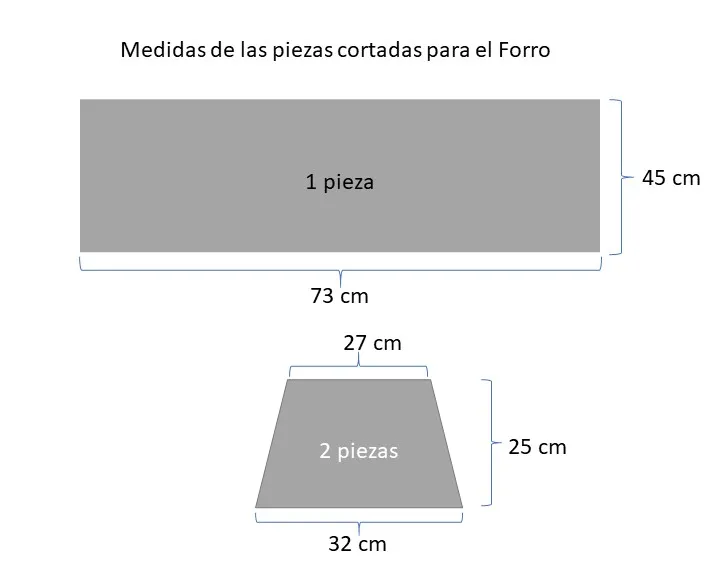
Paso 3
Cortar las piezas de acuerdo a las medidas y trazos realizados.
Paso 4
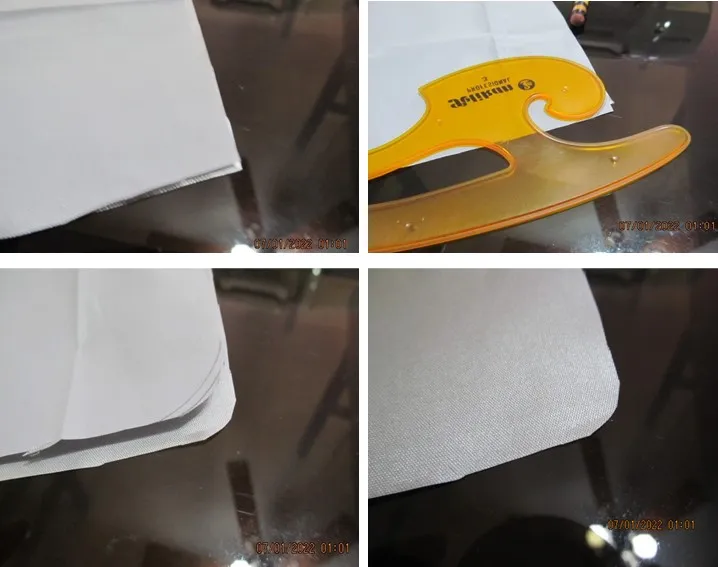
En las esquinas suavizamos el ángulo con una escuadra de curvas y luego recortamos ese sobrante.
Paso 5
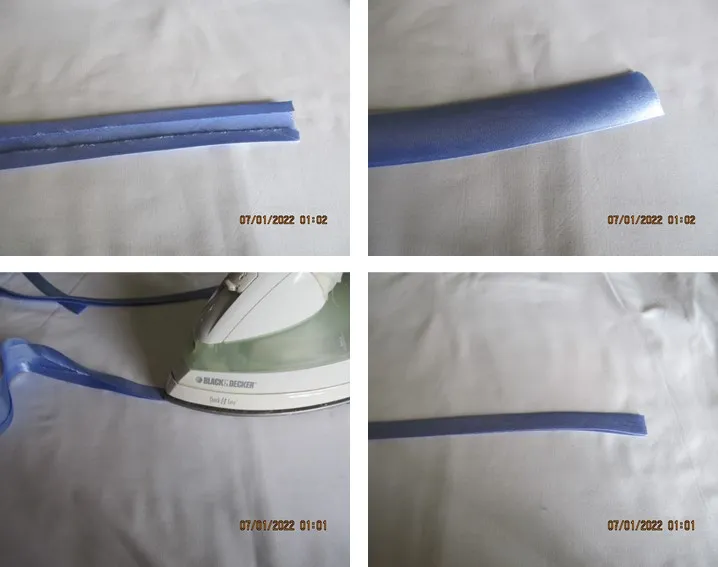
Doblamos el sesgo a la mitad y lo planchamos para mayor facilidad en el momento de coserlo.
Paso 6
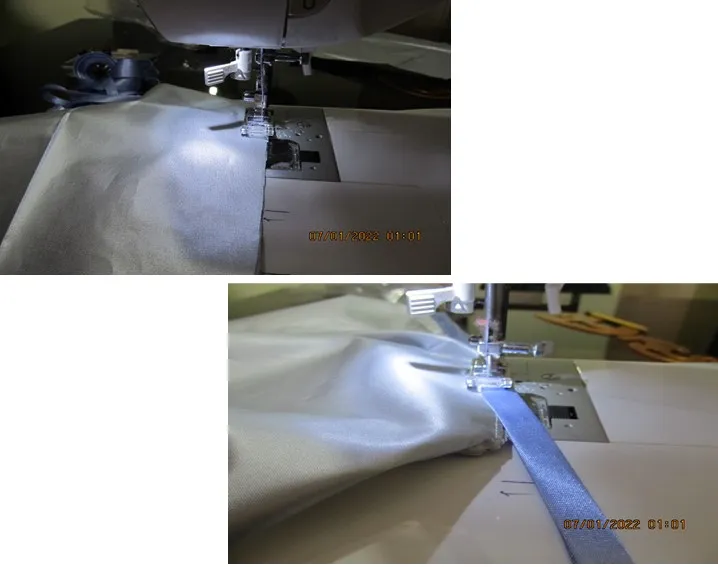
Vamos a unir las piezas mediante una bastilla o puntada grande de la máquina de coser, esto lo hacemos encarando los reveses, decir nos va a quedar la costura hacia el derecho ya que eso lo va a cubrir el sesgo.
Paso 7
Colocamos el sesgo cubriendo esa costura que hicimos en el paso 6, en la unión de las piezas laterales con la pieza central, y luego colocamos sesgo alrededor de la pieza terminada o forro para darle mayor realce.
English
Good dear friends of this community of beautiful projects, today I bring you a useful lining for the electric oven, but it can also serve for a microwave, especially when these small devices are not embedded and then the grease vapors from the kitchen and the dust that is always present, this lining serves to protect them; this was a project that I had some time waiting for me, since I had the fabric from another work that I had done some time ago.
Finally I decided to make it because I really felt the need to protect the stove from the vapors and dust, so I am going to indicate the materials and the step by step so you can make it.
Materials
Fabric for the lining
Razo bias binding
Thread
Measuring tape
Scissors
Sewing machine
Procedure
Step 1
Take all the measurements of the equipment.
Step 2
As it is an aluminized fabric, the strokes are made directly on the fabric, according to the measurements obtained.
Step 3
Cut the pieces according to the measurements.
Cut the pieces according to the measurements and traces made.
Step 4
In the corners we smooth the angle with a square of curves and then cut the excess.
Step 5
Fold the bias binding in half and iron it for easier sewing.
Step 6
We are going to join the pieces using a bastilla or big stitch of the sewing machine, we do this facing the backwards, that is to say that we will have the seam facing the right side since the bias will cover it.
Step 7
We place the bias binding covering the seam we made in step 6, at the junction of the side pieces with the center piece, and then we place bias binding around the finished piece or lining to give it more prominence.
Translated with www.DeepL.com/Translator (free version)
Fuente de imágenes: Archivo personal
Publicación 100% Hive Power


MIS REDES SOCIALES