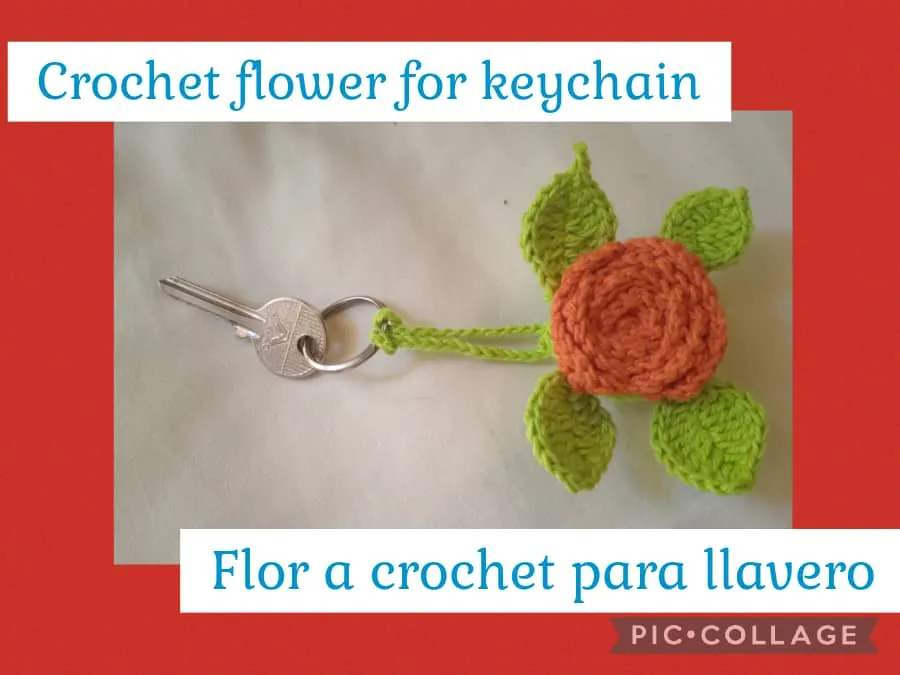
Un saludo mi querida comunidad @NeedleWorkMonday. Muchas veces las cosas no salen como uno las planifica, es increíble como un proyecto tan fácil no lo había terminado debido a inconvenientes cotidianos que se presentan. Prácticamente hice el llavero de flor en dos faces, pero felizmente terminé el proyecto. Este nuevo trabajo realizado a crochet en hilo pabilo, de color verde manzana y naranja, me llamó la atención el motivo de una flor🌻 ya que soy amante de la naturaleza, en especial de las flores. Con puntos básicos de crochet ya que estoy en la etapa de aprendiz, me enamoró el proyecto ya que después de terminado, se me ocurrió que sería un hermoso detalle para regalar, sin más que comentar, espero disfruten los pasos.
✨MATERIALS//MATERIALES✨
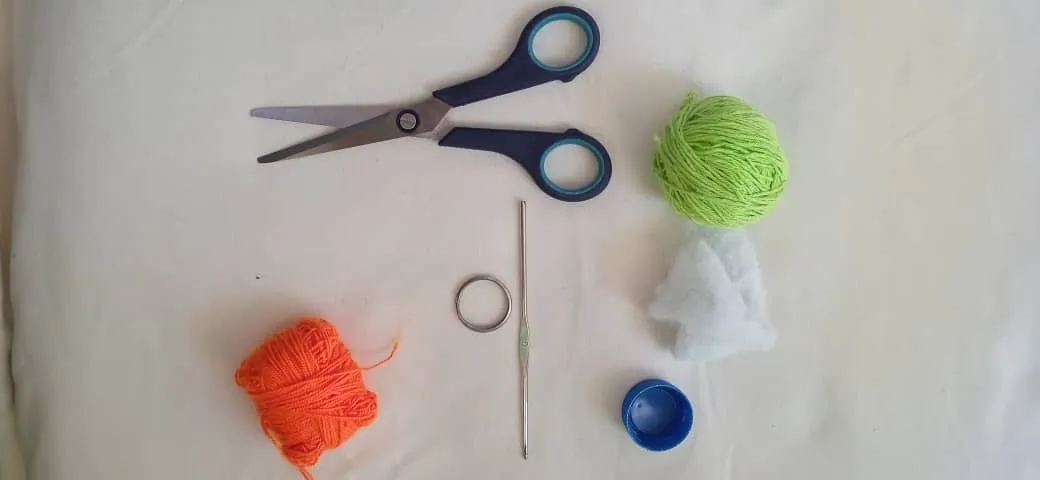
- Apple green wick yarn.
- Orange wick yarn.
- Crochet needle # 0.
- Scissors.
- Wadding or stuffing.
- Key ring.
- Soda cap.
- Hilo pabilo verde manzana.
- Hilo pabilo naranja.
- Aguja crochet # 0.
- Tijera.
- Guata o relleno.
- Aro de llavero.
- Tapa de refresco.
✨STEPS//PASOS✨
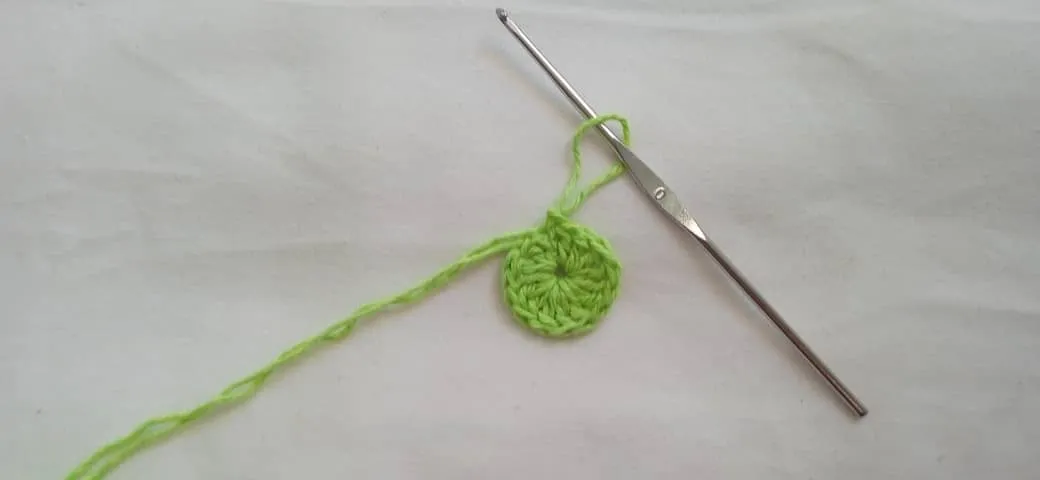
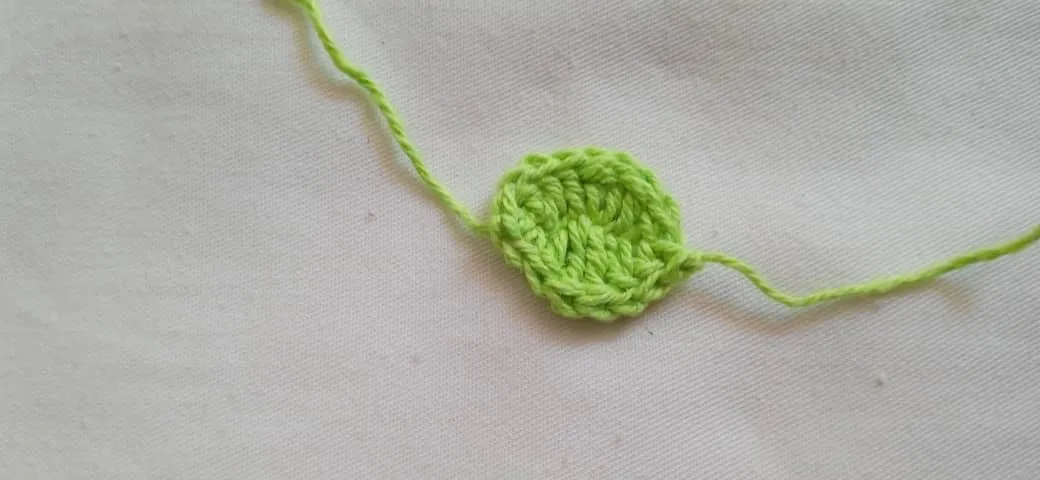
- Start the work with the apple green color, a magic ring, with a base of 12 high stitches, close with a slip stitch, pull the yarn, to give it a circular shape.
- Iniciar la labor con el color verde manzana , un anillo mágico, con una base de 12 puntos altos, cerrar con un punto deslizado, halar el hilo, para darle la forma circular.
- Then knit 3 purl stitches. Work the second row with increase stitches, that is, 2 double crochets followed by a double crochet (VIV) in each stitch until you finish the row with a slip stitch.
- Luego realizar 3 puntos aire. Trabajar la segunda vuelta con puntos de aumentos, es decir 2 puntos altos seguidos de un punto alto, (VIV) en cada punto hasta terminar la vuelta con un punto deslizado.
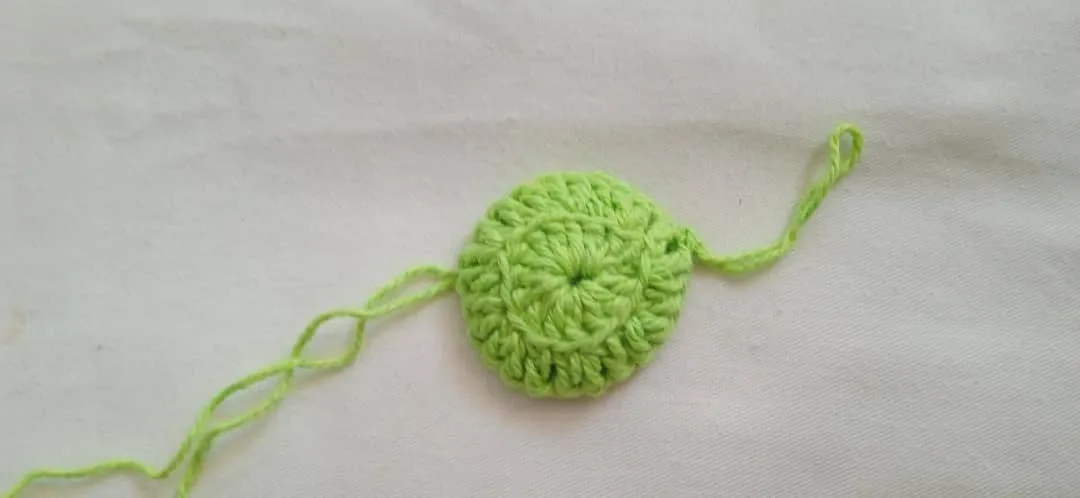
- The third row I will work with double crochet.
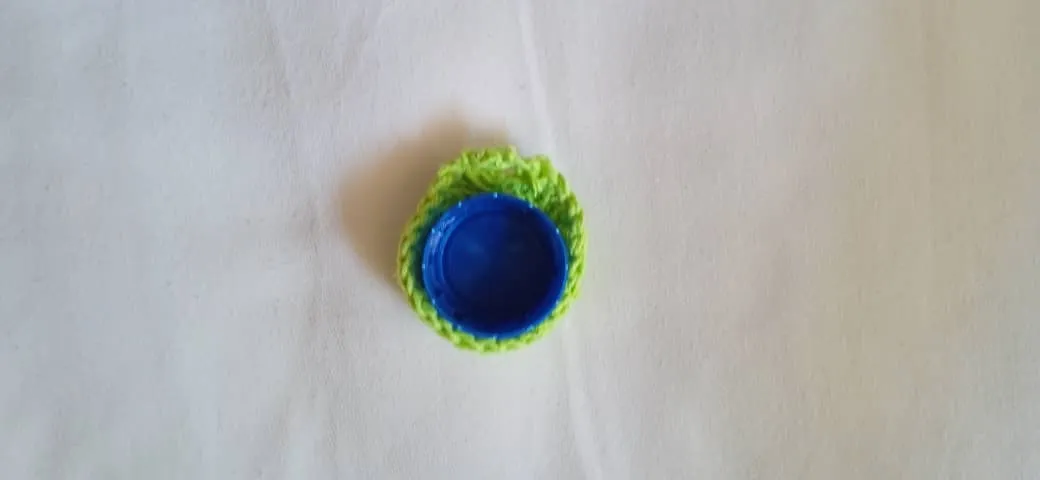
- The fourth row with single crochet and close with a slip stitch. Insert the soda cap, adjusting the base.
- La tercera vuelta la trabajaré con puntos altos.
- La cuarta vuelta con puntos bajos y cerrar con un punto deslizado. Introducir la tapa de refresco, ajustando la base.
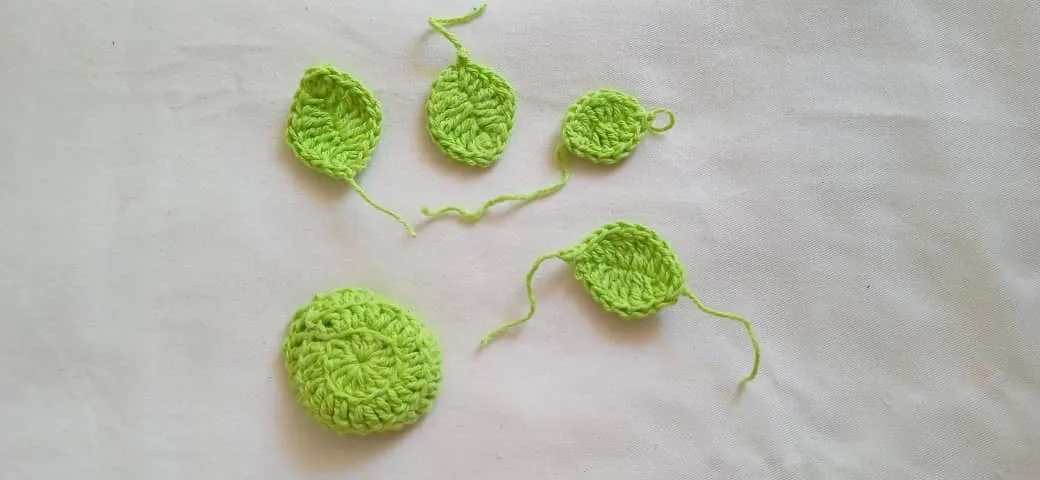
How to make the leaf.
- Make a base of 10 chains, plus a single crochet, enter the second stitch, knit a single crochet, followed by a double crochet, two double crochets, two double crochets, (_xIIVVIIx) continue with two double crochets and repeat the steps until the leaf is finished.
Como hacer la hoja.
- Realizar una base de 10 cadenetas, más un punto al aire, introducir al segundo punto, punto hacer un bajo, seguido de punto medio alto, dos puntos altos, dos puntos dobles, (_xIIVVIIx) proseguir con dos puntos medios y repetir los pasos hasta terminar la hoja.
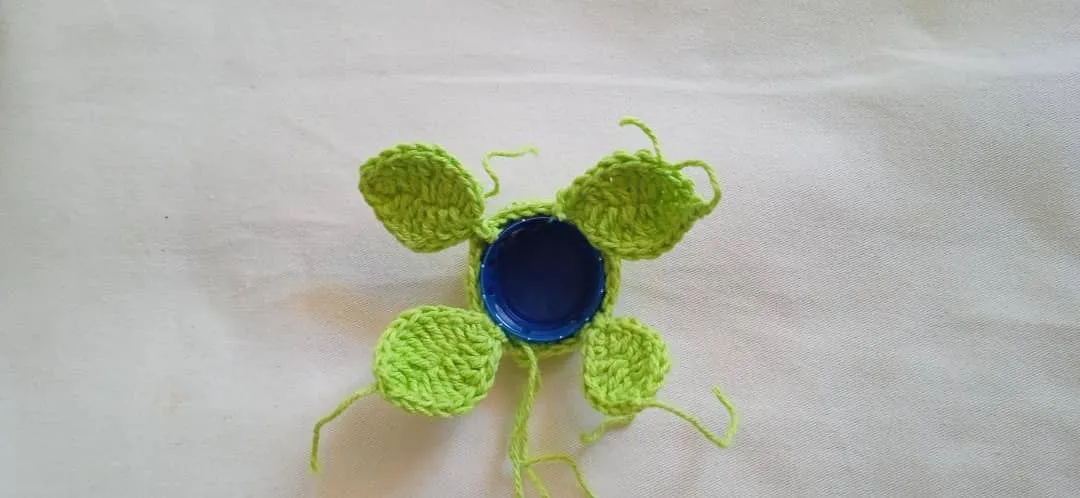
- Make 4 sheets repeating the same procedure.
- Hacer 4 hojas repitiendo el mismo procedimiento.
- Assemble the leaves to our base. Make low stitches, count six low stitches and join the leaves with low stitches.
- Ensamblar las hojas a nuestra base. Realizar puntos bajos, contar seis puntos bajos y unir las hojas con puntos bajos.
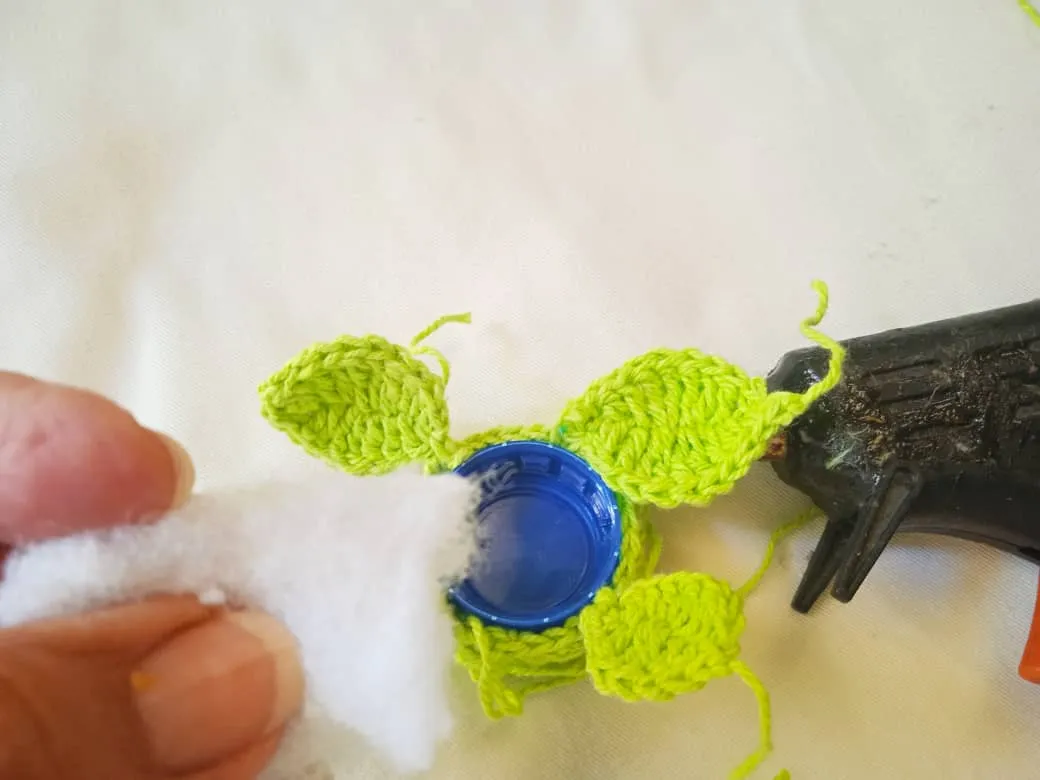
- Place and glue the soft drink lid to the woven base with silicone. Similarly glue the wadding.
- Colocar y pegar con silicón la tapa de refresco a la base tejida. De igual manera pegar la guata.
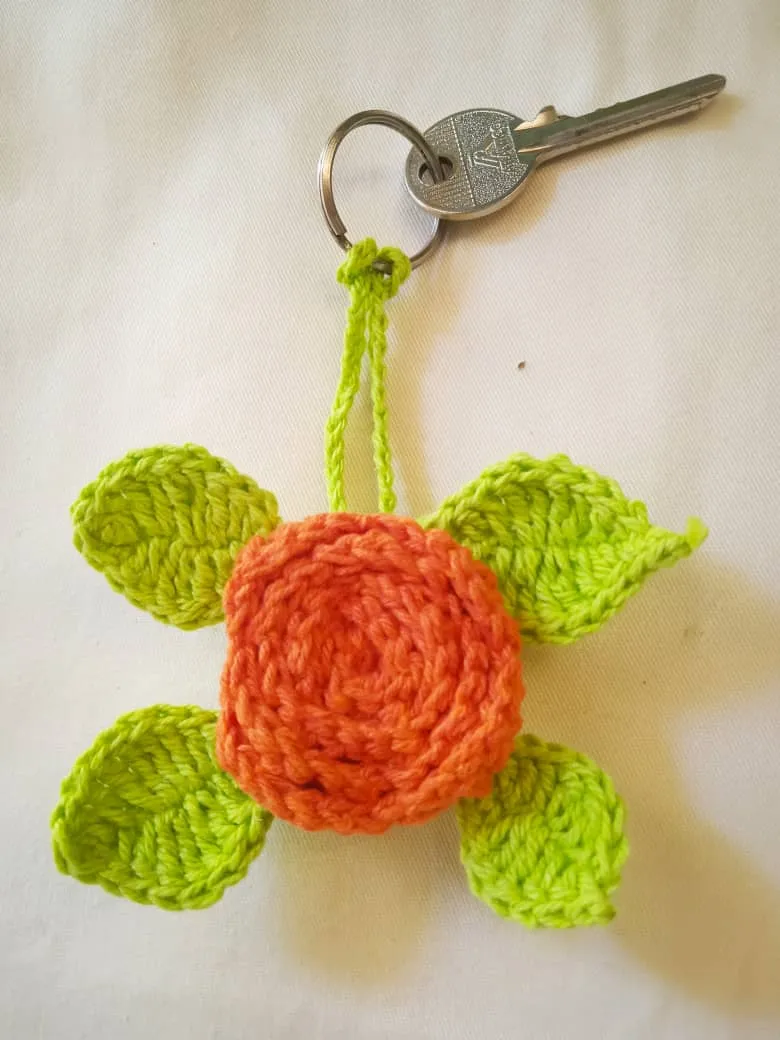
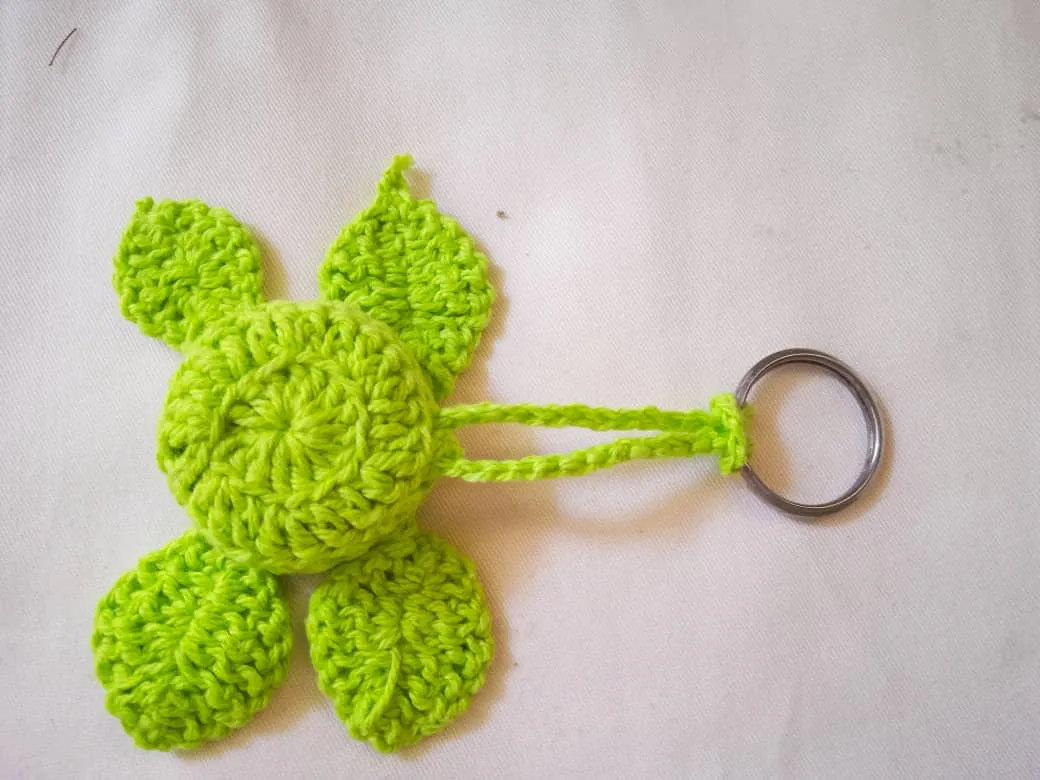
- Make a chain of the desired length to function as a pendant, insert the ring of the key ring. Cut the excess thread.
- Hacer una cadeneta del largo deseado para que funcione como colgante, introducir el aro del llavero. Cortar el exceso de hilo.
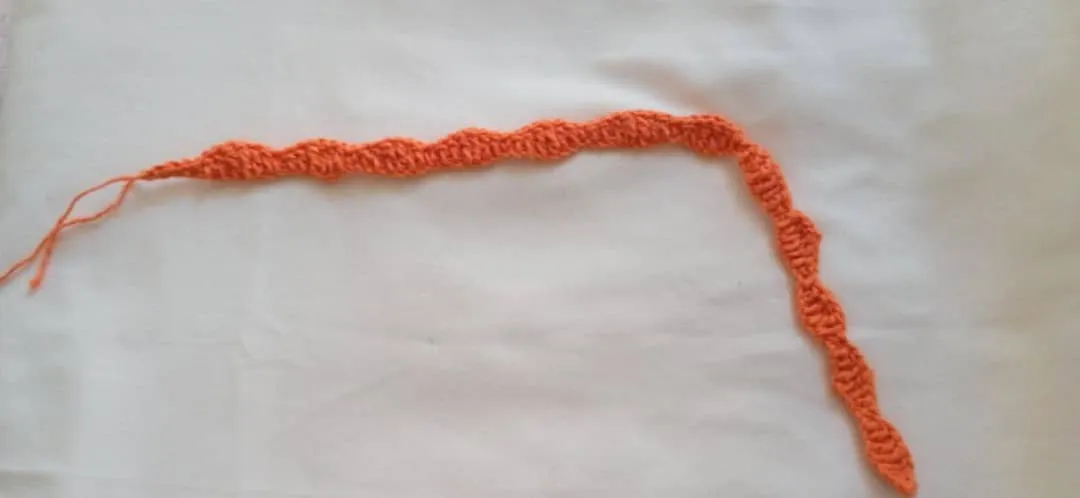
How to make the flower.
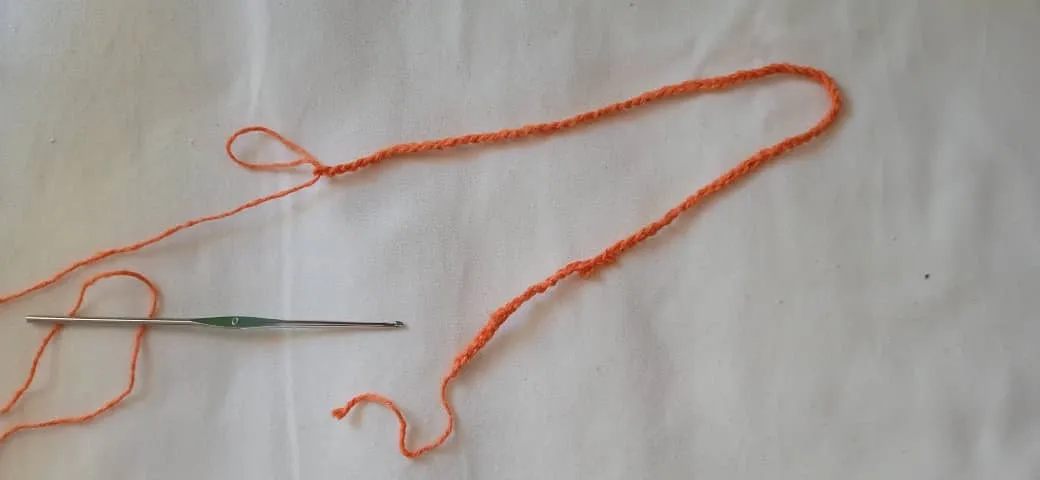
- Start working on a base of 83 chains.
Cómo hacer la flor
- Comenzar a trabajar en una base de 83 cadenetas.
- Then, plus 2 more spaces and count 4 chain stitches, then knit two double crochets to center with 2 double crochets with increase. Then, work: 2 double crochet, plus 2 double crochet, continue with 2 double crochet, then 2 double crochet with increase, continue with double crochet, 2 chain stitches, repeat the procedure, make 12 groups, finish with 5 double crochet.
- Luego, más 2 espacios y contar 4 cadenetas, luego realizar dos puntos altos para centrar con 2 puntos altos de aumento. Luego, trabajar: 2 punto alto, más 2 punto doble, seguir con dos puntos altos, luego 2 punto alto con aumento, seguir con punto alto, 2 cadenetas de espacio y punto bajo, repetir el procedimiento, hacer 12 grupos, finalizar con 5 puntos bajos.
- Join the 2 ends giving it the shape of a flower. Sew.
- Unir los 2 extremos dándole la forma de flor. Coser.
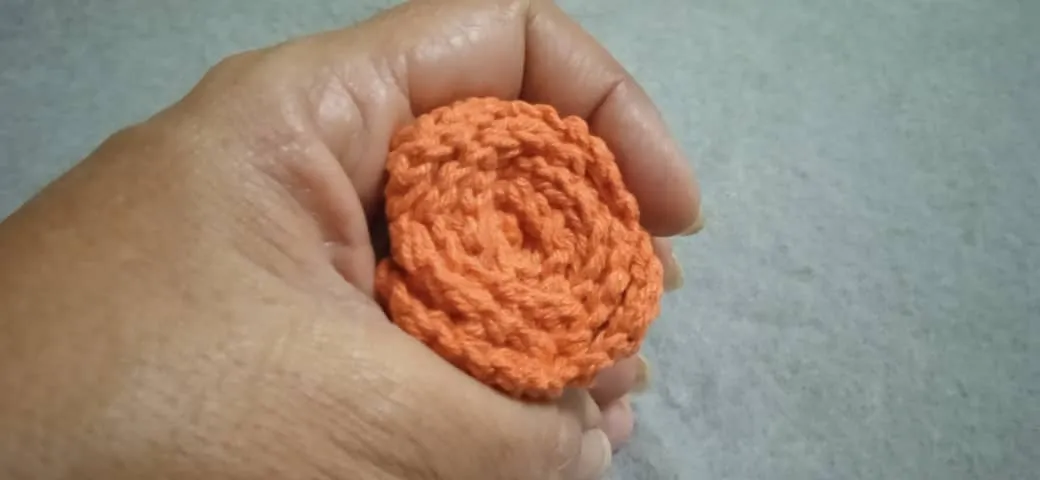
- Now to assemble, place silicone or glue in the central part and on this, the flower.
- Ahora a ensamblar, colocar silicón o pegamento en la parte central y sobre esto, la flor.
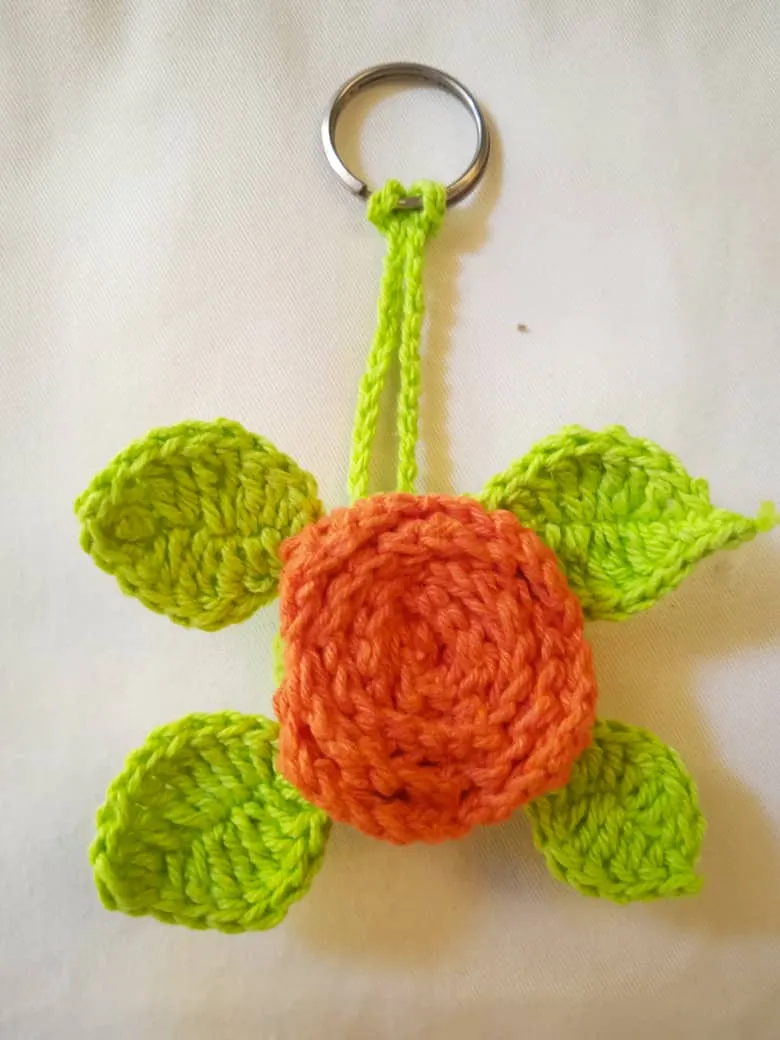
- Ready!!!. The project of a keychain with the motif of a colorful flower🌺, made with pabilo thread, which I will wear with the keys. Delighted😊 to have elaborated and shared with the community.
- Listo!!!. El proyecto de un llavero con el motivo de una colorida flor🌺, hecha con hilo pabilo, que voy a lucir con las llaves. Encantada😊 de haber elaborado y compartido con la comunidad.