Hello needlewokers

Greetings to you all on this beautiful day and a happy independent to all Nigerians here, I hope you all are doing great and having a great day out there, I also use this me opportunity to wish you all a happy new month with greater fulfillment.
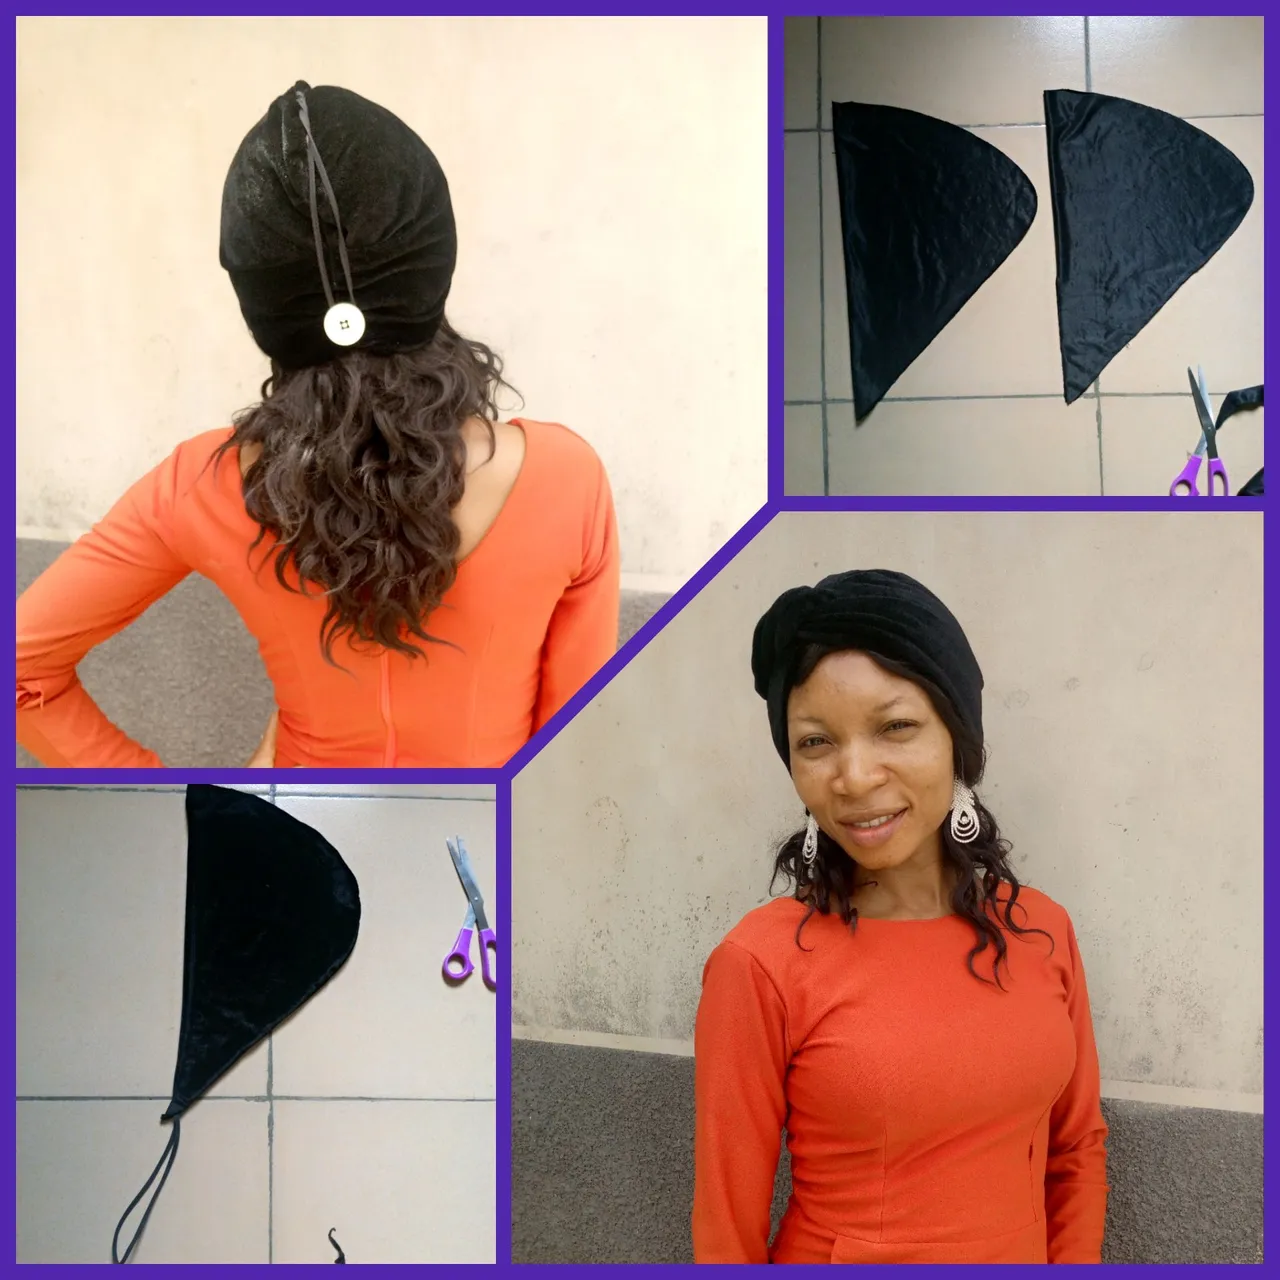
It's a great pleasure for me today to share with you the design of a turban cap I made for myself that can be style in different ways for my church my outfits using black velvet fabric.

I now attend a local church in my area where it's compulsory for every female to cover their hair before entering the church and for this, I have decided to make different turban for myself from most of my left over fabric, sometimes ago, I made a reversible beret and it was so looking nice now, I made this turban cap to add to my collection of cap.

Let me take you through the simple and easy process of cutting and sewing this turban cap.
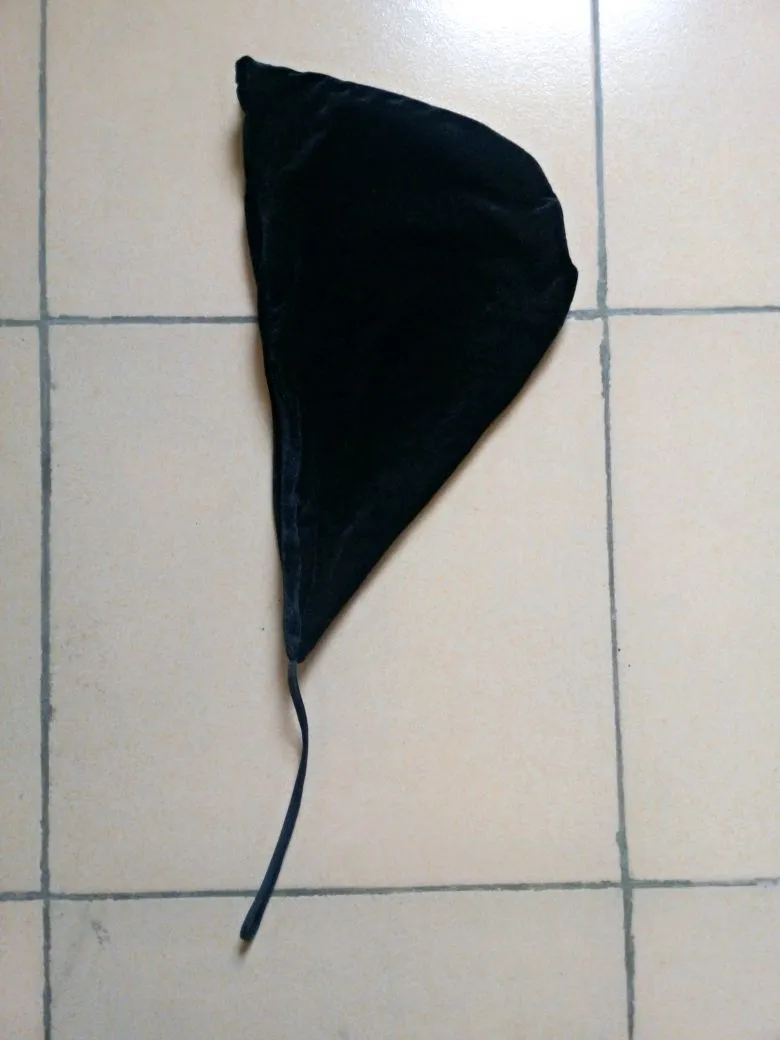
From my left over velvet fabric, it was folded in two and I measured 18 x 10"
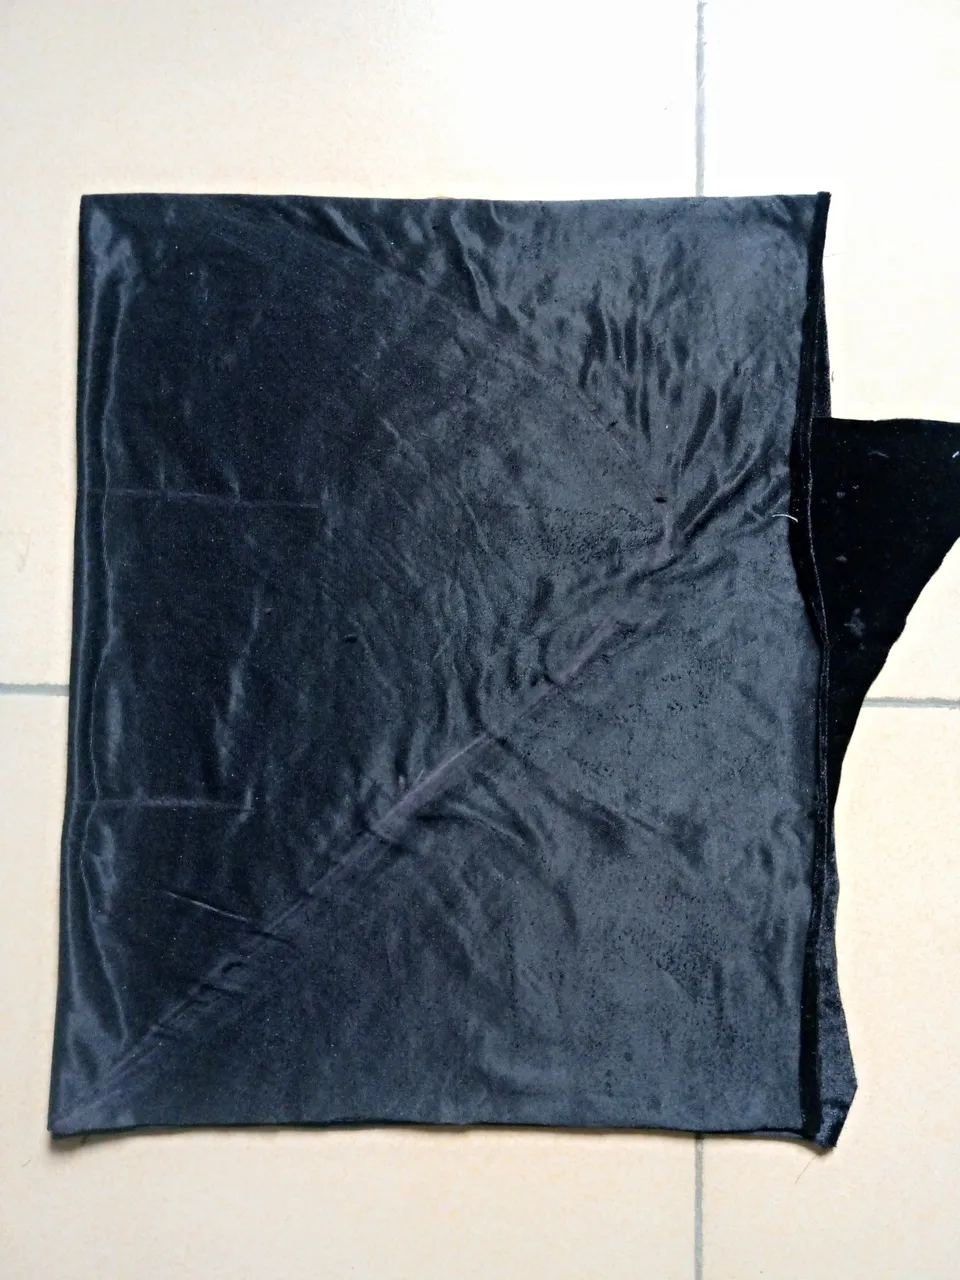
On it, I divided it into 3 with 6" intervals on the tip, I marked 1.5" outward, on the middle, I marked 10" and on the last line, I marked ½" this lines were connected together and cut out. It was placed on another folded fabric and the same shape was cut out and I have 4 pieces, since it was cut on fold.
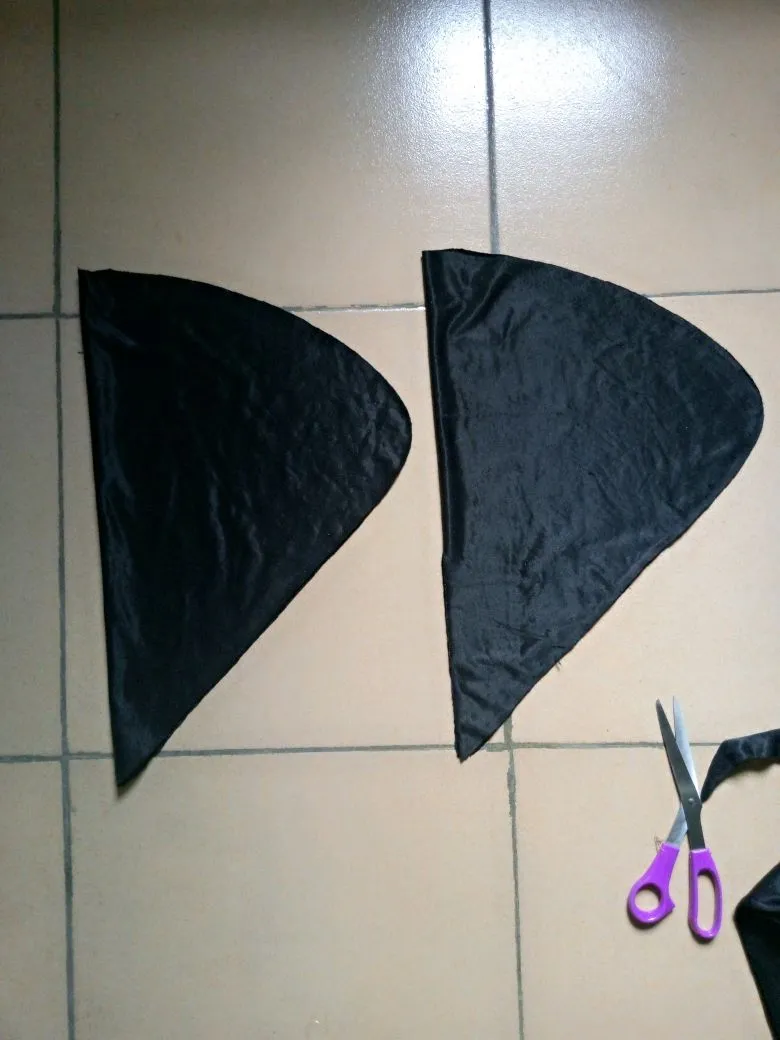
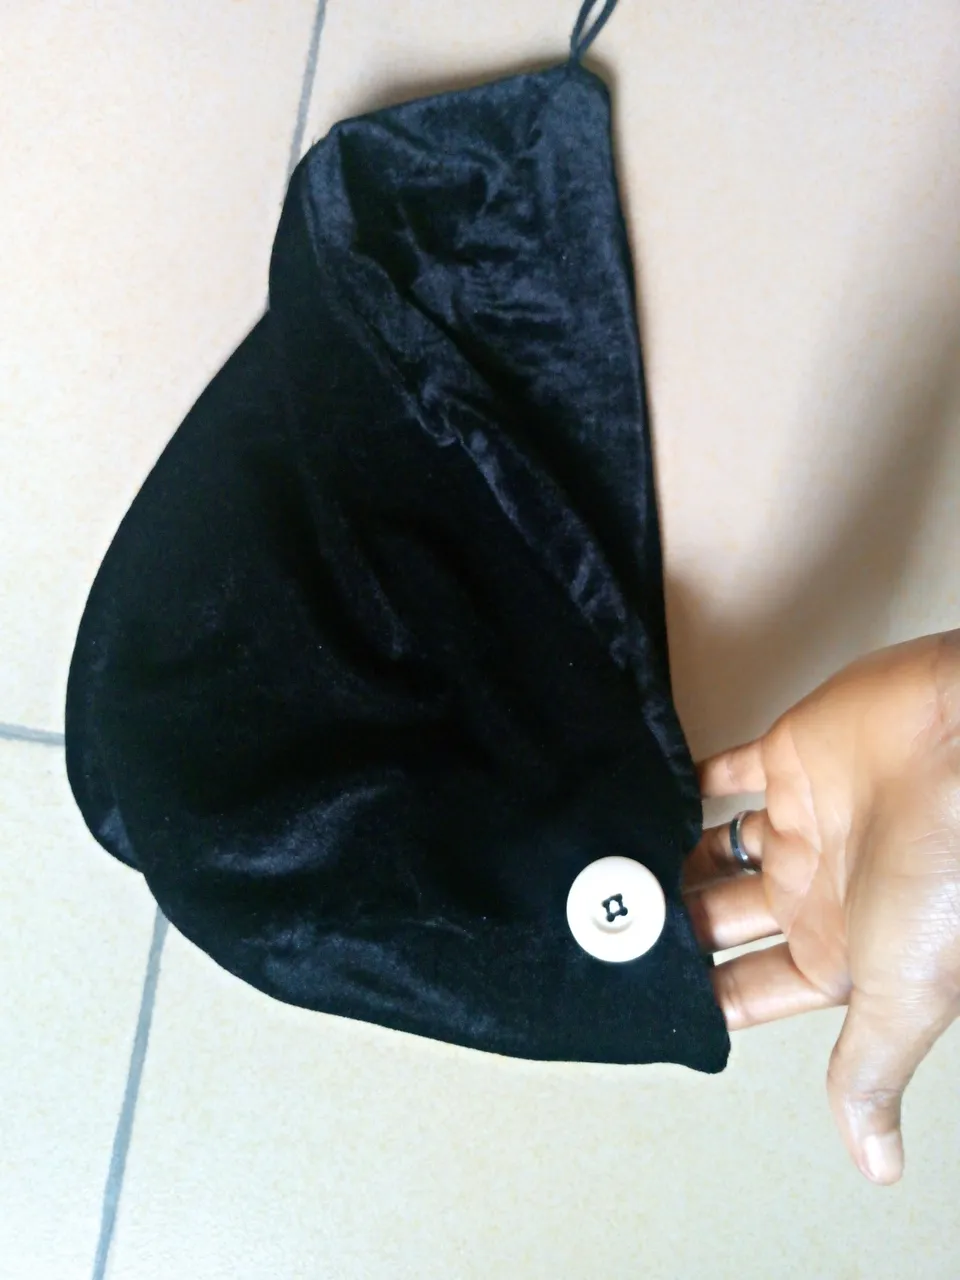
Two pieces were sewn together separately and set aside.
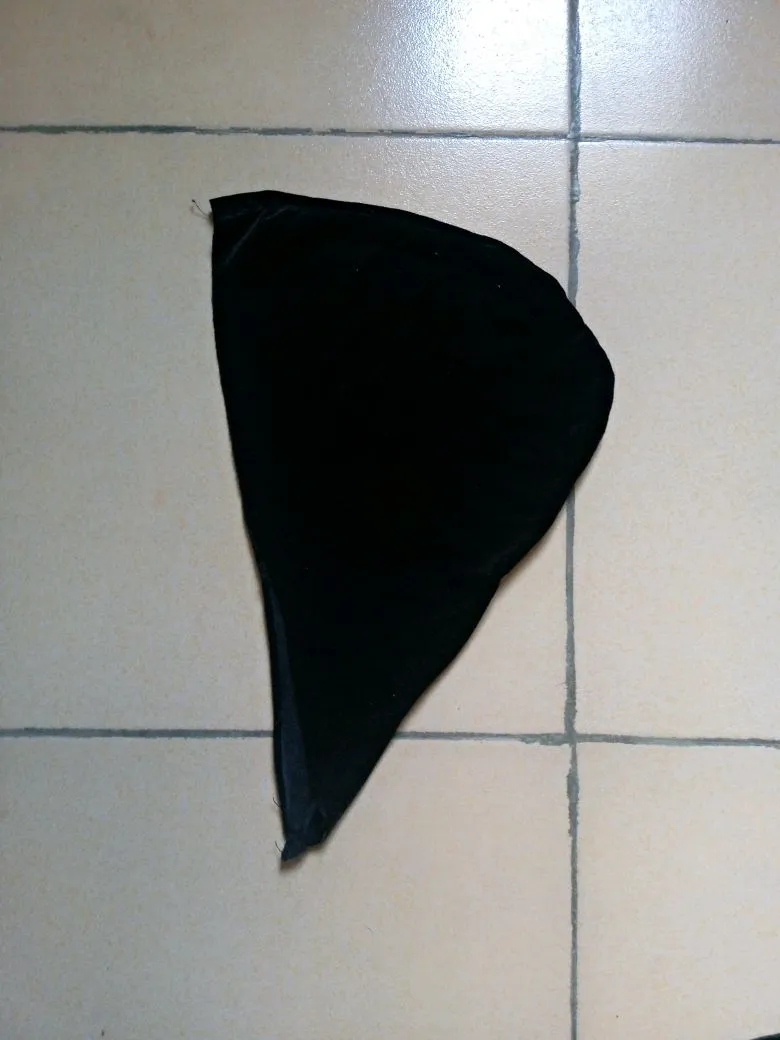
On the other one, before sewing, I cut out a bias strip and sew it together to make a loop to hold the twist end together with a button and it was sew to the right side of the Sharp tip of the other piece.

One piece were inserted in the other with right side to right side and was sewn together leaving an opening where it can be turned inside out, it was sewn and turned inside out.
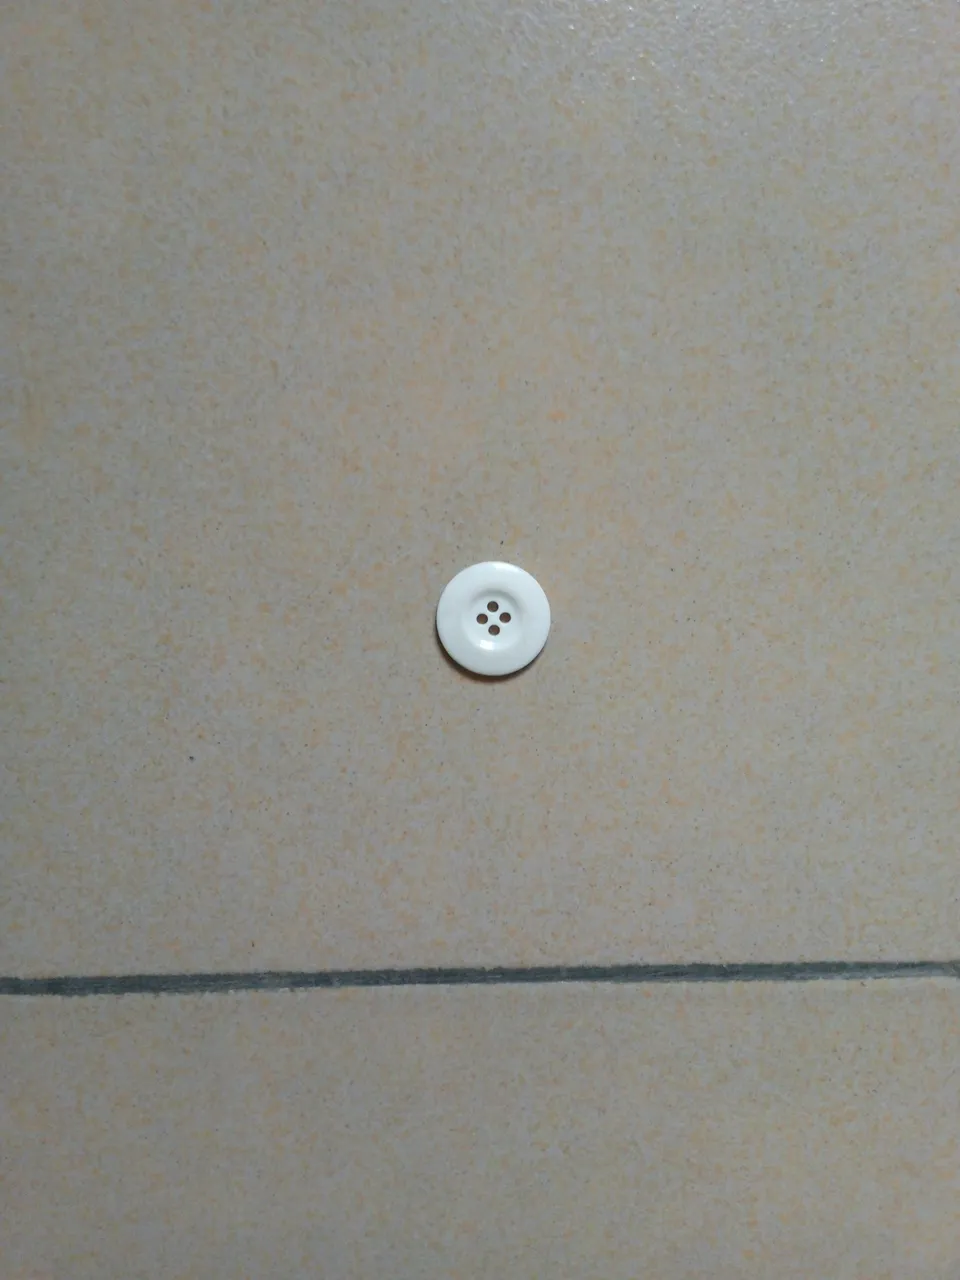
Finally, I used my hand needle and thread to fix a big button on the opposite side of where the strip was sewn.
To style this, the side with the button will be at the back while the side with the loop will be twisted and the rope will be placed on the button to make it firm.
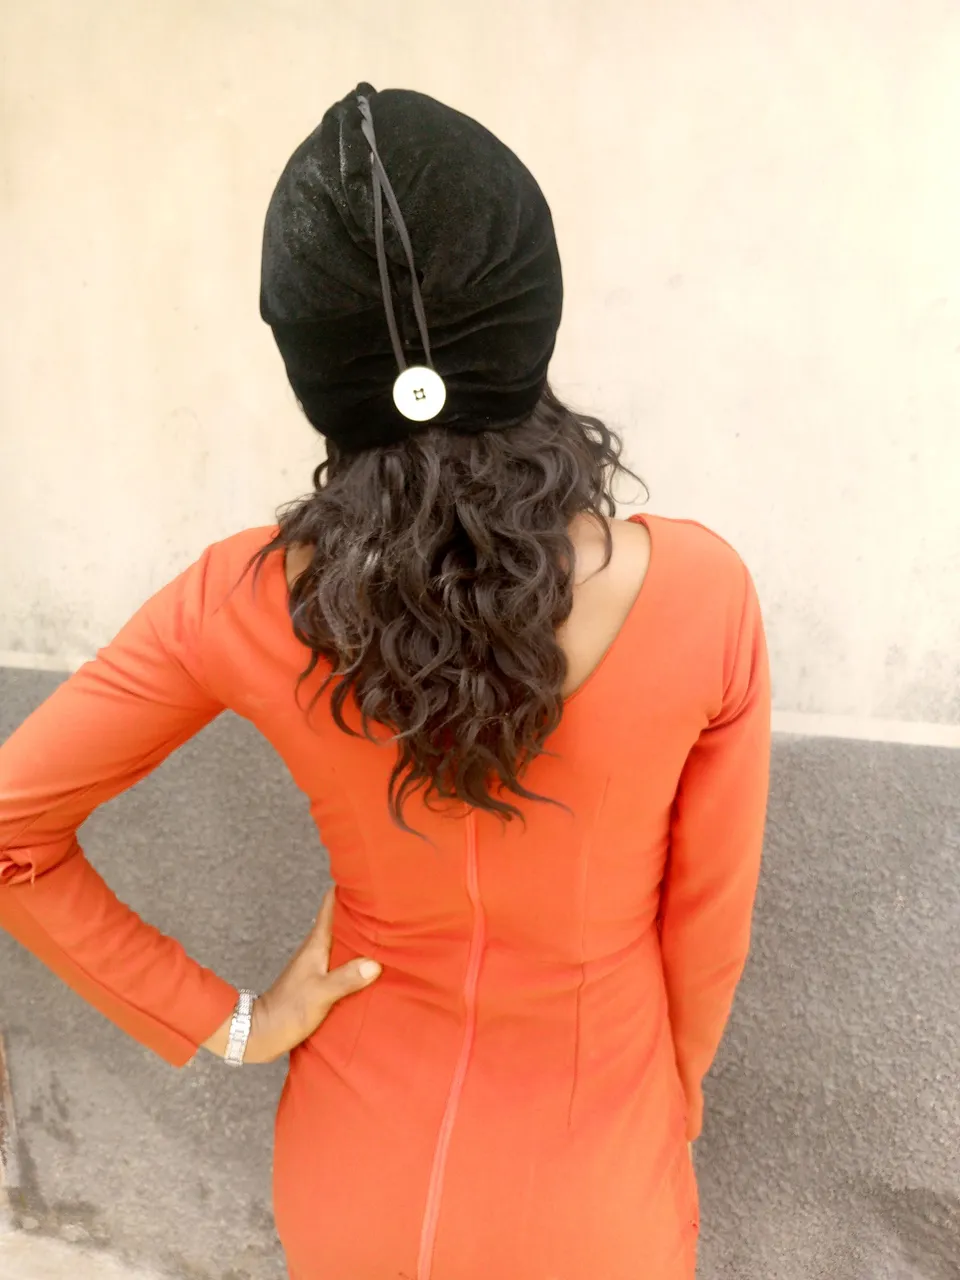
Styling it a different way, the side with the button will be at the front while the side with the loop will be knotted at the back.
It can also be style with the button at the back and the side with the rope will be twisted to the right or left side depending on your choice and the loop will be placed on the button through the same side.

As simple as this, it is very easy to make with a beautiful outcome, I hope you like how it looks.