Confección de panti boxer para las niñas 🧵🪡//Making boxer shorts for girls 🧵🪡[Esp-Eng]

Picsart_24-09-15_13-48-47-045.jpg

Picsart_24-09-15_13-57-28-321 (1).jpg

¡Que tal amigos!espero se encuentren genial la tarde de hoy 😍😊les mando un abrazo a cada uno de ustedes esperando que se encuentren muy bien este domingo aquí en mi ciudad digamos que el calor está pasable pero esperando que nos caiga una agüita fresca para que el clima se refresque un poco.

How are you guys! I hope you're having a great afternoon today 😍😊 I'm sending a hug to each and every one of you hoping that you're doing very well this Sunday here in my city. Let's say that the heat is bearable but I'm hoping that we get some cool water so that the weather cools down a bit.

Aprovechando que la tarde está algo nublada me puse a coser y terminar esta panti boxer que tenía guardada sin terminar ,esta panti la estaré obsequiando a una amiga que ella por supuesto tiene una hija,la he realizado asi con pretina de la misma tela que es algo suave y asi a la niña no le moleste en la cintura y a la hora de usarla pues sea super cómoda,espero le guste y pues los invito a que vean que la verdad solo usé poquitos materiales y es muy sencilla de hacer os muestro el paso a paso.

Taking advantage of the fact that the afternoon is somewhat cloudy, I started sewing and finishing these panties. I will be giving them as a gift to a friend who of course has a daughter. I made them with a waistband of the same fabric which is somewhat soft and so it doesn't bother the girl at the waist and when using them it is super comfortable. I hope she likes it and I invite you to see that the truth is that I only used a few materials and it is very simple to make. I will show you the step by step.


IMG_20240909_154318_415.jpg

Picsart_24-09-15_13-57-28-321 (1).jpg

Materiales que usé:

Materials i used:

Picsart_24-09-15_13-57-28-321 (1).jpg

  • Trozo de tela
  • Alfileres
  • Hilo
  • Tijeras
  • Adorno de tu preferencia el que más te guste para colocarlo de detalle a un lado de la panti

  • Piece of fabric
  • Pins
  • Thread
  • Scissors
  • Ornament of your choice, the one you like the most, to place as a detail on one side of the panty

Picsart_24-09-15_13-57-28-321 (1).jpg

Pasos a seguir:

Steps to follow:

Picsart_24-09-15_13-57-28-321 (1).jpg

Paso 01

Vamos a estar comenzando mis amigas costureras a sacar y cortar las piezas de la panti boxer o cachetero como ustedes prefieran llamarlo,yo para este he usado una medida de un cachetero pequeño que tenía guardado o bien podrían sacar un patrón de una medida o de otra prenda a la niña que desean hacerle esta panti,bien yo he cortado pieza delantera y de atrás pretina claro un poco más pequeña de la cintura para que le quede ajustada y no estire demasiado,y finalicé cortando la pieza de la entrepierna esta son dos piezas osea doble.

Step 01

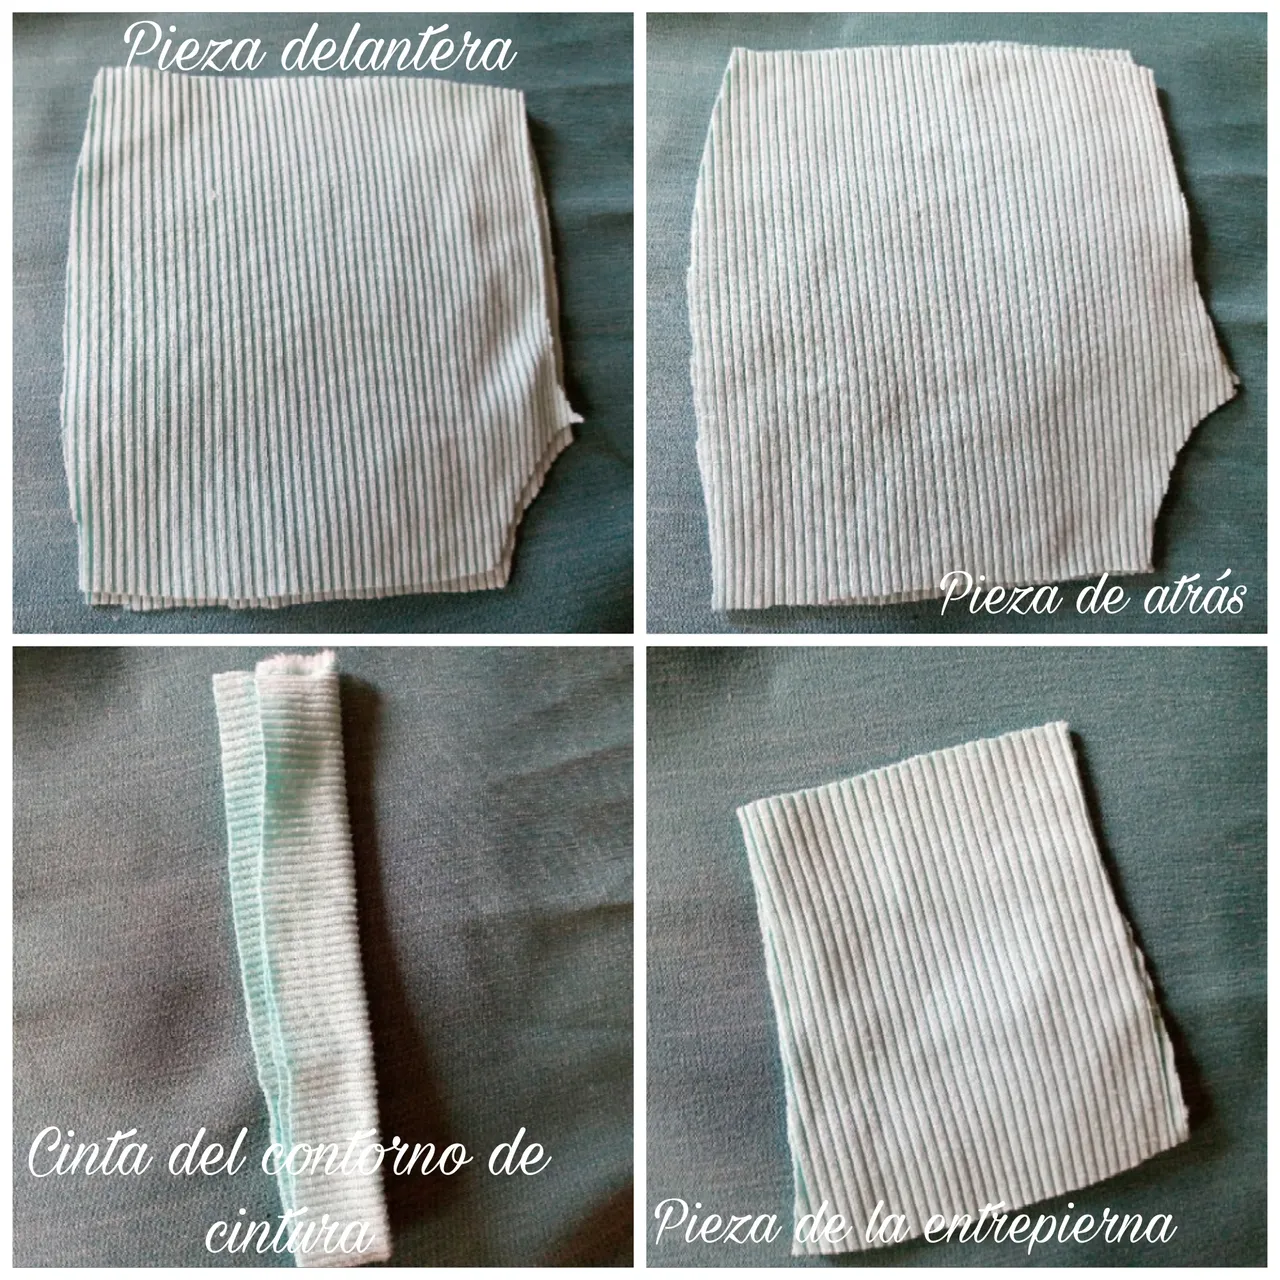
We are going to start, my seamstress friends, to take out and cut the pieces of the boxer panties or thongs as you prefer to call them. For this one I used a measurement of a small thong that I had saved, or you could take out a pattern of a size or another garment for the girl that you want to make these panties for. Well, I cut the front and back pieces, the waistband, of course, a little smaller than the waist so that it fits snugly and doesn't stretch too much, and I finished by cutting the crotch piece, these are two pieces, that is, double.

Picsart_24-09-15_13-05-10-650.jpg


Paso 02

Antes de unir las piezas d ellos laterales yo estaré cosiendo ya mi diseño yo le he colocado como un sticker de tela en forma de perrito adelante para poder coser bien esto con zig zag abajo le he colocado otra tela algo suave y durita así la costura nos va a quedar muy bien en la tela ya que la tela que usé para la panti es algo flexible y estira demasiado, después que cosí el diseño cosí las piezas las uní y asi es como tengo armada mi pieza delantera con nuestro diseño de perrito.

Step 02

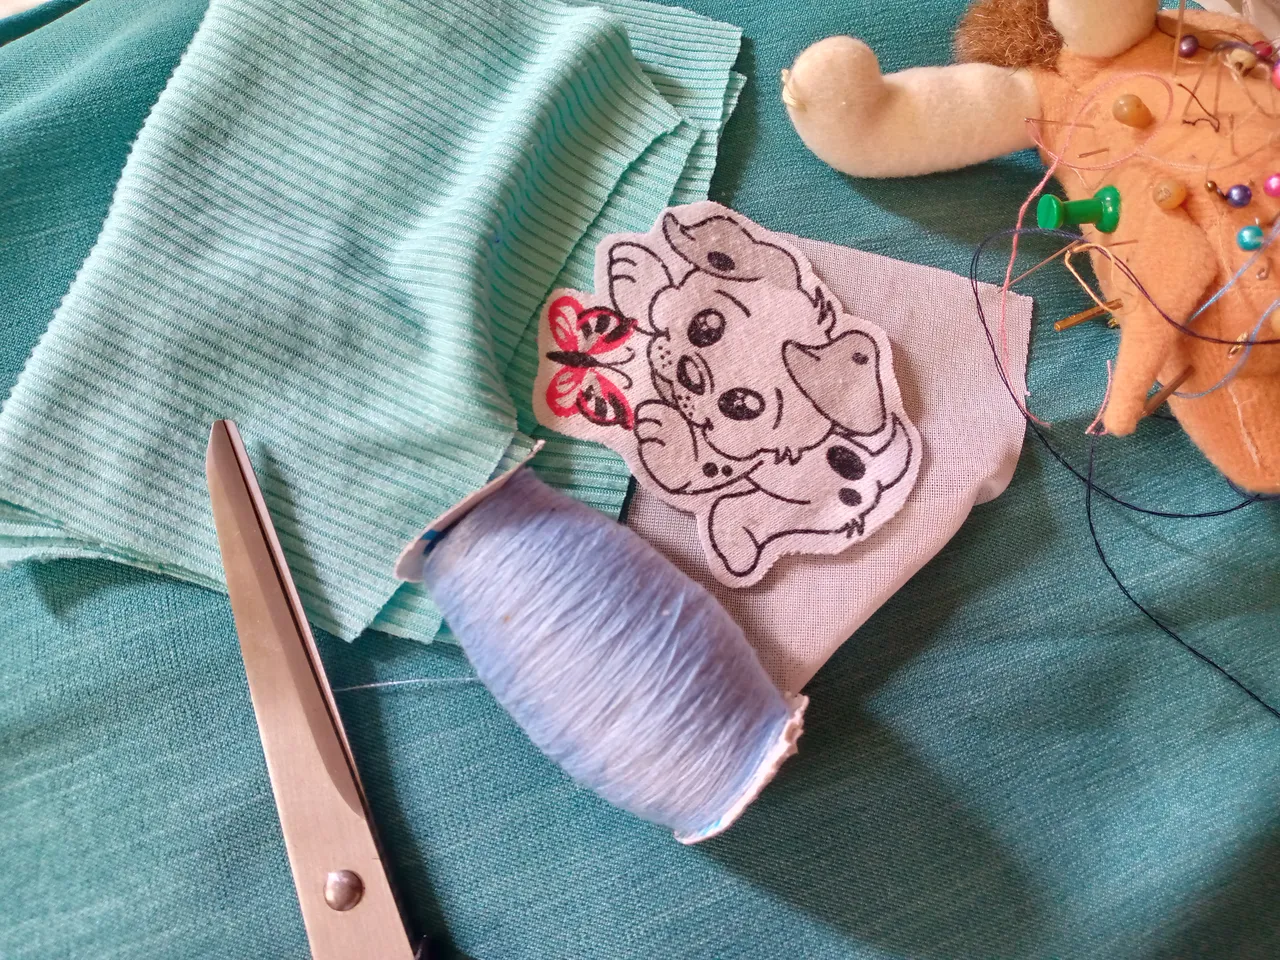
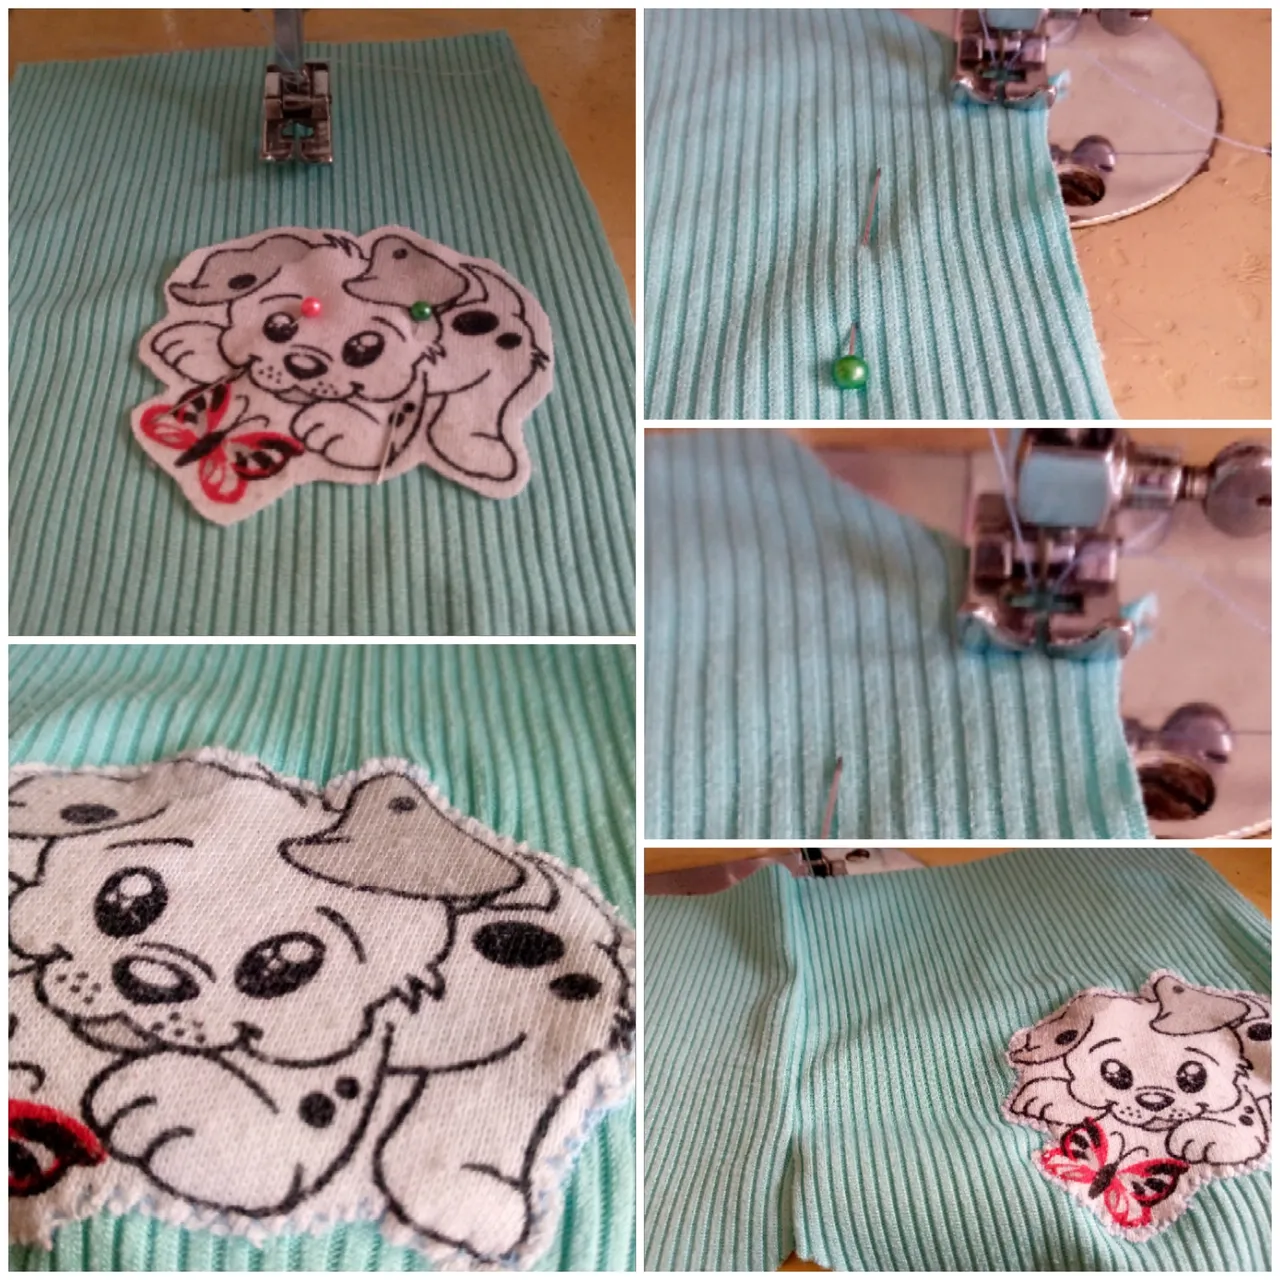
Before joining the side pieces, I will already be sewing my design. I have placed a kind of fabric sticker in the shape of a puppy on the front so I can sew this well with a zigzag stitch. Below it, I have placed another somewhat soft and hard fabric so the seam will look very good on the fabric since the fabric I used for the panties is somewhat flexible and stretches too much. After I sewed the design, I sewed the pieces together and this is how I have my front piece assembled with our puppy design.

Picsart_24-09-15_13-08-30-422.jpg


Paso 03

Seguimos uniendo las otras piezas de la parte de atrás siempre ajustando con un alfiler para que la tela no se nos rueden a la hora de coserla ,luego abajo de una de las dos piezas vamos a estar colocando la pieza de la entre pierna abajo coloco las dos piezas del lado inferior y cosemos con costura recta hacemos lo mismo con la otra pieza la de atras y volteamos asi es como no se nos va a notar la costura de adentro de la entre pierna porque estara cosida por dentro.

Step 03

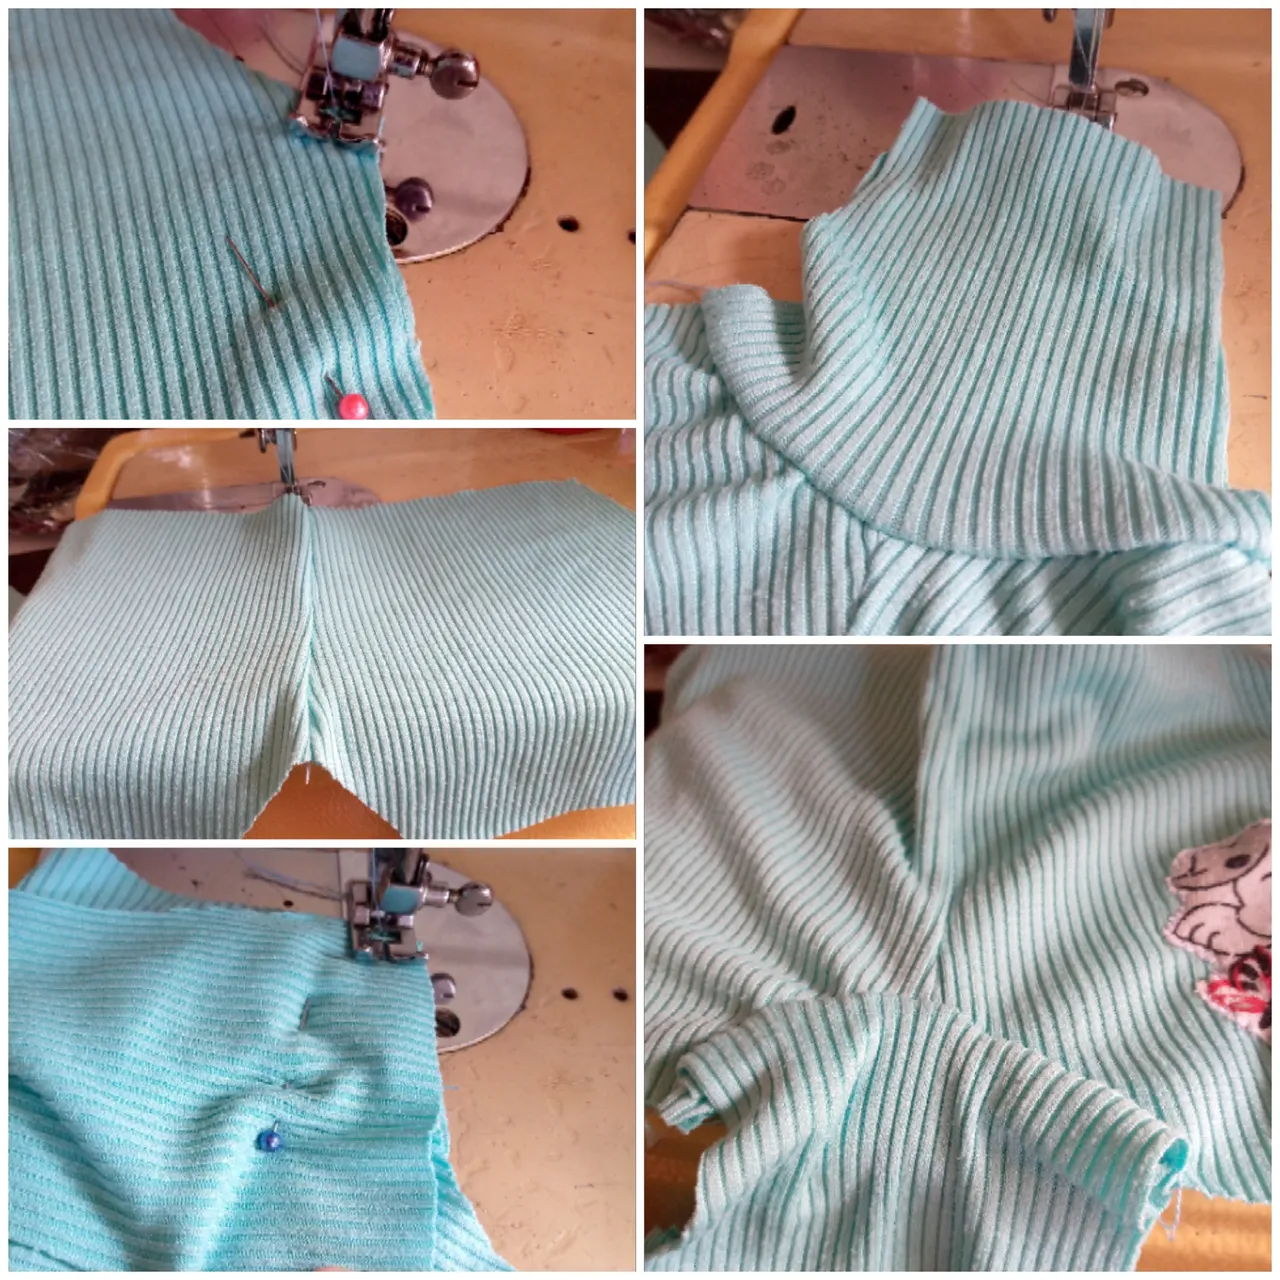
We continue joining the other pieces of the back, always adjusting with a pin so that the fabric does not roll when sewing it, then below one of the two pieces we will be placing the piece of the crotch below. I place the two pieces on the bottom side and sew with a straight seam. We do the same with the other piece, the back one, and turn it over. This is how the seam on the inside of the crotch will not be noticeable because it will be sewn on the inside.

Picsart_24-09-15_13-10-37-873.jpg


Paso 04

Ahora sí estaremos uniendo la pieza delantera con la de atrás a los costados ,pasamos costura recta y por supuesto nuestro zig zag para luego hacer un pequeño dobladillo en la parte de la pierna y así sellar con costura ésta parte.

Step 04

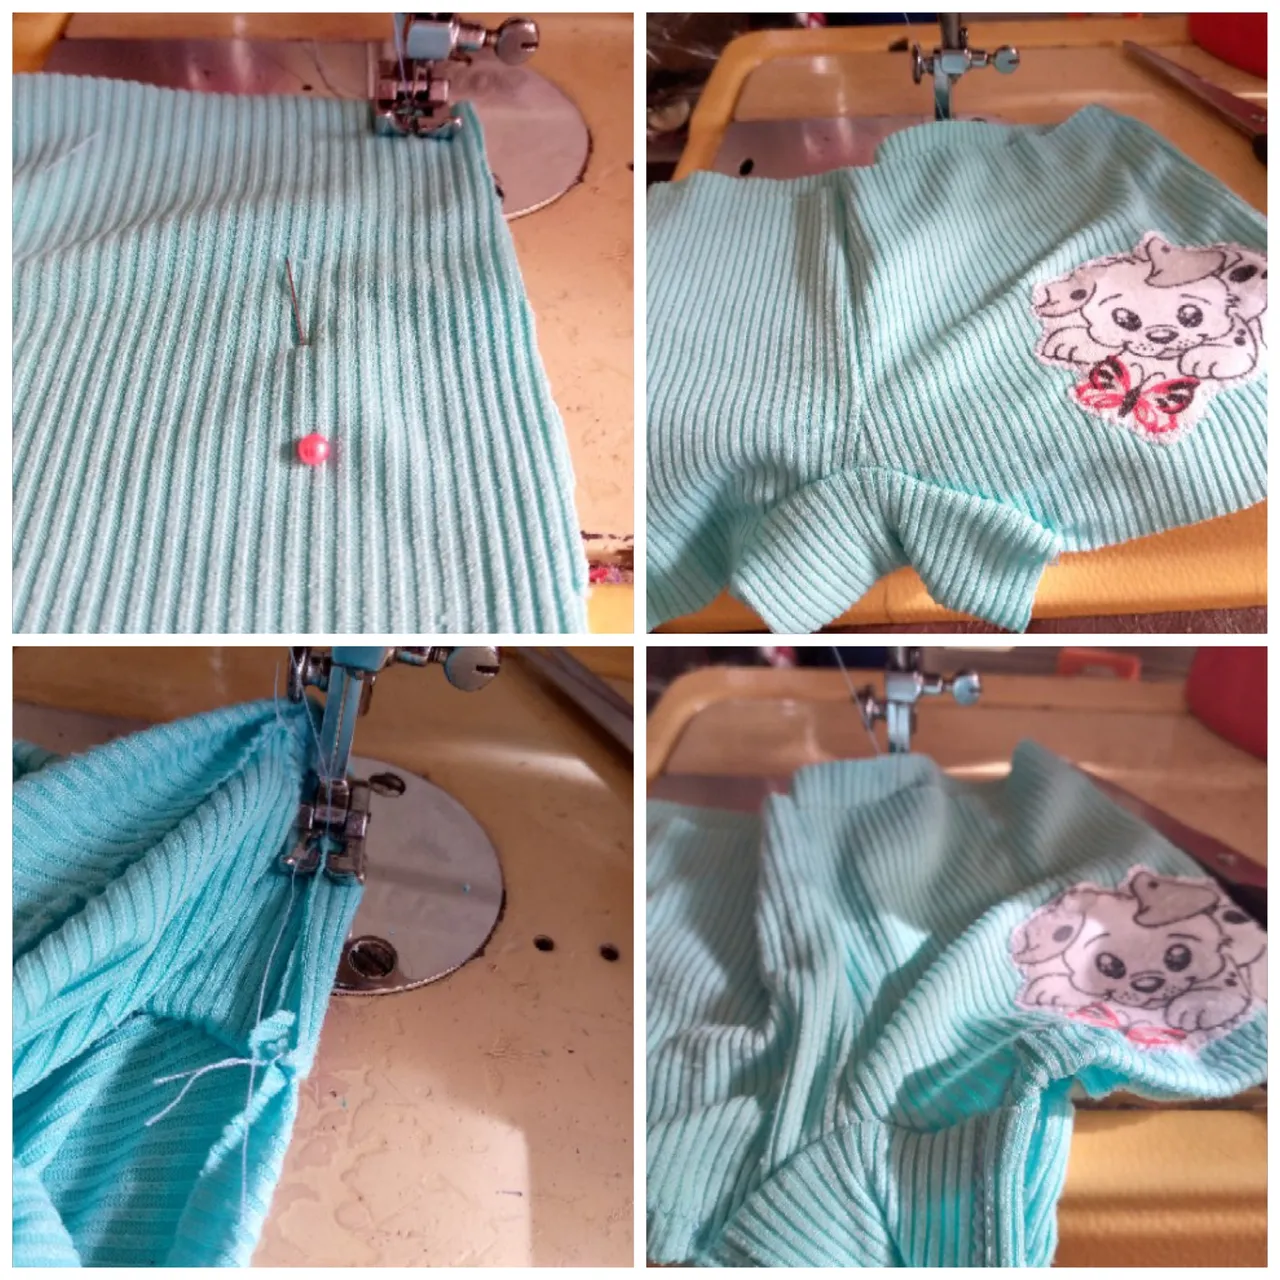
Now we will be joining the front piece with the back piece at the sides, we will sew a straight stitch and of course our zig zag to then make a small hem on the leg part and thus seal this part with a seam.

Picsart_24-09-15_13-12-09-137.jpg


Paso 05

Finalizamos uniendo los extremos de la pretina para coserla con costura recta y doblarla,cosemos por todo el borde estirando muy bien la misma y coser todo el borde la pretina a la panti rematamos con zig zag está parte para que al estirar la panti no se nos rompa el hilo,de esta forma acabamos.

Step 05

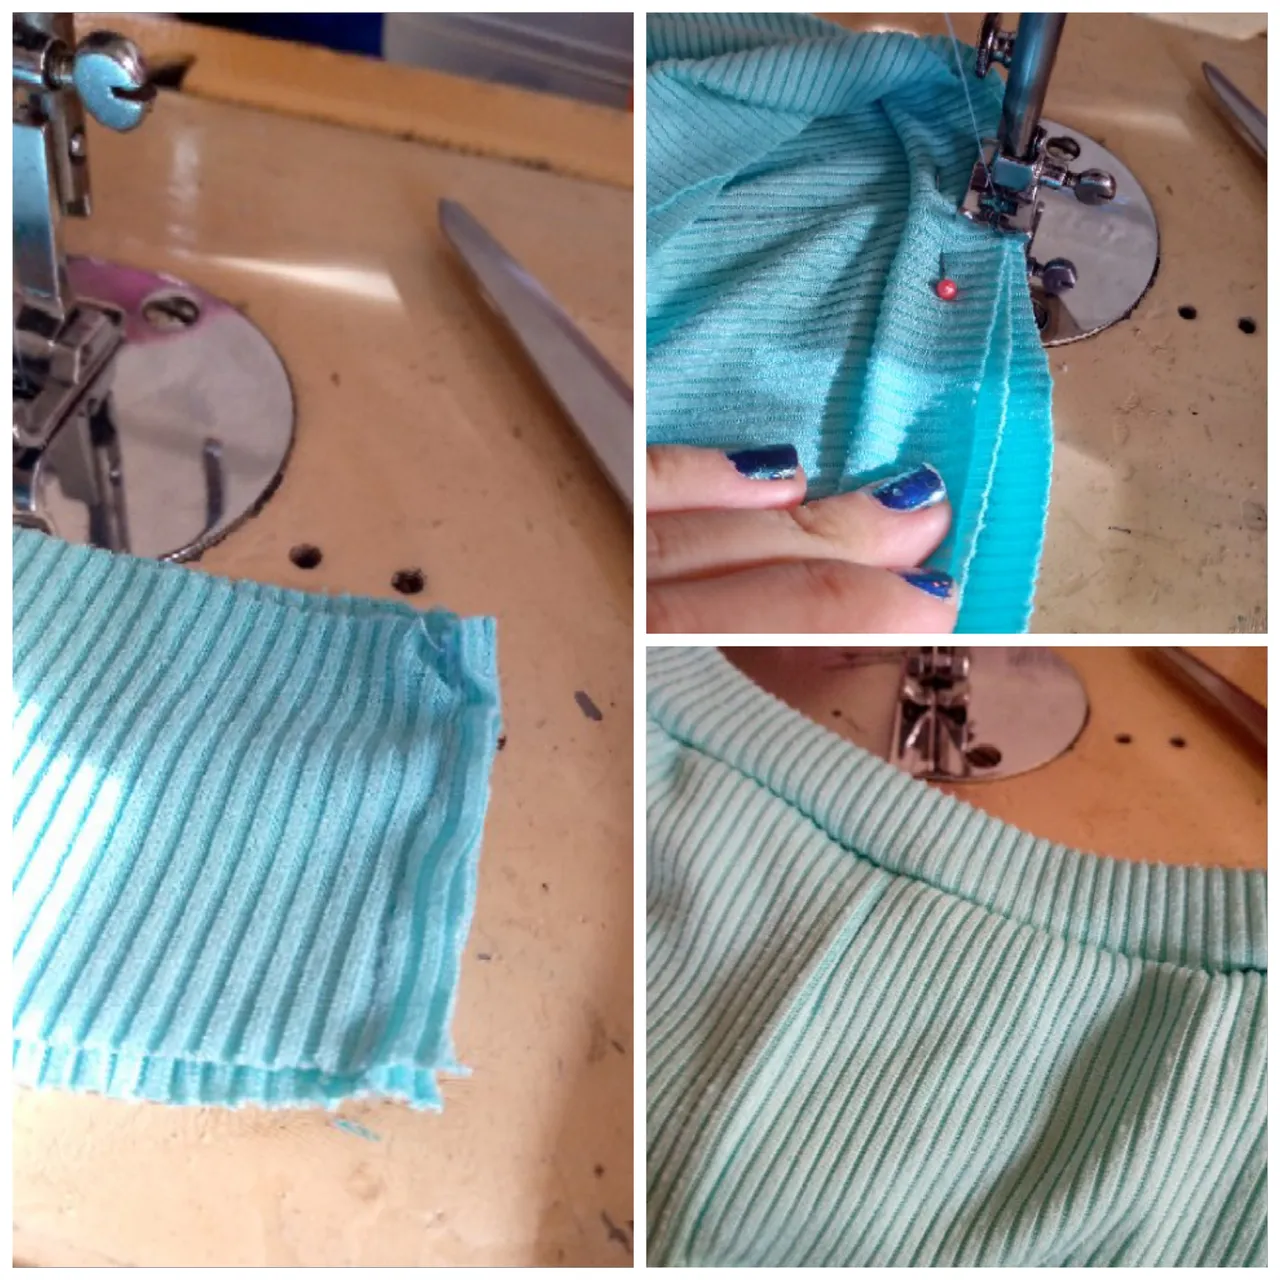
We finish by joining the ends of the waistband to sew it with a straight seam and fold it, we sew along the entire edge stretching it very well and sew the entire edge of the waistband to the panty. We finish this part with a zig zag so that when stretching the panty the thread does not break, this way we finish.

Picsart_24-09-15_13-13-05-902.jpg


Picsart_24-09-15_13-57-28-321 (1).jpg

Resultado:

Result:

Picsart_24-09-15_13-57-28-321 (1).jpg

Cuando terminemos la panti para mejor acabado podríamos planchar la pieza siempre hago esto cuando realizo cualquier tipo de ropa ya que se ve muy bien,aquí he realizado otra panti boxer de un color azul más oscuro me encanta como ha quedado con estos diseños de perritos se ven bien lindas listas para usarlas y para que la niña luzca muy hermosa con ellas,espero que a ustedes les haya gustado y nos vemos en otro próximo tutorial los quiero❤️✨🌼.

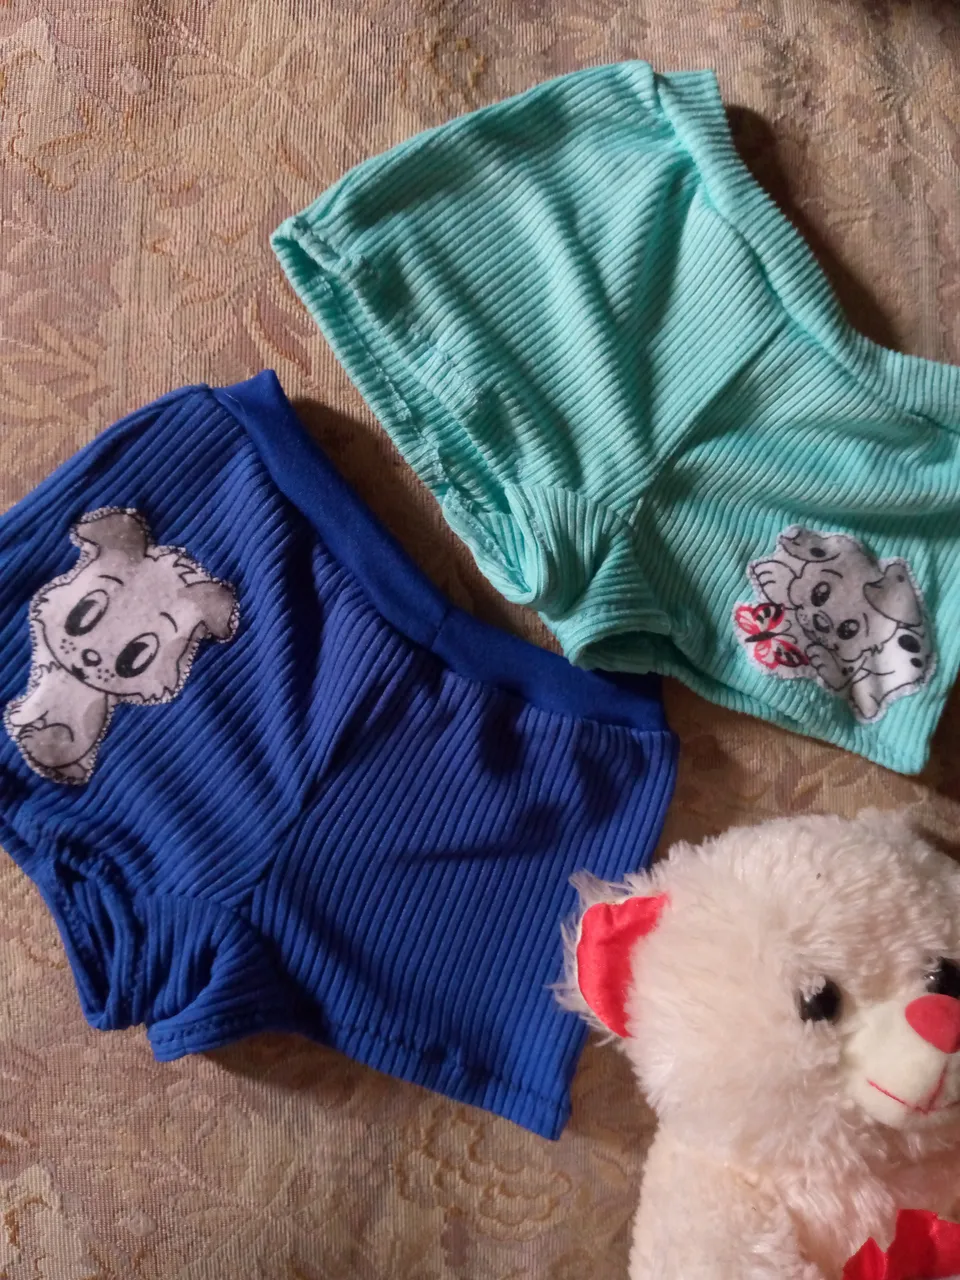
When we finish the panty for a better finish we could iron the piece, I always do this when I make any type of clothing since it looks very good, here I have made another boxer panty in a darker blue color, I love how it turned out with these puppy designs, they look very cute ready to wear and for the girl to look very beautiful in them, I hope you liked it and see you in another next tutorial, I love you❤️✨🌼.

IMG_20240909_164828_475.jpg

Picsart_24-09-15_13-57-28-321 (1).jpg

🦋✨Todas las imágenes de esta publicación son de mi autoria ,📱tomadas con mi celular TecnoSpark8C |📸Fotos editadas en PicsArt y Canva. Texto traducido en el traductor de Google.

🦋✨ All the images in this publication are my author ,📱taken with my TecnoSpark8C cell phone |📸Photos edited in PicsArt and Canva. Text translated in Google Translate.


Picsart_24-08-15_13-46-37-839.jpg


H2
H3
H4
3 columns
2 columns
1 column
9 Comments