¡Hola comunidad de Hive! Espero se encuentren bien.
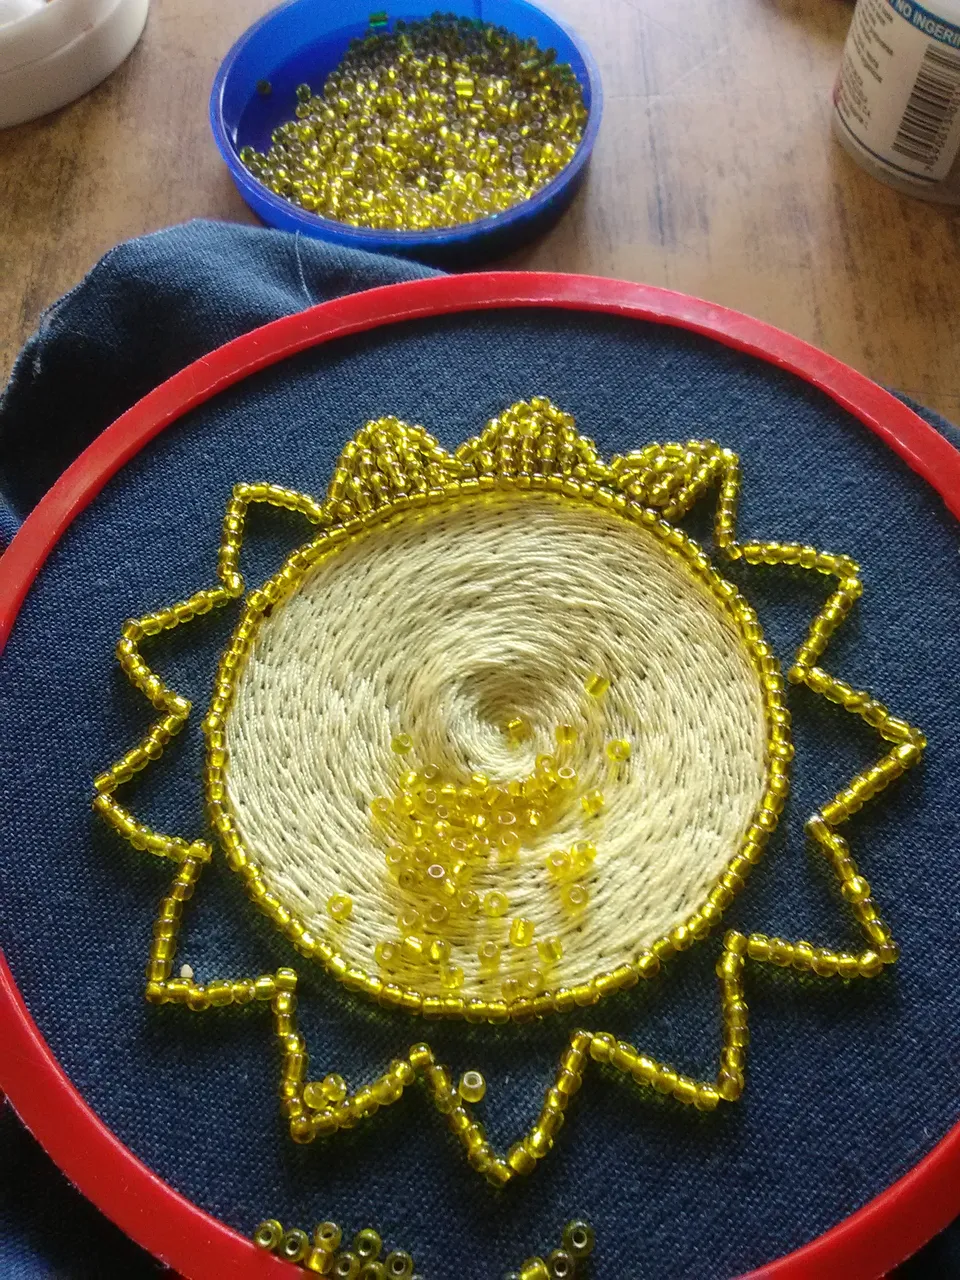
Quiero mostrarles hoy un flor amarilla como muchas de las personas que la han apreciado lo ven, yo lo veo como un sol ya que era la intención.

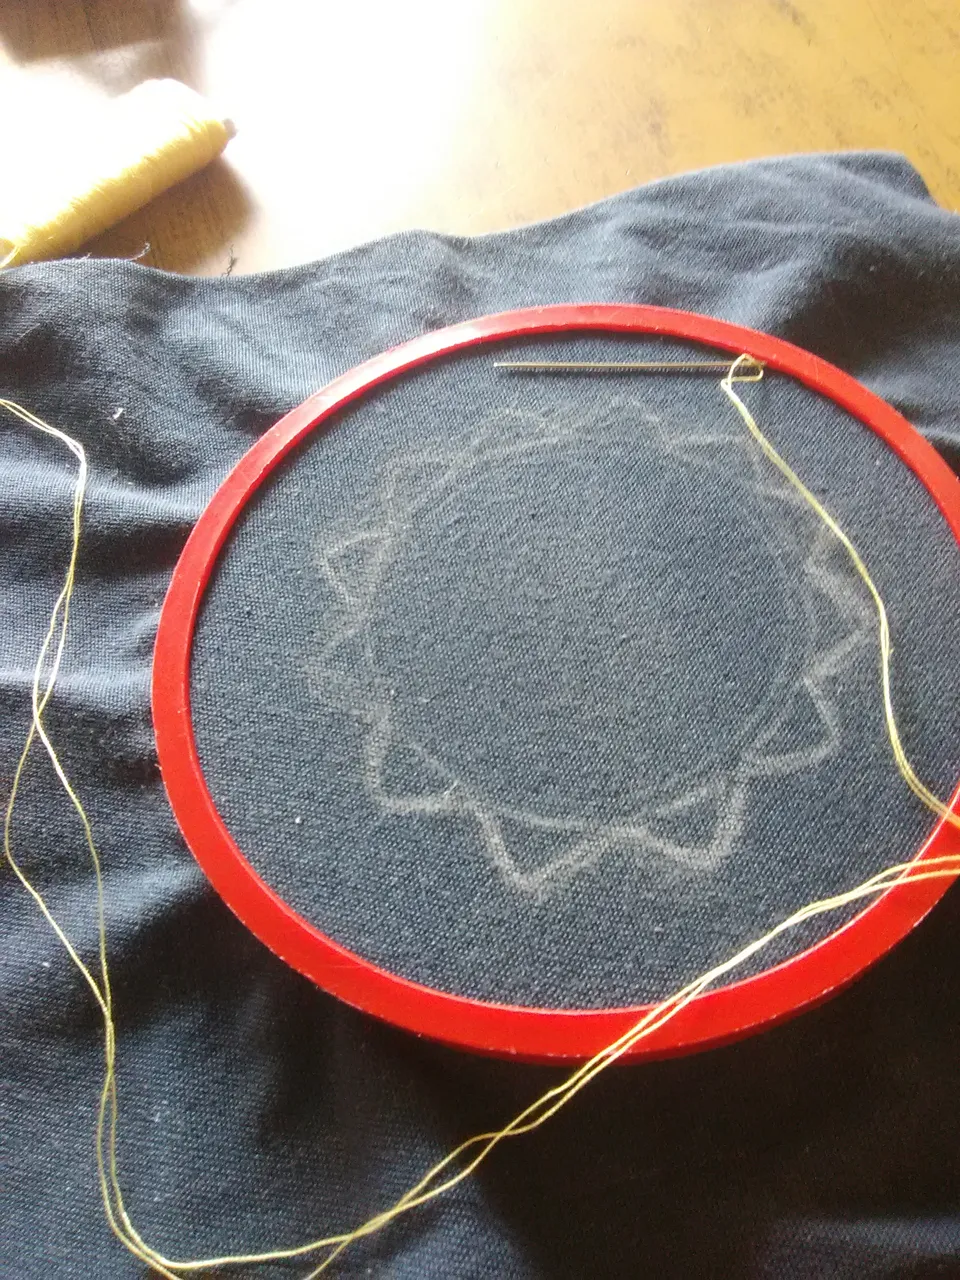
Desde que aprendí a hacer libretas o agendas las he forrado de mil maneras, con papel de regalo, papel kraft, telas de colores o estampadas, y hasta pintadas el mismo cartón de mi propia mano, pero quería algo diferente y que llame la atención, así que tome un retazo de tela a la medida que siempre uso para el forro de las tapas de las agendas y lo prense en un pequeño aro improvisado y comencé a trazar directo en la tela, algo sencillo para no complicarme tanto.
Las medidas del retazo de tela 17cmx25cm aproximadamente, el cual abarque la mitad para el boceto que se centro y trazo con un color blanco.
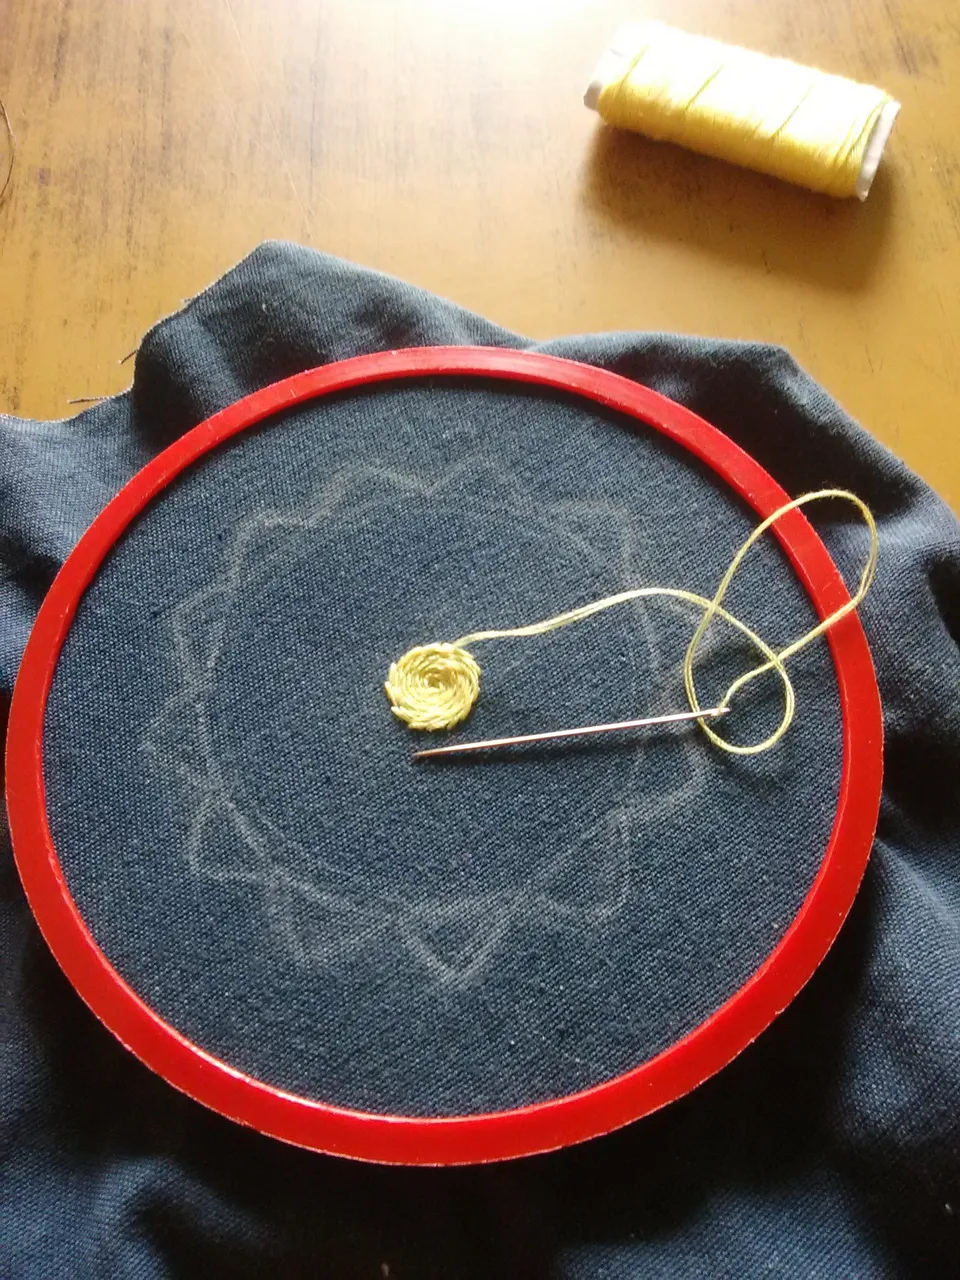
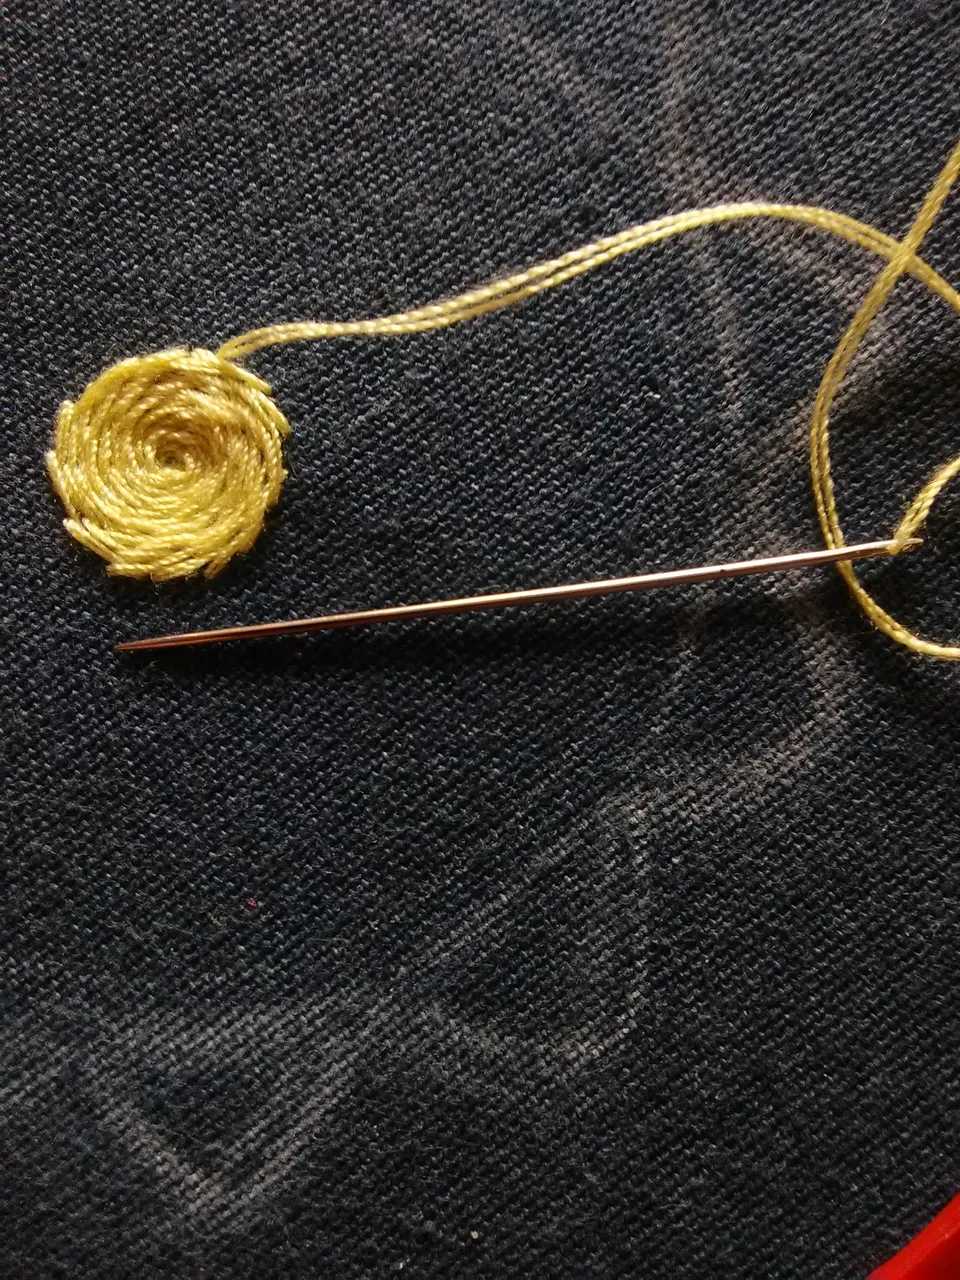
El hilo que uso como ya saben es el de coser común, para el centro amarillo, utilice el punto que veo como una variación, que es el punto de atrás y el punto de tallo, este punto me gusta mucho por los efectos que se pueden lograr, el punto de atrás que es como se conoce, lo utilizo al reverso, lo que quiero decir; es una puntada inversa, ya que la parte superior queda atrás de la tela y la inferior de frente a la tela.
Punto de atrás: a la vista parece puntada de maquina de coser, la cual no lo es, ya que por la parte superior de la tela se ve como una puntada seguida, pero por la parte inferior los puntos son mas largos.
Punto de tallo: es similar a al punto de atrás pero mas abierto en la parte superior de la tela.
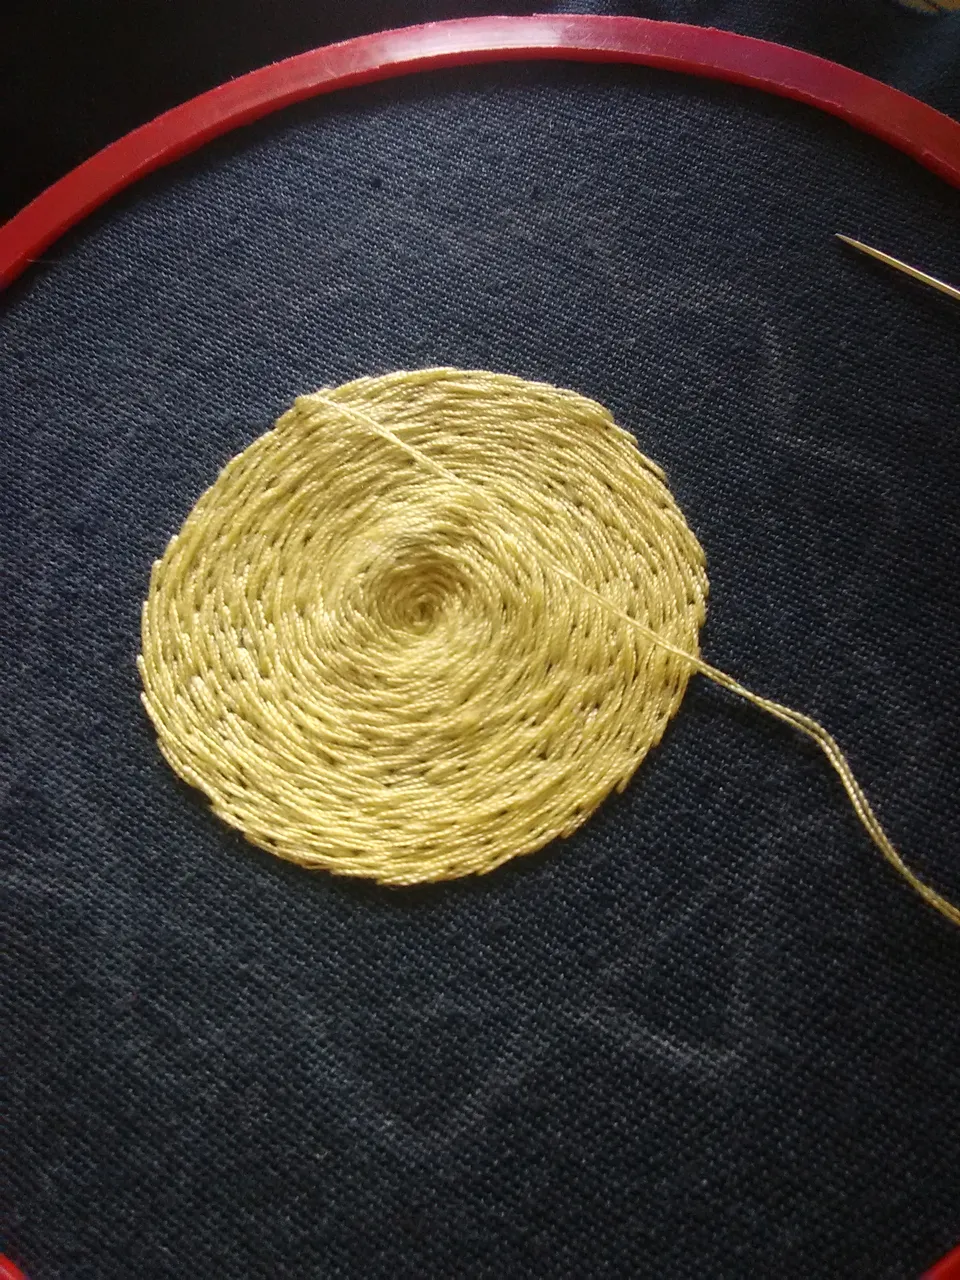
¡EL CIRCULO!
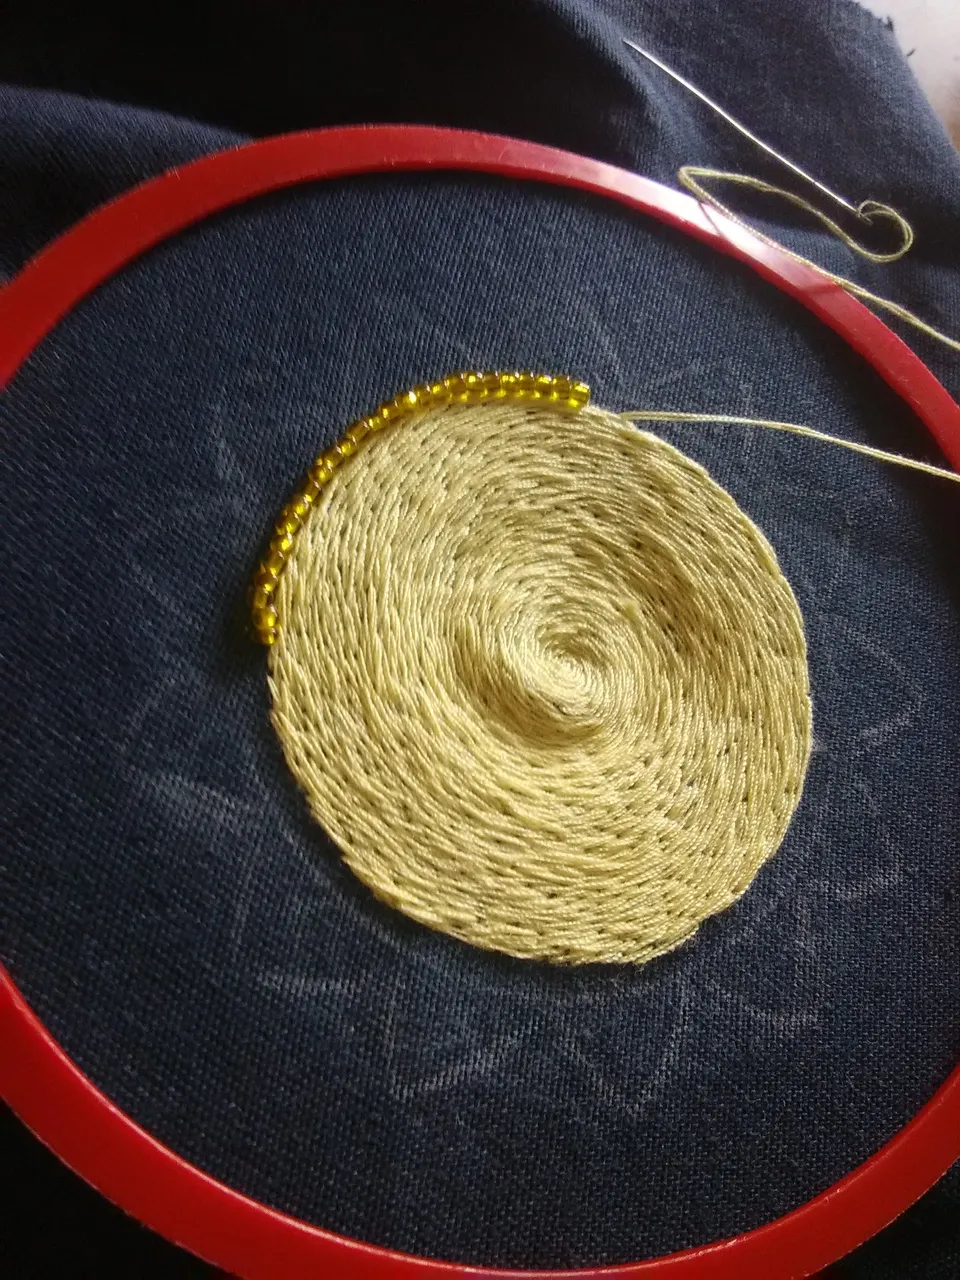
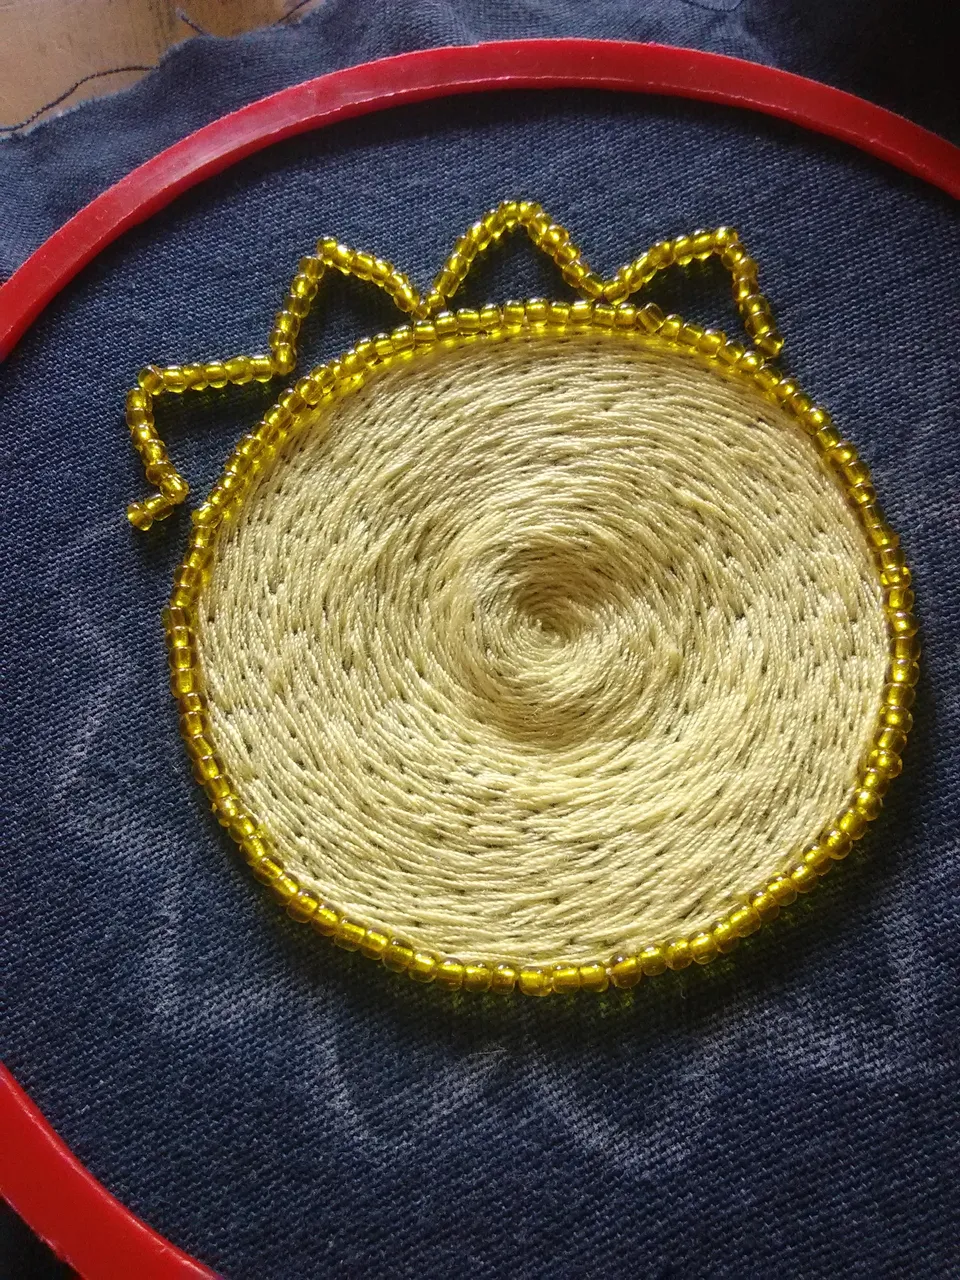
Para los pétalos, o bordes triangulares utilice canutillo amarillo para su relleno, este proceso si me tomo bastante paciencia, ya que algunos no pasaban por la aguja pero me gusto mucho la textura que se le sumo a la imagen, cosía de 3 en 3 esto para que quedaran bien fijos y no flojos, en todo el contorno y los de las columnas de relleno de cada triangulo de igual manera.
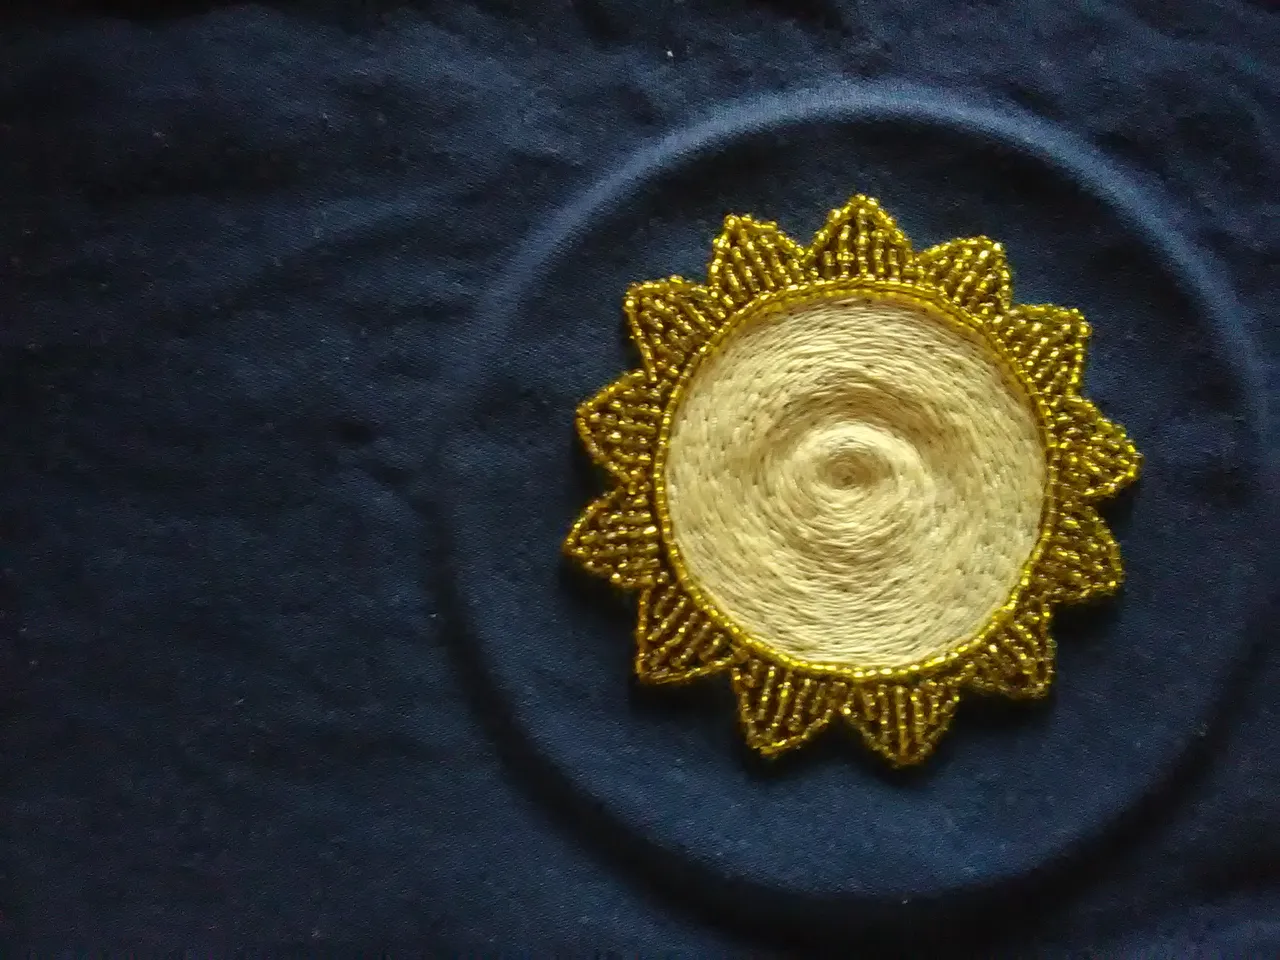
LA FLOR AMARILLA O SOL
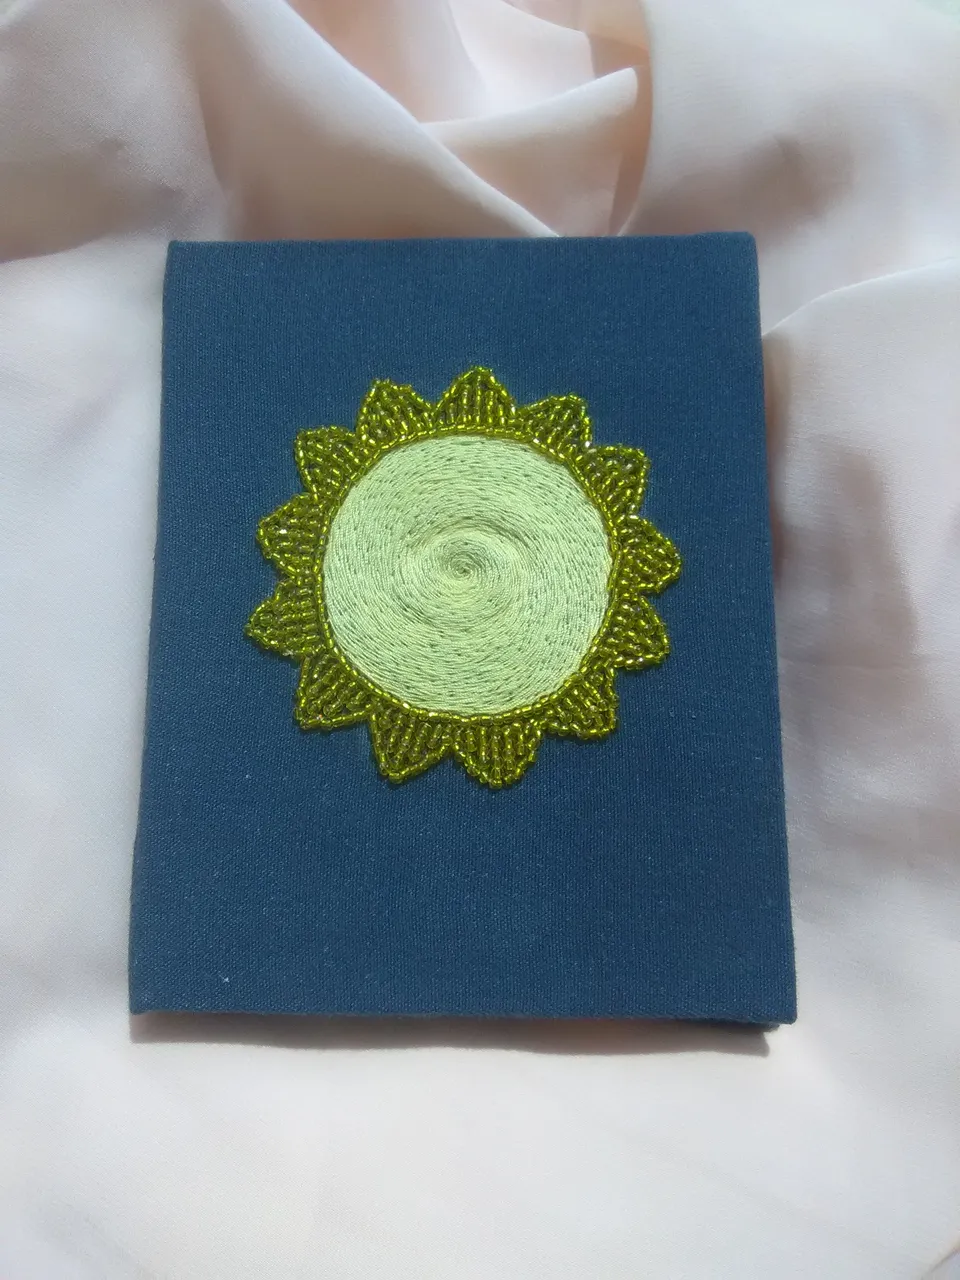
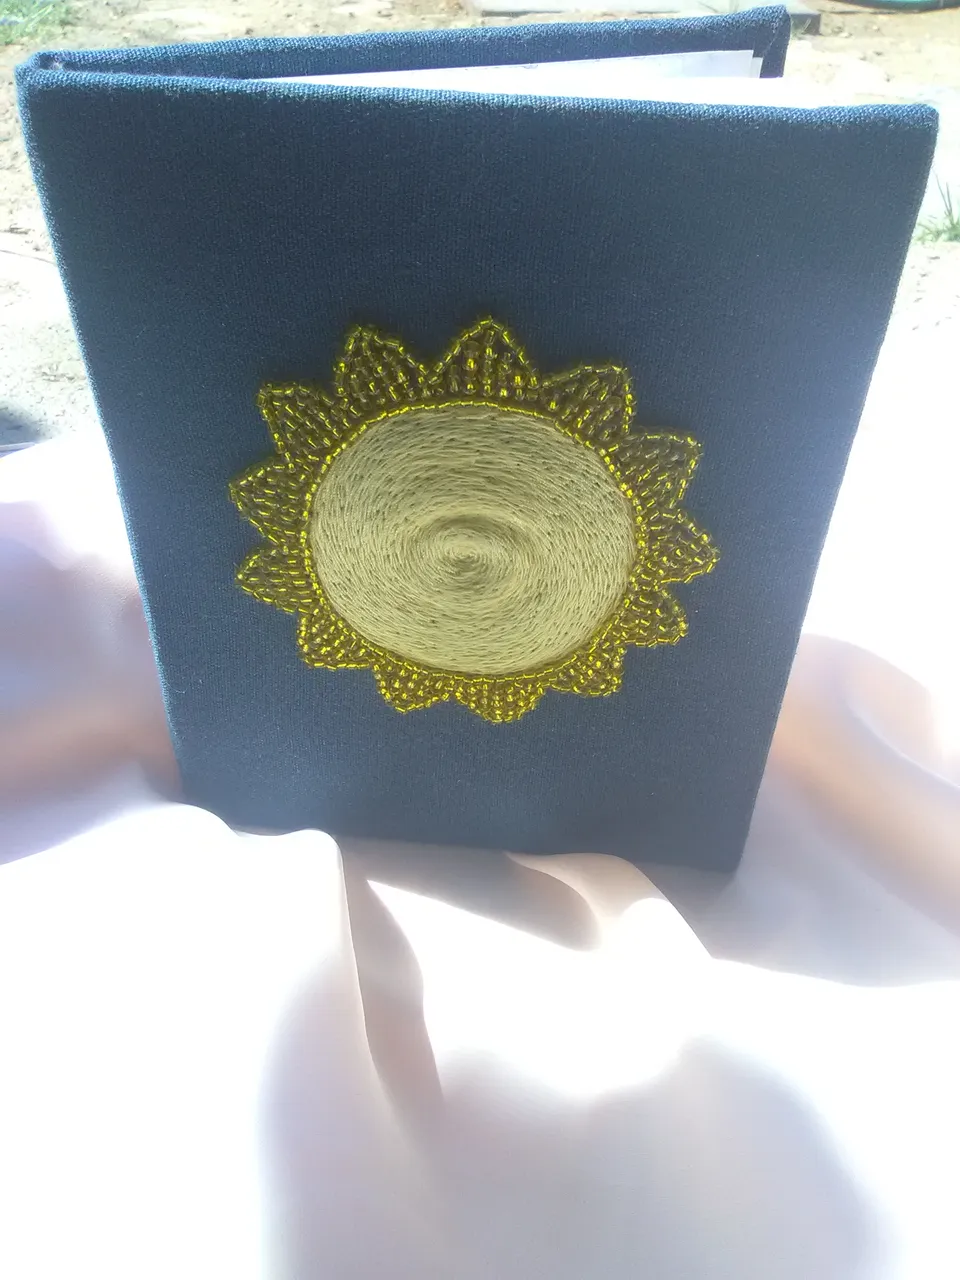
Este es el trabajo final de la agenda, pronto les mostrare como realizo una agenda y la forro, espero les guste y ¿Tu que ves un sol o una flor? espero sus comentarios, hasta un nuevo post!
(ENG)
Hello Hive community! I hope you are well.
I want to show you today a yellow flower as many of the people who have appreciated it see it, I see it as a sun since it was the intention.
Since I learned to make notebooks or diaries I have lined them in a thousand ways, with wrapping paper, kraft paper, colored or patterned fabrics, and even painted the same cardboard with my own hand, but I wanted something different and to attract attention, So I took a piece of fabric to measure that I always use for the lining of the covers of the agendas and press it into a small improvised ring and began to trace directly on the fabric, something simple so as not to complicate so much.
The fabric piece measures approximately 17cmx25cm, take half for the sketch to be centered and trace with a white color.
The thread that I use as you already know is the common sewing thread, for the yellow center, use the point I see as a variation, which is the back point and the stem point, the back point that is how it is known, I use it on the reverse, what I mean; This is a reverse stitch, as the top part is behind the fabric and the bottom part is facing the fabric.
Back stitch: to the eye it looks like a sewing machine stitch, which it is not, since at the top of the fabric it looks like a continuous stitch, but at the bottom the stitches are longer.
Stem stitch: similar to the back stitch but more open at the top of the fabric.
THE CIRCLE!
For the petals, or triangular edges, use yellow canutillo for its filling, this process if I take a lot of patience, since some did not go through the needle but I really liked the texture that was added to the image, I sewed 3 by 3 this so that they were well fixed and not loose, around the contour and those of the filling columns of each triangle in the same way.
THE YELLOW FLOWER OR SUN
This is the final work of the agenda, soon I will show you how I make an agenda and cover it, I hope you like it and what do you see a sun or a flower? I await your comments, until a new post!