
Captura de Pantalla

Saludos #Linuxeros, miembros de la comunidad de #Linux&SoftwareLibre y toda la comunidad de #Linux en #Hive, bienvenidos a un nuevo post de #ViernesDeEscritorio. Hoy estoy presentando el escritorio de Linux Mint 22 "Wilma" con escritorio Cinnamon, y quiero hablarles de cómo poner la interfaz gráfica de Photoshop en nuestro querido editor de imágenes Gimp.
Introducción:
En estos días estaba con una amiga, que tenía problemas con Windows, y la convencí para que usara #Linux, y efectivamente lo hizo. Y por supuesto comenzó los programas de #Linux.
Ella normalmente trabaja mucho con imágenes y aunque le gustó Gimp como editor, se sentía muy incómoda con su interfaz gráfica, así que le instalé un tema, que se llama PhotoGimp, y ahora usa Gimp, con la interfaz gráfica de Photoshop.
Qué es PhotoGimp:
PhotoGIMP es un complemento gratuito que modifica la interfaz de usuario de GIMP a través de un tema, para que se asemeje a la de Photoshop, y también ajusta los atajos predeterminados de GIMP para que sean los mismos que los de Photoshop. Este complemento ayuda a los usuarios experimentados de Photoshop a hacer la transición a GIMP sin necesidad de reaprender todos los atajos y herramientas que suelen utilizar.
¿Cómo instalar PhotoGimp? :
Cunado hablamos de instalar PhotoGimp, tenemos dos opciones, una que se hace un poco complicada, en la cual debemos copiar los archivos del tema a una carpeta, la cual se puede realizar a través de este tutorial.
Y una mucho más sencilla, que se realiza a través de nuestra querida terminal, utilizando un script, realizado por los compañeros de la comunidad "Locos por Linux" que es la que haremos en este post.
Para poder realizar esta instalación del tema, lo más recomendable es desinstalar Gimp, después debemos instalar un editor Gimp, que sea de la versión 2.10 en adelante, ya que el tema PhotoGimp, no sirve para las versiones anteriores.
¿Pasos para instalar PhotoGimp? :
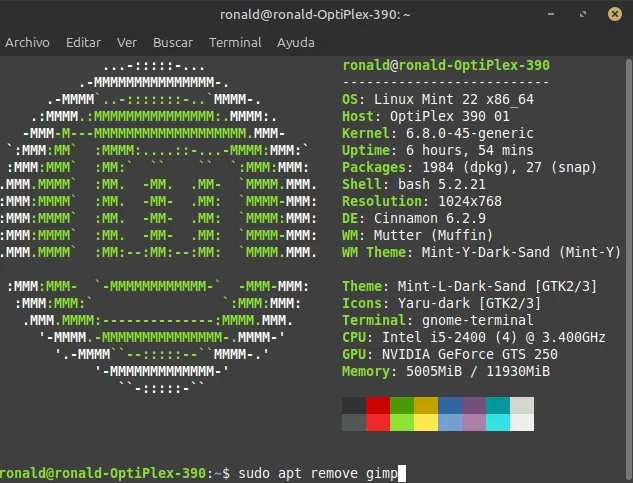
1- Desinstalamos Gimp de nuestro equipo, para hacerlo, abrimos nuestra terminal de manera gráfica o aplicando las teclas Ctrl +Alt +T. Después de abrir nuestro terminal actualizamos colocando: ~ sudo apt update.
Después de actualizar nuestros repositorios, desinstalamos Gimp, usando el comando ~sudo apt remove gimp.
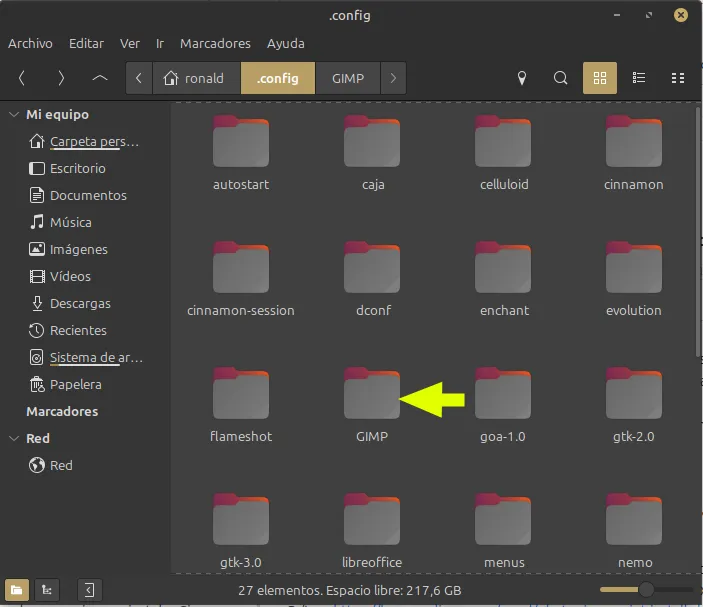
Después de desinstalar el programa, nos vamos a nuestra carpeta personal, aplicamos las teclas Ctrl + h, o buscamos las carpetas ocultas de manera gráfica, y cuando estemos en las carpetas ocultas, buscamos la carpeta Gimp y la borramos. Si la instalamos Gimp con Faltpack o Snap, la carpeta de Gimp, debe estar en la carpeta: $ Home/.config/Gimp, la bucamos y la borramos.
Captura de Pantalla
Captura de Pantalla
2- Después de desinstalar Gimp, abrimos nuestra terminal, y colocamos: ~ sudo apt install gimp. Después de colocar el comando, nos va a pedir nuestra clave, la colocamos, y después de hacerlo, se comienza a instalar Gimp.
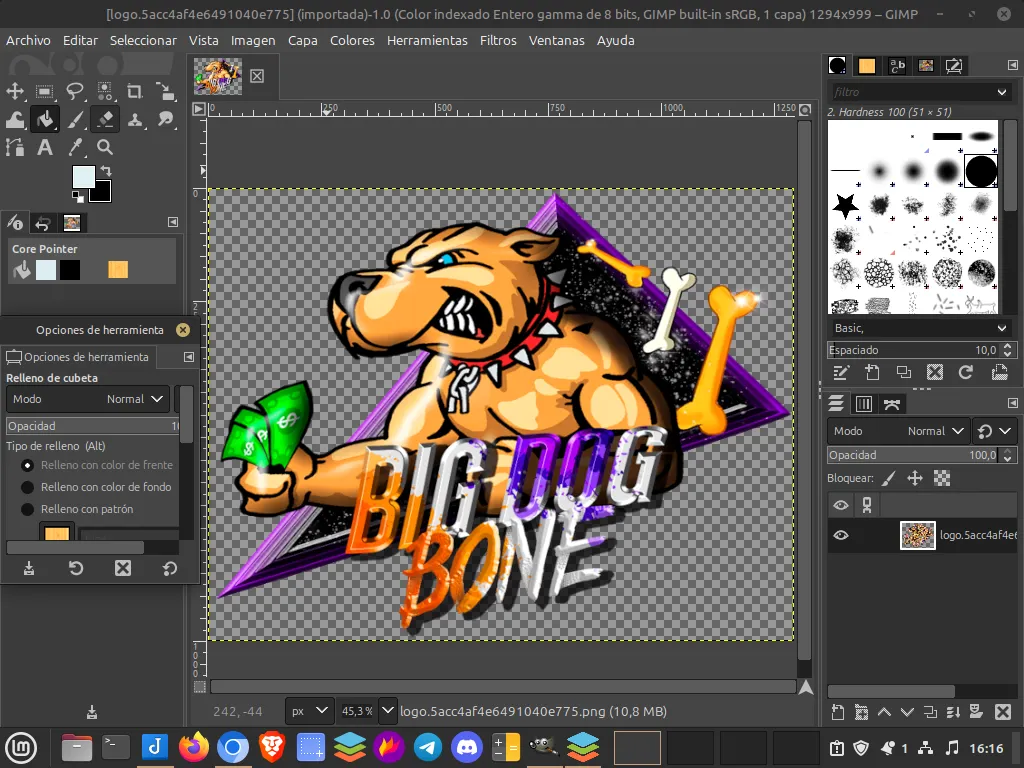
Una vez instalado el Gimp, debemos abrir el programa, ya que si no lo hacemos, la instalación no va a funcionar.
Captura de Pantalla
3- Abrir el programa Gimp.
Captura de Pantalla
Explico la razón, por la cual debemos hacerlo. Cuando nosotros instalamos Gimp, el programa se instala, pero no genera su carpeta, hasta que lo abrimos la primera vez, ver imagen.

Captura de Pantalla
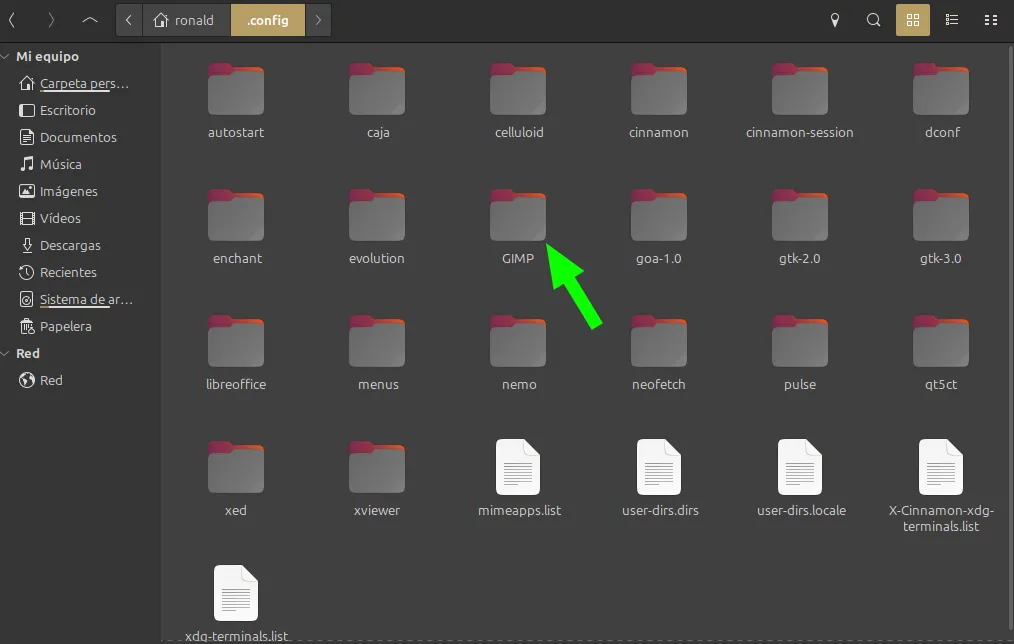
Ahora cuando abrimos el programa la primera vez, él crea su carpeta de programa, y es ahí donde se va a instalar el tema a través del script.
Captura de Pantalla
Ahora, sabemos, la razón por la cual, no se podrá hacer la instalación de manera adecuada, si no abrimos el programa primero.
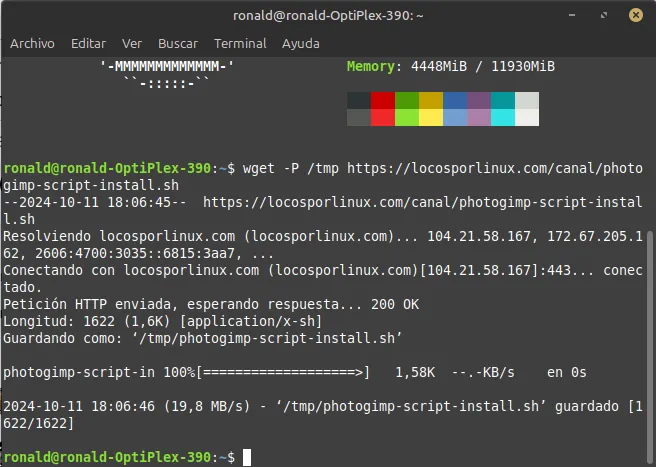
4- Abrimos la terminal y colocamos el siguiente comando que es parte del script, hecho por los compañeros de la comunidad "Locos por Linux" wget -P /tmp https://locosporlinux.com/canal/photogimp-script-install.sh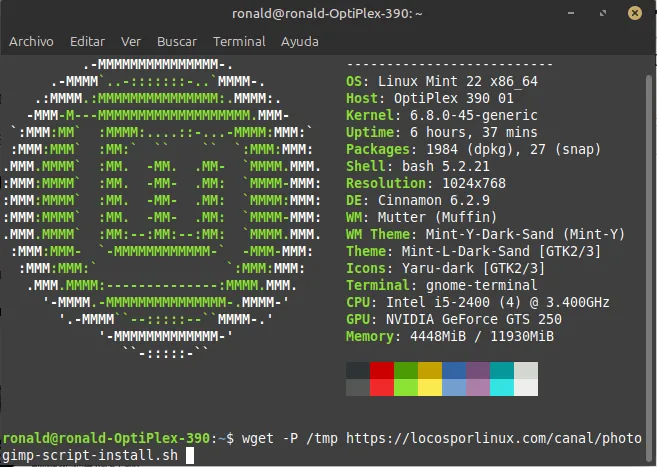
Captura de Pantalla
Captura de Pantalla
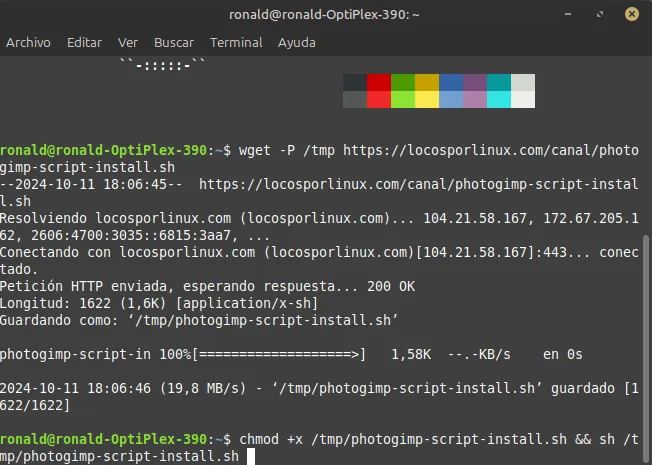
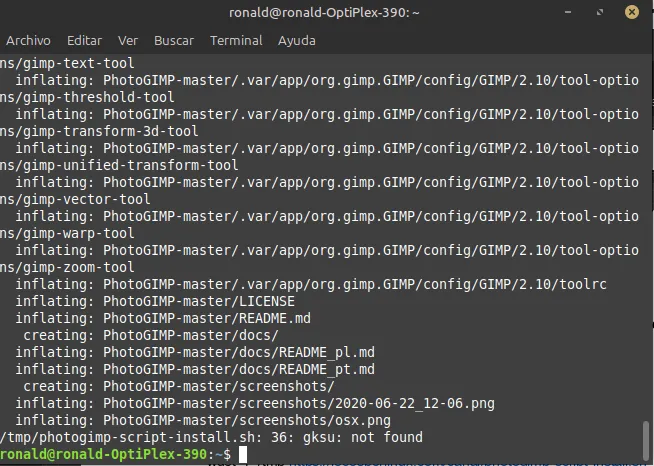
5- En la terminal, colocamos el resto del scrip, que es: ~ chmod +x /tmp/photogimp-script-install.sh && sh /tmp/photogimp-script-install.sh
Captura de Pantalla
Captura de Pantalla
Sé que el script, se puede hacer todo de manera directa, pero la primera vez que lo hice compilado, me dio error, luego lo hice, de la forma que indico en el post y quedó perfecto.
Después de instalar el script, abrimos el programa Gimp y tenemos el tema totalmente funcional de PhotoGimp, en nuestro programa Gimp, listo para ser usado.

Captura de Pantalla
Espero que este tutorial, sea de interés y beneficio para todos los lectores del post y para los miembros de la comunidad.
Muchas gracias por leerme.
Páginas consultadas y Repositorios:

To read English
Screenshot
Greetings #Linuxeros, members of the #Linux&Free Software community and the entire #Linux community in #Hive, welcome to a new post of #ViernesDeEscritorio. Today I'm presenting the Linux Mint 22 desktop "Wilma" with Cinnamon desktop, and I want to tell you about how to put the Photoshop GUI in our beloved Gimp image editor.
Introduction:
These days I was with a friend, who was having problems with Windows, and I convinced her to use #Linux, and indeed she did. And of course he started the #Linux programs.
She usually works a lot with images and although she liked Gimp as an Gimp editor, she felt very uncomfortable with its graphical interface, so I installed a theme for her, which is called PhotoGimp, and now she uses Gimp, with the Photoshop graphical interface.
What is PhotoGimp:
Photo GIMP is a GIMP plugin that modifies the user interface of GIMP through a theme, so that it resembles that of Photoshop.It also adjusts the default shortcuts of GIMP to be the same as those of Photoshop. This add-on helps experienced Photoshop users to make the transition to GIMP without having to relearn all the shortcuts and tools they usually use.
How to install PhotoGimp? :
When we talk about installing PhotoGimp, we have two options, one that gets a little complicated, in which we have to copy the theme files to a folder, which can be done through this tutorial.
And a much simpler one, which is done through our beloved terminal, using a script, made by the colleagues of the community "Crazy for Linux" which is what we will do in this post.
Gimp is the Gimp editor, which is from version 2.10 onwards, since the PhotoGimp theme is not suitable for previous versions.
Steps to install PhotoGimp? :
1- Uninstall Gimp from our computer, to do so, we open our terminal graphically or by applying the Ctrl +Alt +T keys. After opening our terminal we update by placing: ~ sudo apt update.
Gimp is uninstalled Gimp after updating our repositories, using the ~sudo apt remove gimp command.
After uninstalling the program, we go to our personal folder, apply the Ctrl + h keys, or look for the hidden folders graphically, and when we are in the hidden folders, we look for the Gimp folder and delete it. If we install Gimp with Faltpack or Snap, the Gimp folder should be in the folder: $ Home/.config/Gimp, we dive in and delete it.
Screenshot
Screenshot
2- After uninstalling Gimp, open our terminal, and place: ~ sudo apt install gimp. After placing the command, it will ask us for our key, we place it, and after doing so, Gimp starts to be installed.
Once the Gimp is installed, we must open the program, because if we do not do so, the installation will not work.
Screenshot
3- Open the Gimp program.
Screenshot
I explain the reason, why we should do it. When we install Gimp, the program is installed, but it does not generate its folder, until we open it the first time, see image.
Screenshot
Now when we open the program the first time, it creates its program folder, and that's where the theme is going to be installed through the script.
Screenshot
Now, we know, the reason why, the installation will not be able to be done properly, if we do not open the program first.
4- We open the terminal and place the following command that is part of the script, made by the fellows of the community "Crazy for Linux" wget -P/tmp https://locosporlinux.com/canal/photogimp-script-install.sh
Screenshot
Screenshot
5- In the terminal, we put the rest of the scrip, which is: ~ chmod +x /tmp/photogimp-script-install.sh && sh /tmp/photogimp-script-install.sh
Screenshot
Screenshot
I know that the script, you can do everything directly, but the first time I did it compiled, it gave me error, then I did it, the way I indicate in the post and it was perfect.
After installing the script, we open the Gimp program and we have the fully functional PhotoGimp theme, in our Gimp program, ready to be used.
Screenshot
I hope that this tutorial will be of interest and benefit to all the readers of the post and to the members of the community.
Thank you very much for reading me.
Consulted pages and Repositories: