Hola a todos... ✨
Hola a mis queridos Hivers y a la querida comunidad de Hive NFTGame Latino, me encuentro por acá para sumarme a su Reto semanal Hashkings, después de múltiples invitaciones de los amables miembros de la comunidad, me complace mucho finalmente compartirles un trabajo especialmente para ustedes.
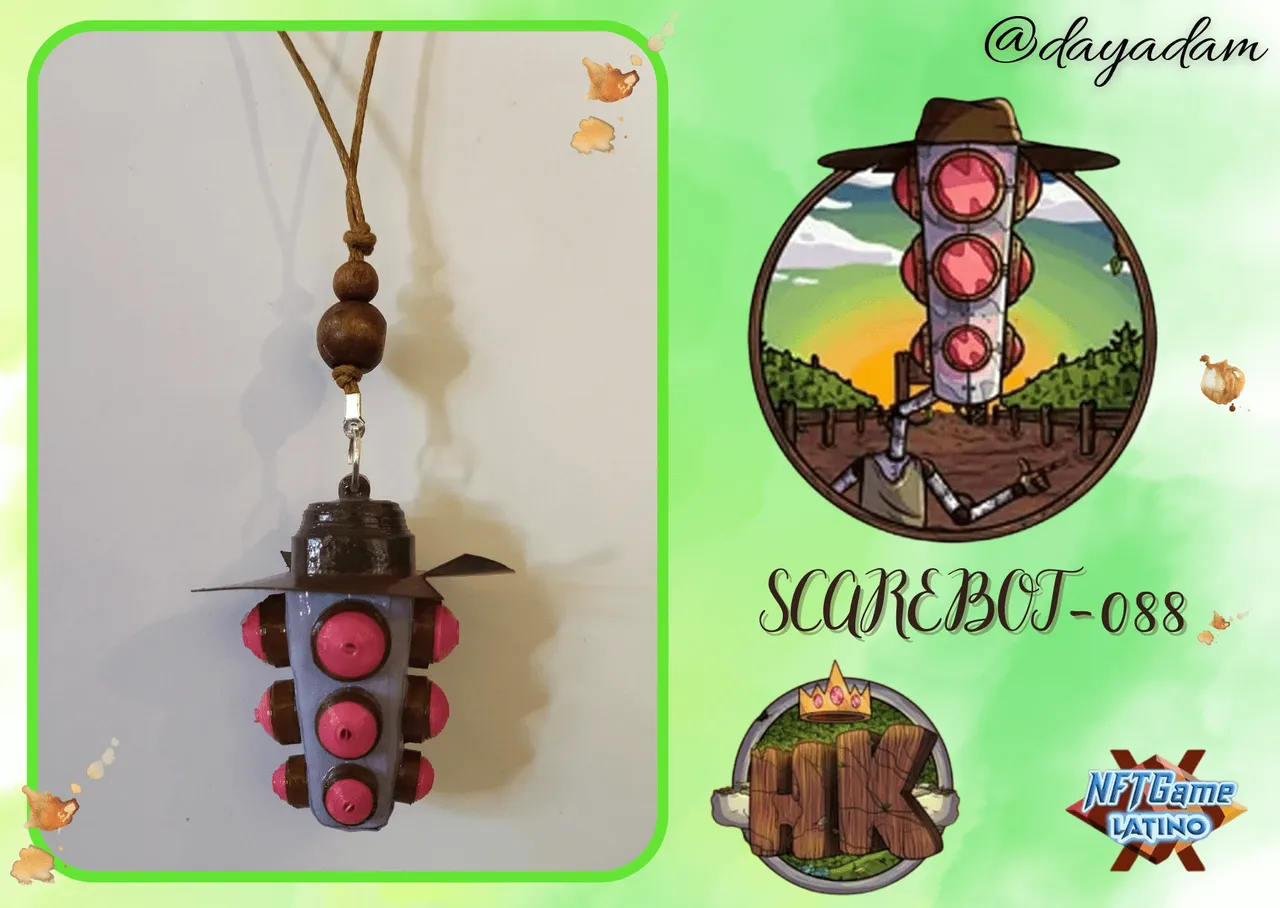
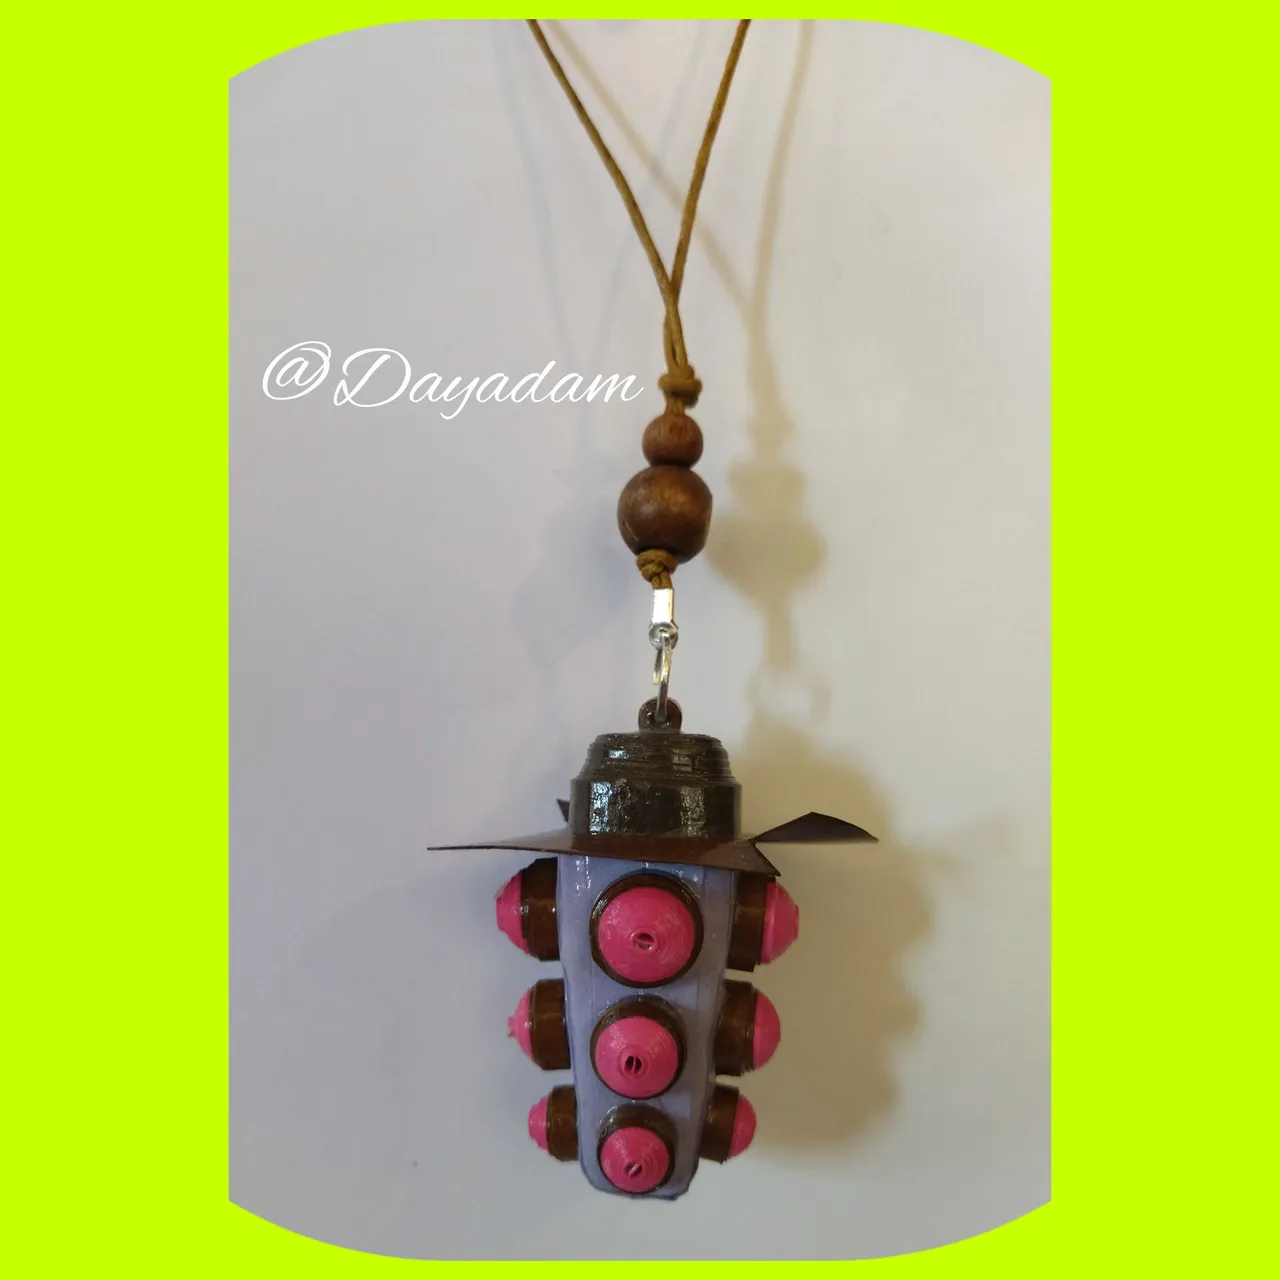
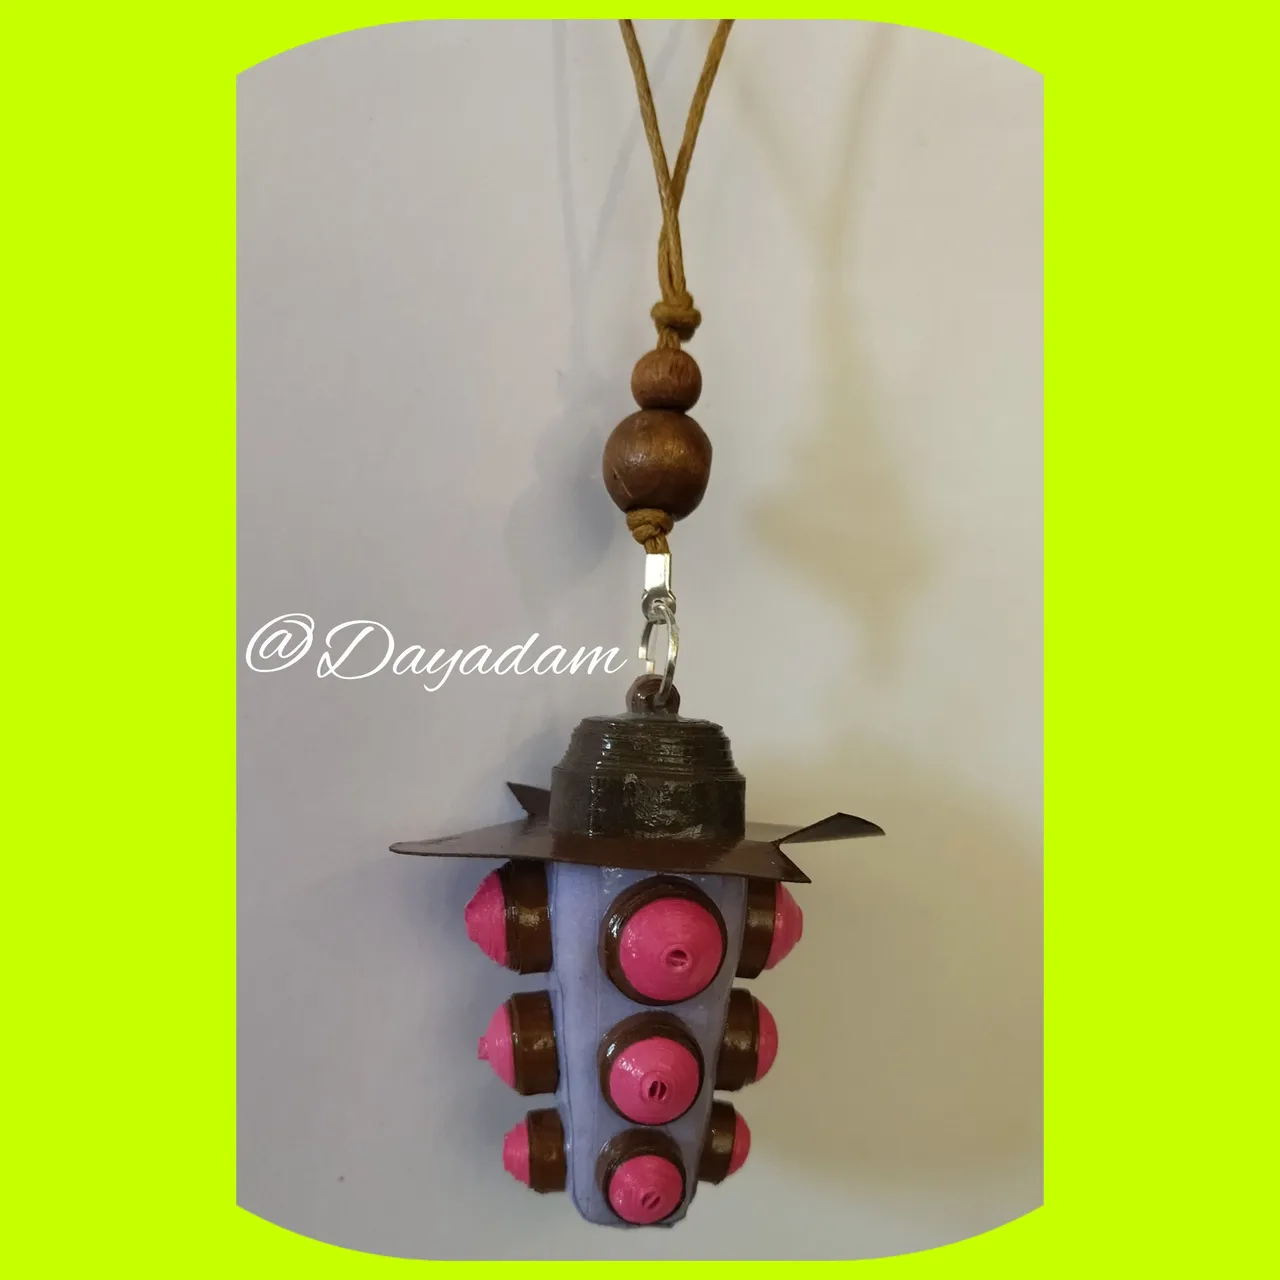
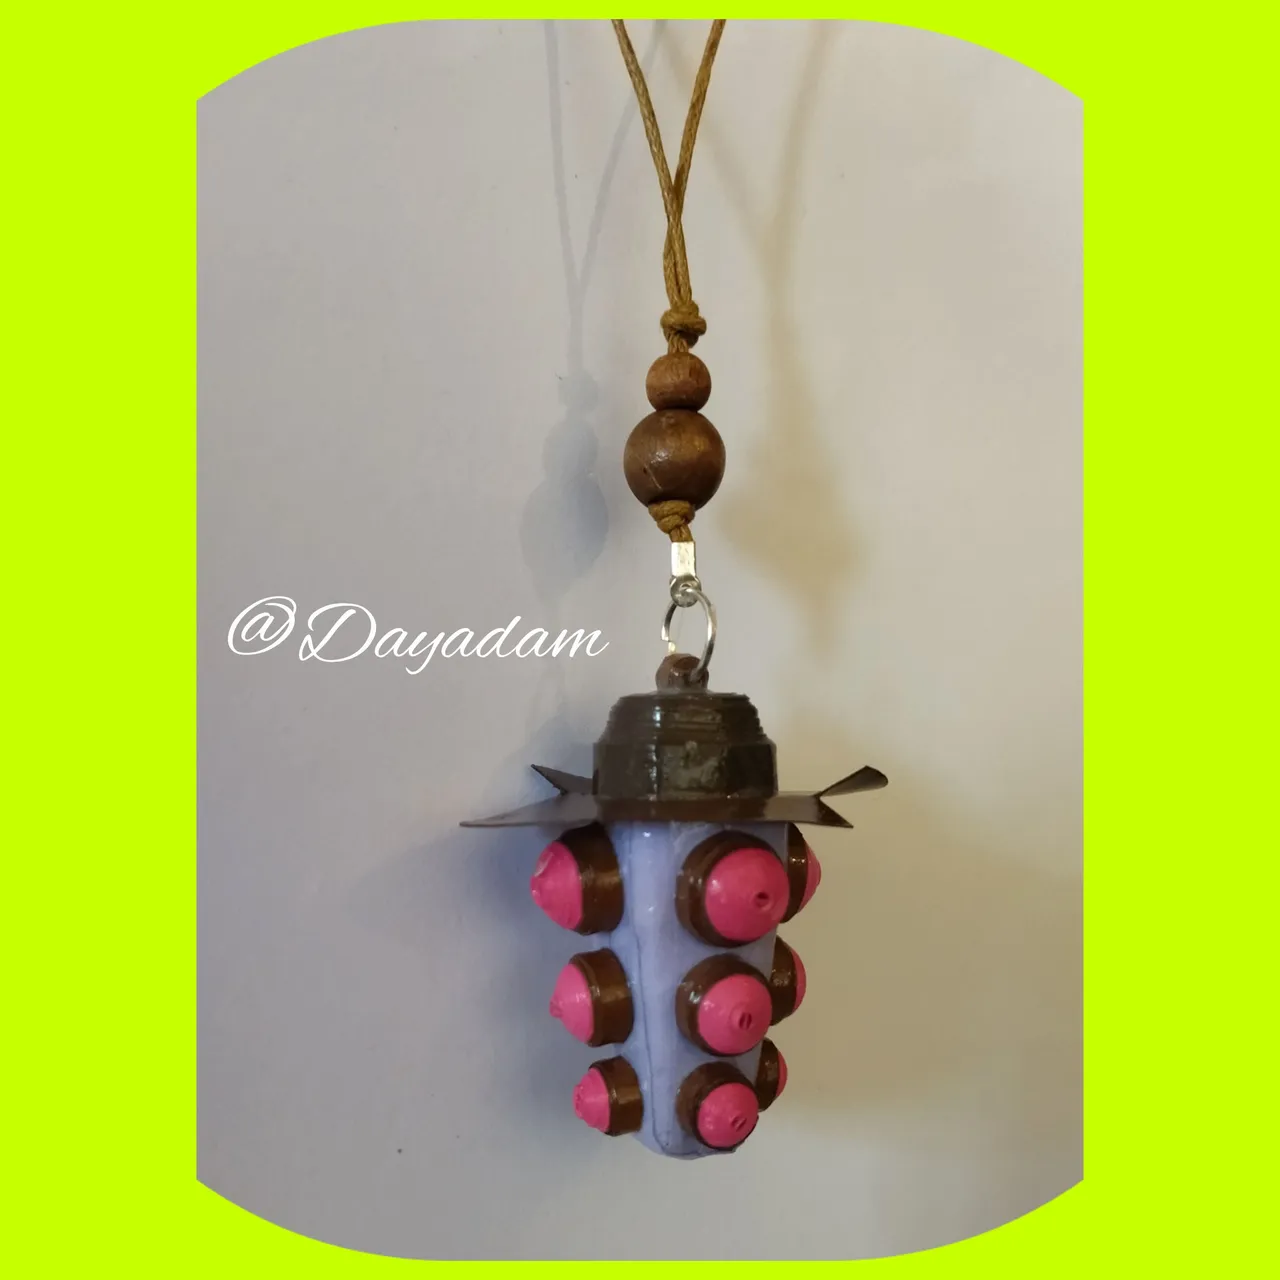
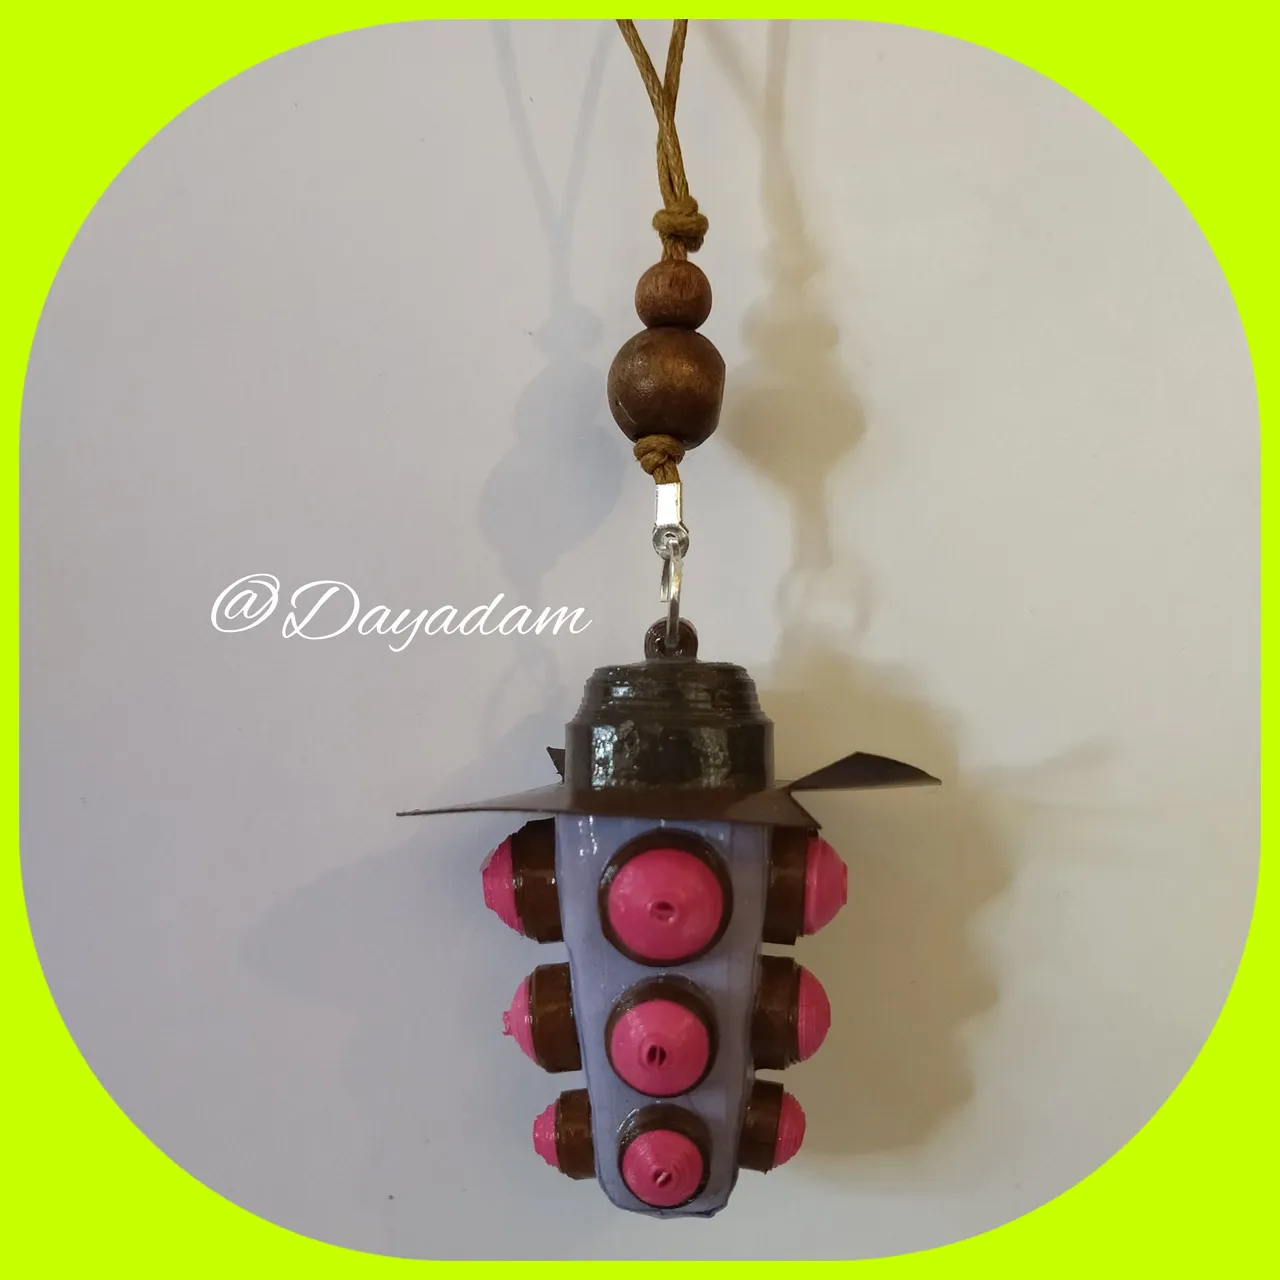
Decidí realizar un pequeño colgante en 3D en la técnica de quilling con algunos elementos alusivos al SCAREBOT-088.
Esperando les guste mi trabajo, sin más preámbulos, les dejo mi proceso creativo.
Comencemos:😃

Hello everyone... ✨
Hello to my dear Hivers and the beloved Hive NFTGame Latino community, I am here to join your Hashkings Weekly Challenge, after multiple invitations from the kind members of the community, I am very pleased to finally share with you a work especially for you.
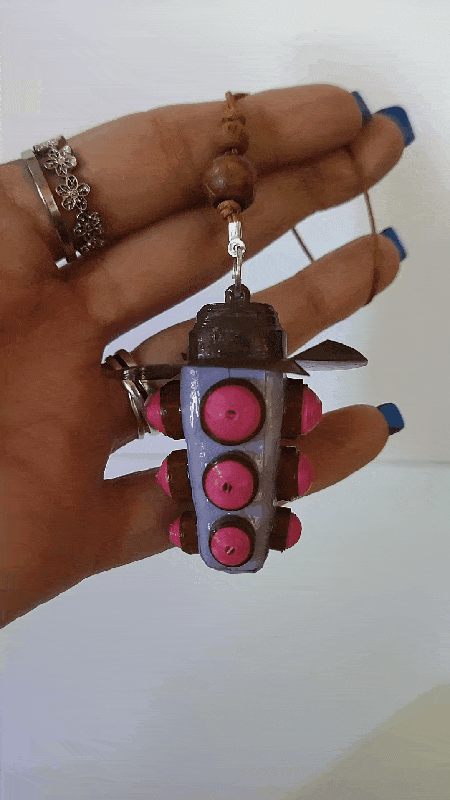
I decided to make a small 3D pendant in the quilling technique with some elements alluding to SCAREBOT-088.
Hoping you like my work, without further ado, I leave you with my creative process.
Let's start:😃

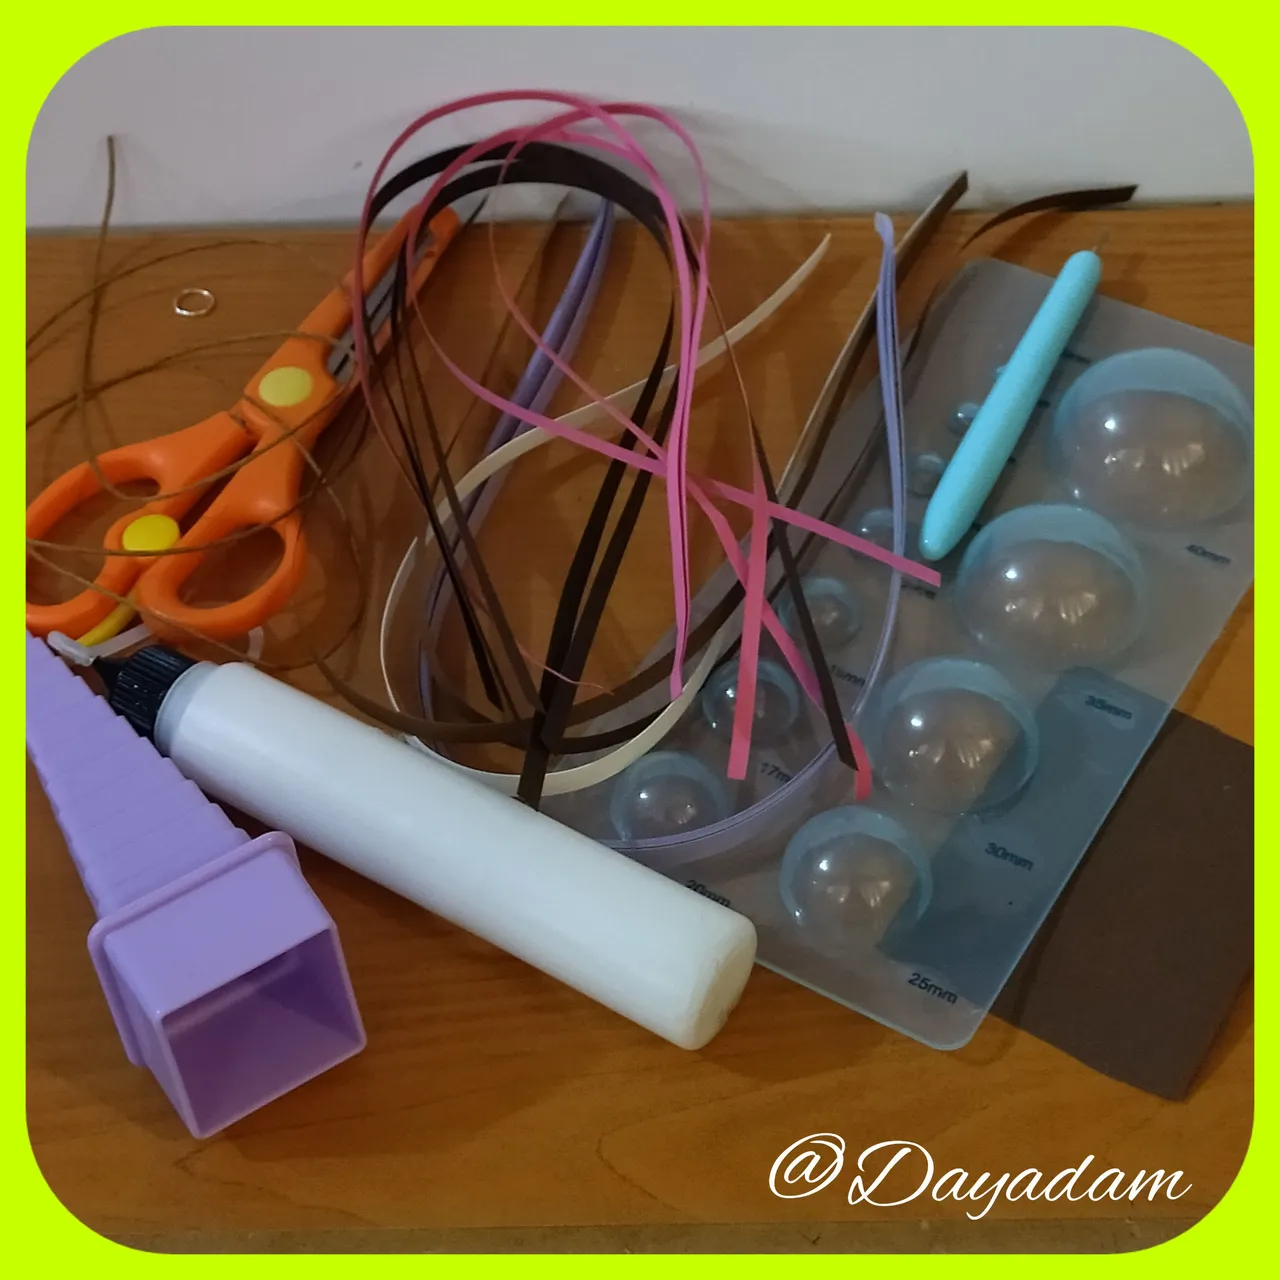
- Quilling ribbons 3mm, 6mm and 9mm wide, various colors.
- White and brown cardboard.
- Quilling needle.
- Template to mold circles.
- Square mold.
- Medium size costume jewelry ring.
- Thin brown jute thread.
- Extra strong white glue (carpentry glue).
- Scissors.
- Paintbrush.
• Cintas de quilling de 3mm, 6mm y 9mm de ancho, diversos colores.
• Cartón blanco y marrón.
• Aguja para quilling.
• Plantilla para moldear círculos.
• Molde Cuadrado.
• Argolla de bisutería mediana.
• Hilo yute fino color marrón.
• Pega blanca extra fuerte (de carpintería).
• Tijera.
• Pincel.

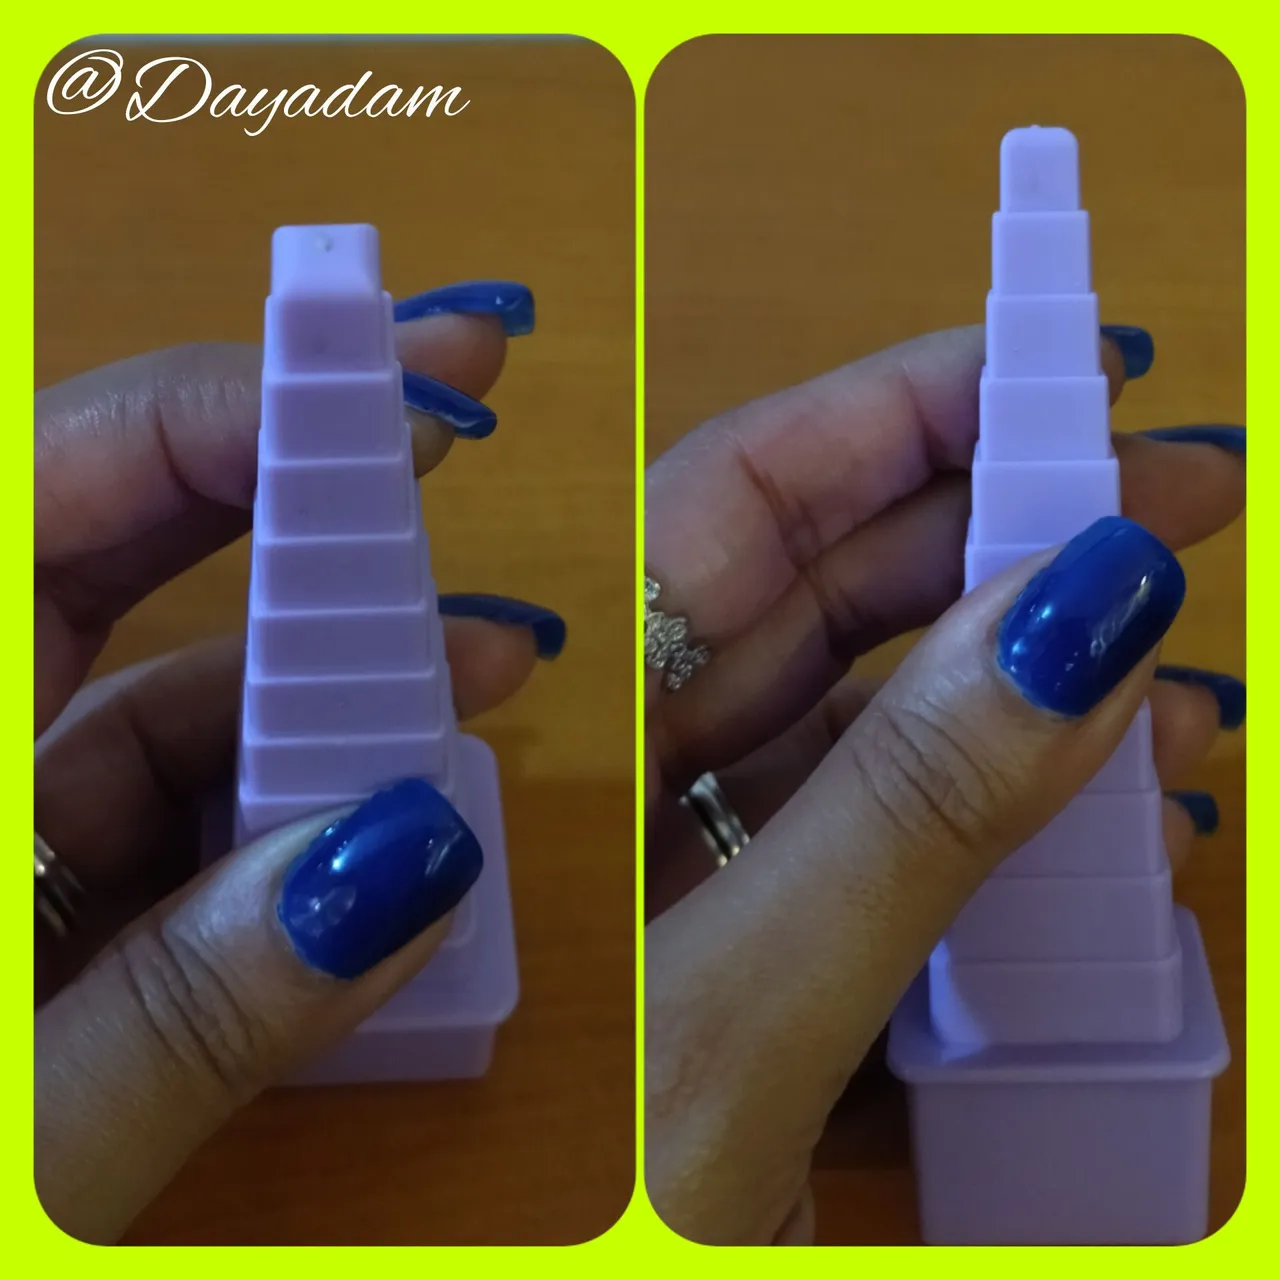
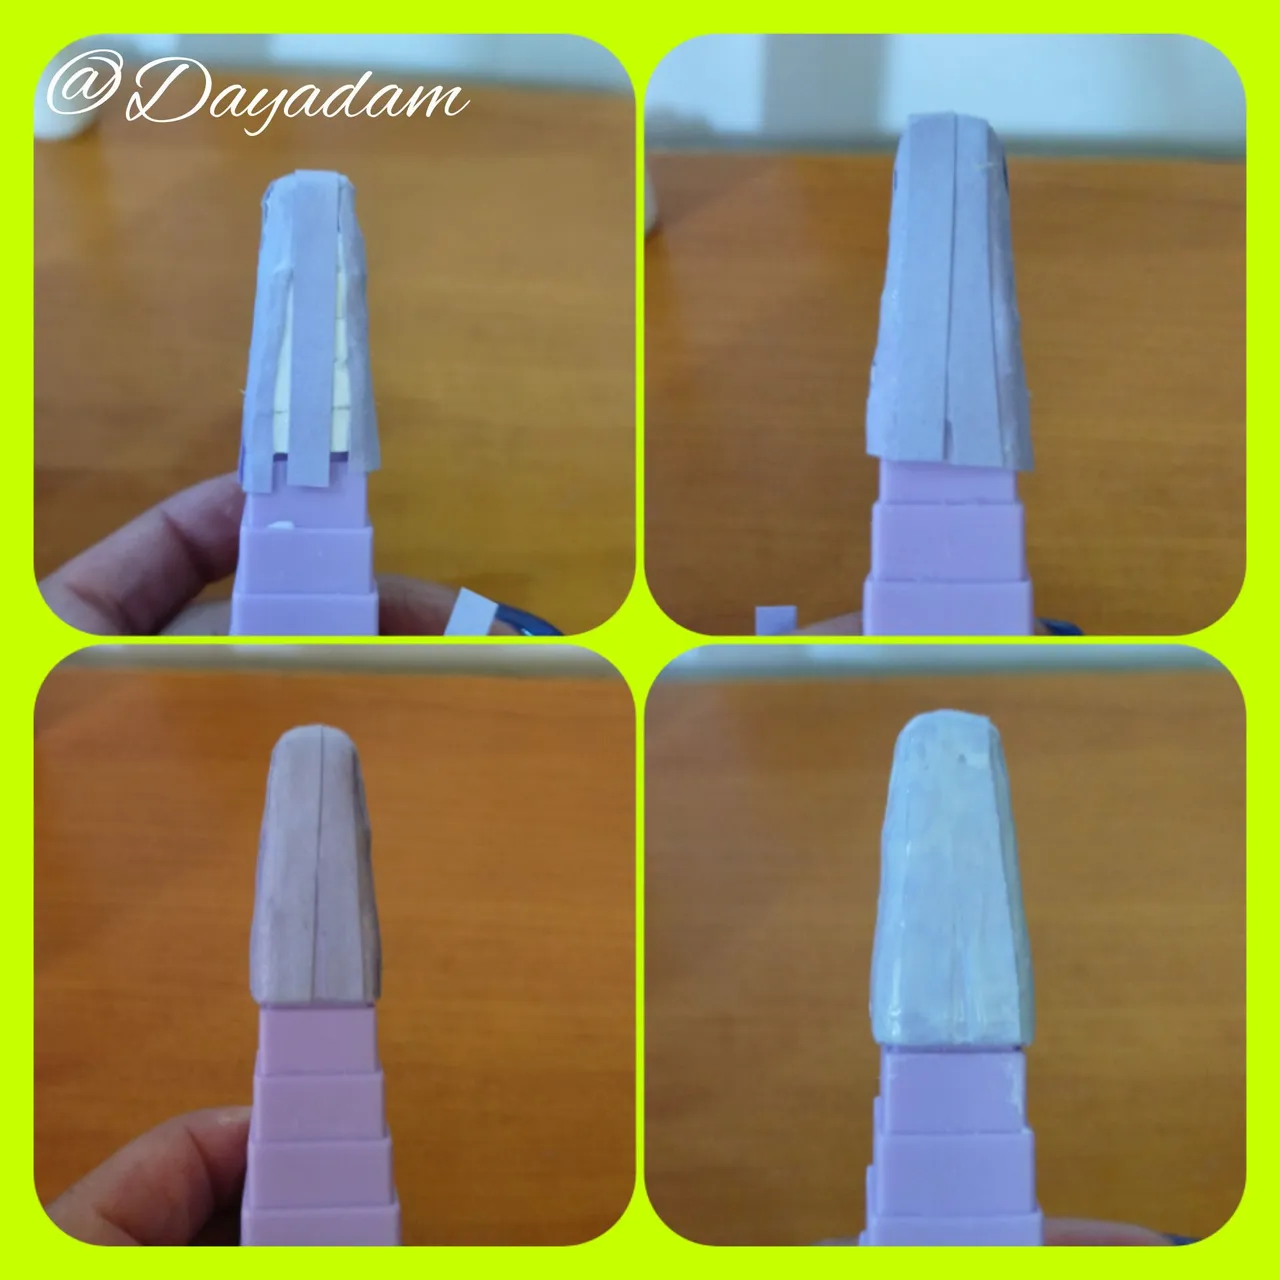
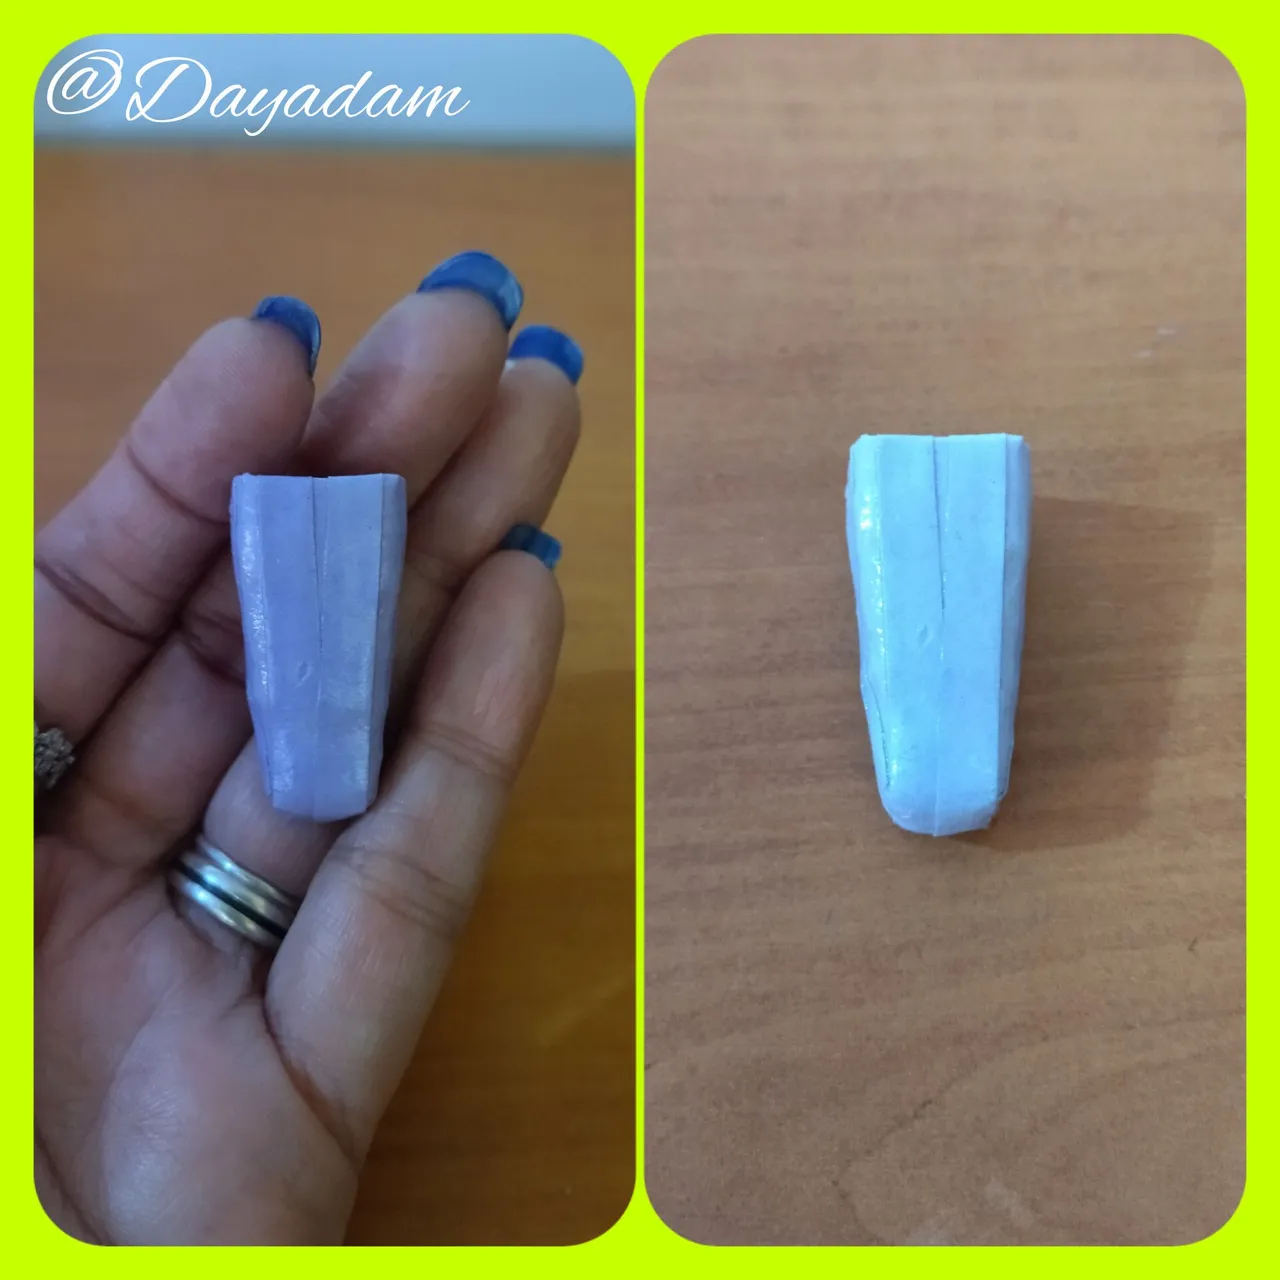
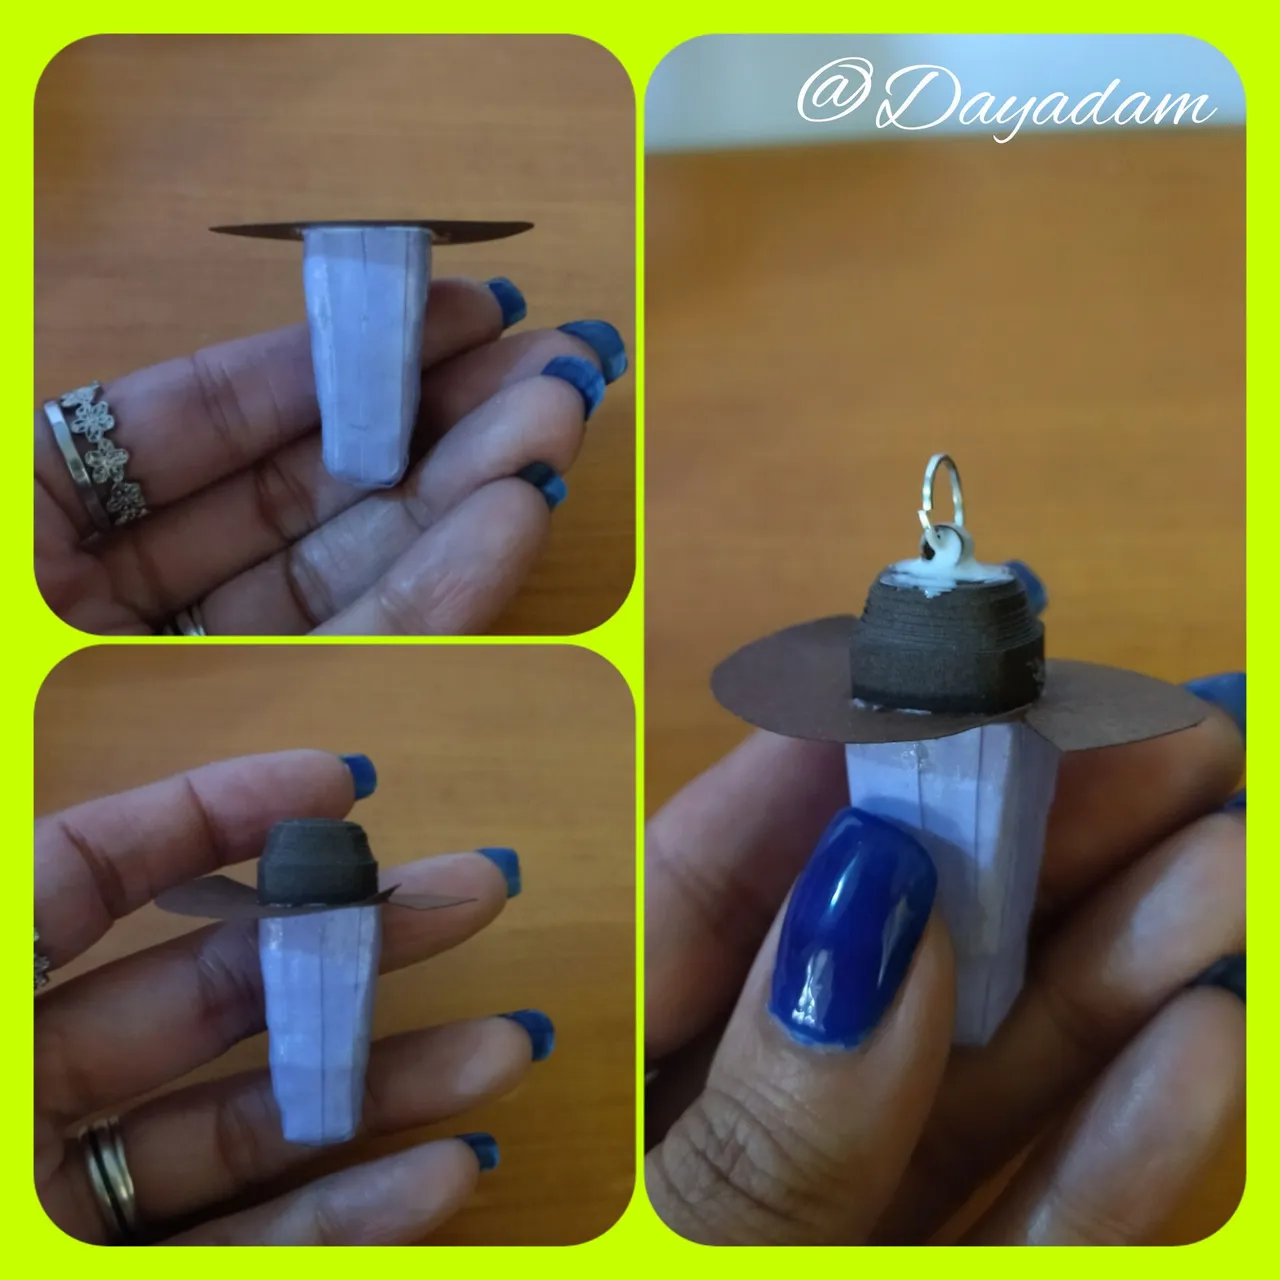
• Comencé tomando una plantilla cuadrada, en ella realice un molde para mi pieza enrollando tiras de cartón blancas, esto para que el colgante sea mas fuerte y resistente.
• Luego tome cintas para quilling color morado claro y las pase por la pieza para forrarla.
• Al terminar de forrar, le agregue pega blanca extra fuerte de carpintería, para plastificarla y deje secar muy bien.

- I started by taking a square template, on it I made a mold for my piece by rolling white cardboard strips, this to make the pendant stronger and more resistant.
- Then I took some light purple quilling ribbons and I rolled them around the piece to cover it.
- When I finished lining it, I added extra strong white carpentry glue to laminate it and let it dry very well.

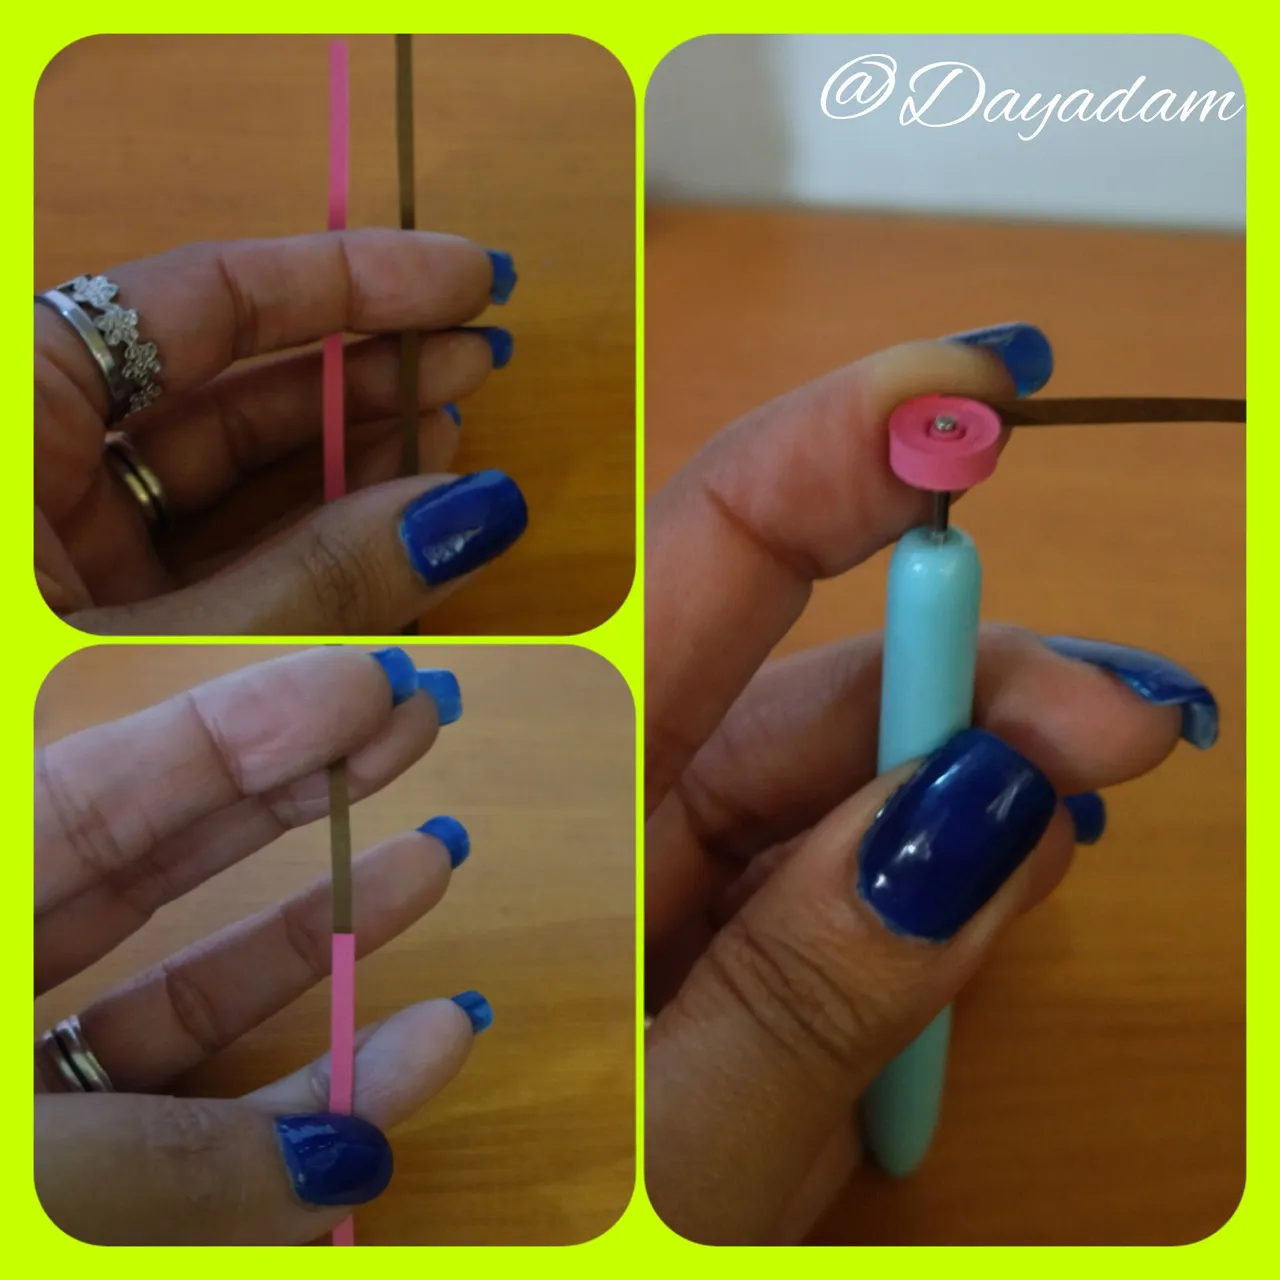
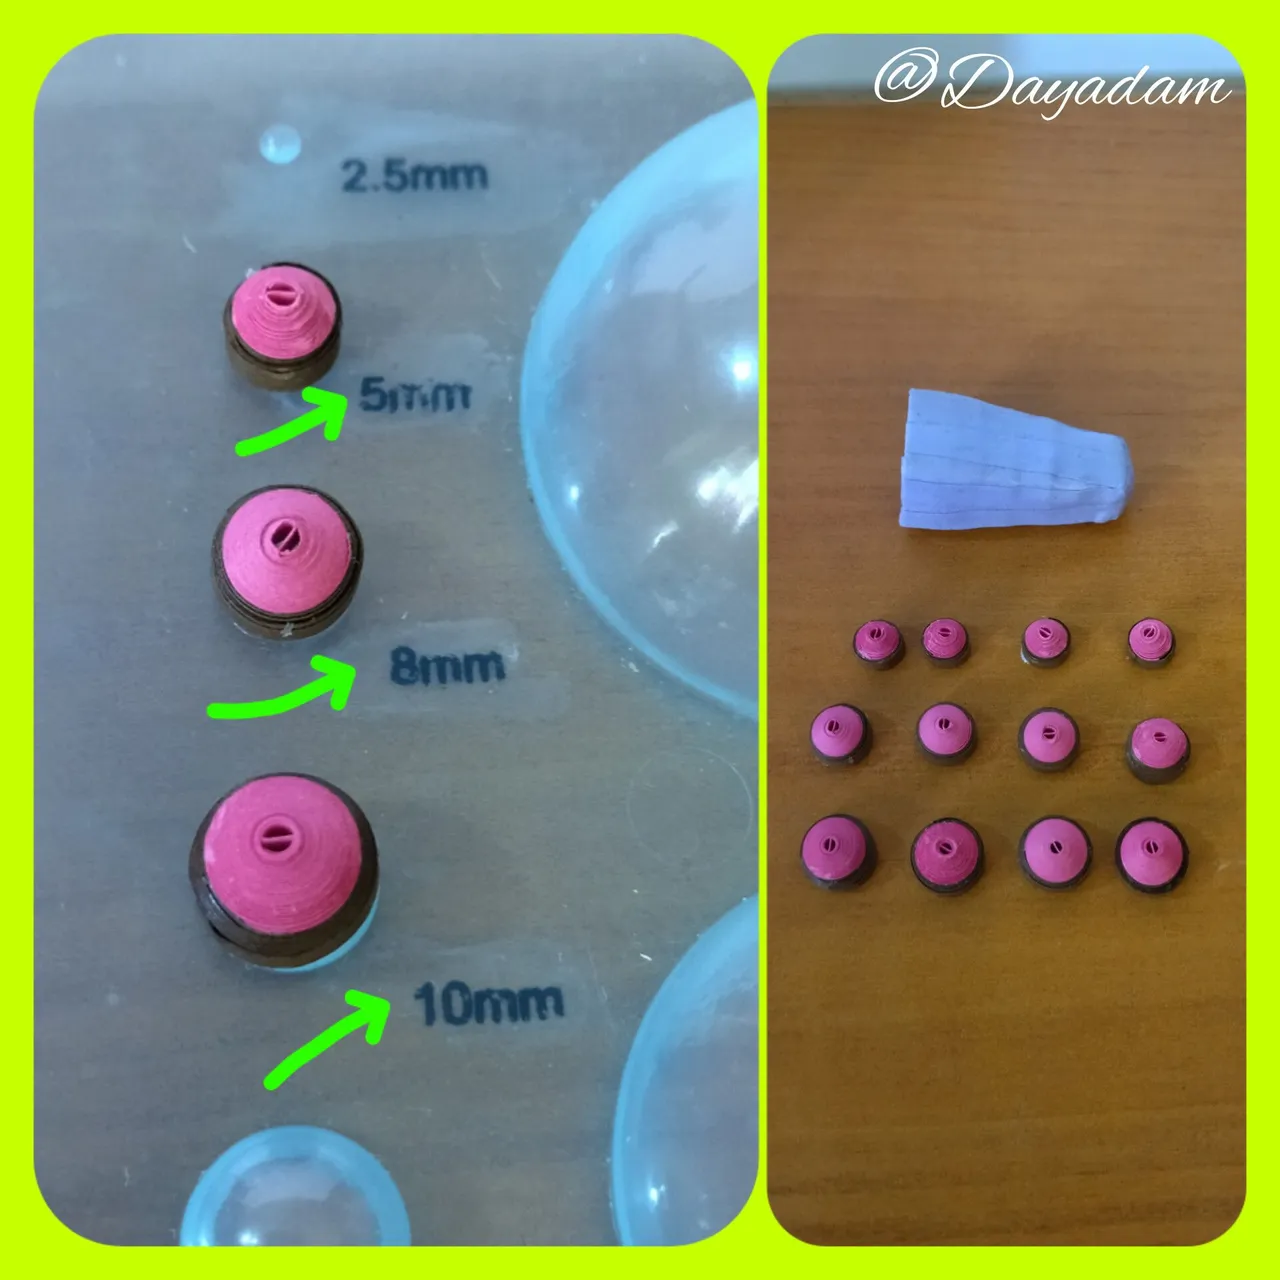
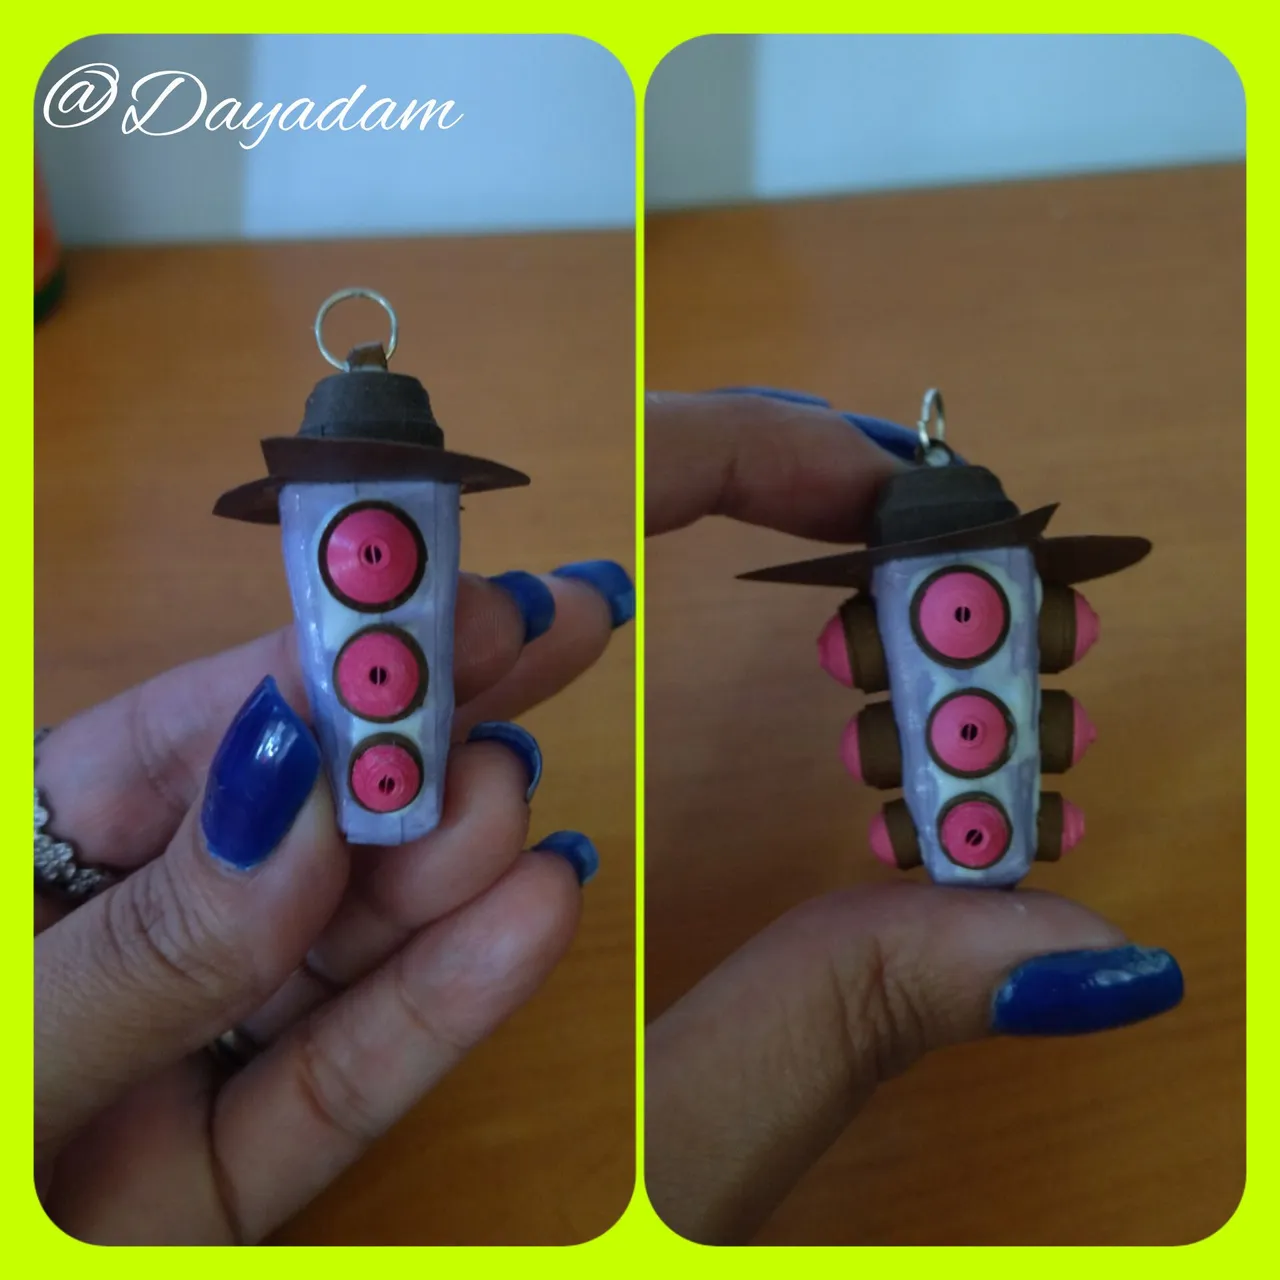
• Ahora tomaremos cinta color rosada de 3mm de ancho x 40cms de largo y una marrón de 3mm de ancho x 20cms de largo, uniremos ambas para formar una sola cinta, enrollaremos con la aguja para quilling empezando por la rosada hasta finalizar con la Marrón para forma un circulo cerrado, sacamos de la aguja y sellamos con pega blanca. Como este necesitaremos 4.
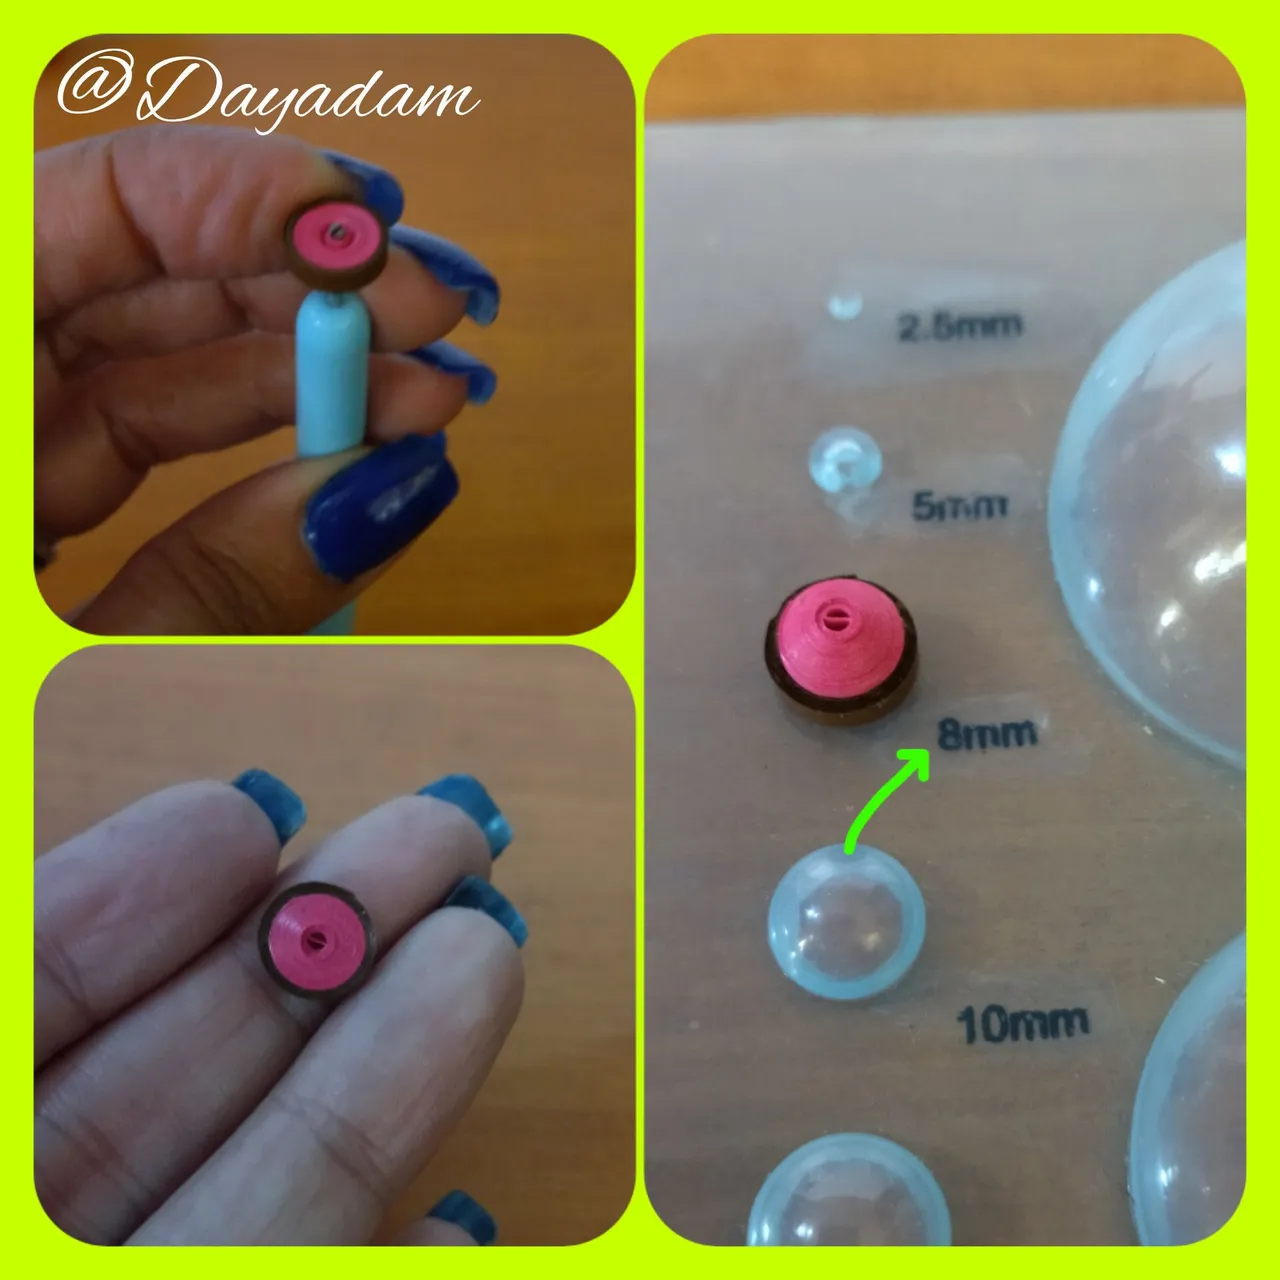
• Vamos a moldear el circulo en una plantilla para darle un efecto 3D, sacamos del molde y en la parte interna aplicaremos pega blanca para evitar que el mismo se deforme.
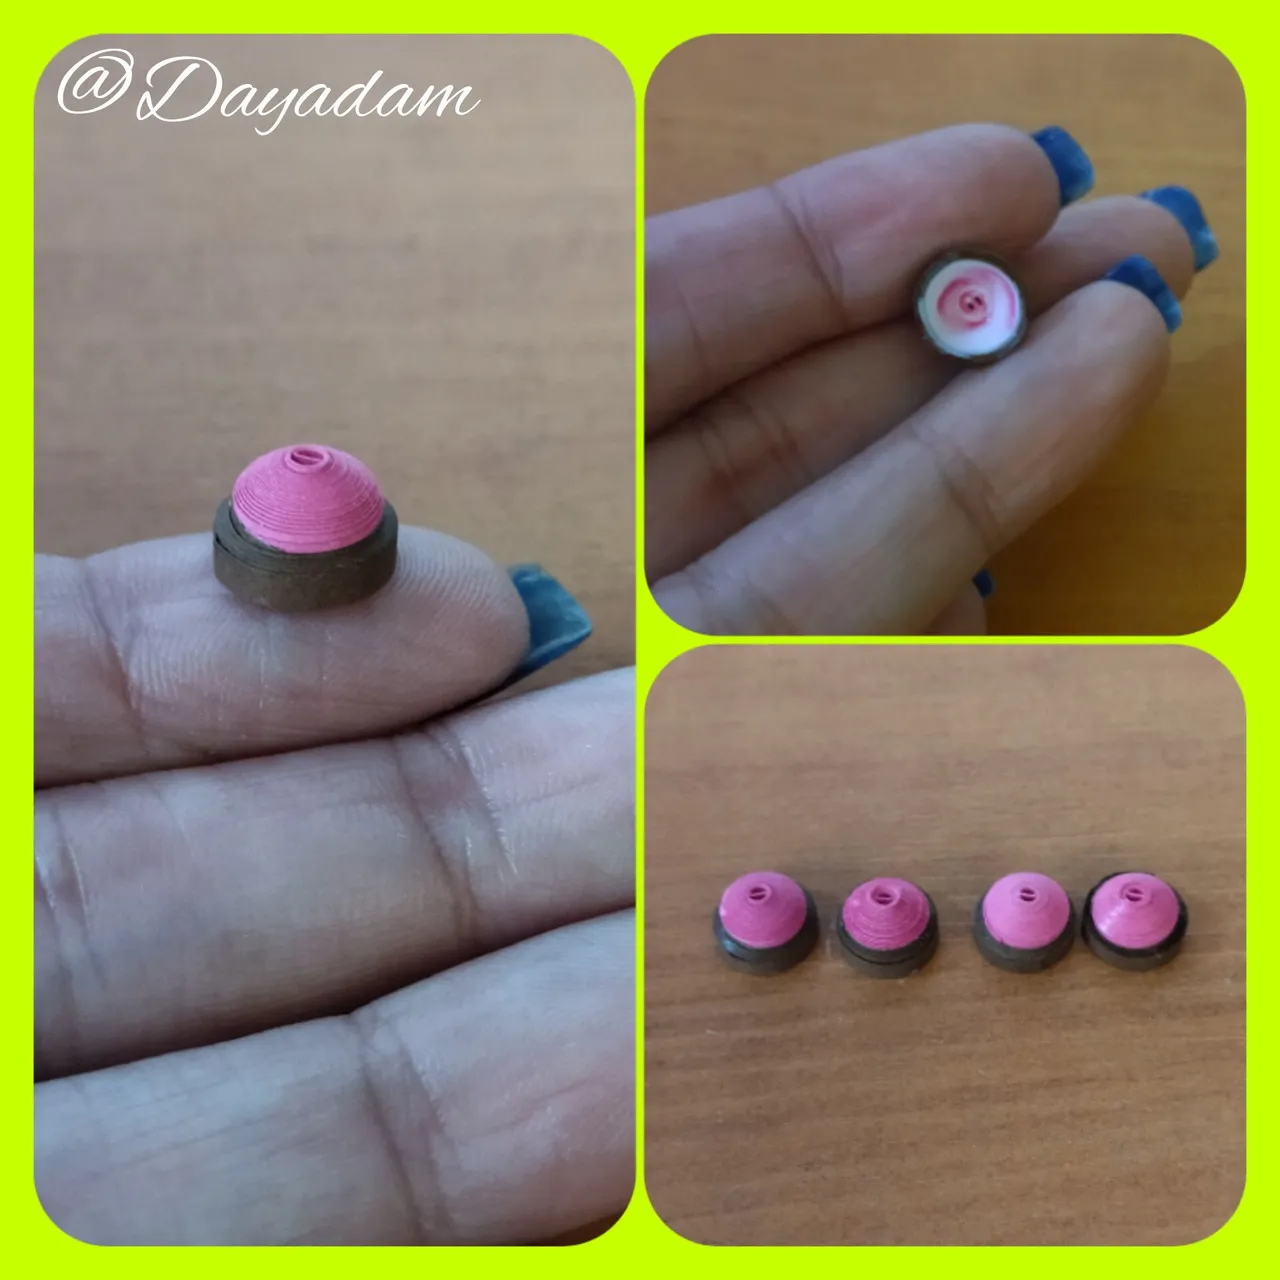
• Bajo los mismos parámetros anteriores con una cinta rosada 3mm x 25cms y marrón de 3mm x 12,5cms, otra rosada de 3mm x 12cms y marrón de 3mm x 6cms, realizaremos 4 círculos de cada uno, moldearemos en la plantilla y aplicaremos pega en la parte interna.
- Now we will take a pink ribbon of 3mm wide x 40cms long and a brown ribbon of 3mm wide x 20cms long, we will join both to form a single ribbon, we will roll with the quilling needle starting with the pink one and ending with the brown one to form a closed circle, we take it out of the needle and seal with white glue. We will need 4 like this one.
- We are going to mold the circle in a template to give it a 3D effect, take it out of the mold and apply white glue on the inside to prevent it from deforming.
- Under the same parameters as above with a pink ribbon 3mm x 25cms and brown 3mm x 12,5cms, another pink 3mm x 12cms and brown 3mm x 6cms, we will make 4 circles of each one, we will mold in the template and we will apply glue in the internal part.
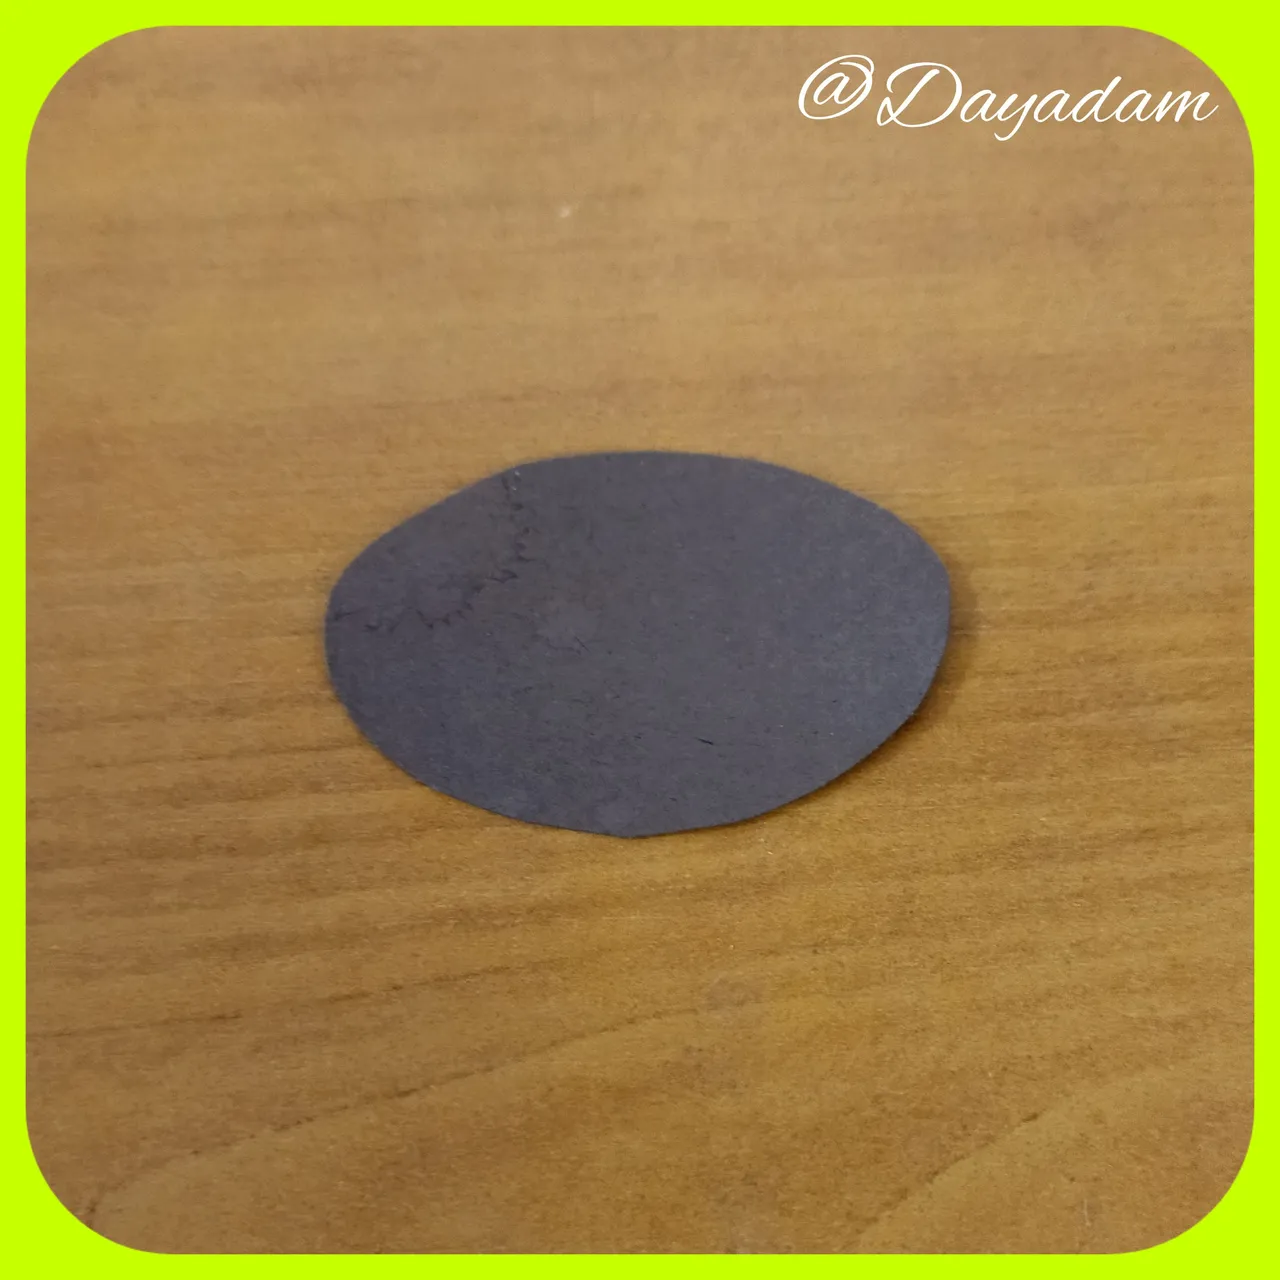
• Tome un trozo de cartón marrón y lo corte de forma ovalada, este formara parte del sombrero.
• Con una cinta marrón de 6mm de ancho realice un circulo cerrado, al finalizar moldee de manera rectangular, saque la pieza hacia afuera para formar la parte de arriba del sombrero y aplique pega por la parte interna para evitar que se deforme.
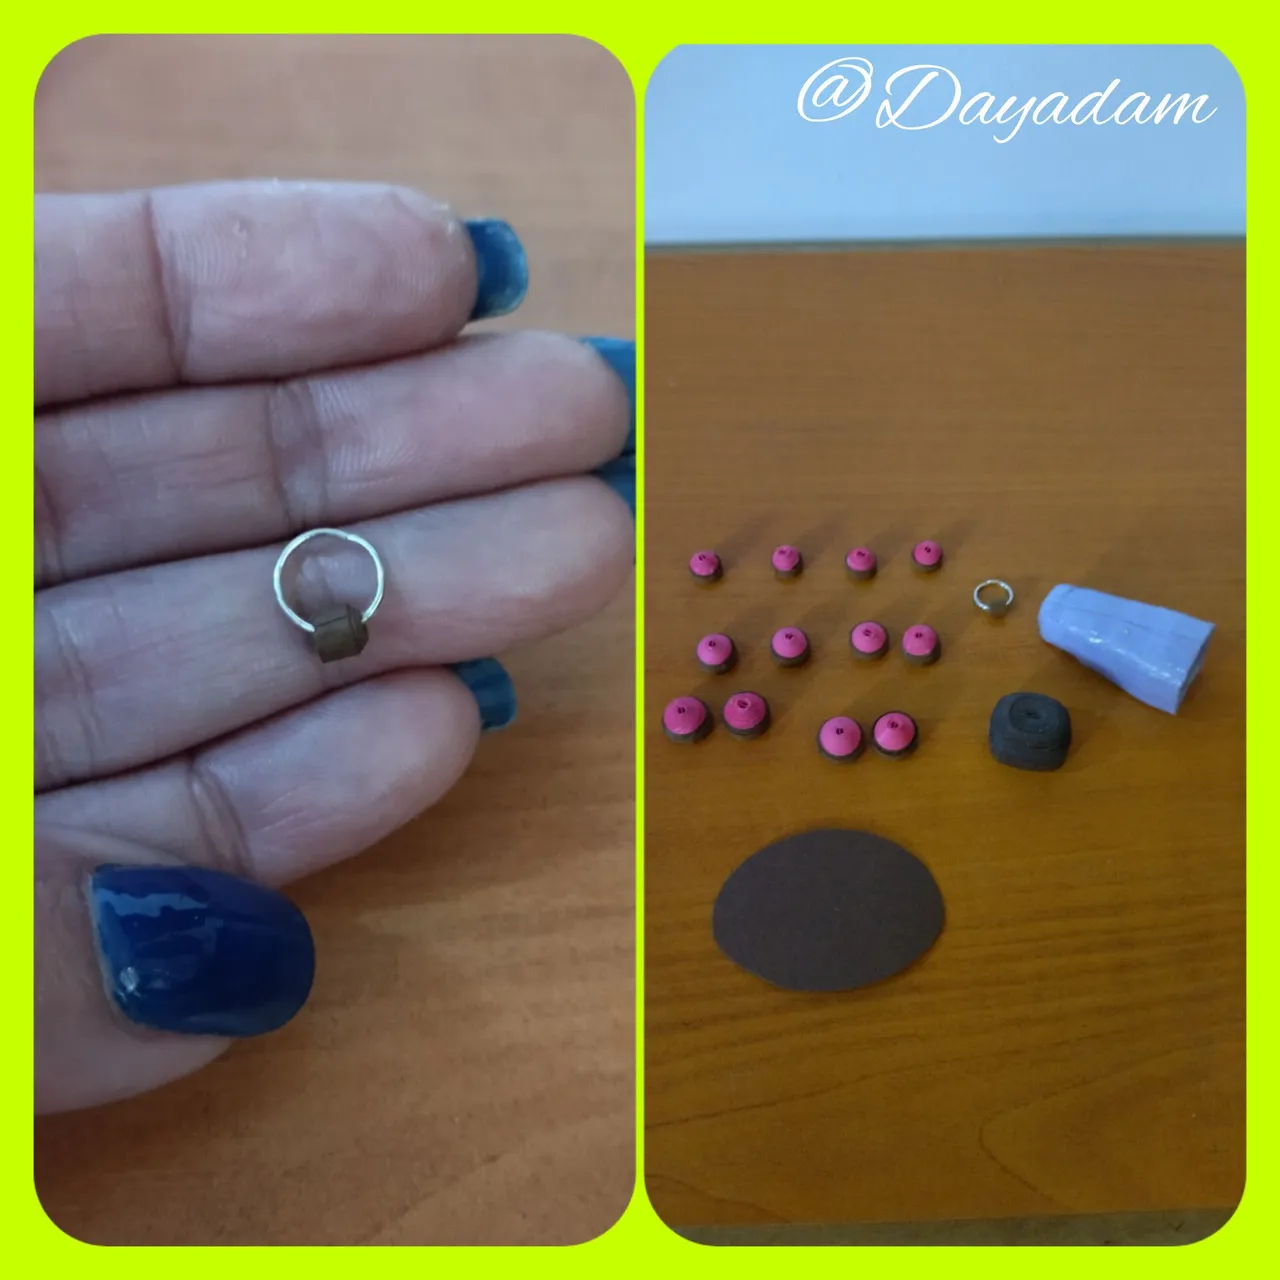
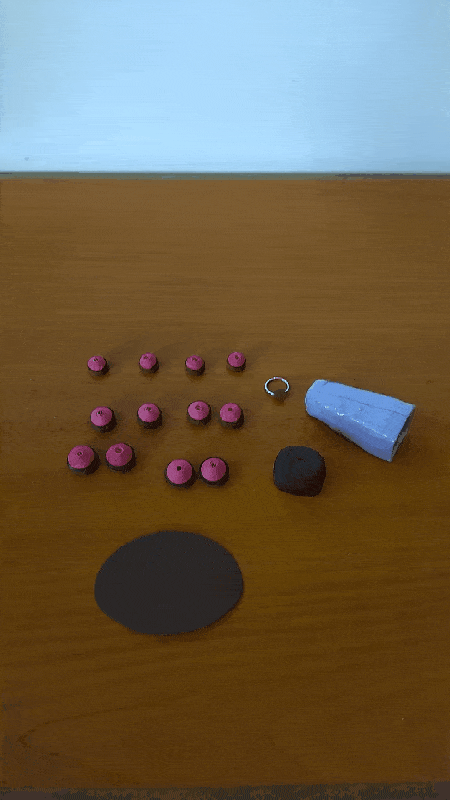
• Con un pequeño trozo de cinta marrón de 3mm de ancho, realizaremos un pequeño círculo cerrado al cual le incorporaremos una argolla mediana de bisutería.
- Take a piece of brown cardboard and cut it in an oval shape, this will be part of the hat.
- With a 6mm wide brown ribbon, make a closed circle, at the end mold it in a rectangular shape, take the piece out to form the top of the hat and apply glue on the inside to prevent it from deforming.
- With a small piece of brown ribbon 3mm wide, we will make a small closed circle to which we will incorporate a medium size ring of costume jewelry.

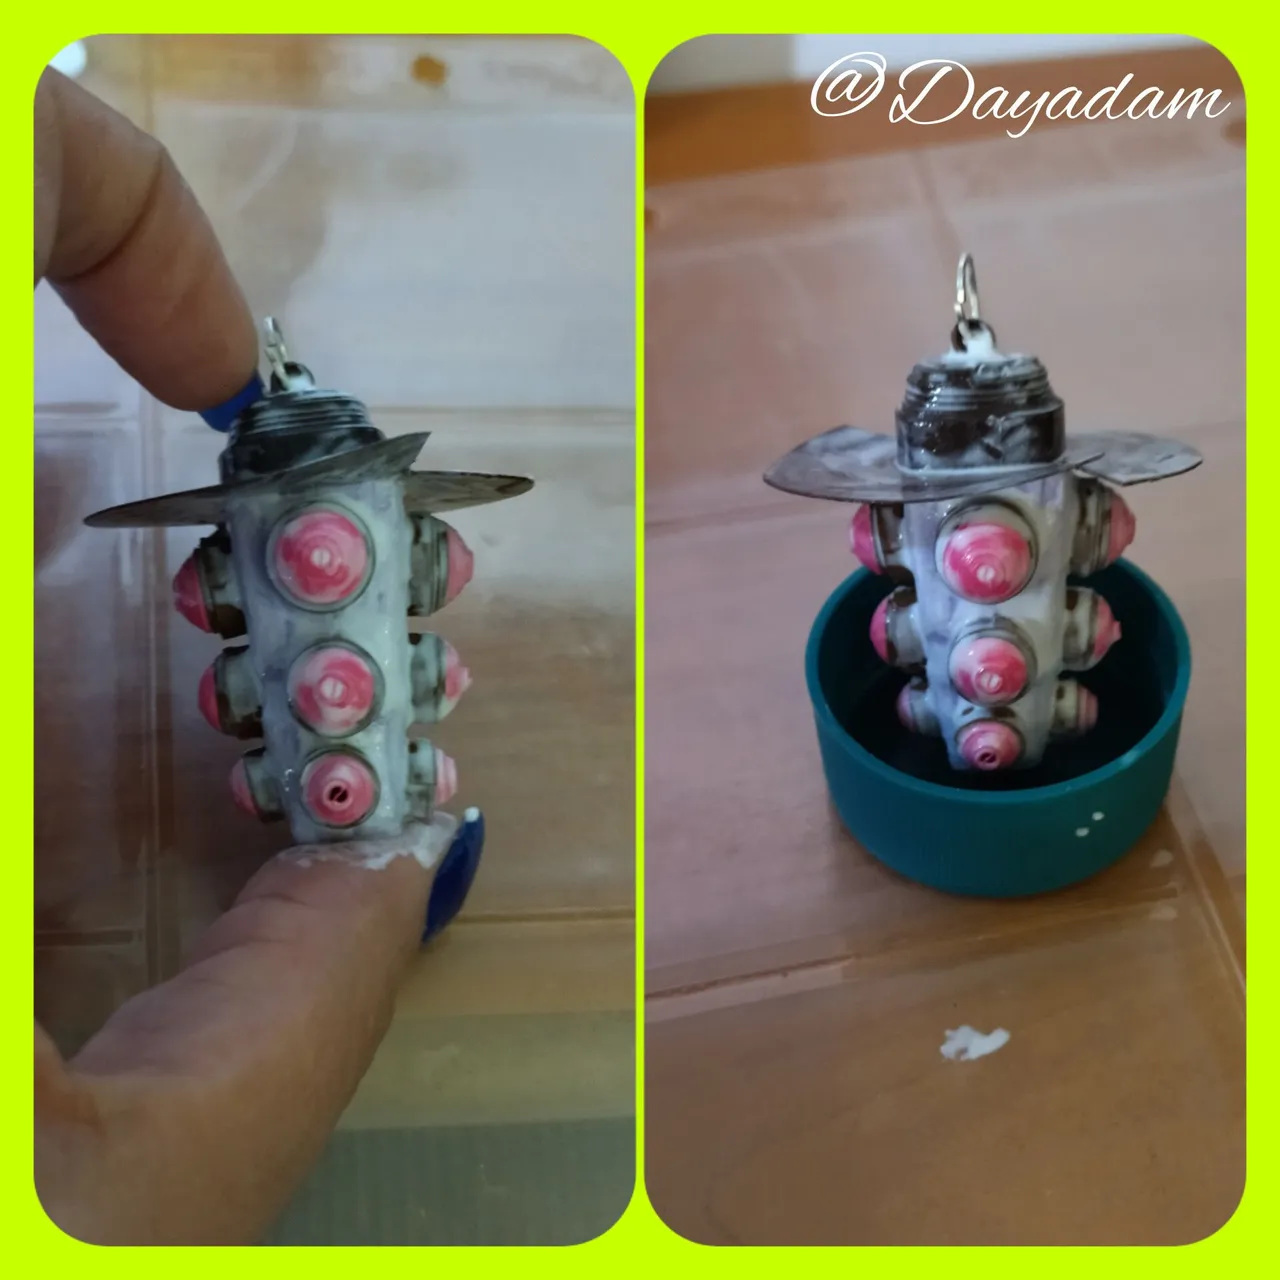
• Vamos a unir todas las piezas para formar el colgante, le hice algunos cortes y detalles al sombrero durante este proceso, una vez todas unidas esperemos que sequen, y adicionalmente aplicaremos varias capas de pega blanca extra fuerte para proteger y plastificar, dejamos secar entre una capa y otra.
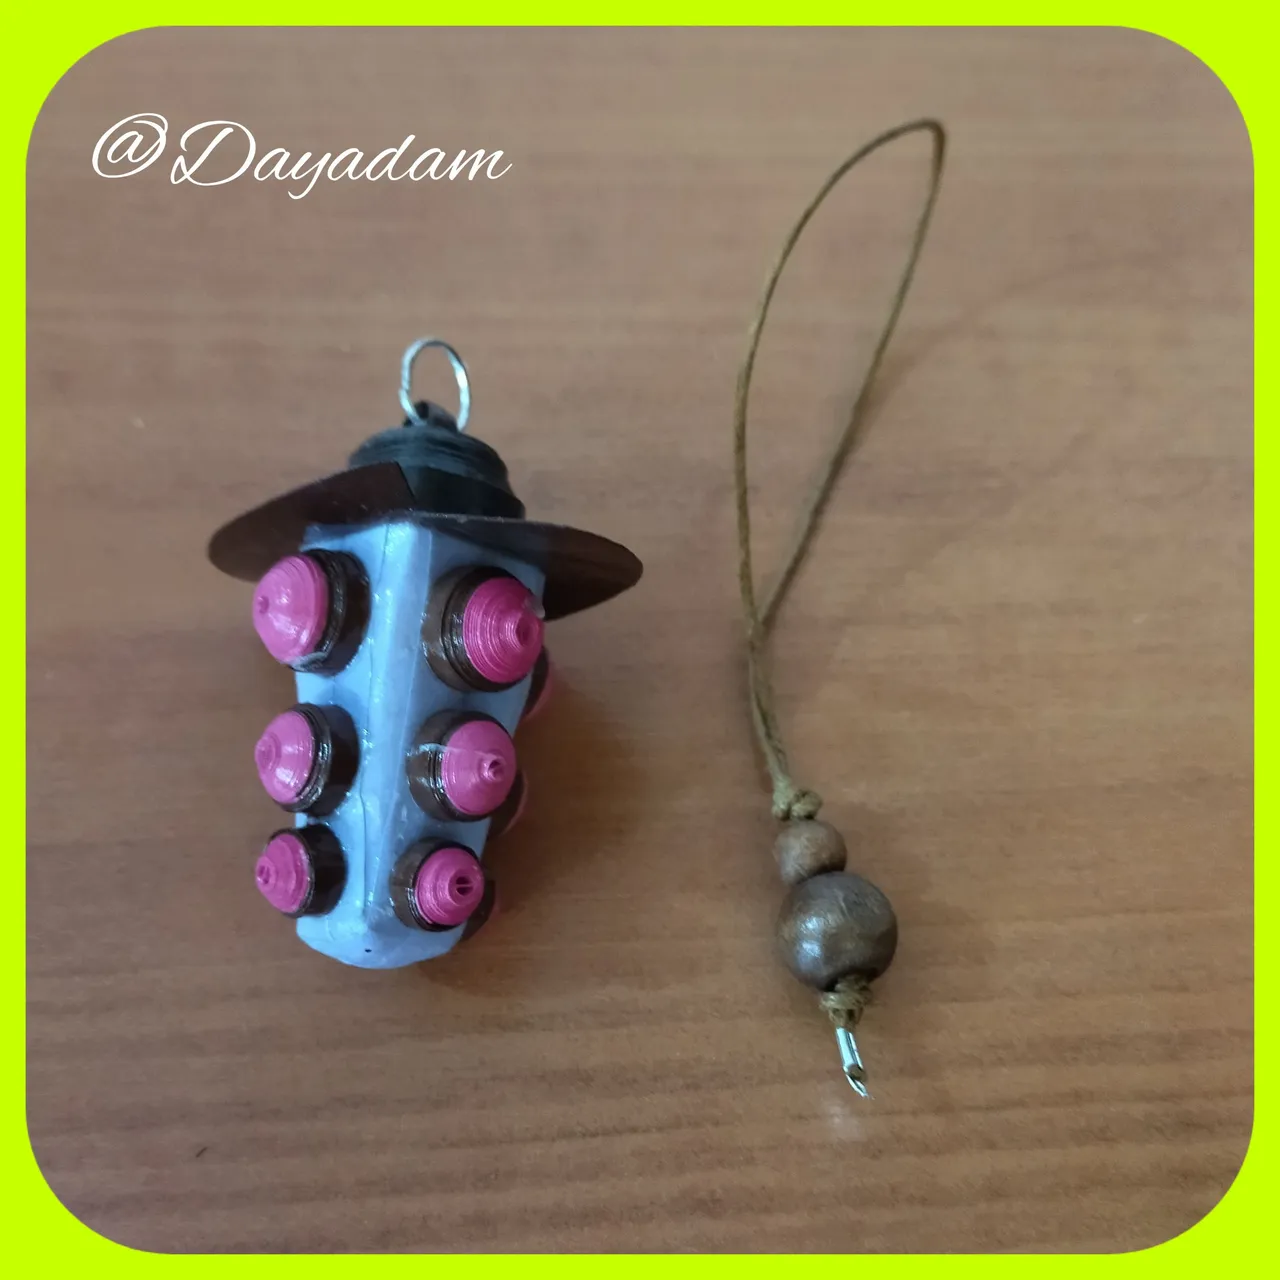
• Listo y seco el colgante le coloque un trozo de yute marrón fino, el cual decore con unas perlas de madera y le coloque su respectivo tapa nudos.
De esta manera esta lista esta representación en forma de dije colgante que realice del SCAREBOT-088.
- We are going to join all the pieces to form the pendant, I made some cuts and details to the hat during this process, once all the pieces are joined we wait for them to dry, and additionally we will apply several layers of extra strong white glue to protect and plasticize, let dry between one layer and another.
- Ready and dry the pendant I put a piece of thin brown jute, which I decorate with some wooden beads and I put its respective knot cover.
This way this representation is ready in the form of a pendant charm that I made of the SCAREBOT-088.

¿Qué les pareció, les gustó?
Espero que sí, que les haya gustado mi explicación, procedimiento y fotos, los hice con mucho cariño por y para ustedes.
"Deja salir esa musa que te inspira, y deja volar tu imaginación".
Gracias a todos, nos vemos en la próxima.
What did you think, did you like it?
I hope you did, I hope you liked my explanation, procedure and photos, I made them with love for you.
"Let out that muse that inspires you, and let your imagination fly".
Thank you all, see you next time.
Todas las fotos usadas en este post son de mi autoría y han sido sacadas en mi celular personal un Redmi 9T y editadas en Canva y en Inshot Banner y separador hecho por mí en Canva Traducido con la ayuda de DeepL
