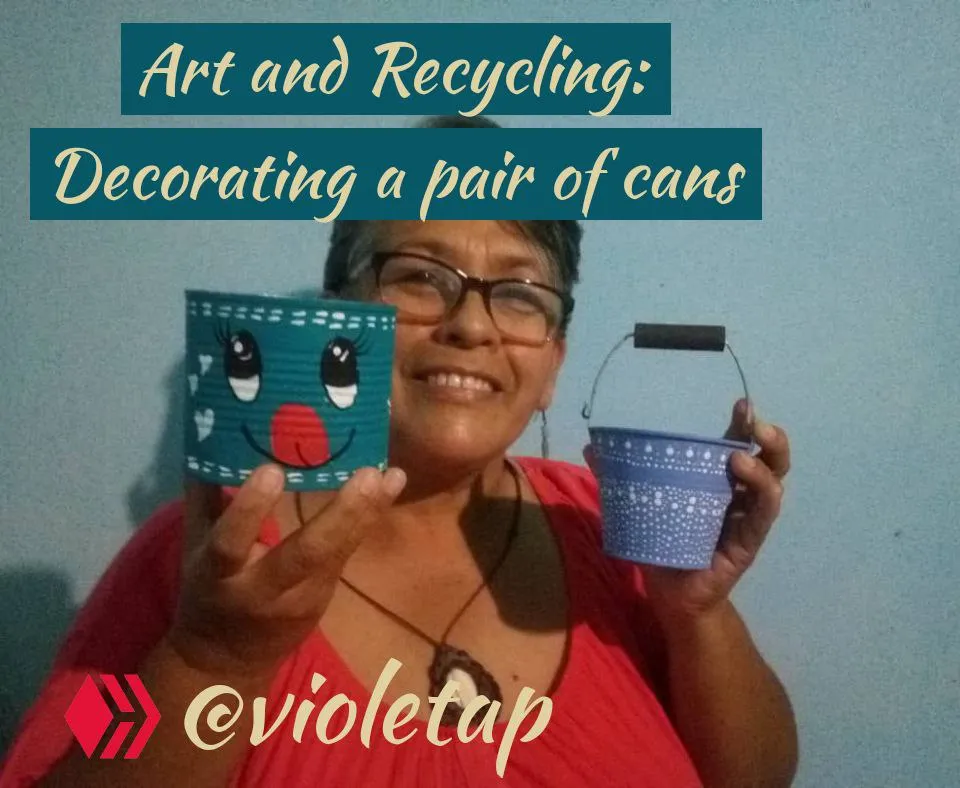
Hello everyone, I hope you are feeling well, this time I am going to show you how I decorated a couple of cans, betting to recycle as much as possible. Sometimes, I think we throw away a lot of things that we can still use in one way or another. Besides contributing a little with the planet and not producing so much waste. But, although there is a bit of recycling to show in this post, what I really want to show you is how my creative process was, so let's go with the decorative process.

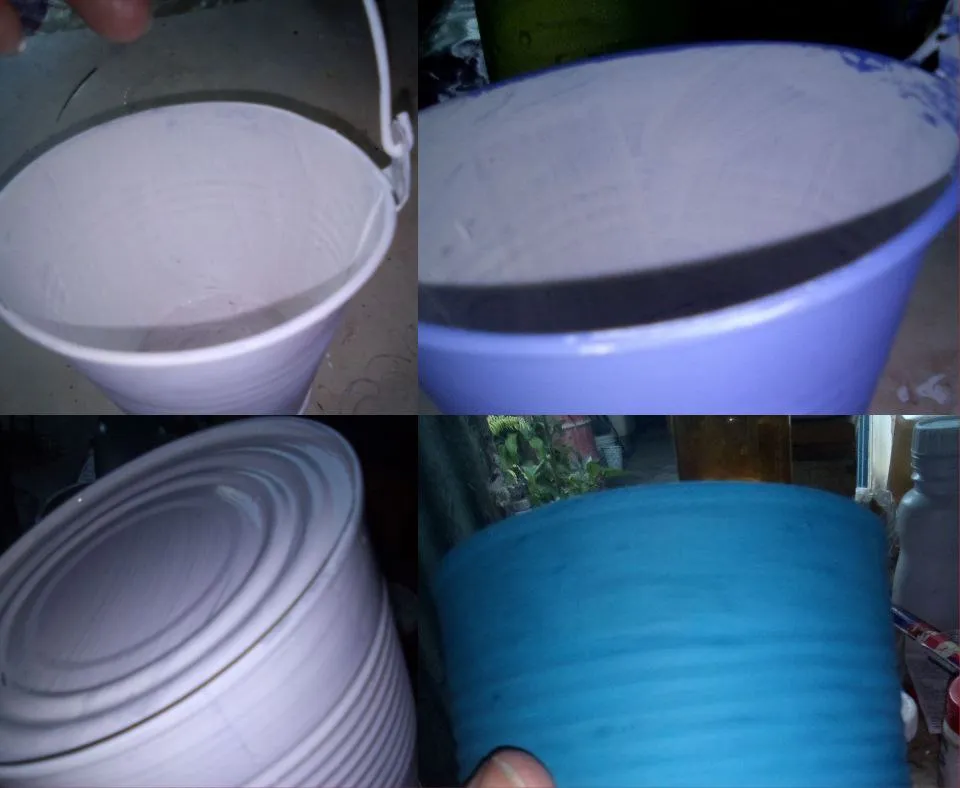
The first thing I did and is the first thing you have to do if you want to decorate some cans, is to clean them very well, preferably alcohol, I helped me with a little cotton to do it more neatly, so we can remove very well the remains of dirt and grease that may have been left in the can after handling. What we have to do next, is to put to the cans white paint, so that it can serve us as a base so that the colors that are placed later can stand out in a better way, and in addition the white color helps us to cover all those imperfections that the can has, because perhaps it has a little rust.
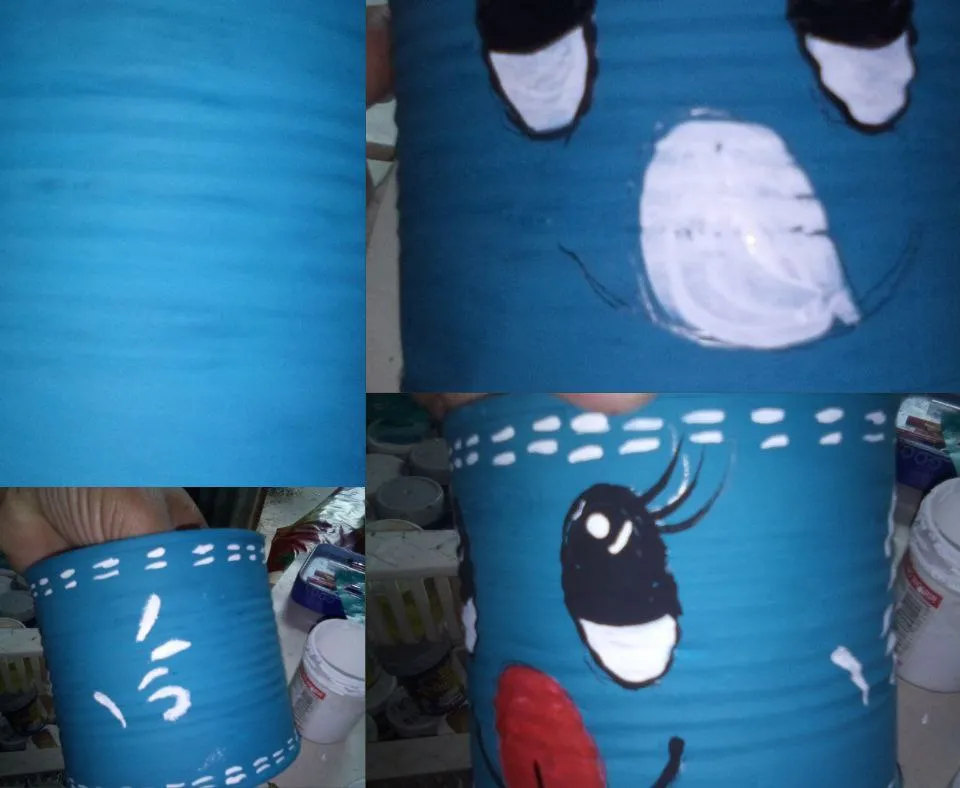
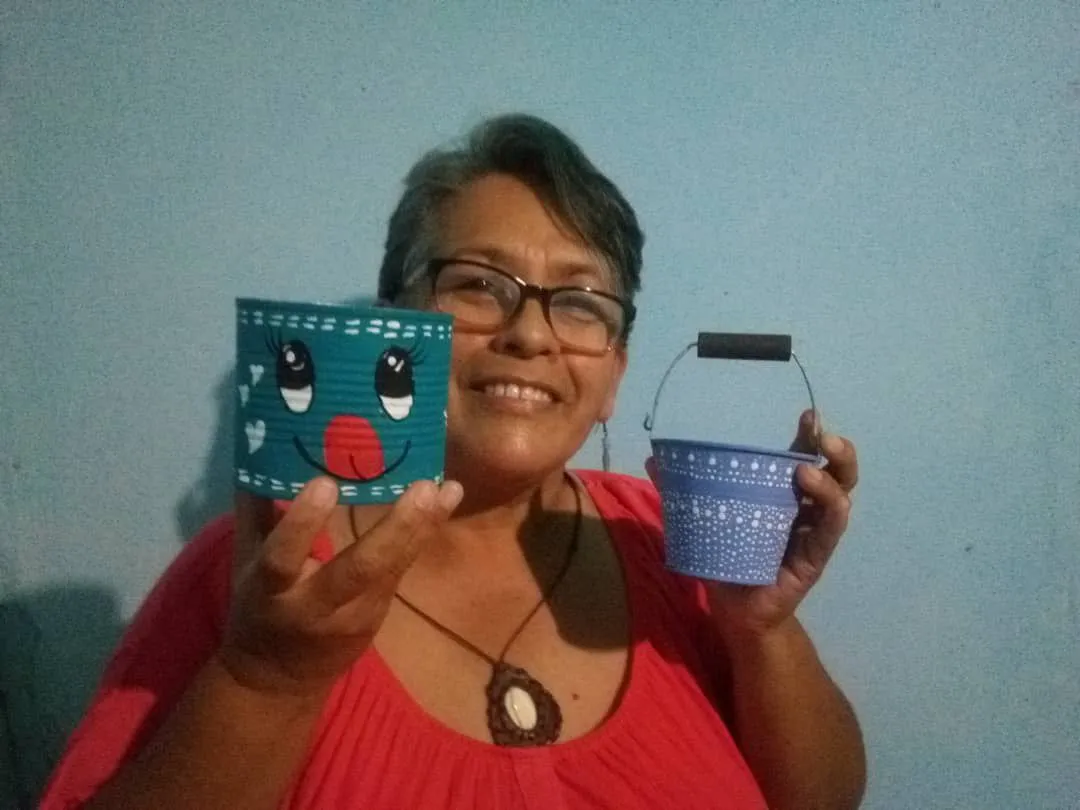
The next thing I did was that I stopped to decorate the first of the cans, so I painted it a deep turquoise color and decorated it by painting a cartoon type face, as this seemed to me something fun. Then with a stencil I placed some white leaves, and to finish the first of the cans, what I did was to add some small details on the top and bottom of the can, and it was not something very complicated, just a few small lines that can simulate the stitching of a needle when sewing, and leave the line of the seam.
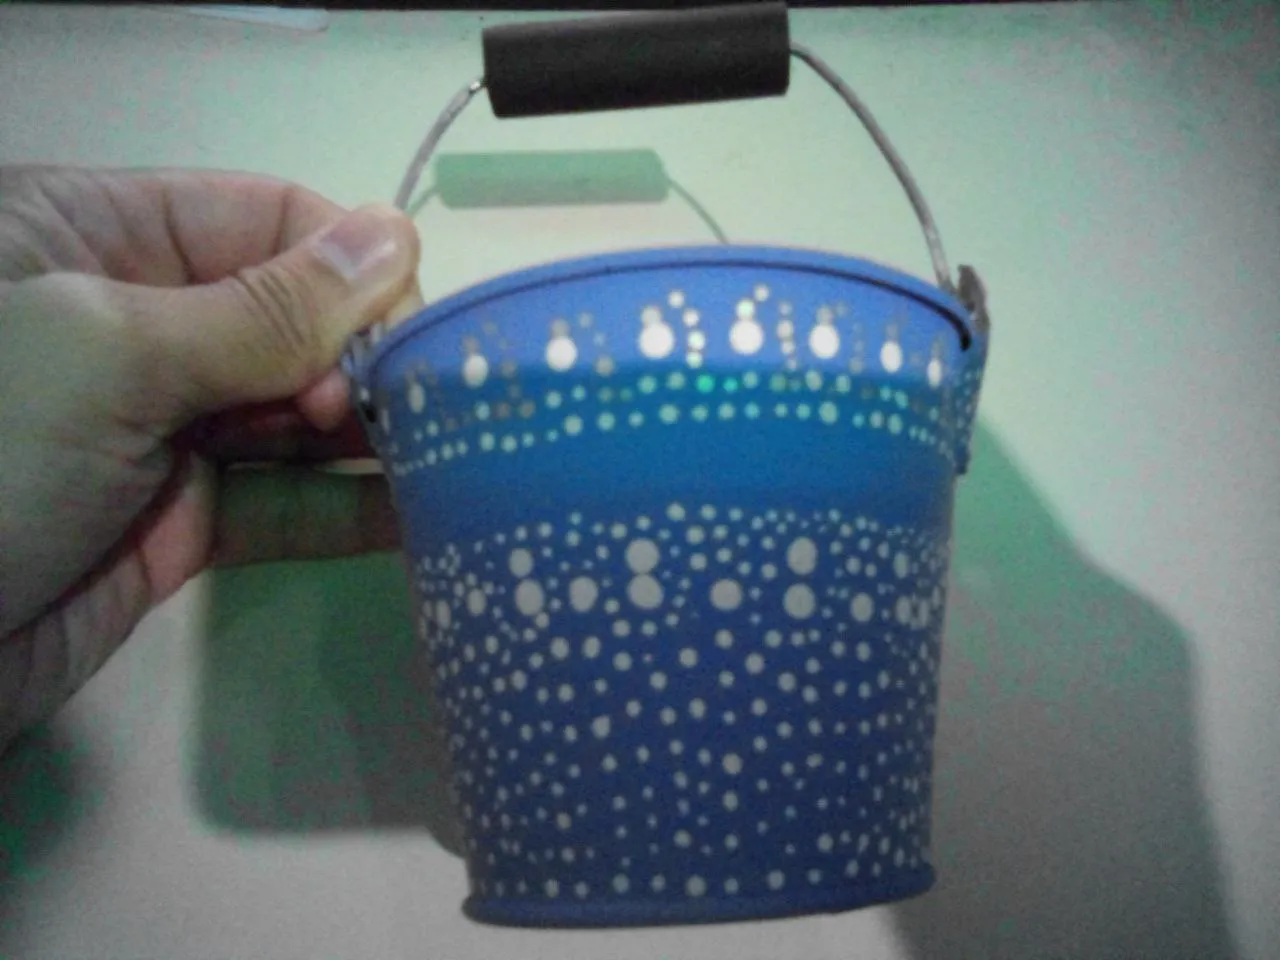
Then with the next can, which has a very curious shape, it looks like a very small bucket. Now, with this one I proceeded to paint it light purple on the outside and gray on the inside of the can in the shape of a bucket, then on the outside I decorated it by making a series of stitches that I learned to do after having finished a course some time ago where I learned a technique called pointillism. It is one of the techniques I use the most.
As you can see the decoration is not very complicated, it is really something very simple to do, and the end result is very nice, I hope you liked it and I encourage you to decorate a can or several that you have at home. I enjoyed it very much, maybe it's because painting is one of my favorite activities in the world. With nothing more to say I say goodbye, many blessings to all of you.
See you next time.

VERSIÓN EN ESPAÑOL
Arte y Reciclaje: Decorando un par de latas
Hola a todos, espero se encuentren muy bien, en esta oportunidad les voy a mostrar cómo decoré un par de latas, apostando por reciclar a medida de lo posible. A veces, creo que botamos a la basura muchas cosas que aun podemos utilizar de uno u otro modo. Además de contribuir un poco con el planeta y no producir tantos desperdicios. Pero, aunque haya un poco de reciclaje para mostrar en este post, lo que en verdad quiero mostrarles es como fue mi proceso creativo, así vamos con el proceso decorativo.
Lo primero que hice y es lo primero que se tiene que hacer si deseas decorar unas latas, es limpiarlas muy bien, preferiblemente alcohol, yo me ayude con un poco de algodón para hacerlo de manera más prolija, de ese modo podemos quitar muy bien los restos de sucio y grasa que le pudo haber quedado en la lata luego de la manipulación. Lo que tenemos que hacer a continuación, es colocar a las latas pintura de color blanco, de modo que nos puede serbir como una base para que los colores que se coloquen más adelante puedan resaltar de una mejor manera, y además el color blanco nos ayuda a tapar todas aquellas imperfecciones que tenga la lata, porque quiza tenga un poco de oxido.
Lo siguiente que realicé fue que me detuve a decorar la primera de las latas, asi que la pinté de color turquesa intenso y la decoré pintándole un rostro tipo caricatura, ya que esto me parecía algo divertido. Después con una plantilla le coloque unas hojitas de color blanco, ya para finalizar la primera de las latas, lo que hice fue agregarle unos pequeños detalles por la parte superior e inferior de la lata, y no fue algo muy complicado, solo unas pequeñas rayitas que puedan simular los punteos de una aguja al coser, y dejar la linea de la costura.
Luego con la siguiente lata, que tiene forma muy curiosa, parece un balde muy pequeño. Ahora bien, con esta procedí a pintarla de color morado claro por la parte de afuera y de color gris por el interior de la lata en forma de balde, luego por la parte de afuera la decoré haciendo una serie de puntos que aprendí hacer luego de haber terminado un curso hace algun tiempo donde aprendí una tacnica llamada puntillismo. Es una de las técnicas que más uso.
Como pueden apreciar la decoración no es muy complicada, en verdad es algo muy sencillo de hacer, y el resultado final es muy bonito, espero que les haya gustado y se animen a decorar una lata o varias que tengan en casa. Yo lo disfruté mucho, quizá sea porque pintar es de mis actividades favoritas del mundo. Sin más que decirles me despido, muchas bendiciones para todos.
Hasta la próxima.