There are spaces at home that present us with certain challenges, especially if we don't have much budget, or in my case, ZERO budget, and that's where creativity plays its role. And today I leave you with two tips to "fill" those empty spaces on the walls.
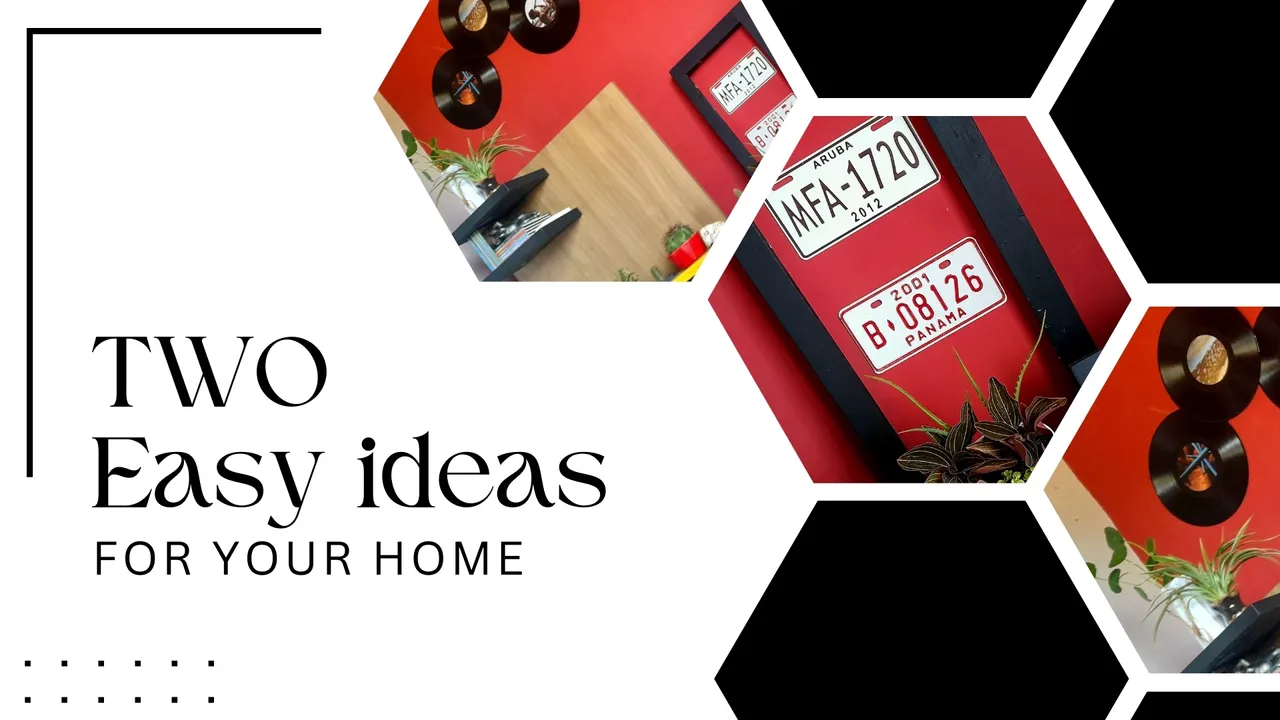
Happy day my beautiful people, I hope you are feeling great, today is about tips, tricks and techniques, not only for home care, but to make it look nicer, so here I am once again in Home Solutions with two ideas that I loved to solve some small decorating "problems" I had at home.
Both were focused on the focal wall of the living room, where there was for a long time, a picture that we made with some useful material when Matias was in preschool (today Mati is 13 years old, and is about to start his second year of high school).
The painting was made with an old window frame and paper rolls, cut out and painted black, but over the years it deteriorated and we decided to remove all the decoration and only the frame was left, which of course I ended up removing, since it made no sense to have it there.
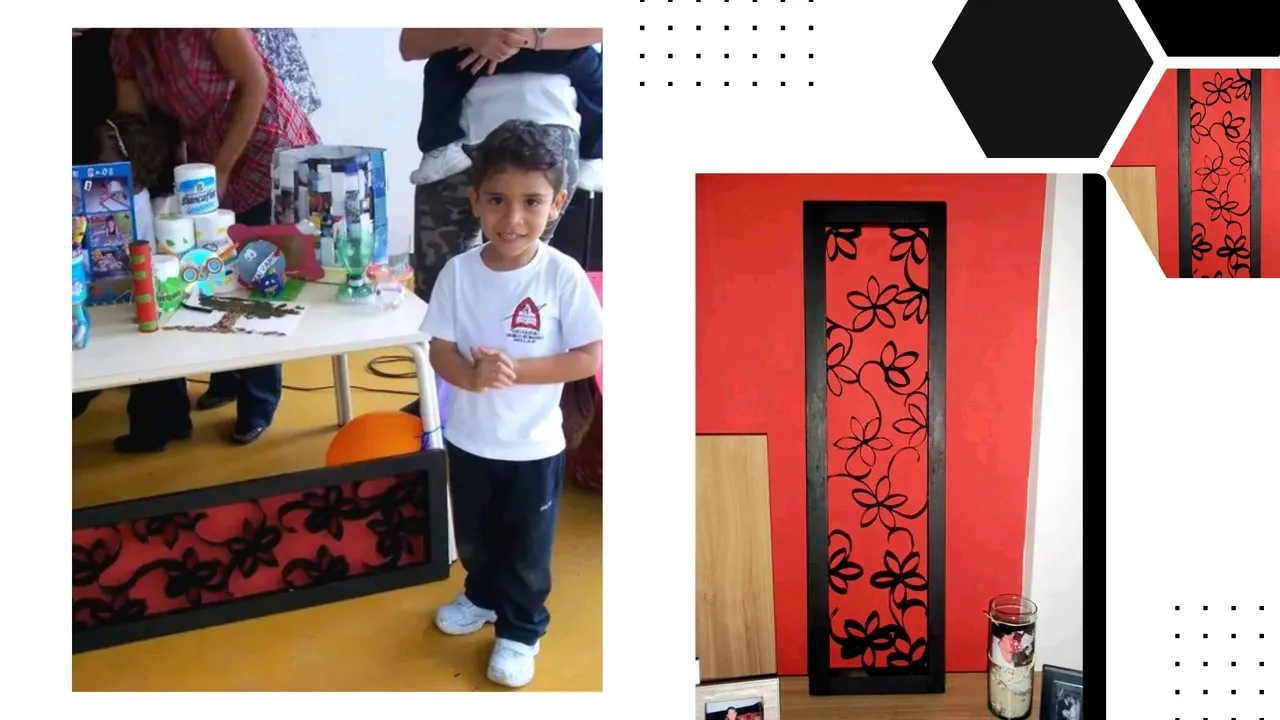
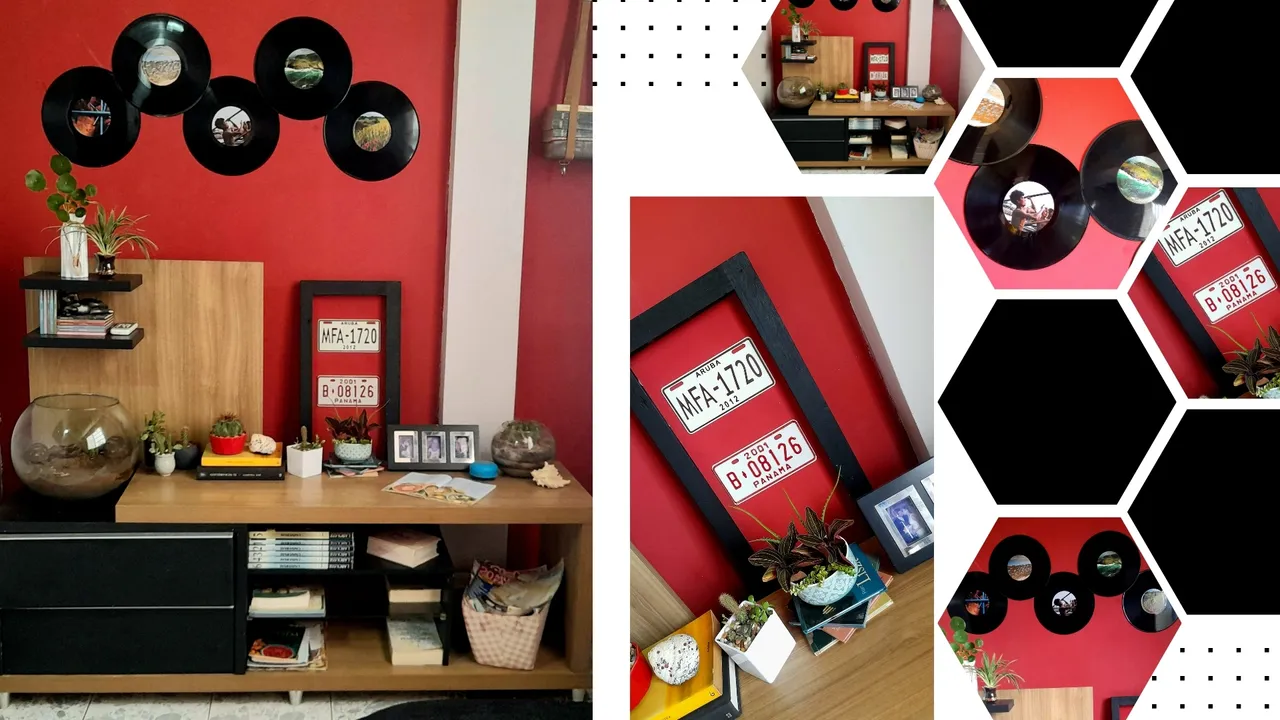
The thing is that I decided to remove it and place it vertically behind the entertainment cabinet and although I thought it looked "good ", the wall above was left with nothing, and I didn't love the frame alone either, but I just let it go, until the ideas that are coming to the community, activated my "decorator vein " and I got down to work, and the first thing was to fill the empty space with an idea I took from our dear @natica83, who weeks ago left us a pretty cool post pretty cool where she used vinyl records, and since my mom had some at home I decided to use them.
But don't worry, I wasn't that shameless and I didn't copy the idea Natalia shared with us, I adapted it to my taste.
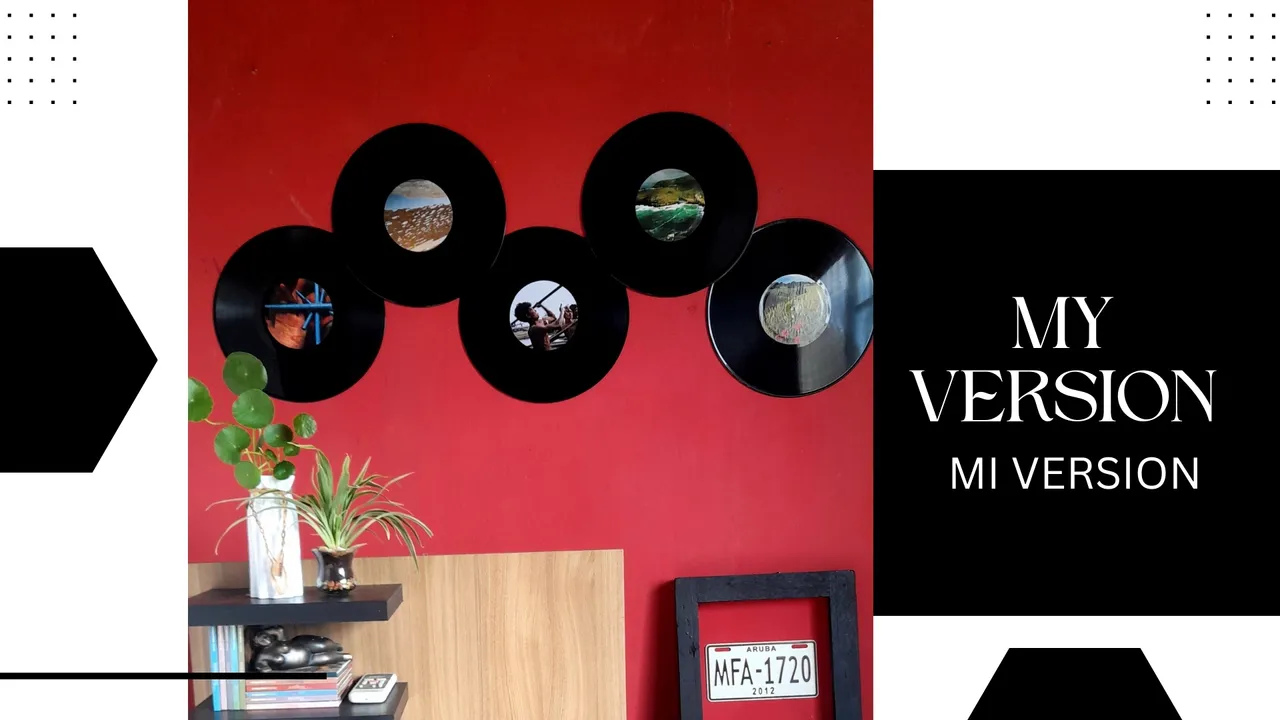
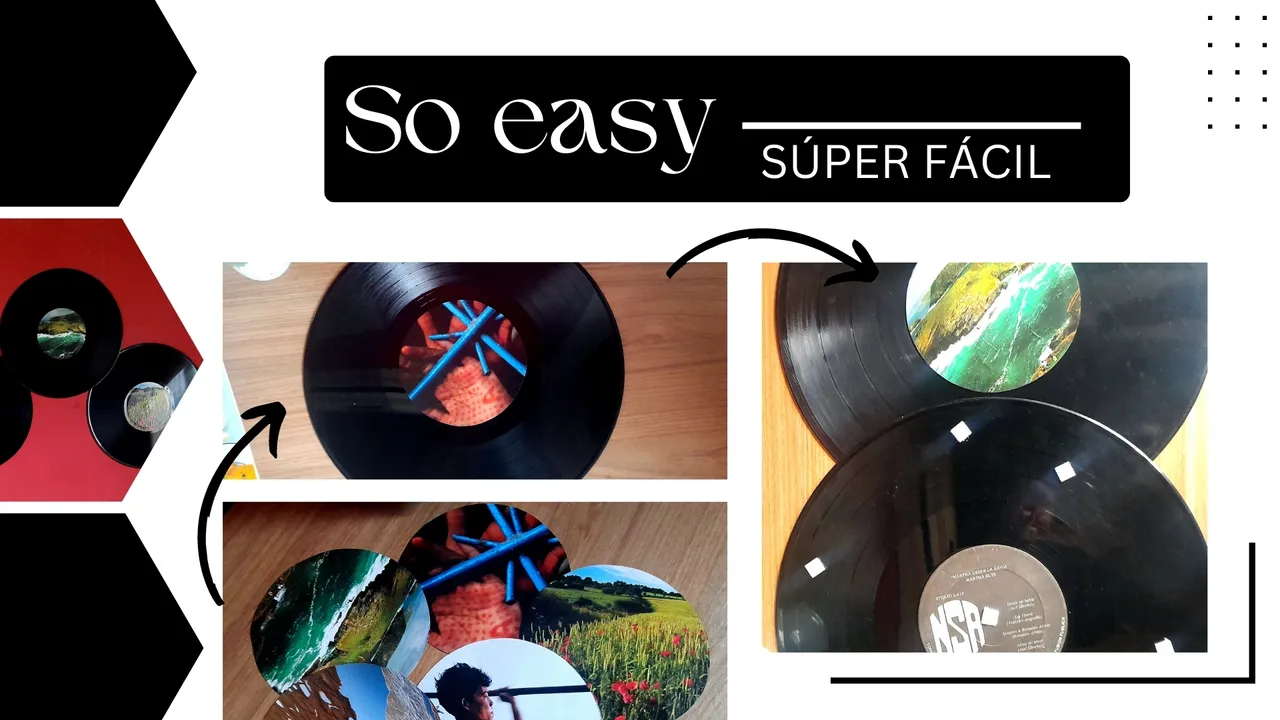
What I did was to clean the vinyl very well and look in some magazines for images that I liked. In this case, I took some very nice ones from National Geographic and cut them out so that they covered the central part of the disk, and then glued them with white glue.
Once this step was done, I just put small pieces of double-sided adhesive that I use for my crafts, put together the design I wanted and proceeded to glue it on the wall. And that way, after a few years I was able to occupy that "blank " space with a decoration that I simply loved and that didn't cost me a single penny.
If you look closely, these sconces fit perfectly with the style of decoration of my living room, so I am more than happy and grateful to my dear @natica for her excellent contribution to the community and to my little house.
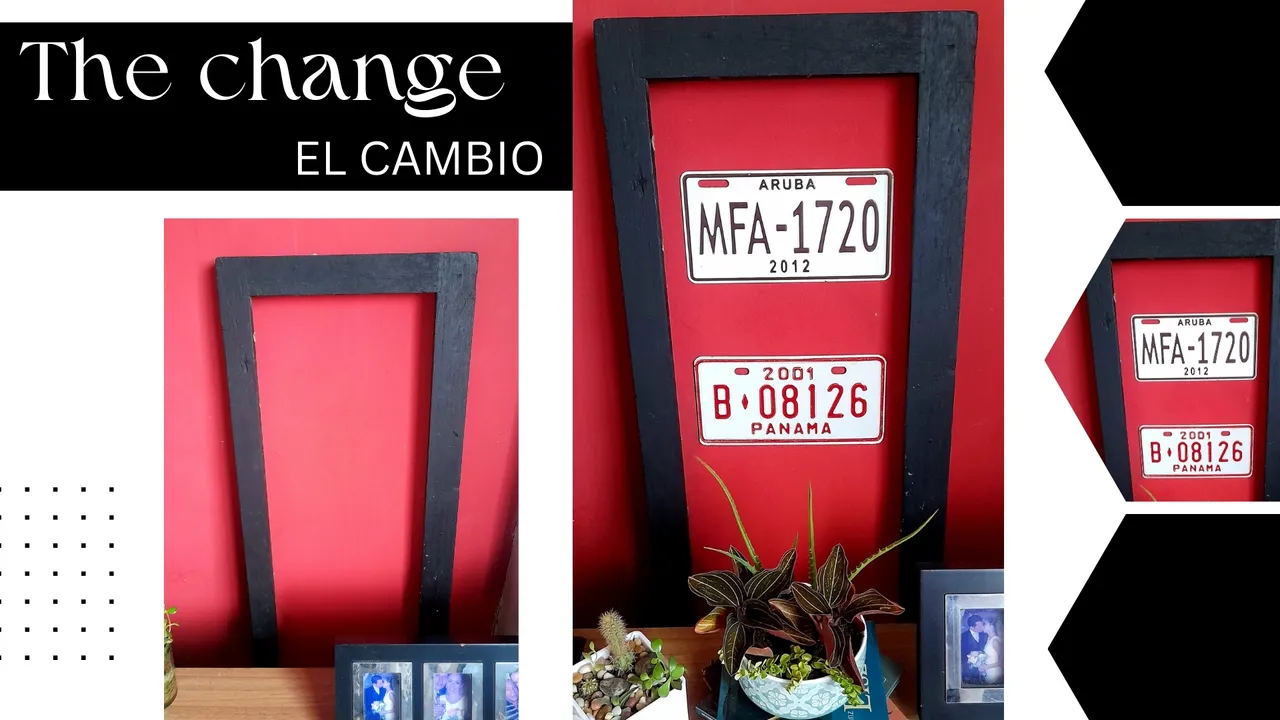
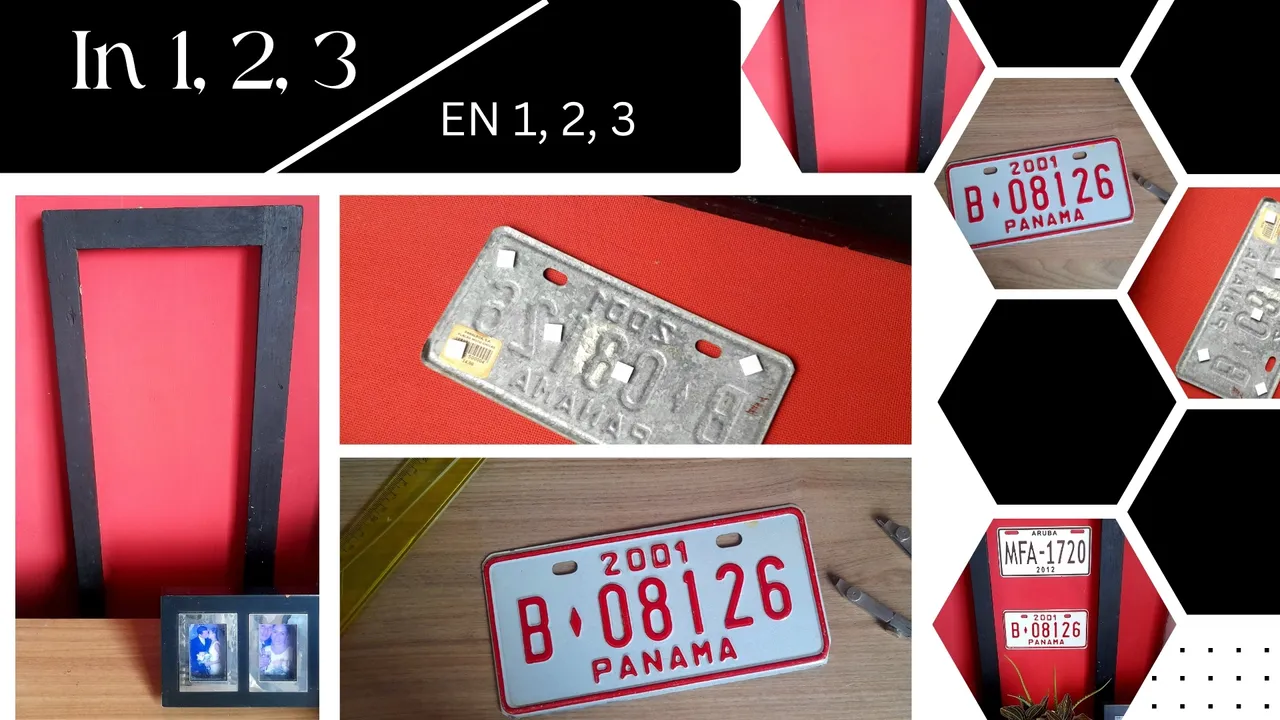
But things didn't stop there, and since it was activated mode with the room, I decided to give "life " to the empty marker, of course without spending anything, so I was thinking and looking at home for something I could use for that purpose and I found some small motorcycle plates that we bought in 2015 on our vacations aboard a cruise.
Of those I only had two, one from Panama and one from Aruba, but they turned out to be perfect, as the space sticking out of the frame wasn't very big.
What I did was really simple, just clean the surfaces of the plates and the frame very well, since I would use the adhesive and any dust particles will prevent it from being fixed, so take that into account when working with this material to avoid inconveniences.
Once they were clean and dry I placed the adhesive on the plates and then placed them on the frame, pressing hard so that they were very well fixed. Finally I put the frame in place, and the result is the one you see in the pictures.
The truth is that I was in love and super satisfied with the result because besides looking beautiful, and very much to my taste, it is something I did quite fast and without spending absolutely nothing. So once again it is demonstrated that desire and creativity are everything when it comes to change our home. I am very grateful to Natalia for sharing her ideas with us, because that is exactly the goal of the community, to provide ideas and solutions that those who visit us can use at home, and turn to HS looking for them. Kisses and blessings guys!

Hay espacios en casa que nos presentan ciertos retos, sobre todo si no contamos con mucho presupuesto, o en mi caso, con CERO presupuesto, y es ahí donde la creatividad hace su papel. Y hoy les dejo dos tips para "llenar" esos espacios vacíos en las paredes.
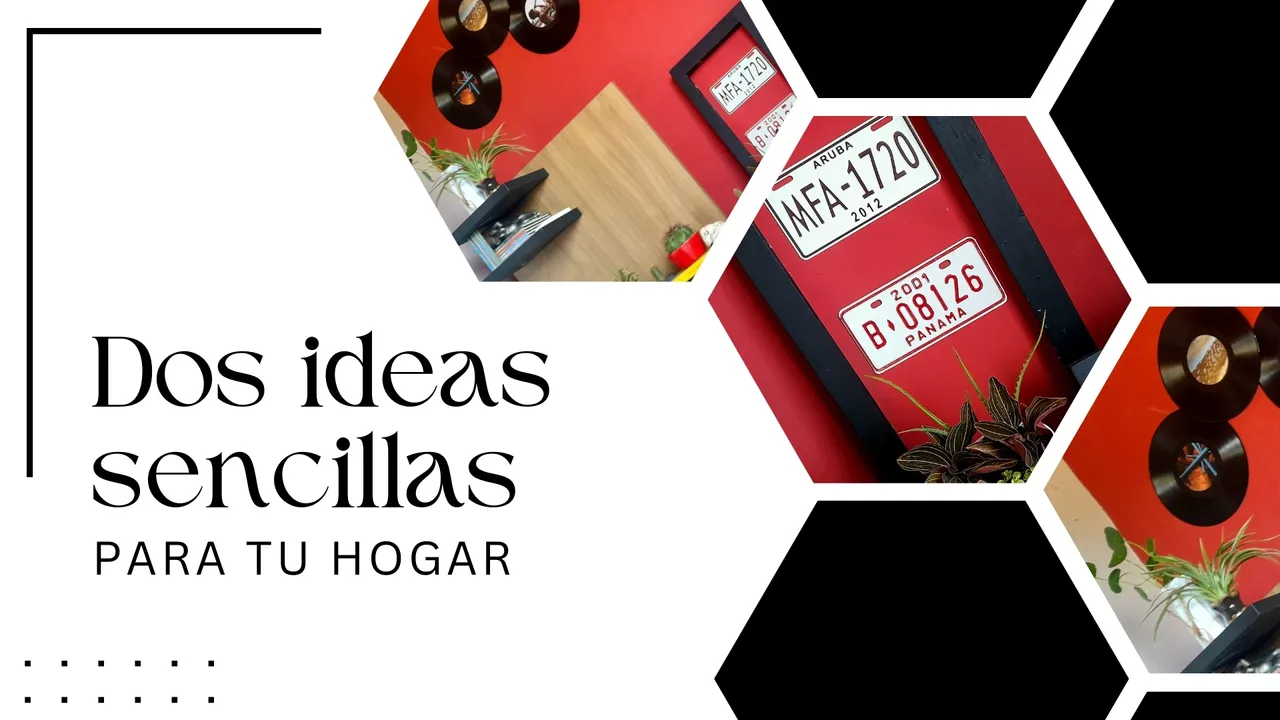
Feliz día mi gente linda, espero se encuentren súper bien, el día de hoy es de tips, trucos y técnicas, no solo para el cuidado del hogar, sino para hacerlo lucir más lindo, así que heme aquí una vez más en Home Solutions con dos ideas que me encantaron para solucionar unos pequeños "problemitas" de decoración que tenía en casa.
Ambos estaban concentrados en la pared focal de la sala, en la que estuvo durante un buen tiempo, un cuadro que realizamos con material de provecho cuando Matías estaba en preescolar (hoy Mati tiene 13 años, y está por iniciar segundo año de secundaria).
El cuadro lo elaboramos con un marco viejo de ventana y con rollos de papel, recortados y pintados de negro, pero con el paso de los años se fue deteriorando y decidimos retirar toda la decoración y quedó solo el marco, el que por supuesto terminé retirando, ya que no tenía ningún sentido tenerlo ahí.
El caso es que decidí quitarlo y colocarlo de forma vertical detrás del mueble de entretenimiento y aunque me parecía se veía "bien", la pared arriba quedó sin nada, y el marco solo tampoco me encantaba, pero simplemente lo dejé pasar, hasta que las ideas que van llegando a la comunidad, activaron mi "vena decoradora" y me puse manos a la obra, y lo primero fue llenar el espacio vacío con una idea que tomé de nuestra querida @natica83, quien semanas atrás nos dejó un post bastante genial donde utilizó discos de vinilo, y ya que mi mamá tenía algunos en casa decidí utilizarlos.
Pero no se preocupen, no fui tan descarada y no copié tal cual la idea que nos compartió Natalia, sino que la adapté a mi gusto.
Lo que hice fue limpiar muy bien los vinilos y buscar en algunas revistas imágenes que me gustaran. En este caso, tomé unas muy bonitas de National Geographic y las recorte de manera que cubrieran la parte central del disco, para luego pegarlas con pega blanca.
Una vez listo este paso, solo coloque detrás pequeñas piezas de adhesivo doble faz del que utilizo para mis manualidades, armé el diseño que quería y procedí a pegarlo en la pared. Y de esa manera, después de algunos años pude ocupar ese espacio en "blanco" con una decoración que simplemente amé y que no me costó un solo centavo.
Si se fijan bien, estos apliques encajan perfectamente con el estilo de decoración de mi salita, así que estoy más que feliz y agradecida con mi querida @natica por su excelente aporte a la comunidad y a mi casita.
Pero la cosa no quedó ahí, y ya que estaba modo activada con la sala, decidí darle "vida" al marcó vacío, por supuesto sin gastar nada, así que estuve pensando y buscando en casa algo que pudiese utilizar para tal fin y me encontré con unas pequeñas placas de motocicletas que compramos en el año 2015 en nuestras vacaciones a bordo de un crucero.
De esas solo tenía dos, una de Panamá y otra de Aruba, pero resultaban perfectas, ya que el espacio que sobresalía del marco no era muy grande.
Lo que hice fue realmente sencillo, solo limpie muy bien las superficies de las placas y del marco, ya que utilizaría el adhesivo y cualquier partícula de polvo impedirán que se fije, así que tomen eso en cuenta a la hora de trabajar con este material para evitar inconvenientes.
Una vez que estuvieron limpias y secas coloqué el adhesivo en las placas y luego las ubiqué en el marco, presionando con fuerza para que quedaran muy bien fijadas. Finalmente coloqué el marco en su lugar, y el resultado es este que ven en las imágenes.
La verdad yo quedé enamorada y súper satisfecha con el resultado pues además de lucir hermoso, y muy a mi gusto, es algo que hice bastante rápido y sin gastar absolutamente nada. Por lo que una vez más queda demostrado que las ganas y la creatividad lo son todo al momento darle un cambio a nuestro hogar. Súper agradecida con Natalia por compartir con nosotros sus ideas, pues justamente ese el objetivo de la comunidad, aportar ideas y soluciones que quienes nos visitan puedan utilizar en casa, y recurran a HS en busca de ellas. ¡Besitos y bendiciones chicos!