EN ESPAÑOL:
Un gran saludo para toda la comunidad de
Hive-Motors, les deseo muchos éxitos para este nuevo año 2023, Les cuento que el día 30 y 31 de diciembre me puse a reparar la lavadora de mi casa, la cual presentó una fuga de agua por el tubo de la transmisión, por lo que era necesario reemplazar los sellos que están ubicados precisamente en el tubo de la transmisión, pero cuando comencé a desarmar la lavadora surgió un nuevo trabajo, ya que al retirar la tina, me di cuenta que la base del piso estaba muy deteriorada por el oxido, así que tuve que hacerle un mantenimiento general a la lavadora, este trabajo se los mostré en mi publicación anterior correspondiente a la primera parte de este interesante trabajo, fue un trabajo un poco duro, pero valió la pena, porque logré alargarle la vida útil a la lavadora de mi casa.
Reemplazo de sellos de fugas y mantenimiento general de lavadora Westinghouse (Parte-2)
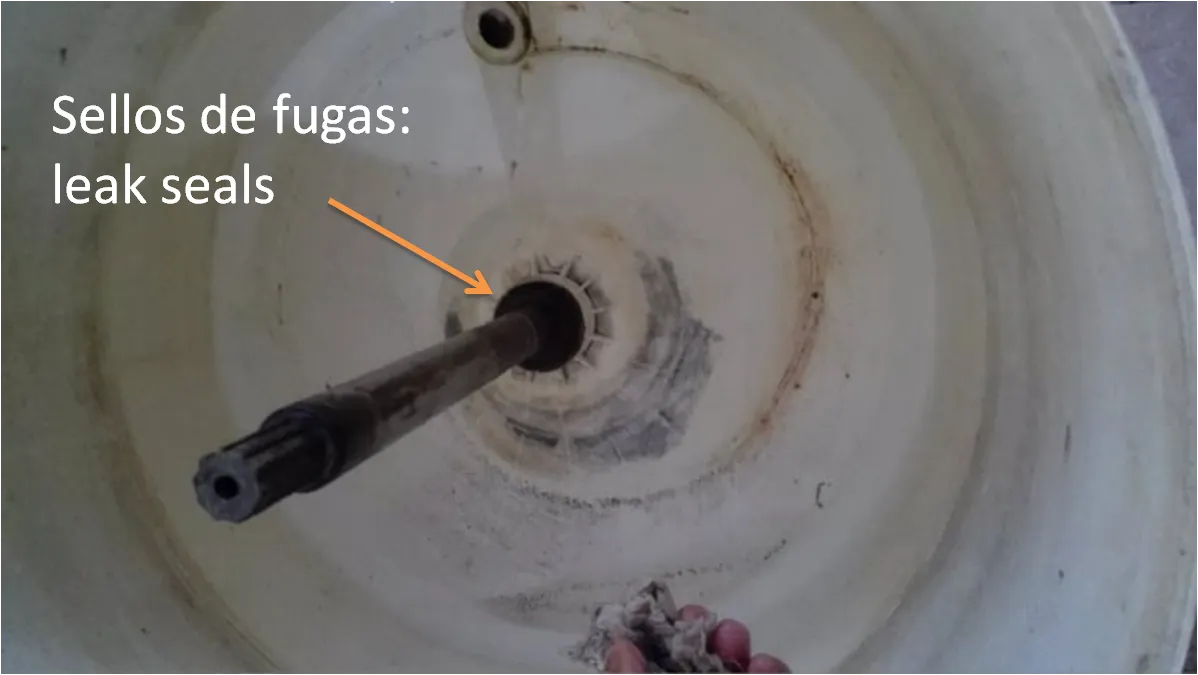
Bueno amigos, me tocó trabajar el 31 de diciembre, si amigos, el viernes 30, comencé a desarmar la lavadora para cambiarle los sellos, pero al retirar todo el cuerpo de la tina, me di cuenta que la base del piso estaba oxidada, por lo que comencé a remover todo el oxido y a pintar esta base con fondo anticorrosivo y pintura, después de este mantenimiento, el día 31 de diciembre comencé a armar la lavadora y a colocar los sellos los cuales van ubicados en el centro de la tina, específicamente en el tubo de la transmisión, estos sellos están formados por un aro de bronce, el cual hace fricción con un sello de goma que posee en su interior un resorte para mantener cierta presión contra el aro para evitar la fuga del agua de la tina, también hay un tercer sello el cual va colocado dentro del aro de bronce, este sello sirve para evitar se filtre el agua entre este aro y el tubo de la transmisión.
Colocación del kit de sellos a la lavadora
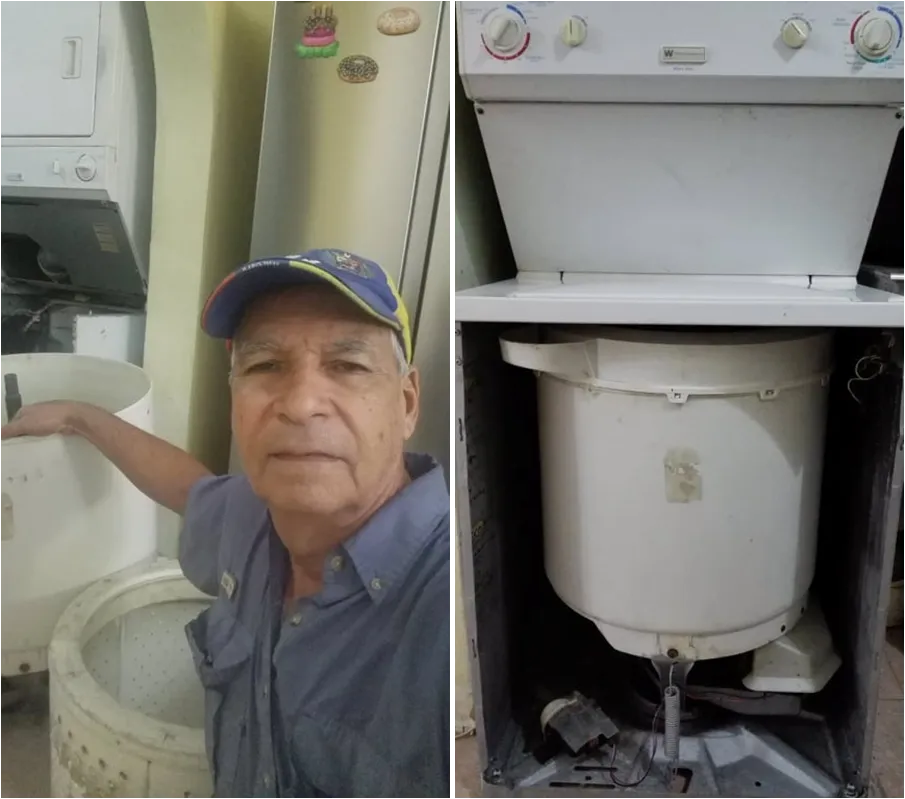
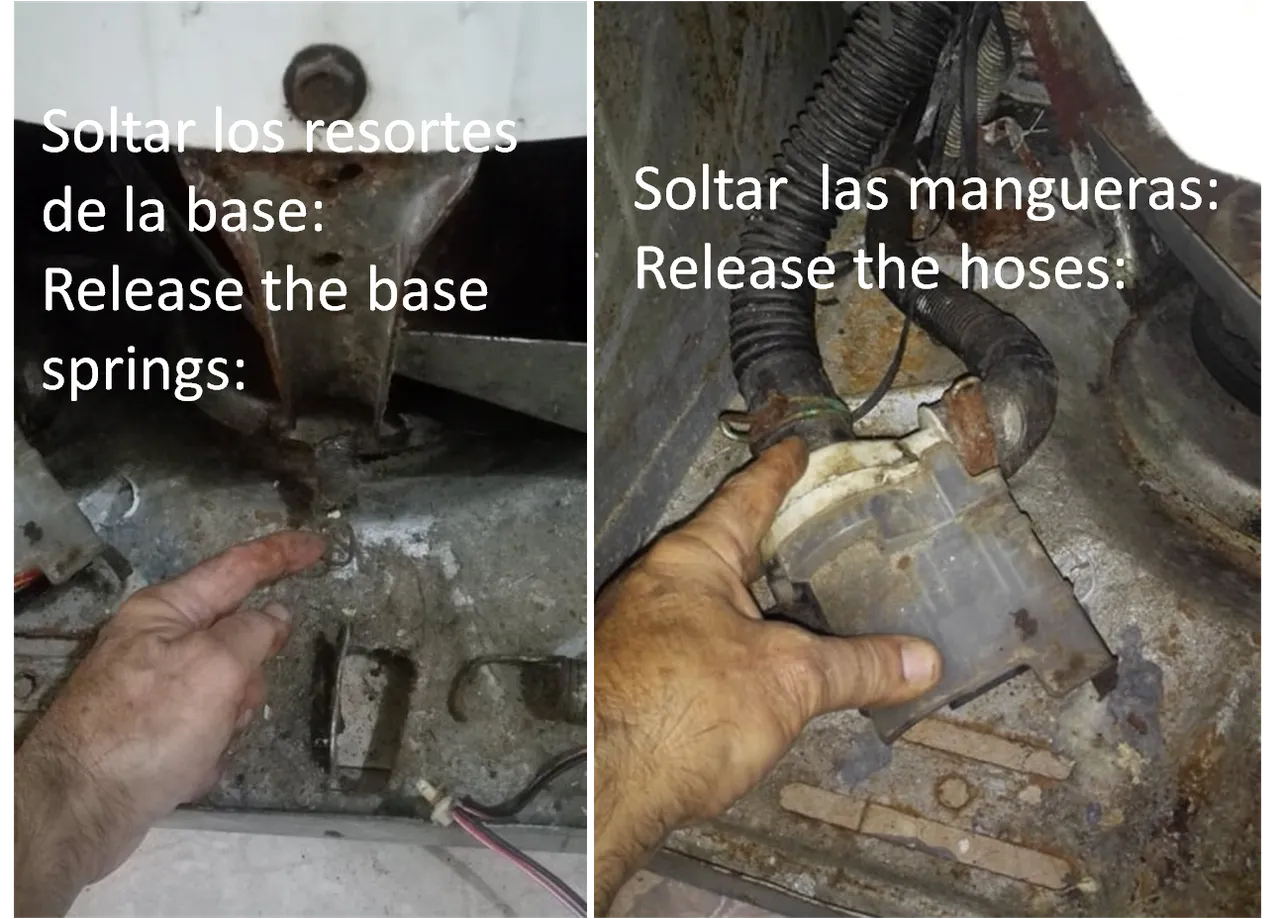
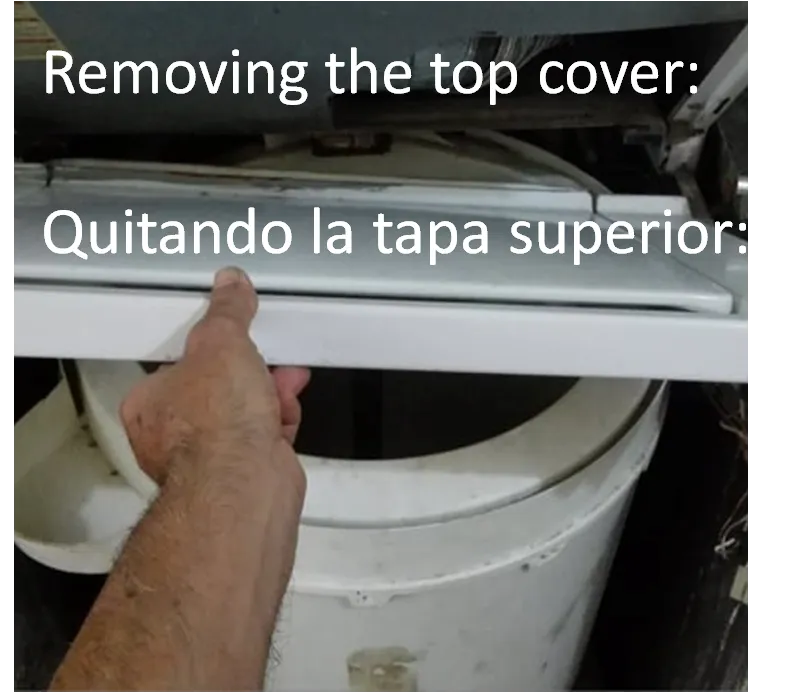
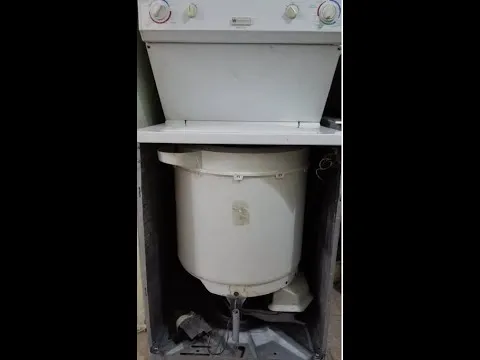
- Para poder cambiar los sellos, es necesario retirar todo el cuerpo de la tina con la base metálica que sostiene la transmisión, también tengo que quitar los resortes de estabilización, la tapa superior y desconectar las mangueras y el motor:
Retirando todo el cuerpo de la tina:
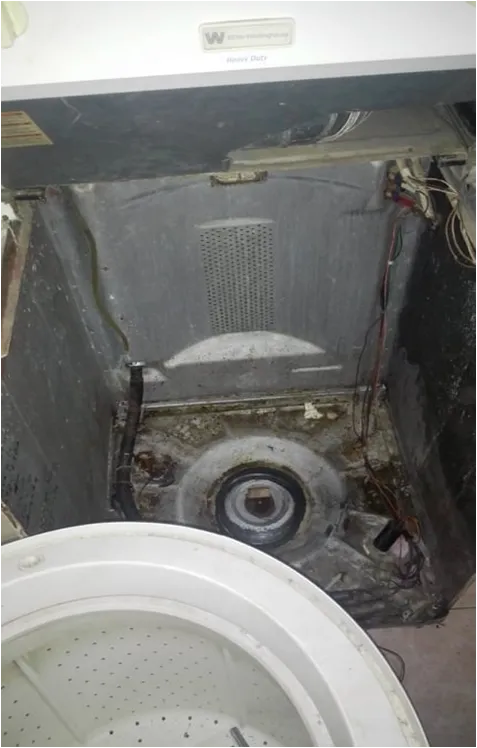
- El siguiente paso será, remover los tornillos y la pletina de hierro que sujeta el tambor, esto esta dentro de la tina, después de realizar este procedimiento, levantamos el tambor, para que se deslice por el tubo, a veces hay dificultad para sacar el tambor debido a la cantidad de barro y detergente que acumula en el tubo, pero cuando se presenta esta situación, procedemos a limpiar la pieza cónica y el tubo, luego le ponemos un poquito de lubricante y le hacemos varios movimientos para que se suelte:
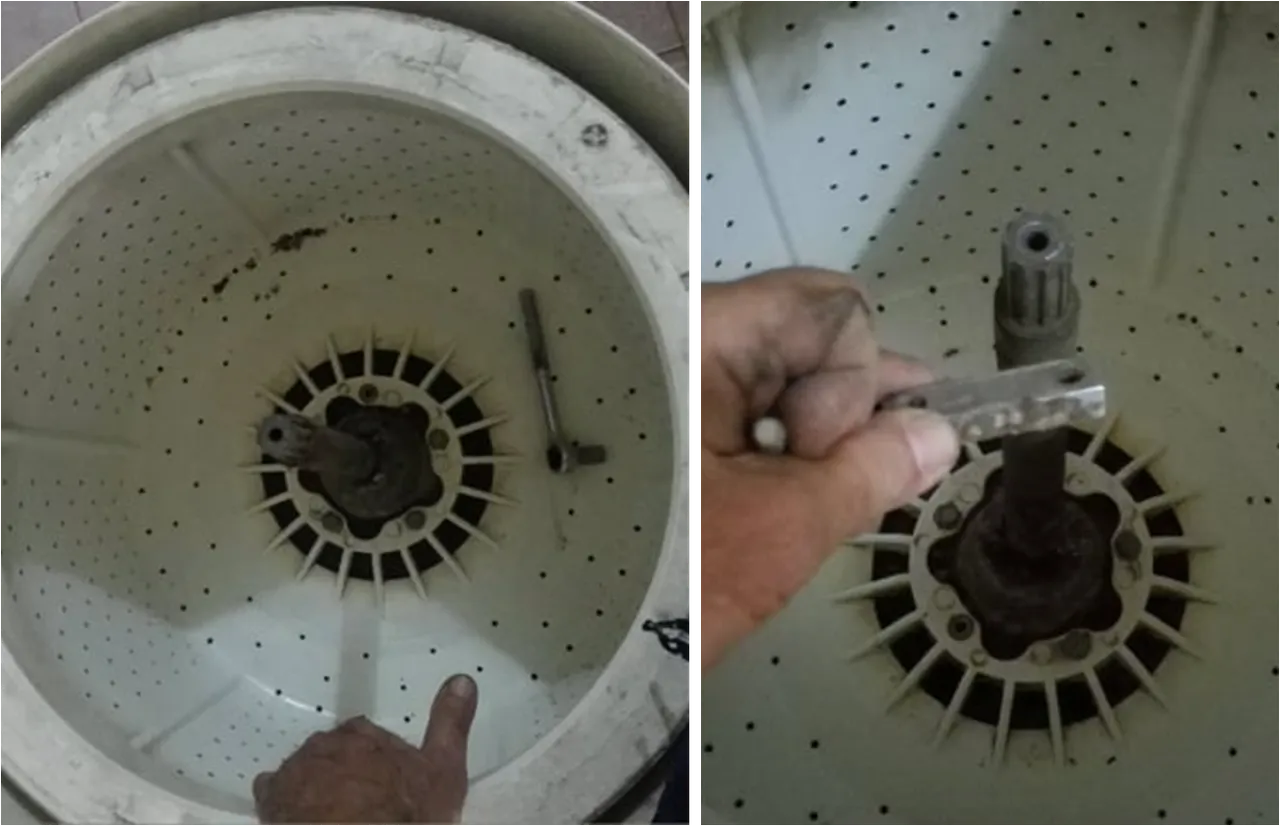
- Al retirar el tambor podemos ver los sellos que están en el tubo de la transmisión, voy a remover estos sellos para sustituirlos por unos nuevos:
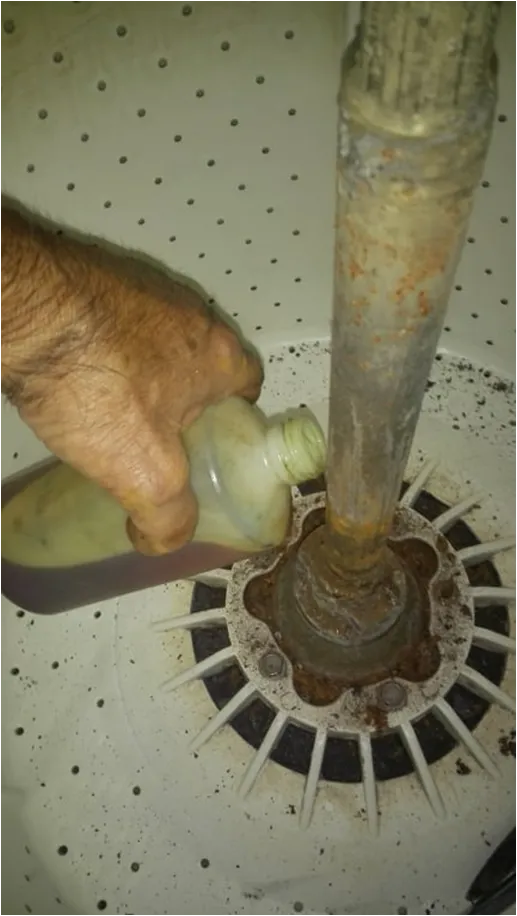
- Antes de colocar los sellos nuevos, primero voy a limpiar y a lijar el tubo de la transmisión, para que los nuevos sellos se deslicen bien, porque cualquier residuo de detergente u oxido, los pueden romper:
- Ahora voy a colocar los sellos, comenzando con el sello cónico de goma, el cual le hace presión al aro de bronce, antes de colocar este sello, le voy a poner alrededor, silicon de empacaduras:
- El segundo sello será el aro de bronce con el sello de goma, tipo oring, es importante impregnar el tubo de aceite o grasa para que el sello de goma se deslice suavemente y no se rompa:
Armar nuevamente la lavadora
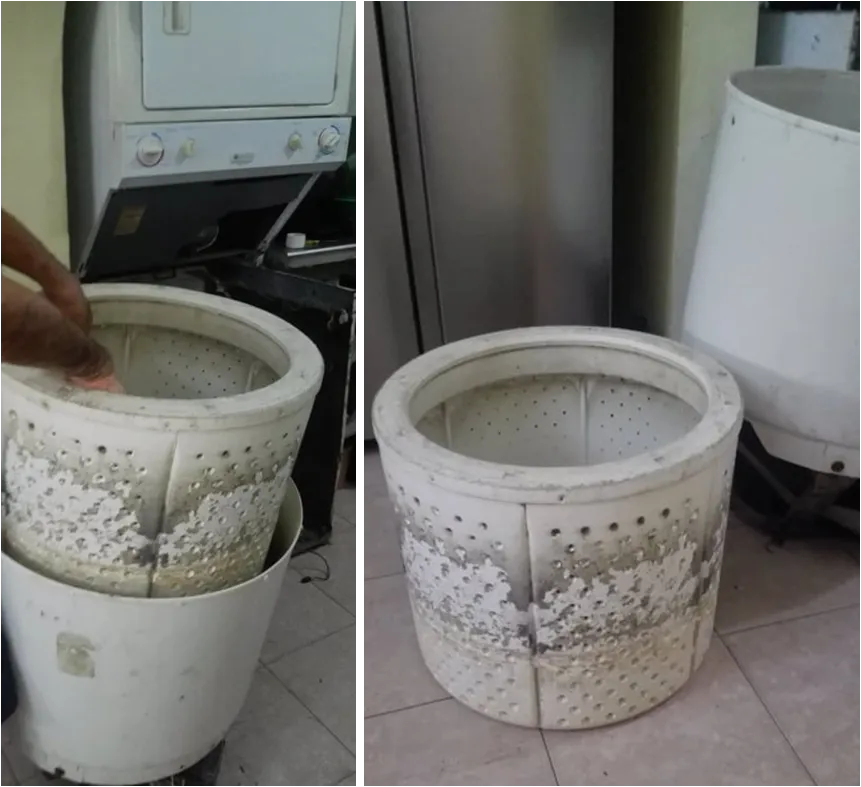
- Después de colocar los sellos, el siguiente paso será colocar nuevamente el tambor dentro de la tina, así como el aspa o batidor, luego montamos la tina sobre la base del piso con sus respectivos resortes de estabilización:
- Ahora voy a colocar todo el cuerpo de la tina y su base dentro del cajón de la lavadora, también le voy a colocar la bomba de agua y las mangueras, así como el conector del motor y la tapa superior que posee la puerta:

A continuación les presento el resultado a través de un vídeo:
Como han podido observar, la lavadora esta trabajando muy bien, no le puse la tapa del frente para que vean su parte interna y también porque quiero someter a prueba la lavadora, para ellos le dije a mi esposa que lavara una ropa, buenos hasta el momento todo esta bien, mi esposa esta muy contenta, porque antes tiraba hacia los lados a causa de un resorte que se había soltado, pero ahora esta más estable, solo vibra, que es normal, por eso repito, que valió la pena esta reparación, aunque me llevó casi todo el día del 31 de diciembre, pero ahora tenemos lavadora para unos cuantos años más, saludos y éxitos para todos en este año 2023.

IN ENGLISH:
A big greeting to the entire community of
Hive-Motors, I wish you many successes for this new year 2023, I tell you that on December 30 and 31 I started to repair the washing machine in my house , which presented a water leak through the transmission tube, for which it was necessary to replace the seals that are located precisely in the transmission tube, but when I began to disassemble the washing machine, a new job arose, since when removing the tub, I realized that the base of the floor was very deteriorated by rust, so I had to do general maintenance on the washing machine, I showed you this work in my [previous publication](https://hive.blog/ hive-102066/@oscarcede/eng-esp-replacement-of-leaking-seals-and-general-maintenance-of-washing-washer-westinghouse-part-1) corresponding to the first part of this interesting work, it was a a little hard, but it was worth it, because I managed to extend the useful life of my washing machine at home.
Replacement of leak seals and general maintenance of Westinghouse washing machine (Part-2)
Well friends, I had to work on December 31, yes friends, on Friday the 30th, I began to disassemble the washing machine to change the seals, but when I removed the whole body from the tub, I realized that the base of the floor was rusty, because of What I began to remove all the rust and paint this base with anticorrosive primer and paint, after this maintenance, on December 31 I began to assemble the washing machine and place the seals which are located in the center of the tub, specifically in the transmission tube, these seals are formed by a bronze ring, which rubs against a rubber seal that has a spring inside to maintain a certain pressure against the ring to prevent water from leaking from the tub, also There is a third seal which is placed inside the bronze ring. This seal is used to prevent water from seeping between this ring and the transmission tube.
Attaching the seal kit to the washing machine
- To be able to change the seals, it is necessary to remove the entire body of the tub with the metal base that supports the transmission, I also have to remove the stabilization springs, the upper cover and disconnect the hoses and the motor:
Removing the entire body from the tub:
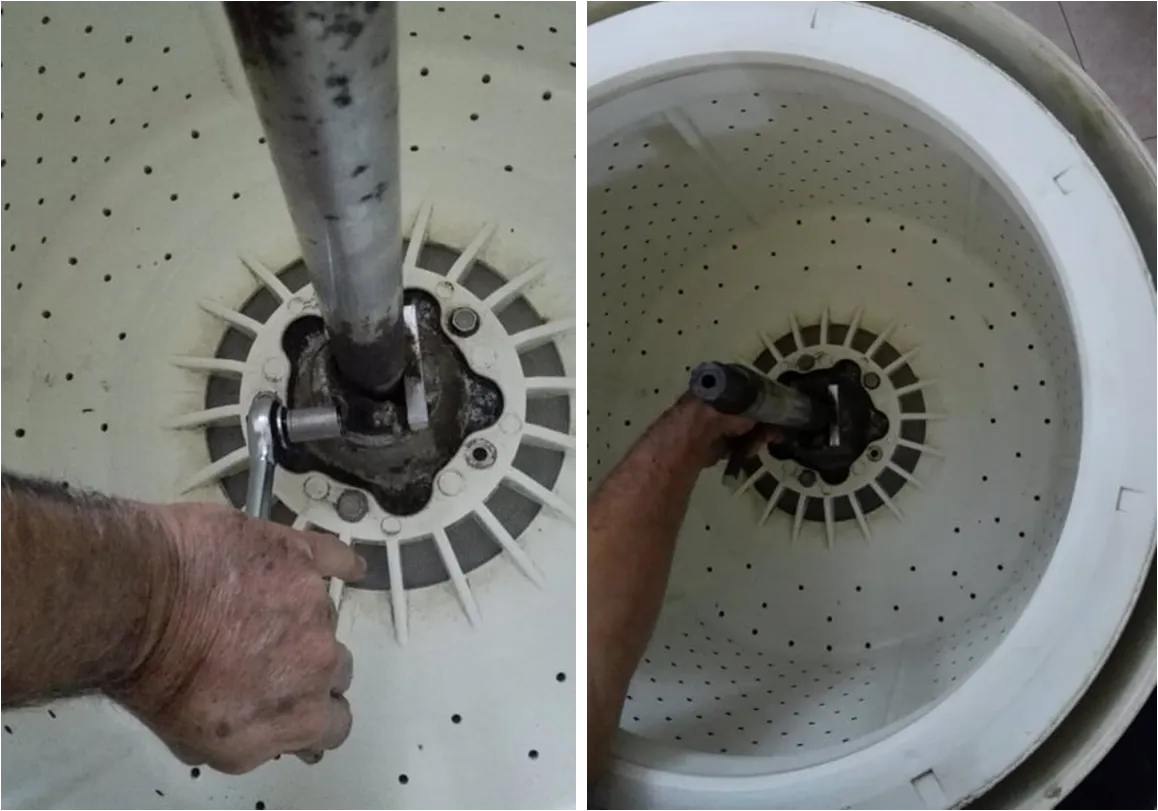
- The next step will be to remove the screws and the iron plate that holds the drum, this is inside the tub, after carrying out this procedure, we lift the drum, so that it slides through the tube, sometimes it is difficult to remove the drum due to the amount of mud and detergent that accumulates in the tube, but when this situation arises, we proceed to clean the conical piece and the tube, then we put a little lubricant on it and we make several movements to make it loosen:
- When removing the drum we can see the seals that are in the transmission tube, I am going to remove these seals to replace them with new ones:
- Before placing the new seals, first I am going to clean and sand the transmission tube, so that the new seals slide well, because any residue of detergent or rust can break them:
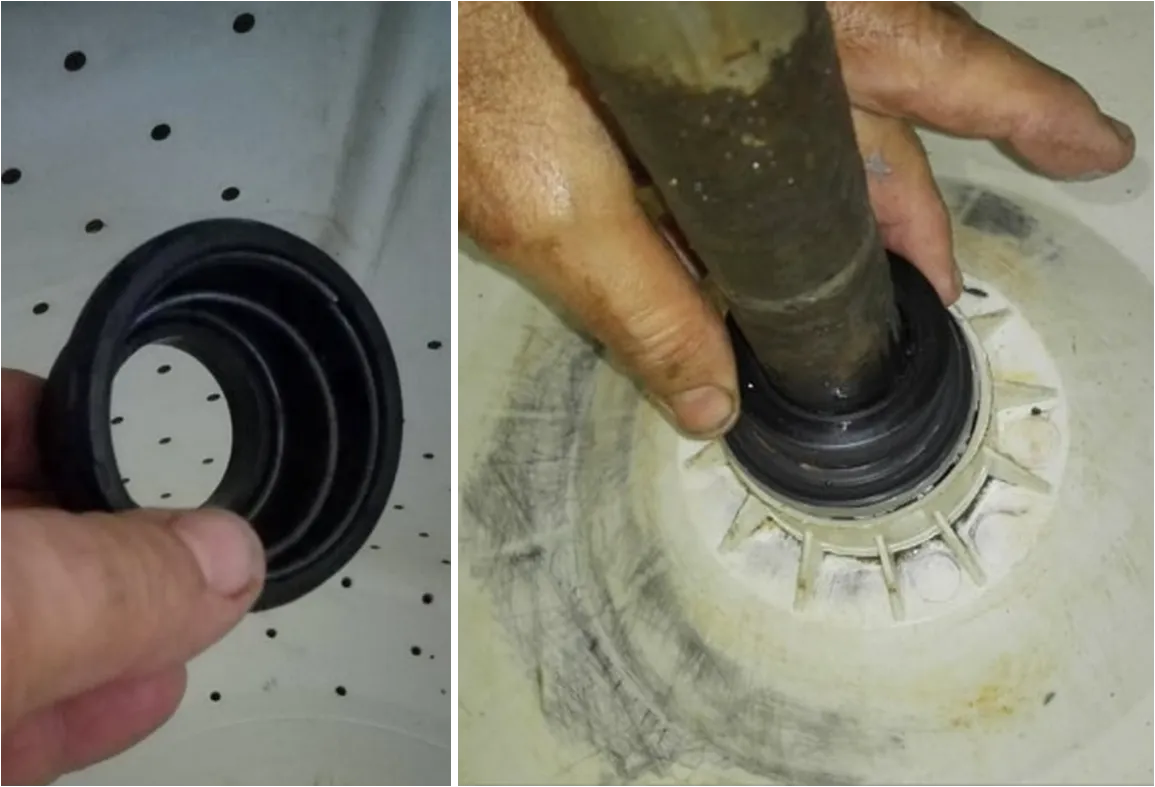
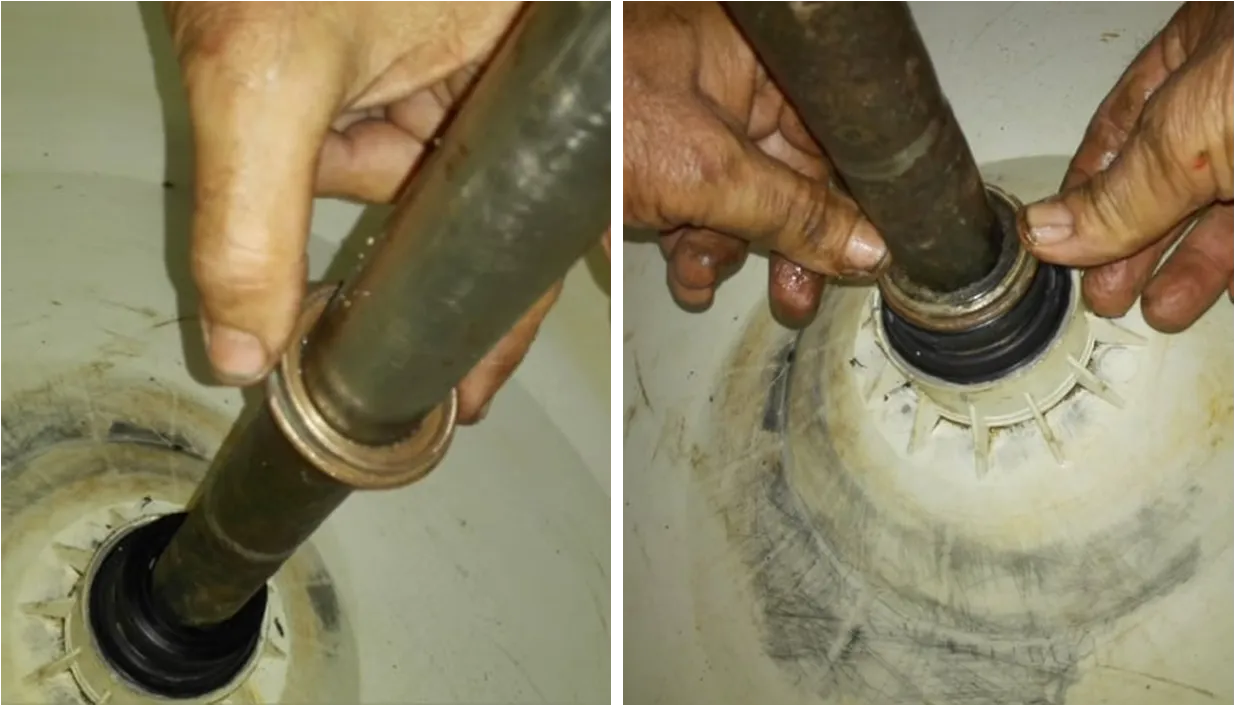
- Now I am going to place the seals, starting with the conical rubber seal, which puts pressure on the bronze ring, before placing this seal, I am going to put silicone gaskets around it:
- The second seal will be the bronze ring with the rubber seal, oring type, it is important to impregnate the tube with oil or grease so that the rubber seal slides smoothly and does not break:
Put the washing machine back together
- After placing the seals, the next step will be to place the drum inside the tub again, as well as the blade or beater, then we mount the tub on the base of the floor with its respective stabilization springs:
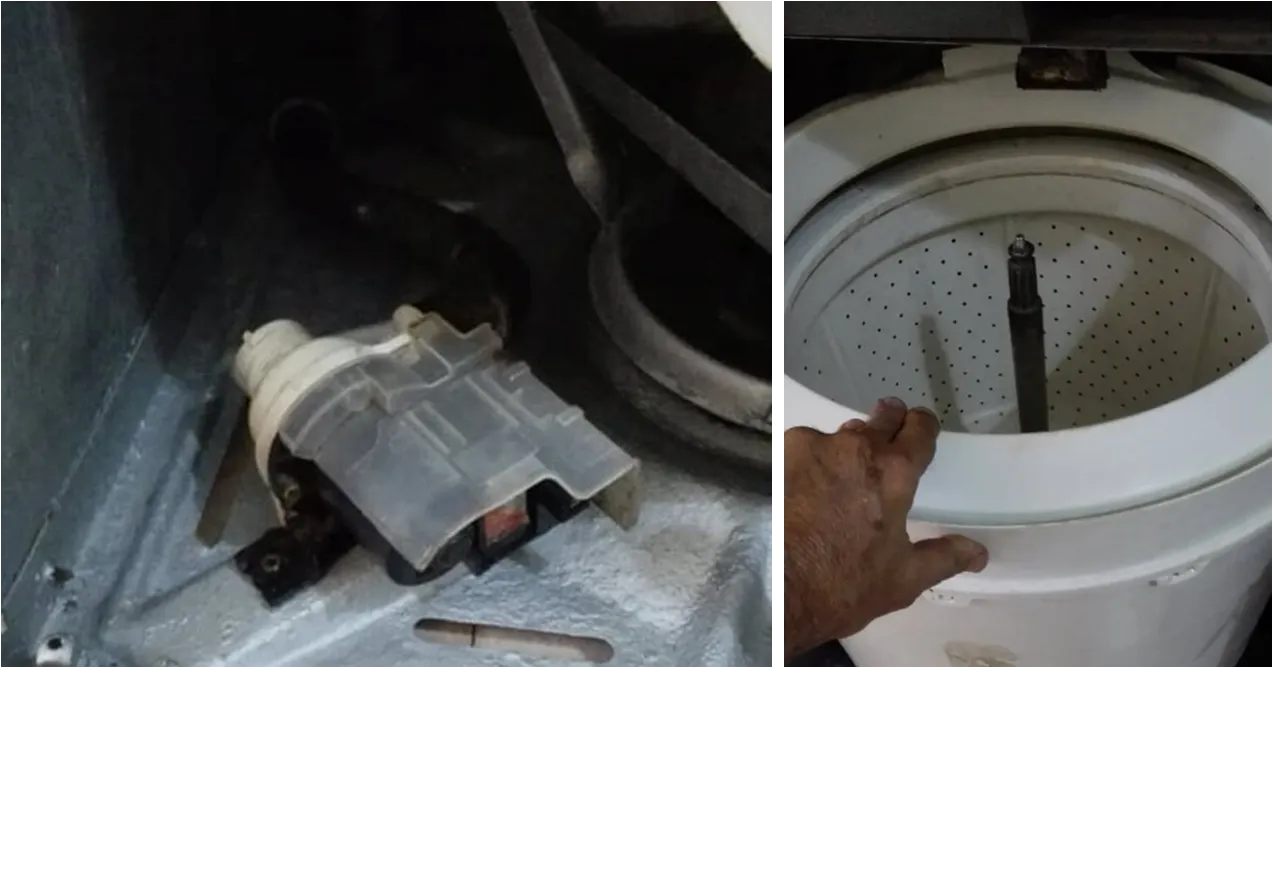
- Now I am going to place the entire body of the tub and its base inside the drawer of the washing machine, I am also going to place the water pump and hoses, as well as the motor connector and the upper cover that has the door:
Below I present the result through a video:
As you have been able to see, the washing machine works very well, I did not put the front cover on it so that they can see its internal part and also because I want to test the washing machine, for them I told my wife to wash some clothes, well, until Everything is fine here, my wife is very happy, because before it was pulling to the sides due to a spring that had come loose, but now it is more stable, it only vibrates, which is normal, so I repeat, this repair was worth it, although it took me almost all day December 31, but we already have a washing machine for a few more years, greetings and success for everyone in this year 2023.