
Hello Hive friends, I hope you have a great start of the week. After being absent for a long time due to college, problems with my internet and other things beyond my control. I return this new year 2023 with good foot to bring you my first post of the year. This time I am going to show you how to change a double outlet for a newer one. I want to change it for the reason that this old outlet when plugging in a outlet it loosens it or does not grip it firmly. Which is a problem, more than once we have had to go and check if things are plugged in because they loosen so much that the plugs come loose by themselves. For this reason I bought a newer one which is very useful, modern and has a good grip, as the internal pins that hold the legs of the plugs are firm. We started with the replacement of our outlet.
Hola amigos de Hive, espero que tengan un grandioso inicio de semana. Después de ausentarme por mucho tiempo debido a la universidad, problemas con mi internet y otras cosas ajenas a mi voluntad. Regreso este nuevo año 2023 con buen pie para traerles mi primer post del año. En esta oportunidad les vengo a mostrar cómo cambiar un tomacorriente doble por uno más nuevo. Lo quiero cambiar por la razón de que este antiguo tomacorriente al conectar un enchufe lo suelta o no lo agarra con firmeza. Lo cual es un problema, más de una vez hemos tenido que ir a revisar si las cosas están conectadas porque se aflojan tanto que se sueltan solos los enchufes. Por esta razón compre uno más nuevo el cual es muy útil, moderno y tiene un buen agarre, ya que las patitas o pines internos que agarran las patas de los enchufes están firmes. Comenzamos con el cambio de nuestro tomacorriente.
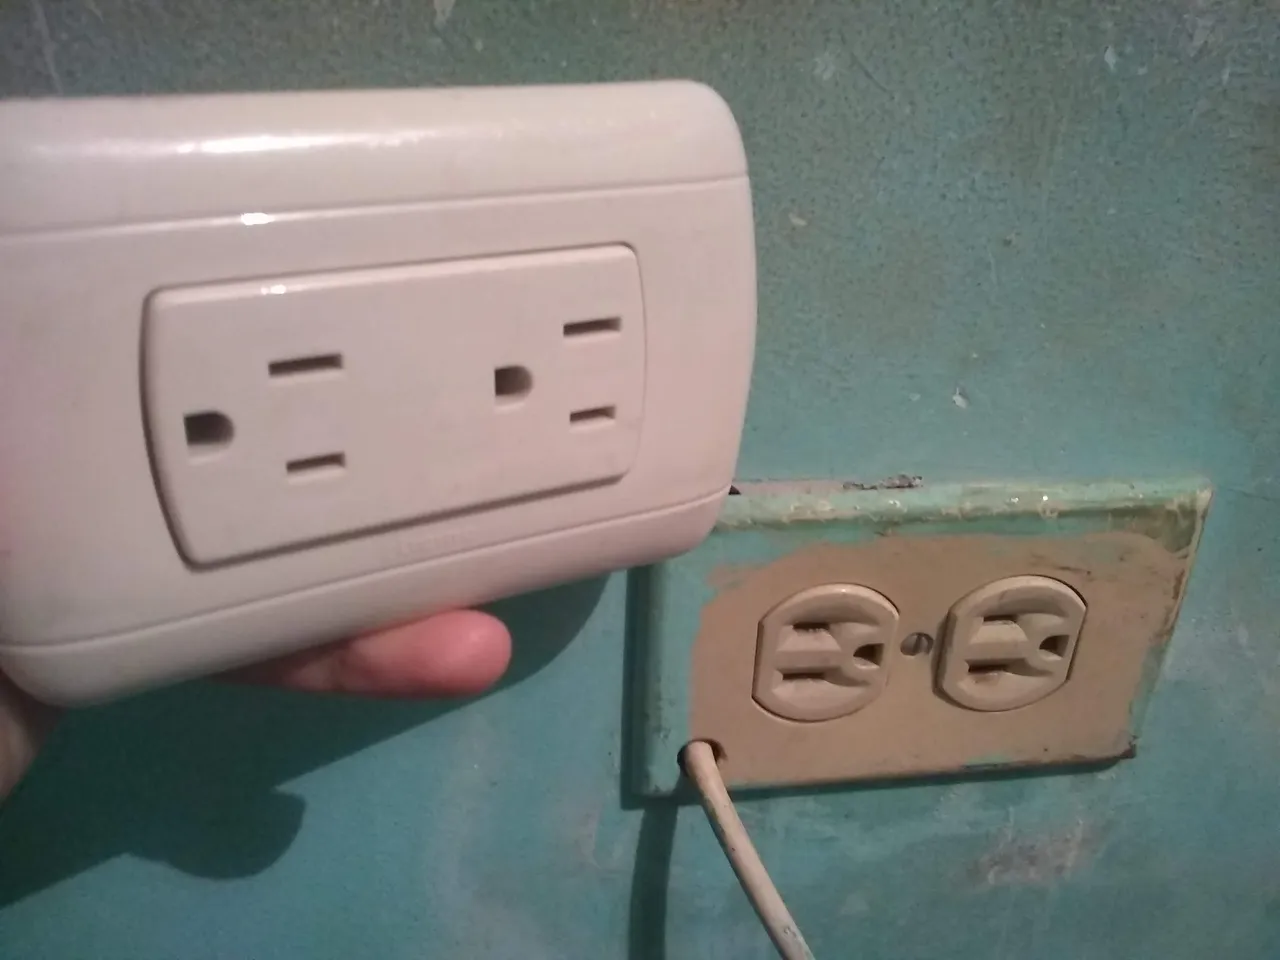
These are the outlets in question. On the left we have the new outlet that we will use to replace the old one on the right.
Estos son los tomacorrientes en cuestión. A la izquierda tenemos el nuevo tomacorriente que usaremos para reemplazar el antiguo que está a la derecha.
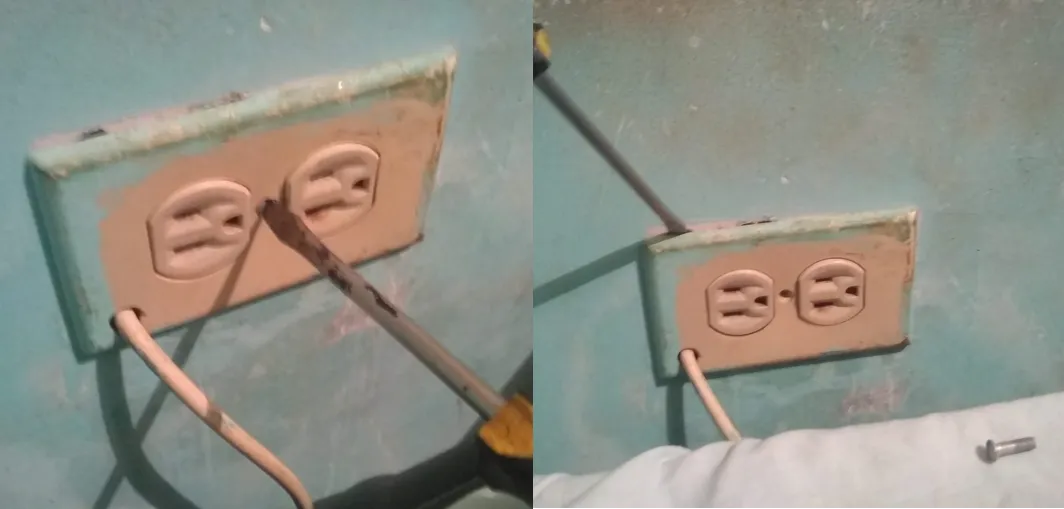
First we remove the screw located in the center of the outlet which is used to attach the face of the outlet to the outlet. Then remove the cover by exerting a little leverage pressure on one of its edges.
Primero quitamos el tornillo ubicado en el centro del tomacorriente el cual se usa para fijar la cara de este al tomacorriente. Luego sacamos la tapa ejerciendo un poco de presión como palanca en uno de sus bordes.
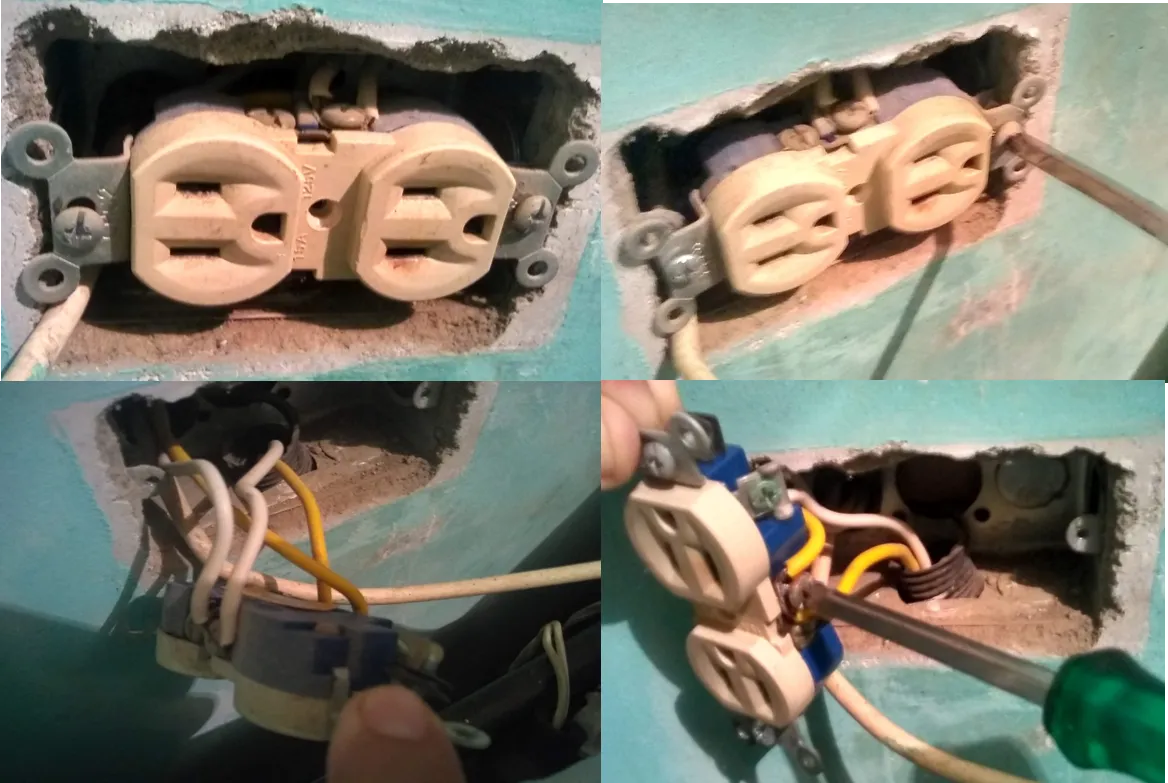
Once the outlet has been discovered, it is unscrewed from the wall or electrical box and we take it out to have access to the screws where its connections are located. It is important to be careful with touching both cables or that these touch each other directly.
Una vez ya descubierto la toma corriente, se desatornilla de la pared o cajetín eléctrico y lo sacamos para tener acceso a los tornillos en los que se encuentran sus conexiones. Es importante tener cuidado con tocar ambos cables o que estos se toquen directamente entre sí.
Once we have the wires in this way, we cut the wire a little and twist it so that it can enter through the holes of the outlet as in the following image.
Una vez tengamos los cables de esta manera cortamos un poco el alambre y lo enrrollamos para que pueda entrar por los agujeros del tomacorriente como en la siguiente imagen.
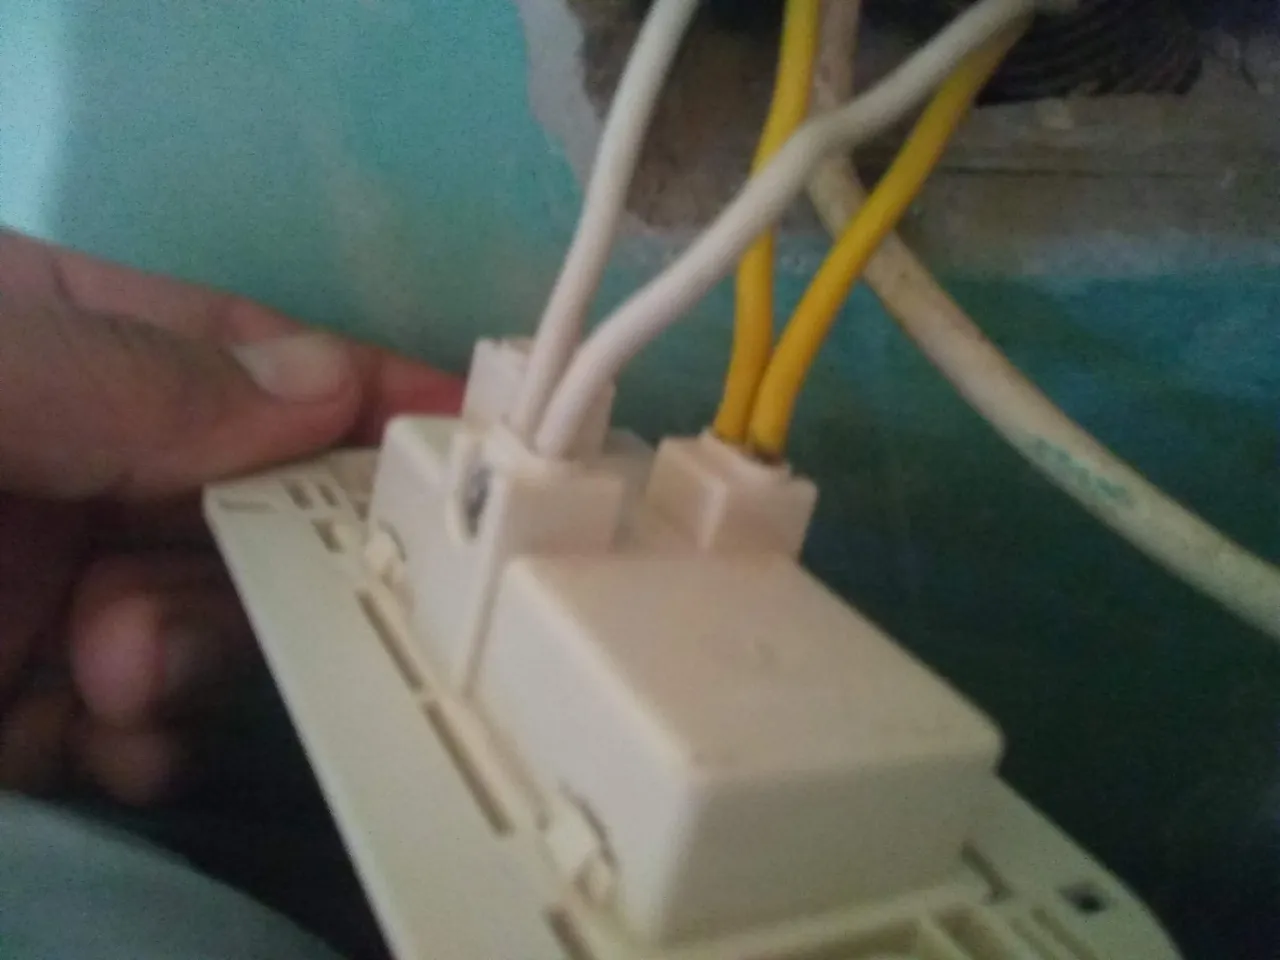
Remember that in a household alternating current is used. That is to say that one of the wires will be the phase (yellow) and the other neutral (white). We place it this way and we tighten the screws that it has to its side so that these cables do not come out.
Recordar que en un hogar se usa corriente alterna. Es decir que uno de los cables sera la fase (El amarillo) y en otro neutro (Blanco). Lo colocamos de esta manera y apretamos los tornillos que tiene a su lado para que estos cables no se salgan.
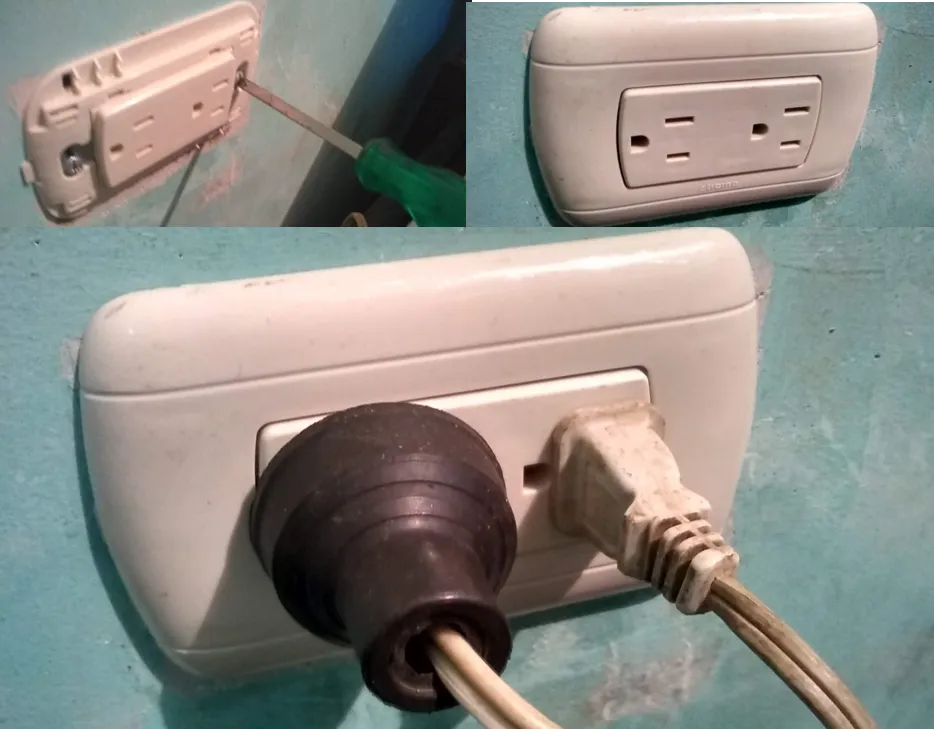
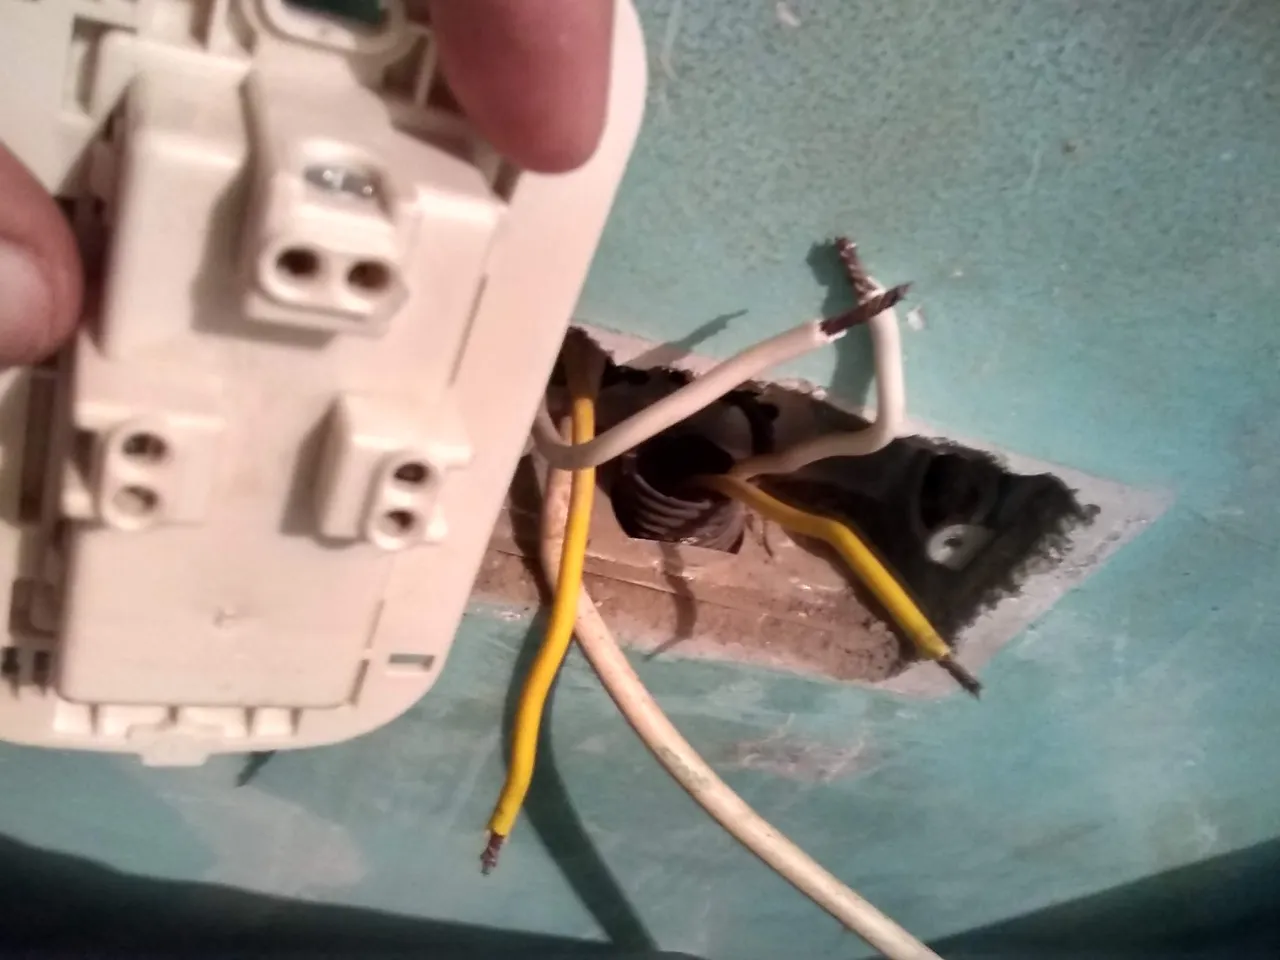
Now we attach this outlet to the wall and place the face of the outlet. Our outlet has been successfully replaced. I am very happy with the result as I have always wanted to make my room more modern. I feel this is a very good start towards that goal.
The flow of electrical charge that runs through a house is known as alternating current, it is so named because the polarity of the current alternates over time between negative and positive. As shown in the pictures we will have two wires, the Phase wire (in this case yellow) and the Neutral wire (which is the white wire). Residential electricity is interesting and it is great to learn a little more about it, I have always been very curious. I like to learn as much as I can about various subjects. That's why, in this opportunity, I share with you this little demonstration for those who love to learn as much as I do.
Ahora fijamos a la pared este tomacorriente y colocamos la cara del tomacorriente. Nuestro tomacorriente ha sido cambiado exitosamente. Estoy muy contento con el resultado ya que siempre he querido darle unos retoques a mi cuarto más modernos. Con esto siento que es un muy buen inicio para lograr dicho objetivo.
El flujo de carga eléctrica que corre en una casa es conocido como corriente alterna, esta lleva ese nombre debido a que la polaridad de esta alterna con el tiempo entre negativo y positivo. Como se mostró en las fotos tendremos dos cables, el cable de Fase (en este caso de color amarillo) y el cable de Neutro (que es el cable de color blanco). La electricidad residencial es interesante y es genial aprender un poco más sobre ella, siempre he sido muy curioso. Me gusta aprender todo lo posible en cuanto a diversos temas. Es por eso que, en esta oportunidad, les comparto esta pequeña demostración para quienes amen aprender tanto como yo.
Gracias por leer mi post 😁,Feliz y bendecido día. 😉Saludos y hasta la próxima.
Fotos de mi autoria usando mi Motorola MotoE5 Play, edición realizada con PowerPoint2016 y Canva. Texto de mi autoría, traducido con DeepL, Publicación realizada con Pc Desktop.