Hello my dear and gentle reader I hope you are doing great today. This will be my first contribution to the community where I explain in detail how I change the rear wheel hubs on my motorcycle 🛵 and this has become a little annoyance due to the large number of poor quality parts that do not last at all. Yes! before these bushings were changed every half year or more and I did it for preventive maintenance, now I have to be aware that it has no movement (play) to be safe on the track.
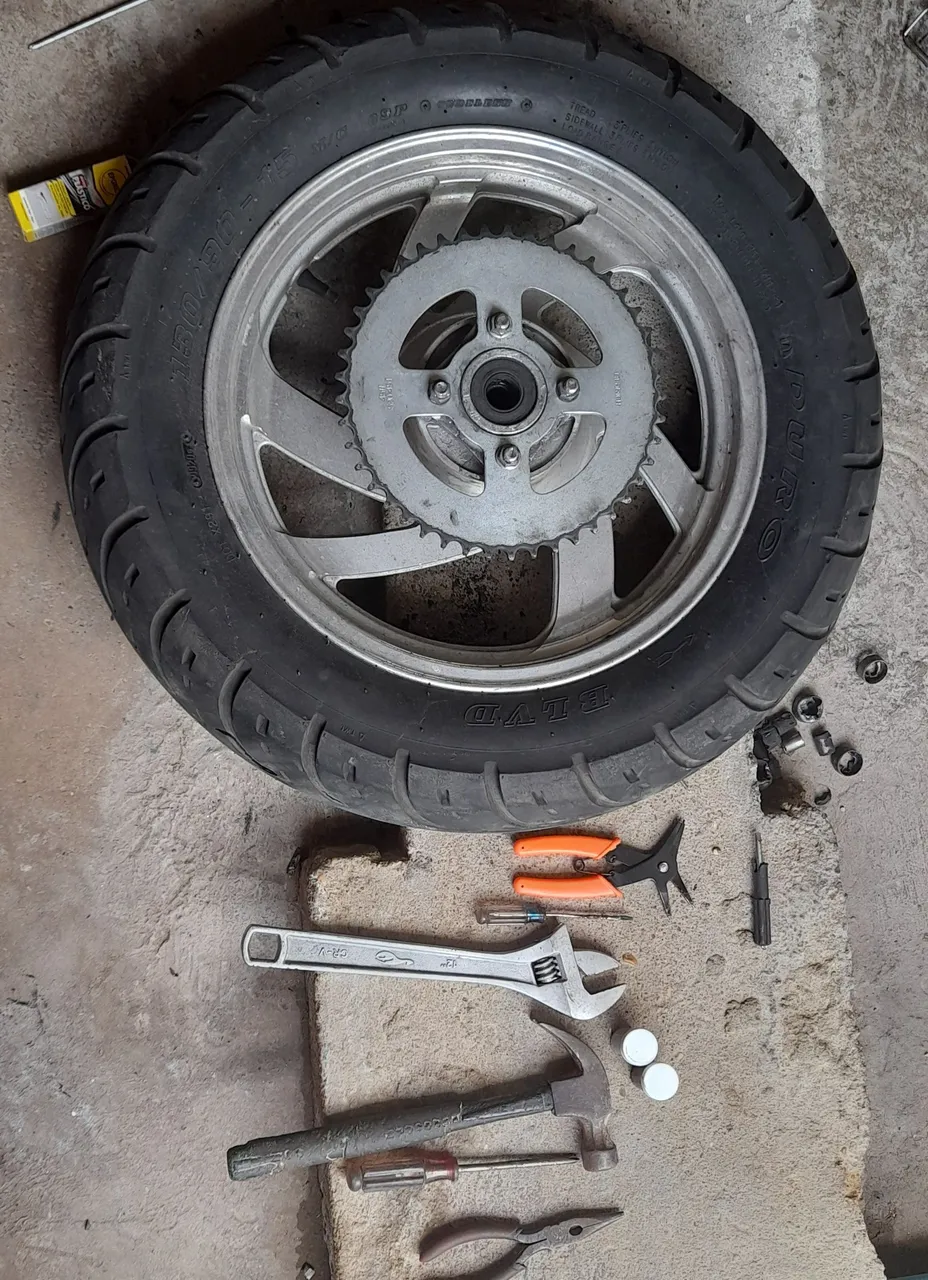
The tools to use are almost the basic ones that everyone should have in their tool box with the exception of the orange caliper.
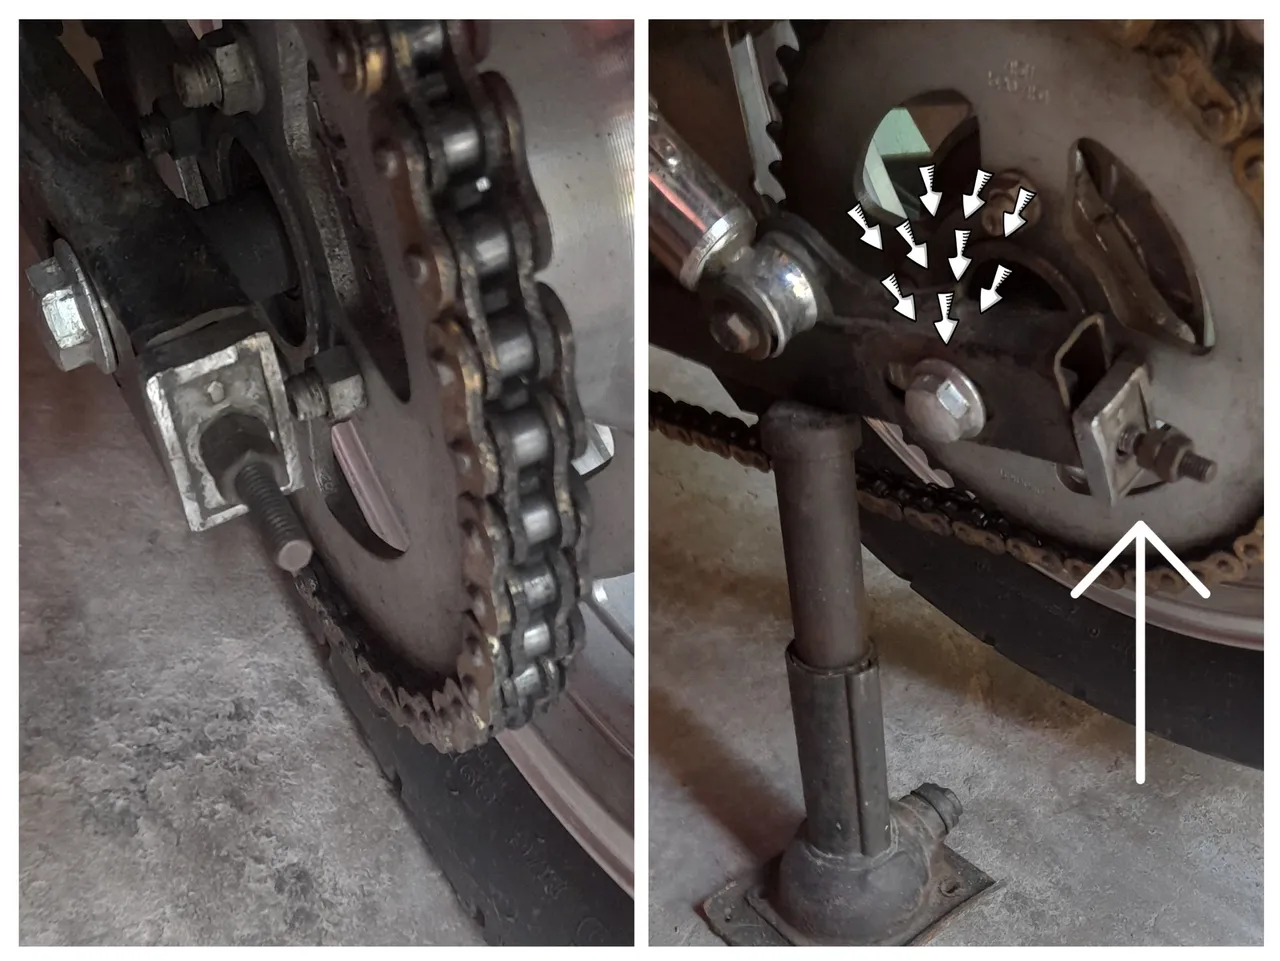
The first thing we must have is the work area clean and dry (I particularly like it that way) we identify the nuts that we must loosen:
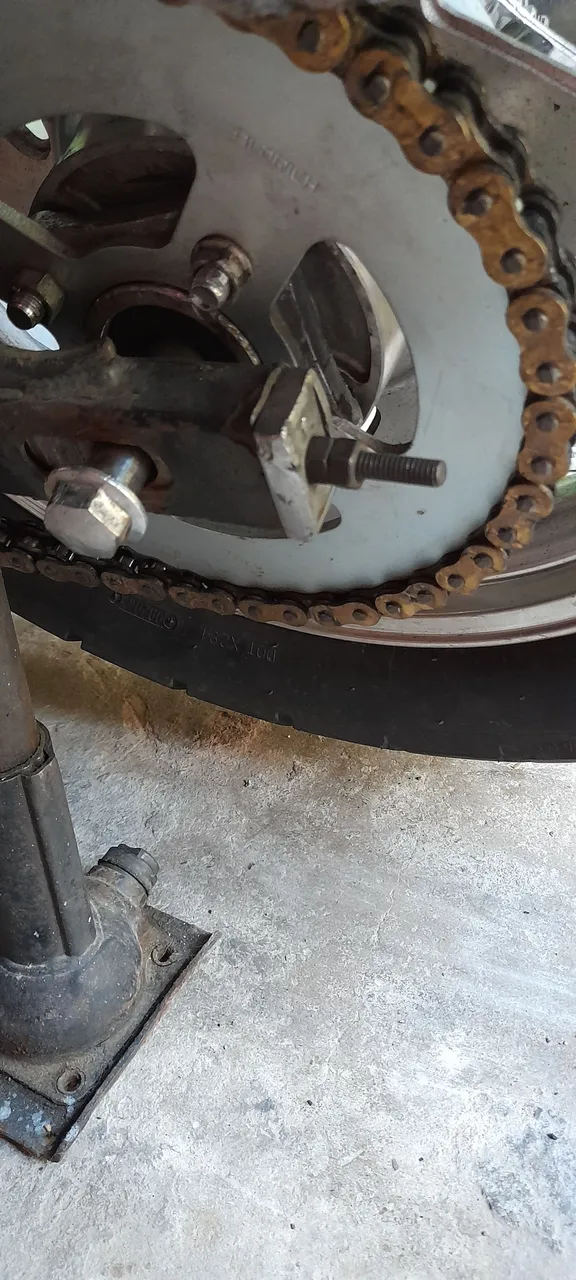
- the center bolt nut (lots of arrows)
- the brake line nut (the thin arrow)
- the chain tensioner nut these are on both the left and right side (the thick arrow)
- the anti-roll bar bolt
As the motorcycle model I have does not have a stand to mount it and do these types of maintenance, I proceed to help myself with a light vehicle jack.
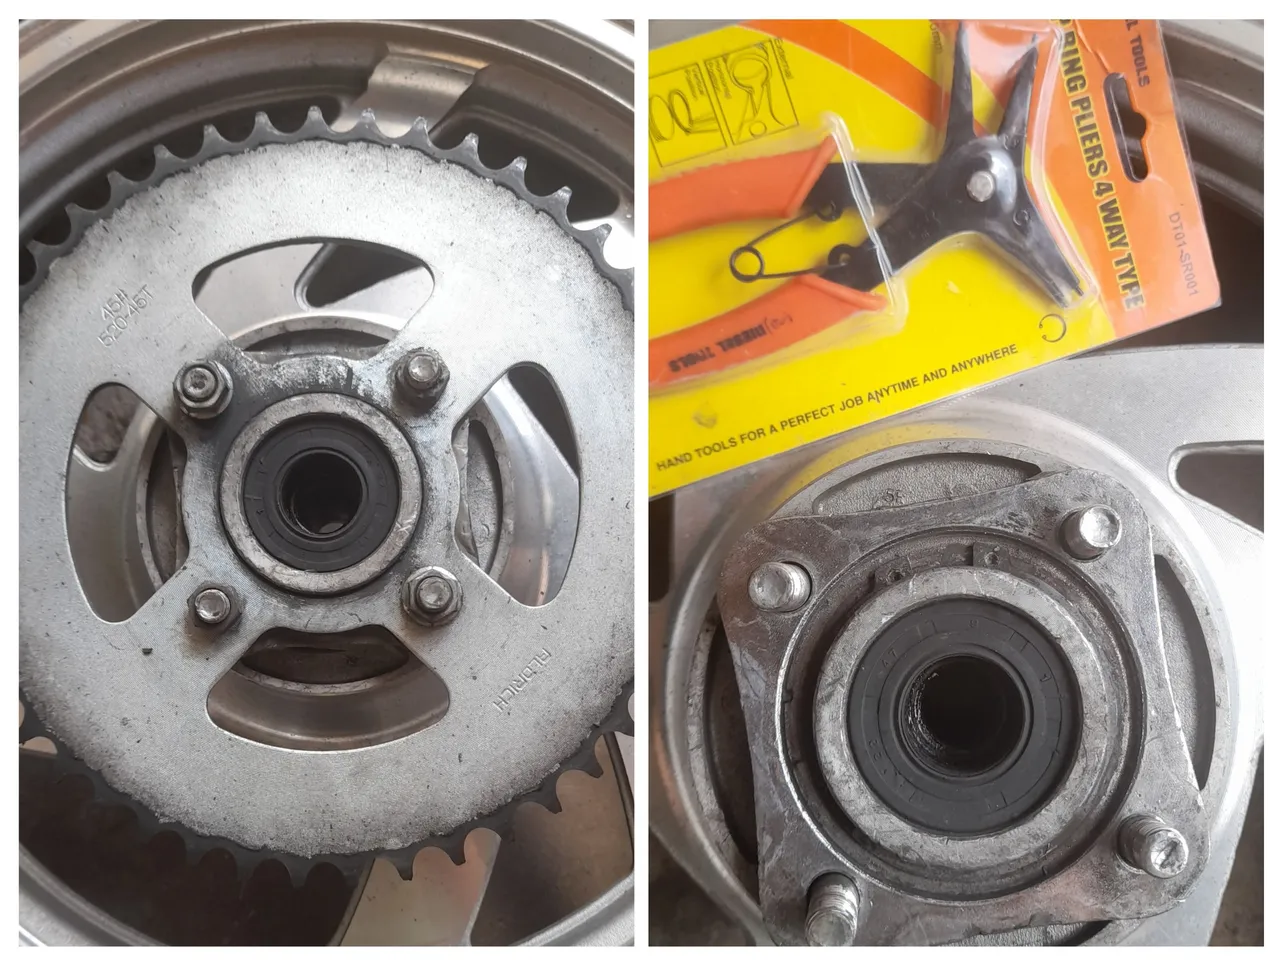
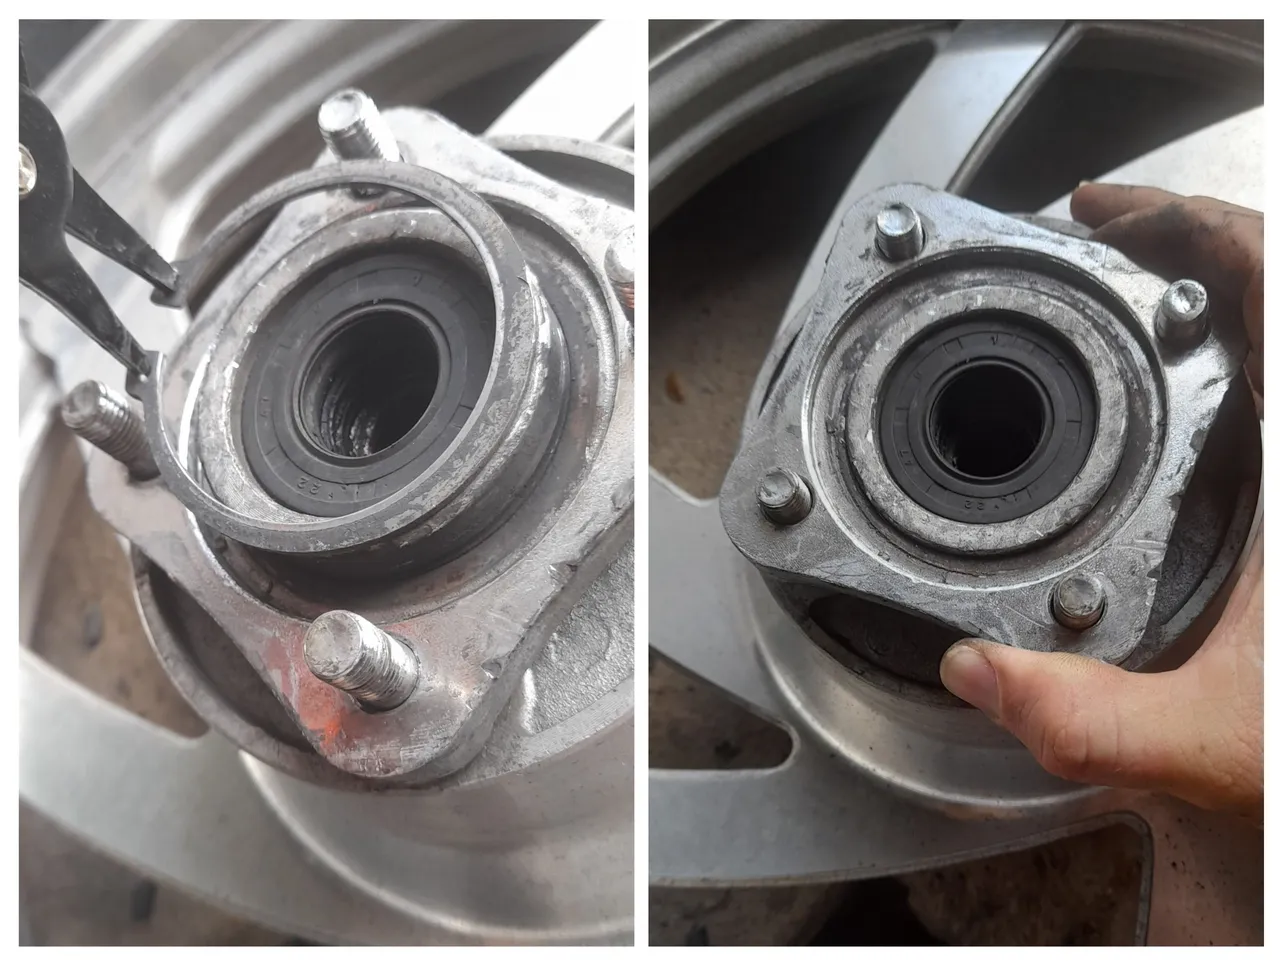
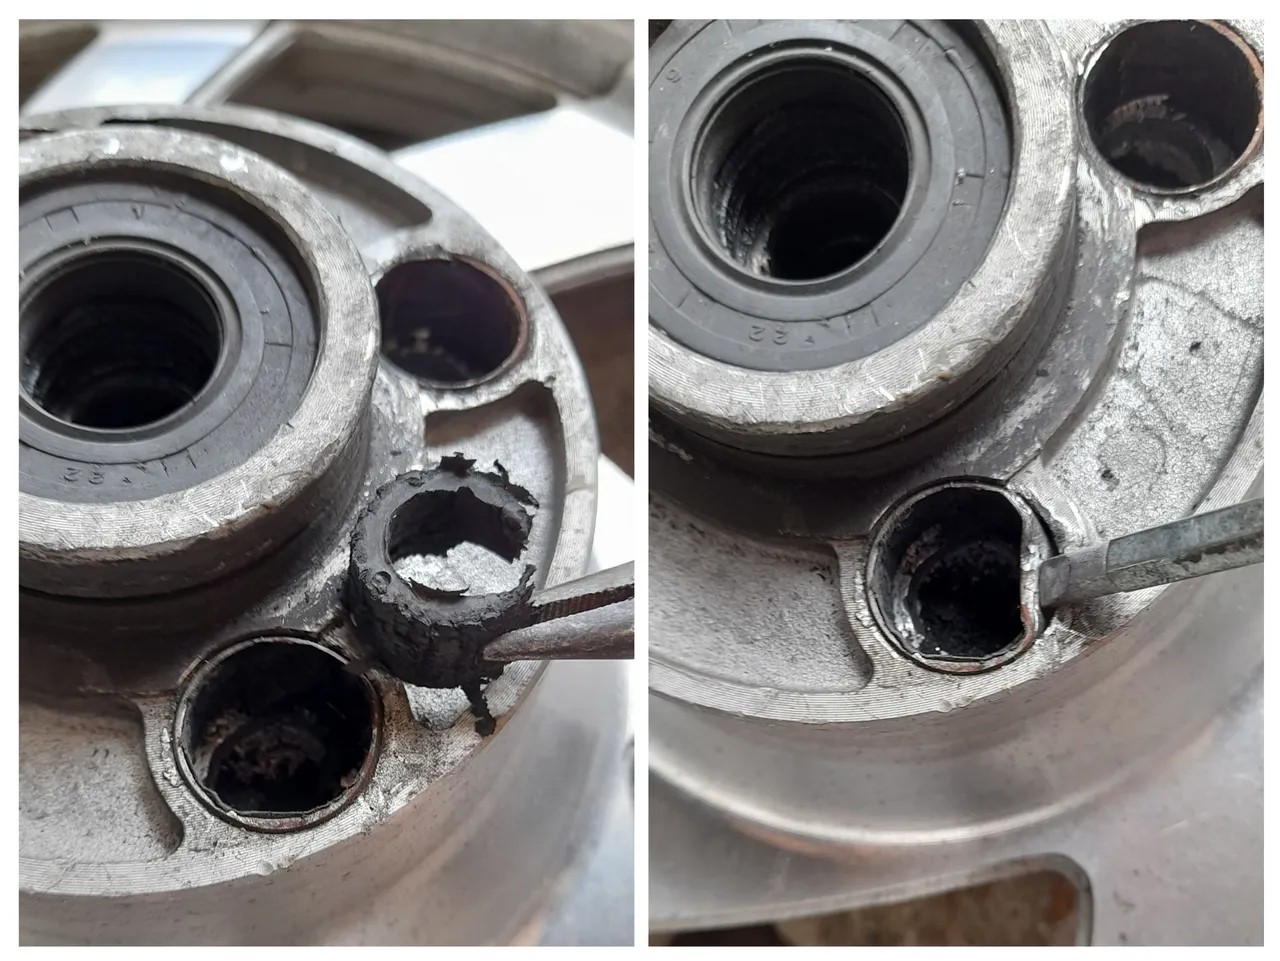
The four nuts are loosened to remove the crown and the metal o-ring is removed with the pliers to remove the metal o-ring and thus be able to subtract the quadrant and reach the target.
 |  |
|---|
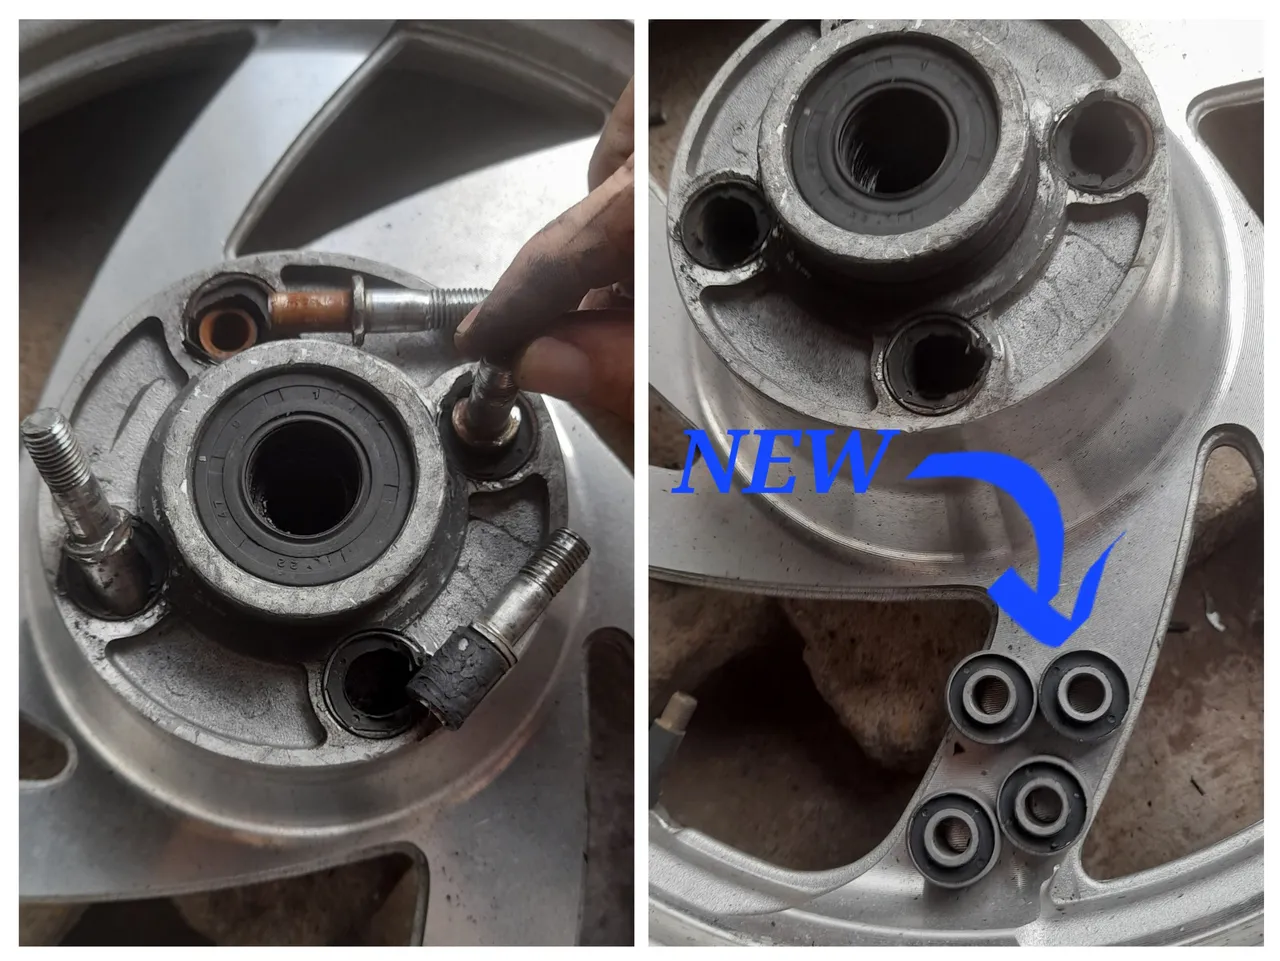
We observe what we had already predicted that these bushings were already very damaged as we can see in the image on the right (when touching it increases its size) the new bushings must have the rubber in good condition since this is the one that absorbs part of the effort in the gear changes made.
Already at this point as some of the university professors said "what is left is carpentry" to let us know that it is a super easy procedure or that the procedure to be applied is in our knowledge learned in past subjects.
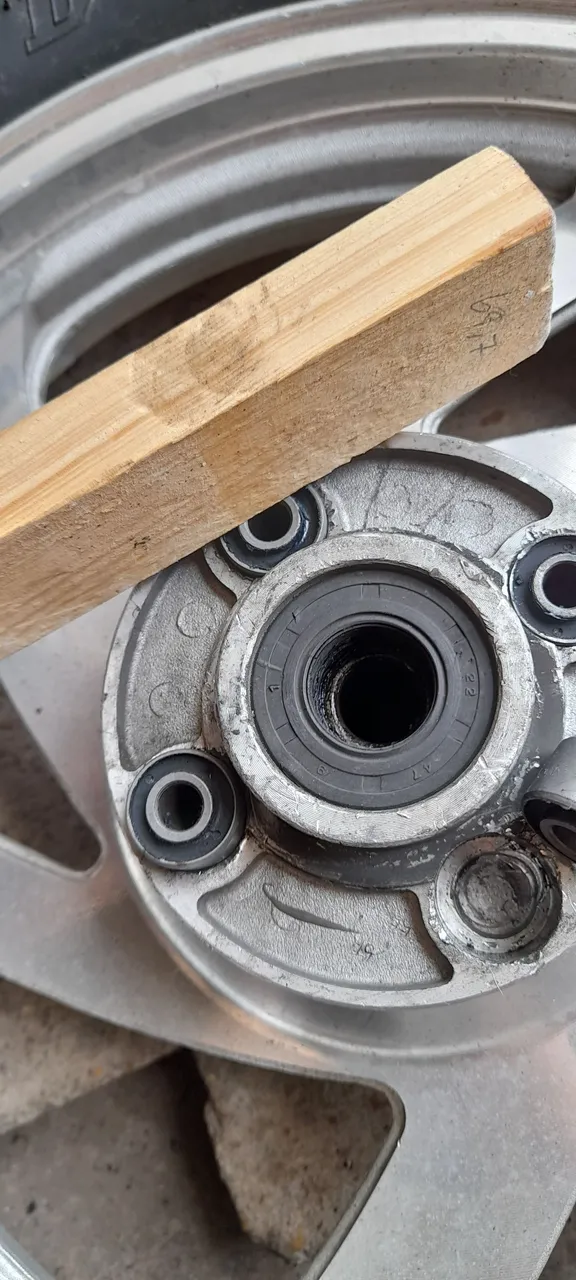
Now we place the replacement, as they are metal parts we spread a little oil or grease the idea is to provide a little lubrication to reduce friction when placing the bushing inside the rim of the motorcycle; and as the bushing enters almost with zero tolerance we help us with a board so that when hitting with a hammer this molds to the bushing and the transmission of the blow is evenly.
We begin the installation procedure where we start with the bolts of the bushings and then place the quadrant and the O-Ring, then comes the crown and nuts to tighten the crown. Once this is ready it is time to mount the rim on the bike here if you have no experience ask for help because it is a little difficult to square the center bolt with the hole in the rim, we mount the bearing chain and having this ready we place the brake guaya, the stabilizer bar, the chain tensioners which must be aligned on both sides and finally tighten the center bolt. And to roll.
In summary the procedure is very similar for almost all low displacement motorcycles ranging from 250cc or less and having in the chain bearing train. If you are encouraged to do it yourself and need help do not hesitate to write to help you as much as possible. See you in the next publication.
Hola mi querido y gentil lector espero que les este yendo de maravilla en este día. Esta será mi primera contribución a la comunidad donde detalladamente explico como le hago el cambio a los bujes del rin trasero en mi motocicleta 🛵 y es que esto se ha vuelto una pequeña molestia debido a la gran cantidad de repuestos de mala calidad que no duran nada. ¡Si! antes estos bujes los cambiaba cada medio año o más y lo hacia por mantenimiento preventivo, ahora tengo que estar pendiente que no tenga movimiento (juego) para así estar seguro en la pista.
Los instrumentos a utilizar son casi básicas que todos deberíamos tener en nuestra caja de herramientas con excepción de la pinza saca reten que es la de color naranja.
Bueno comenzamos, Lo primero que debemos tener es el área de trabajo limpia y seca (en lo particular me gusta así) identificamos las tuercas que debemos aflojar:
- la tuerca del perno central (muchas flechas)
- la tuerca de la guaya de freno (la flecha delgada)
- la tuerca de los tensores de la cadena estas se encuentran en ambos lados izquierdo y derecho ( la flecha gruesa)
- el tornillo de la barra estabilizadora
Como el modelo de motocicleta que tengo no trae el burro o caballete que es para poder montarla y hacer estos tipos de mantenimiento procedo a ayudarme con un gato de vehículos livianos
Una ves este aflojado la tuerca de tensor de cadena del lado izquierdo se procede a deslizar el caucho con el rin hacia adelante para que de esta forma la cadena de rodamiento se destemple o afloje y poder sacarla de la corona y colocarla a un lado, ya echo esto podemos sacar el caucho y así trabajar en lo que necesitamos reemplazar
Se aflojan las cuatro tuercas para sacar la corona y con la pinza saca reten sacamos el o-ring metalico y así poder sustraer el cuadrante y llegar al objetivo
| |
|---|
Observamos lo que ya habíamos predicho que dichos bujes estaban ya super dañados como podemos ver en la imagen de la derecha (al tocarla aumenta su tamaño) los bujes nuevos deben tener la goma en buen estado ya que esta es la que absorve parte del esfuerzo en los cambios de marcha efectuados.
Ya en este punto como decían algunos de los profesores de la universidad "lo que queda es carpinteria" para hacernos saber que es un procedimiento super fácil o que el procedimiento que se debe aplicar esta en nuestros conocimientos aprendidos en materias pasadas.
Ahora colocamos el reemplazo, como son piezas metálicas le untamos un poco de aceite o grasa la idea es que proporcione un poco de lubricacion para así reducir la fricción al momento colocar el buje dentro del rin de la motocicleta; y como el buje entra casi que con tolerancia cero nos ayudamos con una tabla para que al golpear con un martillo esta se amolde al buje y la transmisión del golpe sea de forma pareja.
Comenzamos el procedimiento de instalación donde comenzamos con los tornillos de los bujes para luego colocar el cuadrante y el O-Ring, luego viene la corona y las tuercas para apretar la corona. Ya estando esto listo es hora de montar el rin en moto aquí si no tienes experiencia solicita ayuda ya que es un poco difícil cuadrar el perno central con el orificio del rin, montamos la cadena de rodamiento y teniendo listo esto colocamos la guaya de freno, la barra estabilizadora, los tensores de la cadena los cuales deben estar alineados en ambos lados y por último apretar el perno central. Y a rodar.
En resumen el procedimiento es muy similar para casi todas las motos de baja cilindrada que van desde 250cc o menos y que tengan en el tren de rodamiento de cadena. Si se animan para hacerlo tú mismo y necesitas ayuda no dudes en escribir para ayudarte en lo posible. Nos vemos en la próxima publicación.
All photos are my property taken with Samsung A21s And edited in Google photos
Translation made on deepl.com
Motocicleta: Keeway super shadow 250cc //
Todas las fotos son de mi propiedad tomadas con Samsung A21s y editadas en Google fotos
Traducción realizada en deepl.com
Motorcicle: Keeway super shadow 250cc