Reparación de bombillos ahorrador
Saludos amigos lectores de Hive, en mi primer escrito de este año 2022, quiero enseñarles cómo arreglar bombillos ahorradores, voy a tratar de hacerlo paso a paso y de explicar lo más sencillo posible, me servirán de apoyo las fotos que les servirán de guías.
Greetings friends readers of Hive, in my first writing of this year 2022, I want to show you how to fix energy saving light bulbs, I will try to do it step by step and to explain as simple as possible, I will use the photos as a support that will serve as guides.
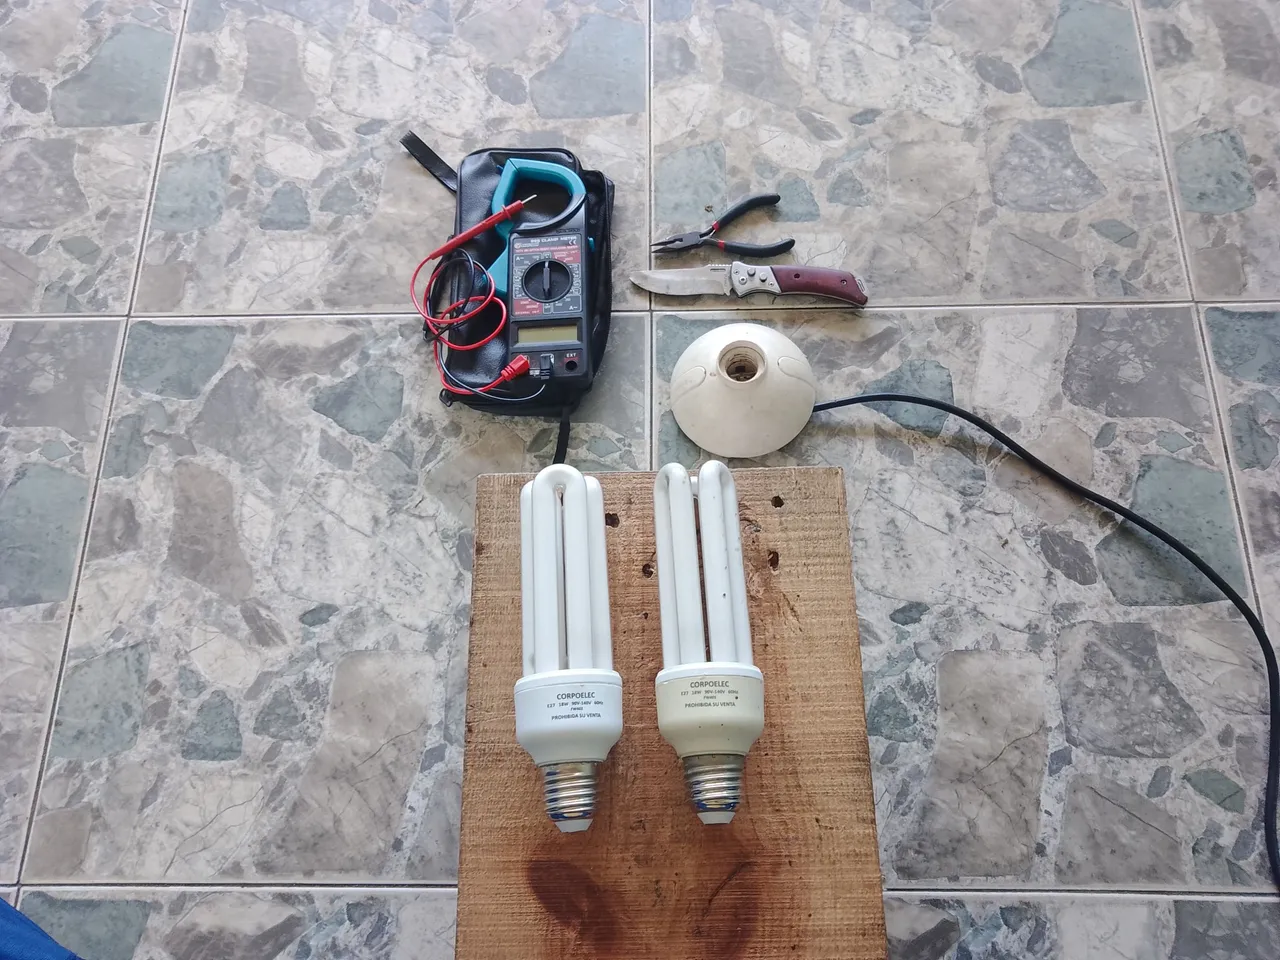
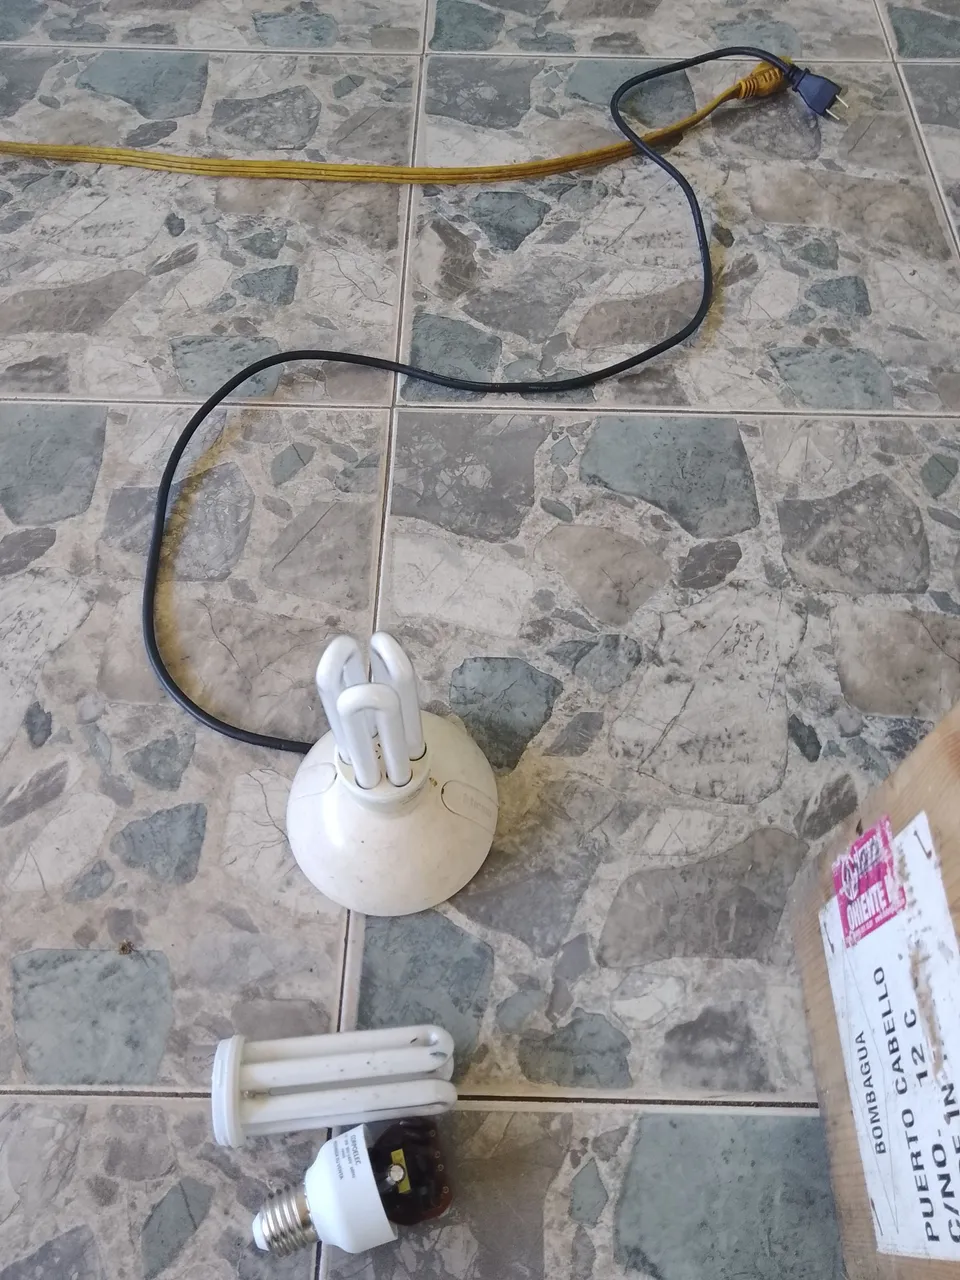
Por aquí tenemos dos bombillos ahorradores de una misma marca y vatios, uno presenta los tubos fluorescentes quemados, pero la parte del balasto eléctrico, está en buenas condiciones.
Here we have two energy saving bulbs of the same brand and wattage, one has burned fluorescent tubes, but the electric ballast part is in good condition.
Por el contrario, el otro tiene en buen estado los tubos fluorescentes pero la parte de balasto eléctrico está dañado. Por tal razón esto me permite poder reparar uno de ellos.
On the contrary, the other one has in good condition the fluorescent tubes but the electric ballast part is damaged. For this reason this allows me to repair one of them.
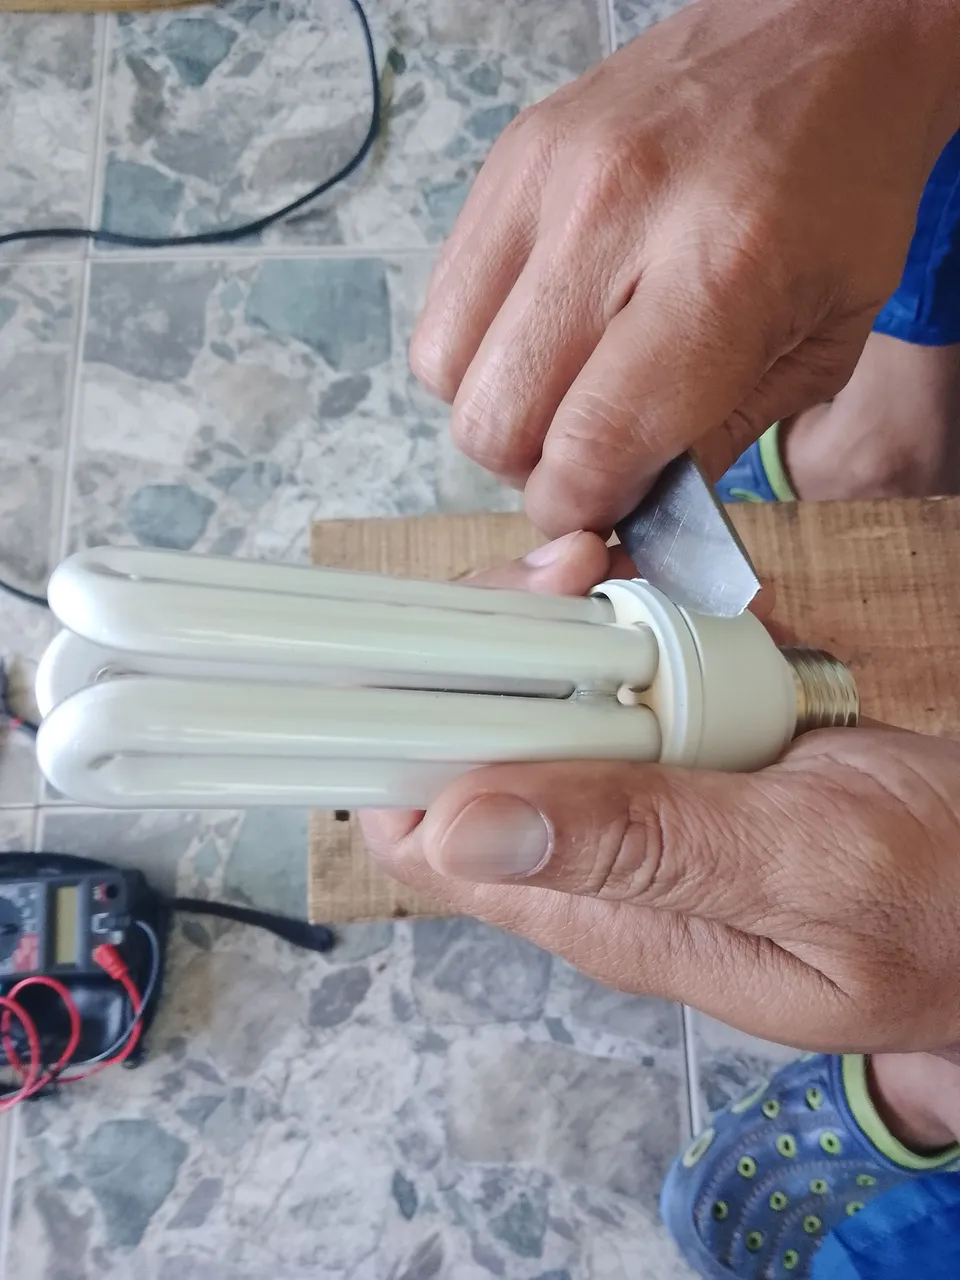
Procedemos a destapar ambos, con la ayuda de una navaja, con sumo cuidado de no cortarnos, visualizamos la ranura que divide las dos partes del bombillo e introducimos la parte del centro de la navaja y palanqueamos con cuidado. Una vez abierto los dos bombillos, usamos un multímetro en posición ohmios, verificamos cuál de los dos tubos fluorescentes está dañado, para esto utilizamos las dos puntas del multímetro una en cada lado de los filamentos, primero un lado luego el otro.
We proceed to uncover both, with the help of a knife, with extreme care of not cutting ourselves, we visualize the groove that divides the two parts of the bulb and we introduce the part of the center of the knife and we lever carefully. Once opened the two bulbs, we use a multimeter in ohms position, we verify which of the two fluorescent tubes is damaged, for this we use the two tips of the multimeter one in each side of the filaments, first one side then the other.
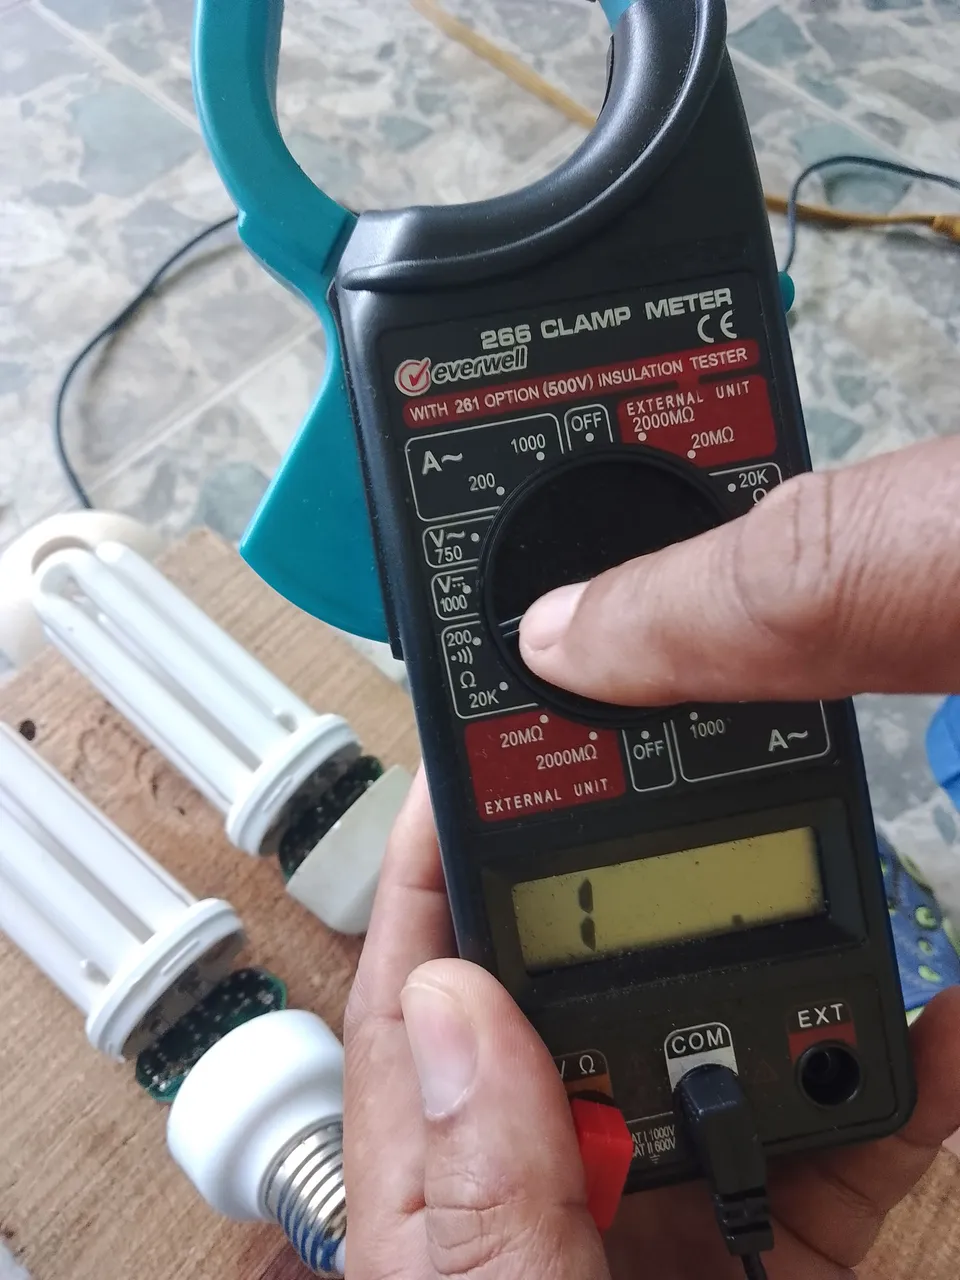
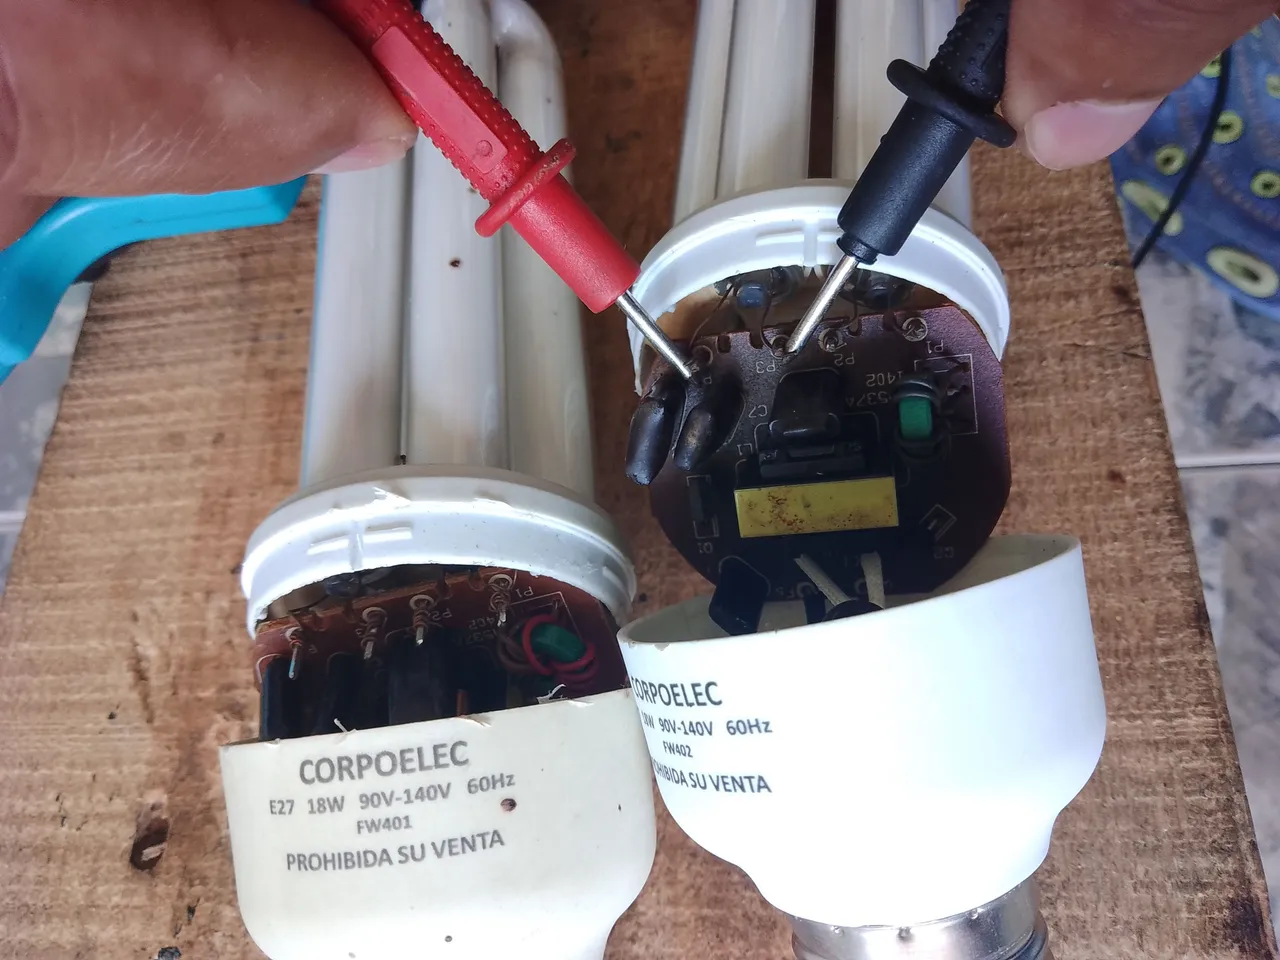
El multímetro al conectarlo a los dos filamentos nos debe dar una numeración en su pantalla, eso nos indica qué lado está bueno, si no da ninguna, nos confirma que está quemada, solo de esa forma podemos cerciorarnos cuáles de sus partes están dañadas y las que están en perfecto estado.
The multimeter when connecting it to the two filaments must give us a numbering in its screen, that indicates us which side is good, if it does not give any, it confirms us that it is burned, only in this way we can make sure which of its parts are damaged and which are in perfect state.

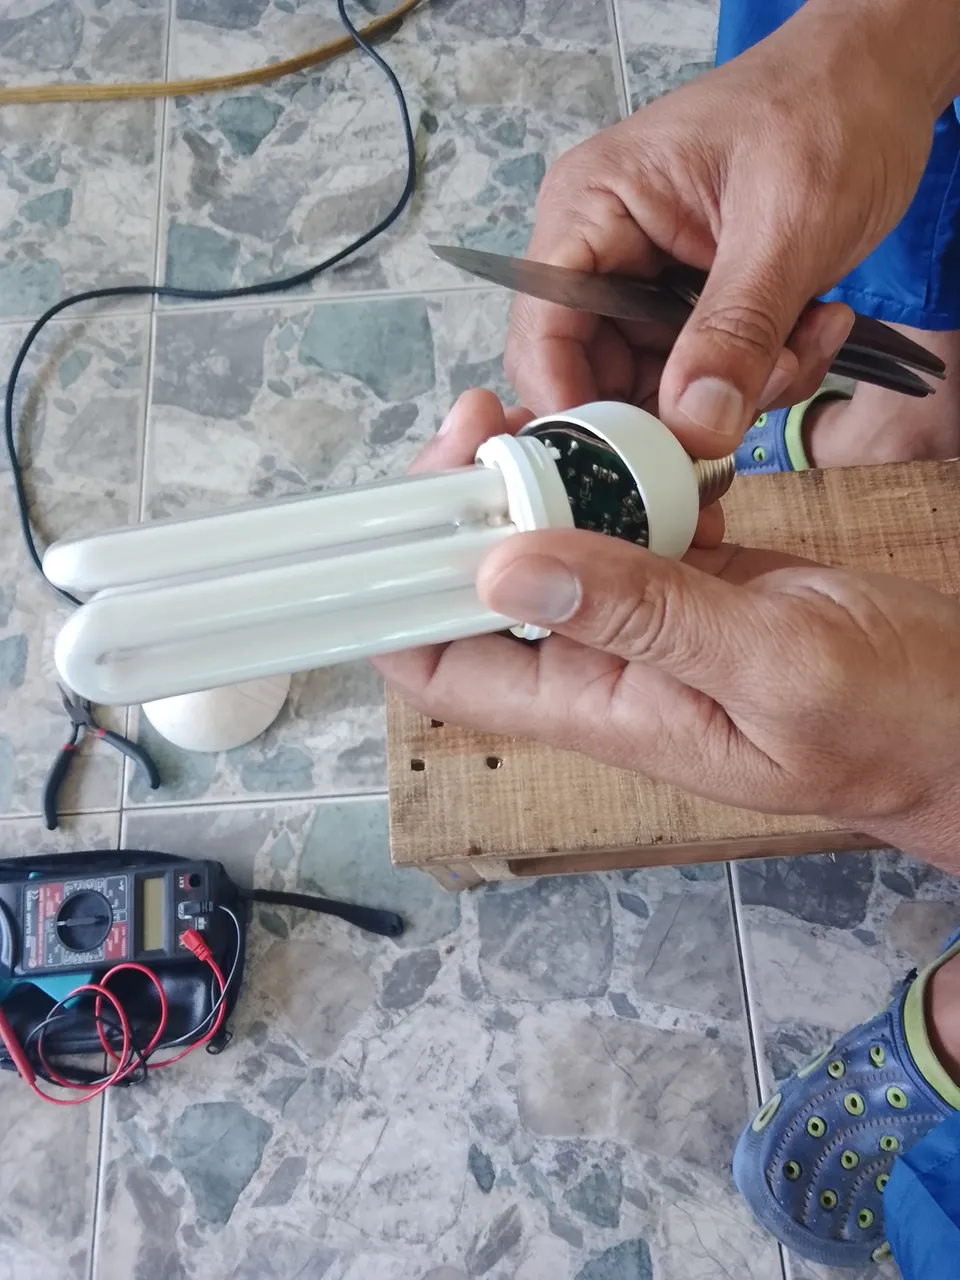
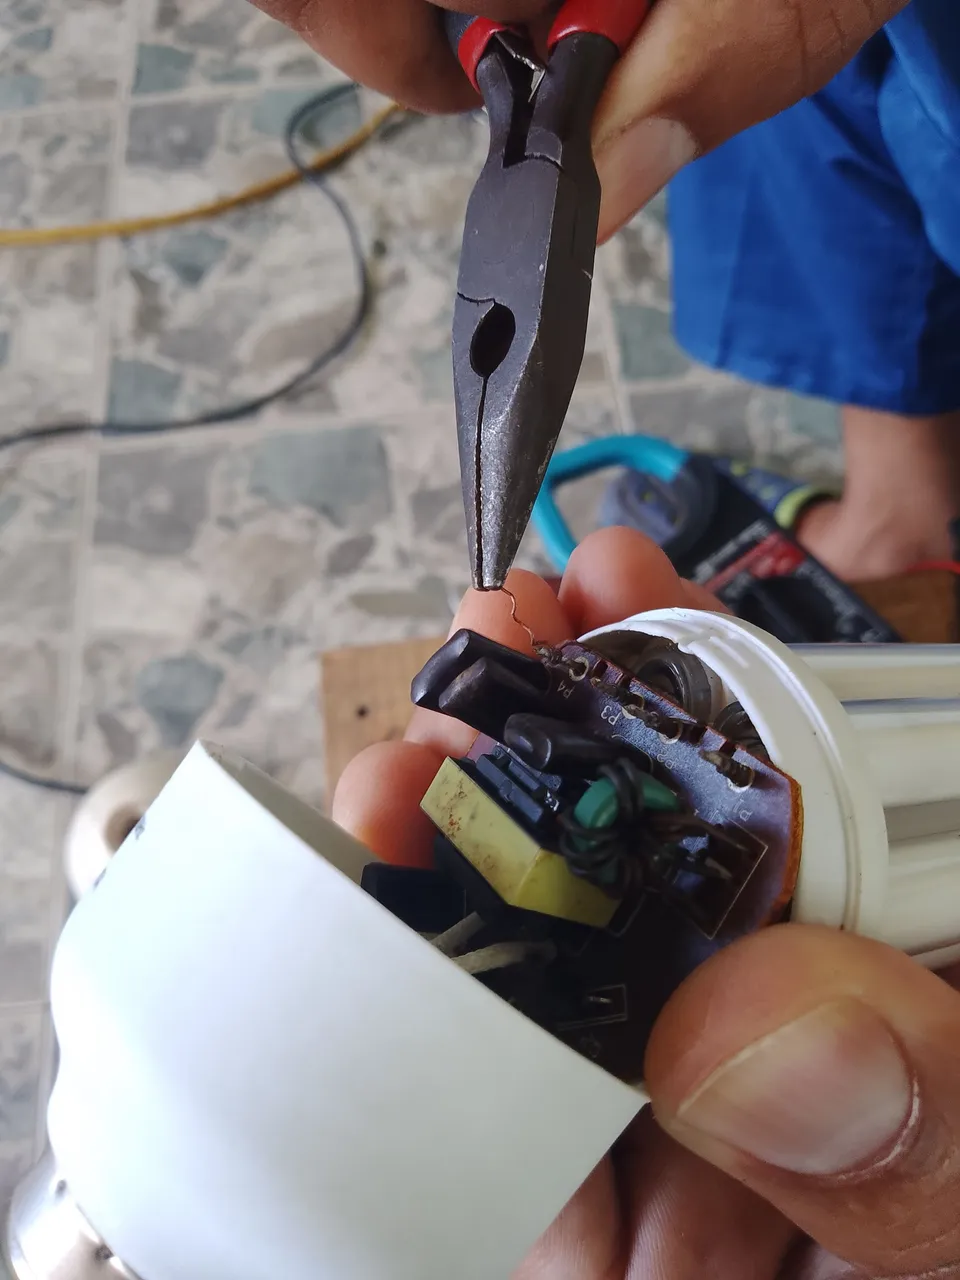
Ya teniendo identificado lo que está dañado, procedemos a reemplazar, con una pinza con cuidado retiramos los filamentos de la placa uno a uno, son cuatro filamentos a retirar y así procedemos con el otro bombillo.
Already having identified what is damaged, we proceed to replace, with a tweezers carefully remove the filaments of the plate one by one, there are four filaments to remove and so we proceed with the other bulb.
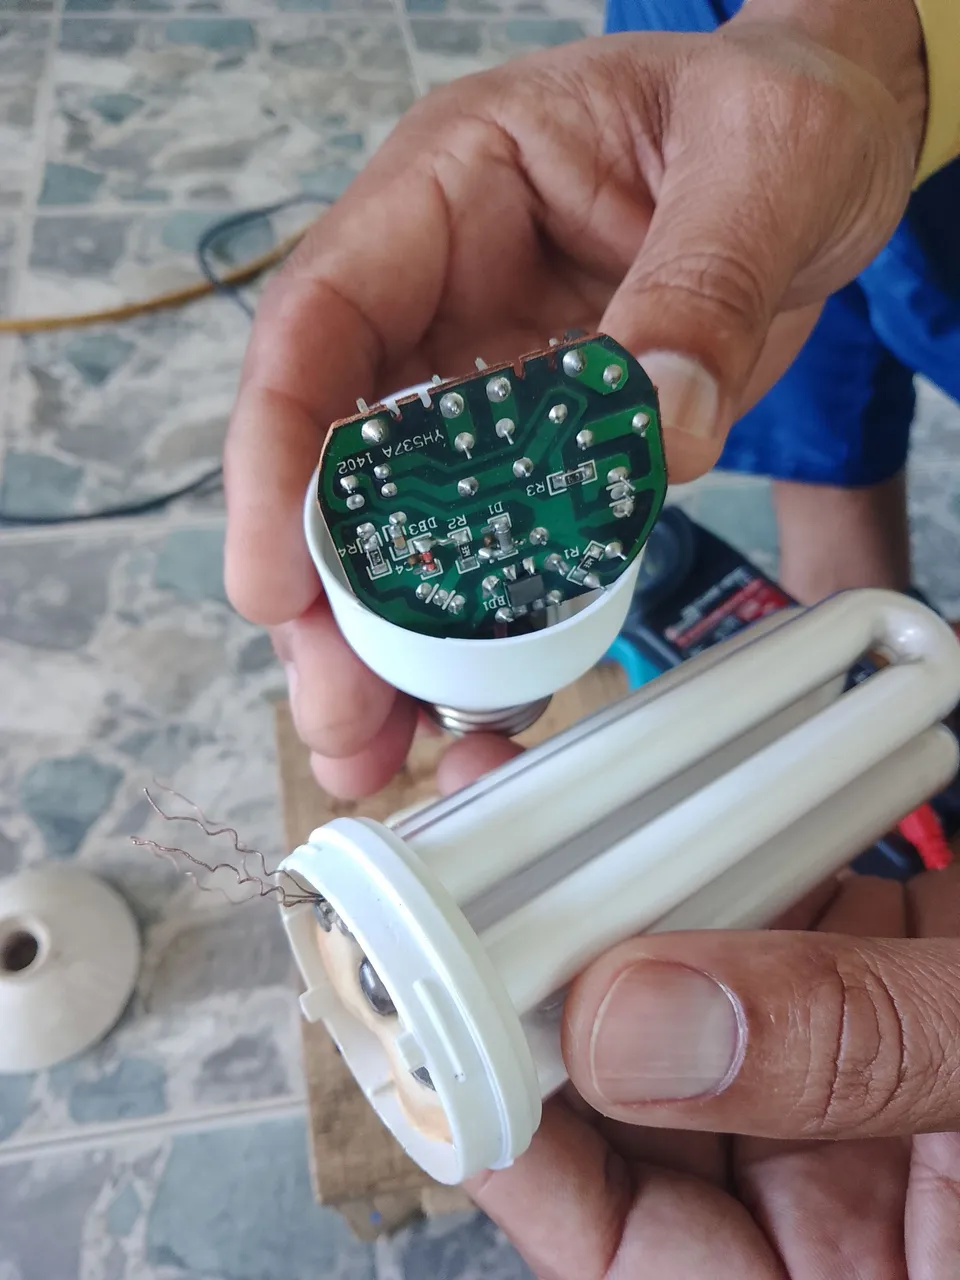
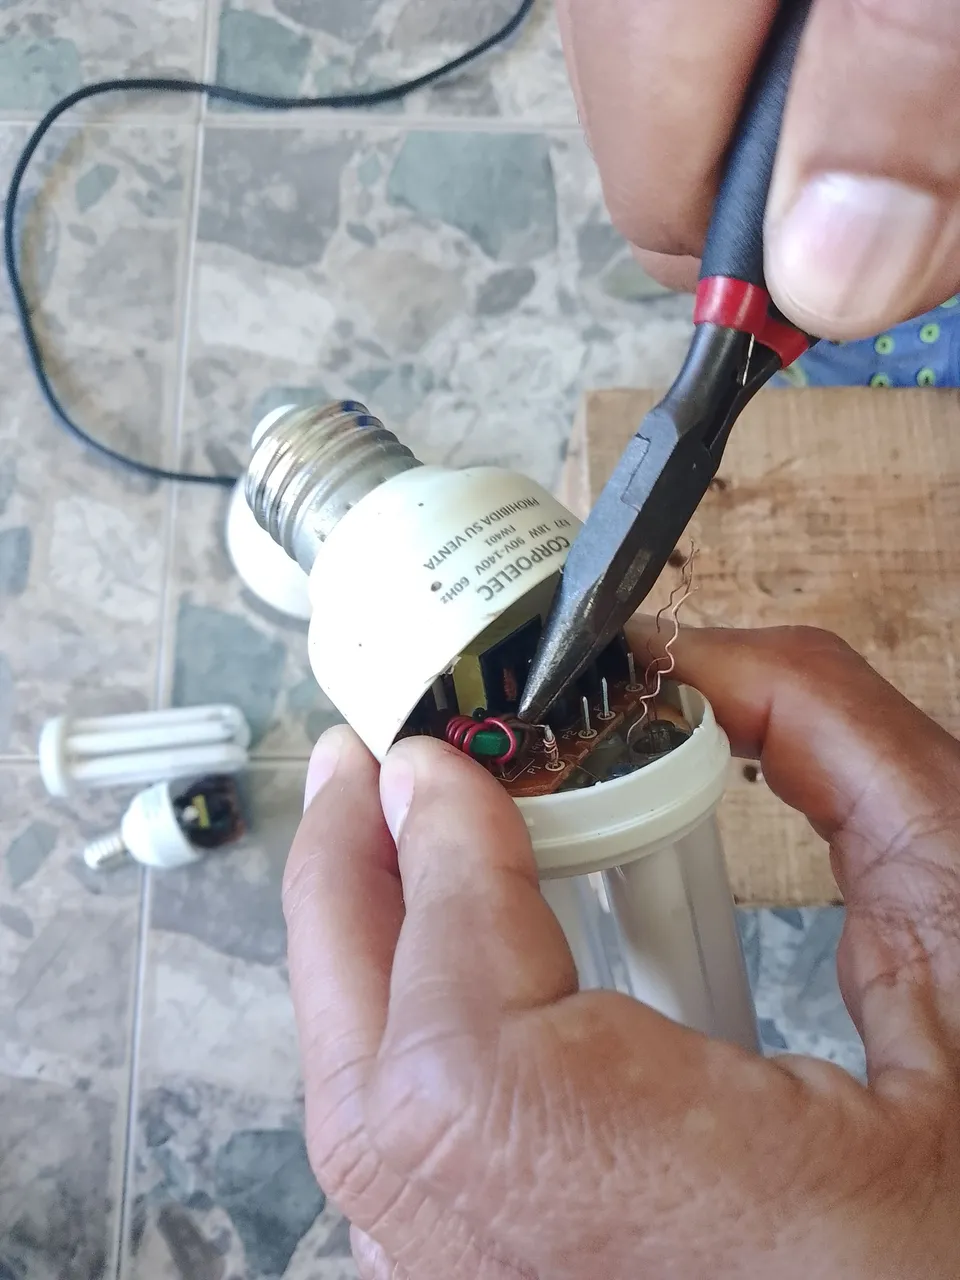
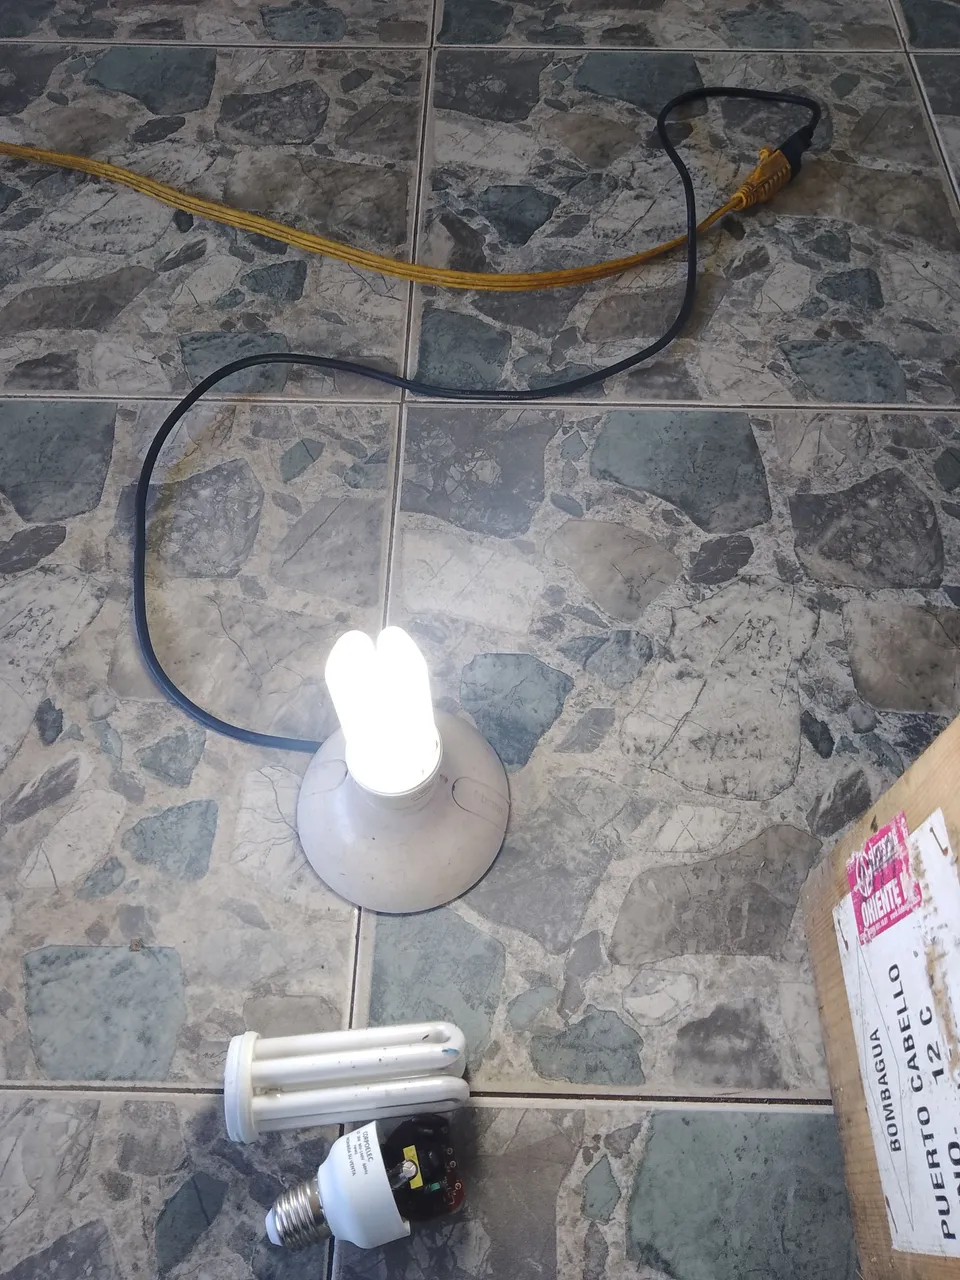
Luego colocamos las dos piezas buenas del bombillo en su posición y colocaremos sus filamentos con la pinza y lo entorcharemos con delicadeza de no dañarlos, debemos de estar pendientes que no estén en contactos unos con otros. Terminado el procedimiento cerramos ambas partes y probamos su funcionamiento en el socate conectado a la corriente.
Then we place the two good pieces of the bulb in its position and we will place its filaments with the tweezers and we will twist it with delicacy of not damaging them, we must be pending that they are not in contact with each other. Finished the procedure we close both parts and we test its operation in the socket connected to the current.

Amigos lectores yo acostumbro a comprar siempre bombillos de la misma marca y vatios, para así facilitarme el arreglo a la hora que se dañen, espero sea de provecho para ustedes este post, para otra ocasión les estaré enseñando trucos para cuando esté dañado la parte de los capacitadores en estos tipos de bombillos y unos tips para los bombillos LED.
Friends readers I am used to always buy bulbs of the same brand and wattage, to facilitate the arrangement when they are damaged, I hope this post will be of benefit to you, for another occasion I will be teaching tricks for when the part of the capacitors in these types of bulbs is damaged and some tips for LED bulbs.