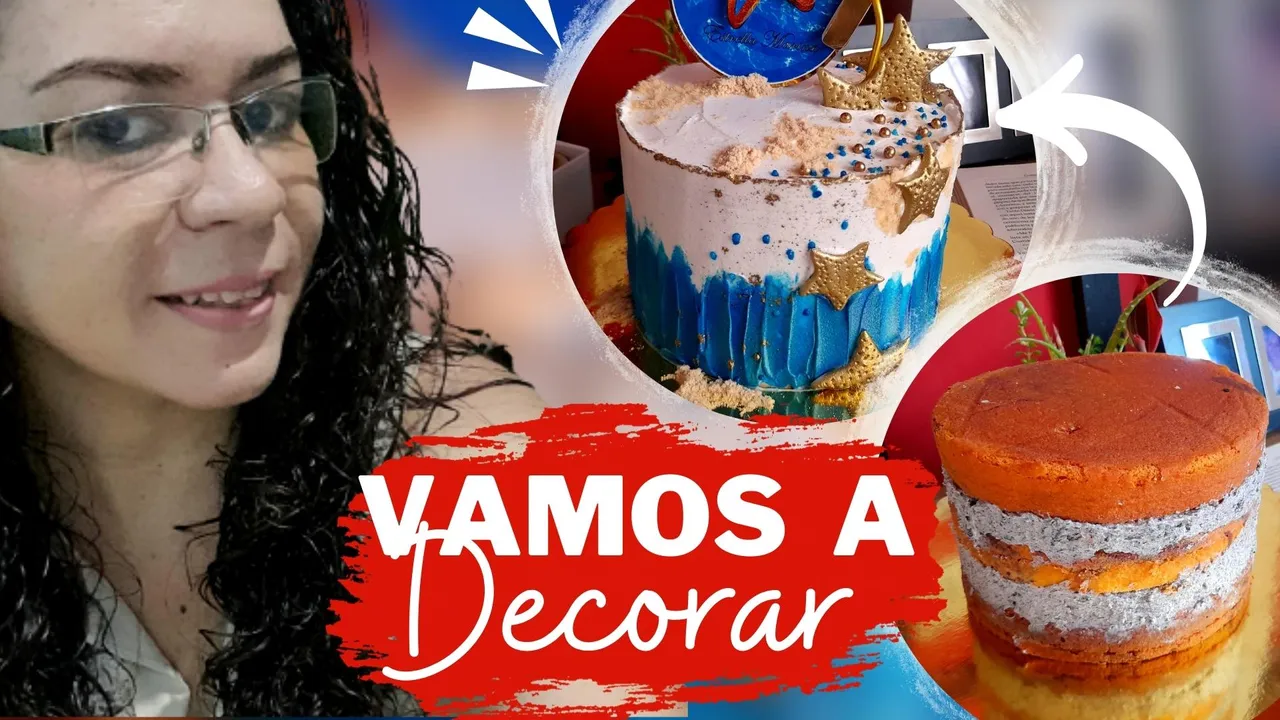
Hace unos días estuve compartiendo con ustedes la elaboración de un delicioso pastel marmoleado relleno con buttercream de oreo, que si bien es cierto, puede ser consumido en el punto en que lo dejamos la vez pasada (sin cobertura), en mi caso, yo lo necesitaba decorado, con temática marina, específicamente, estrellas de mar.
Y se me ocurrió que sería buena idea darme un paseo por las diferentes técnicas y accesorios que utilicé para su decoración, por si un día se animan en casa, ya que pueden aplicarlas para cualquier tipo de decoración, y por eso estamos aquí el día de hoy.
Para este pastel hice varias cositas que trabajaremos en distintas publicaciones, y por aquí les dejo la lista:
- Cobertura con buttercream y decorado con espátula
- Coloreado del buttercream
- Estrellas en pasta de goma y detalles en polvo de oro
Por lo que para este primer post trabajaremos con la cobertura y el decorado con espátula, así que lo primero que aprenderemos a hacer, será a cubrir el pastel, y aunque parezca complicado, pienso que con hacer las cosas con cuidado es más que suficiente. De hecho, cuando inicie con la elaboración de pasteles decorados, no tenía ni una sola herramienta. Así que querer, es poder.
En mi caso ahora cuento con una bailarina, que es una base giratoria que nos ayuda no solo a cubrir el pastel, sino a alisarlo con mayor comodidad, pero cuando no tenía herramientas lo colocaba al borde de la mesa, de manera que la base sobresaliera de la misma, y lo iba girando con mis manos, así que su uso no es indispensable. Y ahora sí, vamos a entrar en materia.

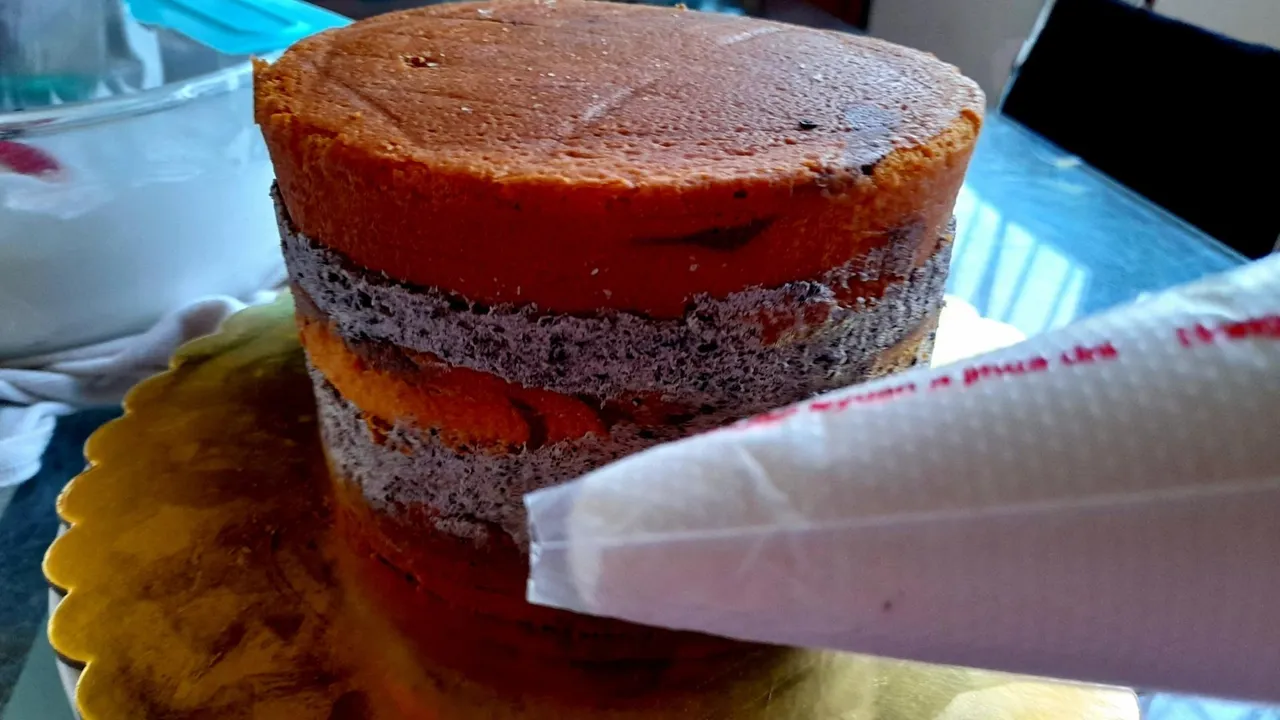
Para este pastel yo utilicé buttercream de mantecado (partes iguales de mantequilla o manteca vegetal y azúcar glas saborizada con esencia de mantecado y una cucharada de leche en polvo), el cual dejé completamente blanco.
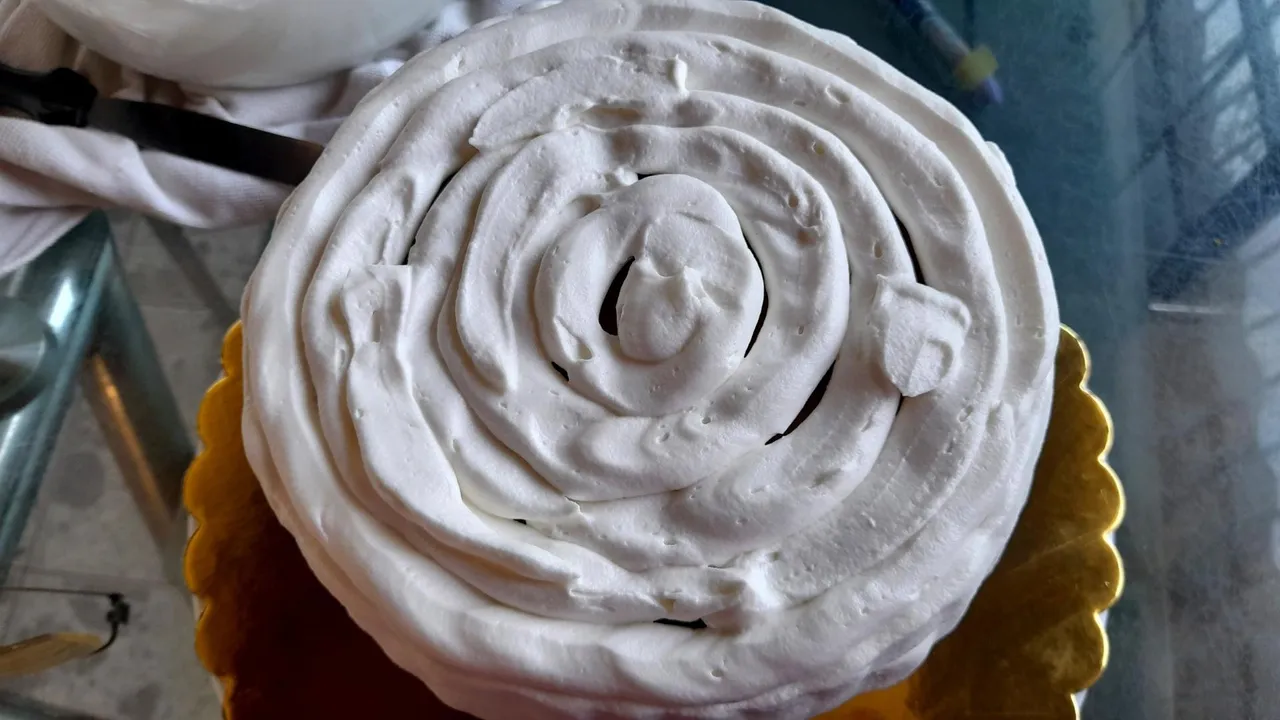
Para cubrirlo solo necesitas colocar la buttercream en una manga y "rodear" todo el pastel con la crema, incluída la parte superior, para posteriormente proceder a alisar la superficie.


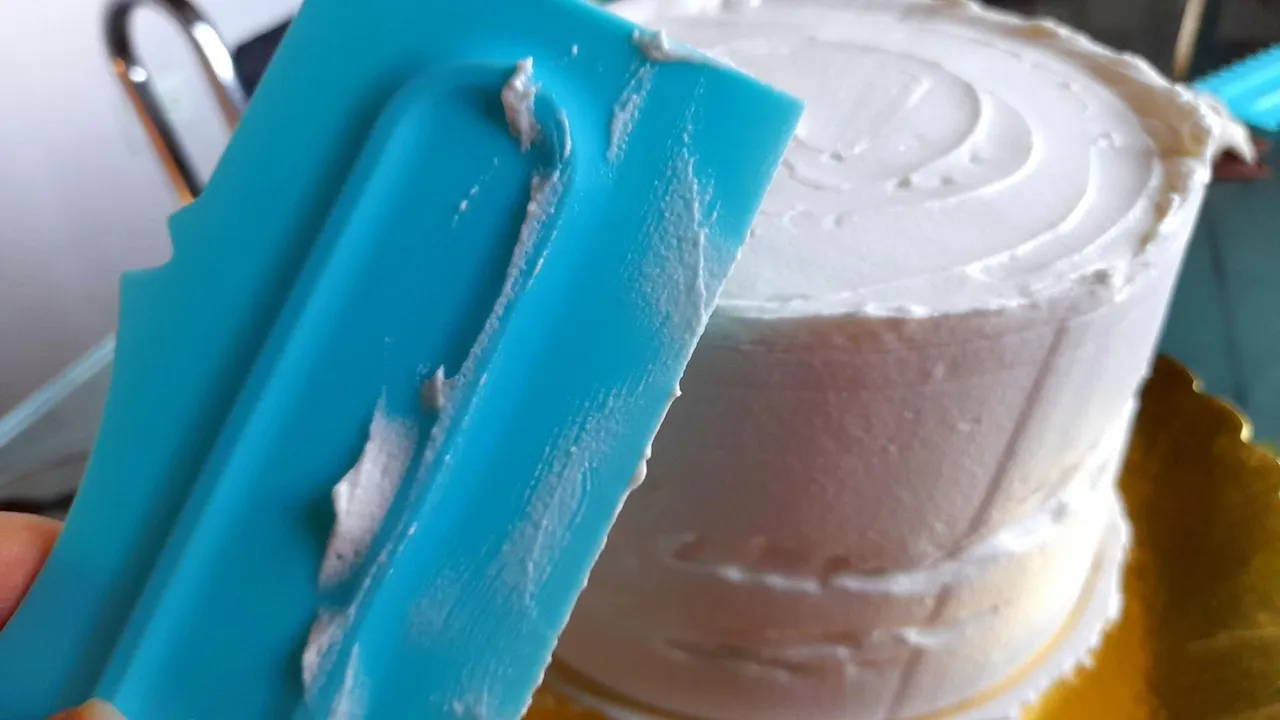
Para esta tarea hay muchas herramientas disponibles en el mercado, pero si no tienes una en casa, puedes utilizar una regla, ya que era lo que usaba en mis inicios y cumplía la misma función, sólo debes colocar la herramienta al ras de la crema y girar la base para alisar lo mejor posible la cobertura.
Este proceso, lo haremos comenzando por la parte superior y una vez logremos dejarla como deseamos procedemos a alisar sus lados.
Y con respecto al borde superior, pueden alisarlo una vez terminen con los lados, o simplemente dejarlo fluir, que también se ve realmente lindo. De hecho me gusta mucho, sobre todo para la temática elegida, por lo que así lo dejé.

Listo este paso ya tendríamos todo el pastel cubierto, y perfectamente pudiese quedar así, pues con algunas chispas de colores o chocolate, o simplemente colorear la buttercream estaría listo para cantar cumple, pero recuerden que yo necesitaba crear un pastel con temática marina, así que quise darle toques de azul en diferentes tonalidades.
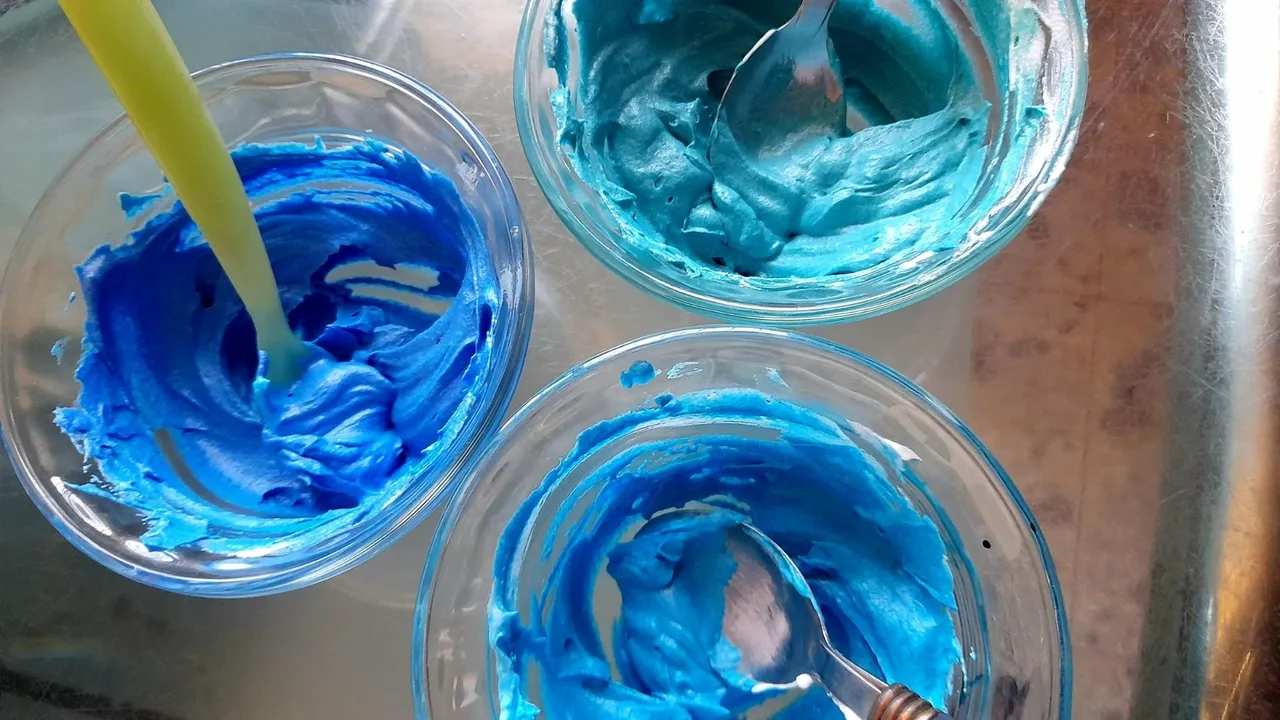
Para esto, con ayuda de colorantes en gel (el más recomendado para buttercream) creé tres tonos de azul que le darían ese toque especial que yo estaba buscando, y una vez listos los colores lo que viene es bastante sencillo, pero debe hacerse con cuidado.
Y en este punto debo aclarar que no tengo fotos del proceso pues en esos días tuvimos serias fallas de electricidad y mi celular ya se había descargado, pero les explicaré lo mejor posible. Y si tienen alguna duda pueden dejarla en los comentarios. Así que vamos con la explicación.

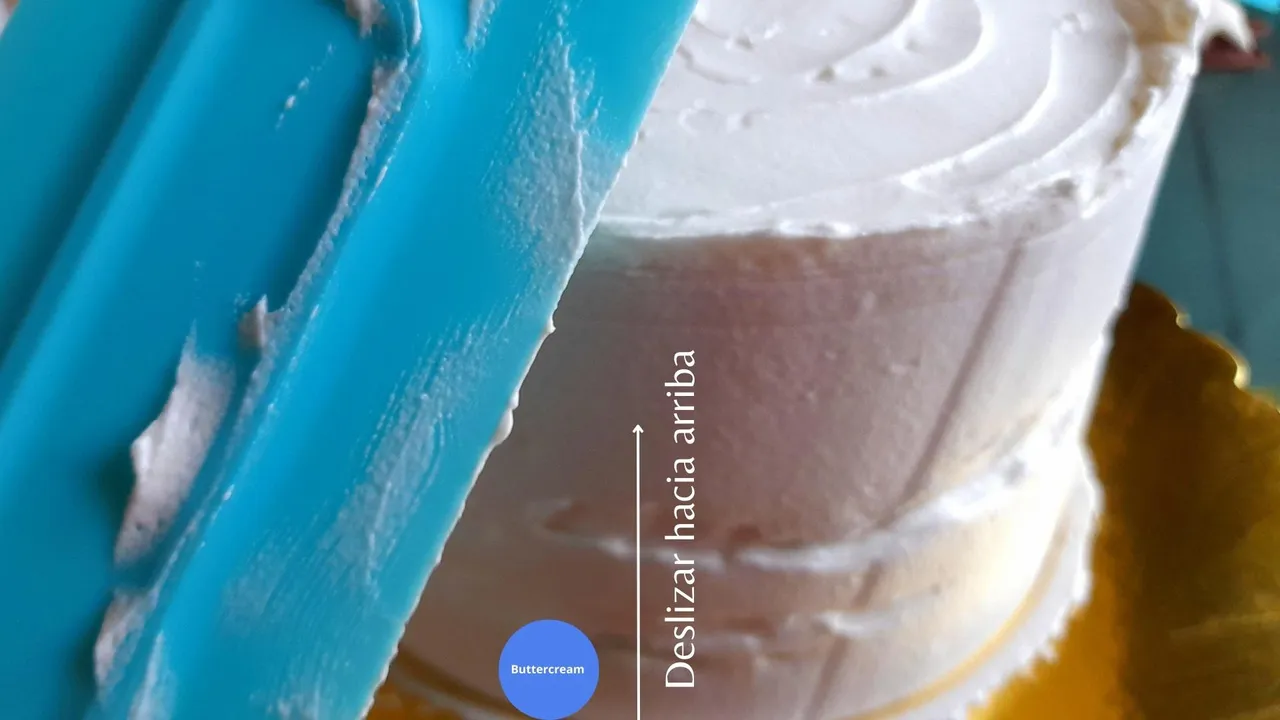
Como pueden ver en la imágen de arriba la parte inferior del pastel está cubierta con los tres tonos de azul de manera intercalada, para ello lo que hice fue utilizar una espátula, pero si no tienen en casa, una cucharita pequeña les sirve. Y ahora sí, vamos con la explicación:
Con el pastel bien frío, para que la crema se solidifique, con la espátula o cuchara, tomaremos una pequeña cantidad de crema azul y la pondremos justo en el borde inferior de la torta y subiremos la herramienta que estamos usando hasta la altura que deseemos, y de esta forma tendremos la primera de nuestras tiras azules.
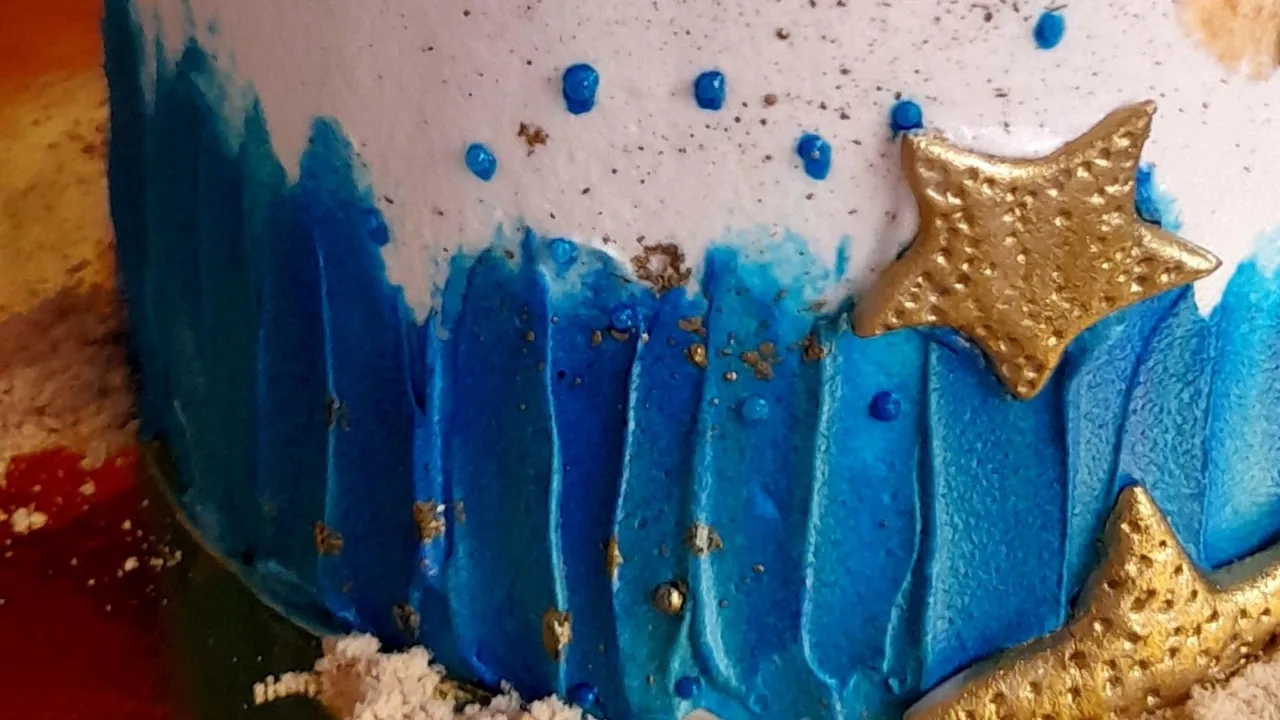
Lo siguiente es repetir el paso anterior con cada tono de azul por todo el borde del pastel, limpiando cada vez la espátula para no mezclar demasiado los colores. Y de esta manera habremos decorado toda la parte inferior del pastel.
Con lo que tendríamos lista una decoración preciosa, y con solo cambiar los colores tanto de la base como de los tonos que usamos en el borde podemos adaptar el pastel a la decoración del cumpleaños sin problemas.

Y por supuesto que hay algunos tips que nos ayudarán a hacer este trabajo de la mejor manera posible, así que les comparto los míos:
- La buttercream debe estar firme para hacer cualquier decoración sobre ella, por lo que debes refrigerar antes, y parar cuando se esté volviendo suave, refrigerar nuevamente y continuar.
- Trabajar sin ejercer demasiada presión, solo lo justo y necesario para lograr hacer el diseño sin que todos los colores terminen mezclados o dañar la base blanca.
- Limpiar tras cada uso las herramientas para evitar manchas sobre la base de buttercream o mezclar colores.
- La crema que vamos a aplicar sobre la superficie de buttercream debe estar suave para que se deslice sin necesidad de presionar demasiado.
Y con estos pequeños tips, creo que no se me escapa nada amigos, pero si hay alguna pregunta, no duden en dejarla en el buzón de comentarios.
Y ya para despedirme les animo a arriesgarse y probar en casa. Estoy segura que si yo pude, ¡ustedes pueden!

A few days ago I was sharing with you the elaboration of a delicious marbled cake filled with oreo buttercream, which although it is true, can be eaten at the point where we left it last time (without frosting), in my case, I needed it decorated, with a marine theme, specifically, starfish.
And it occurred to me that it would be a good idea to take a walk through the different techniques and accessories I used to decorate it, in case one day you are encouraged at home, since you can apply them to any type of decoration, and that's why we are here today.
For this cake I made several little things that we will work on in different publications, and here is the list:
- Covering with buttercream and decorating with spatula.
- Coloring the buttercream
- Stars in gum paste and details in gold dust
So for this first post we will work with the covering and decorating with spatula, so the first thing we will learn to do, will be to cover the cake, and although it seems complicated, I think that doing things carefully is more than enough. In fact, when I started with the elaboration of decorated cakes, I didn't have a single tool. So wanting is power.
In my case I now have a bailarina, which is a rotating base that helps us not only to cover the cake, but to smooth it more comfortably, but when I had no tools I placed it on the edge of the table, so that the base protruded from the table, and I was turning it with my hands, so its use is not essential. And now, let's get down to business.
For this cake I used buttercream buttercream (equal parts butter or vegetable shortening and powdered sugar flavored with butter essence and a tablespoon of powdered milk), which I left completely white.
To cover it you just need to put the buttercream in a piping bag and "surround " the whole cake with the cream, including the top, and then proceed to smooth the surface.
For this task there are many tools available in the market, but if you don't have one at home, you can use a ruler, as it was what I used in my beginnings and it fulfilled the same function, you just have to place the tool flush with the cream and turn the base to smooth the frosting as best as possible.
This process, we will do it starting from the top and once we achieve to leave it as we wish we proceed to smooth its sides.
And regarding the top border, you can smooth it out once you're done with the sides, or just let it flow, which also looks really nice. I actually really like it, especially for the chosen theme, so that's how I left it.
Ready this step we would already have the whole cake covered, and it could perfectly be like this, because with some colored sprinkles or chocolate, or just coloring the buttercream it would be ready to sing birthday, but remember that I needed to create a cake with a marine theme, so I wanted to give it touches of blue in different shades.
For this, with the help of gel coloring (the most recommended for buttercream) I created three shades of blue that would give it that special touch I was looking for, and once the colors are ready what comes next is quite simple, but it must be done carefully.
And at this point I must clarify that I have no photos of the process because in those days we had serious power failures and my cell phone was already discharged, but I will explain as best as possible. And if you have any doubts you can leave them in the comments. So let's go with the explanation.
As you can see in the image above the bottom of the cake is covered with the three shades of blue in an intercalated way, for this I used a spatula, but if you don't have one at home, a small spoon will do. And now, let's go with the explanation:
With the cake well cooled, so that the cream solidifies, with the spatula or spoon, we will take a small amount of blue cream and put it right on the bottom edge of the cake and raise the tool we are using to the height we want, and in this way we will have the first of our blue strips.
The next thing is to repeat the previous step with each shade of blue all around the edge of the cake, cleaning the spatula each time so as not to mix the colors too much. And in this way we will have decorated the entire bottom of the cake.
With this we would have a beautiful decoration ready, and just by changing the colors of both the base and the tones we use in the border we can adapt the cake to the birthday decoration without any problem.

And of course there are some tips that will help us to do this job in the best possible way, so I'll share mine:
- The buttercream must be firm to make any decoration on it, so you must refrigerate before, and stop when it is getting soft, refrigerate again and continue.
- Work without exerting too much pressure, just enough to achieve the design without mixing all the colors or damaging the white base.
- Clean the tools after each use to avoid stains on the buttercream base or mixing colors.
- The cream that we are going to apply on the buttercream surface must be soft so that it slides without pressing too much.
And with these little tips, I think I'm not missing anything friends, but if there are any questions, do not hesitate to leave them in the comments box.
And now to say goodbye, I encourage you to take a chance and try it at home. I'm sure that if I could, you can!