Gridcoin is a cryptocurrency that rewards users for running the Berkeley Open Infrastructure for Network Computing (BOINC). With BOINC you are not burning electricity in order to find a fitting nonce for a hash, you are actually contributing to scientific research.
If this sounds interesting you should check out this wonderful guide by @dutch to get you started: Link to Guide
My Guide will focus on running Boinc on the Odroid XU4Q. Here is what I will cover:
- The Odroid XU4
- Things you'll need
- The Setup
- Configuration Part 1
- Making your Odroid unique
- Configuration Part 2
- Connecting to grcpool.com
- Some words on heat
- Performance
- Whats next?
The Odroid XU4
The Odroid XU4 is a single board computer (SBC) by hardkernel. SBCs are pretty energy efficient and thus are suited very well for crunching 24/7 without skyrocketing your power bill. With its Samsung Exynos 5422 processor the XU4 comes with a lot of power on 8 Cores (4x 2000Mhz, and 4x 1400Mhz). You could call it a raspberry pi on steroids.
Things you'll need
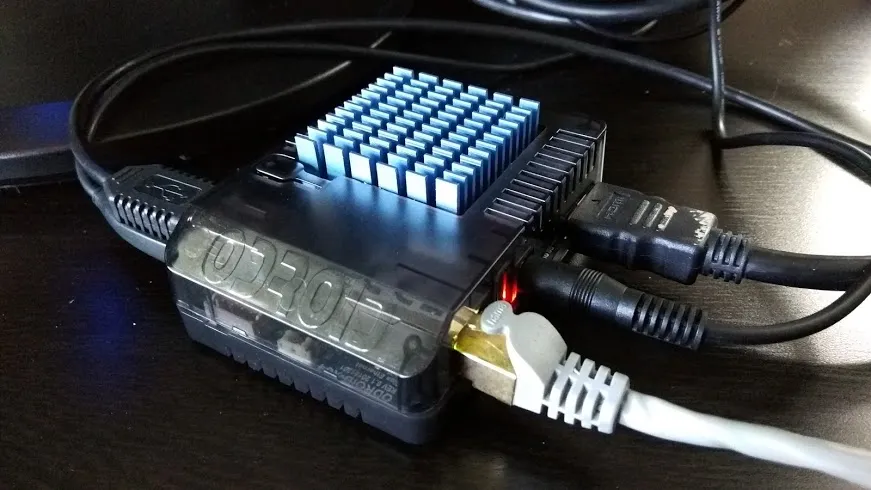
- The Odroid XU4 or Odroid XU4Q. The only difference between them is the cooling. The XU4 comes with an active cooler, but a lot of users reported that it's kind of noisy, so I decided to get the XU4Q which comes with a big heat sink. I had some trouble with heat, but more on that later.
- A 5V/4A power supply
- A storage medium. You can choose between an SD-Card or an eMMC. The eMMC is more expensive, but a lot faster and better at multi-tasking and is recommended to use by hardkernel. I decided that the extra investment was not worth it for running BOINC, because it does not need that much read and write operations, so I bought an SD-Card. I chose an 16GB Class 10 Micro-SD-Card with UHS-1.
- an ethernet cable to hook it up to your router
- a case is optional, but I bought one as well
- an SD-Card Reader
The Setup
- Put the SD-Card into your SD-Card-Reader
- Format the SD-Card using a tool like SDFormatter. In the options choose “Format Type FULL (Erase)” and set Format Size Adjustment to ON
- You do have the choice between running android or linux, but I went with linux because I could use some of my experience from my raspberry pis
- Go to https://odroid.in/ubuntu_16.04lts/ and download ubuntu minimal (ubuntu-16.04.02-minimal-odroid-xu4-20170516) and unzip it
- Write the Image to the SD-Card using a tool like Win32DiskImager
- Put the SD-Card into the Odroid and make sure the switch on the side is in the correct position (you can flip it in order to choose to boot from eMMC or SD-Card). Now you can hook up your keyboard, monitor and ethernet cable and finally plug in the power cable. The Odroid should boot now, time for configuration.
Configuration Part 1
- Login using user “root” with password “odroid”. Note: When using Linux you don't see any characters being typed when typing a password.
- Start by adding a new user with “adduser odroid” and set a password
- Add the new user to the sudo group with “adduser odroid sudo”
- Update apt-get with “apt-get update”
- Upgrade with “apt-get upgrade”
Making your Odroid unique
I am not sure if this step is 100% necessary when running solo, but when crunching in the pool I had quite a few problems with the pool or the projects websites not being able to tell my Odroid apart from other users Odroids.
With the image we downloaded we unfortunately have the same MAC address like everyone else using this image. You can check this with “ifconfig”. Your HWaddr is probably 00:1e:06:31:ab:0a. So there are two things I did to make my Odroid unique to the outside world.
Step 1: Change the MAC address
- Install macchanger with “apt-get install macchanger”
- You can now change your MAC address with “macchanger -a eth0”
- Check out your new MAC (HWaddr with “ifconfig”)
- I wanted to make sure the MAC does not jump back to its default address after a reboot and I didn't want the MAC to change to anything else in order to configure my router to assign the same IPv4 to my Odroid. So let's make sure the new Mac we just received is set on boot.
- Type “nano /etc/init.d/macchanger” to create a new file
- Add the following content:
#!/bin/bash
# disable network device
ifconfig eth0 down
# set the mac address (replace the FF:FF… with your new MAC)
/usr/bin/macchanger -m FF:FF:FF:FF:FF:FF eth0
# enable network device
ifconfig eth0 up
- Leave the editor with CTRL + X. Save – yes.
- Make it executable with “chmod +x /etc/init.d/macchanger”
- Enable it with “update-rc.d macchanger defaults 10”
Step 2: Change the hostname
- Change the hostname with “hostnamectl set-hostname NewNameHere”
- Open “nano /etc/hosts” and replace your new hostname here as well. CTRL + X to leave and save – yes.
- Open “nano /etc/hostname” and put your new hostname here as well
Configuration Part 2
- Go to your router and assign a fixed IPv4 to your Odroid device. This is different on every router, it's most likely somewhere in the DHCP settings.
- While you are here, give your computer a fixed IPv4 as well, we will need this in order to control BOINC from SSH.
- Now that we will reach the Odroid with the same IPv4 all the time, we can finally go headless and remove the monitor and keyboard.
- SSH into your Odroid from your computer using a tool like PuTTY and the IPv4 of your Odroid
- Login with your newly created user “Odroid” and the password you chose
- It's finally time to install BOINC using “sudo apt-get install boinc”
- Let's configure the remote_hosts.cfg next with “sudo nano /etc/boinc-client/remote_hosts.cfg”. Add the IP of your computer at the bottom and leave and save wih CTRL + X.
- Next up is gui_rpc_auth.cfg with “sudo nano /etc/boinc-client/gui_rpc_auth.cfg”. The file is most likely empty. Place your password here (I used my login password for the odroid). Leave and Save with CTRL + X.
- switch to the boinc directory with “cd /var/lib/boinc-client”
- Boinc should already be running and you can control it from here with “boinccmd”. Type “boinccmd --get_simple_gui_info” for example, to see the current projects and tasks. If you do this now, the list should be empty.
Connecting to grcpool.com
You could very well use the Odroid for solo crunching from here, or hook it up to the BAM!.
I chose to add this host to my account on grcpool.com. If you don't have an account, go to the website and create one (it's not hard and there are plenty of videos/guides to help you out).
- In order to make your Odroid show up on the hosts page in your grcpool account you need to join an account manager. You can do this with “sudo boinccmd --join_acct_mgr https://www.grcpool.com/ Username Password”
- If you refresh grcpool.com now, the host should show up
- Time to select a project for the host. The Odroid is an ARM device, which means that you will have to pick a project, that works with ARM. You can go to https://www.grcpool.com/project/poolStats and pick a project that hast a coloured raspberry. For efficiency you should avoid projects where you will compete with other users GPUs, so you could pick Universe@Home for example. Add the project and save your settings.
- Now you have to sync the Odroid and the pool again so it will see the project it has to crunch. You do this with “sudo boinccmd --join_acct_mgr https://www.grcpool.com/ Username Password”
- If you now type “boinccmd --get_simple_gui_info” the project should show up. Don't worry if you don't see any tasks, they are probably being downloaded right now.
- Come back after a few minutes and type “boinccmd--get_simple_gui_info” again. The tasks should show up now and the Odroid should be crunching happily. You can now sync the Odroid with the pool again and get rid of the error on the website this way (so the pool knows, that everything is now correctly synced). “sudo boinccmd --join_acct_mgr https://www.grcpool.com/ Username Password”
- After 24h (maybe earlier) your magnitude on grcpool.com should begin to rise.
Some words on heat
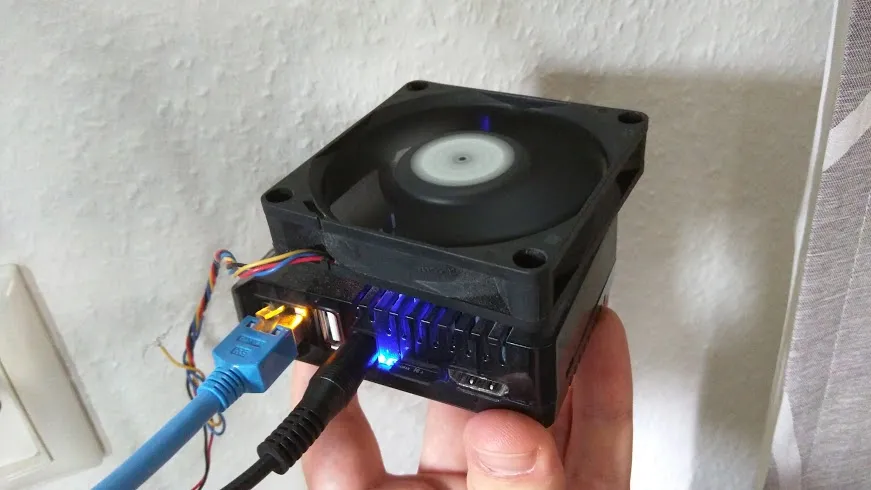
Crunching for BOINC will make your Odroid sweat. I quickly reached 90°C, which I wasn't really comfortable with. The passive heat sink just can't handle the full load and the CPU will be throttled.
Here is some data I collected:
After 10 minutes: 91°C, 4x 1400Mhz, 4x1600Mhz
After 18 minutes: 90°C, 4x 1200Mhz, 4x1400Mhz
After 36 minutes: 90°C, 4x 1300Mhz, 4x1500Mhz
Here is the script I used to monitor this:
#!/bin/sh
watch "echo -n '0: CPU Frequency: ' && echo -n $((sudo cat /sys/devices/system/cpu/cpu0/cpufreq/cpuinfo_cur_freq /1000)) && echo 'Mhz'
&& echo -n '1: CPU Frequency: ' && echo -n $((sudo cat /sys/devices/system/cpu/cpu1/cpufreq/cpuinfo_cur_freq /1000)) && echo 'Mhz'
&& echo -n '2: CPU Frequency: ' && echo -n $((sudo cat /sys/devices/system/cpu/cpu2/cpufreq/cpuinfo_cur_freq /1000)) && echo 'Mhz'
&& echo -n '3: CPU Frequency: ' && echo -n $((sudo cat /sys/devices/system/cpu/cpu3/cpufreq/cpuinfo_cur_freq /1000)) && echo 'Mhz'
&& echo -n '4: CPU Frequency: ' && echo -n $((sudo cat /sys/devices/system/cpu/cpu4/cpufreq/cpuinfo_cur_freq /1000)) && echo 'Mhz'
&& echo -n '5: CPU Frequency: ' && echo -n $((sudo cat /sys/devices/system/cpu/cpu5/cpufreq/cpuinfo_cur_freq /1000)) && echo 'Mhz'
&& echo -n '6: CPU Frequency: ' && echo -n $((sudo cat /sys/devices/system/cpu/cpu6/cpufreq/cpuinfo_cur_freq /1000)) && echo 'Mhz'
&& echo -n '7: CPU Frequency: ' && echo -n $((sudo cat /sys/devices/system/cpu/cpu7/cpufreq/cpuinfo_cur_freq /1000)) && echo 'Mhz'
&& echo -n 'TEMP: ' && sudo cat /sys/devices/virtual/thermal/thermal_zone0/temp"
- Create the file with “sudo nano showtemp.sh” and paste the content.
- Save and close the file
- Make it executable with “sudo chmod +x showtemp.sh”
- run it with “./showtemp.sh”
- quit with CTRL + C.
I really wanted the Odroid to run at full performance, so I added an old CPU fan on top of the heat sink. Unfortunately I had nothing to wire it up to the Odroid, so I used an old Nokia charger to power the fan (this was nice because I didn't really need 12V anyway and the 4.9V the charger outputs is enough to keep it cool).
Performance
I am really happy with the performance of this setup. According to the gene.disi.unitn.it website floating point operations are at 1373.06 million per second and integer operations at 5679.53 million per second (http://gene.disi.unitn.it/test/show_host_detail.php?hostid=12282)
And what's the RAC and MAG? I ran into a lot of problems when setting up the Odroid as you can probably tell from the length of this guide. Especially the temperatures, making the Odroid unique and making it run smoothly with grcpool.com took quite a lot of time. So my mag dropped a few times and when my SD-Cards failed I had to start from scratch with a new one. That's why I can't give you numbers right now.
In terms of power consuption I measured 4.2W when in idle and 13W under full load. Which means that the Odroid might be the only device I can run on german electricity costs that might pay for itself.
What's next?
- Solar:At one point I got really interested in running this thing with solar power only. Just imagine crunching for science with the power of the sun alone. That's amazing. Unfortunately we do not have a roof where I can mount big panels. The panels to run it 24/7/365.25 would need to be bigger than I expected in the beginning in order to fill up the batteries for a constant draw of 13W. Monitoring battery levels and safely turn off the Odroid and other things seemed to be too much overload to go into detail.
- Giant heat sink: I might try and replace the active fan with a really big heat sink to reduce power consumtion even more.
- Odroid MC1: The Ordoid MC1 will be released by hardkernel in September and is basically 4 Odroid XU4 stacked on top of each other without HDMI-ports and stuff like that for ~200$. If my Odroid keeps running stable now this might be something really interesting to look into.
I hope this helps you getting started. I am by no means an expert on Odroids, just trying to share my findings. Happy crunching! :)
Thoro