參考:如何建立 VM
https://doc.freenas.org/11/vms.html#
https://www.getnas.com/2017/06/2178.html
參考:如何建立新的 Raw File(= VMDK 檔)
https://redmine.ixsystems.com/issues/28466
https://redmine.ixsystems.com/issues/23652
1、安裝 VNC Viewer 軟體
https://www.realvnc.com/en/connect/download/viewer/
2、到這裡下載最新版 Ubuntu 或 CentOS ISO 映象檔
https://www.centos.org/download/
https://www.ubuntu-tw.org/modules/tinyd0/index.php?id=7
3、在「儲存 Storage」中建立一個 FreeNAS VMs 專用 Dataset:/mnt/UserVolume/VMsDataset
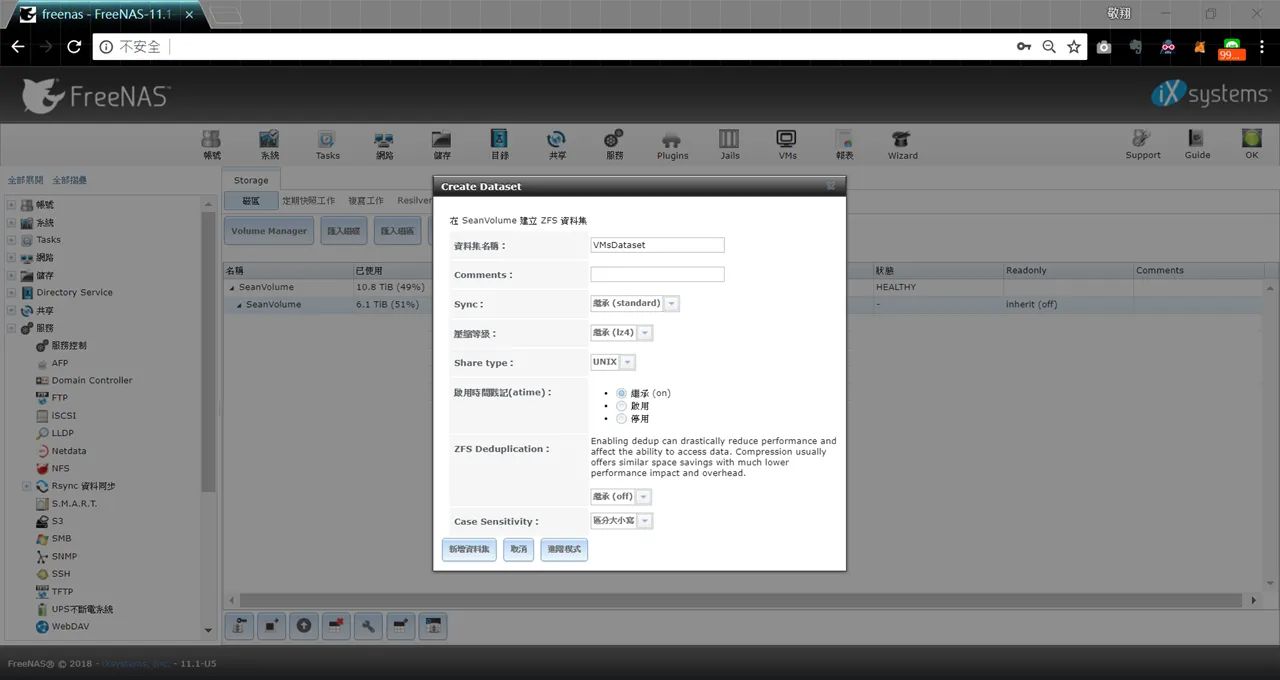
4、設置 VMsDataset 的 Group 有寫入權限

5、開放 /mnt/UserVolume/VMsDataset 的 SMB 服務
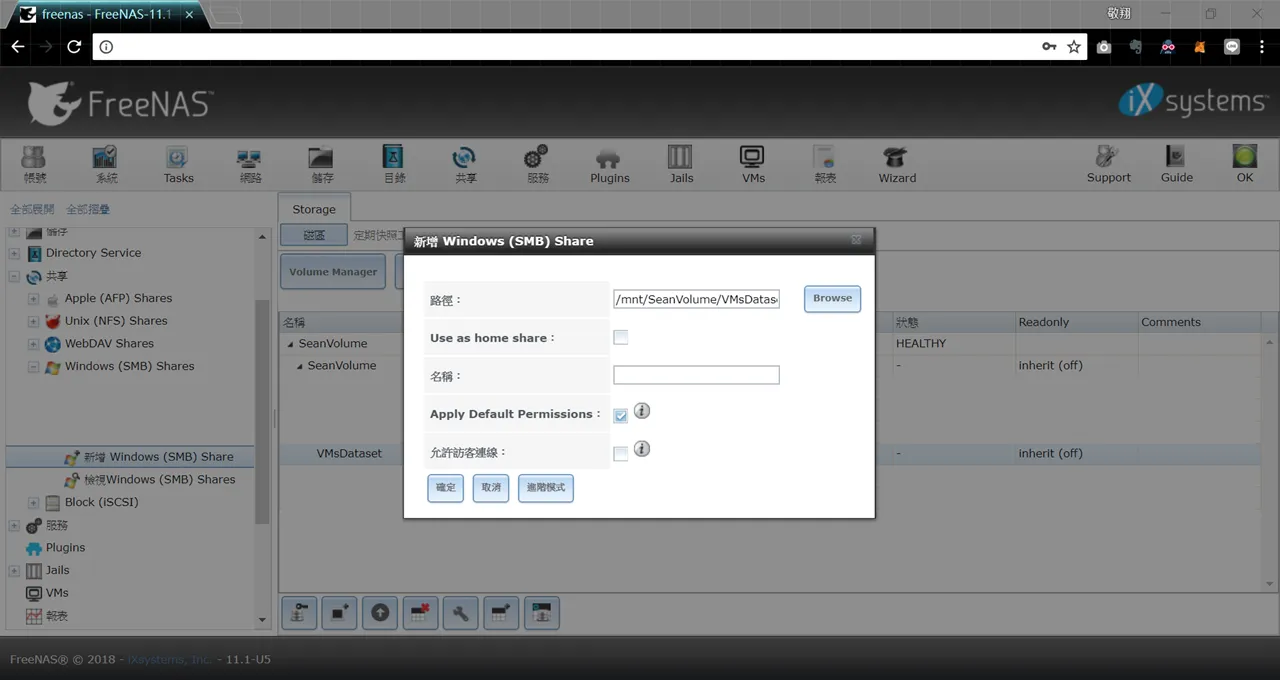
6、重啟 SMB 服務使 /mnt/UserVolume/VMsDataset 路徑生效

7、透過 SMB 服務將 CentOS ISO 檔放到 /mnt/UserVolume/VMsDataset 內

8、透過至 FreeNAS Web 的指令列,在 /mnt/UserVolume/VMsDataset 內建立 512GB 大小空的 .img 檔
參考:如何建立新的 Raw File(= VMDK 檔)
https://redmine.ixsystems.com/issues/28466
https://redmine.ixsystems.com/issues/23652
[root@freenas ~]# cd /mnt/SeanVolume/VMsDataset/
[root@freenas /mnt/SeanVolume/VMsDataset]# truncate -s 512G "CentOS7.img"
[root@freenas /mnt/SeanVolume/VMsDataset]# chown root:wheel "CentOS7.img" && chmod 666 "CentOS7.img"
[root@freenas /mnt/SeanVolume/VMsDataset]# ls -al ./
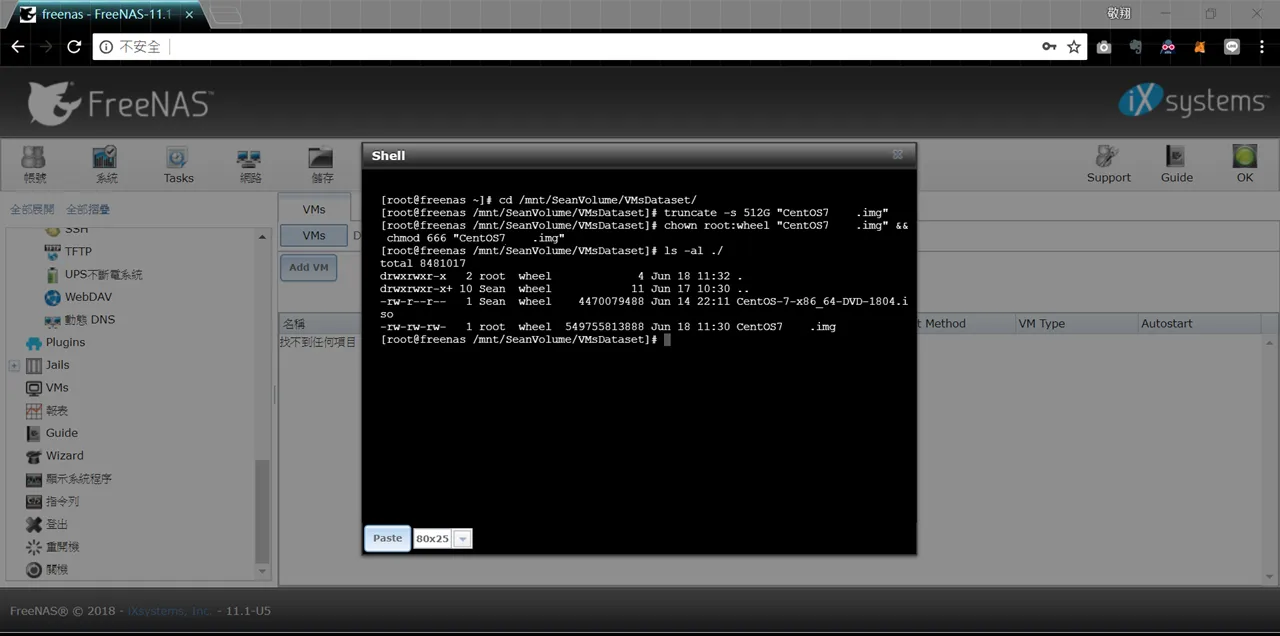
9、建立新的 VM
VM Type:Virtual Machine
名稱:CentOS7
說明:CentOS-7-x86_64-DVD-1804
Virtual CPUs:2
Memory Size (MiB):4,096
Boot Method:UEFI
Autostart:✖

10、點選 VM→「Devices」
(1)網路卡(基本上預設即可)
VM:CentOS7
型態:Network Interface
Adapter Type:Intel e82545 (e1000)
NIC to attach:lagg0
MAC Address:

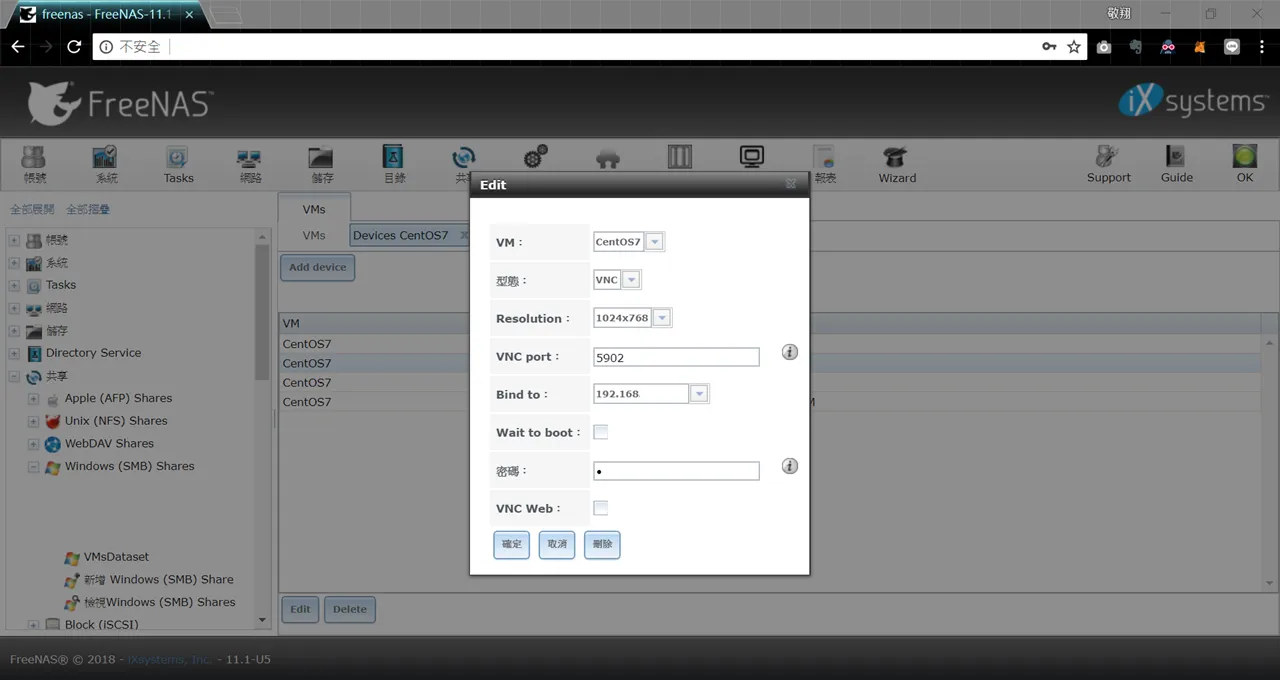
(2)VNC
VM:CentOS7
型態:VNC
Resolution:1024x768
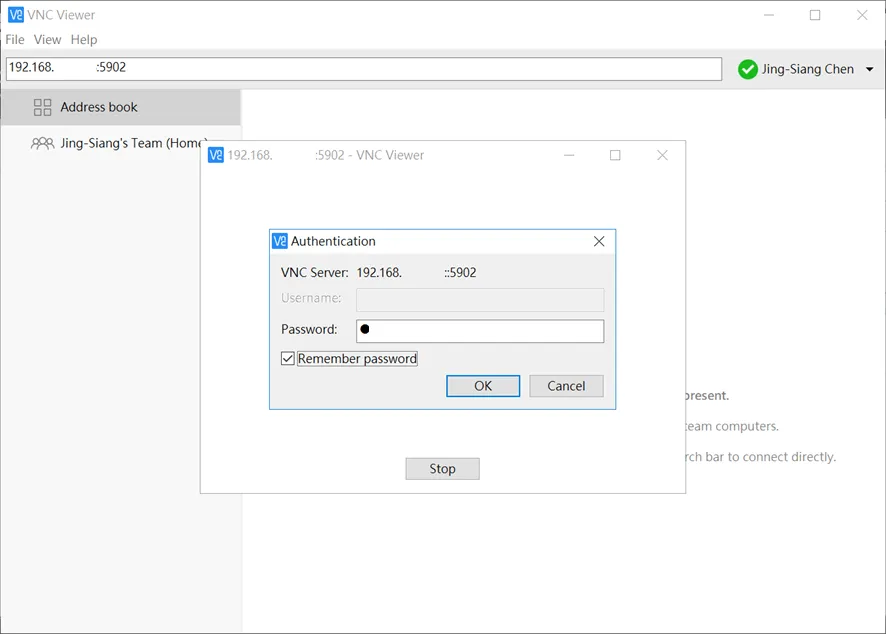
VNC port:5902
Bind to:192.168.xxx.xxx
Wait to boot:✖
密碼:*
VNC Web:✖
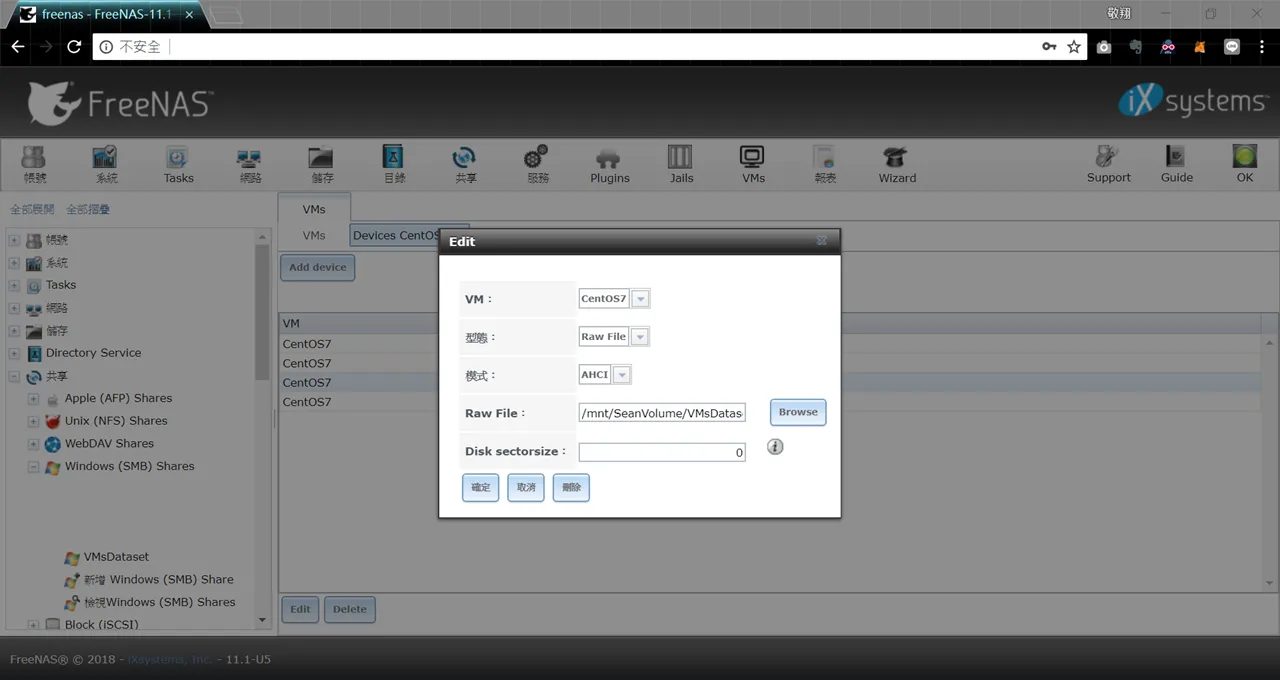
(3)RAW File
點選【Add device】
VM:CentOS7
型態:Raw File
模式:AHCI
Raw File:/mnt/UserVolume/VMsDataset/CentOS7.img
Disk sectorsize:0
(4)CD-ROM
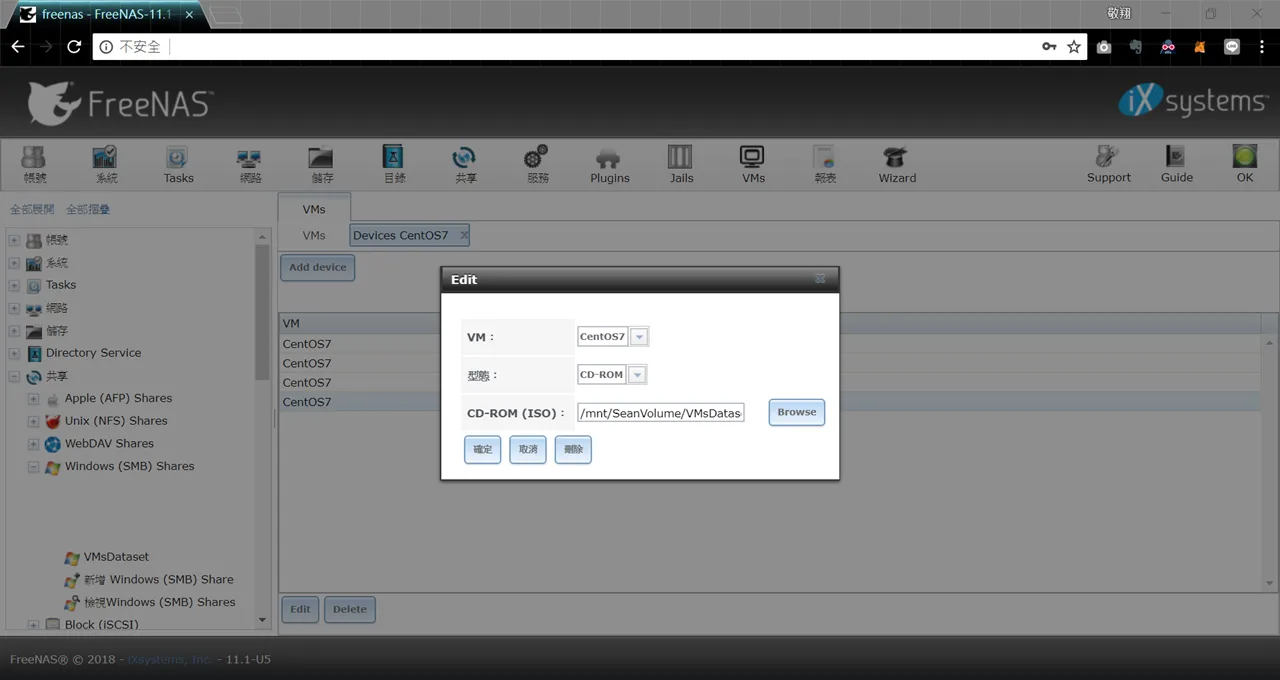
點選【Add device】
VM:CentOS7
型態:CD-ROM
CD-ROM (ISO):/mnt/UserVolume/VMsDataset/CentOS-7-x86_64-DVD-1804.iso
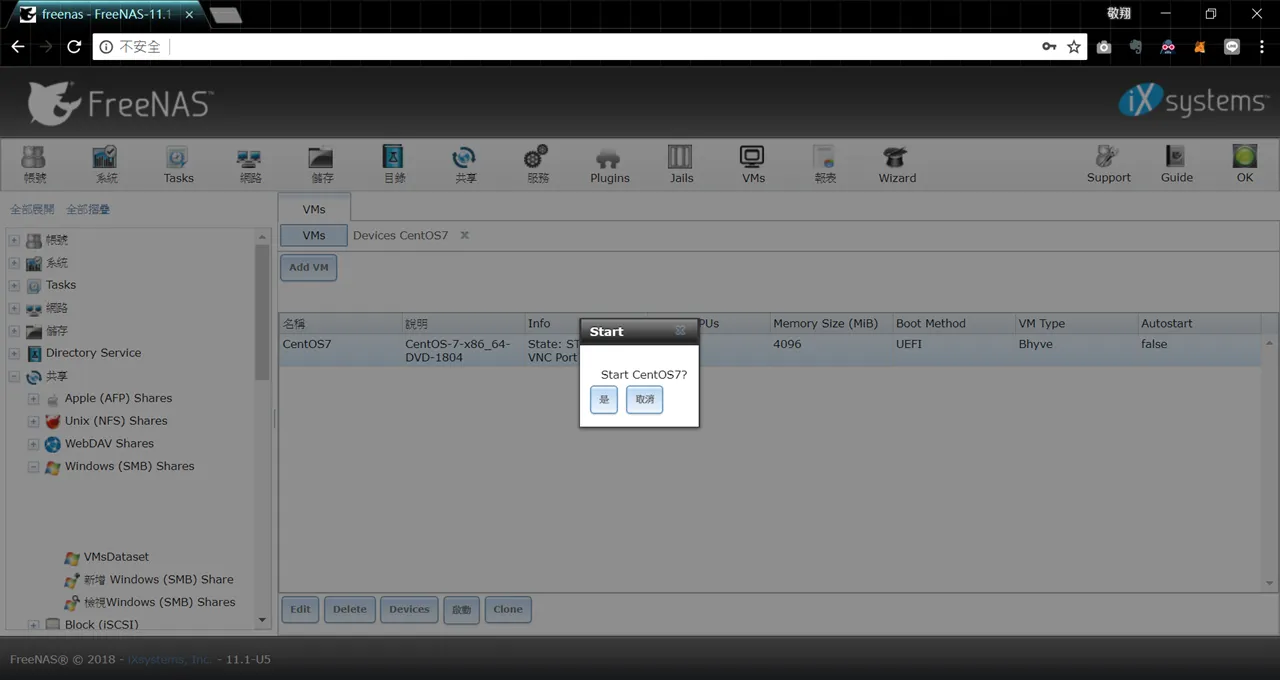
11、開機
12、使用 VNC 連線
13、進行 CentOS7 初始化安裝

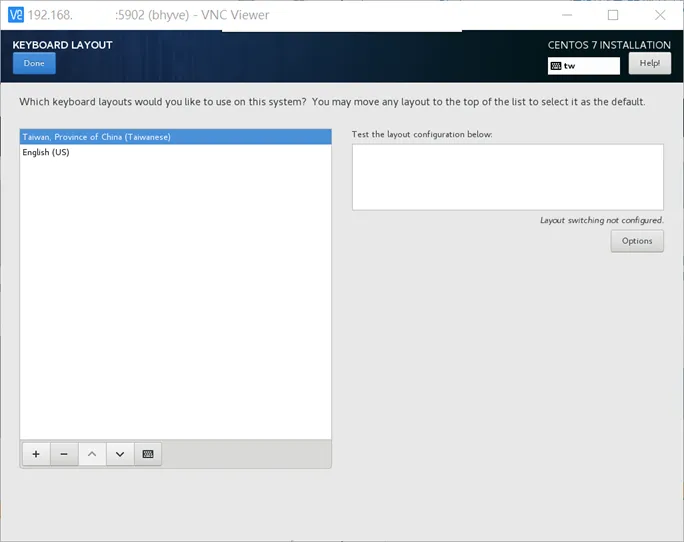

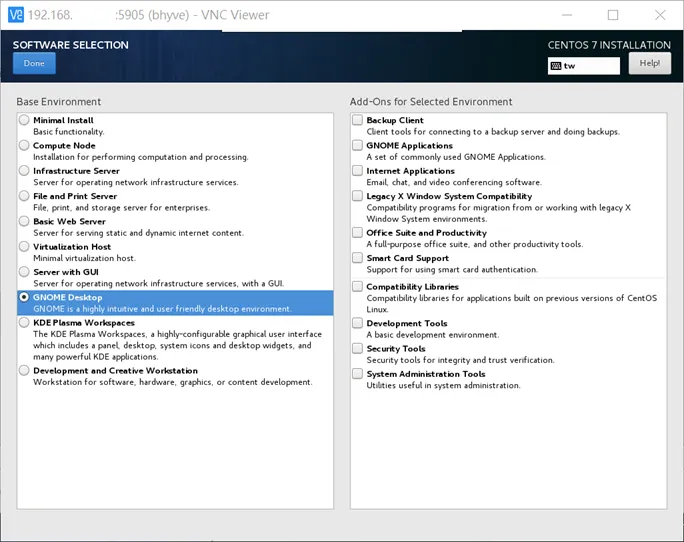
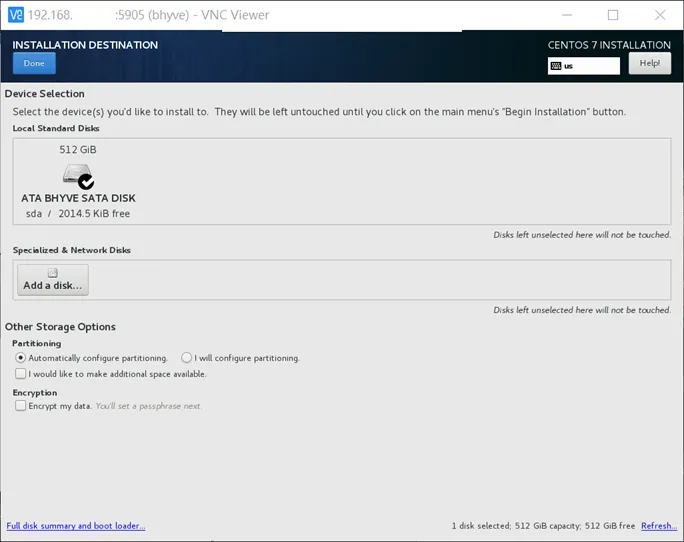
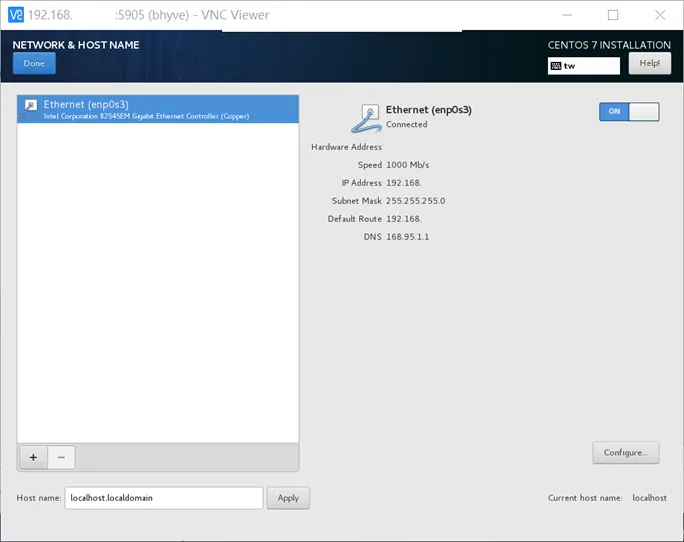
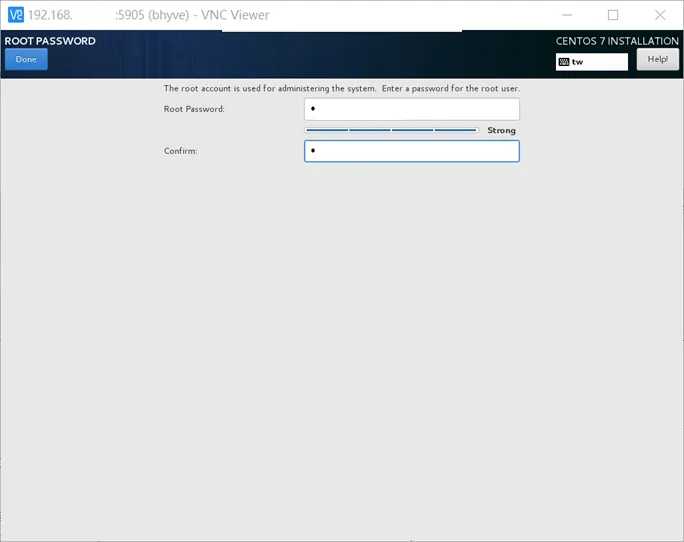


14、在 CentOS7 第一次安裝完成後會順利進入到桌面,執行下方指令
(1)更新
$ sudo systemctl stop packagekit
$ sudo systemctl disable packagekit

$ sudo yum -y autoremove && sudo yum clean all
$ sudo rm -rf /var/cache/yum

$ sudo yum check-update && sudo yum -y update
(2)修正 freenas bhyve 的臭蟲,需將 CentOS7 VM 開機檔改到其他位置之後才可正常開機
$ su root
# mv /boot/efi/EFI/BOOT/bootx64.efi /boot/efi/EFI/BOOT/bootx64.efi.bak
# cp /boot/efi/EFI/centos/grubx64.efi /boot/efi/EFI/BOOT/bootx64.efi
# exit
(3)將 CentOS7 VM 關機
$ sudo sync; sudo sync; sudo sync; sudo sync; sudo sync; sudo sync; sudo sync; sudo shutdown -h now;
15、移除 VM 的 CD-ROM

16、可透過 SMB 將 /mnt/UserVolume/VMsDataset/CentOS7.img 檔進行壓縮備份
註:若要使用 FreeNAS 的 Snapshot 功能可以參考此影片:

17、再次啟動

18、安裝特定軟體
$ sudo yum install -y openssh wget vim gedit nano net-tools iputils traceroute curl bind-utils sudo man tree
19、接著我們要讓 sudo 的群組成員,在執行 sudo xxx 命令時,不再需要輸入密碼。
$ sudo vim /etc/sudoers
  …(前略)
  ## Allows people in group wheel to run all commands
  %wheel ALL=(ALL) ALL

  ## Same thing without a password
  # %wheel ALL=(ALL) NOPASSWD: ALL
  …(後略)
↑ 第 99 列及 102 列修改成 ↓
  …(前略)
  ## Allows people in group wheel to run all commands
  #%wheel ALL=(ALL) ALL

  ## Same thing without a password
  %wheel ALL=(ALL) NOPASSWD: ALL
  …(後略)