The series about how I made my map of Kranisis was so popular that I've decided to do another. Strictly speaking, this one isn't the one I desperately need next (for when I get to the Birth of the Neví), but I'm finding I need it for work on another story which takes place in Terrenden's ancient history - long before an erupting caldera took out large chunks of this island. So Velantia gets a map first.
Note: I will be using GIMP until the text-adding stage.
I do have an old map of Vendaria that I looked at first - it also needs to be redone, but not today. Here is what it looks like at present...

I made this using basic paint techniques - probably 8 years or so ago.
But this is what it looks like in 850 Terrenden Common Era - long after the destruction it suffered. The map I need right now is for 1200 Before the Terrenden Common Era, so about 2000 years previously - when it was still called Velantia.
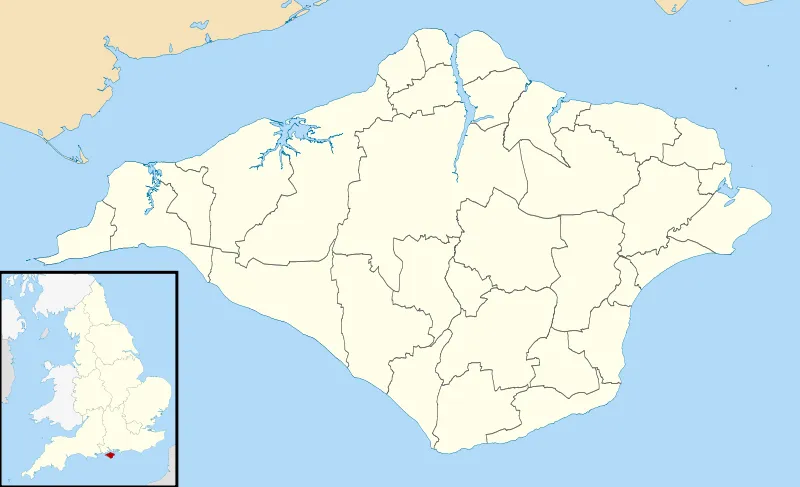
Looking at this map, and knowing that some of the structure is likely to change, I decided to use the Isle of Wight off the south coast of England (near where I lived for 6 years) as my base map - I've chosen it because I can easily imagine Velantia in this shape before eruptions took huge chunks out of it....
Since no one can copyright a land mass, (well, not yet, anyway) I feel comfortable using real land to help me form the basic shape. But it's ultimately not a map of the Isle of Wight - it will change greatly...
Here is what the Isle of Wight looks like - image from Wikipedia Commons - alteration permitted.
Creating and using the water layer
I first use the "Image" menu with the "Transform" sub-menu to flip it both horizontally and vertically.
Then, I go to the layers dialogue box (defaults on the righthand side of the screen). I right-click on the layer (the only one we have right now) and click on "duplicate later." I name the top one "land" and the bottom one "water."
On my "water" layer, I click on the color picker tool (for me, it's on the top row of my tool box - righthand-most icon - though my desktop computer is actually running a version of GIMP from about 6 months ago - not the newest one.
I click on the water first and delete the current color. Unselect all (shift + control + A). I pick the color of blue that I want for my water and use the paint bucket tool to fill the water area. (I had to click on "Image then Mode then RGB because it kept filling gray, not blue!)
- Next, I use my color picker tool to select the land color - then click "delete."
So, now my water area looks like this (land layer visibility turned off):

Using my land area
Right click on your "land" layer in the layer dialogue box and click on "add alpha channel" - this will allow you to have transparent areas.
I click on my "land" layer to select it. I (again) use my color picker tool to first select the land area. I "delete" the existing information and use the "bucket fill" tool to color it green. (It honestly doesn't matter what color right now as I'm going to do something else with it in a minute.)
I use the "invert" select setting (control + I) to select the water area now. I click on "delete."
Now, I have this map:

In the next part, I will start giving it a little bit of a 3D look and make the water/land look a bit nicer.

Lori – photographer at Viking Visual, author at A’mara books, student-of-the-world.

Banner by @shai-hulud