The Girl Who Is Called Kulay Kahoy
A painting
Watercolor is one of my favorite medium since 2015. I used student grade watercolors such as Marie's, Sakura Koi, Pebeo, Studio, Prang and even the cheapest watercolor for my practice and exhibit pieces. So far, Marie's watercolor and 200gsm Canson watercolor paper is the best duo for me. I haven't tried the Artists grade watercolor yet but I'm dreaming to have one.
What is Kulay Kahoy?
Kulay Kahoy is a Filipino translation of Wood Color, in other words, brown or any color that represents a log, trunk or wood. It has many variation. For a Filipina, having a Kulay Kahoy or Morena skin is very common. But, it's not what most of the people love, they wanted fairer skin, so people with darker skin often get bullied. This is the effect of the colonial mentality in the Philippines.
But now, as a Filipina grows mature, the more she appreciate the complexion she has. More and more people began to appreciate and embrace this wonderful complexion.
Who is that girl called Kulay Kahoy?
That's me ✨
And I love my color. Like I blend well with nature. I have been called Negra, several times. Uling (charcoal) and many more. But that was then, when I was still a child.
At first I didn't want thisthis color because of the words I heard. But since it became my pagkakakilanlan (identification) I used it as my psuedo name in some of my art especially in Photography.
Materials:
- Watercolor
- Pointed brush
- Water
- Pencil
- Bristol board
Process
Step 1:
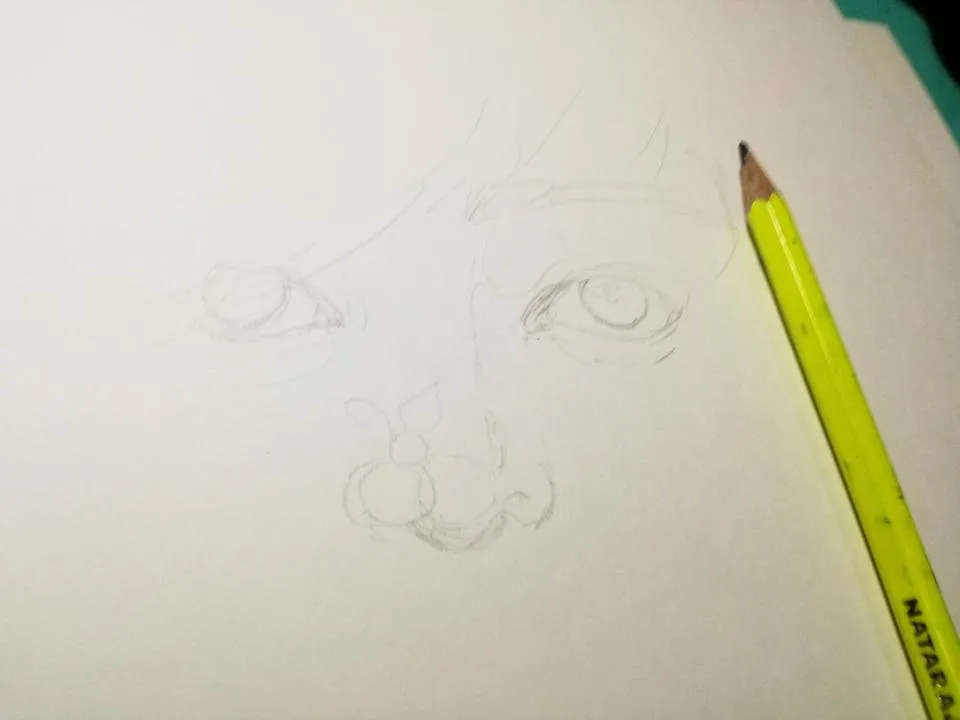
I prepared all the materials so that I can easily get them. Using a pencil, I outlined the subject, a girl's face.
Step 2:
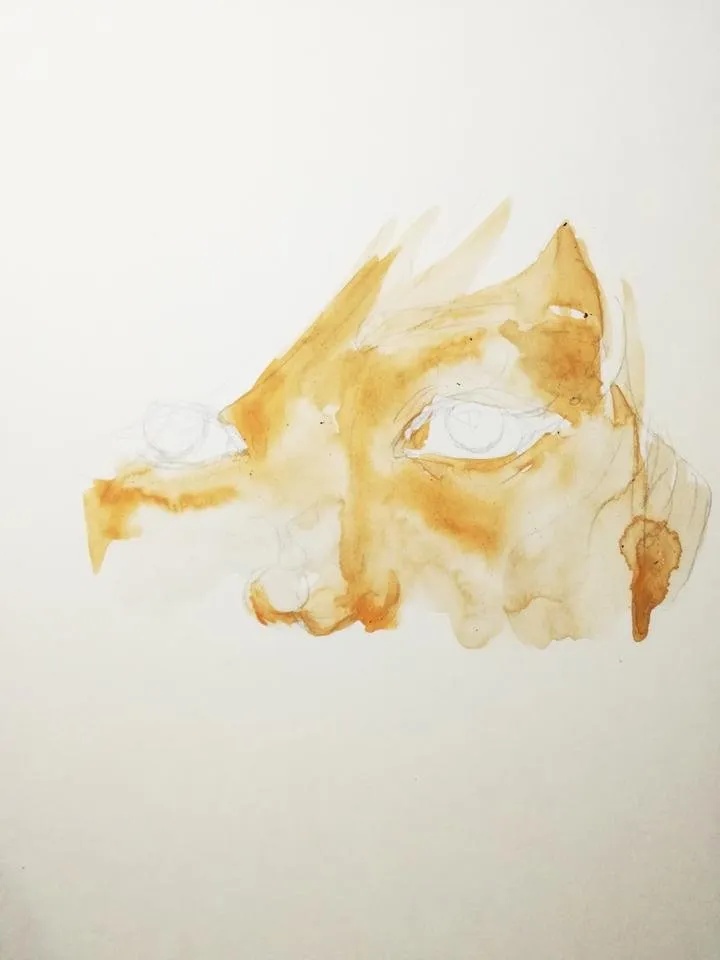
Using shades of brown and flesh, I painted the first layer of the painting. At first layer, it might be seen as the ugly art of the process, but that's okay, you just need some patience and time. And let it dry.
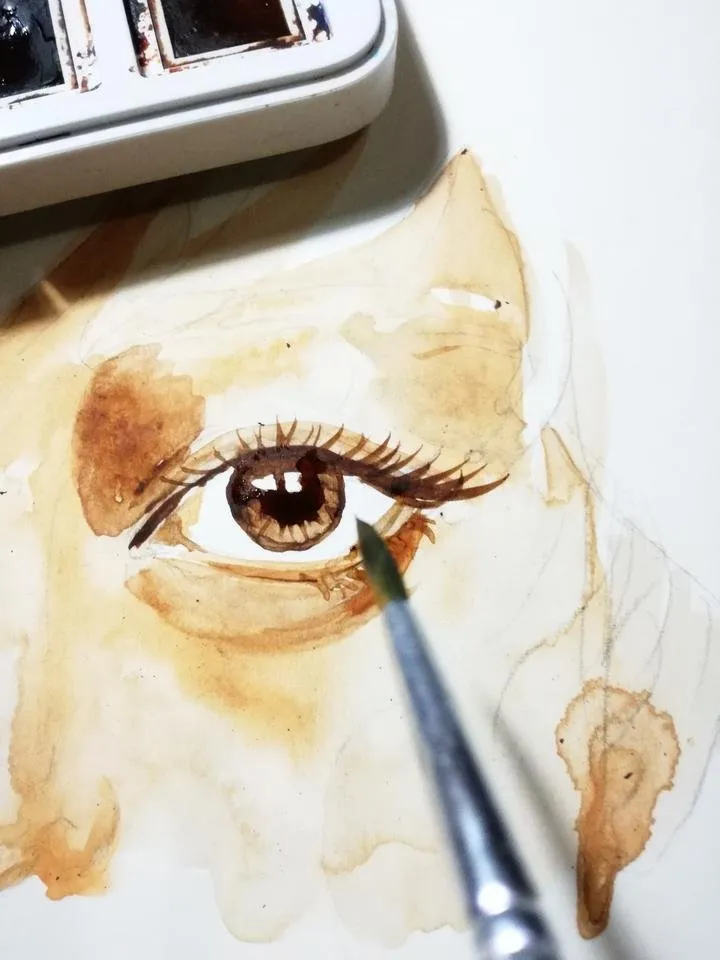
Step 3:
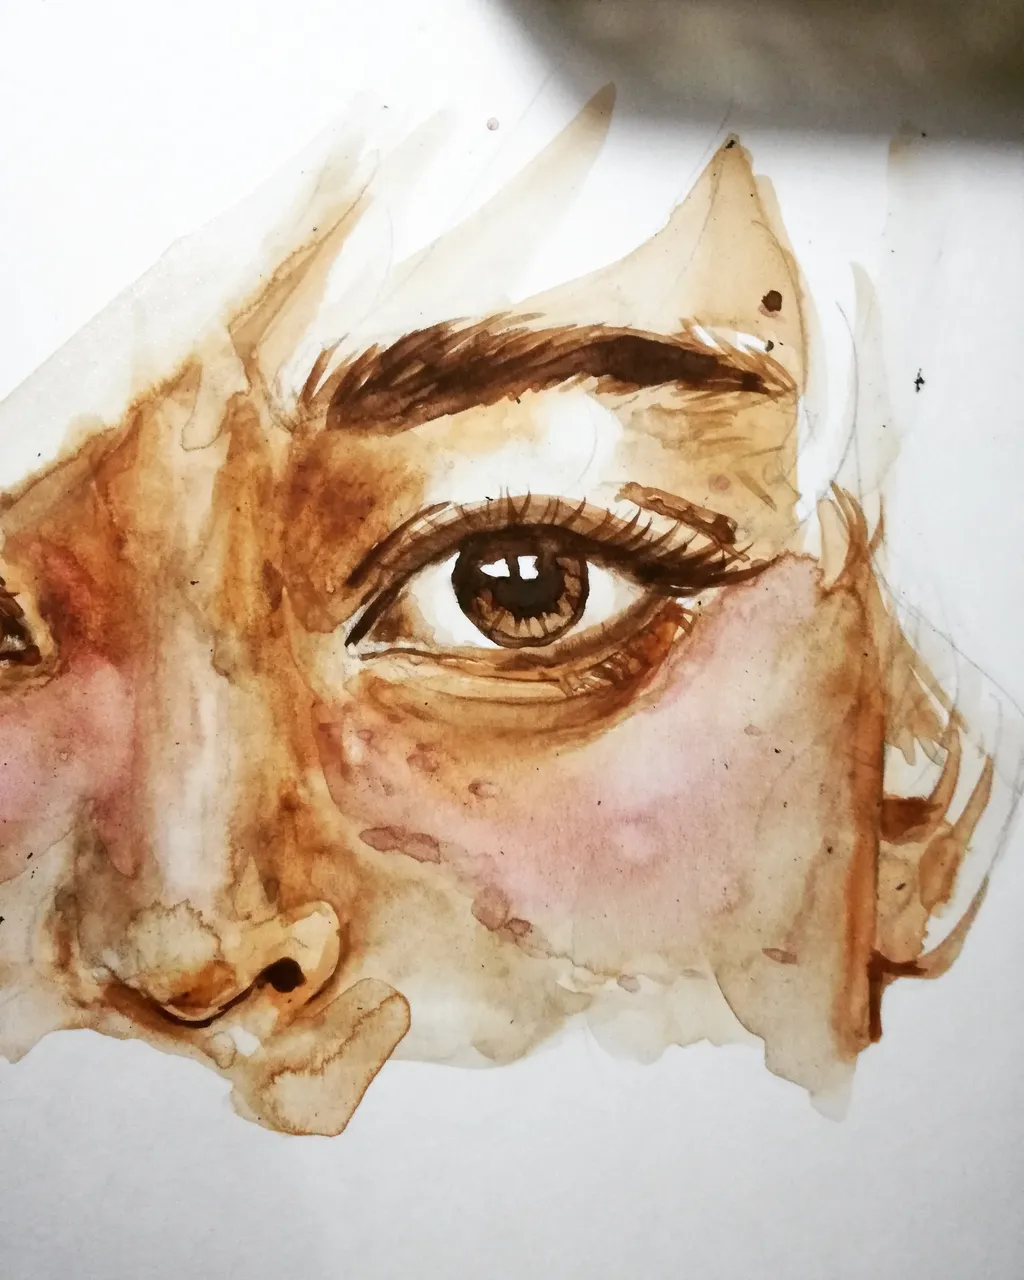
After the first layer has dried, add the details for the eyes. This time I used burnt umber for the darker part of the eyes
Step 5:
Add more details using darker color. I saturate the color by adding just small amount of water to the pigment. Then I let the layer dry before adding another layer of colors.
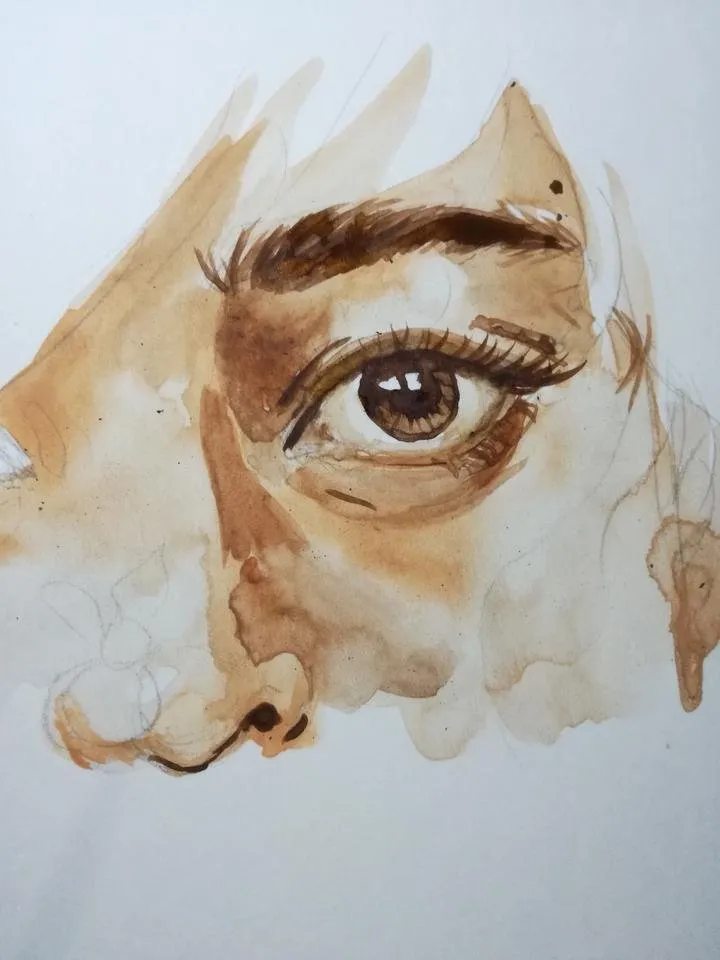
Step 6:
Add details. I painted a diluted crimson pink on her cheeks to give it a bit rosey effect.
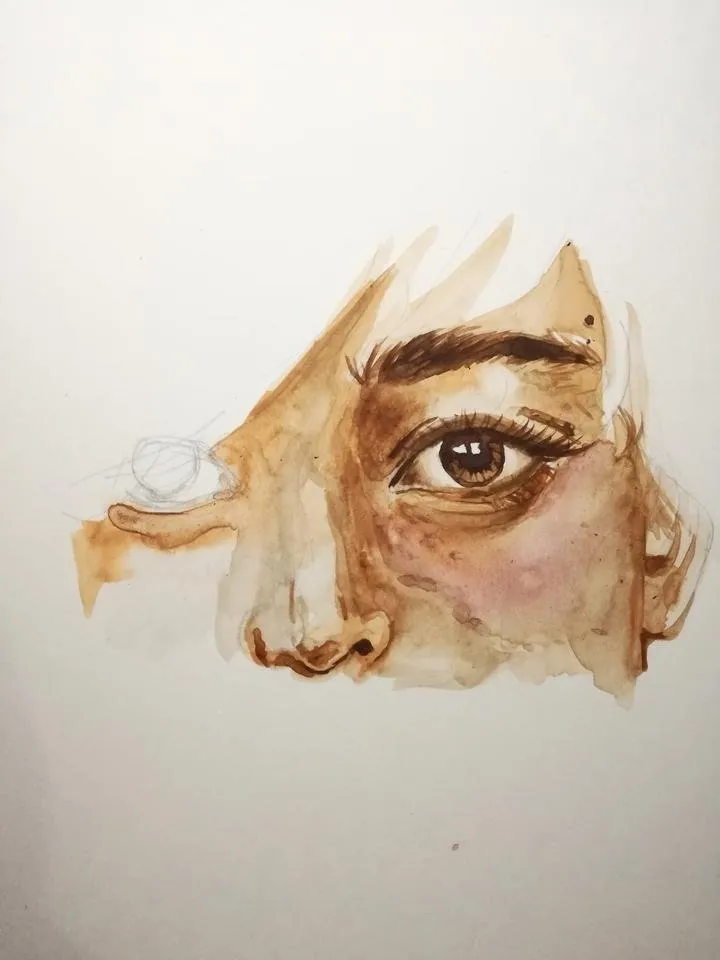
Step 7:
Continue to add details to the face. I finally painted the remaining eye and tried to make it complement with the other side.
I repeated the process of adding crimson red to the cheek.
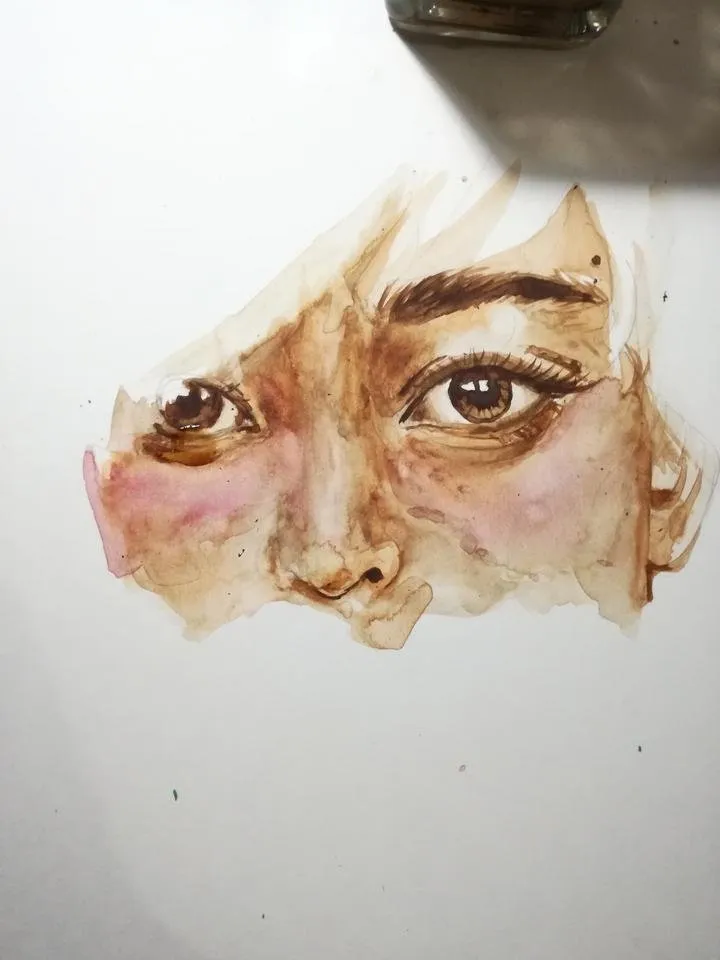
Step 8:
This is where I think I made a mistake.
I added green color to paint random leaves and shape because I wanted this painting to blended with nature.
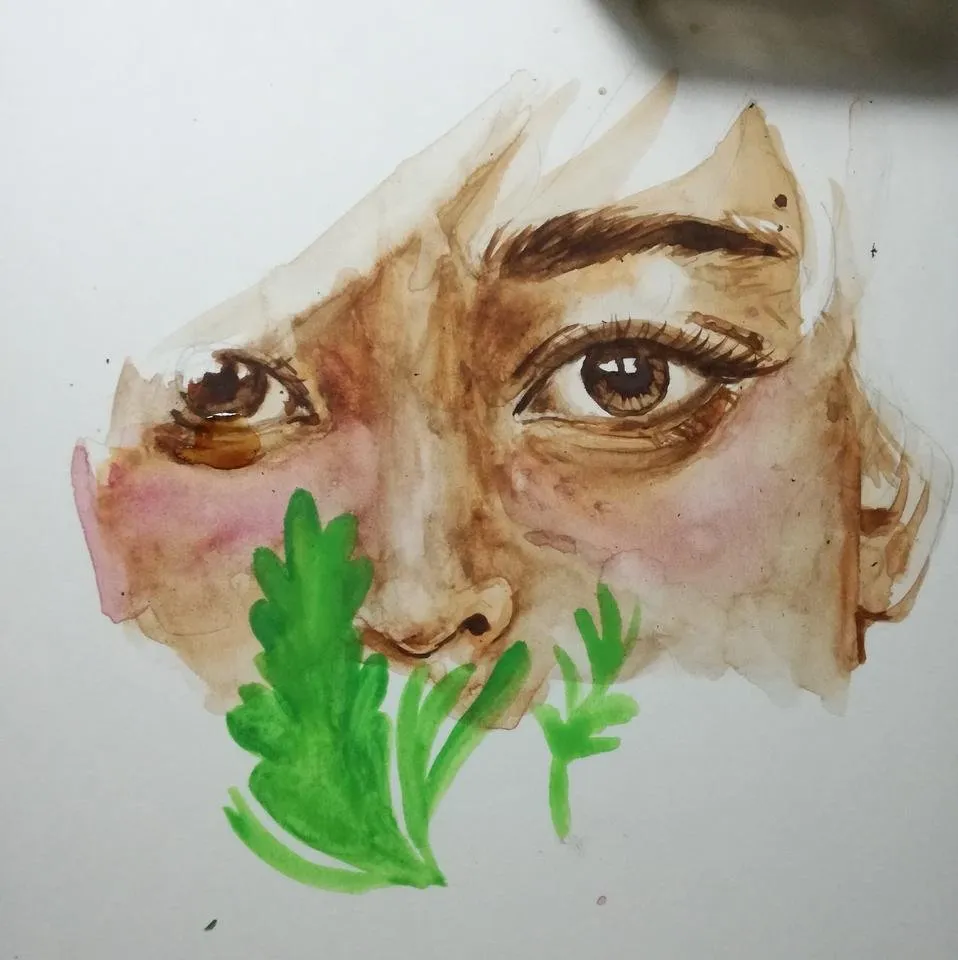

And this is the end of the progression of the painting. I hope you all like it. Thank you for dropping by.

toggle night mode to see the stars