
A short video showing the one person operation of a construction lift.
▶️ Watch on DTube
▶️ Watch Source (IPFS)
Many times when there’s work to be done there is only one person to do it, especially around the farm or homestead. When you’re by yourself you often look for or build tools to make your life easier and/or safer. (In fact it’s that trait which catapulted man to the number one apex predator position!)
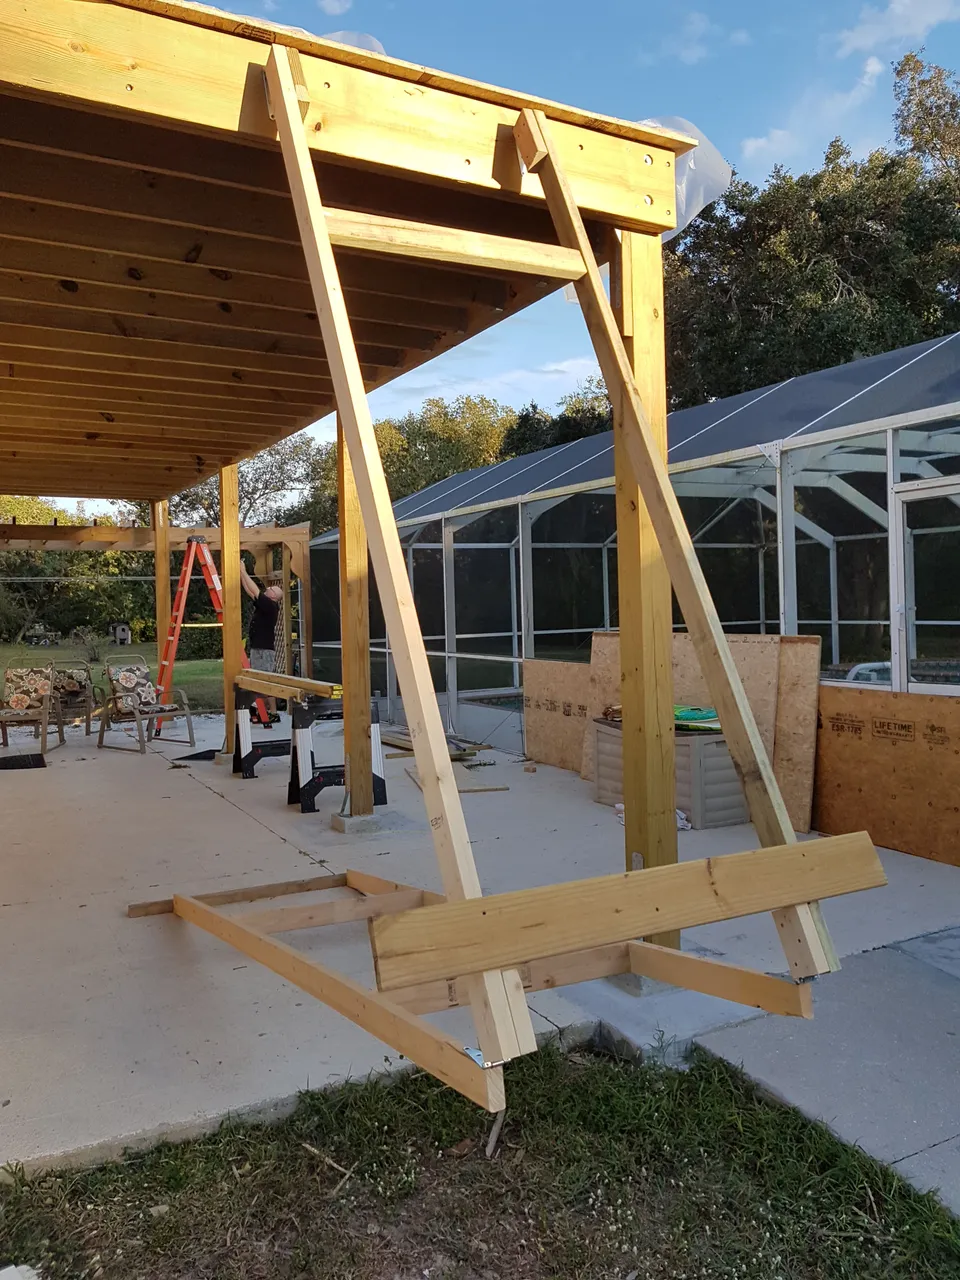
Recently we had to put a roof on a porch. Even with two people lifting sheets of 3/4” OCB sheathing up to the rafters that are at about 11 feet off the ground was not possible. We needed a tool so we built one. Not an original one as we got the general idea from others. But I thought I’d document on Steemit exactly what we did and show some pictures of the details and its operation.
The lift was constructed from:
- 2x4 lumber
- four (4) hinges
- drywall screws, various lengths.
From the video you can see the basic design and operation. I don’t think I need to belabor folks with details of construction since each lift will be different but the basic design will apply. I will point out the things we learned.
- You can assemble the lift on the ground and then lift it into position if you have two people. If you are alone you will need to assemble it in place from the top down.
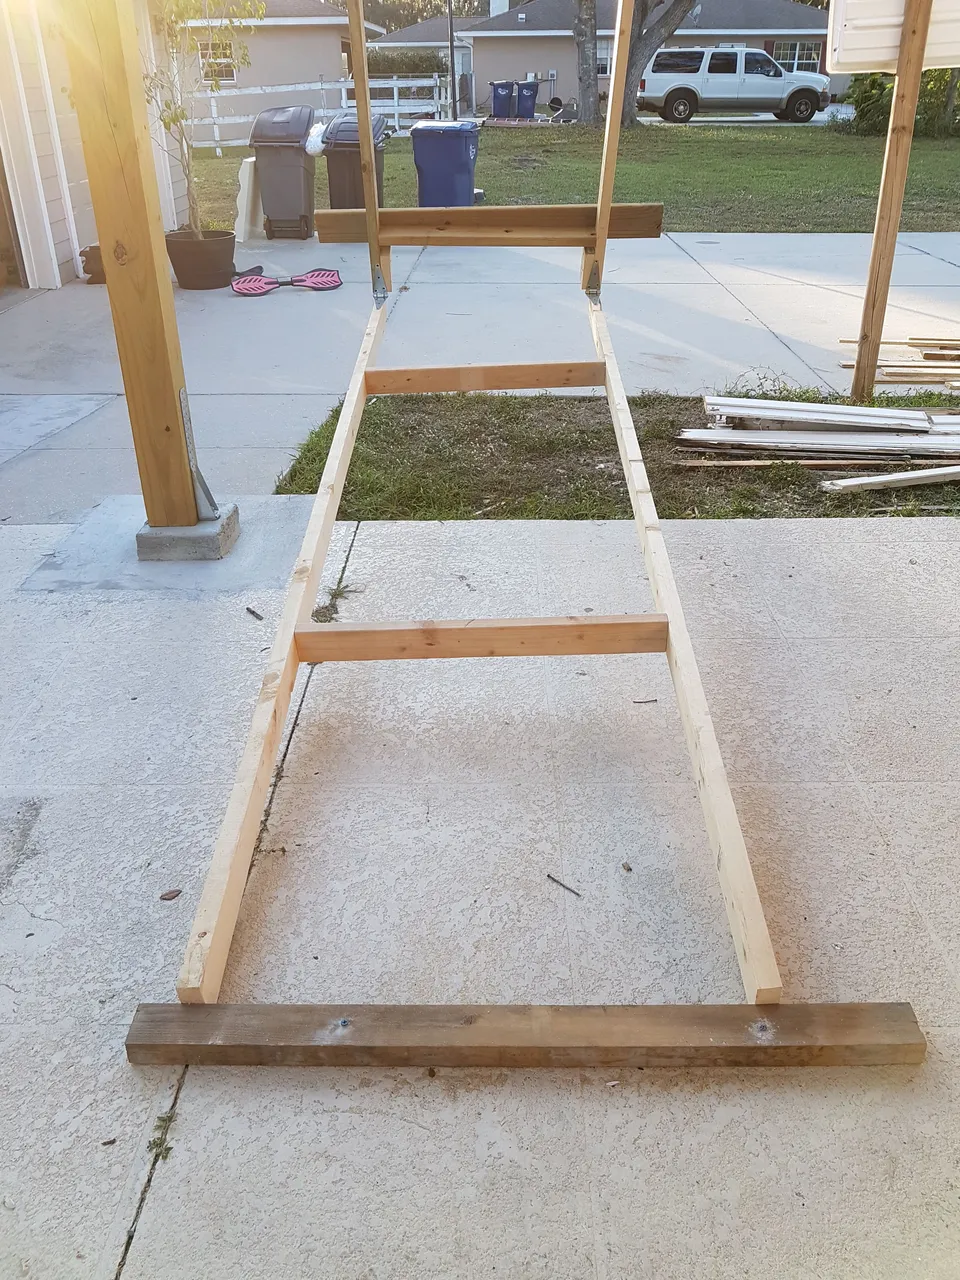
- Every lift will be different, depending on the specific application. The half that receives the material I will call the “platform” and the half that serve as legs I will call “legs.
- These factors determine design:
- Height of surface you need to access (i.e. the top of your rafters, roof, etc.). This will determine the lengths of the 2x4s.
- The 2x4s that receive your plywood (platform) will be about 1-2 feet SHORTER than the height of your roof. It depends on how high you want/need to lift the plywood onto the lift.
- The 2x4s that serve as legs and lift handles are usually the same length as the height of the roof. Maybe a few inches shorter.
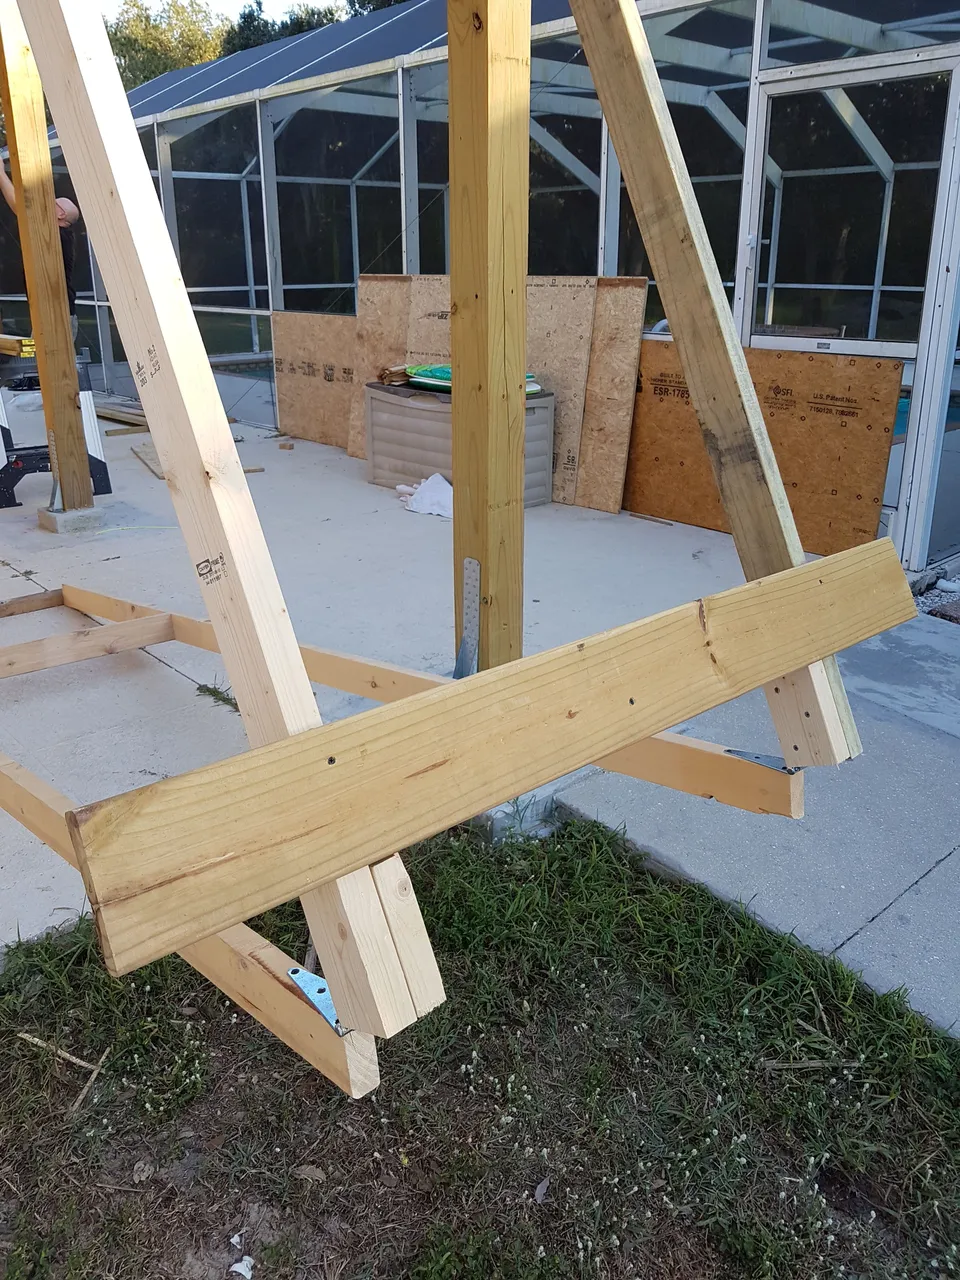
- Type and dimensions of material you’re lifting. Typically this is a sheet of plywood or OCB. These will determine the location and width of the cross (horizontal) braces
- Decide if you want your sheets to be loaded horizontal (easier for one person to handle) or vertical (probably necessary if your roof is higher than 8-9 feet, as ours was). This will determine two things:
- Where you put the cross board that serves as a guide/stop to prevent the sheet from sliding off the lift platform. Remember that you want the edge of the plywood as close to the edge of the roof when it is lifted so that it can be reached from the roof.
- How wide you make your lift. Vertical sheets only need a lift 3 feet wide. That leaves 6 inches on either side for fingers! Horizontal sheets work better if they’re 4-5 feet wide.
- Where you put the cross board that serves as a guide/stop to prevent the sheet from sliding off the lift platform. Remember that you want the edge of the plywood as close to the edge of the roof when it is lifted so that it can be reached from the roof.
- Decide if you want your sheets to be loaded horizontal (easier for one person to handle) or vertical (probably necessary if your roof is higher than 8-9 feet, as ours was). This will determine two things:
- Height of surface you need to access (i.e. the top of your rafters, roof, etc.). This will determine the lengths of the 2x4s.
- Some “tricks” we learned:
- Keep all bracing lumber BELOW the top surface of the platform 2x4s. Otherwise , when you try to slide the plywood into positing it will invariably catch on those high surfaces.
- Make a stop from an extra 2x4 to prevent the lift from returning to a vertical position when empty. A slight angle makes it easer to load the plywood and start the lift.
- Position one of the horizontal braces in a position so that it is convenient to reach and use as a “handle” when pushing the lift up.
- Position the top hinges so that the top of the platform 2x4s are ABOVE the surface to which you intend to lift. It saves fingers and makes your life easier.
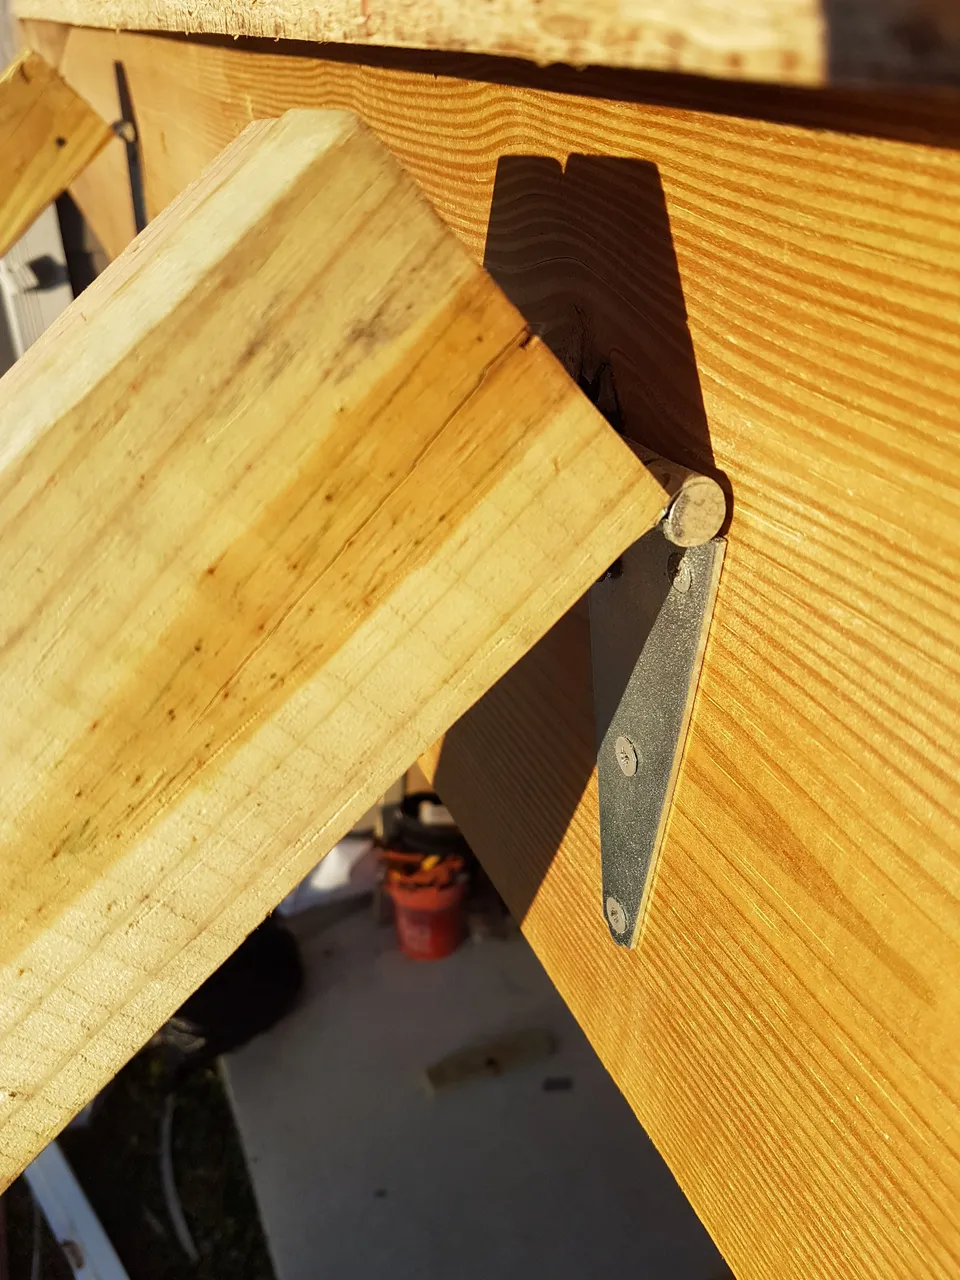
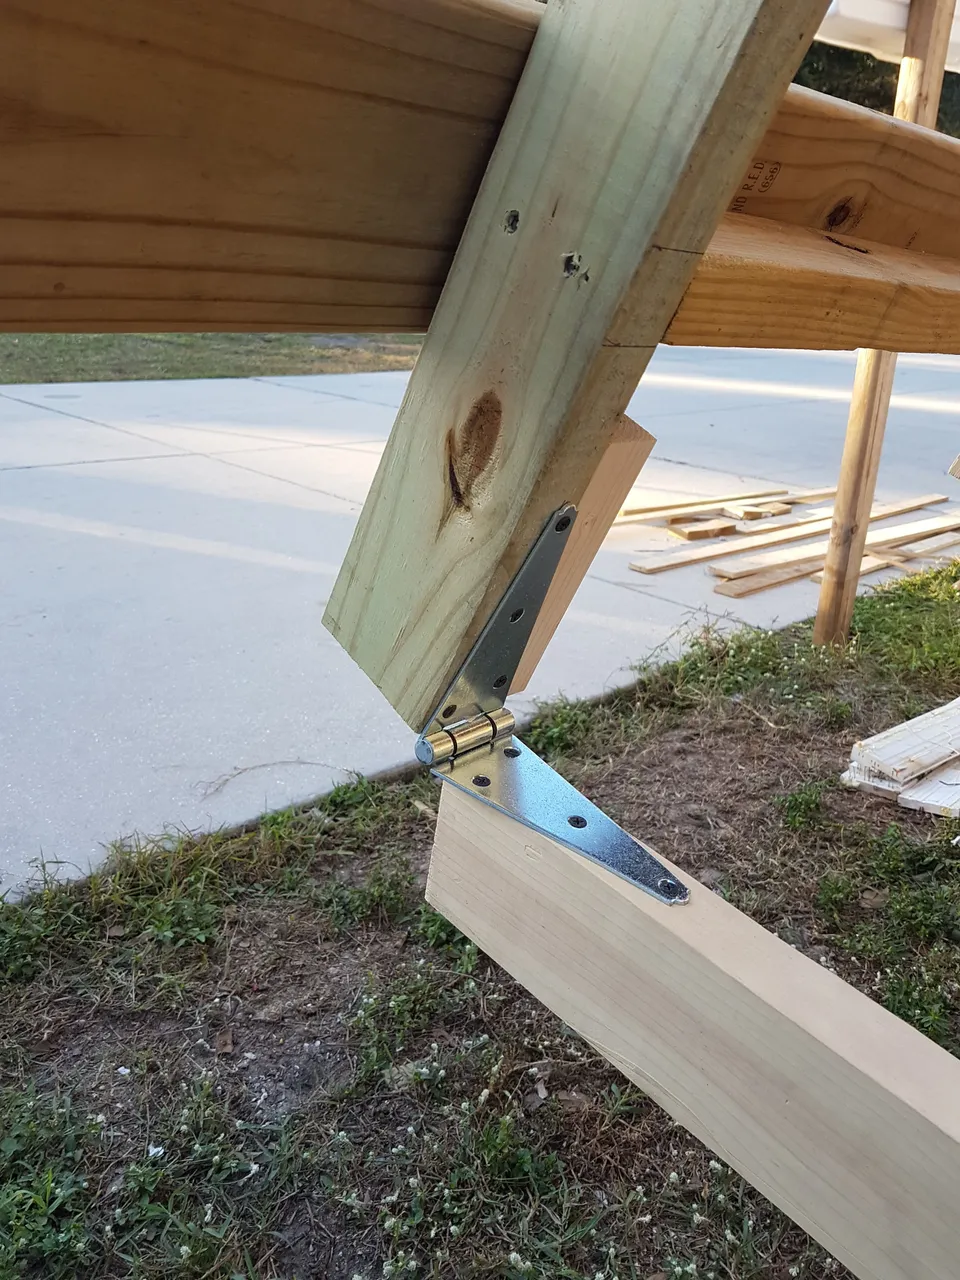
- Here is a photo of our leg-to-platform hinge.
Hopefully this will help someone and save some backs in the process.