Welcome back, in this post I will cover connecting, testing and integrating the DS 18B20 sensor with the raspberry Pi3 and Ros2.
Connecting and Testing
Started by following the Ground Temperature section of this guide. It didn't fully work and I found myself questioning whether or not I had correctly crimped wire connectors onto the end of the sensor. After some time I found you have to actually mount /boot before editing /boot/config.txt. The boot config editing should go as follows:
sudo mount /dev/mmcblk0p1 /boot
sudo nano /boot/config.txt
Add dtoverlay=w1-gpio,gpiopin=4 to the end of the file.
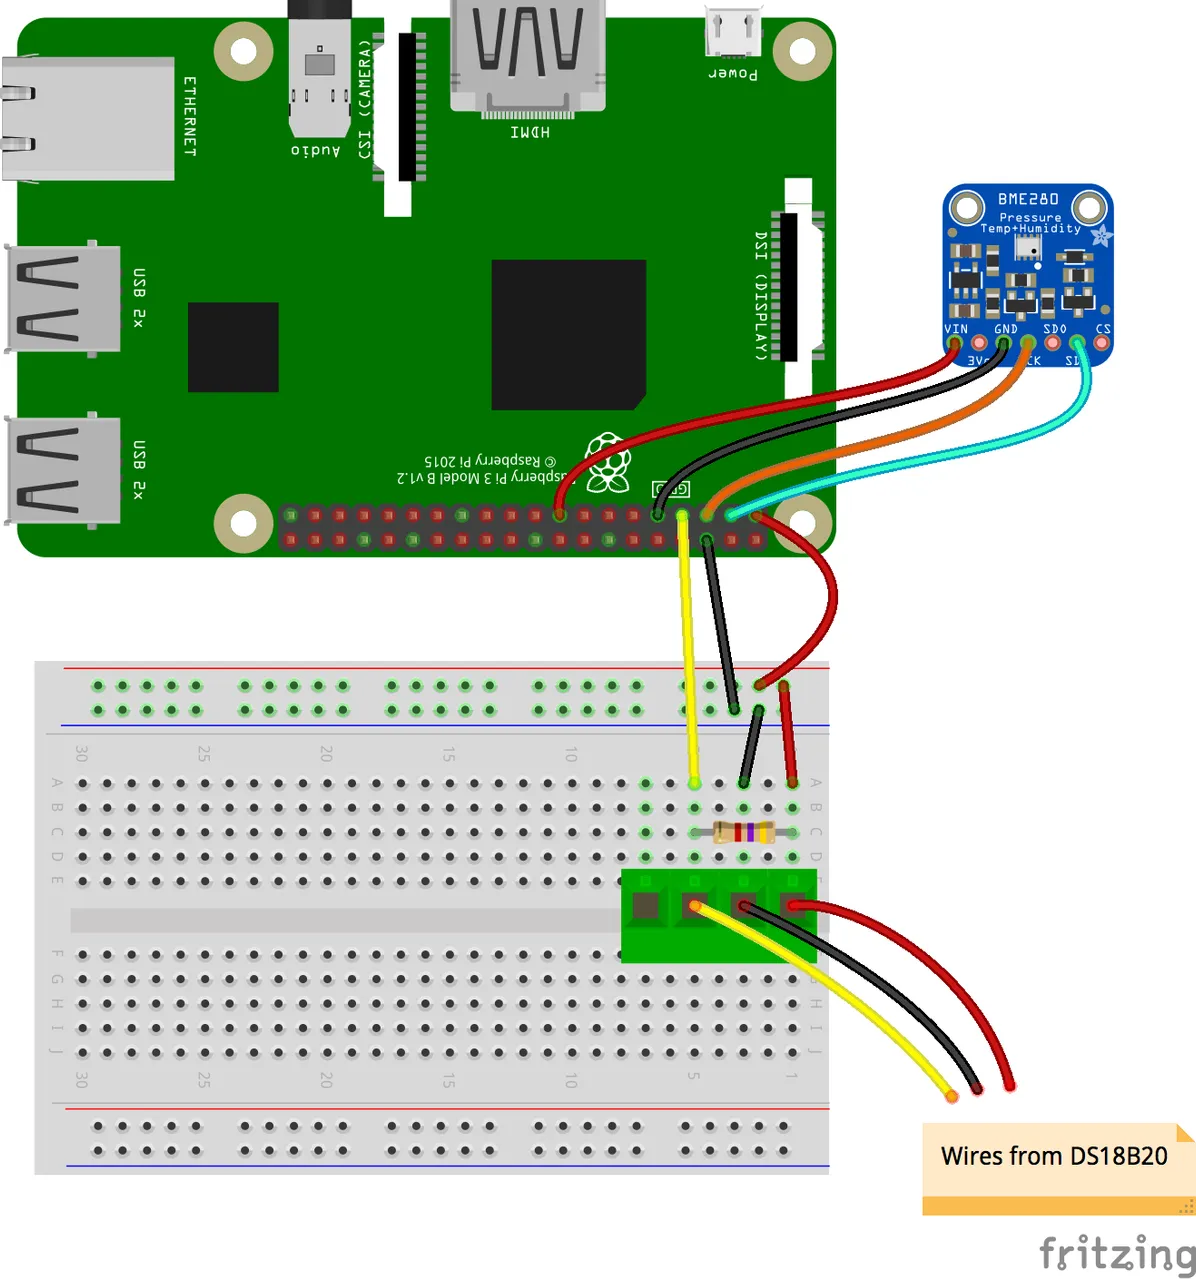
The ground sensor is connected through the bread board as shown.
Adding Ros2
Added another ros node to the project called DS18B20_sensor.py. The node publishes the temperature in Celsius published on the ros topic /ds18B20_temperature. Check out the third blog for information on downloading and using the code.
Created a launch file in /launch to launch all 3 active sensors and will be expanded for the remaining wind and rain sensor. To use after building and sourcing the ROS project run ros2 launch mimir all_sensors_launch.py.
Please like and subscribe.