Hello Steemians! Today, I will delightfully illustrate and show you our immensely precious DIY project that my husband and I did for the last 2 funny lovely days… yes you read it right! T-W-O full days! You might think this is just a very easy project but believe me it’s the opposite… it consumed our time and patience while doing it however in return, it turned out to be a valuable quality time of bonding as a happy couple. Without further ado, please spend some time in reading this post of mine. Thank you in advance. ^_^
I call this project of ours ”Our Enchanted Farm”, why? Because this farm has everything that I dream of, I will not look nor ask for anything more…
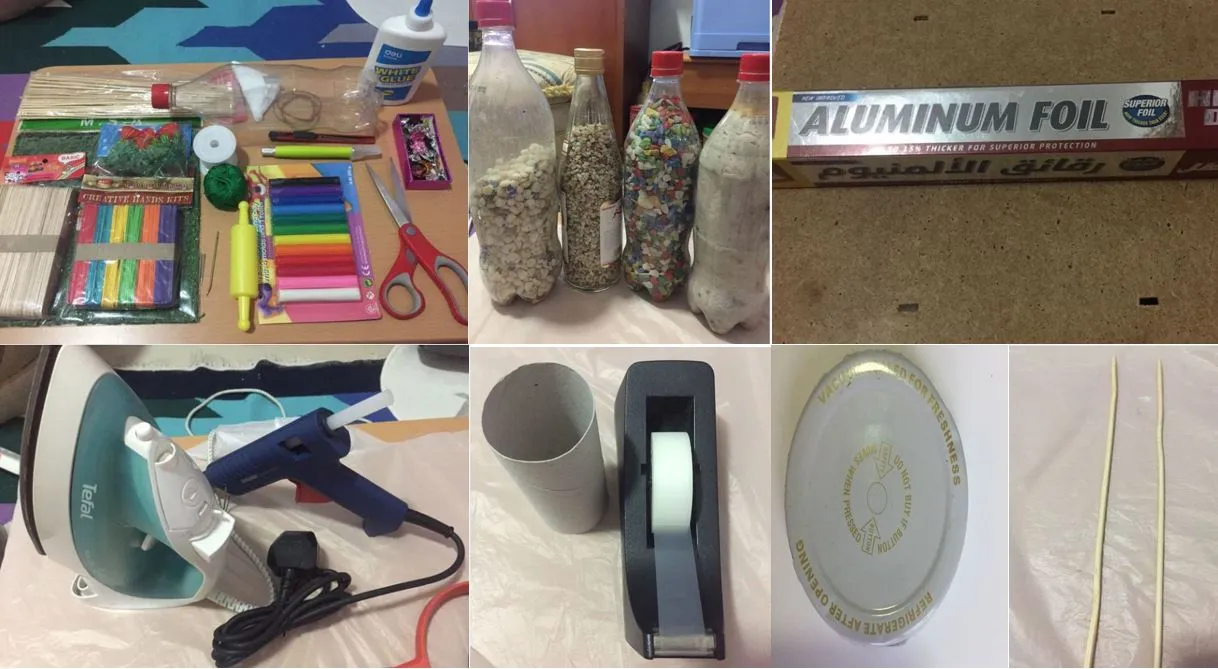
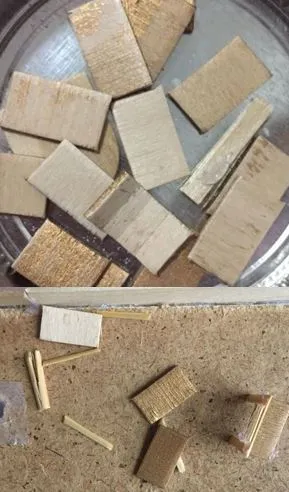
Things You Need :
Now, let’s do the ’How To: this is not in chronological order but what I will be posting is the order how I consider the easiest to the hardest part of doing this project.
SHED
Get few of the small popsicle sticks cut them together on your preferred size, attach the sides forming a shed and then use the other half of the sticks as a stand and you’re done.

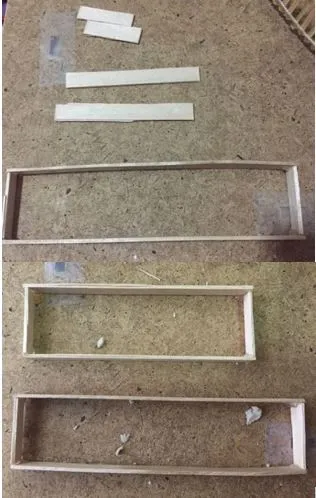
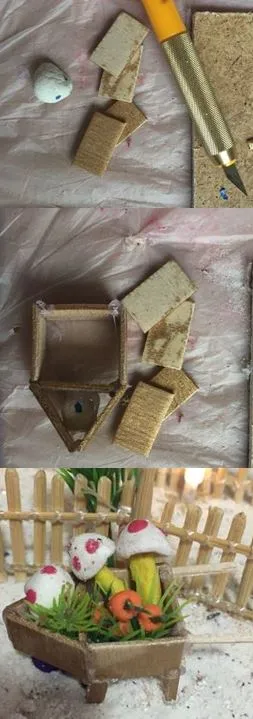
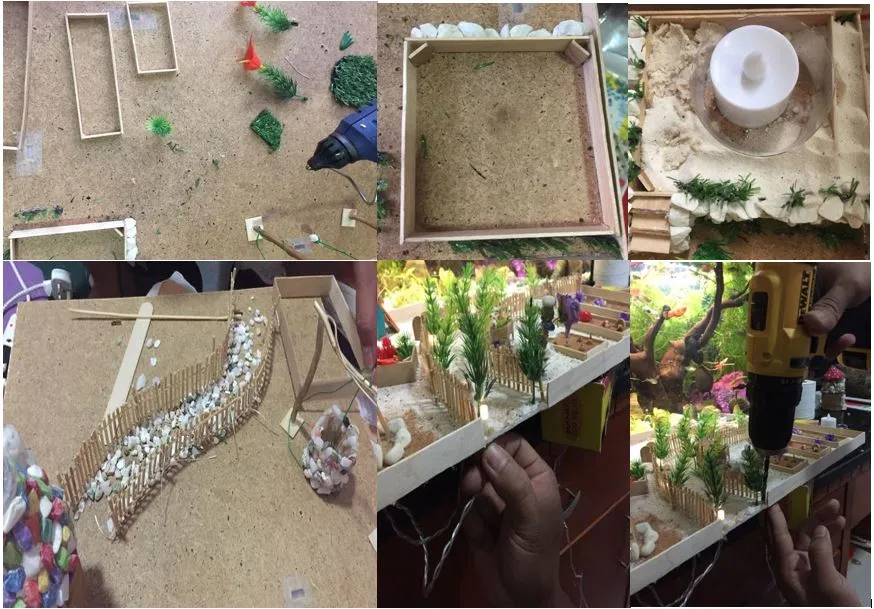
PLANT BED
Very simple, cut the big size popsicle sticks into half and glue all the ends to form a rectangular size of the plant bed.
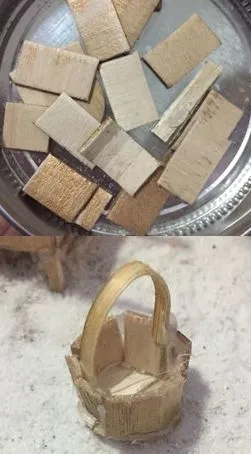
BASKET
Cut the popsicle sticks in small pieces in rectangular shapes. Bend it to form a small circle and use a glue gun to attach the bended rectangular shape popsicle sticks forming a basket. Use a tiny stick and put a glue on both ends, bend it a little more to make a handle for your basket.
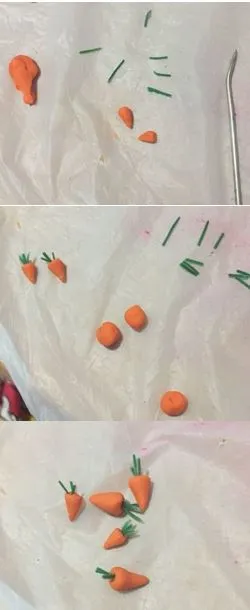
CARROTS
Get a piece of orange clay, a needle or anything that has sharp edge (please be careful) and few strips of your green plants. Roll the orange color into an oval shape but make the other end into a triangular rounded pointed tip. Use the tip of your needle to make a small hole on the oval part of your clay to put the strips of the leaves.
MUSHROOM
Get a piece of colors white, red and yellow clay and few ends of cut tiny short skewers. Roll the yellow clay covering the skewer stick. Next is to shape the white clays in circle, slightly flattened forming an umbrella and attach on one end of the yellow clay covered skewer stick. For the final touch, embed some small circle shape red clays of different sizes on top of the mushroom by carefully pushing into the top white clay.

CHAIRS and TABLE
Cut in small pieces a few of popsicle sticks in small rectangle as well as some skewers which will be the legs of the table and legs/back support of the chair. Glue all the skewer sticks on all edges of the rectangle popsicle stick in upright position to form a chair/table and attach the back support for the chair.
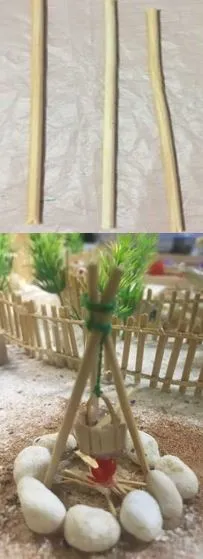
BONFIRE
Cut 3 short pieces of skewer sticks and tie them all together at one end with a string which will serve as a top part of the bonfire. Spread out the other ends of the skewers to form a triangle shape which will then attach on the board using your glue gun. Glue some stones on the sides and form a circle. Then hang a small basket over the fire. You can use an LED light to make a fire.
CART WHEEL
Use few square shaped popsicle sticks and a stone to use as a wheel. Make a triangle shape and cover it with popsicle sticks, use skewer if you want to use as handles, you can also use the popsicle sticks if you wish to.
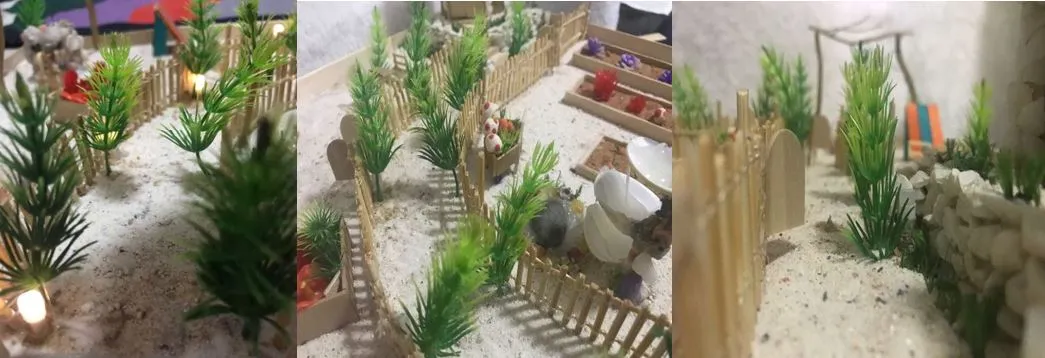
FENCE
Mark the skewers for the preferred length or height of the fence and cut as many as needed, once done, use two long skewer (preferably cut into half for easy bending fence for bended pathway) as a foundation while attaching the cut skewers into the foundation by using a string to form a fence.

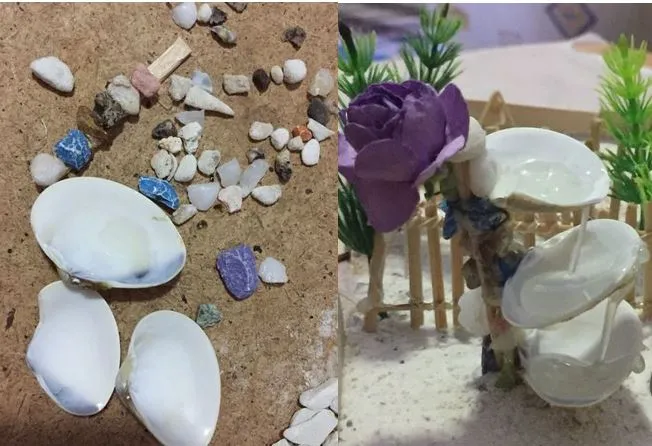
FOUNTAIN
Get a piece of a half skewer, shells and stones; glue the stones into the skewer to make a pole, attach the 3 different sizes of the shells onto the pole. Lastly, put the melted glue sticks on top of the shells and use it as a flowing water.
WISHING WELL
Use any circle shaped object, attach the skewers on the object to form a well and cover it with stones. Now, get few twigs and use it as a stand, glue them altogether to form an arc shape. Cut a string of about 4 inches in length, tie one end at the center of the arc and tie a pail on the other end of a string that will be hanged over the well.

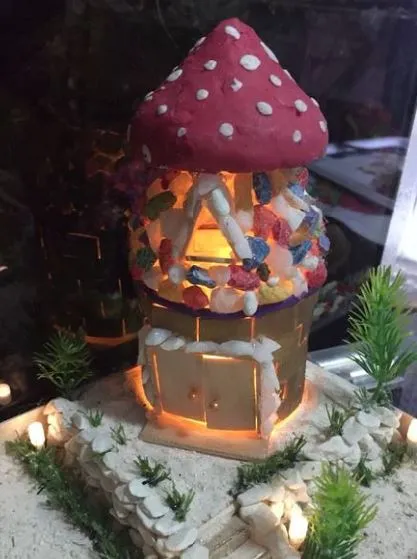
HOUSE – THE ATTIC
Form a triangle shape using the spare square shaped popsicle sticks and glue them altogether.
HOUSE – THE BODY OF THE HOUSE
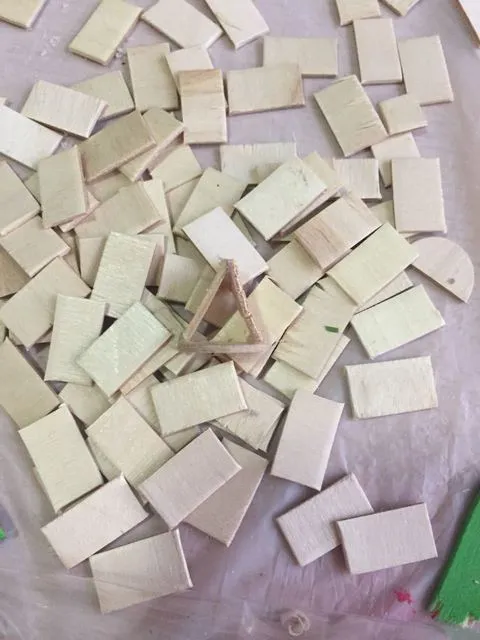
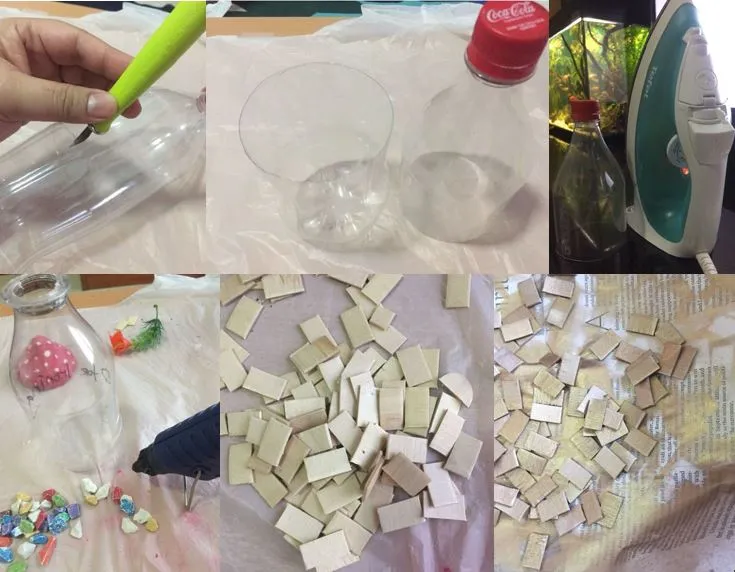
Cut the plastic bottle into half. Use iron to remove the sharp edges of the bottle this is an alternative if you don’t have sandpaper. Using glue gun, attach the stones onto the upper part of the plastic bottle – the triangular shape, leaving the other half clean. Cut some popsicle sticks into small rectangular pieces and use spray paint of any desired color, I used brown(ish) color to make it a little old(ish). To finish it off, attach them to the lower body of the bottle using glue gun forming a brick design wall.
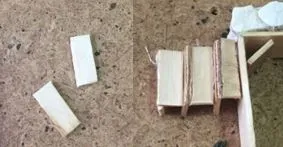
HOUSE – DOOR
Using the small popsicle sticks cut in to 2 rectangular shapes which will serve as the door. To make the frame of the door, cut 4 sticks, 2 for the sides and one for the top and one for the bottom part. Attach the ends using a glue forming a rectangular frame. Afterwards, attach the door on the frame. Use 2 cloth pins as door knobs.
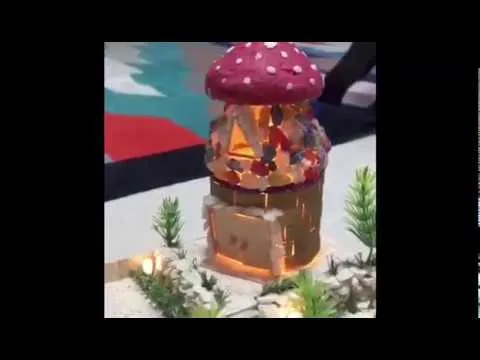
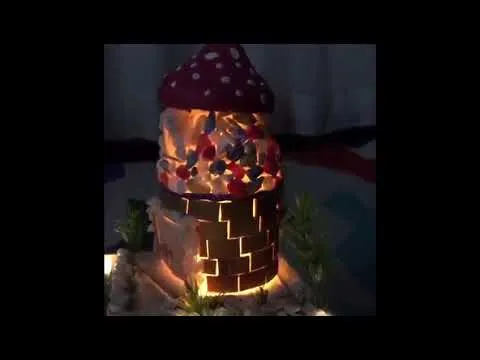
HOUSE – MUSHROOM ROOF
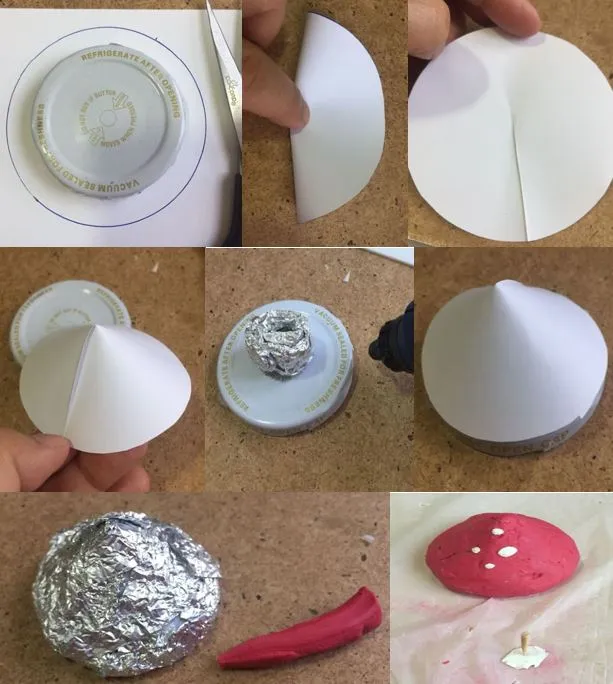
Get a piece of paper and draw a circle bigger than your lid and cut it and further cut the round shape paper into halves. Roll the paper attaching it end to end forming a cone shape. Another layer is added by using aluminum foil as fillers and attach it on top of your lid. Attach the cone shape paper on top of the aluminum foil filler then cover it with red color clay as the final layer. To finish it off, add small white round clays of different sizes and press it gently on the roof.
HOUSE – STAIRS
Use the popsicles to form a stair.
Now that we are done with the How To, below are the pictures of:
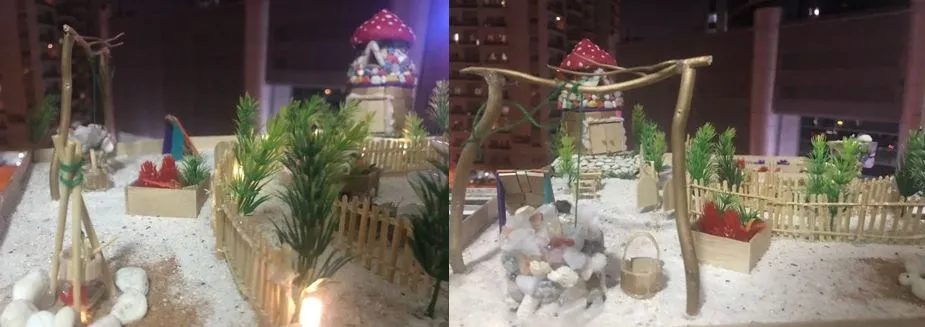
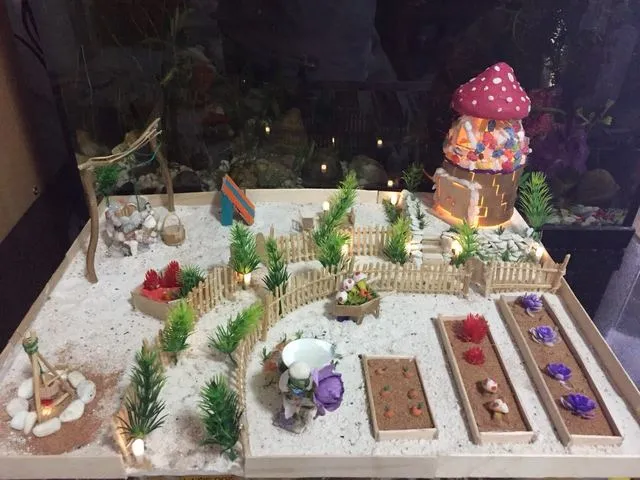
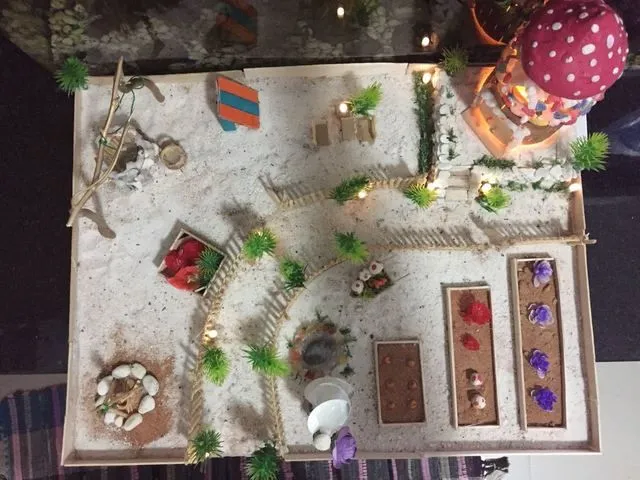
Layout
Focus is all you need here… you need to focus in setting-up this miniature project. To make this more a lil realistic, my husband added LED lights where they are needed. ^_^

And now that we are done, I would like to give my personal comment on this... I consider this project as well planned and executed not because we were the one who made this but because we gave our full time in doing this from planning to execution. Also, the time spent were valuable and showcased the artistic side of ourselves, we even considered this as a productive experience of ours . Doing this has tested our patience as well; doing a miniature is not an easy task, it may seem to look like one but believe me it is not. Side note, we argued while doing this project… reason? We both have different ideas in setting this project up! ^_^ Yeah, what a petty thing haha! But after doing this we’ve managed to highlight the attitudes we’ve shown towards each other and to our project. I can literally say Patience is a Virtue. And this made the experience worthy.
I hope you’ve not been bored reading this post of mine and learned something out of it. c”,)
If you would like to see my previous posts please click the below links:
Once again, thank you for dropping by… until then