Making a Beech Wood Pipe
Wood pipes for smoking tobacco and other herbs have been used for a long time. A couple friends stopped by for a visit the other day and each of them had a wood pipe carved out of birch wood - I was inspired to make one of my own. The classic store bought wood tobacco pipes are made with briar root - a very hardwood that does not ignite easily. Other hardwoods can be used for pipe making as well.
While briar root pipes are by far the most common wooden pipes, a wide range of other woods have been used. Times in which briar is scarce or completely unavailable (war, economic depression, etc.) have prompted curious carvers to explore the properties of alternative and more abundant materials. While softer, less porous or more susceptible to burning than briar, a temporary solution is often better than not smoking at all.
Source: Alternative Woods Used For Pipe making
Alternative Hardwood for Pipe Making
Maple, Cherry, Black Walnut, Oak, Olive, Rosewood, Manzanita, Mesquite-wood, Beech, Hickory, Mountain Laurel, Mahogany, Ebony, Jujube, Buxuse, Jichi-mu, and Wenge are all suitable hardwood for pipe making - hard times or not :)

Beech Hardwood Selected
I have two cords of hardwood for the winter incuding Maple, Beech, Oak, and more. Beech hardwood bark with it's grey smoothness was easiest for this amateur to positively identify.
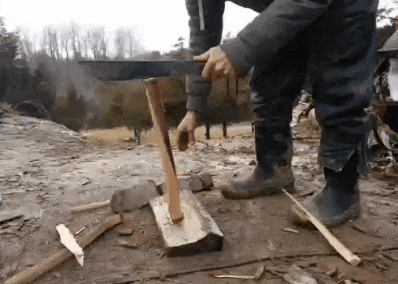
Cutting the Beech Wood Down to Size
A Maul ax, and then machete with baton are used to cut the wood down to a smaller size - close to the desired width of the pipe.

|
|
The sawzall quickly cut the beech wood to desired pipe length.

Pocket Knife Carving
With a pocket knife the rough edges are carved out of the wood. I made sure the bottom was flat enough so the pipe sits firmly, and does not rock back and forth when placed on a flat surface. The top of the pipe was also carved to be flat and symmetrical - along with the sides.

|

|
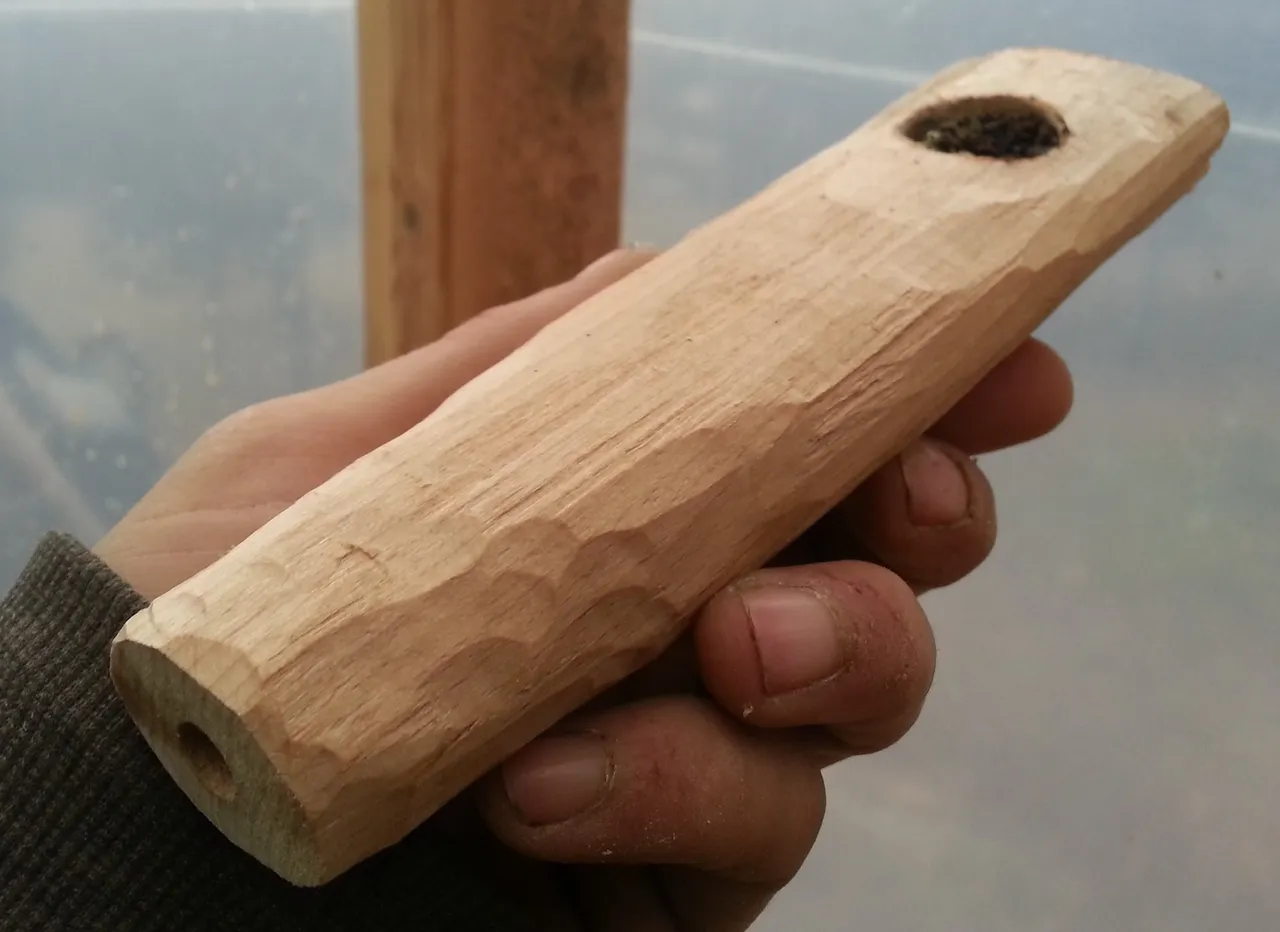
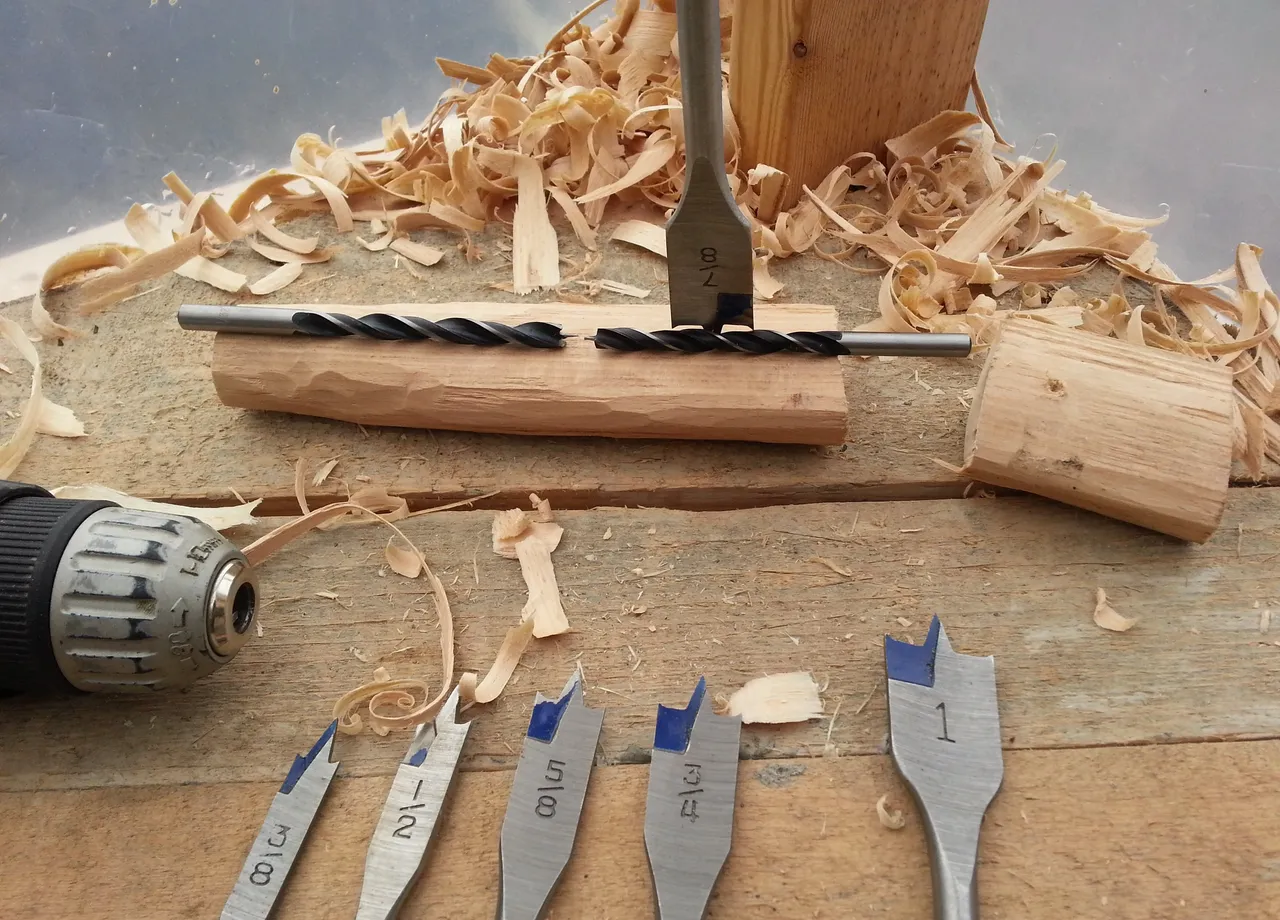
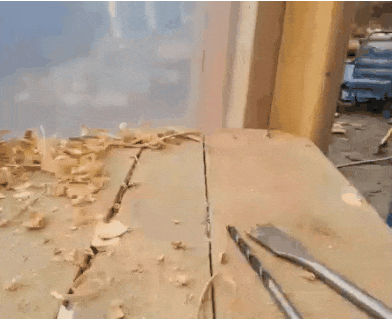
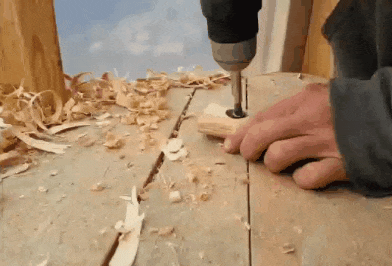
Drilling the Bowl Hole
For the pipe bowl hole drilling I went with a 7/8" drill bit. You can see that I used the sawzall to shorten the pipe a little more. The drill bits I have wouldn't have been long enough to drill through the entire length of the pipe - even drilling from both ends.
Slow and steady, I was careful not to drill through the bottom of the pipe.
|

|
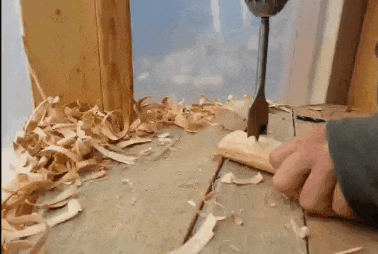
Drilling the Pipe Hole
You can see the pipe being drilled from each end so the hole runs the entire length of the pipe. The hole on the bowl end of the pipe will be covered with a finger when holding the pipe.

|

|
Sawdust Blow Out
A quick sawdust blow out of the pipe before finishing up the bowl. A drill bit usually used for sinking screws flush with wood is used to smooth out the bowl and give it more of a 'bowl' shape.
|

|
Bowl Touch Up with the Drill
Below you can see the final drill bit touch up to the pipe bowl.
|

|
I may carve more details into the wood when I have some down time for whittling, but for now this completed wood pipe is functional and ready for usage.