Dear Steemians!
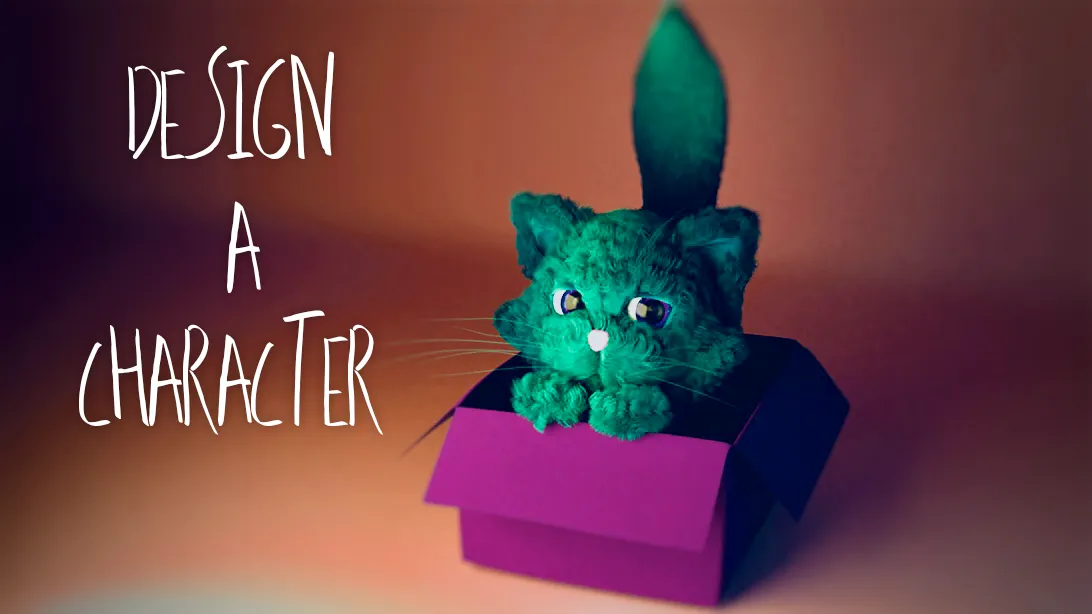
I participated in @w0olf ‘s contest. This weeks contest is a special edition in cooperation with @fraenk. The goal is to design a female cute little cat in different poses for @steemkitten.
For the sketch I tested out a similar designs, but mixed up the proportions - changed up the size of the head for example and added a few frames to make a gif with Photoshop.
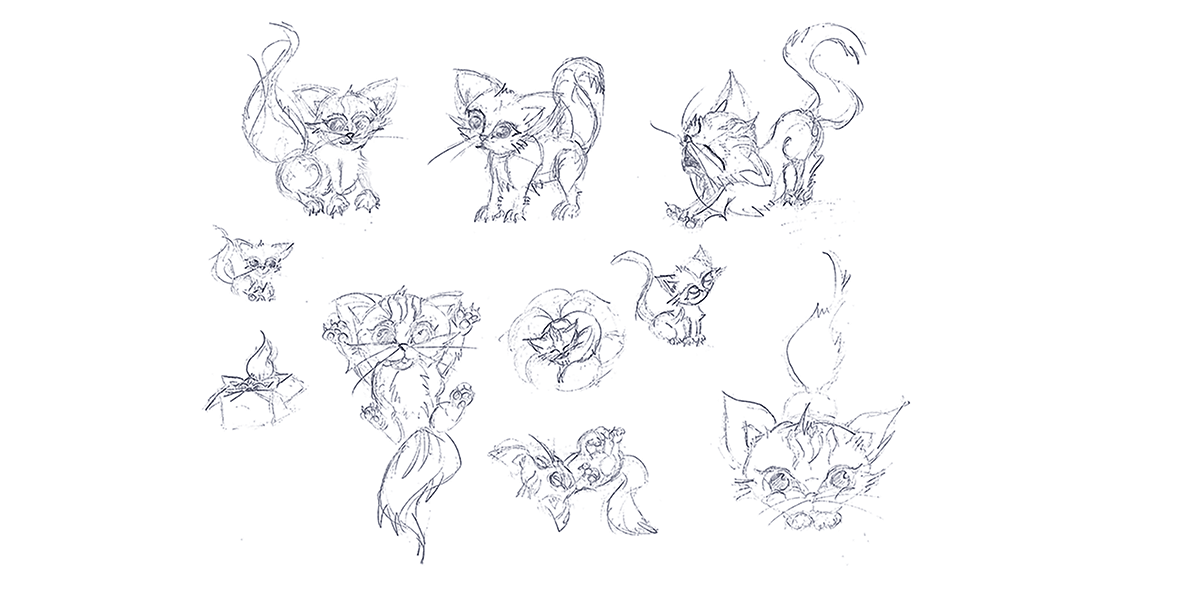
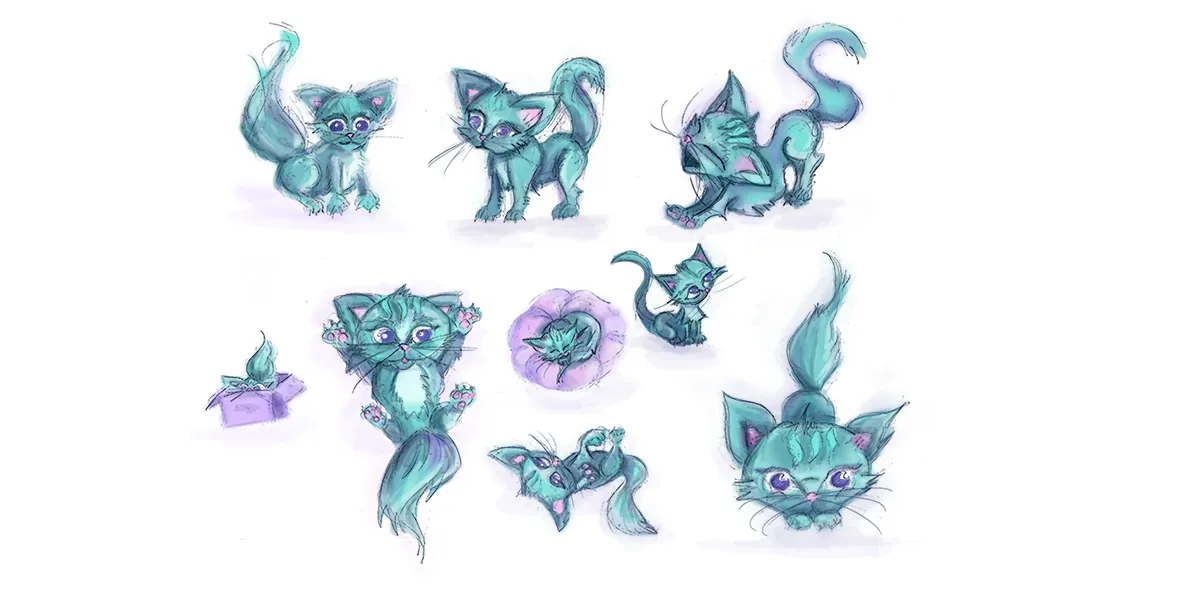
I was inspired by this cute little tickled cat. Just love that vid! Later on I sporadically colored in the sketch to determine the color palette, as I wanted to design the cat in 3D and wanted to expand my skills for fur, as I just learned how to style realistic looking hair.
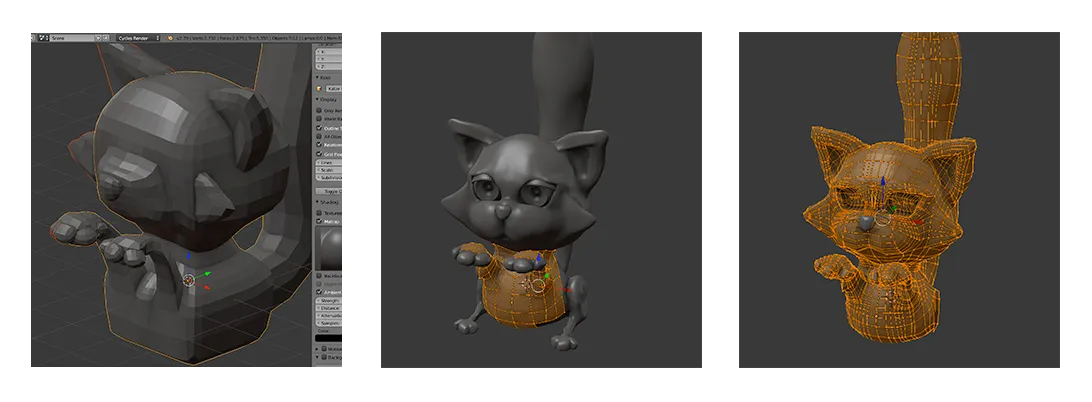
I (box) modeled the cat directly in Blender, starting with a cube and after the base form was accomplished, I started to sculpt the mesh. For this I downloaded blender sculpt tools here and installed the Add-on in the User Preferences.
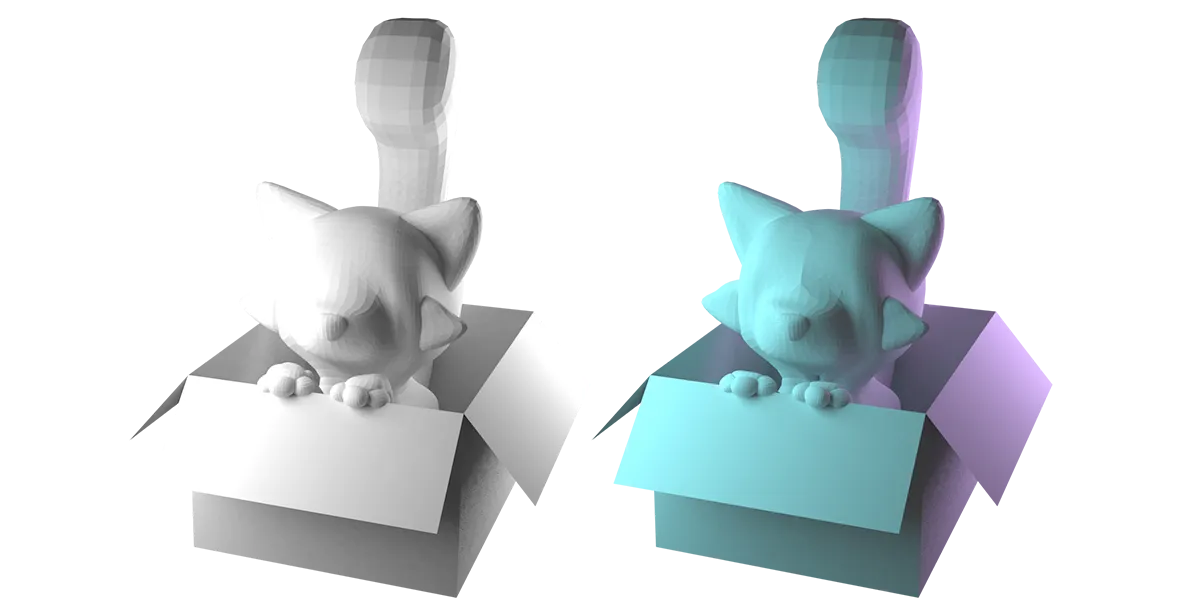
The ears and paws are not combined, but instead of combining them with ctrl+j, the new Add-On I downloaded will be used to unify all objects selected with shift (parent-object at the end). So now everything is ready for sculpting. I only concentrated on the parts, that were visible, so the body was quite square at the beginning. The character is symmetrical, so I enabled mirror, so that every action will be adopted to the other side and of course to rigg (=give the character a skeleton) and animate the cat later on.
After that I retopologised the body and duplicated some parts, where I wanted to add the fur.
After the retopo I added eyes and lid, that also could be animated
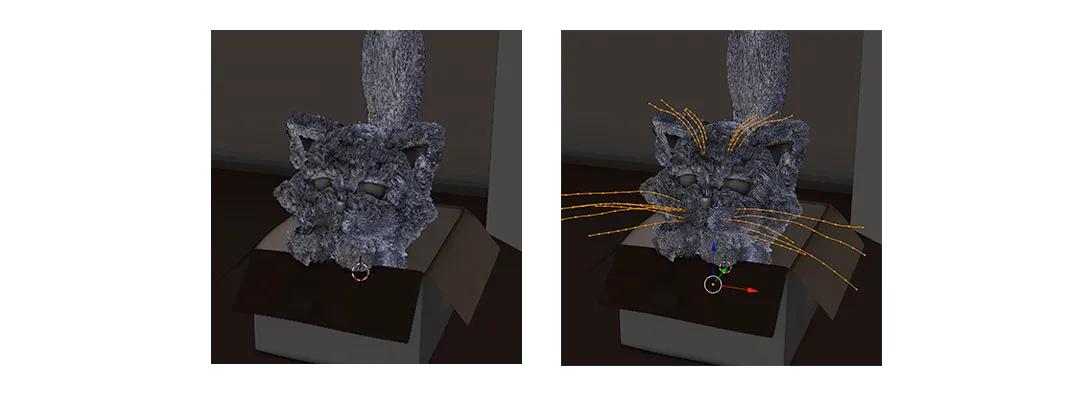
Now was the time to add the fur. Therefore I used the Particle System, chose the length of the fur and set the amount to zero. I enabled the Particle Edit, where I systematically placed the fur and enabled Children in the Properties Panel, where you choose the amount, that will be placed and be rendered. This makes working with fur/hair more clear, because you can just edit one strand, which affects 50-100 other "Children-Strands".
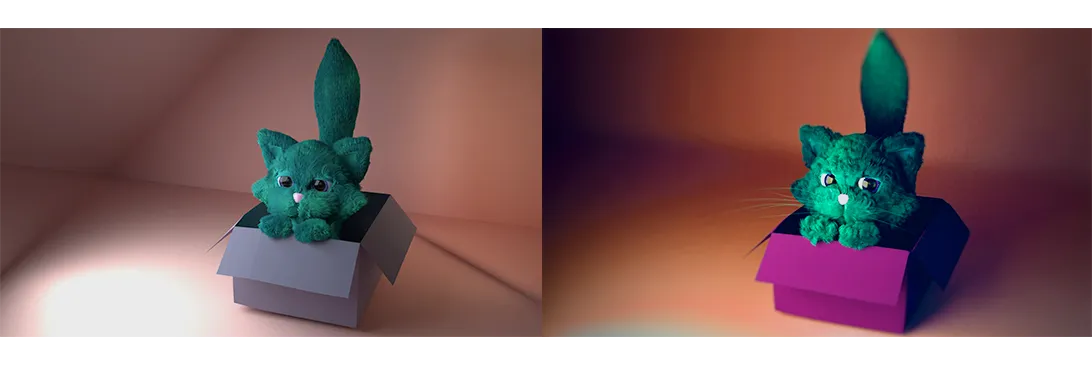
I edited this post since yesterday. Here‘s a side by side, what I‘ve changed: the fur, the position of the eyes, the smoothness of the box and the background (subdivision surface) and played a little with lighting. There‘s of course always something you can change, but for a small project, this is what I came up with:)
And here are the top three of this contest! Please head over and give your vote until Wednesday!:)
xxx.