Today, I am going to share you guys my process in coming up with shirt designs. By the way, This specific shirt design is for one of clients/friend. He is planning to release another batch of designs for his streetwear clothing line, Skewer, and he wanted me to come up with the designs"
Mood Board
My moodboard for this specific design (images gathered from pinterest)
Yep, you heard me. To all the designers reading this, you know what a mood board is. And yes I use it even in designing shirts. Sometimes, If I am not sure of what kind of clothing line a company have, I ask them certain questions and compile multiple images regarding on what he says his clothing line is all about. This will serve as my guide to what kind of feel, style and motif the designs should have. Pinterest, for me, is the best way in gathering images for my moodboard. but Google is also fine.
Sketches
After the moodboard has been approved by the client, I proceed in sketching the shirt design. Just scribble around on what form should the design be. Do not spend too much time in sketching. You want the ideas to flow freely as you sketch multiple forms.
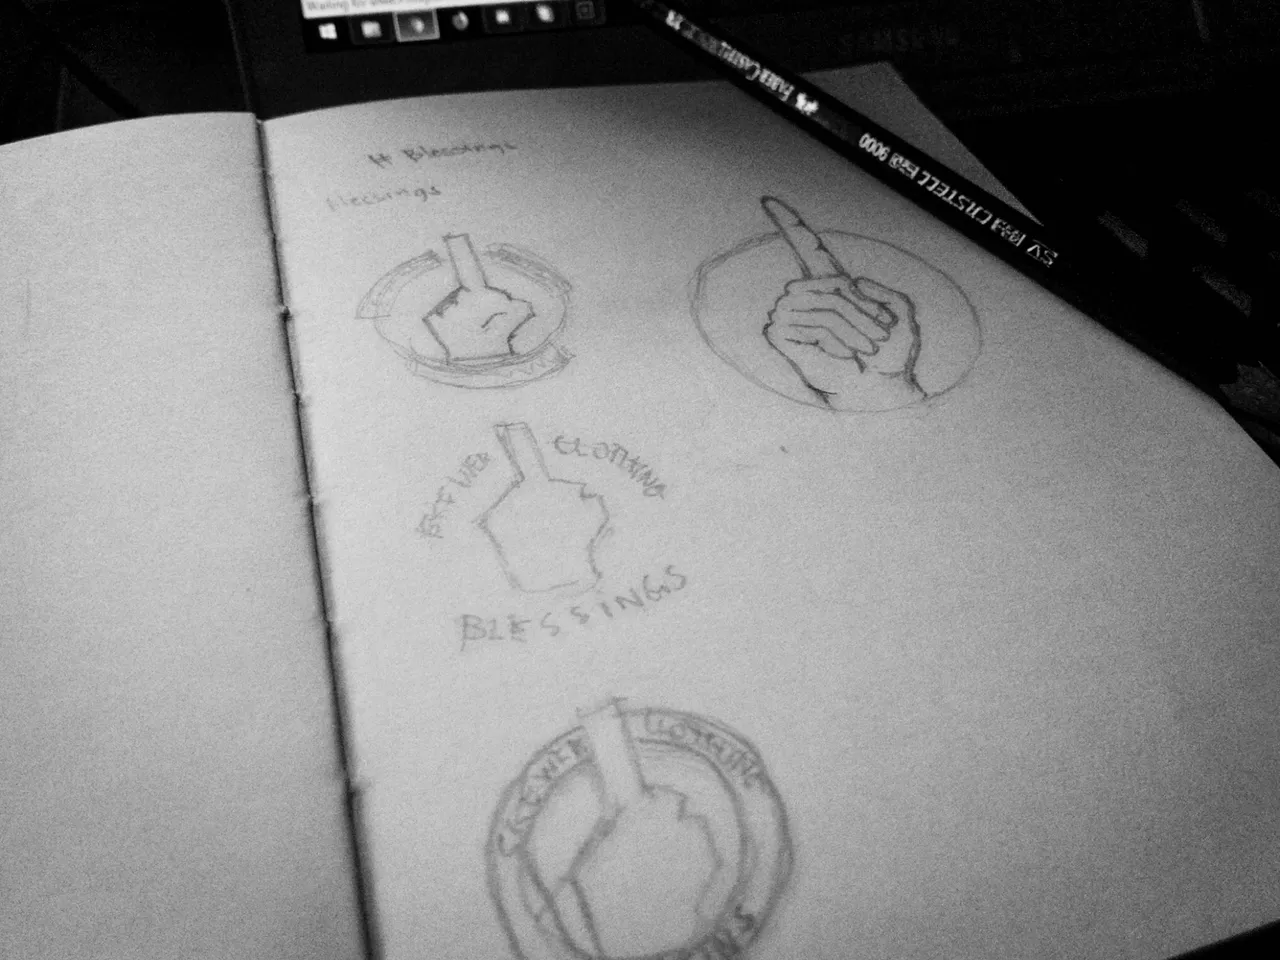
Sketches that I came up randomly but still having the moodboard in mind.
After doing the sketches, pick the ones that you really like. I usually pick the last sketch that I'm actively sorting it out in my mind while sketching the first ones. Now draw the final sketch but now with details. though, you could add more details later on in Adobe Illustrator so, no worries.
When you're done with the final sketch, Take a clear picture or scan it so that you can import the sketch in Illustrator and start tracing. I usually ink my final sketch just so I could clearly trace the lines.
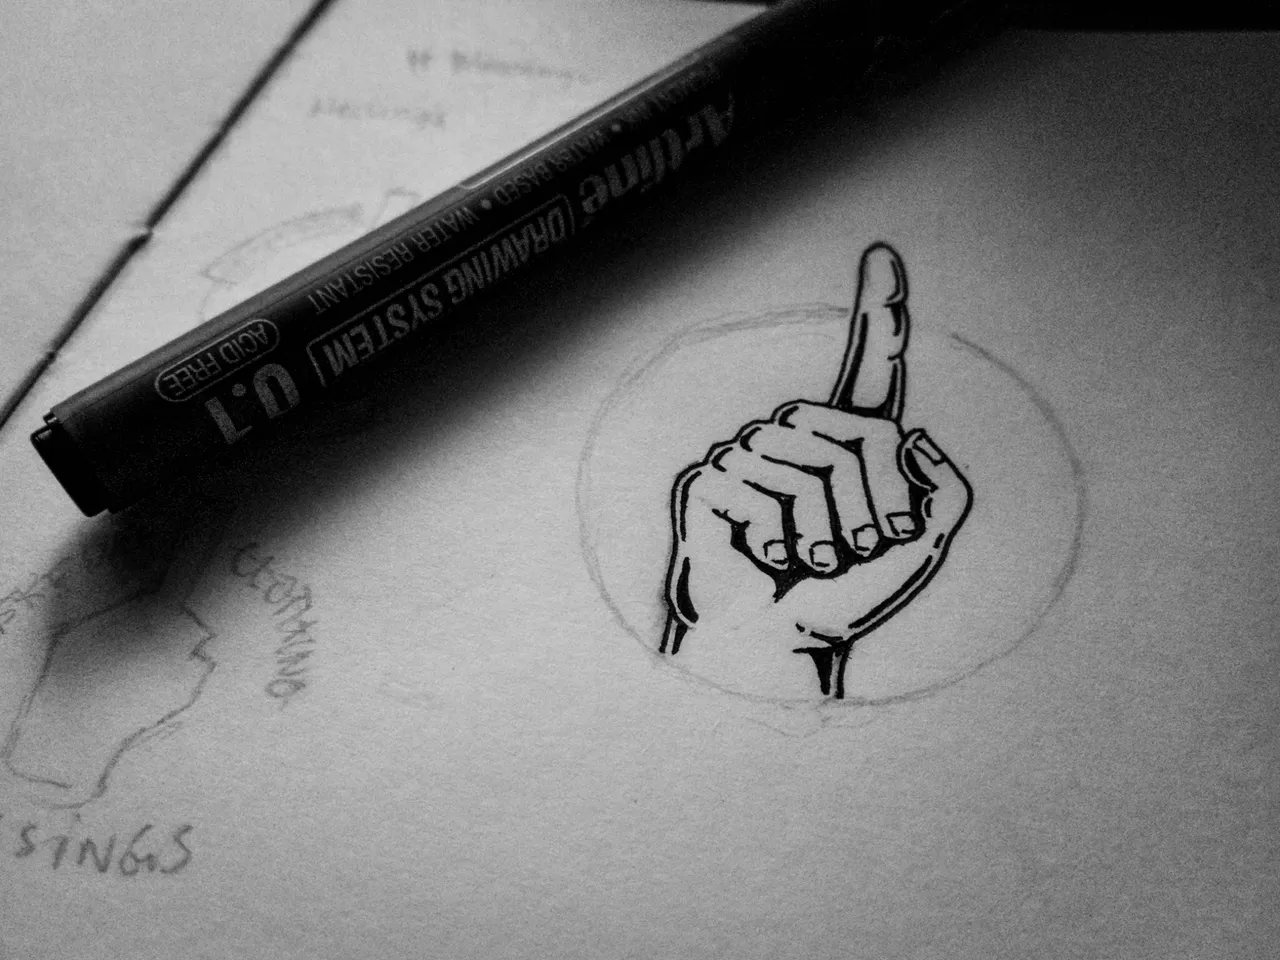
My inked final sketch.
Line Art
Open up Adobe Illustrator, Import your final sketch and start tracing the lines. Just the lines. Don't worry about the details and shadows just yet. You want to trace the form first. you can also adjust some elements at this stage if you think something is off, just like what I did at the image below. I noticed that the forefinger is too long so i resized it a little bit to fix it.
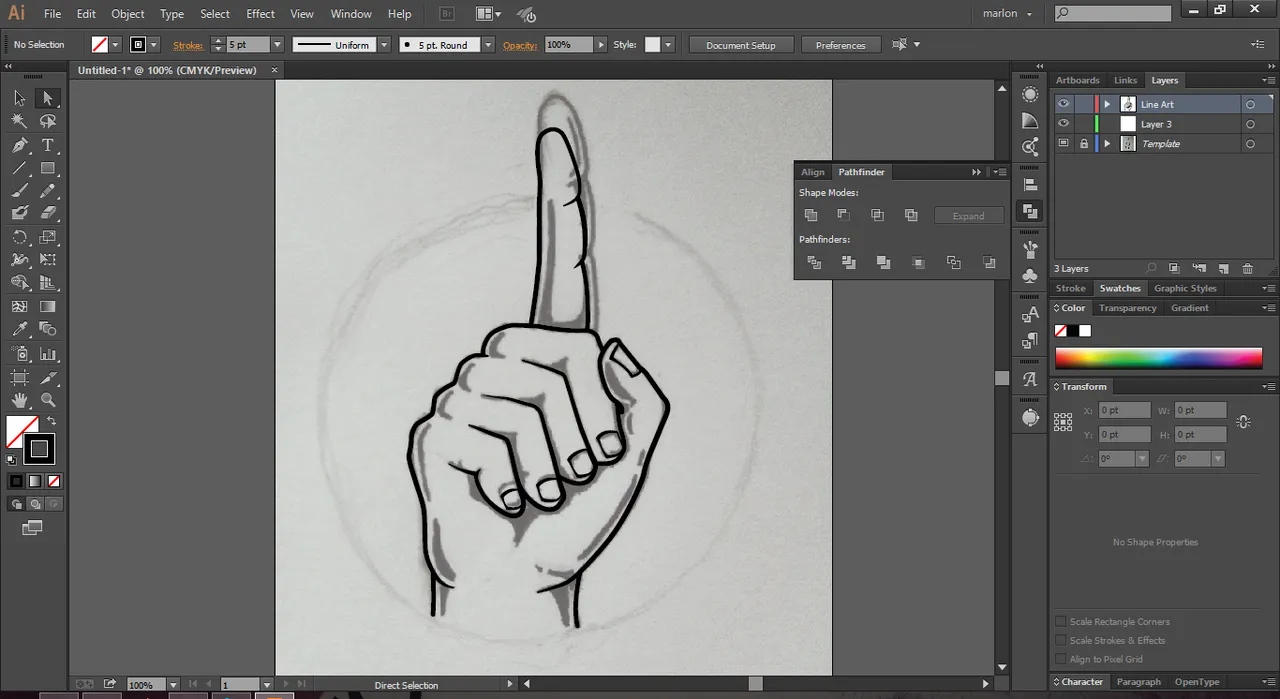
Tracing the lines using Pen Tool
Shadows and Details Details Details...
When you're done with the line art, It's time to add the shadows and the details. you can hide the final sketch if you want so that you can add some details with a fresh eye.
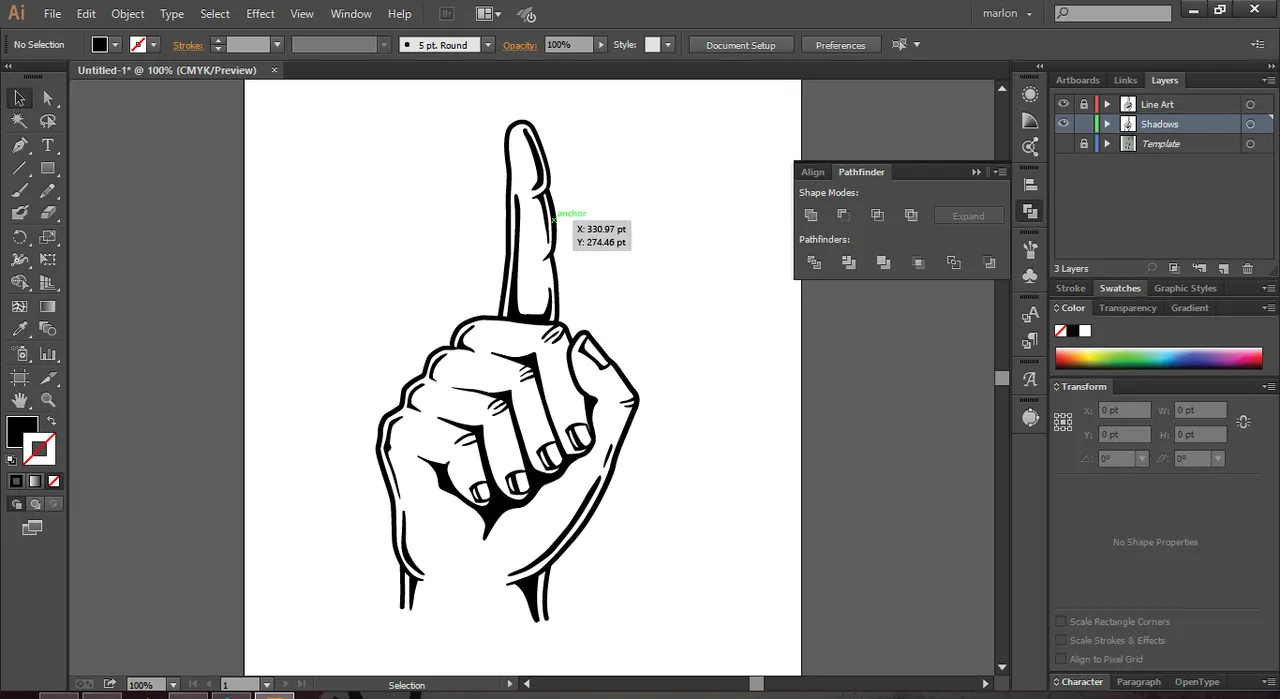
added some additional details like the wrinkles. nice.
Texts and shape
So we're done with the main element of the shirt design which is the Hand. It's time to make it look like a T-shirt design and not just a random clipart of a hand. Let's put the texts and some details to make it form like a circle. Let's add some random details while we're at it.
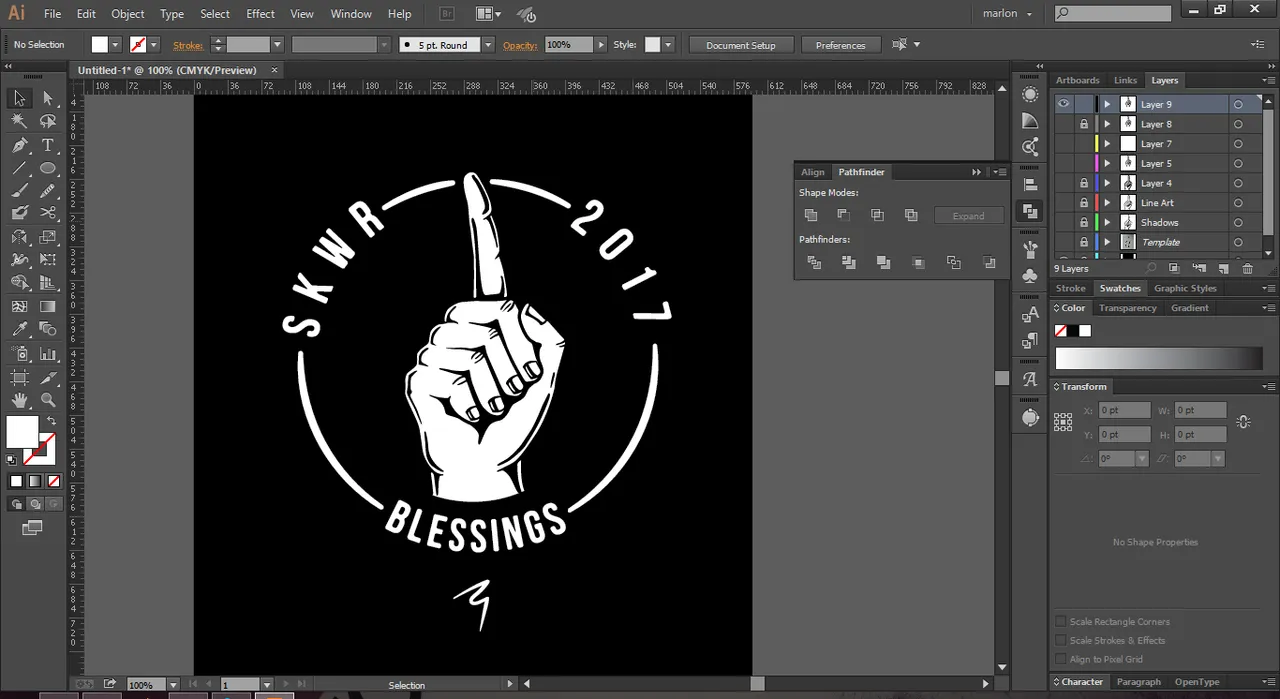
Making the text go around the hand and some strokes to give it it's form
Done? Wait, one thing...
I noticed that It's too clean. Let's give it a little bit of noise just like the style in our moodboard.

Let's sprinkle some salt in there
And we're done!
I hope I helped you guys with my process and liked it. For those who have really read this blog, Thank you so much.
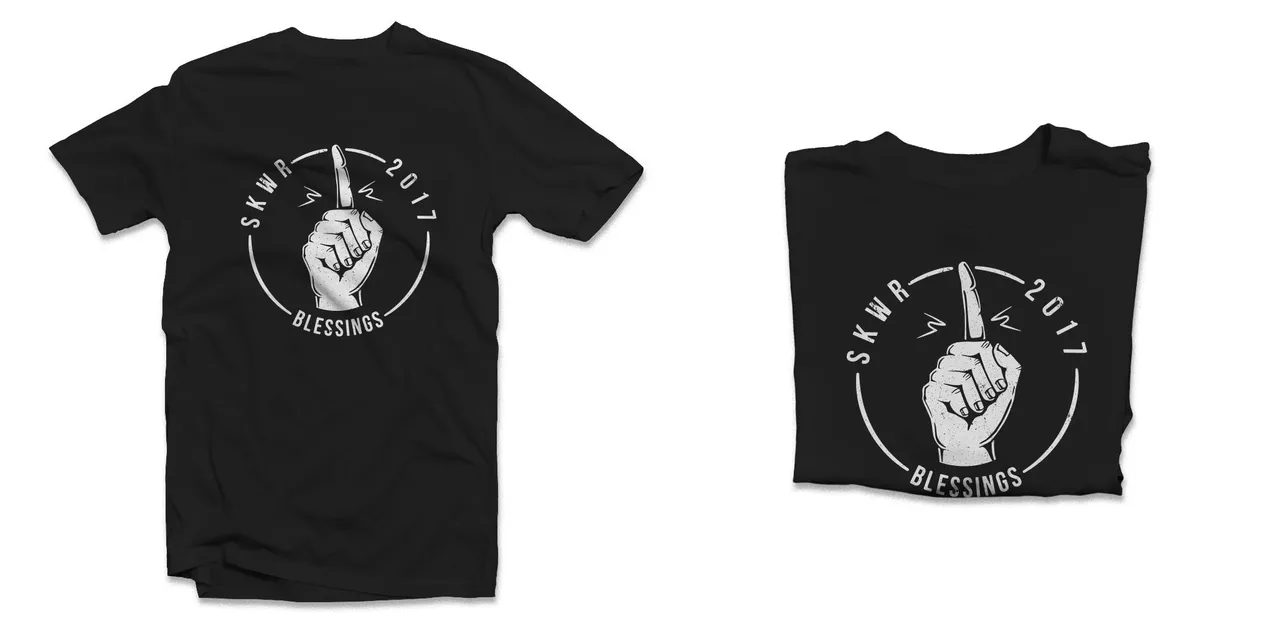
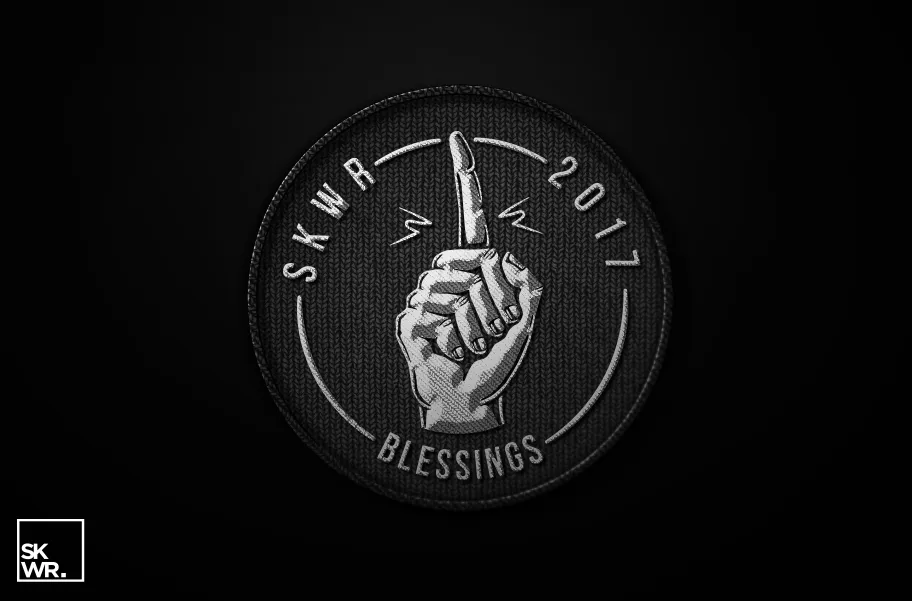
Here's how the design would look like in some mediums.