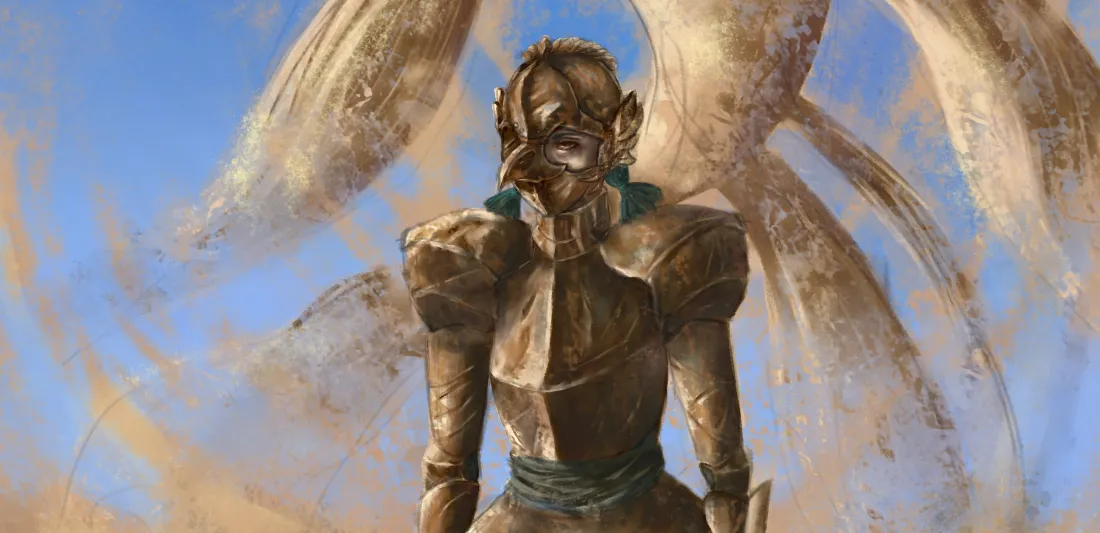
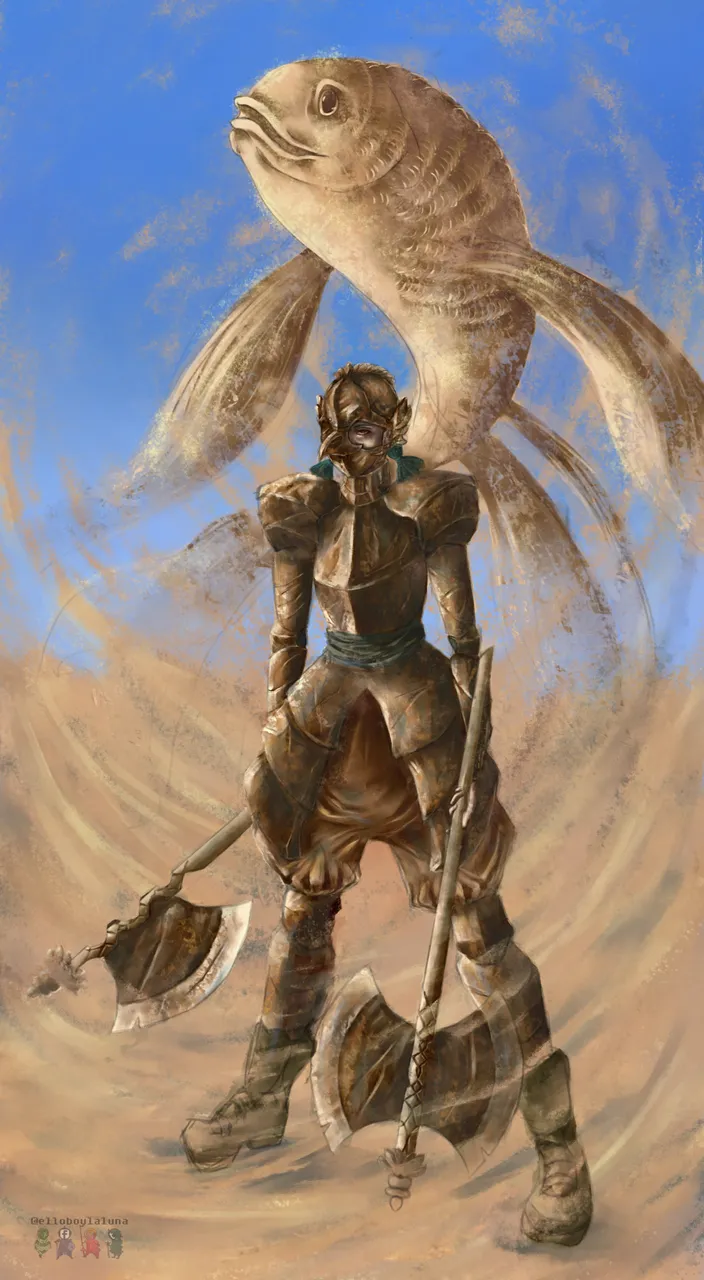
- ¡Bienvenidos de nuevo, mis queridos viajeros de los parajes steemianos! En esta oportunidad, quiero compartir con ustedes mi más reciente ilustración, dentro de la que experimento con diversas texturas visuales, mostrando a una agotada y perdida guerrera que por los pesares del destino ha acabado vagando por un interminable desierto. Sin embargo, no estará completamente sola, pues contará con la desgraciada compañía de un pez de arena que constantemente le sonríe en una suerte de burla.
Así pues, me dispongo a mostrarles el proceso que he llevado a cabo para obtener el resultado final. - Welcome again, my dear travelers from the Steemian sites! On this occasion, I want to share with you my most recent illustration, within which I experiment with various visual textures, showing an exhausted and lost warrior who by the sorrows of fate has ended up wandering through an endless desert. However, she will not be completely alone, since she will have the unfortunate company of a sand fish that constantly smiles at her in a kind of mockery.
So, I am going to show you the process that I have carried out to obtain the final result.

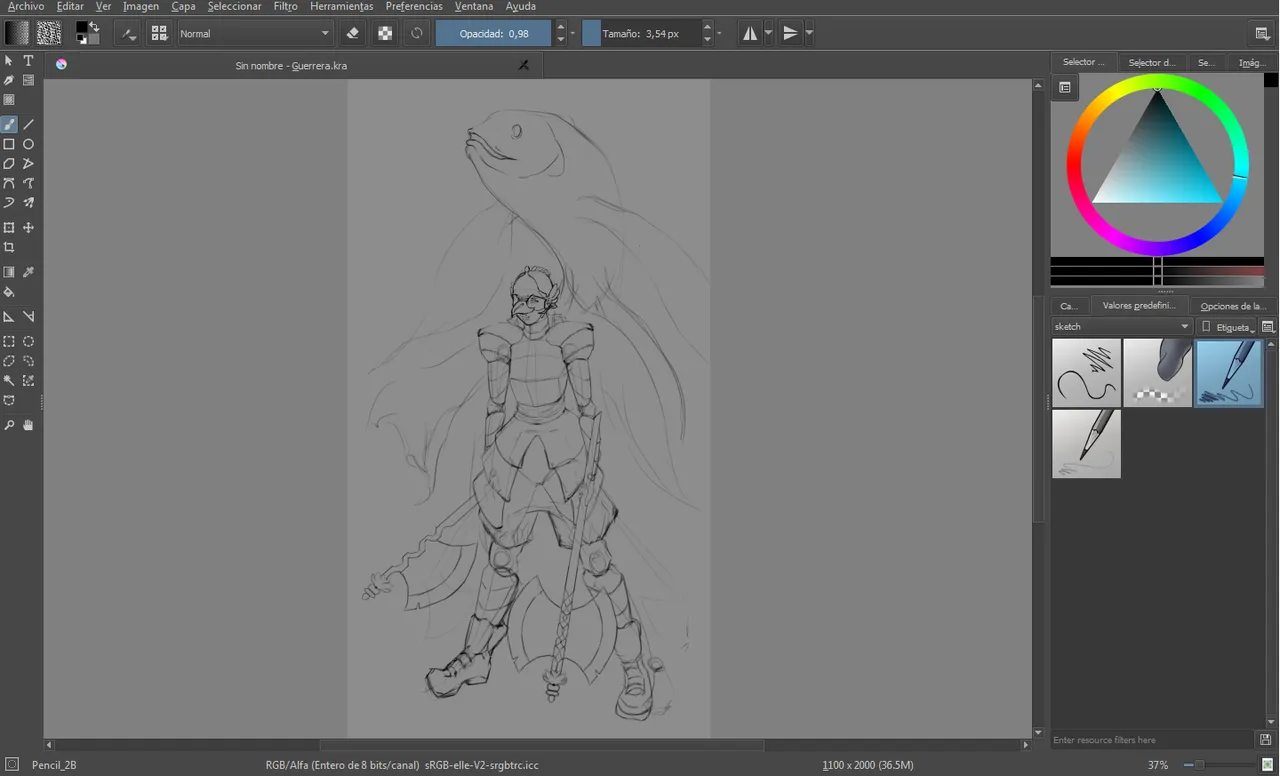
1.
Comencé por trazar un esbozo con el lápiz 2B (disponible en el menú desplegable de pinceles, en la categoría sketch).
I started by drawing an outline with the pencil 2B (available in the drop-down menu of brushes, in the sketch category)
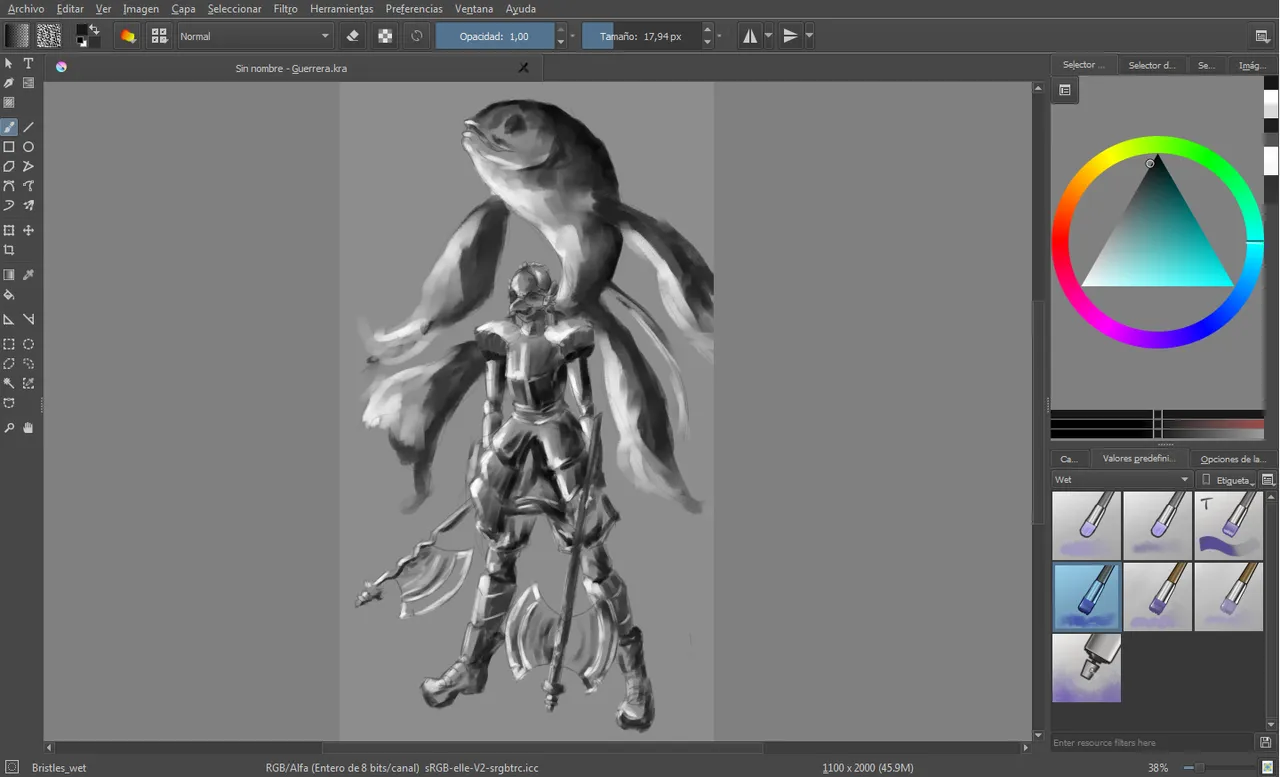
2.
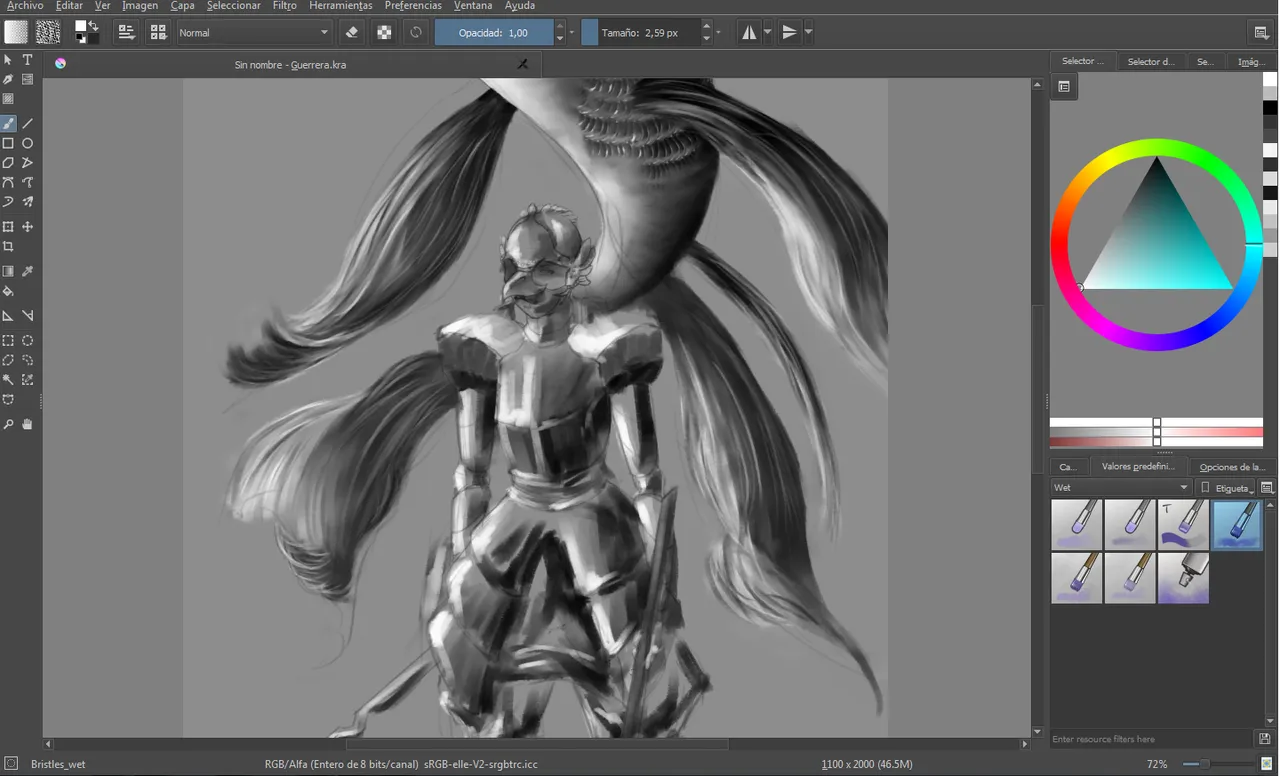
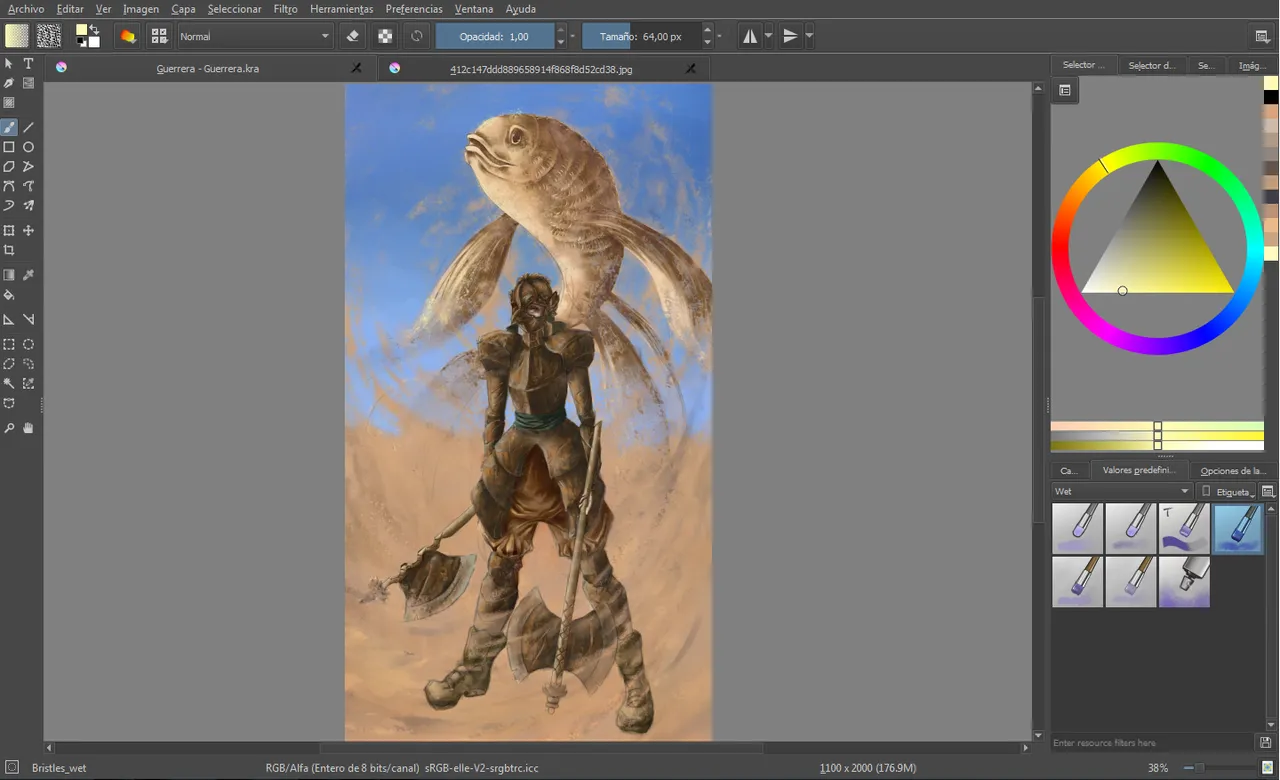
Seguidamente, en un nueva capa, puesta por debajo de la anterior, con el pincel bristles wet (disponible en el menú desplegable de pinceles, en la categoría wet) generé una mancha en la que ubicaría los tonos.
Next, in a new layer, placed below the previous one, with the bristles wet brush (available in the drop-down menu of brushes, in the wet category) I generated a spot where I would place the tones.
3.
Acto seguido, con el mismo pincel, comencé a definir el pez. (Aprovecho para sugerirles, que, al dibujar, constantemente reflejen la imagen de modo horizontal, con el fin de detectar errores con mayor facilidad. En Krita, versión 3.1.3 – el software que he utilizado para esta ilustración – pueden hacerlo presionando en su teclado, la tecla M).
Then, with the same brush, I began to define the fish. (I take this opportunity to suggest that, when drawing, they constantly reflect the image horizontally, in order to detect errors more easily.) In Krita, version 3.1.3 - the software that I used for this illustration - you can do it by pressing on your keyboard, the M key).

4.
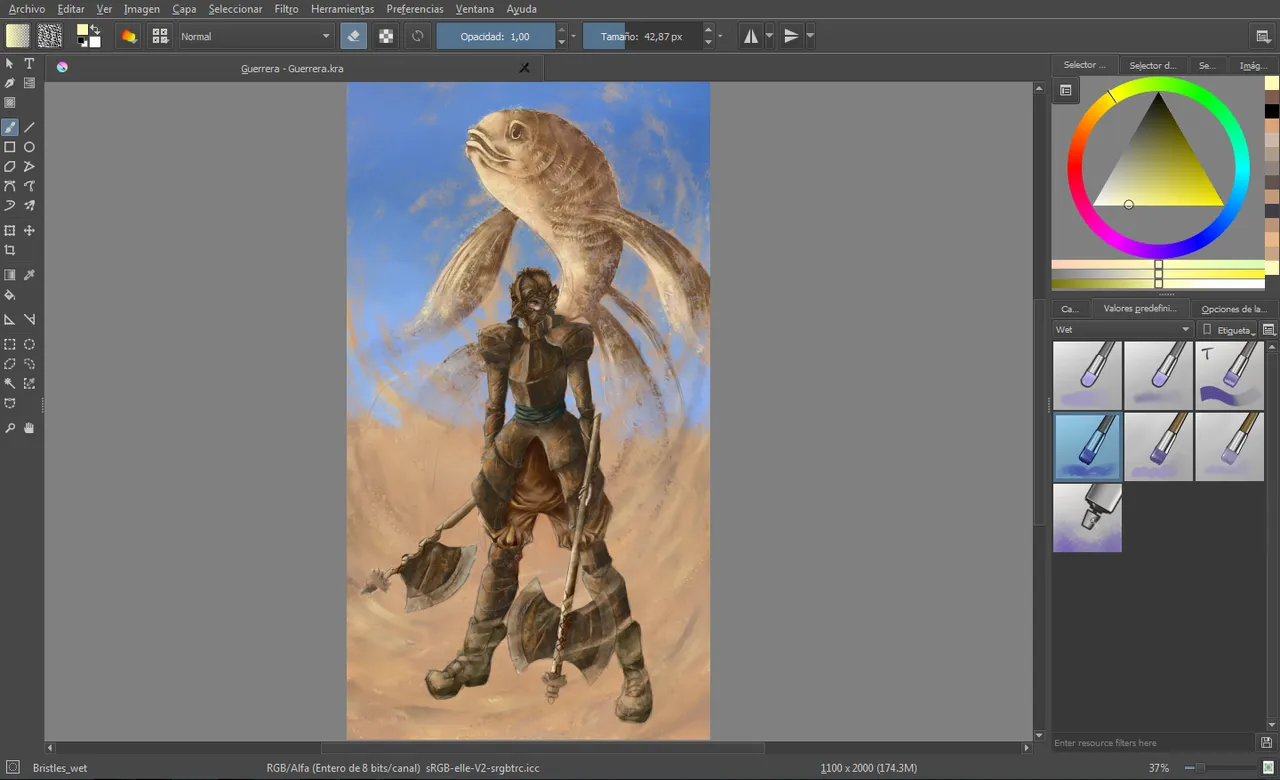
Para las aletas he seguido un procedimiento similar al que utilizo cuando creo cabello. Es decir, trazando delgadas líneas paralelas a la forma de la aleta, en un sentido curvo/vertical.
For the fins I followed a procedure similar to the one I use when I create hair. That is, drawing thin lines parallel to the shape of the fin, in a curved / vertical direction.
5.
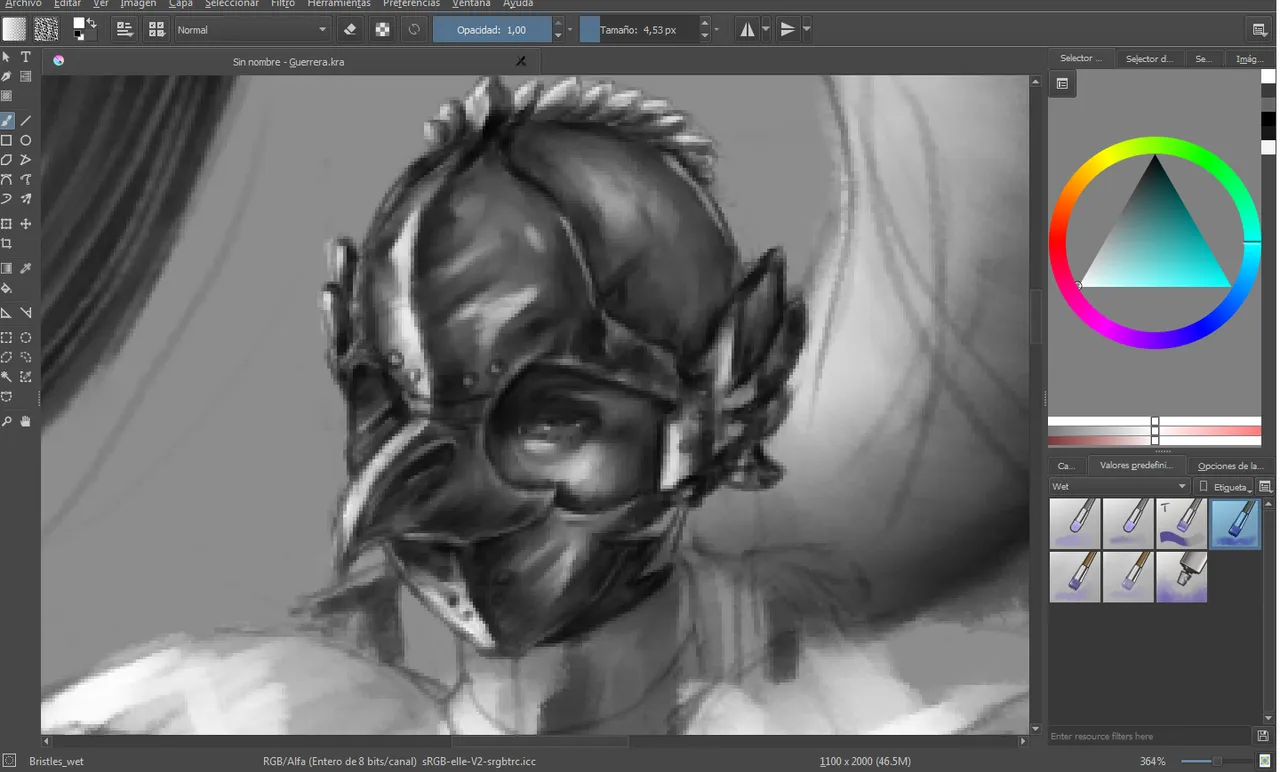
Para el casco he generado los volúmenes con pinceladas rápidas, sin reparar mucho en él, en vista de que no quería que se apreciara como un metal pulcramente lustrado, sino todo lo contrario.
For the helmet I have generated the volumes with quick brushstrokes, without paying much attention to it, since I did not want it to be seen as a neatly polished metal, but quite the opposite.
6.
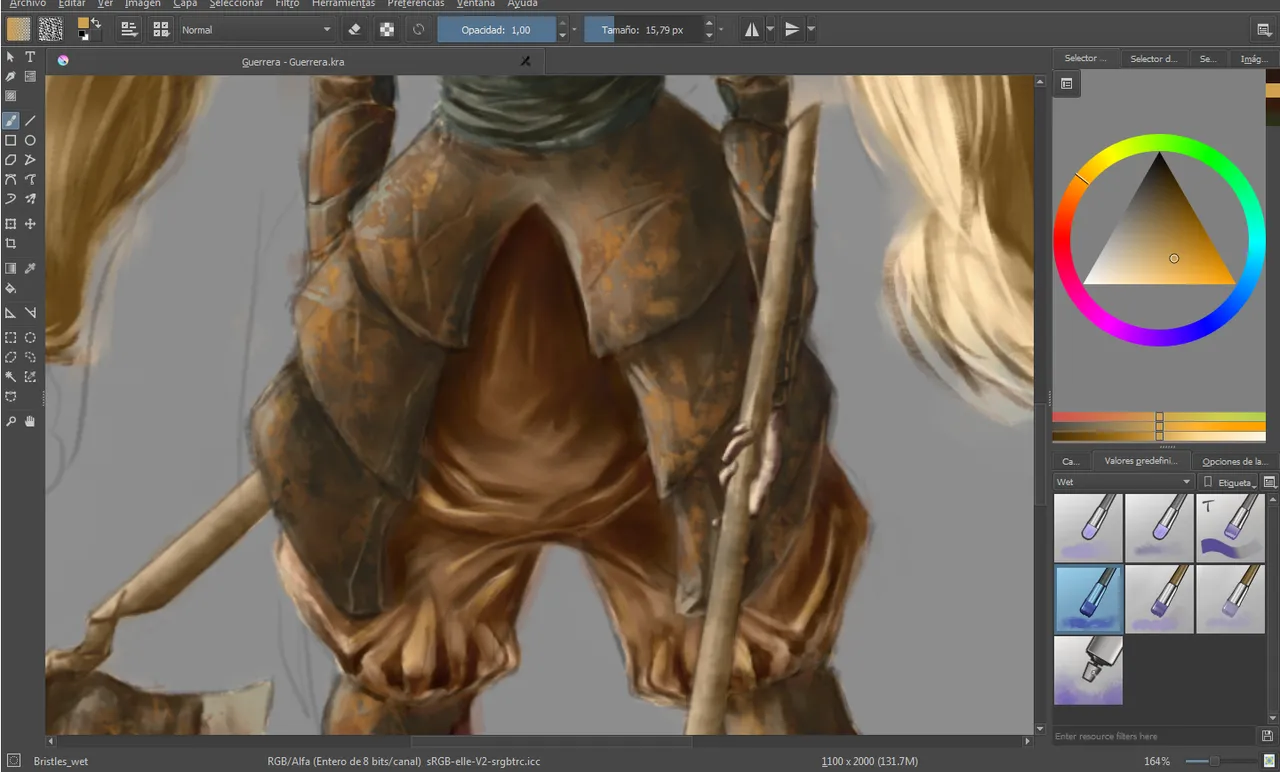
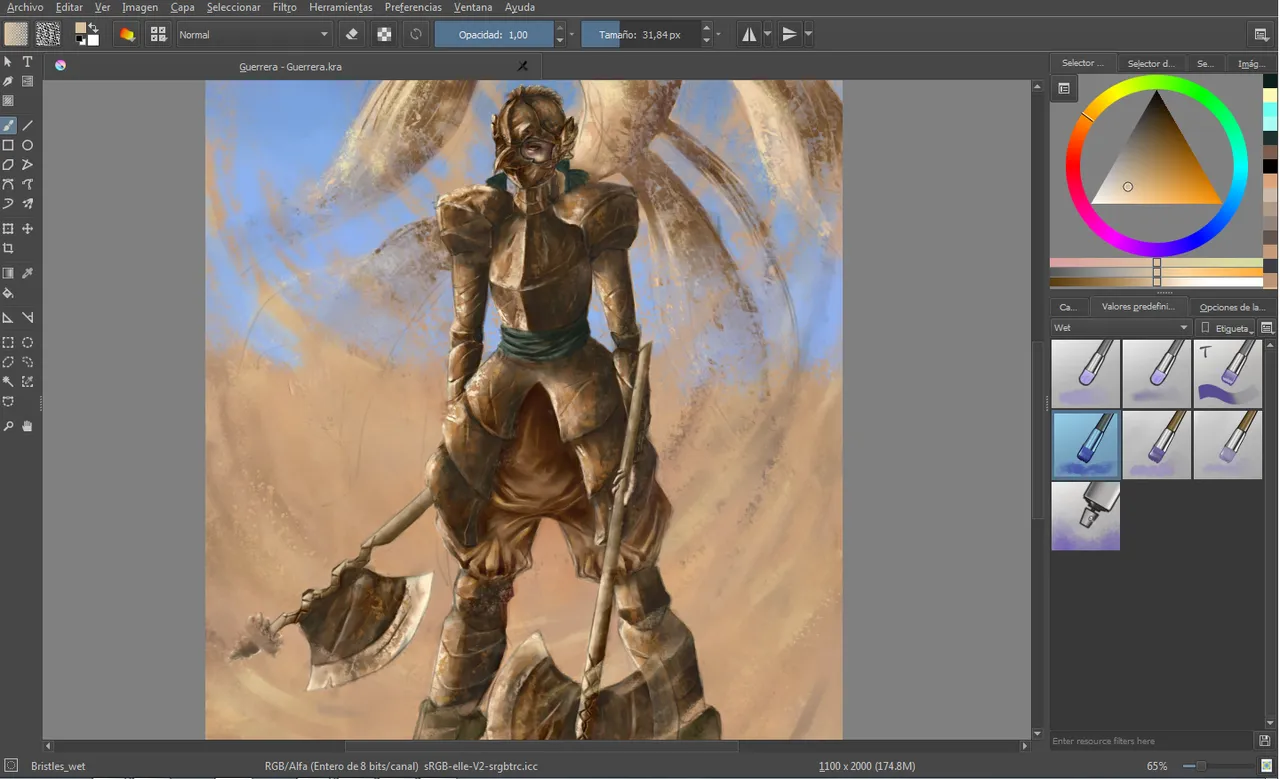
Para las telas he utilizado una pincelada más minuciosa, lo suficiente para generar una textura más fluída que la del metal.
For the fabrics I used a more meticulous brushwork, enough to generate a more fluid texture than the metal.
7.
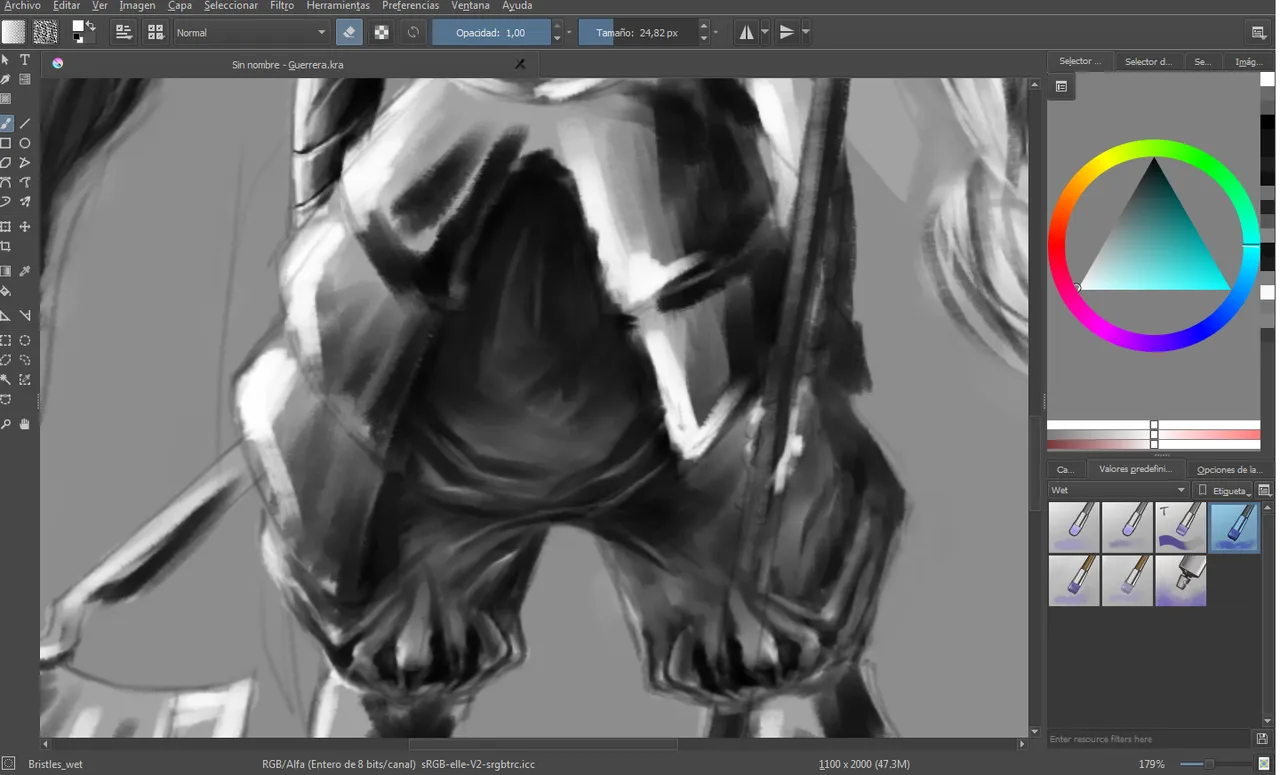
Para el resto de la armadura seguí el mismo proceso del casco en un sentido más vertical, con el objetivo de acreditarle tosquedad.
For the rest of the armor I followed the same process of the helmet in a more vertical sense, in order to accredit it roughness.
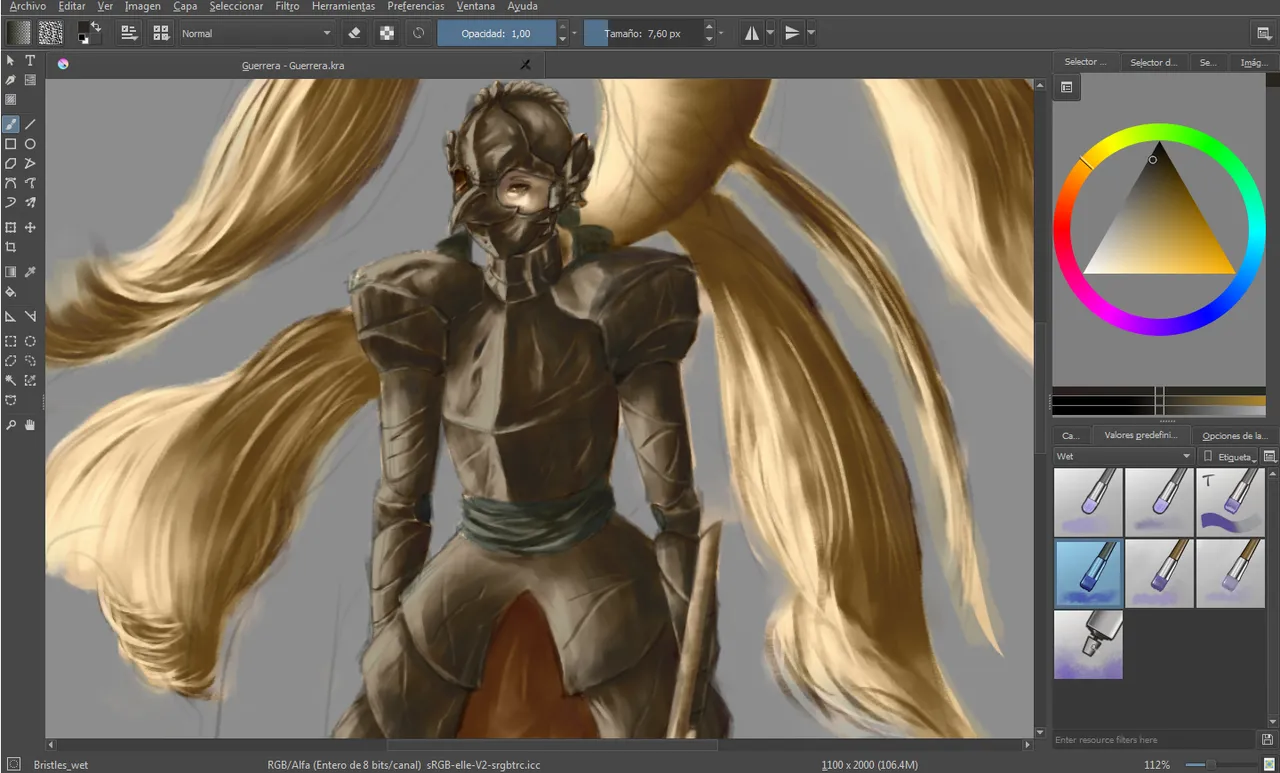
8.
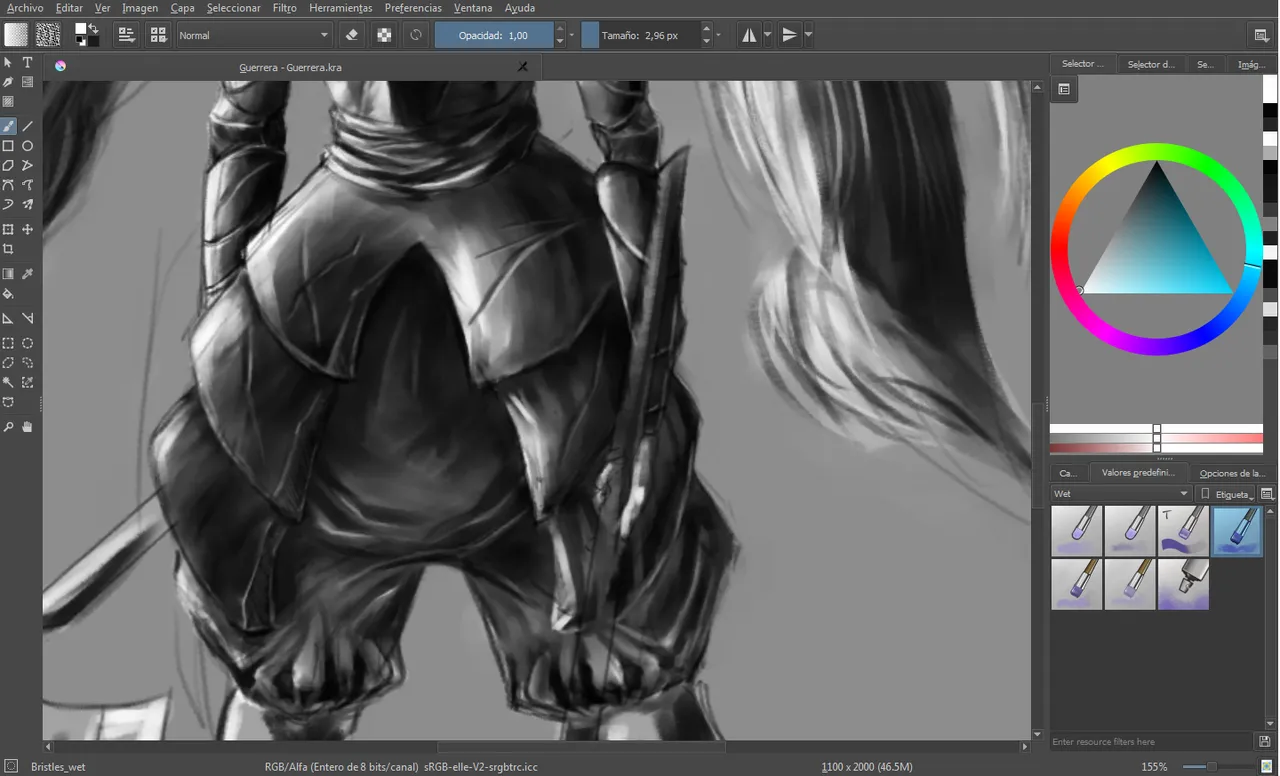
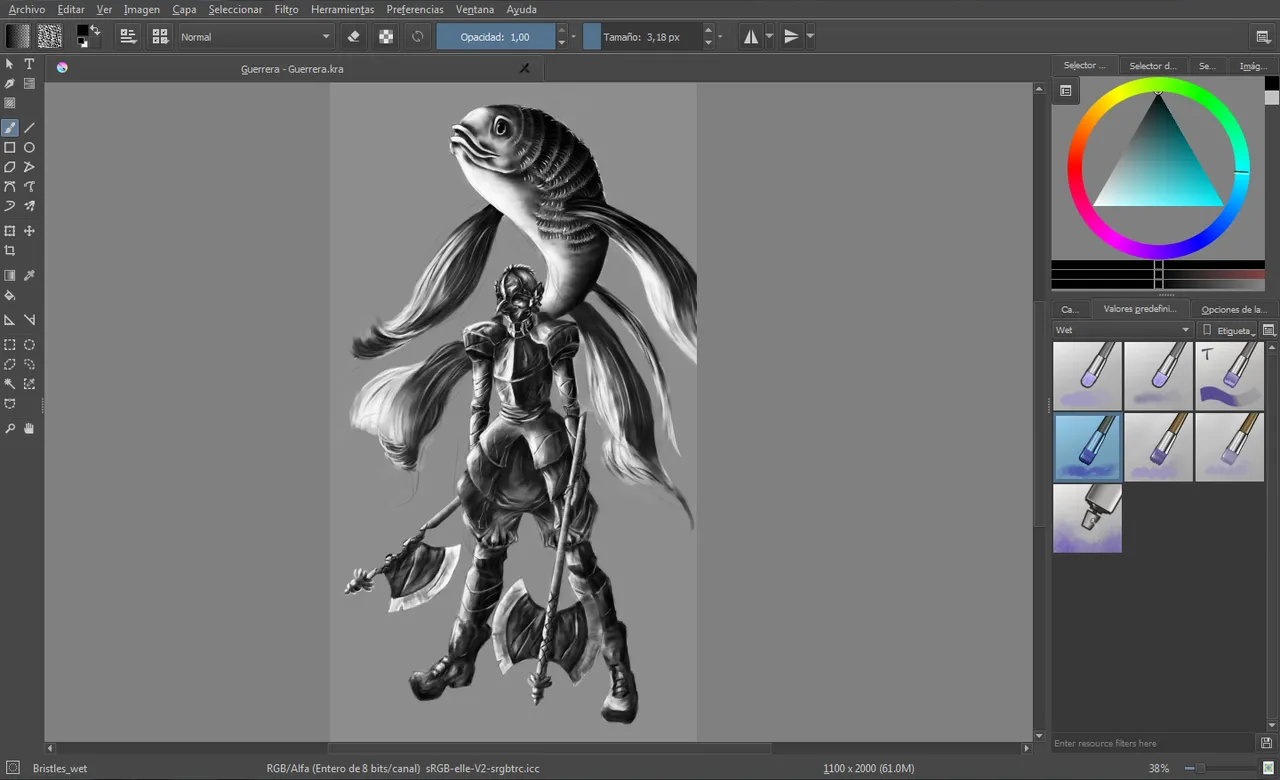
He aquí una vista de la escala de grises finalizada.
Here is a view of the gray scale finished.
9.
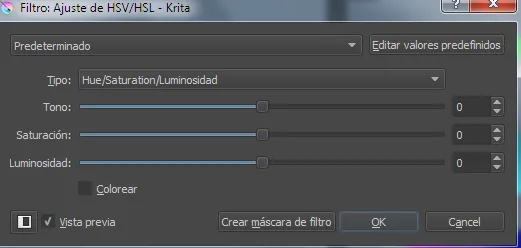
Seguidamente presioné ctrl+u > tipo > croma azul/ croma rojo/ luma > ajusté las opciones de modo manual > Ok
Then I pressed ctrl + u> type> chroma blue / chroma red / luma> I adjusted the options manually> Ok
10.
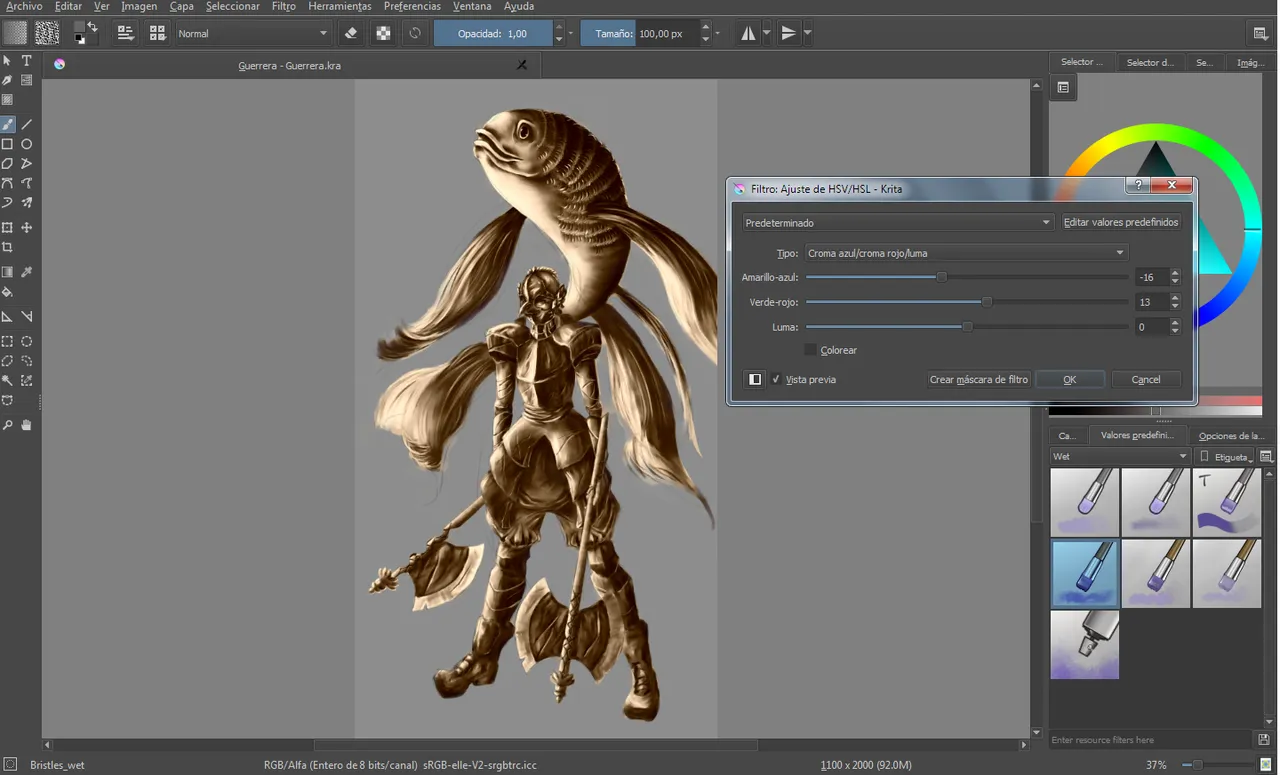
Una vez hecho esto, procedí a aplicar el color plano de cada elemento, en una capa distinta para cada color (es importante separar los colores por capas, ya que cada uno posee su propia iluminación).
Once this was done, I proceeded to apply the flat color of each element, in a different layer for each color (it is important to separate the colors by layers, since each one has its own lighting).
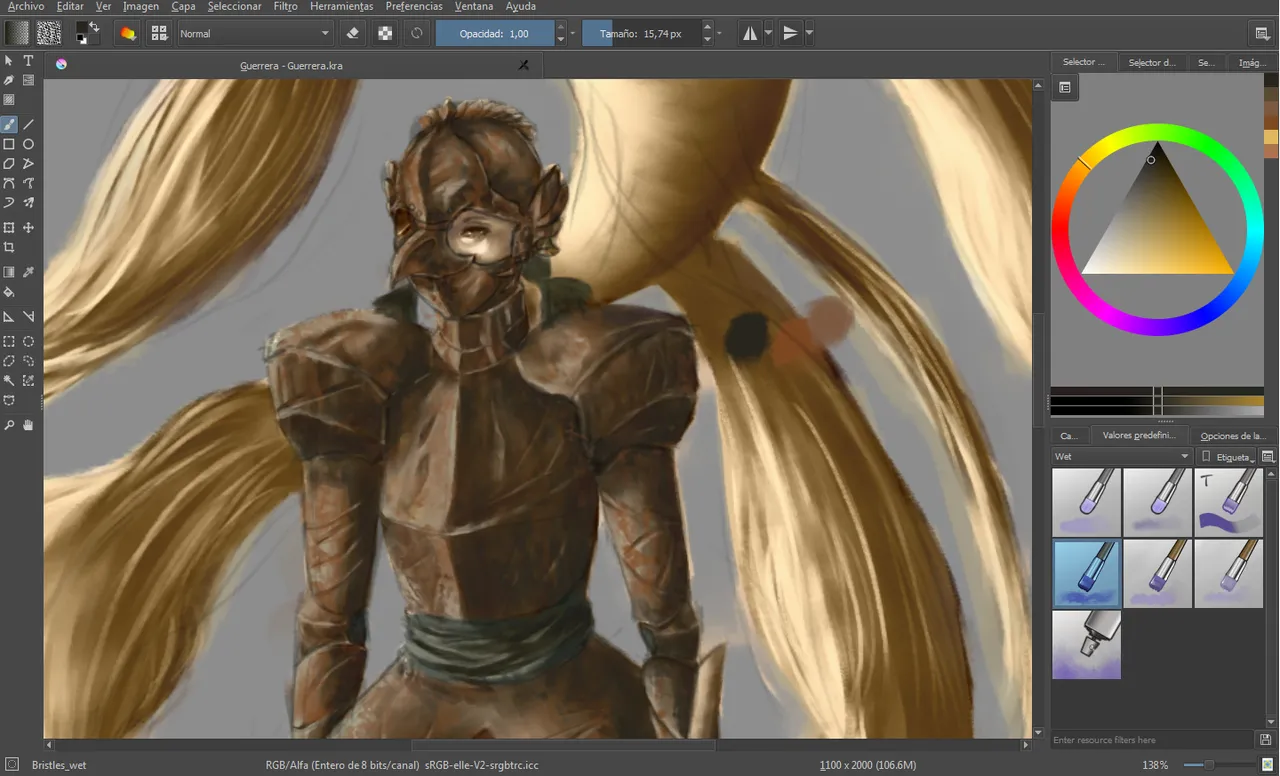
11.1, 11.2, 11.3
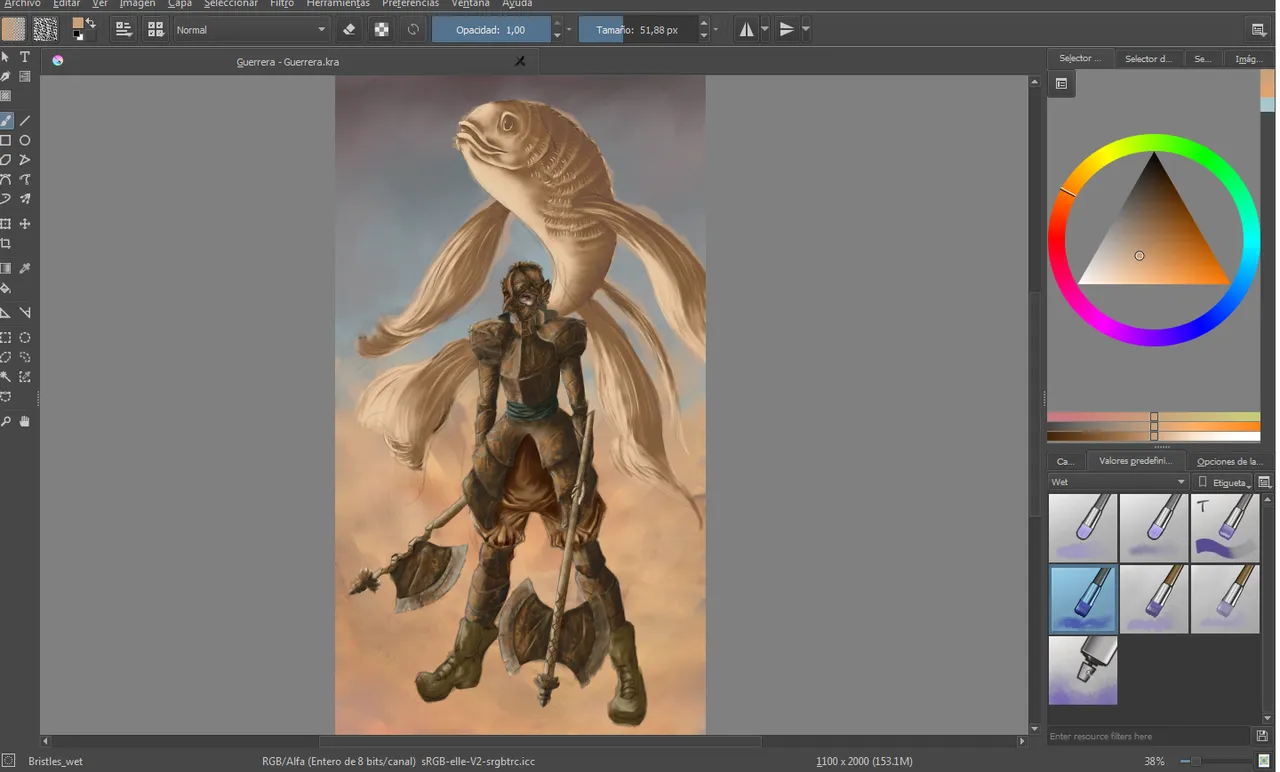
Con bristles wet añadí un tono más bajo en las zonas en sombra de la armadura, y seguidamente añadí colores terracota y amarillos para simular el óxido de la misma.
With bristles wet I added a lower tone in the shadow areas of the armor, and then I added terracotta and yellow colors to simulate the oxide of the same.
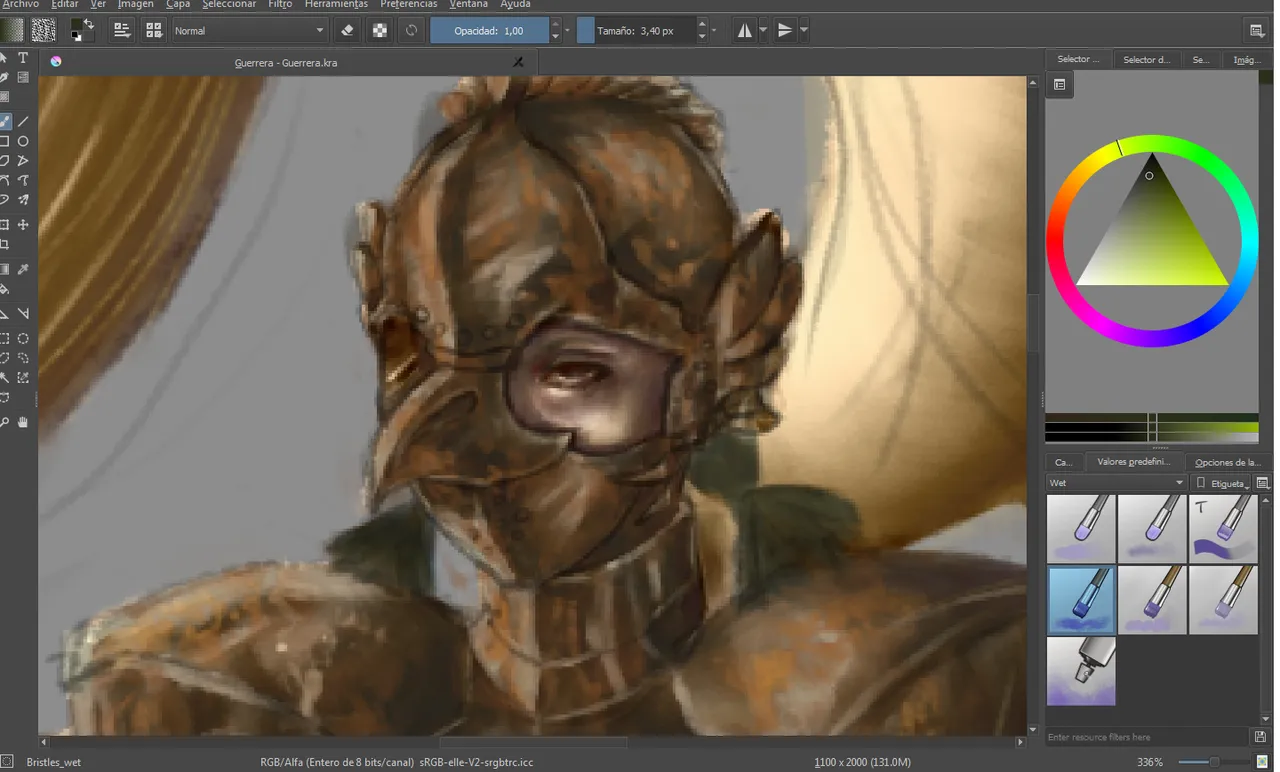
12.
Añadí matices a la piel con verdes, púrpuras y azules.
I added nuances to the skin with greens, purples and blues.
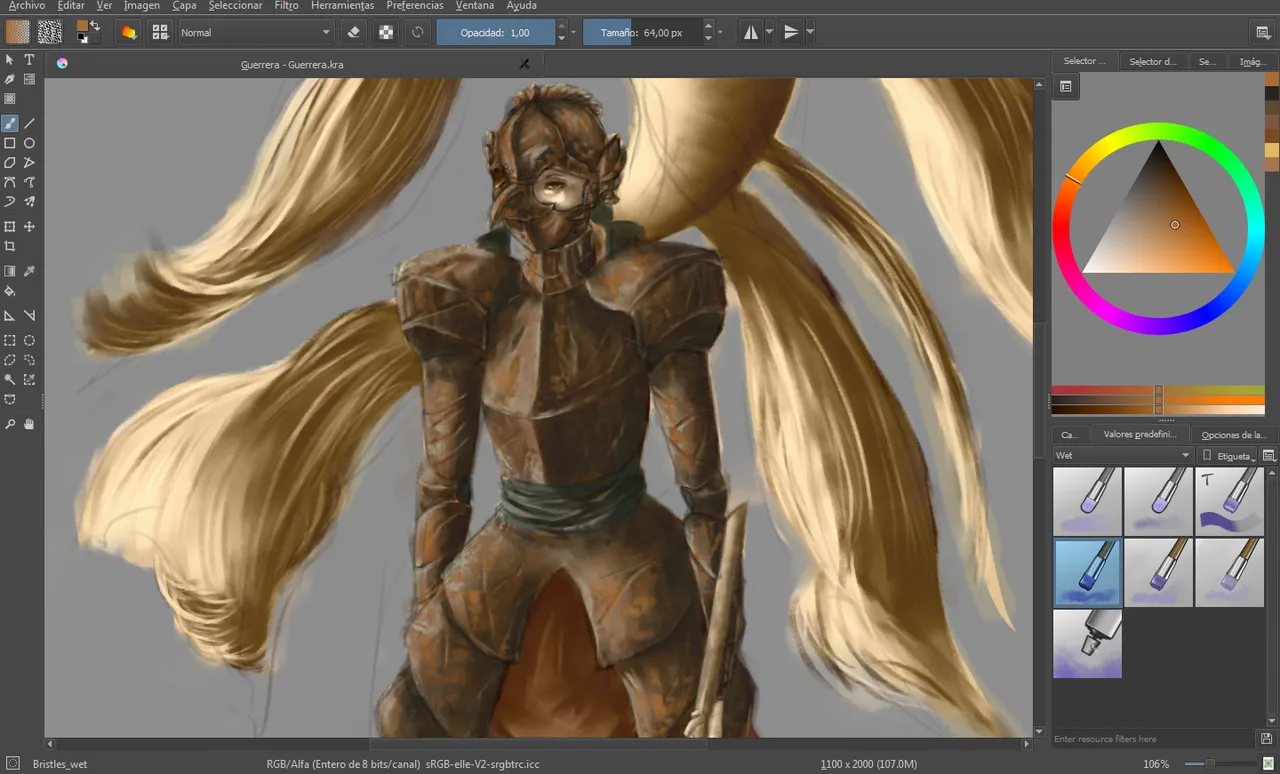
13.
Añadí tonos más bajos, así como altos en el pantalón.
I added lower tones as well as high trousers.
14.
Comencé a trabajar en los colores del fondo.
I started working on the background colors.
15.
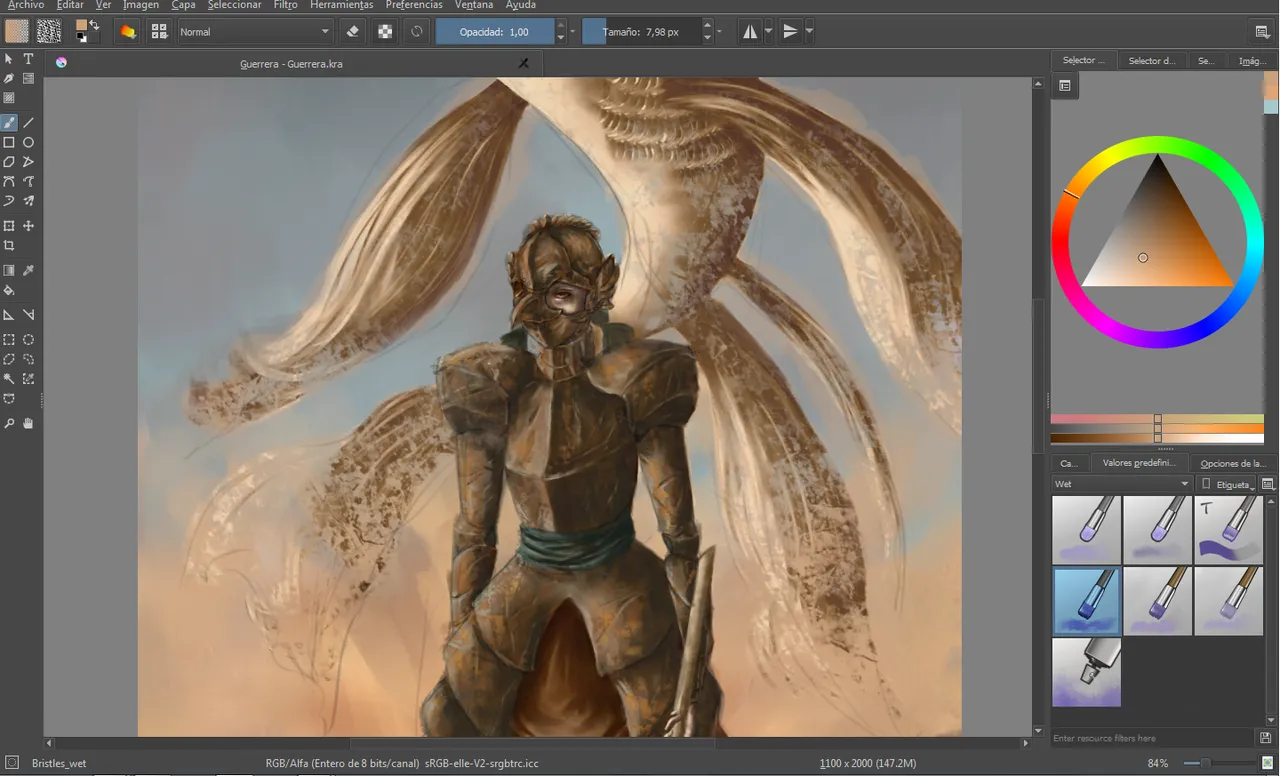
Con el pincel bristles wet, presionando en mi teclado la letra E (para convertir el pincel en un borrador) procedí a eliminar, tanto en la capa de tonos, como en la de color del pez, ciertas áreas con la finalidad de generar una sensación de desvanecimiento.
With the bristles wet brush, pressing on my keyboard the letter E (to turn the brush into an eraser) I proceeded to eliminate, in both the toned layer and the color layer of the fish, certain areas in order to generate a sensation of fading.
16.
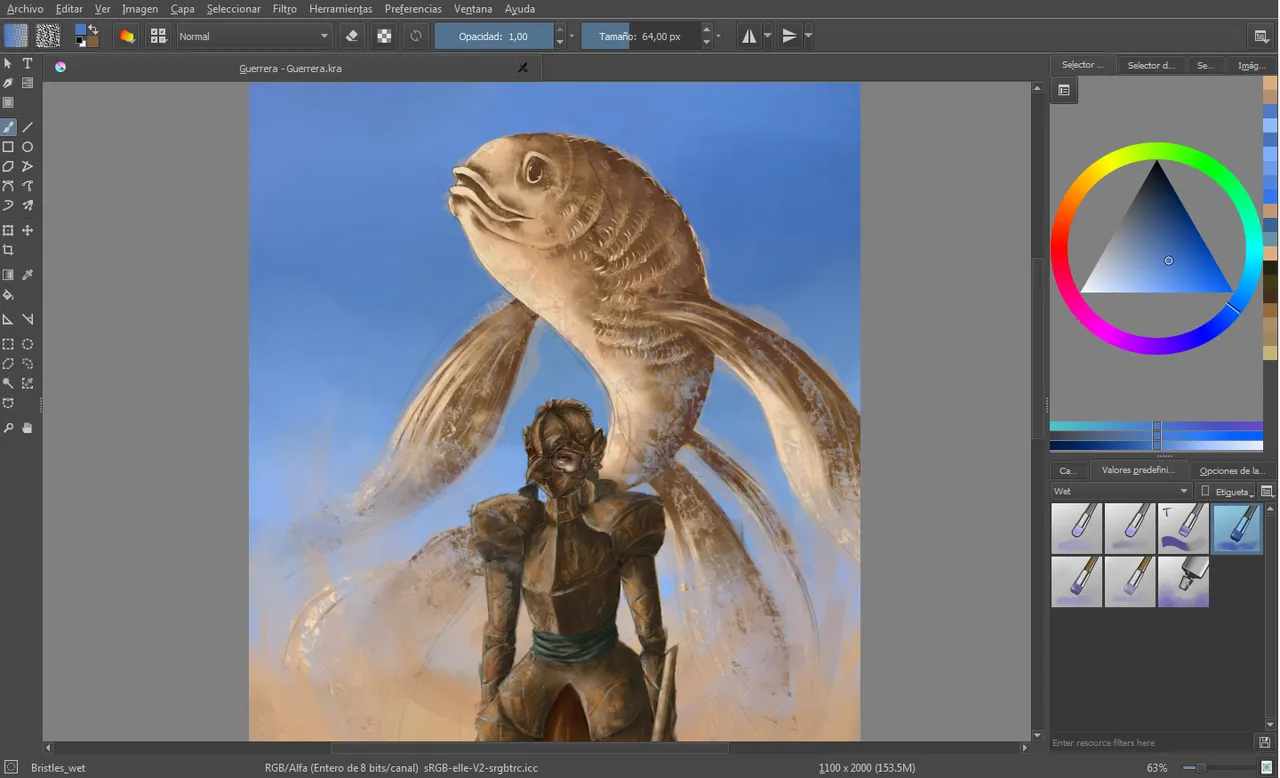
En este punto noté que el color del cielo no realzaba a los personajes como me gustaría, motivo por el que añadí un azul de mayor intensidad.
At this point I noticed that the color of the sky did not enhance the characters as I would like, which is why I added a blue of greater intensity.
17.
Con el fin de hacer alusión a que el pez emergía de la arena, decidí agregrar arena en movimiento en la zona del cielo, para ello utilicé la herramienta splat wet cells (disponible en el menú desplegable de pinceles, en la categoría wet), como el pincel bristles wet.
In order to make reference to the fish emerging from the sand, I decided to add sand in movement in the sky area, for this I used the splat wet cells tool (available in the drop-down menu of brushes, in the wet category), as the bristles wet brush.
18.
Por último, con el pincel bristles wet, añadí luces en la armadura.
Finally, with the bristles wet brush, I added lights to the armor.
- Y para finalizaaaaaaar ¡He aquí la ilustración! Gracias por leer hasta el final, viajeros. Honestamente me he sentido realmente feliz con el resultado. Recuerden que continuaremos subiendo entradas de este tipo, estén atentos. Se despiden con amor y brillitos, el Lobo y la Luna <3.
P.D.: La ilustración fue realizada en el software Krita, versión 3.1.3 - And to finalize Here's the illustration! Thanks for reading until the end, travelers. I have honestly felt really happy with the result. Remember that we will continue uploading post like this, stay tuned. They say goodbye with love and glitter, the Wolf and the Moon <3.
P.D .: The illustration was made in the software Krita, version 3.1.3
Tumblr
Deviantart
Attribution 4.0 International License"
Copyright @elsll - All Rights Reserved