
Good Day Steemians!
Today, I'm showing you how I made this little customized squared booklet. It combines Art heavily into Crafting, I've given it a name: "ArtCraft". We will start off this post by learning how to make "Splatter Art" on cardboard that will serve as the covers of this 'ArtCraft'.
Here are the steps, if you wish you can even follow it and craft your Notepad in the comforts of your home. Enjoy:
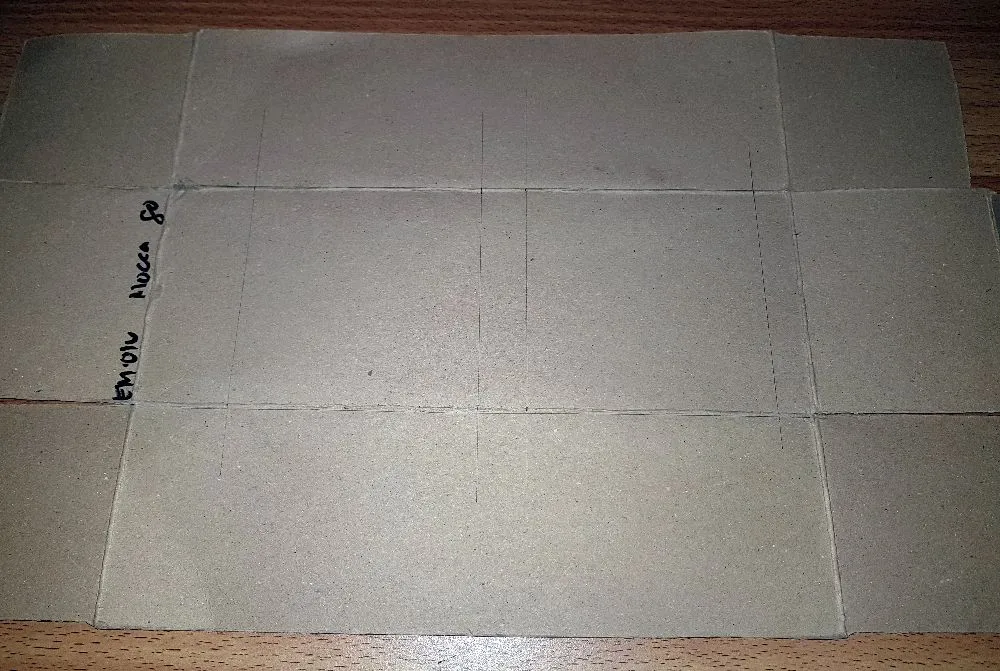
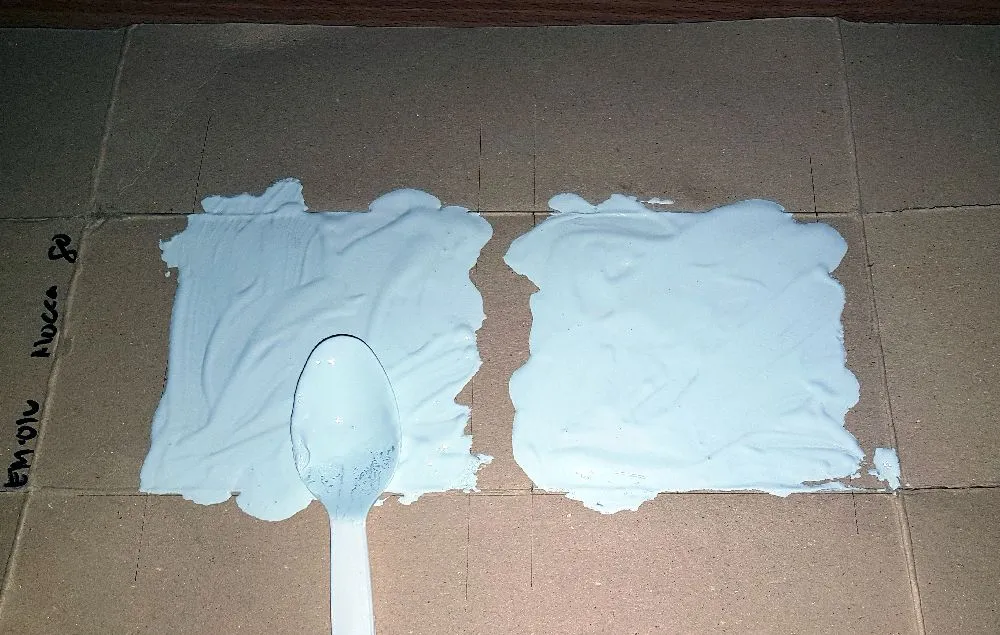
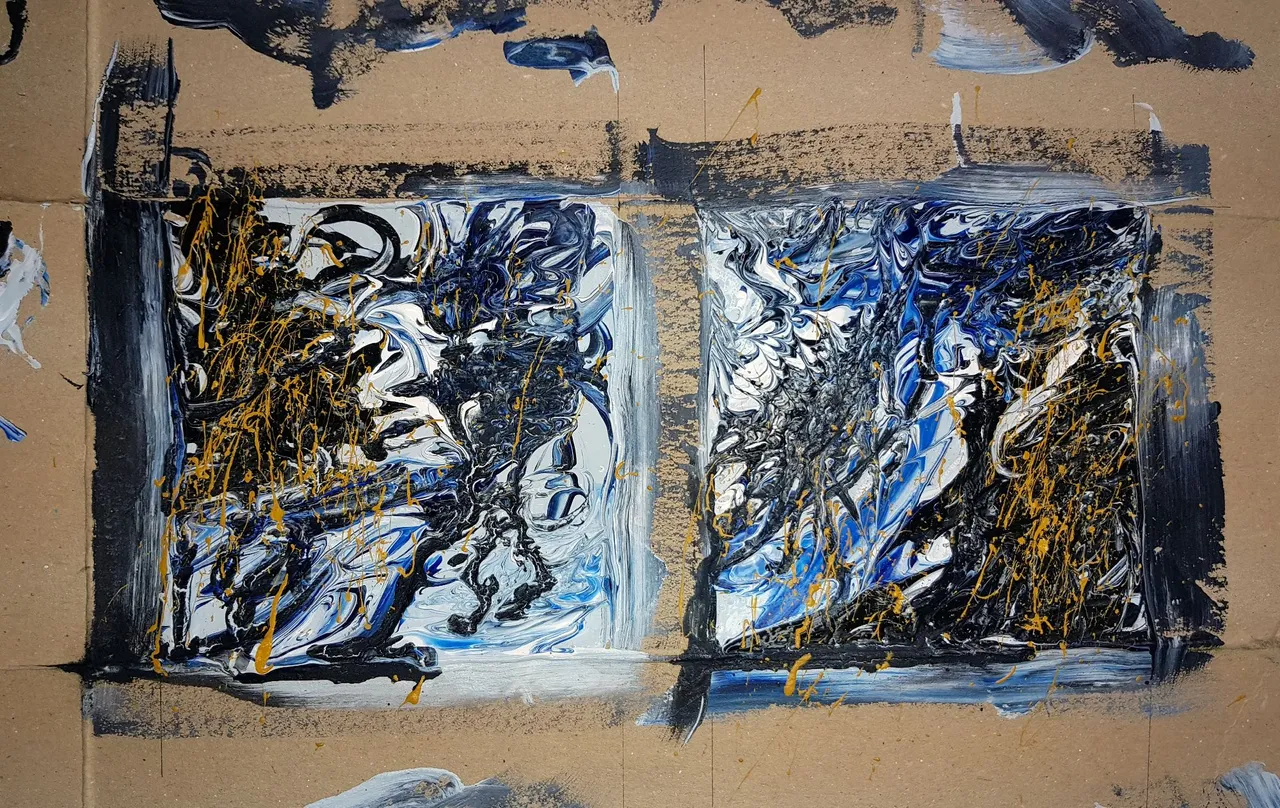
First of all, get yourself a cardboard (can be from scrap boxes) that you'll make use as the canvas (This is actually from an old shoebox in our house). I drew boxes on it with pencils. They will guide us on which part to paint.
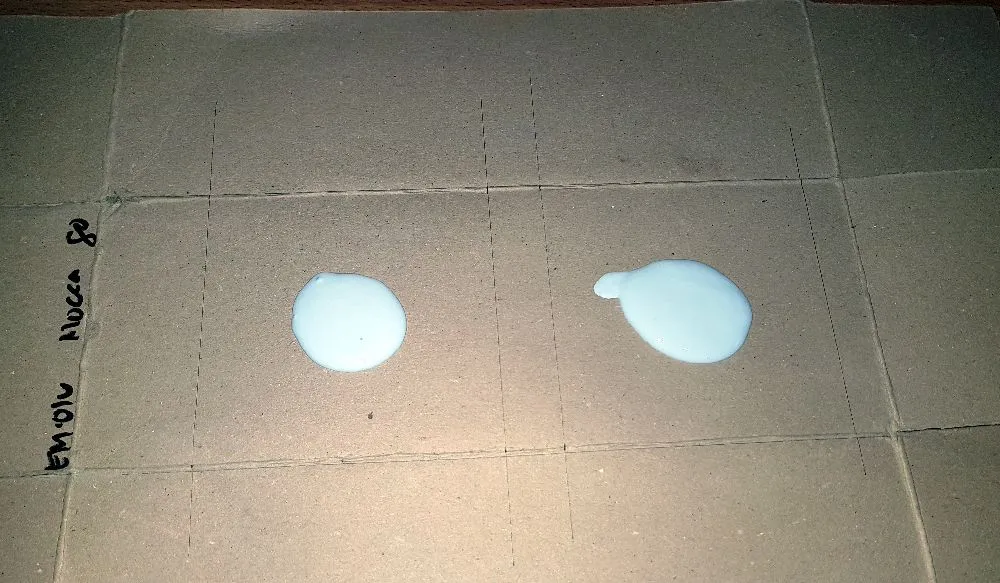
I started off by adding 2 blobs of light gray paint onto the cardboard, this will serve as our base color. Make sure you add enough paint for both boxes.
Next up is to spread the base paint across the boxes that we drew. Make sure to cover all the parts of it, if needed then add more paint in case there are still unpainted spaces on it.
Add a few drops of paint on it. For this step I chose 3 different paints of white, black, and dark blue. I poured them randomly onto the already painted area.
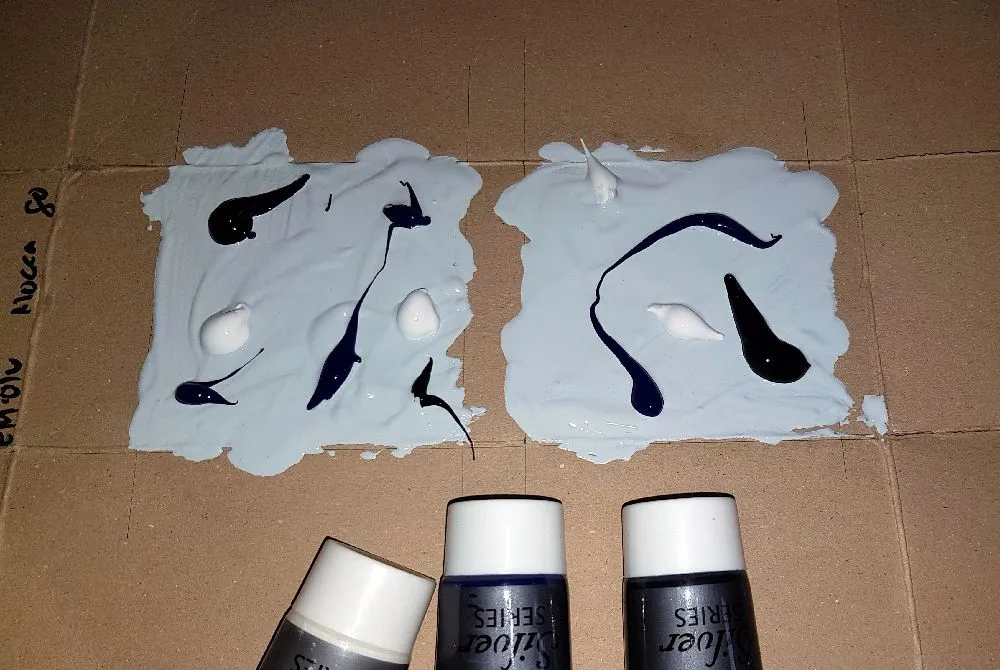
I ran the tip of toothpicks across the paint till they mix a bit and produced some effects. In case the paint isn't that fluid or if there are parts that you think needs more colors, just add more paint on it.
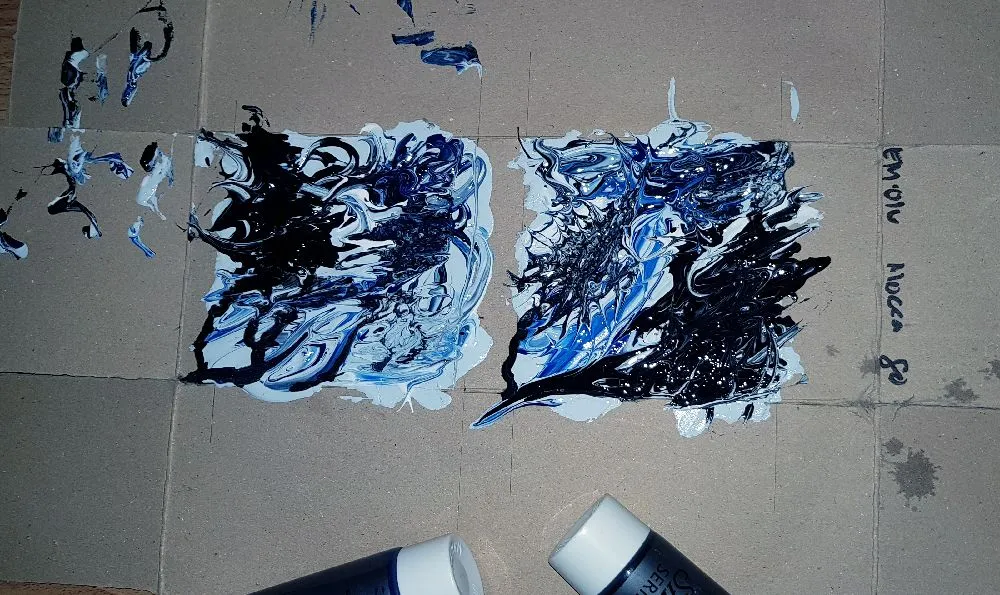
After that I splattered yellowish paint onto it using cardboard and an unused toothbrush. By flickering the toothbrush onto the cardboard, paint will splatter into one direction and will produce cool splatter effects. If you wish to, you can add more colors and apply the same technique.
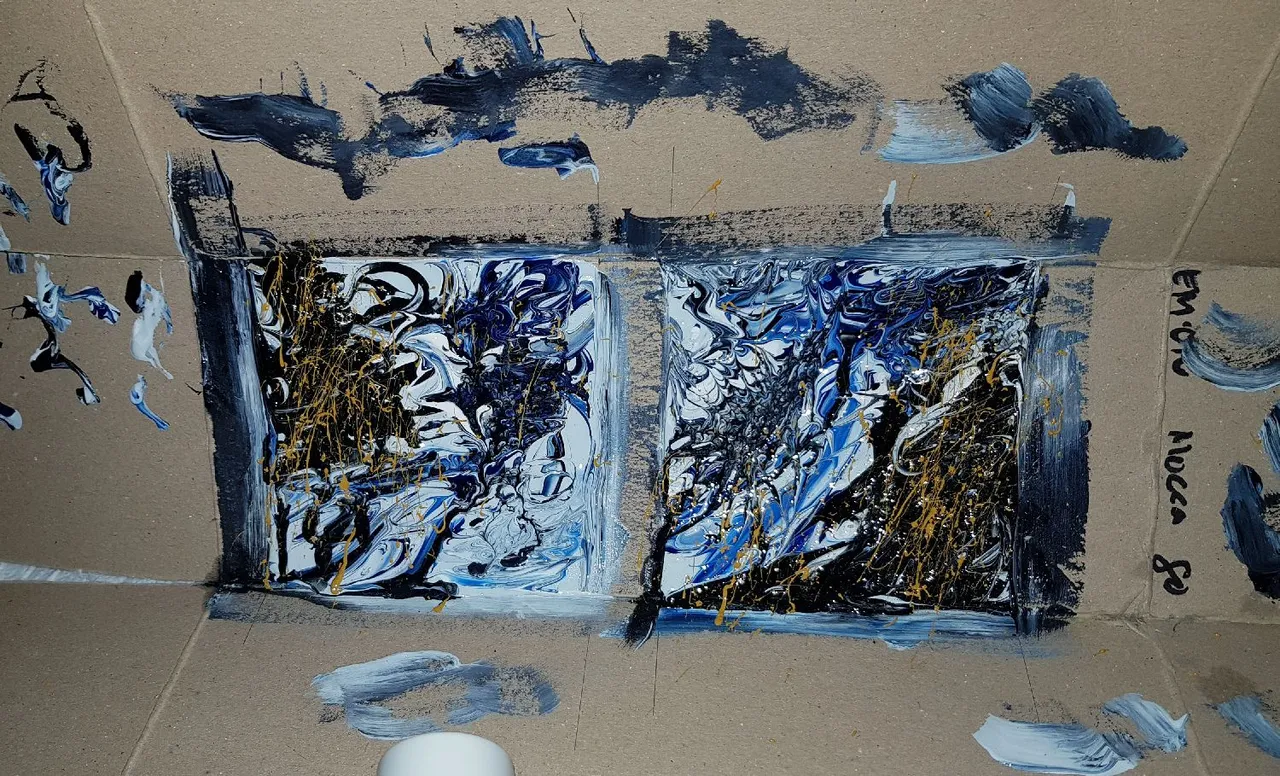
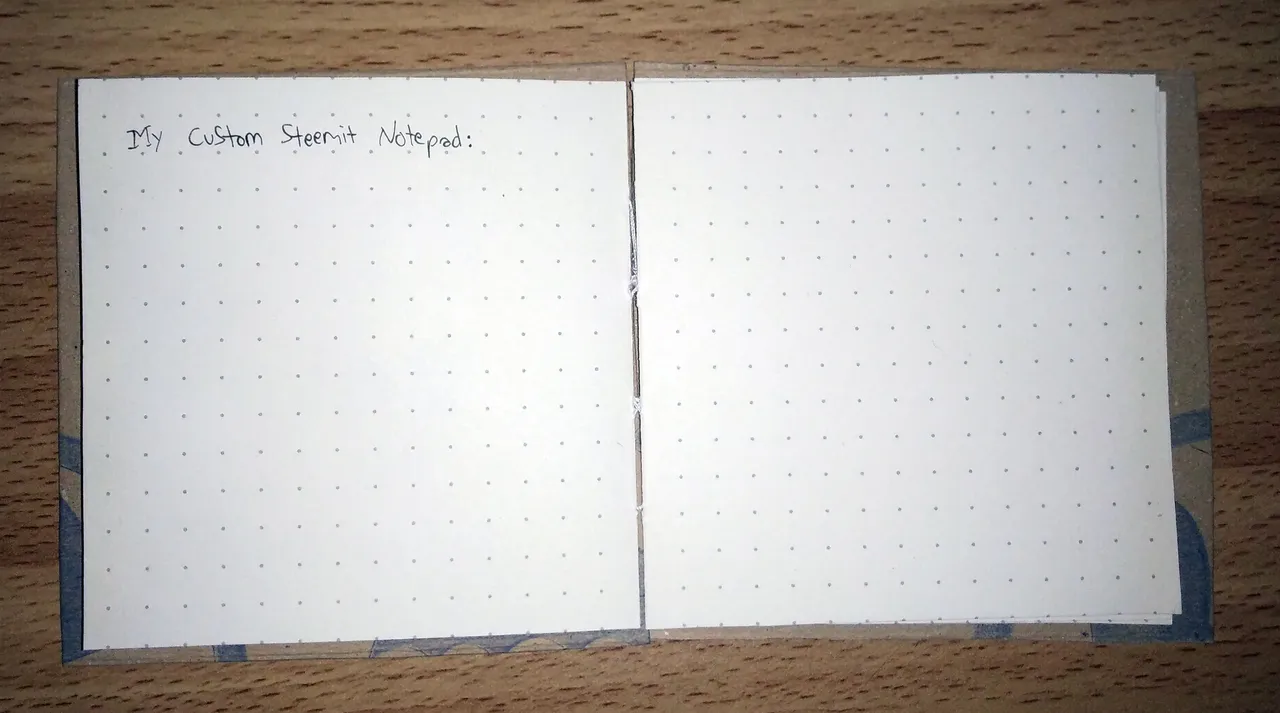
Once done, we just have to allow the paint to dry up before we cut them out. While doing so, I have prepared the pages of the notepad.
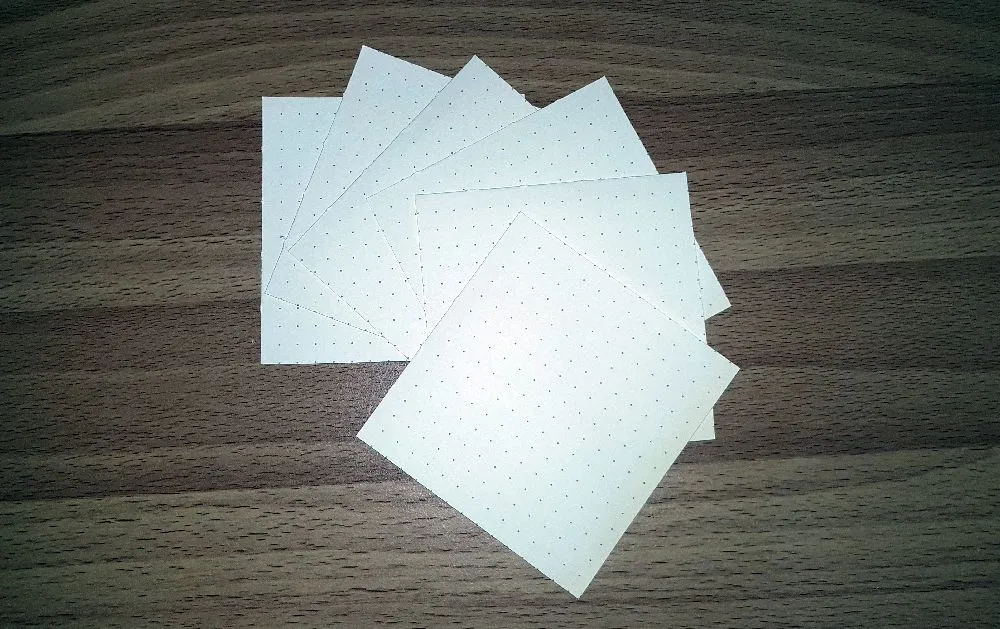
For this, I looked for an unused notebook and cut them out into rectangles that I can fold in half t squares. I stitched them into place so they can form a 'book'.
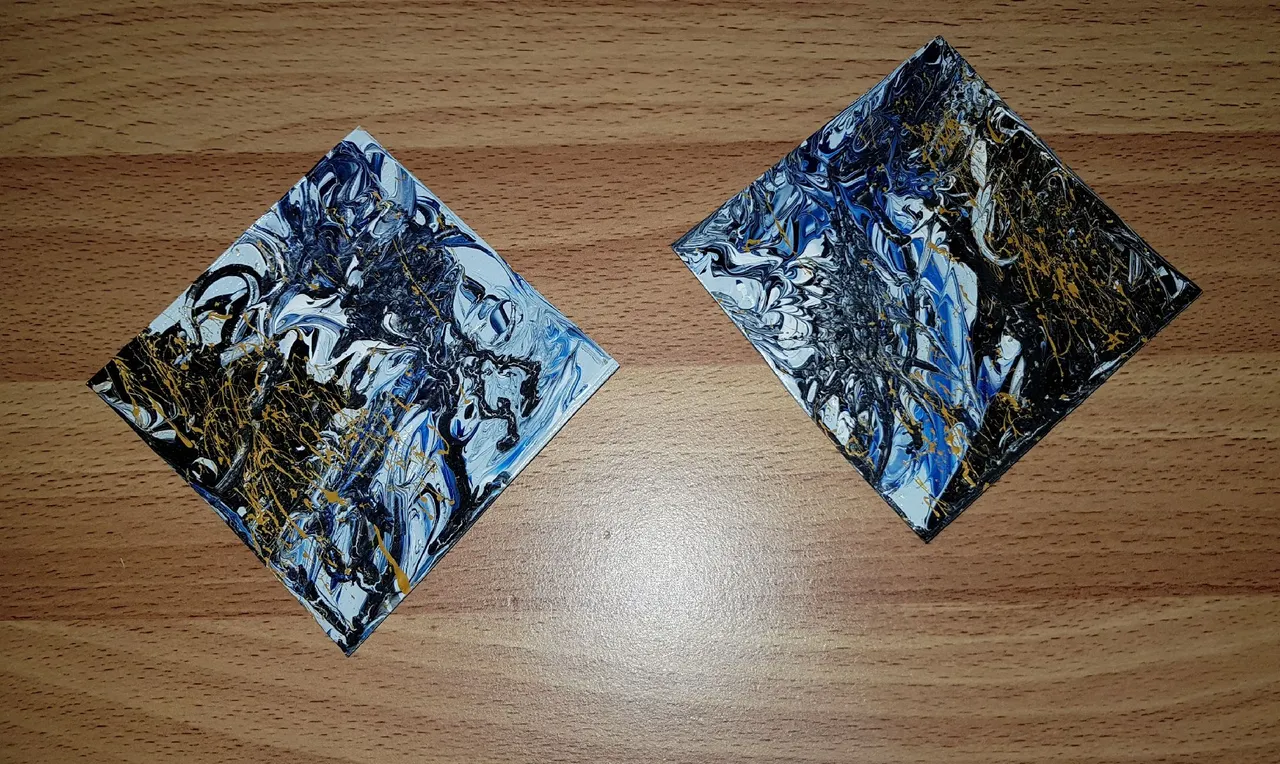
Here's how the covers look like. They're all dried up now so I started cutting them out using the guides I drew on the start.
I just used scissors to cut them, however I suggest using a ruler and a blade/cutter so that you can get more clean cuts on them. Make sure that both of them are of the same size. You can choose the orientation of your covers to test which side looks best for the front or the back or which orientation would look best.
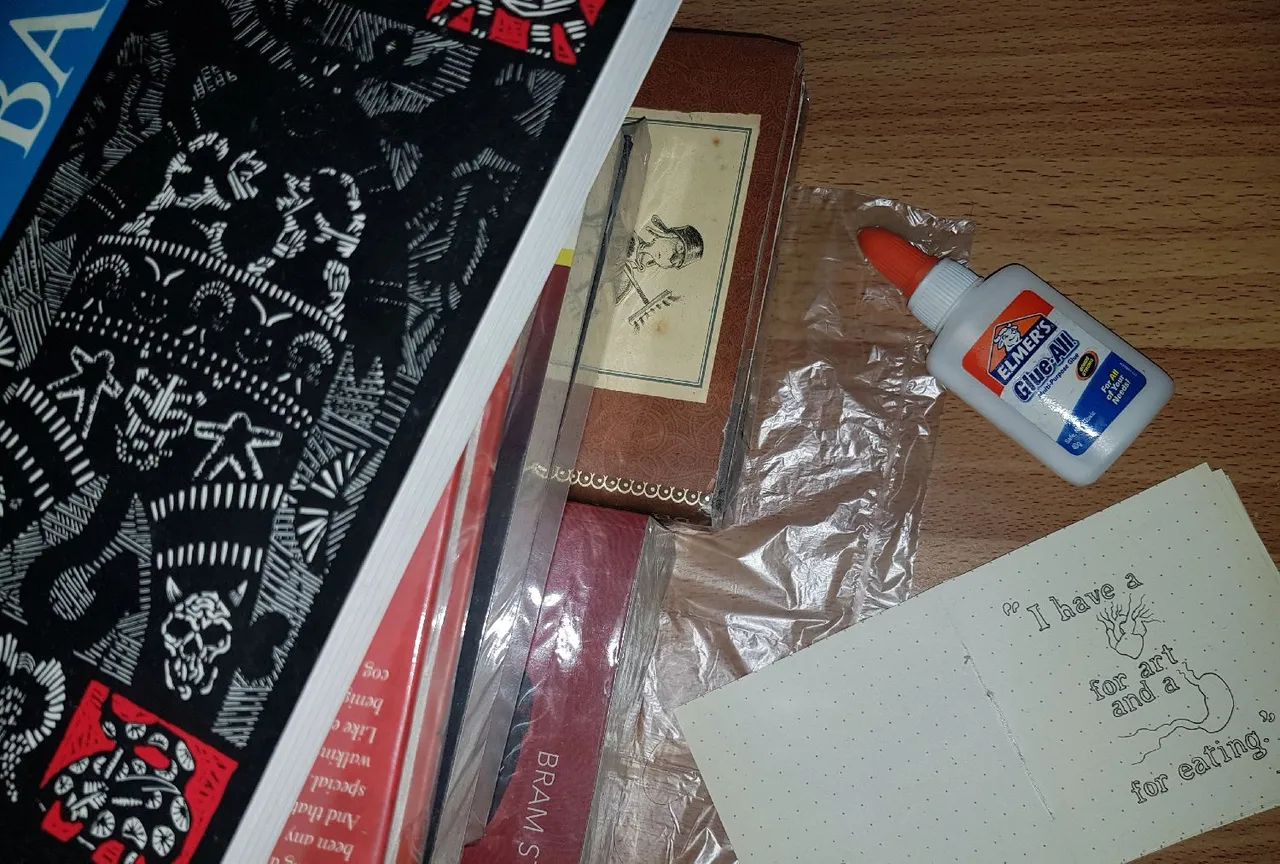
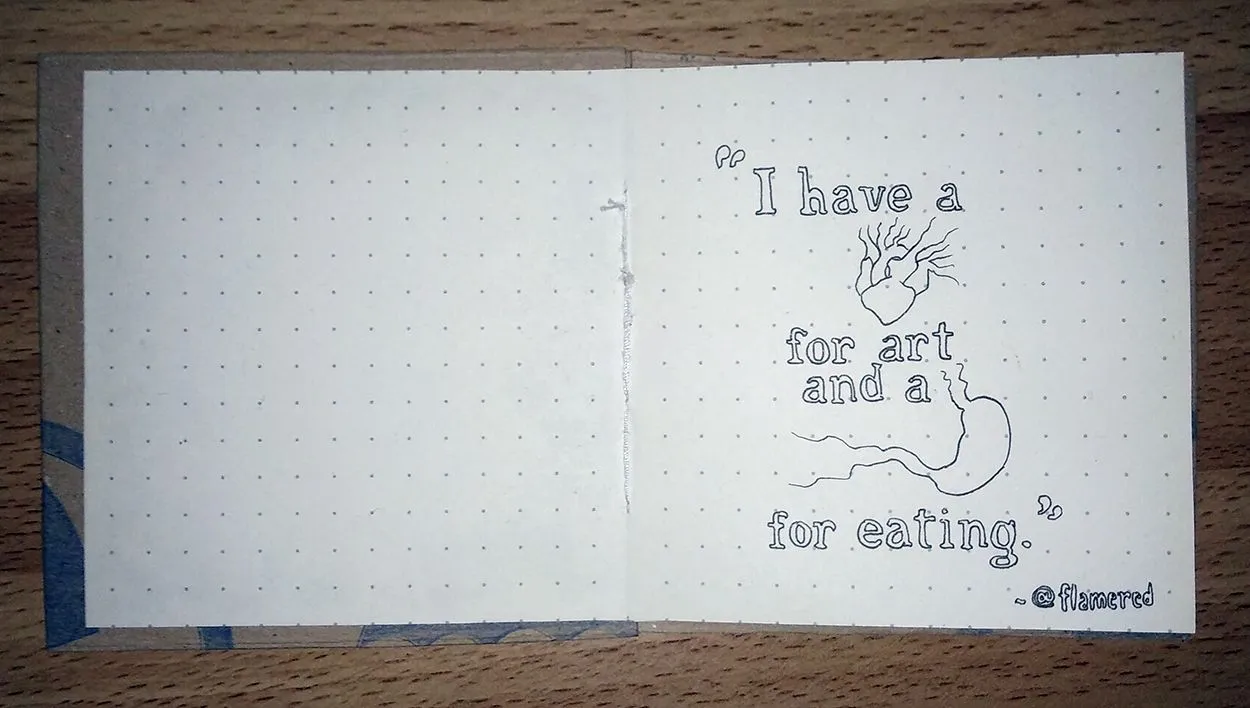
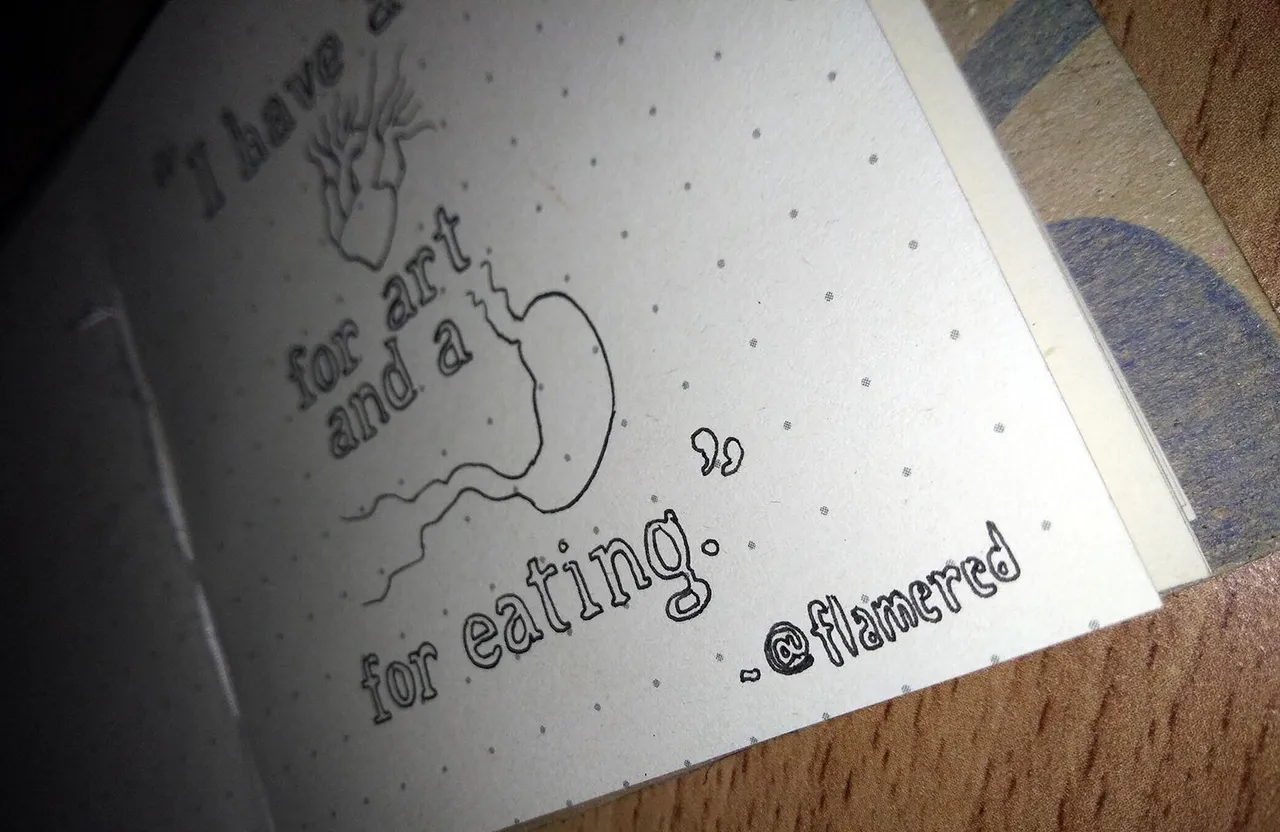
Since they were heavily painted, the cardboard was still a bit moist and has lost its shape. I had to put it under a stack of books I have to make them flatter. While doing that I started adding some things onto the notepad's pages. As you can see in this photo, I added my Steemit tagline "I have a heart for art & a stomach for eating". I have white glue ready because I'll need to stick those covers onto the notepad once they look better.
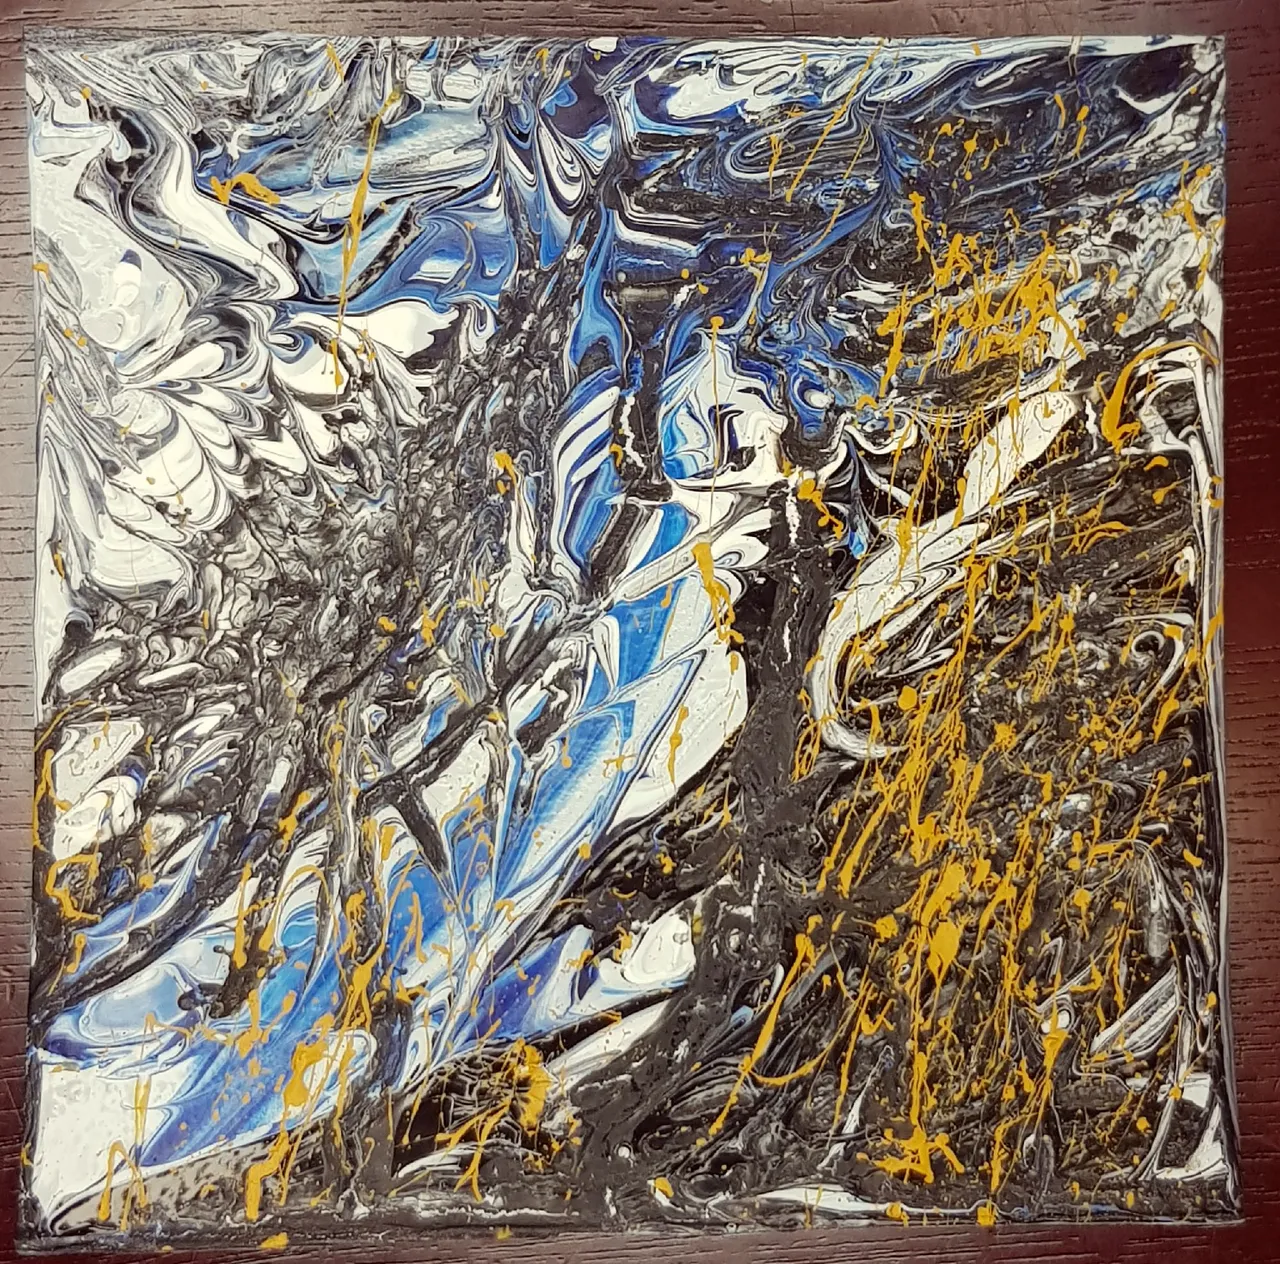
Here's how the 2 of the covers looked like. I made these shots really big so the details will look bigger and more noticeable. This one will become our front cover:

While this one is going to be our back cover:
Now, we will have to join the notepad piece to the cover pieces, I used the white glue for this. Put glue on the sides of the last page of the notepad and spread them then stick the cover onto it. Make sure the orientation and alignment is right.
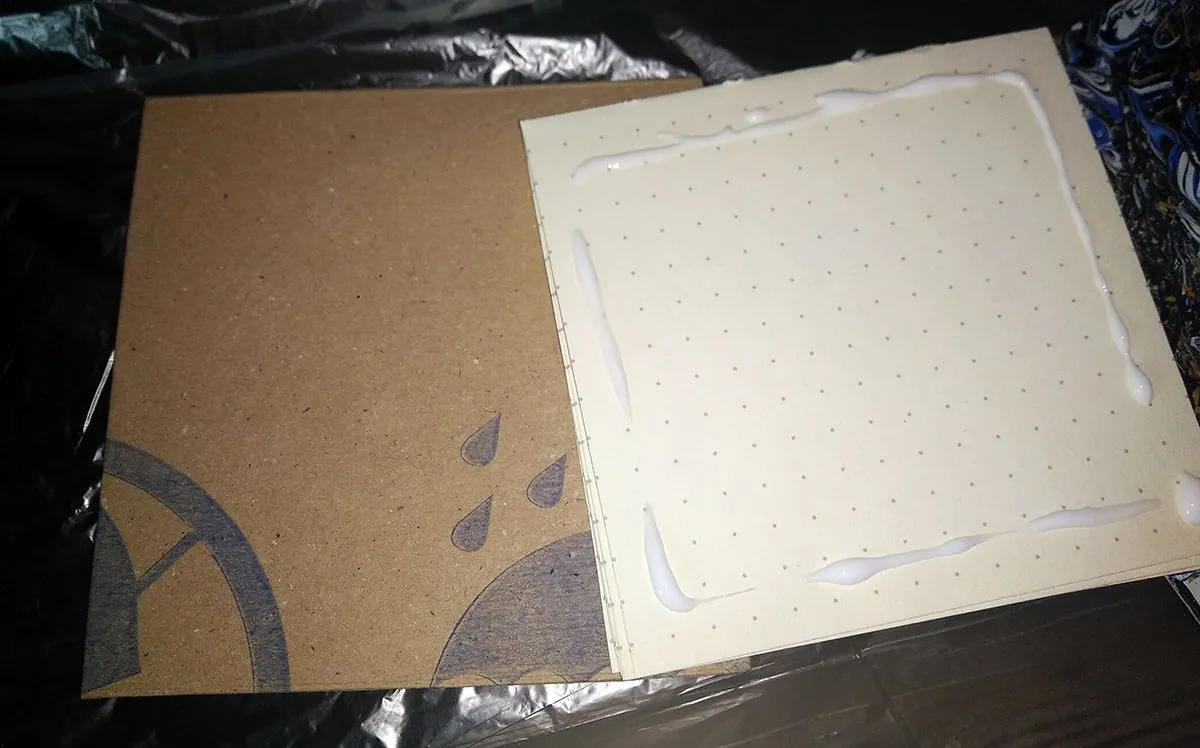
Press down the sides and wait a bit till it dries up. You can also add weight on top of it to make sure the adhesive will really stick those 2 pieces together.
I did the same thing on the back cover and laid the whole piece flat on the surface, I added wait and waited a few minutes, making sure they've stuck together properly.
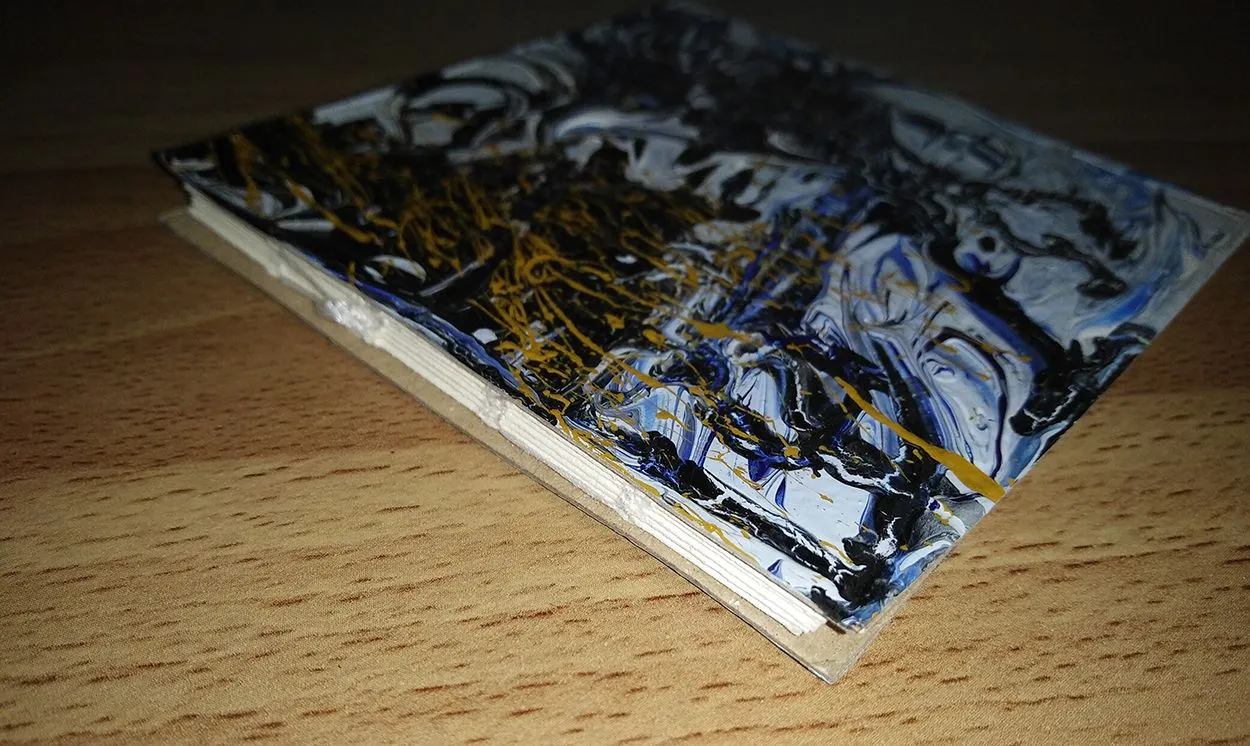
There you have it, here's my custom notepad I made to share with you guys! I've been quite busy so I made this ultra lengthy post to compensate for the number of days I can't make one. All I did the past week was lurk around the website and comment on some posts.
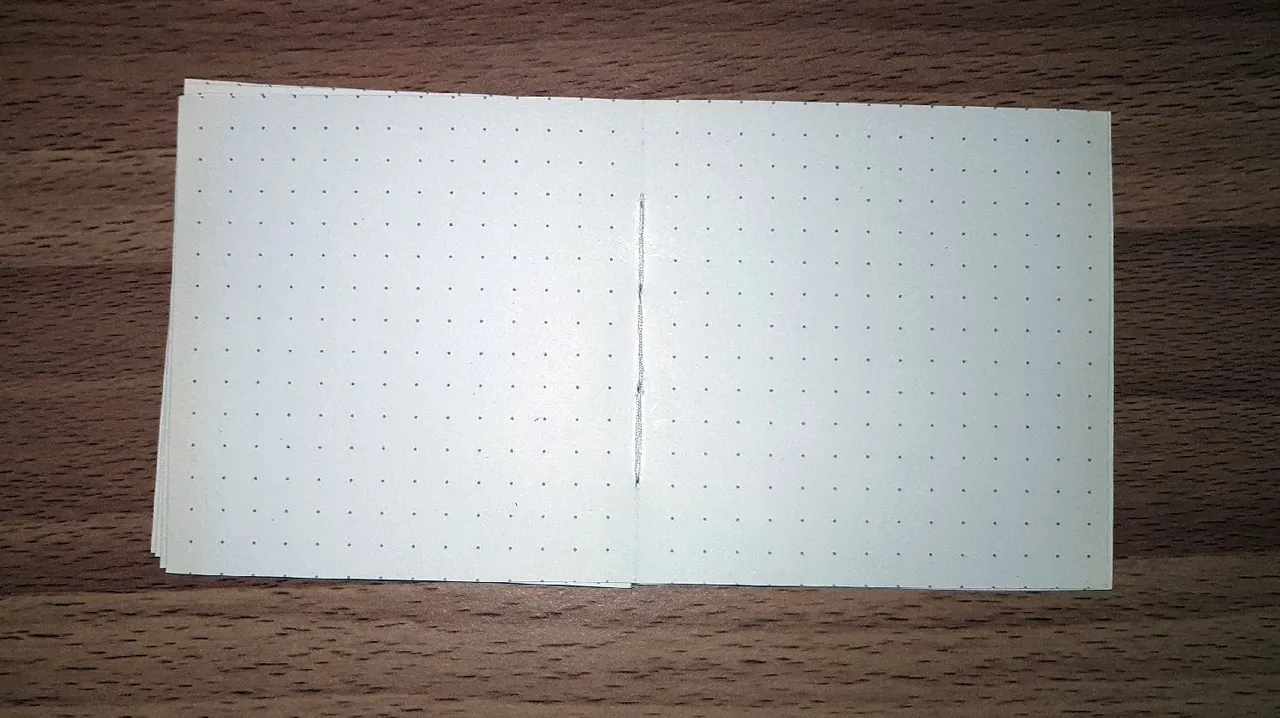
Here are some close-up shots of my notepad. Here you can see how I joined them on one side. You'll see the stitches I made.
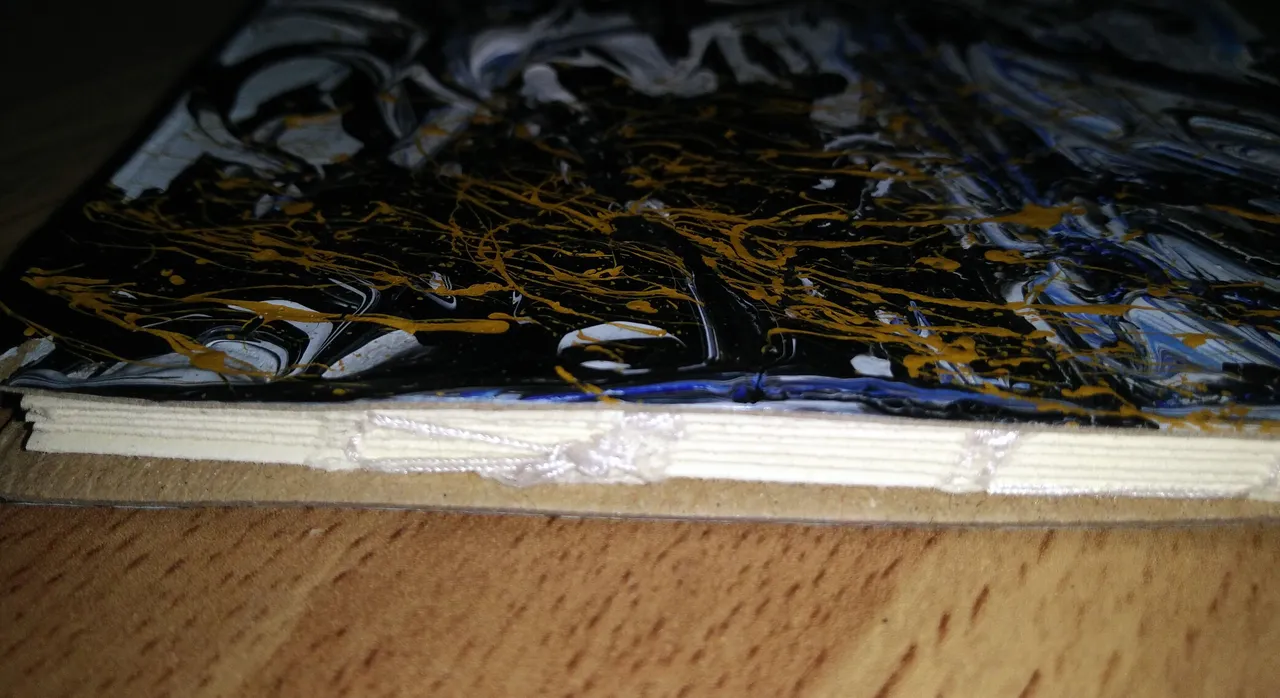
Another shot that shows the binded side of my notepad.
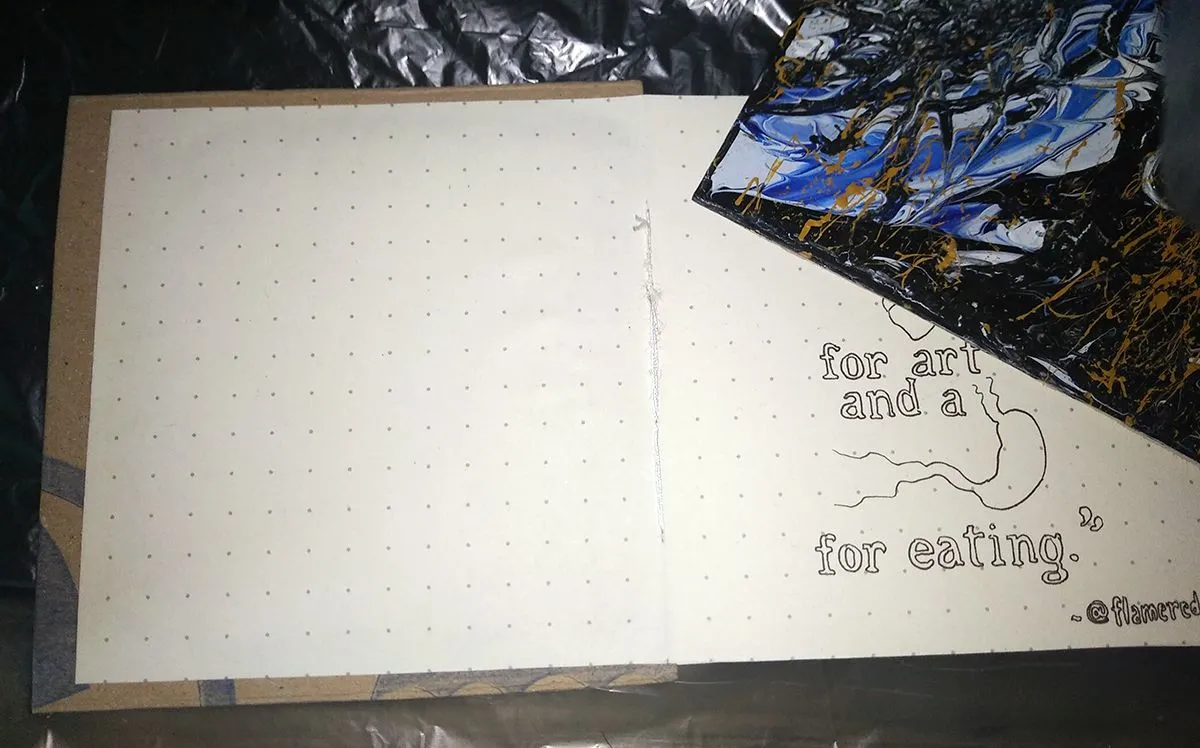
Lastly, here's one more shot of my tagline that I wrote onto the notepad's first page. I turned that quote into an artwork too by drawing the 'heart' and 'stomach' instead of writing them out. I guess I'll name those "ArtQuotes". Haha.
Thank you so much for reaching the end of my post. I hope you did enjoy the process work I've shown you today. I enjoyed making this Art+Craft especially the part where I painted the covers, it was a lengthy and delicate process. I've seen better artwork like that here but please excuse me since it is my first time creating something like that. What do yu think of my piece? Care to share it in the comments? I'd appreciate that a lot!