Spanish
Un saludo a todos mis compañeros de Hive. Hoy les traigo un nuevo post que sé que les va a encantar y facilitar la vida a muchas mujeres.
Les traigo…
10 PASOS PARA REALIZAR UN DELINEADO FACIL Y HERMOSO.

1.Con una sombra marrón vamos a delinear el borde del parpado superior, dando una línea un poco gruesa
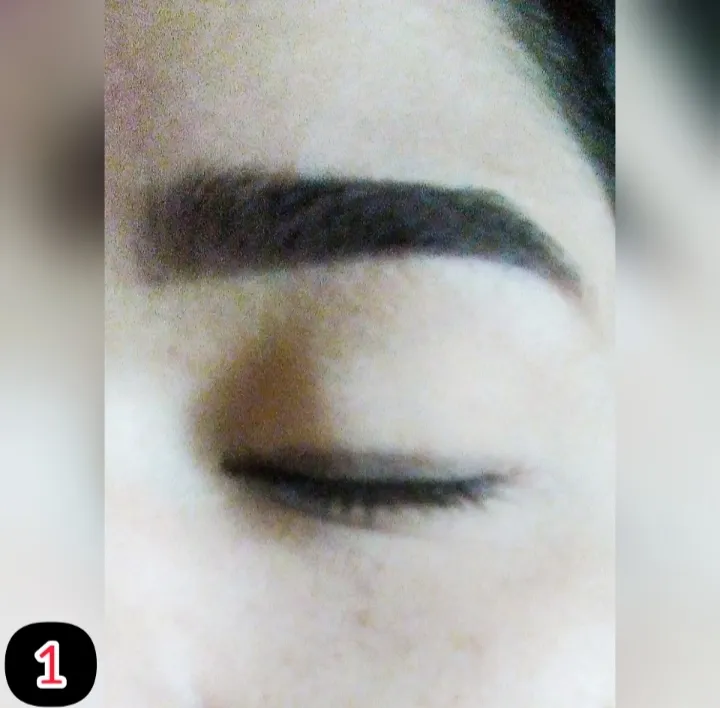
2.Realizamos con la misma sombra y pincel otra línea que va dese el limite lateral del parpado en dirección al punto final de la ceja, quedando una diagonal definida y corta
3.Difuminamos toda la sombra
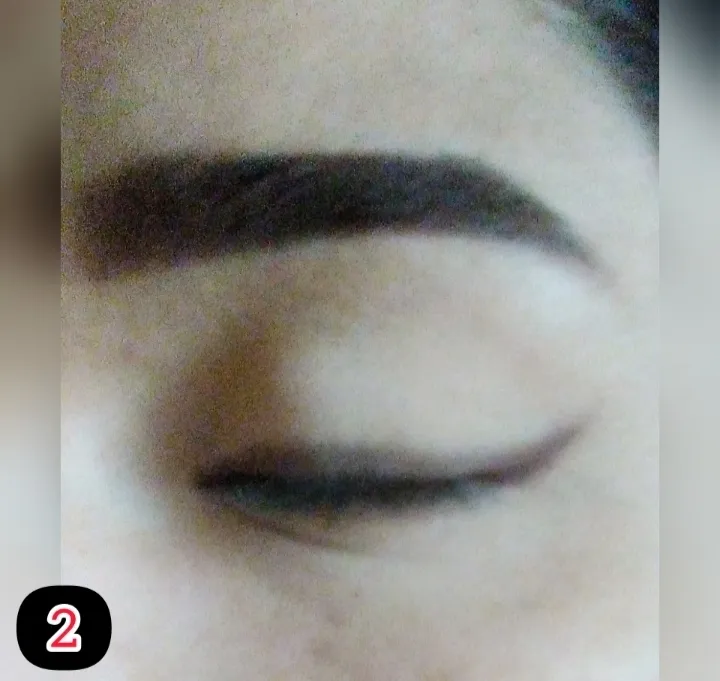
4.Con el delineador trazaremos una línea recta delgada desde el final de nuestro ojo hasta el punto final de la ceja nuevamente en diagonal sobre la sombra.
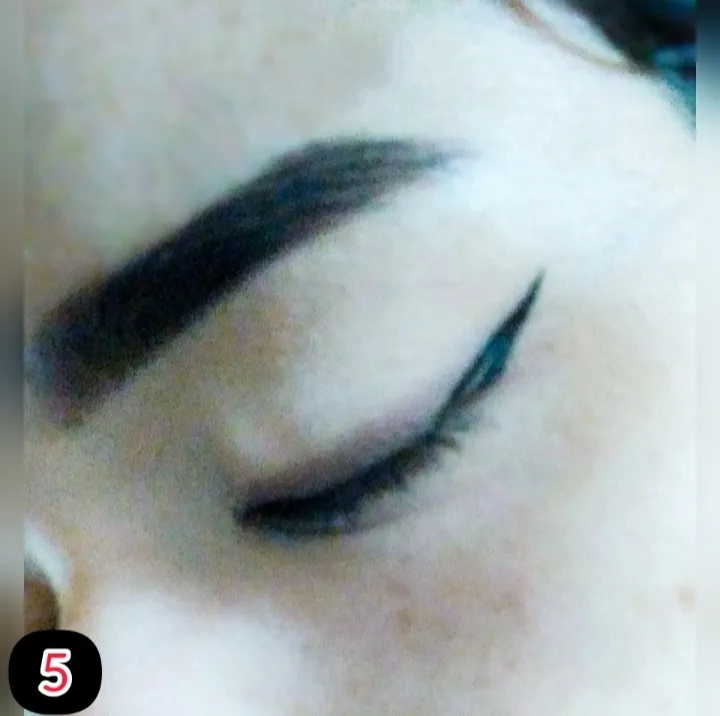
5.Trazaremos otra línea desde el final de la primera Lina con delineador hasta el parpado tocando las pestañas. (debe comenzar a marcar desde aproximadamente un milímetro por debajo de la punta para que no se pierda el fino del delineado)
6.Rellenamos el espacio entre ambas líneas

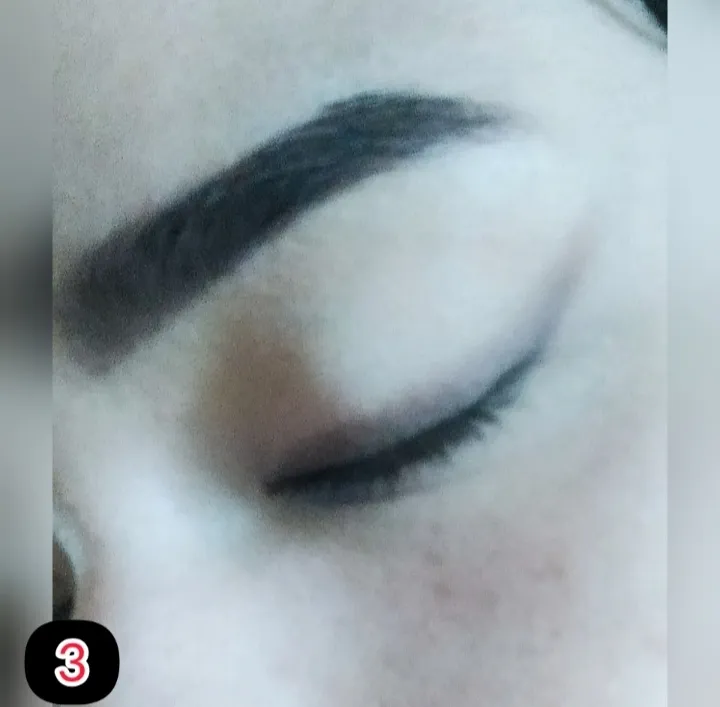
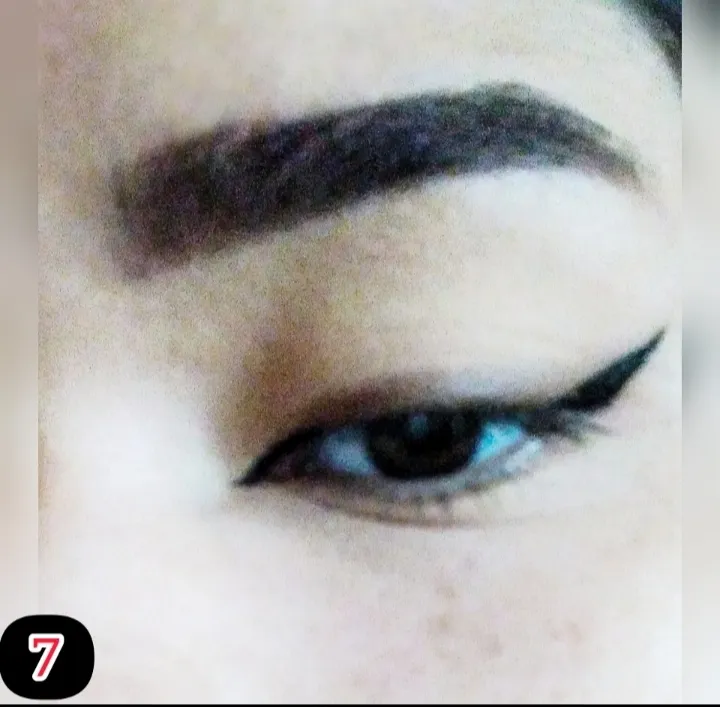
7.Sobre la piel que recubre el lagrimal haremos una línea delgada y muy muy pequeña para simular que el ojo es más grande
8.Sobre todo el borde del parpado delinearemos con un trazo muy delgado hasta llegar a la zona del lágrimas, por supuesto todo sobre la piel únicamente.

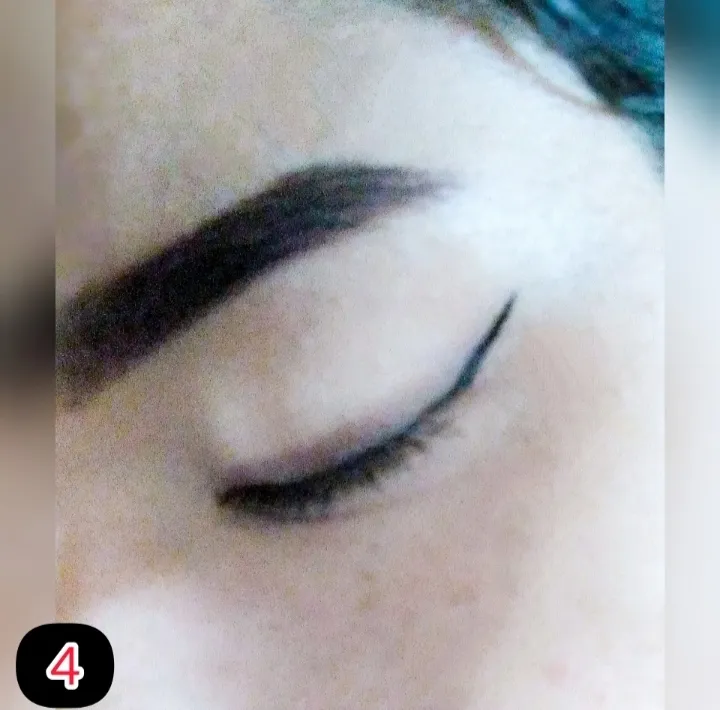
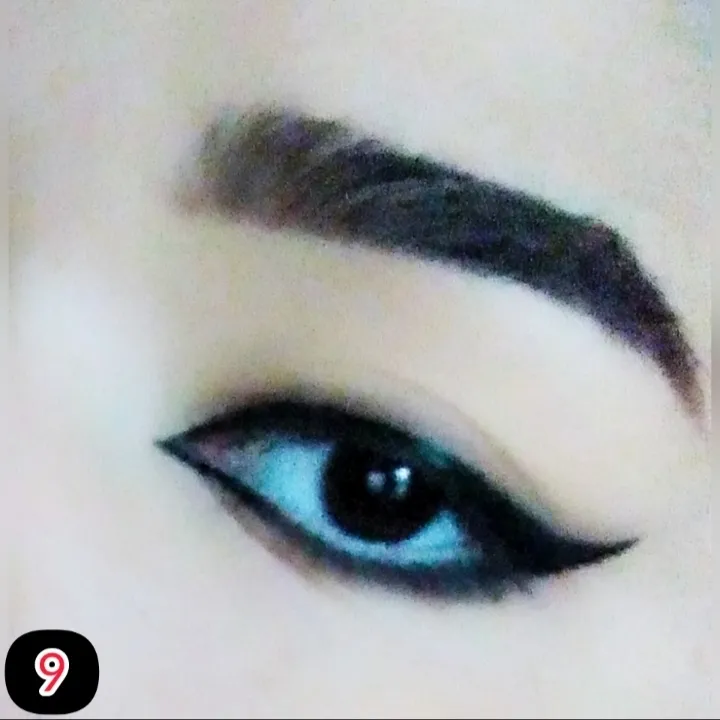
9.Una vez terminado el delineado en el parpado superior podemos delinear con un lápiz el borde del parpado interior si así lo prefiere
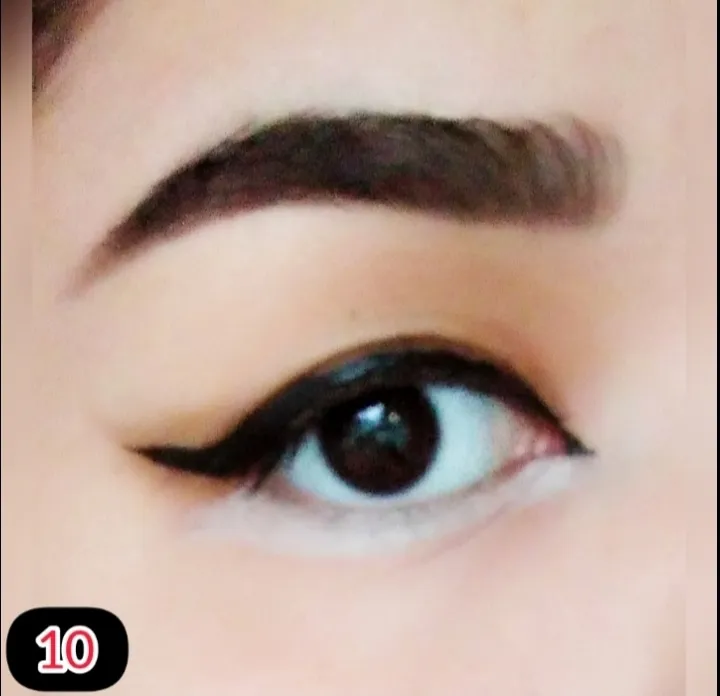
10.O podemos solo dejar el parpado inferior intacto aplicar alguna sombra o lápiz blanco que simulara una apertura de los ojos más amplia
NOTA: antes de delinear es recomendable aplicar a base y sellar con polvo toda zona de los parpados, en lo personal me gusta este tipo de delineados ya que podemos usarlo en un maquillaje sencillo y práctico para cualquier momento del día e incluso para un invento de noche. Si así lo prefieres puedes no aplicar la sombra antes del delineado evitar esos 3 primeros pasos.
Podrán ver algunas imágenes de todos los pasos correspondientes y por su puesto el resultado final tanto de día como de noche.
De corazón espero que les haya gustado este post, lo hice con mucho cariño y pronto compartiré con ustedes más tips que desde mi experiencia me ayudaron a facilitar y mejorar muchas cosas en el maquillaje.


Todas las fotos me pertenecen y fueron tomadas desde mi teléfono móvil Xiaomi Redmi 8. Texto en Español, traducido desde deepl
English
Greetings to all my fellow Hive. Today I bring you a new post that I know many women will love and it will make their lives easier.
I bring to you ...
10 STEPS TO MAKE AN EASY AND BEAUTIFUL MAKEUP.
- With a brown shadow we are going to outline the edge of the upper eyelid, giving a slightly thick line
2.We make another line with the same shadow and brush that goes from the lateral limit of the eyelid to the end point of the eyebrow, leaving a defined and short diagonal.
3.We blur all the shadow.
4.With the eyeliner we will draw a fine straight line from the end of our eye to the end point of the eyebrow again diagonally over the shadow.
5.We will draw another line from the end of the first line with eyeliner to the eyelid touching the eyelashes. (You should start marking from about a millimeter below the tip so that the fineness of the eyeliner is not lost)
6.We fill in the space between both lines.
7.On the skin that covers the lacrimal we will make a fine and very very small line to simulate that the eye is larger
8.Above all the edge of the eyelid we will delineate with a very fine line until we reach the area of tears, of course everything only on the skin.
9.Once the delineation on the upper eyelid is finished, we can outline the edge of the inner eyelid with a pencil if you prefer.
10.Or we can simply leave the lower eyelid intact or apply a shadow or a white pencil that simulates a wider eye opening
NOTE: before outlining it is advisable to apply a base and seal the entire area of the eyelids with powder, personally I like this type of eyeliner since we can use it in a simple and practical makeup for any time of the day and even for an invention of night. If you prefer, you can not apply the shadow before the outline, avoid those first 3 steps.
You will be able to see some images of all the corresponding steps and of course the final result both day and night.
I sincerely hope you liked this post, I did it with great affection and soon I will share with you more tips that from my experience helped me to facilitate and improve many things in makeup.
All the photos belong to me and were taken from my Xiaomi Redmi 8 mobile phone. Text in Spanish, translated from deepl.