
Plans change
Lately I've been killing spare time by restoring 'Matchbox' toy cars. (See my first post about them here). This article goes through the progress of this iconic Porsche 911 build, and other thoughts on this blog as I get going.
The plan was to build up a few experiments before posting about them. The end results turned out ok, and the more I manipulate them with photography, touch up in Adobe Photoshop [Ps], I am pleasantly surprised at the results. Needless to say, I ended up deciding that to just start posting the content for you. My skill and level of this hobby should evolve and improve as we go along the way. In other words hoping to create myself a virtuous loop - whilst I practice and improve in the hobby, I blog and hone my digital skills at the same time.
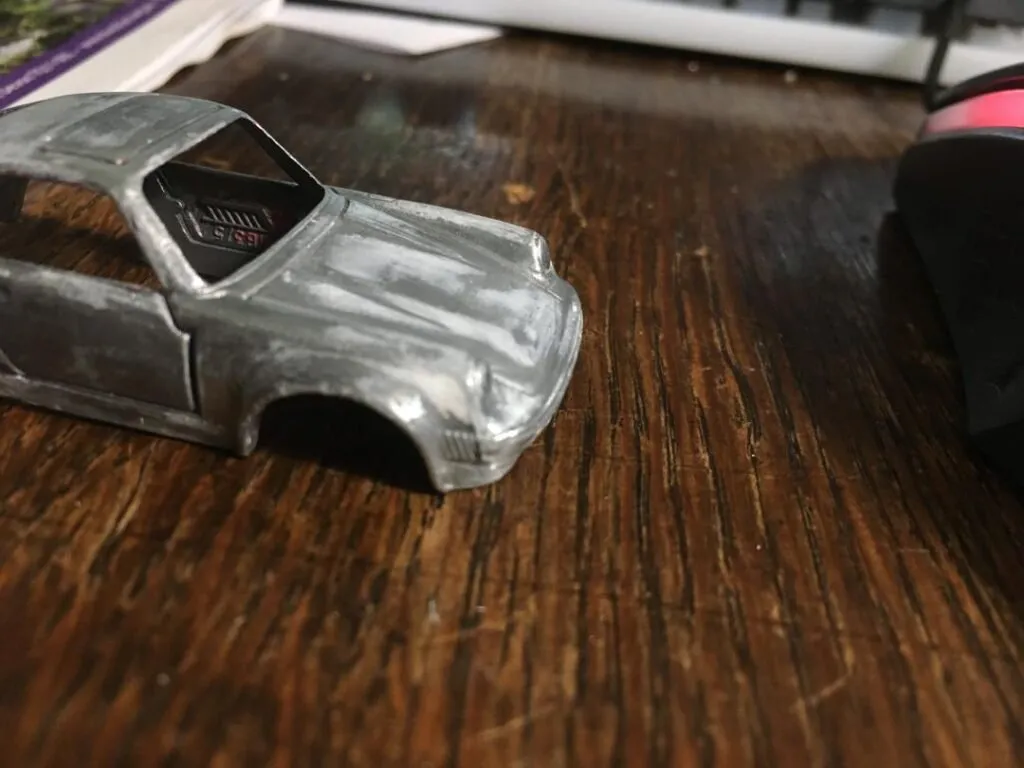
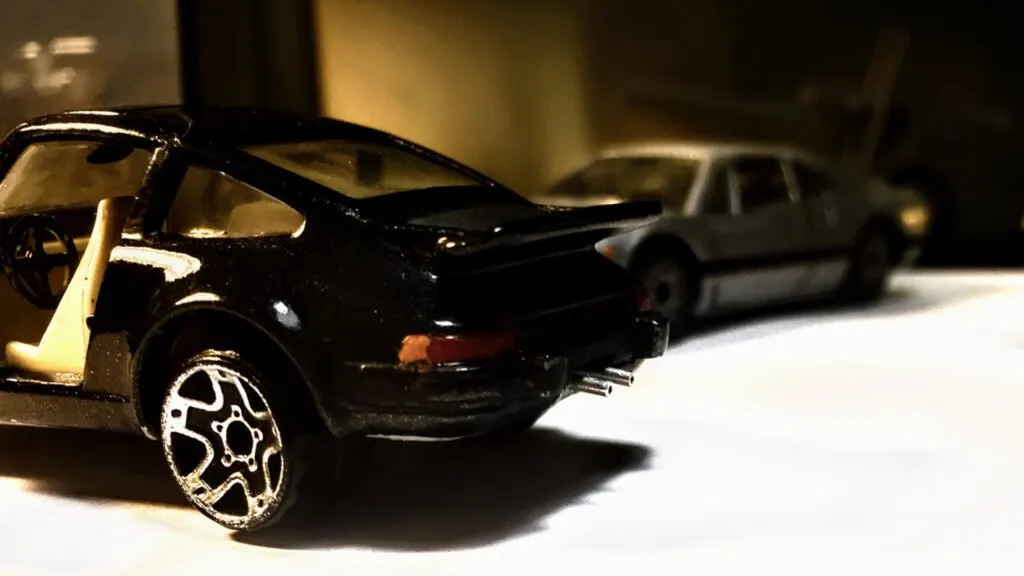
I'm quietly pleased then how these little Matchbox 1/64 scale Porsche 911 Turbo turned out. Let's go through some of the process in pictures. First, before shot with it's in-period German buddy, a BMW 2002 Turbo.

The Porsche's only 'before' pic (on the left). Post on the BMW coming soon.
On the right, the iconic BMW 2002 Turbo (in some strangely flared arches style). Porsche in it's original 'guards red' is the subject of this post. The 'Beemer' did also receive a strip down and refinish so I'll post another pic of it later. Note extensive paint chipping, or 'play worn condition' as they'd say in the die-cast collectors market.
Process in brief
The first step, (and I'll catch it all in future posts) is stripping the rivets on the base and separating all plastic parts from the main bodyshell. Ok, the quickest ever description of the entire process - here goes: Plastic parts including windows undergo as much of a cleanup as possible. Metal body is dunked in paint stripper and forgotten for a couple hours. Toothbrush sees to the cleanup, care taken with nitrile gloves and goggles (don't get paint stripper on your skin or have it flick from a toothbrush to your eye). Wash it all in the sink with cold water. Some wire wool and a point of sharp scalpels or tweezers can be used to gently flick up stubborn spots of paint remaining. Then it is prepped much like the real thing - fillers > sanding/leveling > primer > paint > clearcoat. Hours even days between each of those layers curing. After which, all the small details and polishing are done - the devil is in the detail, as these are by far the hardest parts to do. That's skipping over it very much. However as I said, all of these steps will be captured in detail over future projects!
Awaiting filler to harden before sanding it back. Some paint visible on interior, which I spotted later.
Above and below, using putty such as Milliput. It's smeared to fill all the tiny pits and scratches on the metal surface, plus correct any corroded spots. Later sanded smooth. Soon to try revell and tamiya products for this step as I think they'll be easier to work.
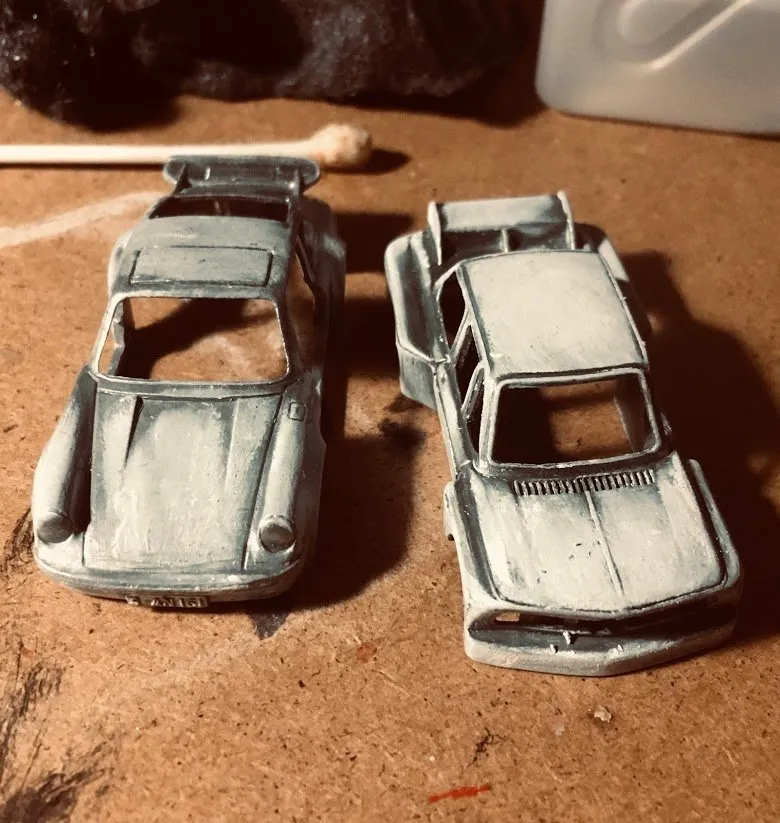
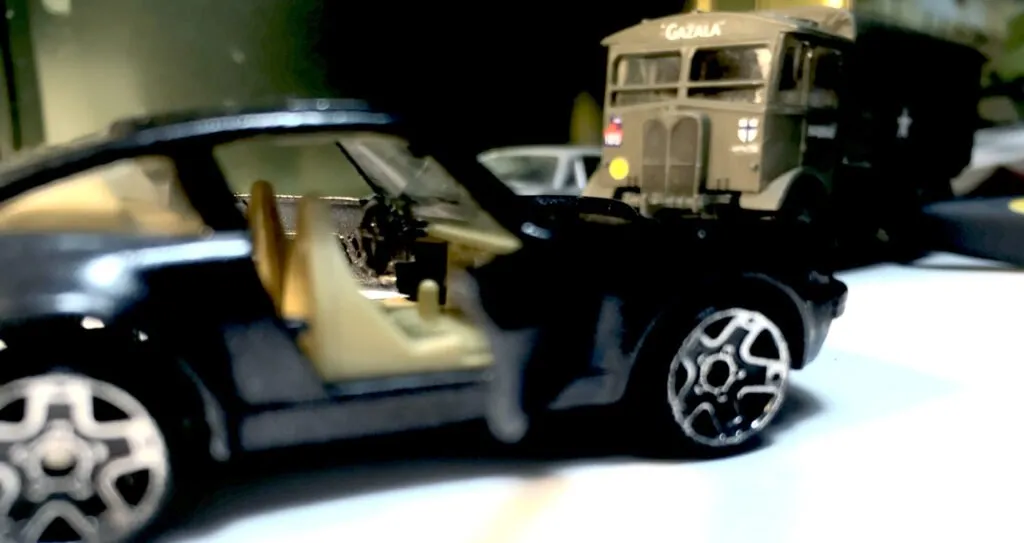
about the only other progress shot, alongside the BMW again which I'll feature another time.
Here's one I finished ...
Sorry for lack of continuity, rest of the pics are pretty much of the finished item. Future projects will have all the in-progress in-between shots :)
Wheels - Hot or Not?
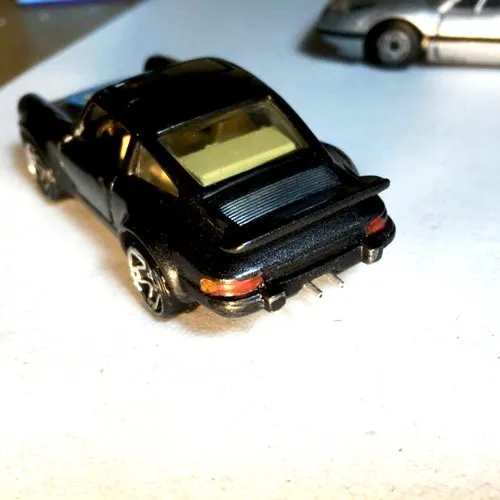
The wheels were a challenge. The originals didn't look good no matter what I did. First I did some shopping online, and nothing grabbed my interest, apart from one. There are Porsche 'Fuchs' 1/64 style wheels available online, 3D printed, which look amazing. However, A) expensive B) nicer than I can make these models yet C) Come in bare plastic,that looks tricky to paint. D) No tyres! So, actually they're a bit next level just for now. Workaround? Unbelievably simple, I had a box-load of die-cast cars in a job lot and went through them all. Any that had cool wheels or other parts are now my donor cars. The wheels for this Porsche came from a HotWheels police tow truck. Purists might call it sacrilege ... let me know what you think of them on the finished 911 Turbo below.
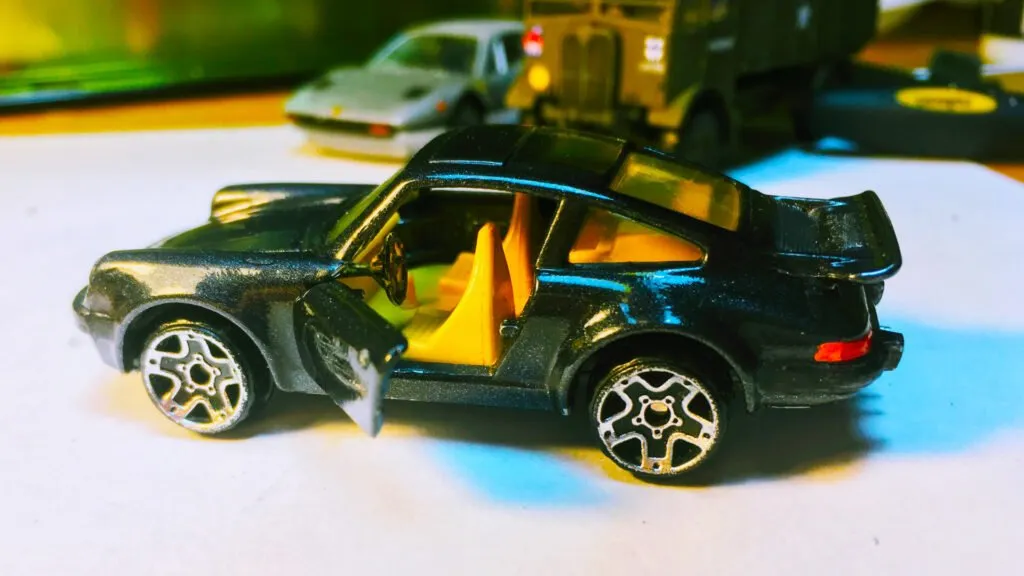
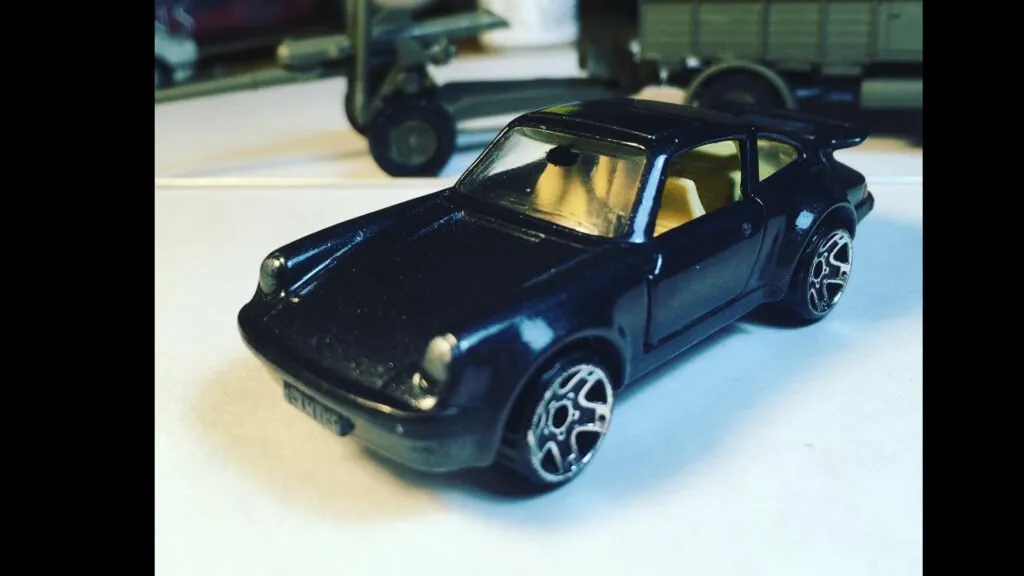
The finished Matchbox repaint with 'HotWheels' wheels. Couple more projects lurking in the background, an unexpectedly simple diorama effect.
The next steps for these little projects, is to get the tooling required so they have free-spinning wheels and are re-assembled with screws instead of superglue. Currently they're fine for dioramas and Instagram shots, next will be reconstructing items so they can whizz across floorboards, just like the originals.
Dry-brushed the headlights with silver, which gives a nice illusion.
Straight Piped
One elaboration is the exhaust tips which I made from some model-railway 1mm alloy tube material. There's a quick video of me making these to follow. Rear lights - It's a really tiny model IRL so tiny errors also look a lot more obvious in the pic below. Since tidied these up a bit more after spotting more errors in the photos that aren't so noticeable to naked eye!
the zIt's actually a lot smaller than it looks in the pictures
A peek inside
Some final thoughts - On taking up any hobby...
An airbrush is on my wish list for a long time. Probably the most expensive (with compressor + all the accessories) yet also important investment a scale model maker can make. Also a tool that can produce astonishingly beautiful results. So why I'm still holding out on it? Reason, first because there is no point in buying cheap or used on this item. Only a proper compressor, with tank, water trap, and gravity fed metal airbrush and all brand new. It's also non-essential, and much can be learned prior to getting one. Spraycans can also yield very ok results handled correctly. Mixing and blending acrylics and thinners for brush painting needs mastery, inclusive for later when we start airbrushing. Because of the feeling I can refine my basic model making skills a lot more by managing without one for as long as possible.
This leads to my hobby takeaway tip for today - Take time to MASTER the basics in learning any new skill or hobby. Only then will you have a chance of mastering the finer aspects. Patience is your friend!
The iconic shape and design of the 911 in 1/64 scale, to put on the man-cave shelf
Masters or gurus are ones that have done the very basics over and over to perfection - remember they also started as a beginner once. Practice, and patience, are big elements which money can't buy and only come from within you - for reaching your own 'zen mastery'.
Social media
Follow my Instagram rosswlkr where I'm now consolidating all my accounts to just this single personal one.
Join https://HIVE.blog and follow @newtonclassics - Bloggers, signup and share your own content there and grow by engaging an alternative audience and community. Own your content, and get rewarded for it in cryptocurrency.
Posted from my blog with HivePress : https://newtonclassics.co.uk/2020/11/07/matchbox-porsche-911turbo-1/