
Getting Started with Electron Pt 4: Finishing it Up
written on Busy (beta)
This is the 4th and final post in a tutorial series on building applications with Electron. In this post, we'll dig into the rest of the code to understand how the app comes together. We'll also cover some of the nuances of building an Electron application on macOS.
Part 3 Exercise Solution
Last time, we left off with a nice exercise to solidify the lessons in the post. For convenience, it was:
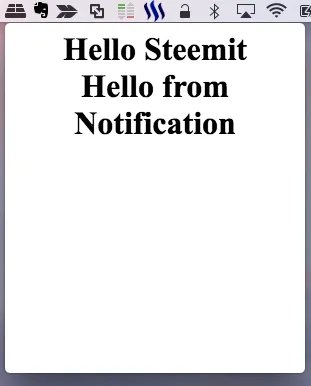
Using the concepts of IPC from this post, update the main and renderer processes so that clicking the notification appends the message "Hello from Notification" beneath the "Hello Steemit!" text.
So how do we do it? Here's the solution:
index.html
<html>
<head>
<title>Sample Menubar App</title>
<script charset="utf-8">require('./index')</script>
</head>
<body>
<div></div>
<center><h1 id="message">Hello Steemit</h1>center>
</body>
</html>
- Add an
id to the <h1> element so it's easy to query from Javascript
index.js
ipcRenderer.on('append-message', (evt, msg) => {
document.querySelector('#message').innerHTML += `${msg}`;
});
- Add an event handler for an event type,
append-message, that we'll call from main.js.
- The handler will receive an
evt (event) object with information about the event itself, and a msg parameter, which will be the message we pass in from main.js
- Query the DOM for the
id="message" we put onto the <h1> tag
- Append a template string of a
<div> with the content of the message to the element's innerHTML
- Note: it's not technically good practice to assign a
<div> to the children of a header tag, but for a simple solution, this will do.
main.js
let tray = undefined;
let window = undefined;
let webContents = undefined;
- In the header of main.js, define a new variable,
webContents in the global scope, and set it to undefined
app.on('ready', () => {
// ... code omitted ...
// Make the popup window for the menubar
window = new BrowserWindow({
width: 300,
height: 350,
show: false,
frame: false,
resizable: false,
})
// Tell the popup window to load our index.html file
window.loadURL(`file://${path.join(__dirname, 'index.html')}`)
// Get webContents of `window` to send messages
webContents = window.webContents;
// ... code omitted ...
- In the
app.on('ready') event handler, after creating the window, assign the webContents variable to window.webContents
ipcMain.on('notification-clicked', () => {
showWindow();
webContents.send('append-message', 'Hello from Notification');
})
- In the event handler for
notification-clicked, call webContents.send with the append-message event, and our message, Hello from Notification, as the second parameter.
And that's all there is to it. Let me know if you have questions in the comments.
Tooling Updates (yarn, npm, and electron-prebuilt)
As I mentioned in Part 3, it was shortly after I had published Part 2 that Facebook published yarn, an alternative to npm that enhances it. And I've since switched to yarn for all of my Node-based projects.
Why Yarn?
As noted on Facebook's page for Yarn, the tool was born out of frustration with some of the technical limitations and unoptimized aspects of npm when writing large, production-ready apps at scale. Particularly, they had trouble with the consistency, security, and performance of npm.
So they took the time to build a very reliable and efficient alternative that works seamlessly with npm. Some of the main benefits of using it are:
- Speed: it caches the packages you download from your projects, so you save a ton of time compared to the old
npm install when the packages you need are already on disk. It's technically even possible to do a full offline install of a package.json provided you already have all the packages from other projects.
- Security: unlike NPM, it verifies the checksums of the packages and won't install if something is off
- Parallel Downloads / Installs: Unlike npm, which works serially, yarn will download and install packages at the same time, also reducing the amount of time from the old
npm install.
How to start using yarn?
Starting to use yarn in a given project is platform-specific, so it's best that you go to the Installation page yourself: Installation | Yarn.
But if you're on macOS, like I am, your best bet is a simple install via Homebrew: with: brew install yarn.
Regardless of how you install, once you've done it, you should be able to verify via command-line:
$ yarn -V
0.21.3
And once you've done that, you can go ahead and install packages in any project via yarn simply by cding to the project's directory and typing:
yarn or yarn install
Similarly, adding packages is done via:
yarn add <package name> to add to dependenciesyarn add -D <package name> to add to devDependencies
Finally, removing packages is done via: yarn remove <package name>
So if you've used npm before, the interface is fairly similar and straight forward.
One of the nice perks is that, instead of typing npm run build:dev, you can now simply say yarn build:dev.
electron or electron-prebuilt?
In the time since writing Part 2 of this series, the package we have been using to build our Electron app, named electron-prebuilt, has been renamed to electron.
We'll need to update our package.json with the following commands:
yarn remove electron-prebuilt
yarn add electron
This has an additional necessary benefit of upgrading our Electron version.
One issue that I notice in a lot of the Electron apps that get open-sourced is that the authors will create a cool or unique app and then never keep up with the update cycle of Node and Electron. This is actually a somewhat risky thing to do, since Chromium (on which Electron is based) and Node are regularly patched for security vulnerabilities.
Digging into the Code
Now it's time to go through everything and start to understand how the code creates the app that we have. Let's start off easy with index.html.
index.html
<html>
<head>
<title>Sample Menubar App</title>
<script charset="utf-8">
require('./index')
</script>
</head>
<body>
<div></div>
<center>
<h1>Hello Steemit</h1>
</center>
</body>
</html>
This is a fairly straightforward file containing the user interface of our app as an HTML page. In the section you can see our "Hello Steemit" message. Of equal importance is the <script> tag in the page header. It contains an import statement to load our index.js file:
require('./index')
You'll notice that we omitted the '.js' from the statement. This is simply part of Node's syntax for importing JS files.This statement ensures that, when the page loads, our JS file containing any logic for the user interface has loaded.
index.js
const {ipcRenderer} = require('electron')
document.addEventListener('DOMContentLoaded', () => {
let n = new Notification('You did it!', {
body: 'Nice work.'
})
// Tell the notification to show the menubar popup window on click
n.onclick = () => { ipcRenderer.send('show-window') }
})
index.js contains the code for how the user interface in our app should behave. As we saw above, our user interface is simply an HTML file that Electron loads for us, and that HTML file then loads this file. In this particular case, the file contains logic to display the notification that we saw when launching the app in Part 2.
Now let's go through it line-by-line.
const {ipcRenderer} = require('electron')
Here, we are importing ipcRenderer from the electron package. As we covered in detail in Part 3, this is a function that allows us to communicate with the main process.
The first line, in ES2015 style, imports ipcRenderer from the electron package. For those of you coming from Python, this style is slightly similar to: from electron import ipcRenderer. As mentioned in Part 3, this is in the renderer process, which is why we're importing ipcRenderer from Electron. ipcRenderer will allow us to communicate with the main process from within the page.
As a brief refresher, here's the sequence of events for how our app launches:
- Electron reads our package.json file and knows to create our main process from the code in main.js
- The code in main.js creates a new
BrowserWindow, which loads the contents of our index.html file
- Loading the index.html file creates the renderer process for that
BrowserWindow
- index.html loads our index.js file, which is the Javascript code for our renderer process, and is no different from Javascript as it would run in a webpage
- index.js communicates back to the main process via
ipcRenderer
Hopefully that's making a lot of sense now after the last post and this brief refresher. If it still isn't, post a comment and we'll sort it out. As you might know from Part 1, I used to be a tutor.
main.js
Finally, we come to main.js - the entry point for our app and how everything gets started.
Imports
const {app, BrowserWindow, ipcMain, Tray, nativeImage} = require('electron')
const path = require('path')
In the first two lines, we're taking care of imports. As you can see, we import several things from the electron package. Here's how we use them:
app is used to respond to events from Electron about our app. We can write event handlers for many events, such as when the app has loaded, and when the app is about to close.BrowserWindow is the driving component of the renderer process, and our UI. We use BrowserWindow to create a new window on the user's desktop, loaded with a webpage of our choice. We can create multiple windows simultaneously, if we'd like.ipcMain, as we covered in the previous post, is how we can receive events from the renderer processTray is used to create the menubar aspect of our application - the interactive icon that appears in the menubar of the user's desktopnativeImage is used for loading image data and getting the user's operating system to display the image in some way. In our case, we use it to tell the operating system to put the Steemit logo as the icon in the menubar.
app.on('ready')
let tray = undefined;
let window = undefined;
After getting our imports taken care of, we define 2 global variables: tray and window.
Note: window technically isn't the best name in this context, since, in the renderer process, it refers to the browser's window object.
These are two variables that we want to be able to access from all of our functions in the main file. Now, I have to admit, over a year after throwing this sample app together, this is not how I would structure things today, but for the purposes of a simple tutorial, it will get things done.
// This method is called once Electron is ready to run our code
// It is effectively the main method of our Electron app
app.on('ready', () => {
After defining those variables, we get into the ready method of our app. This is the callback that Electron will invoke when it has finished all of its setup and is ready to run our code.
// Setup the menubar with an icon
let icon = nativeImage.createFromDataURL(base64Icon)
tray = new Tray(icon)
The first thing we do once the app is ready is to instantiate the tray. As we saw above, we already defined tray as a global variable, and so once Electron tells us everything is setup, it's safe to actually create the tray.
Notice that we're also creating the icon for the tray, and the content of the icon is base64Icon, which is a base64 string defined at the bottom of the file. As you might have guessed, it's the Steemit logo converted to base64.
As an aside, I think it's pretty cool that it only takes two lines inside of this method to put a tray icon in on the user's desktop.
// Add a click handler so that when the user clicks on the menubar icon, it shows
// our popup window
tray.on('click', function(event) {
toggleWindow()
// Show devtools when command clicked
if (window.isVisible() && process.defaultApp && event.metaKey) {
window.openDevTools({mode: 'detach'})
}
})
Now that we've made the tray, we need to define its behavior. We create a click handler that tells Electron to run our toggleWindow function when the user clicks on the tray icon. We also have some code to open Chrome's developer tools for debugging under special circumstances.
// Make the popup window for the menubar
window = new BrowserWindow({
width: 300,
height: 350,
show: false,
frame: false,
resizable: false,
})
Now it's time to make the popup window for the tray icon in the menubar. As you can see, it's a pretty straightforward constructor that simply accepts an object with configuration like width, height, whether or not to draw a frame, whether or not to show it on load, etc.
You can read more about the interface for creating a BrowserWindow in Electron's docs: Electron: BrowserWindow.
// Tell the popup window to load our index.html file
window.loadURL(`file://${path.join(__dirname, 'index.html')}`)
Next up is where we start to bring it all together. We tell the window object we just created to now load our index.html file into the window.
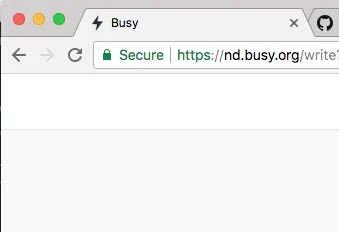
There's something interesting to note here - you can load any URL you want in there. So an Electron app could literally just be a wrapper on a website, if you'd like.
And you likely won't be surprised, but, there's an app for that (TM). Someone made a command line tool called nativefier, where you plug in a URL and get
a shiny new Electron app wrapping that website.
window.on('blur', () => {
if(!window.webContents.isDevToolsOpened()) {
window.hide()
}
})
The last thing we do in our app's ready handler is to define the onblur behavior for the window. Yes, with Electron, we literally have to define all of the behavior that we take for granted in native apps. Typically, you expect when you open a popup from the menubar, it will disappear when you click away from it. But we even have to take care of that part, or it will just stay open forever.
In a way, it's nice to have the flexibility to implement custom behavior, but I wouldn't mind some defaults here and there.
const toggleWindow = () => {
if (window.isVisible()) {
window.hide()
} else {
showWindow()
}
}
Next up, we define the toggleWindow function that we saw in our app's ready handler. It's incredibly simple logic: if the window is showing, hide it; if it's not showing, show it.
However, as you're about to see the logic of showing the menubar popup is a bit more complicated than just "show it".
const showWindow = () => {
const trayPos = tray.getBounds()
const windowPos = window.getBounds()
let x, y = 0
if (process.platform == 'darwin') {
x = Math.round(trayPos.x + (trayPos.width / 2) - (windowPos.width / 2))
y = Math.round(trayPos.y + trayPos.height)
} else {
x = Math.round(trayPos.x + (trayPos.width / 2) - (windowPos.width / 2))
y = Math.round(trayPos.y + trayPos.height * 10)
}
window.setPosition(x, y, false)
window.show()
window.focus()
}
So, okay, first we have to get the position of the tray. Why? Because we want the popup window to appear centered under our icon in the tray. And we don't generally have control over the order that our tray icon gets placed in the menubar - the OS handles that, and it's pretty much based on who loaded first.
We do this via a function on the tray called getBounds, which returns an object with the following shape:
{x, y, width, height}
So now we know where on the screen the tray icon is. But we did say we want to center the window, so in order to do that, we have to know the bounds of the window as well.
Once we have that, there's yet another degree of complexity. Because Electron apps are versatile enough to run on macOS, Windows, and Linux, we need to consider how things behave on the different operating systems.
For example, as you may know, Windows doesn't have the menubar at the top of the screen for its tray icons - it has the taskbar in the start menu, which the user can drag to the side of the screen, or the top, or leave it in its default position on the bottom. Because this behavior is more complicated, we don't get too fancy with the logic for Windows, and in fact it may not even render correctly in some cases at this point.
We can detect if we're on macOS by checking the process.platform property. This returns darwin if we're on macOS.
So the formula, as you saw above, is to take the x position of the tray icon. Then add half of its width (the center of it), and subtract half of the width of the window.
And then, for the y coordinate of the window, we simply put it at the tray icon's y coordinate plus the tray icon's height, so the window is positioned directly below the tray icon.
Now, for Windows (and Linux as well), I mentioned that we're not too concerned whether or not this renders perfectly at the moment. We use the same logic to compute the x-coordinate, but the y-coordinate we simply ballpark as wanting it to render some place above the start menu on Windows.
Note that this likely won't look so nice on Ubuntu, for example. If you're on one of these operating systems, treat it as an additional exercise to figure out how to make it look nice on your OS, and I'd love to see what you come up with in the comments.
app.on('window-all-closed', () => {
// On macOS it is common for applications and their menu bar
// to stay active until the user quits explicitly with Cmd + Q
if (process.platform !== 'darwin') {
app.quit()
}
})
Finally, we implement the logic for when our app closes. Notice how, just like how we had to implement the default behavior of hiding the popup menu, we have to actually tell our app when to quit. In this case, the special event handler we're looking for is window-all-closed, indicating that none of the BrowserWindows created by the application are open anymore.
The only additional logic we need is to handle macOS, and, as the comment mentions, we need it to handle the specifics of how the UX (User Experience) works on macOS.
On Windows, when you click the X in the upper-righthand corner of the window, it typically means that you want to completely exit the application.
On macOS, it's a little more nuanced. It's more like... you maybe want to close out of your existing work (i.e. in Chrome, close all tabs), but the application can keep running in the background. Or with Slack, I want to hide the window from the screen, but if I get a message I can open the app back up and it's still running - there's no reconnecting or anything.
You can tell that an app is still running when there is a dot underneath it in the dock on macOS:

If you want to fully quit an app on macOS, you can press Cmd + Q while the app is open.
So if we made an Electron application that had a BrowserWindow with a frame, it would contain the red button in the upper-lefthand corner indicating to close the application:
And that's what this special logic is for. In the case that we don't want our Electron app to completely exit when the user clicks that button, we add the exception. In this case, the user will typically know to press Cmd + Q to do a full quit.
In our case, though, we only have a tray icon. And even if we didn't have this special logic for macOS, the application would stay open even when the popup window closes. This is because menubar applications are generally helper applications that are meant to be there all the time. Evernote and Dropbox are both applications that have a helper application in the menubar.
// Tray Icon as Base64 so tutorial has less overhead
let base64Icon = `data:image/png;base64,iVBORw...
At the very bottom of the file, we have a rather long string containing the base64-formatted version of the Steemit logo to display in our tray. As I mentioned in the comment, this is just to make the tutorial have less overhead - i.e. you don't have to clone the repo, you could just copy the code directly from these articles.
TrayIcon Naming Convention
Something more nuanced that I think separates a good Electron app from a really great Electron application is proper handling of the tray icon. Electron looks for a special file naming convention on the icon files you provide it.
This provides two aspects of functionality:
- Proper rendering of retina icons
- Proper rendering in macOS dark mode
Retina Icons
For retina icons, you'll need to have several files in the same directory with the same prefix of their filename, but with different resolutions. Let's say your icon file was called IconTemplate.png, and had a size of 21x21 pixels. If you wanted to support retina displays at @2x and @3x (i.e. the newer MacBooks, Thunderbolt Monitors, etc. with clearer resolution), you would have the following files:
- IconTemplate.png (21x21)
- IconTemplate@2x.png (42x42)
- IconTemplate@3x.png (63x63)
But the only file you pass to the Tray is IconTemplate.png. It knows to look for the others and include them if they exist.
With this setup, Electron will determine what kind of display the user has and render the correct icon. It might seem like a minor difference, but if you publish your app without it, and someone uses your application who has a nicer display, your icon will look incredibly blurry and unpleasant to them.
Dark Mode
The second aspect has to do with dark mode. macOS has a UI feature that makes the OS interface darker.
Here's a preview of how it looks
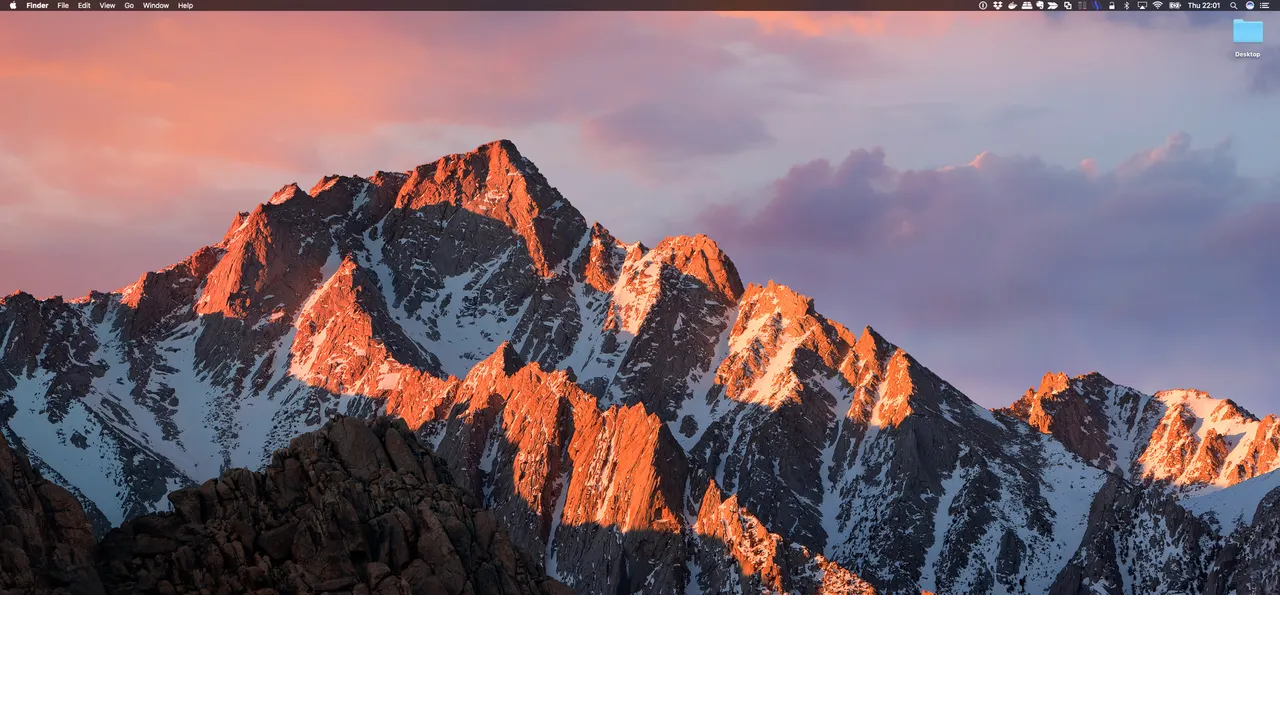
Notice that the menubar and dock are darker now. More importantly, if we look close, we'll see that all of the icons in the menubar naturally inverted their colors:
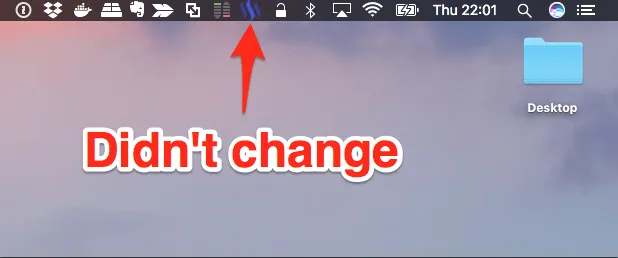
Except if we look at our tray icon, it didn't change. This is of course because we haven't followed the file naming convention, and have simply passed in base64 data.
As you can see, our icon doesn't look so great up there, and you can barely see it. This is why it's the nuances that make an Electron app great. You have to pay attention to the details, even if they're for features you don't use. I know plenty of people that primarily use macOS's dark mode feature.
And that's why it's typically a good idea to spend a lot of time getting the aspects of one operating system solid for your Electron app. This tutorial focuses primarily on macOS, and so that's why we're discussing these nuances. Additionally, I don't know if there are quite as many nuances on Windows. Electron seems to have the most support for macOS-specific features, like rendering at different layers of the screen, so that you could make a screensaver application; or an application that changes your background every few minutes, sourcing the images from an API.
You can read more about the icon formats here: Electron | nativeImage
The screen module
I said in Part 3 that I would mention the screen module from Electron. It actually isn't necessary for this tutorial, but the reason I'm familiar with it has to do with the nuances of macOS that I was discussing above.
I made a simple Electron app at one point, and I noticed an issue when working with multiple displays. In my case, I have a larger monitor hooked up to my MacBook. I found that, if I launched the app on my MacBook display (which has a smaller size than the monitor), some weird behavior would occur when opening the menubar application on the monitor:

Part of this stems from the logic we covered above of determining where to draw the popup window. Electron thinks that the x and y coordinates we're referring to are still on the screen that we launched the application from, so when it tries to draw it at certain coordinates, things can get messed up.
To solve this issue, what you have to do is make use of the screen module:
let display = electronScreen.getDisplayNearestPoint({
x: trayBounds.x,
y: trayBounds.y
});
This tells Electron to translate the coordinates we're giving it - i.e. where the tray icon is drawn, onto the nearest active display. So if I'm working in an application on my monitor versus on my MacBook display, the active display is my monitor. From there, it handles the logic correctly and we can tell Electron how to make sure it gets drawn in the right position.
Exercises for the Reader
Just like last time, let's apply what we learned in the post with some exercises. In this post, we mostly went into detail on how all of the code functions together, so you should have a pretty good idea of how things work now.
These exercises center around expanding how the app behaves. If you master these exercises, you could build cool functionality into many different kinds of apps, like a Pomodoro productivity app, or an app that sends you Reminders; or even just an app that periodically checks an API and sends you a notification when something interesting happens.
And since this is actually the last post in the series, I likely won't be making another post with the solutions. However, feel free to ask me for them in the comments if you'd like.
Here you go:
- Make the notification display one minute after the app loads
- Once you have 1. working, make the notification display at a random time after loading the app between zero and one minute. i.e. on any given launch of the app, the notification will display at a random time in this range. It could display immediately, or at 45 seconds, or at exactly 1 minute, for example.
- Make the app display a notification once every 5 minutes.
As a final reminder, keep in mind that what we've made is not a complete app, but is definitely usable on your local machine. We did not cover the build and release process, or a few other things necessary to actually releasing the app. It is an additional exercise to you to learn about those things, so reach out if you have questions.
The End of the End
That's all there is to it, folks. I hope this has been an informative tutorial series for you. I'm happy to have helped you all in better understanding this framework, and I wish you the best in creating some very cool and unique apps.
And as a nice way of finishing things off, take the time to browse through all of the cool Electron apps other people have made and (mostly) open-sourced:
Apps Built on Electron
(423 apps, as of this writing)
And if you'd like to see more of these posts on Electron, or on other topics, please let me know what you'd be interested in learning more about.
As always, I'm available in the comments. Don't hesitate to reach out.
Farewell!


Hey, I'm Ryan.
I'm a software engineer living in the Bay Area who was introduced to Steemit about a year ago and recently started posting again. You can learn more about me in my intro post.
References
Research