Hey guys It's Vaan here. Welcome back to my blog and I'm going to be showing you how I draw portraits using charcoal. First, you're going to need a pencil of your choice, doesn't matter if it's regular mechanical just whatever you want to use. You're going to need an eraser. I'm using an eraser pencil but just a regular eraser will be fine. I'm going to be doing blending technique so I'm going to need a blender sticks if you don't have it you can use your fingers and last but not least a black charcoal pencil if you don't have access to charcoal, you are more than welcome to use a black colored pencil.
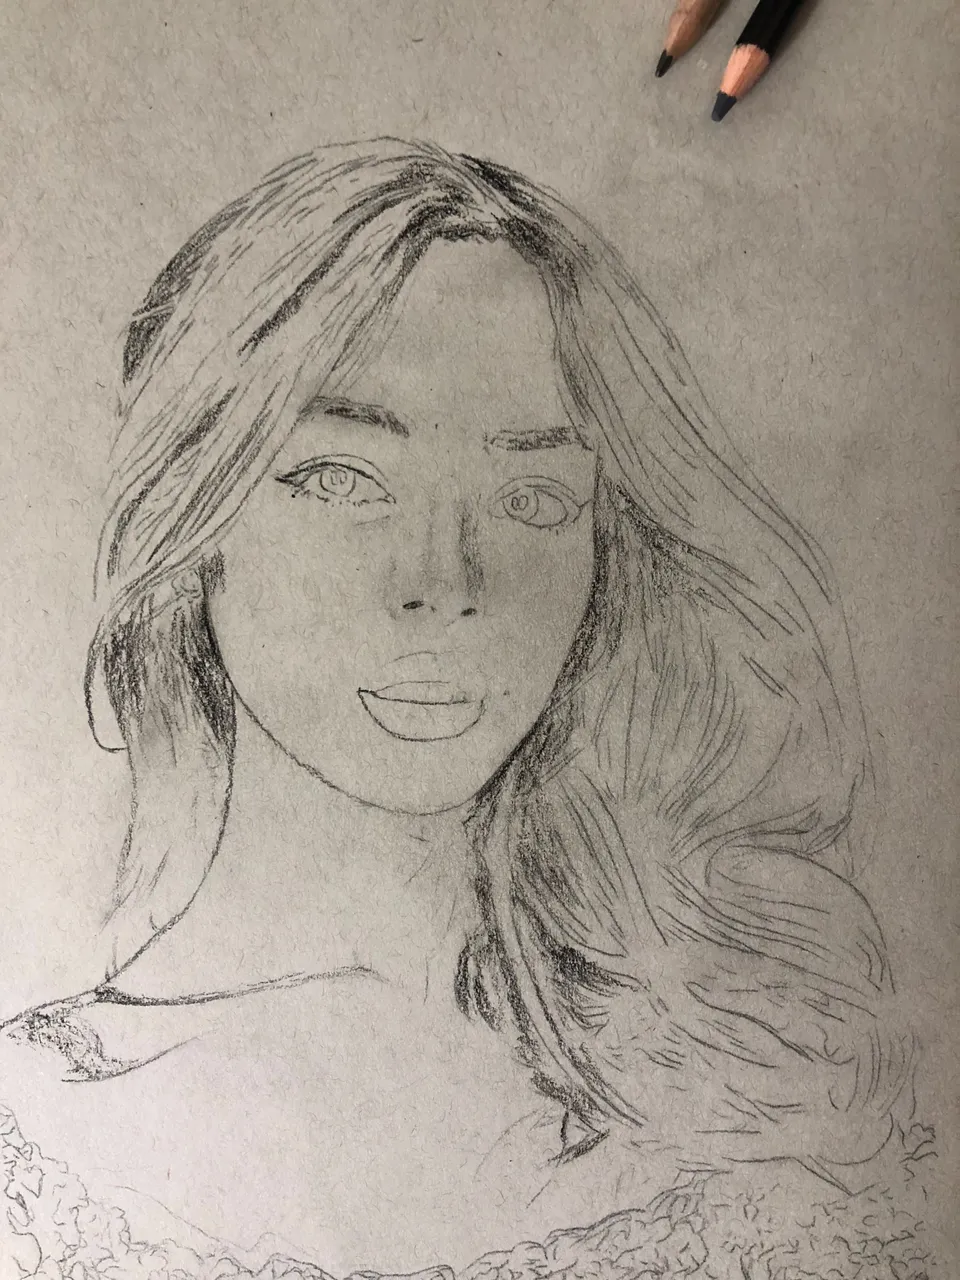
Step number one for me is always creating the outline. When drawing portraits I always start off with the head shape first and there's no specific reason as to why I start with the head. It's just kind of comfortable for me so if there's a different starting point that you feel comfortable with like starting from the eyes or the nose or wherever go ahead and do that. I have created the outline and it doesn't look like much now but once you start adding in shadows and highlights and everything like that it'll get much better looking. Next is creating your base layer shadows so since nothing serious has gone on pretty much everything that we've created at this point can be reversed or erased or anything like that this is the perfect opportunity.
I'm adding in the first layer of shadows which will be the face shadows and like most realistic drawing techniques I'm going to start off with light shadows and build them up by layer until finally by the time I'm done they're going to be pure black. Which is why I use a charcoal pencil because it gives a really nice deep shadow. It's super important to get your baseline shadows done because they do require a lot of blending and blending tends to mess up detail so it's better to do it now and not mess up anything then do it later. Next, we got the contour shadows, start building up what will soon become your darkest shadows. I am filling in the eyebrows which are going to be pure black and I'm filling in the nostrils which are pure black and even the lips.
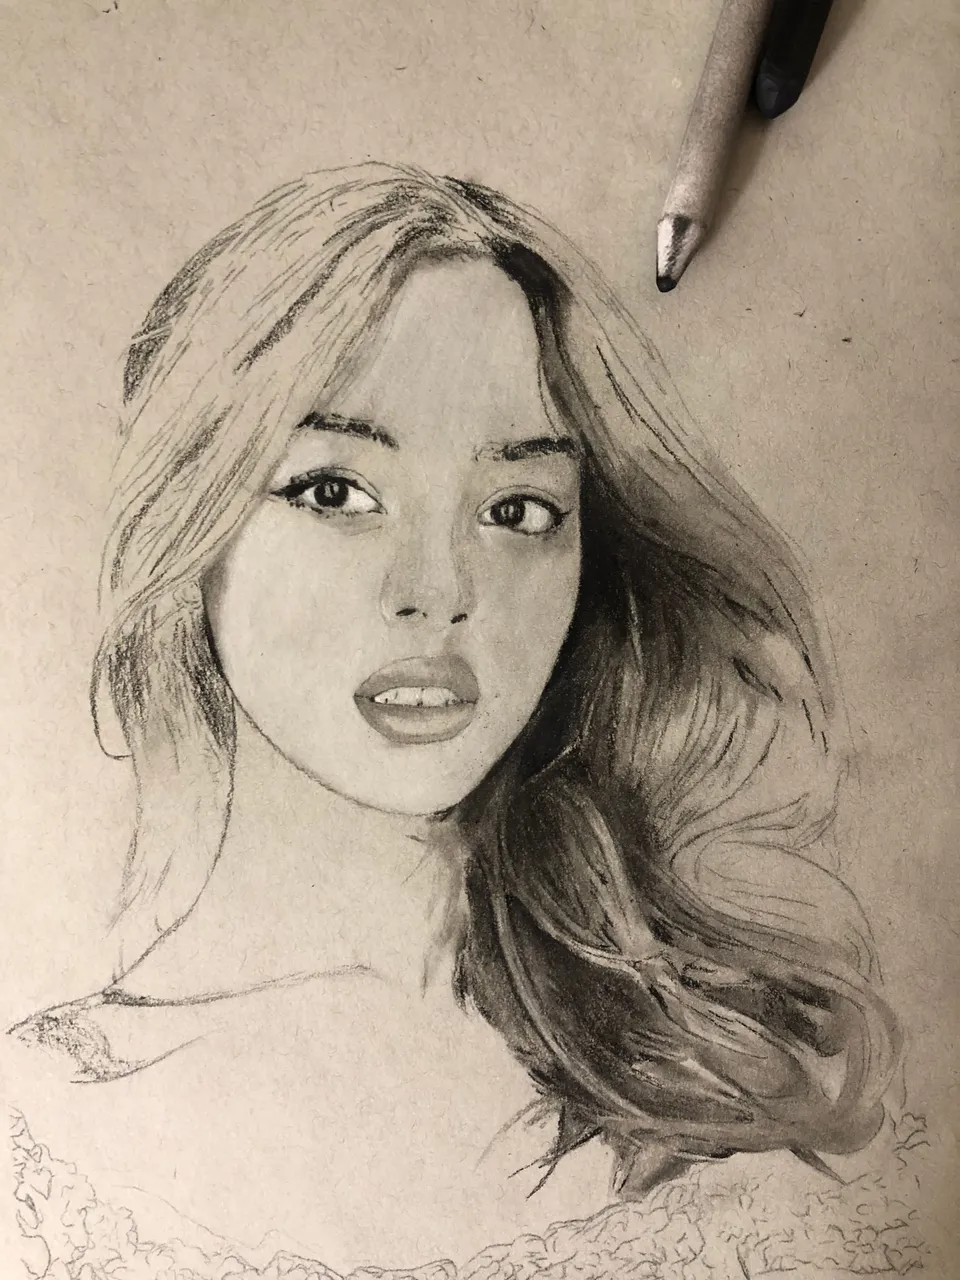
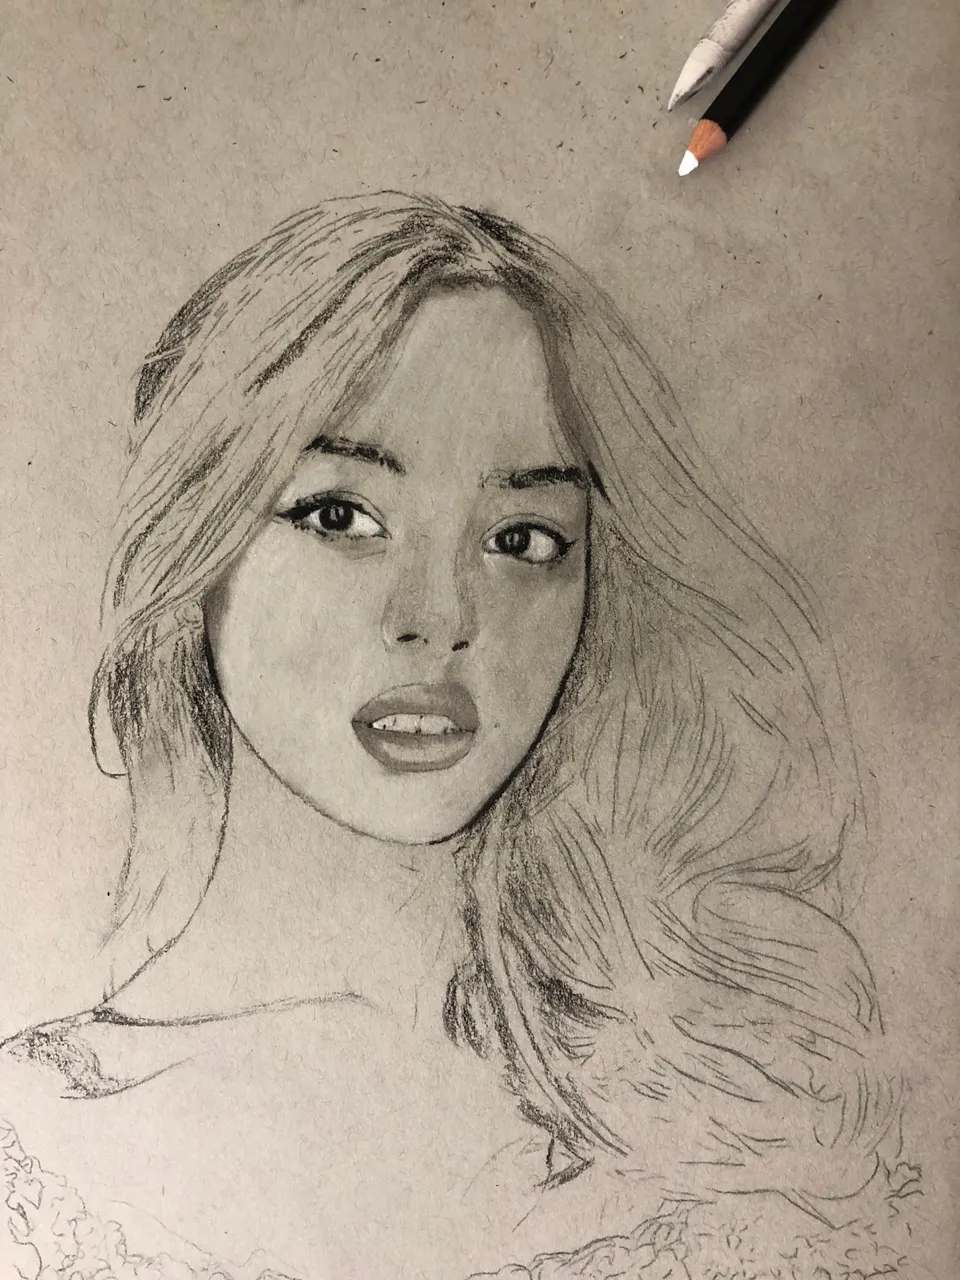
I'm going to start working on the hair and add a pure layer of charcoal to the hair. I like to fill up a big area with the charcoal and from there I like to smear it down with a blending stick that way it locks into place and spreads that pigment around. Next, I have to blend in the hairline and then add a few little details. Once I have done with that I'm going to start adding highlights to the hair.
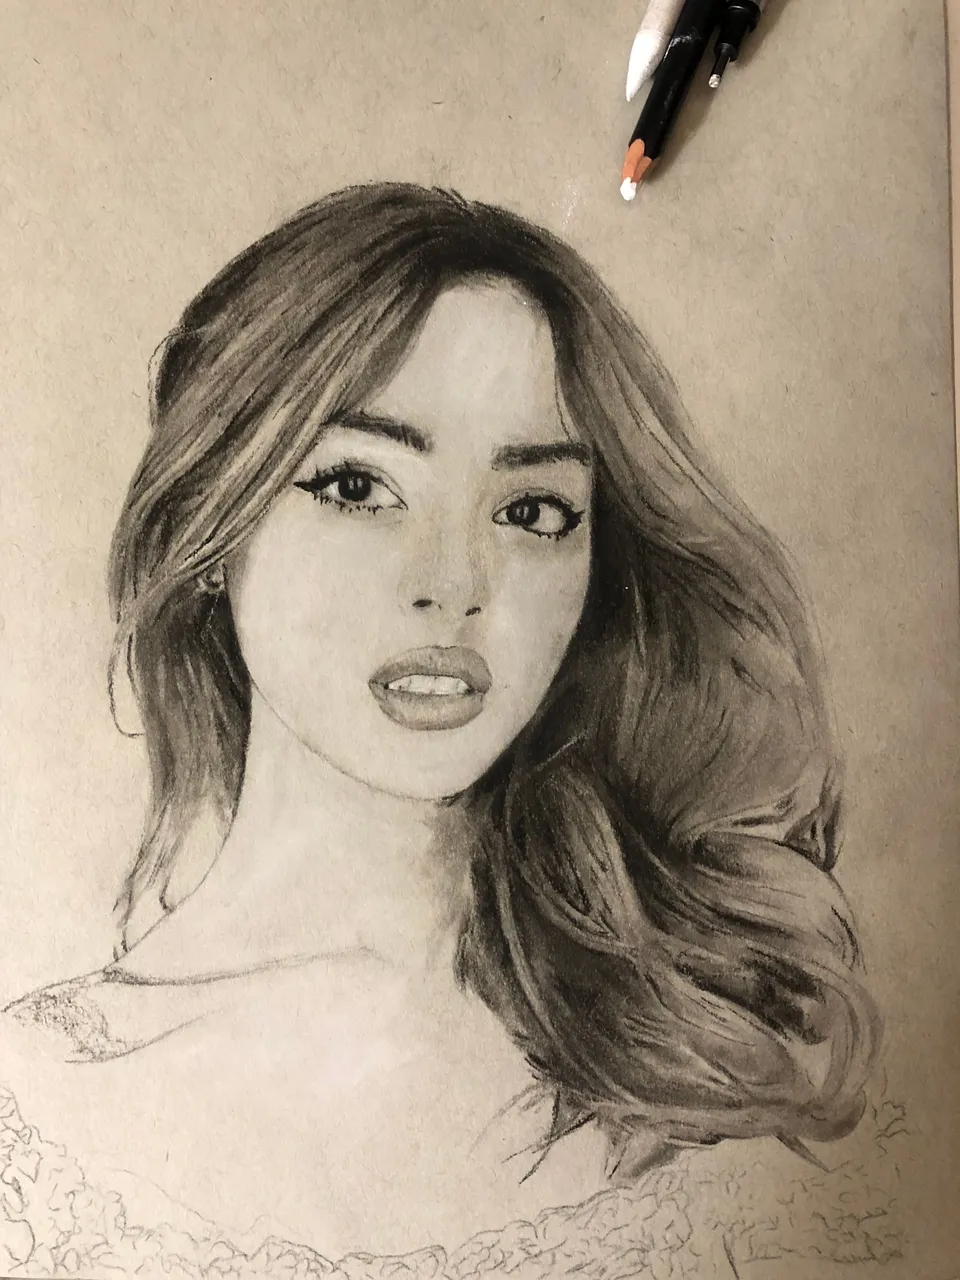
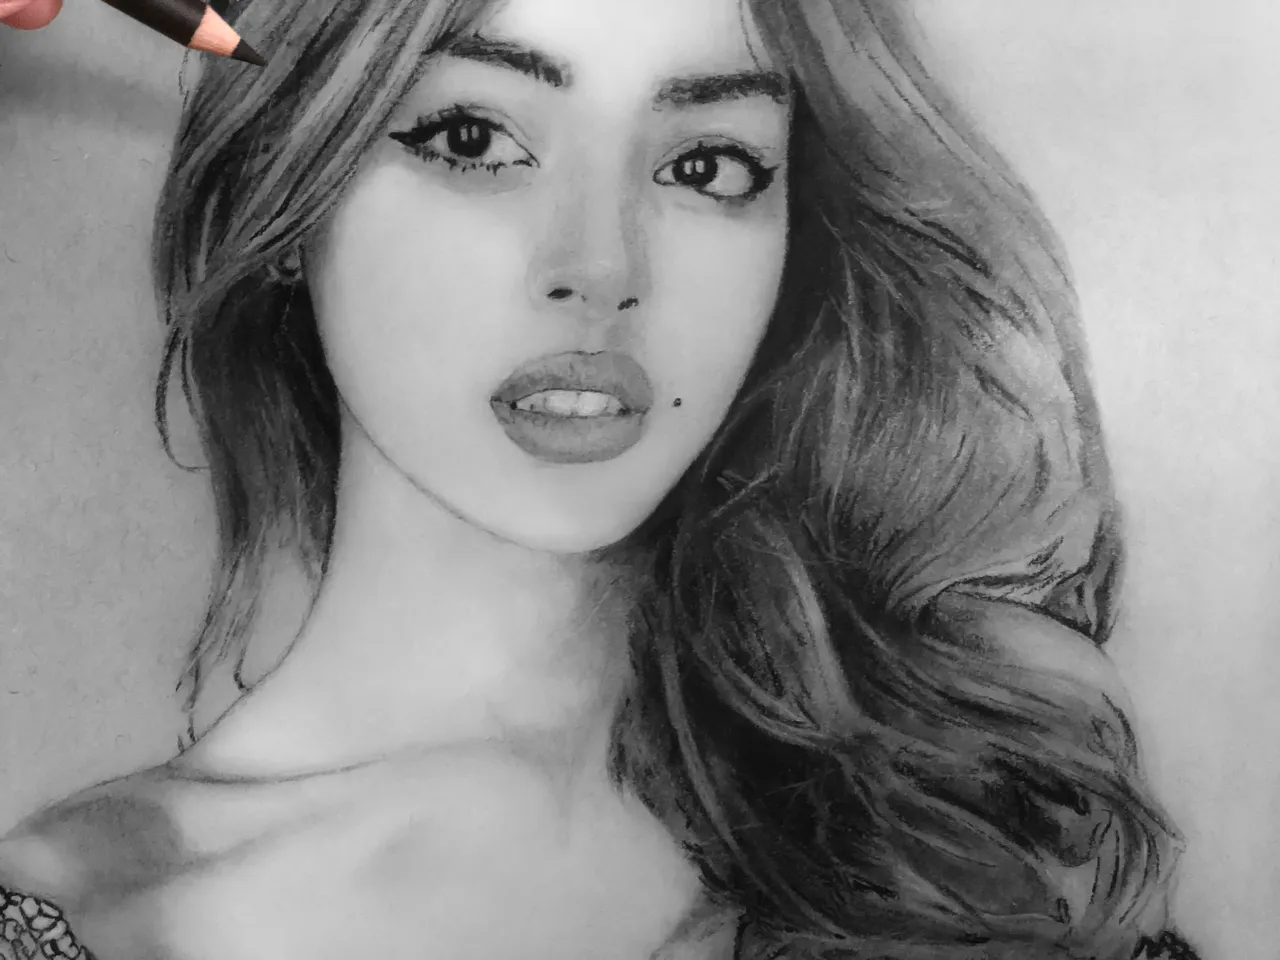
Next, I'm going to use a white charcoal pencil. It's important to make her skin really smooth and the best way I have found to give it a really soft smooth look is to use a blending stick.
The next step is drawing her shirt. I'm starting on the shirt and drawing her shirt was a really simple technique and basically, I'm just drawing the pattern and blending until I get the shades that I like.

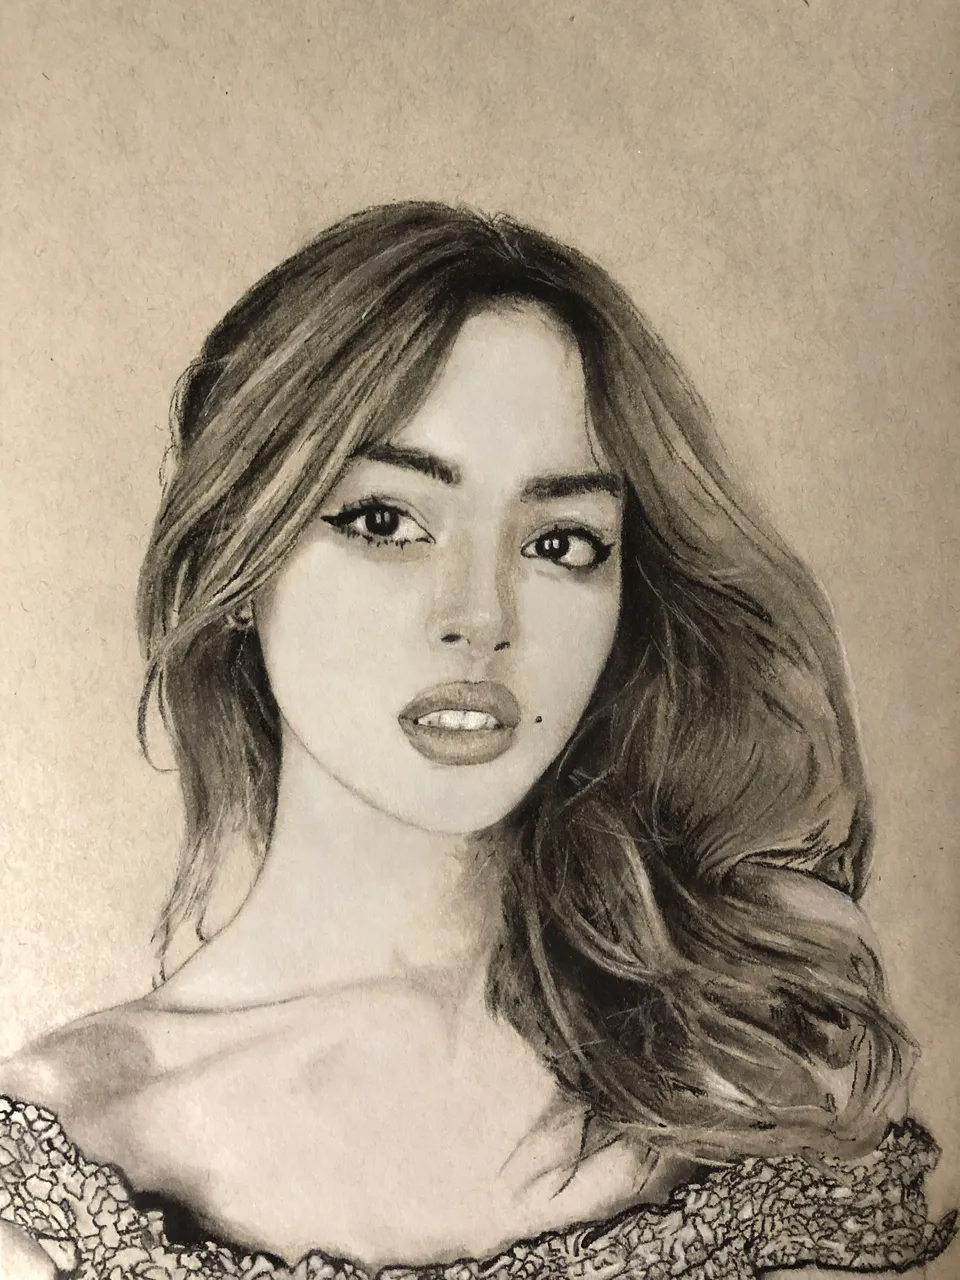
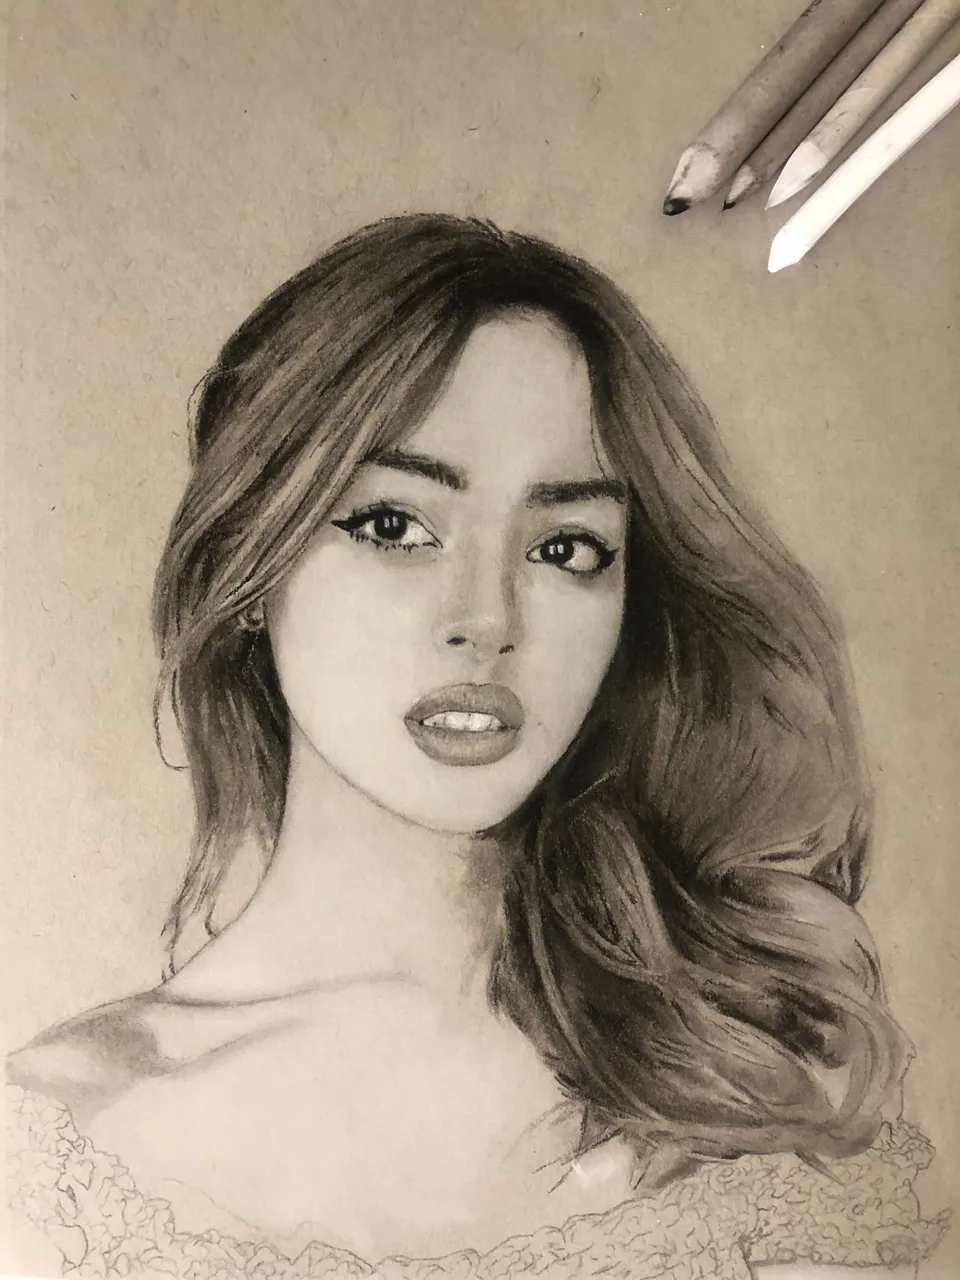
The last step which is fine tune so this step is pretty easy, I'm just going to add little details of hair here and there just to give it more of a realistic look. I'm going to clean up the sides make sure there's not a bunch of smudges everywhere and that's it just a general cleanup of anything that you think it needs. That's basically it. I really hope you found it useful. Thank you, everyone!