UNDERSTANDING LETTERS
One cannot master brush calligraphy overnight. That’s one thing for sure. But somehow, an individual who has no experience in brush calligraphy may master the basics over a short period of time. How is this even possible? The concept is to learn the letters by parts. If a beginner wants to learn calligraphy by practicing on writing the letters directly without breaking it by parts, a beginner will be having a hard time. Let us take into account the first 4 letters of the alphabet: "a" , "b," "c" and "d". Let us observe how these letters are written:

The first four letters of the alphabet and the way they are written.
As what we can observe, the letter “a” is more of an oval shape. This is usually where the difficulty comes since while rounding, the person needs to control the thick curve and the thin upstroke and the shifting from thick to thin. For the letter “b”, still the same as letter “a”, an oval exists, but the thick curve is on the right side. For the last two examples, letter “c” and "d", same as the previous letters, both exhibit the shape of a half oval. You get my point. We need to break the letters down and start from as basic as possible.
I know by now that you might be getting impatient. “Just tell us directly how to master brush calligraphy quickly!”. Okay so here it is, the key to learning brush calligraphy quickly is to : PRACTICE BRUSH LETTERING DRILLS.
BRUSH LETTERING DRILLS
That's right! But what do we mean by “Drills”? Drills enable a beginner to master the most basic of all. From down strokes to upstrokes, one may be able to hand letter well by mastering the drills for hand lettering first. These are for beginners and also for experts; it’s always a good idea to exercise drills. There are lots of brush lettering drills ranging from easy to the advanced ones. It depends upon the artist which ones to use. On this post, I will show you 8 Basic Hand Lettering Drills that few Calligraphy Artists including me practice.
PROPER WAY OF HOLDING THE BRUSH/ BRUSH PEN:

Incorrect way of holding the brush or brush pen.

Correct way of holding the brush or brush pen.
I am currently using the Kuretake Bimoji Pen 0.5-8.0mm as an example. This technique also works well with a typical brush pen and a water brush. Before moving on into writing the drills, you should learn how to hold the brush pen properly. If you aspire to use a brush pen, hold the pen in an angle. Through this, you will be able to easily control how thick or thin the strokes you want to create as well as the direction of the brush.
8 BASIC DRILLS:
1. DOWN STROKE
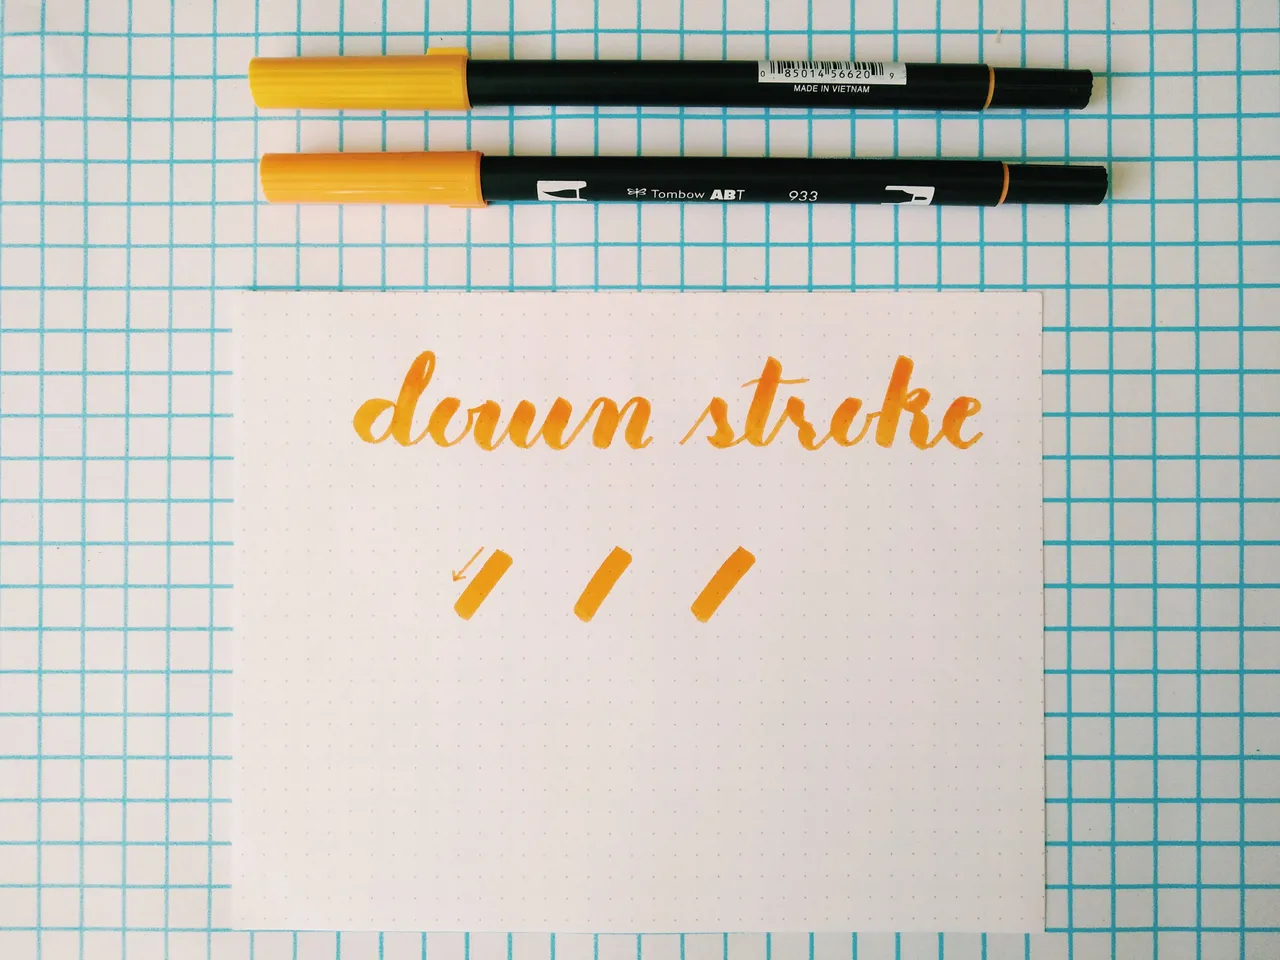
The key is to press firmly and apply pressure while doing down strokes. Follow the direction as specified in the illustration. The pen may produce a squeaking sound, but it’s just normal because of the force you apply. These work best for producing thick strokes.
2.UP STROKE
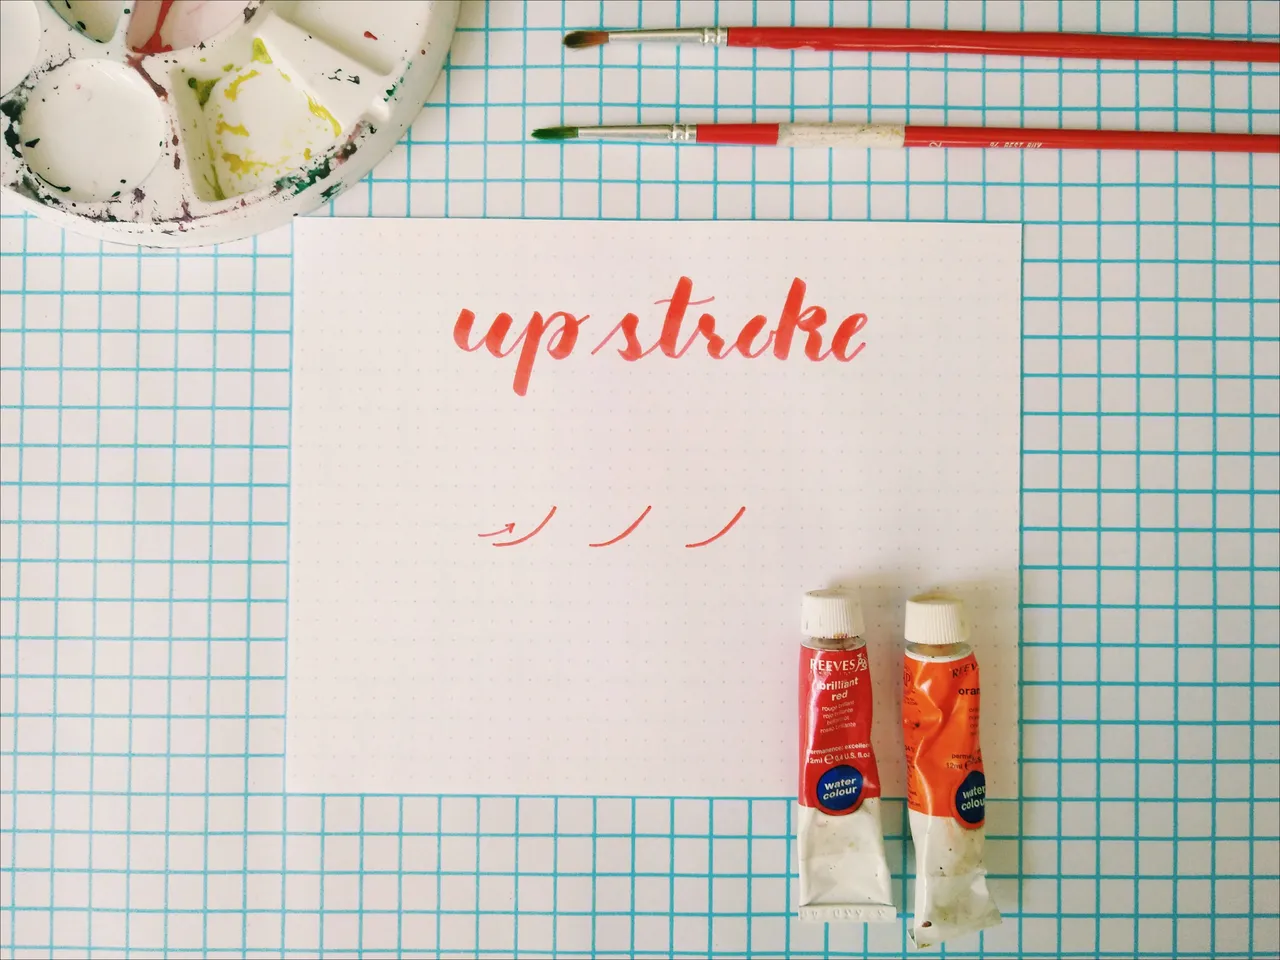
It is essential to press in a loose manner and lightly produce the stroke. For beginners, the strokes might look a bit shaky and not perfect, but that’s okay. Through constant practice, you may be able to control the strokes you produce. These work well when producing thin figures.Another thing also is that, this drill helps in making the entrance and the exit strokes of the letters to provide emphasis.
3. UNDER TURN
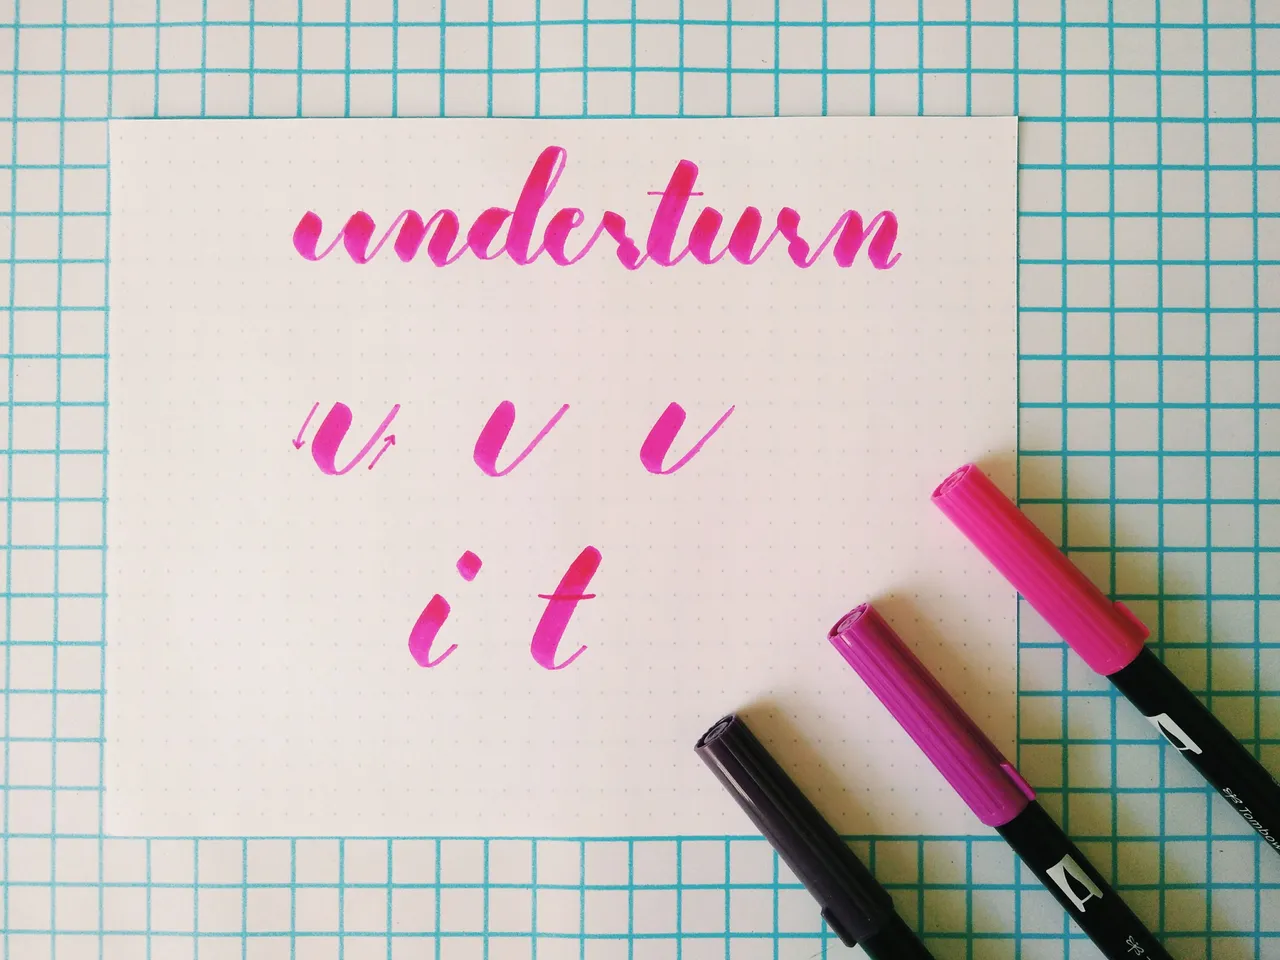
This is a combination of down stroke and upstroke connected by a curve. This drill is useful in producing the letters: “i” and “t”.
4. OVER TURN

This drill is quite the opposite of the “Under turn”. A combination of upstroke and down stroke connected by a curve. The overturn drill is helpful in writing the letters: "m","n","u","v" and "w".
5. OVAL
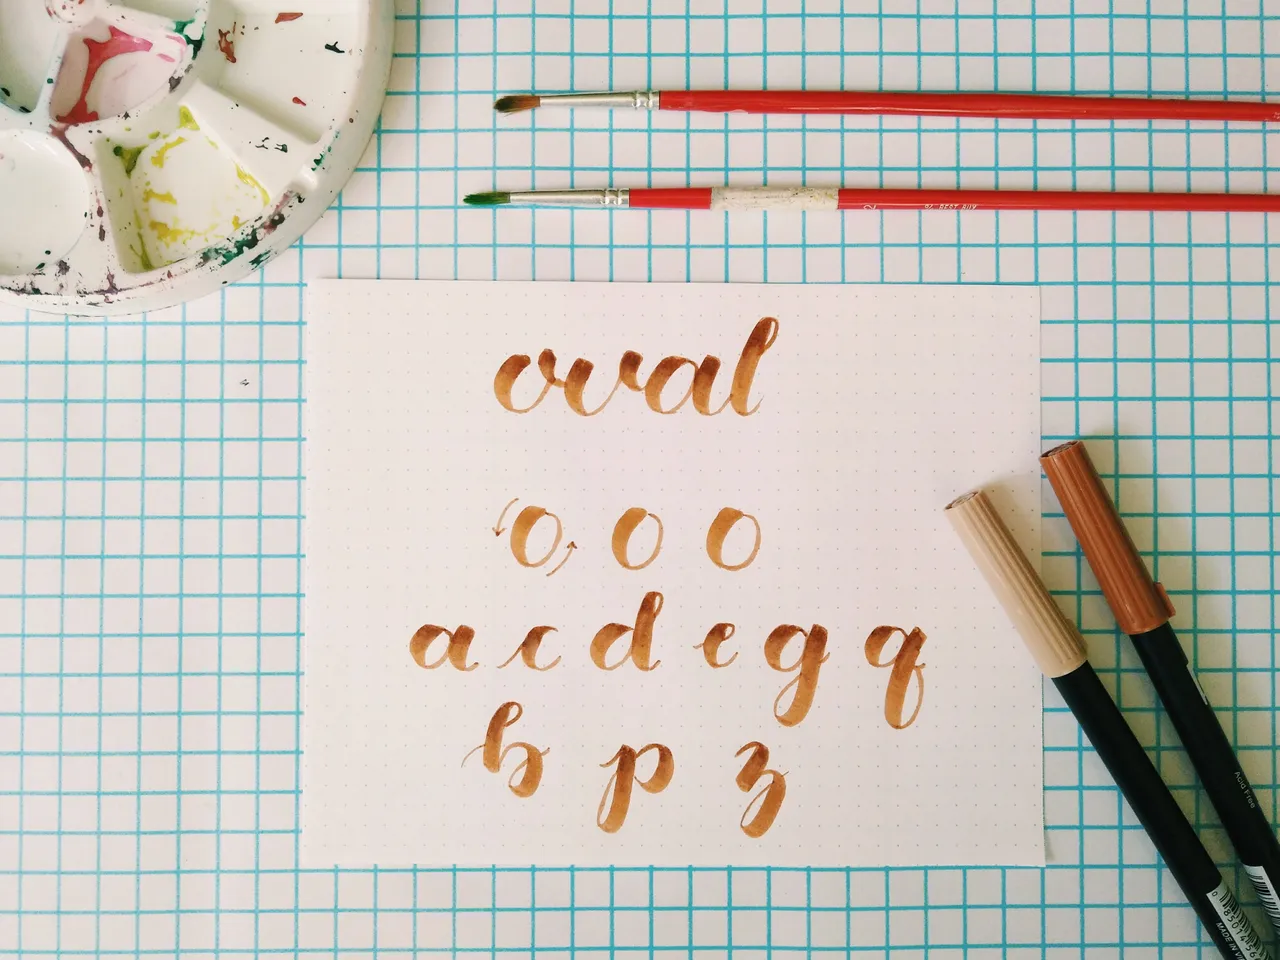
There are two types of oval. The first oval is used for: "a","c","d","e","g","o" and letter "q". While the second type of oval can be used while writing "b", "p", and "z". Personally, I think the oval is the most difficult to master. That’s why constant practice is very much recommended. Always remember, practice makes one better!
6. ASCEND
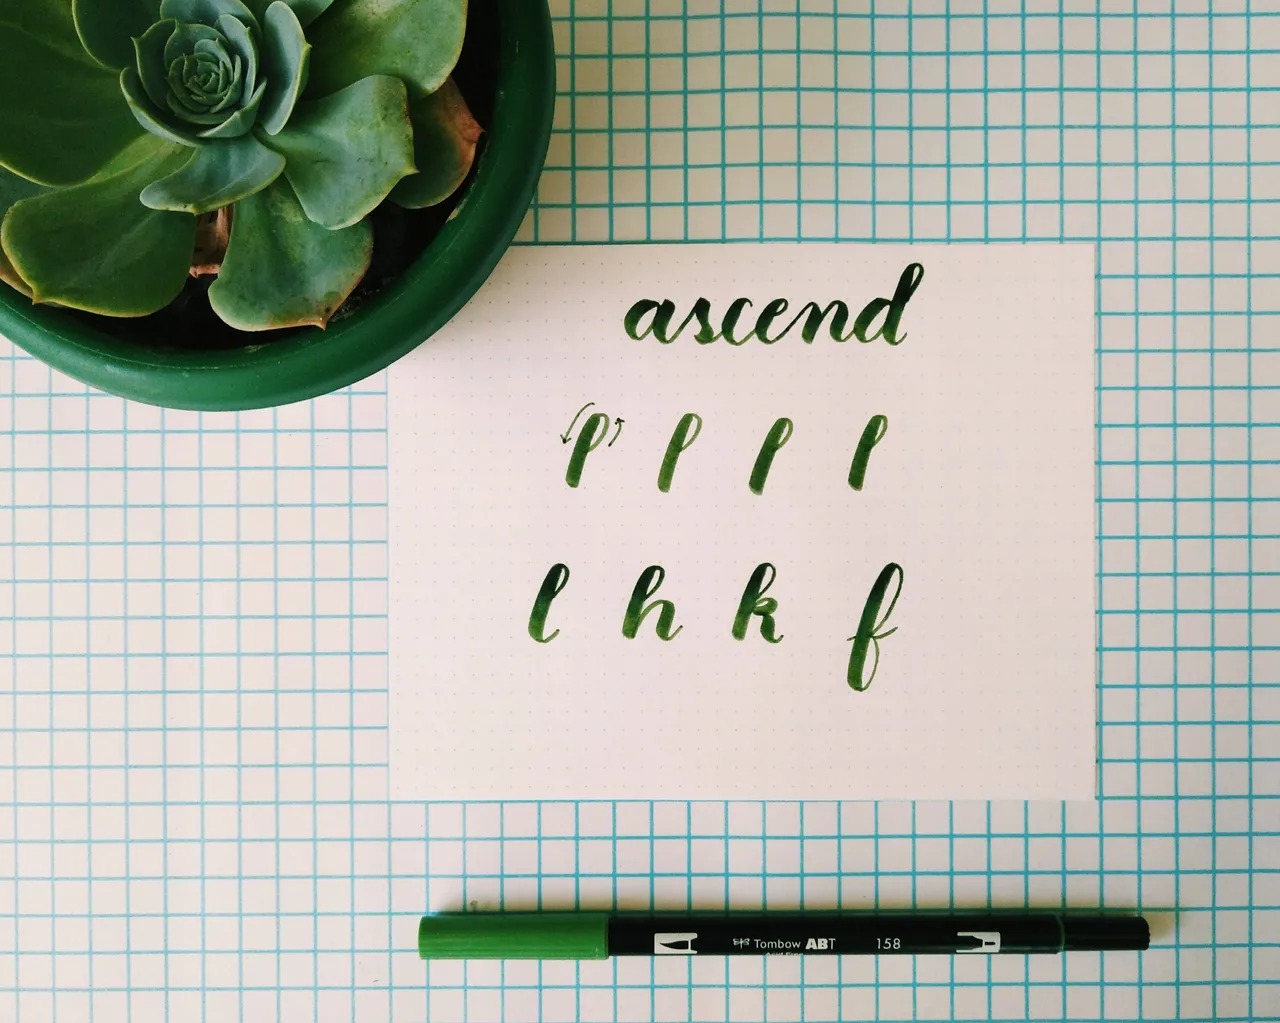
The “Ascend” looks just like a stem with a small loop. The size of the small loop just before the down stroke depends on the artist, some prefer bigger ones others also small. It is up to you on how large the loop you want to create. This drill helps a beginner control and have a feeling of ease while shifting from upstroke towards down stroke. If you master this drill, it would be easier for you to write the letters:"l","h","f" and 'k".
7. DESCEND
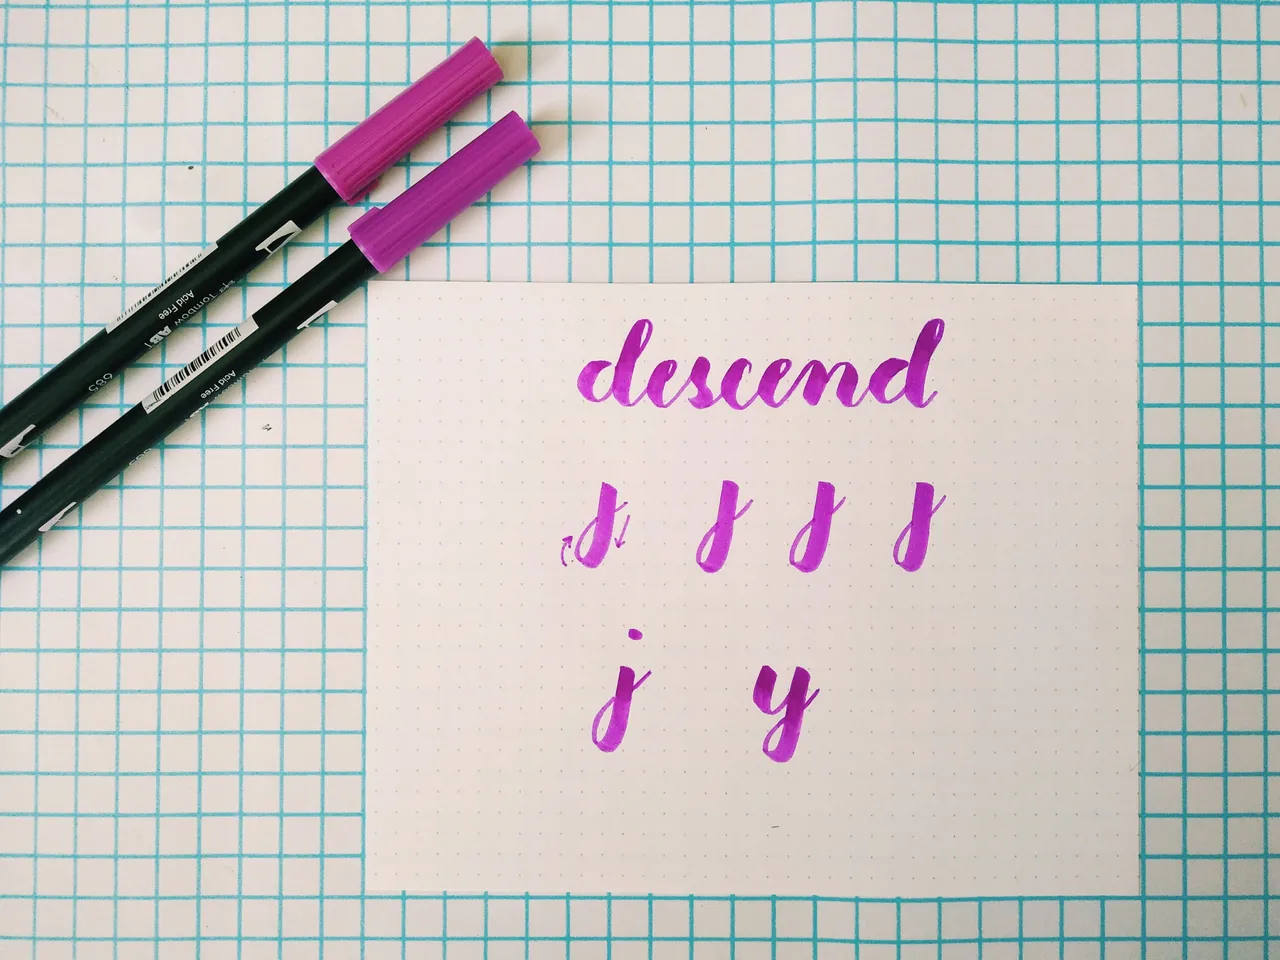
The “Descend” is just like the “Ascend” with the loop on the lower part of the stroke. Just like the previous drill, the size of the loop depends on the artist. Mastering this drill, helps one to create the letters "j" and "y".
8. COMBINATION
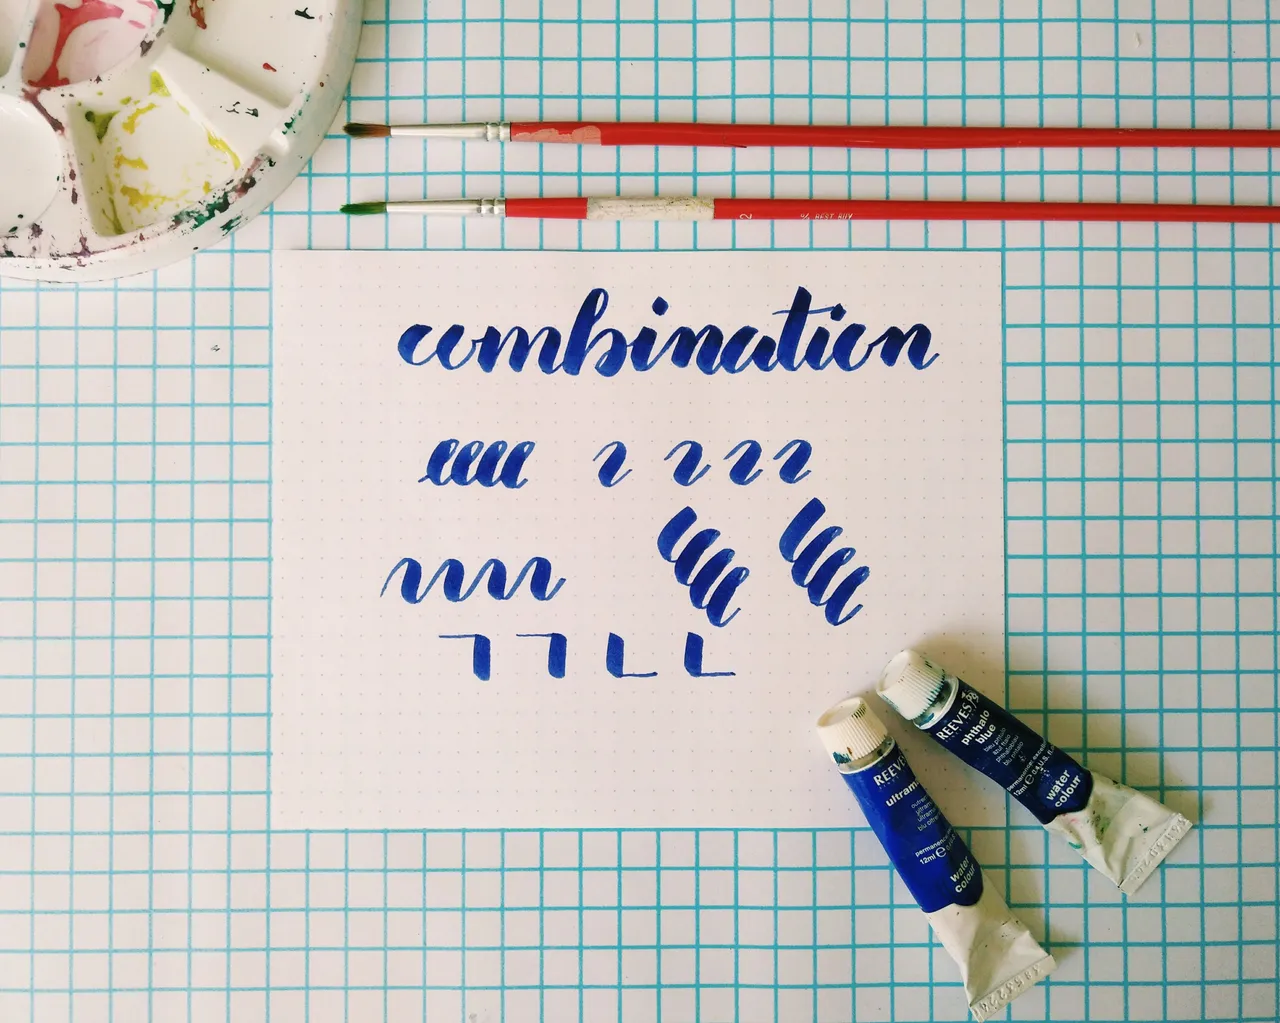
To improve further, here are some additional drills with the strokes such as the combination of the previous drills. You may or may not do the combination drills but if you want to improve and be better, it is advisable to do so. You may also create your own drills! If there is a particular aspect in hand lettering that you find difficult, get creative and create one!
BONUS:
While brush lettering, always remember this key point: THICK DOWN, THIN UP. As easy as that, if you are writing figures going down, press firmly to produce thick strokes, if you are writing figures going up, loosen up your grip and strike thinly. The products I used in the demos are: Tombow brushes in the shade of 725,158,N00,177,685,933,665,565,373,873,885,Kuretake Bimoji Pen 0.5-8.0mm and Rhodia Pad.
“WHEN WILL WE BECOME EXPERTS?”
It is understandable that after your first practice, you may become hyped and want to become an expert in no time. Don’t get disappointed when you don’t get the results you desire. The amount of time you spend in practicing is proportional with you getting better. Doing calligraphy drills do not make you an expert overnight but will help you improve and become better at hand lettering. Also, expensive brushes and tools do not ensure quality works so also try the materials that are cheap but useful. Practice! Practice! Practice!
FINAL THOUGHTS
Winston S. Churchill once said:
“Success is stumbling from failure to failure with no loss of enthusiasm.”
Don’t strive for perfection. Just practice and become better. Always keep positive thoughts in mind! I guess there is no right or wrong way in brush calligraphy; it is just an expression of one’s self. I hope you can use this post to help you become better at brush calligraphy. I am no way a calligraphy expert and I also need your feed backs if you have. The names of some of the drills were shortened to easily remember them. Feel free to share your thoughts below and suggest what you want to be featured next. Don’t be so conscious about your work because just like other forms of art, you just need to be creative and you will surely produce a masterpiece!