Hello~
This week has been hectic and tiring. I haven't gotten much sleep and most time I was mentally exhausted. This is normal on the first month of work because we have new documents to file, activities to handle, new kids to deal with, and so much more.
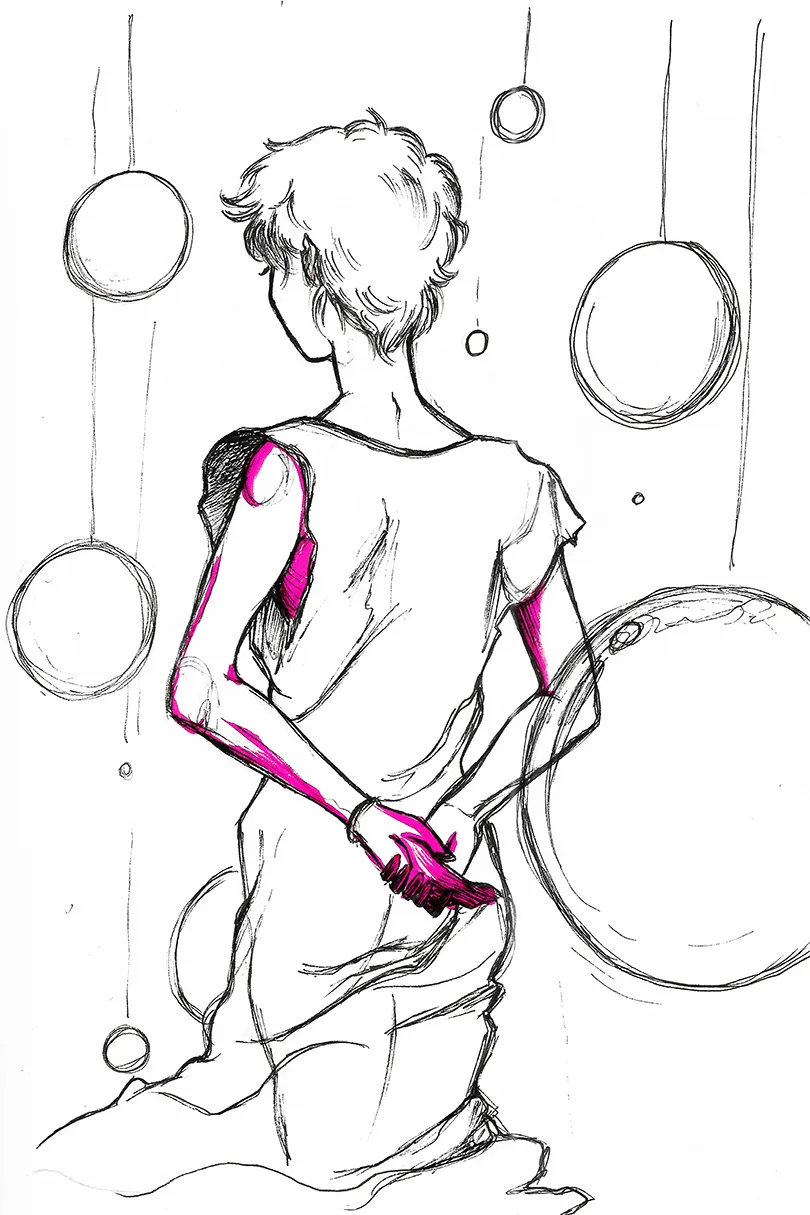
But I'm not here to bore you to death with my work life. I'm here today to share with you on how I scanned my artwork.
Alright, here goes.
Things You'll Need
A scanner.
Photoshop, or Gimp.
Let's Get Started
It is quite simple actually.
Step 1
All you need to do is scan an artwork. When scanning, choose the type of document you want to scan; for instance, I will choose mine to colors because my artwork contained colors. Use black and white if you want to scan black and white image and such.
Make sure you've set the dpi to at least 300. Higher dpi will cause longer scan time but image will have higher quality. This is good if you want to print out in higher quality but will be a problem when you want to use it as an internet image.
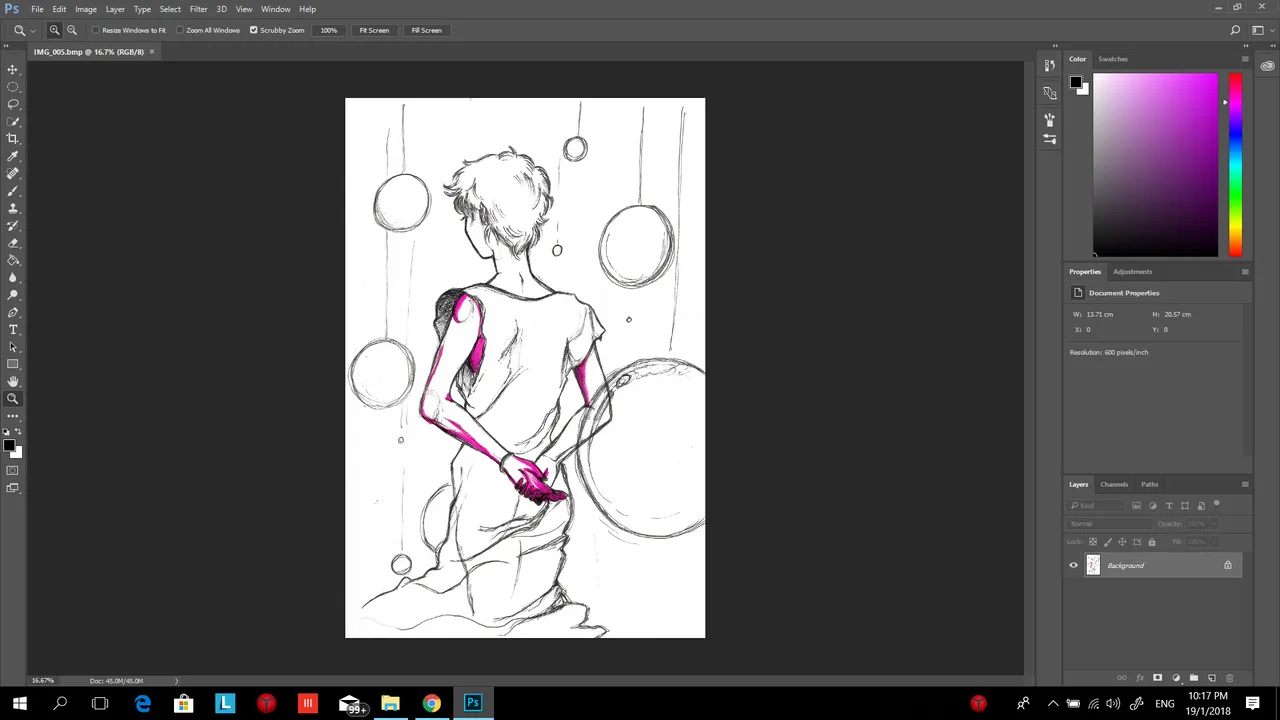
After you're done, the scanned image will be transferred to your chosen software work space. In this tutorial, I used Adobe Photoshop. It's my go to for image editing.
You'll realize at first that the image appeared washed out. This is perfectly normal and this is also why we need to edit the image so that it would appear as close as it can to the original artwork.
Step 2
There are two ways I always used to increase the contrast of my image.
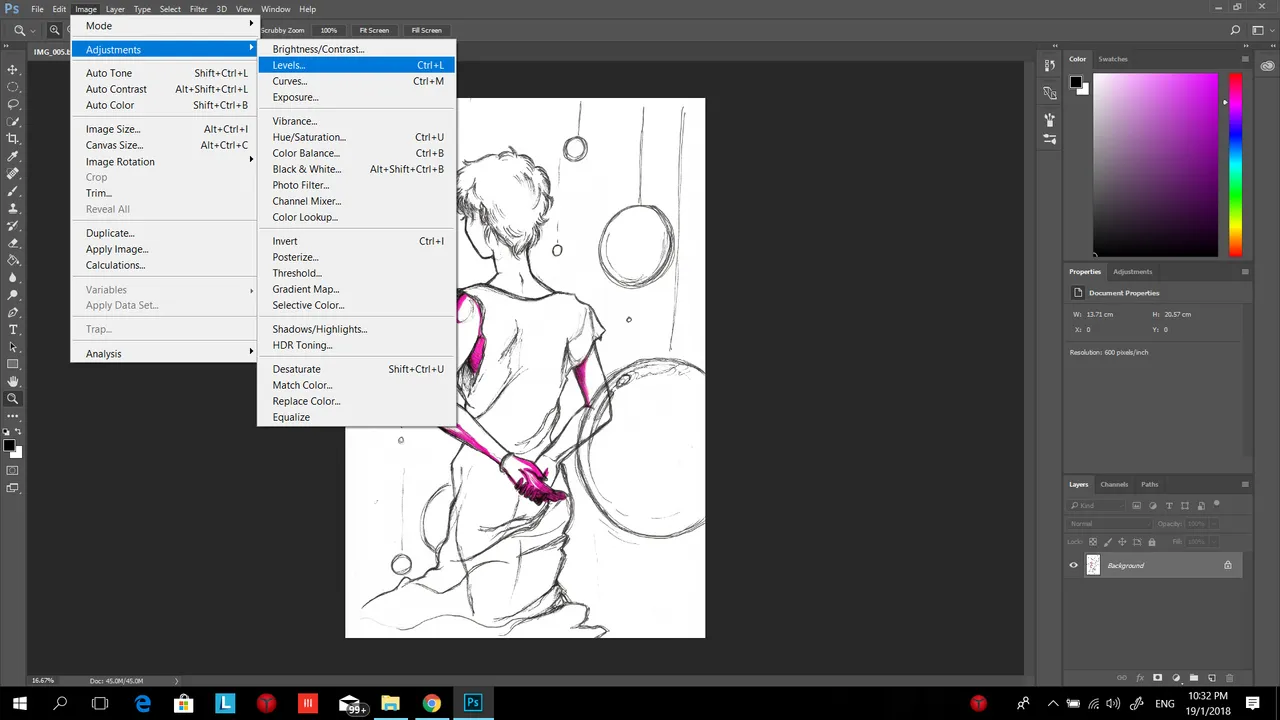
The first one is by using level. Simply go to Image> Adjustments> Levels...
A window will pop up like this.
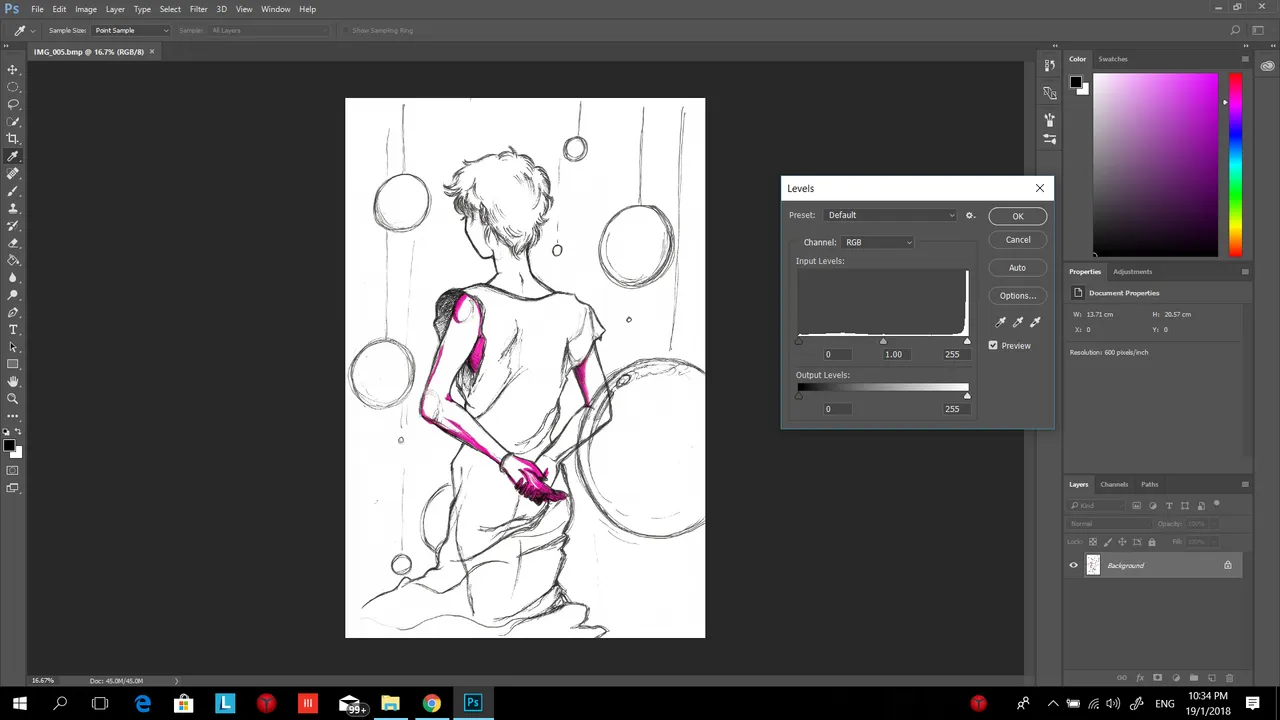
Now, what you need to do is simply pull the left arrow to the right until you're satisfied with the dark contrast. Pull the right arrow to the left to adjust how much white you want in your image.
I usually ignore the output and input.
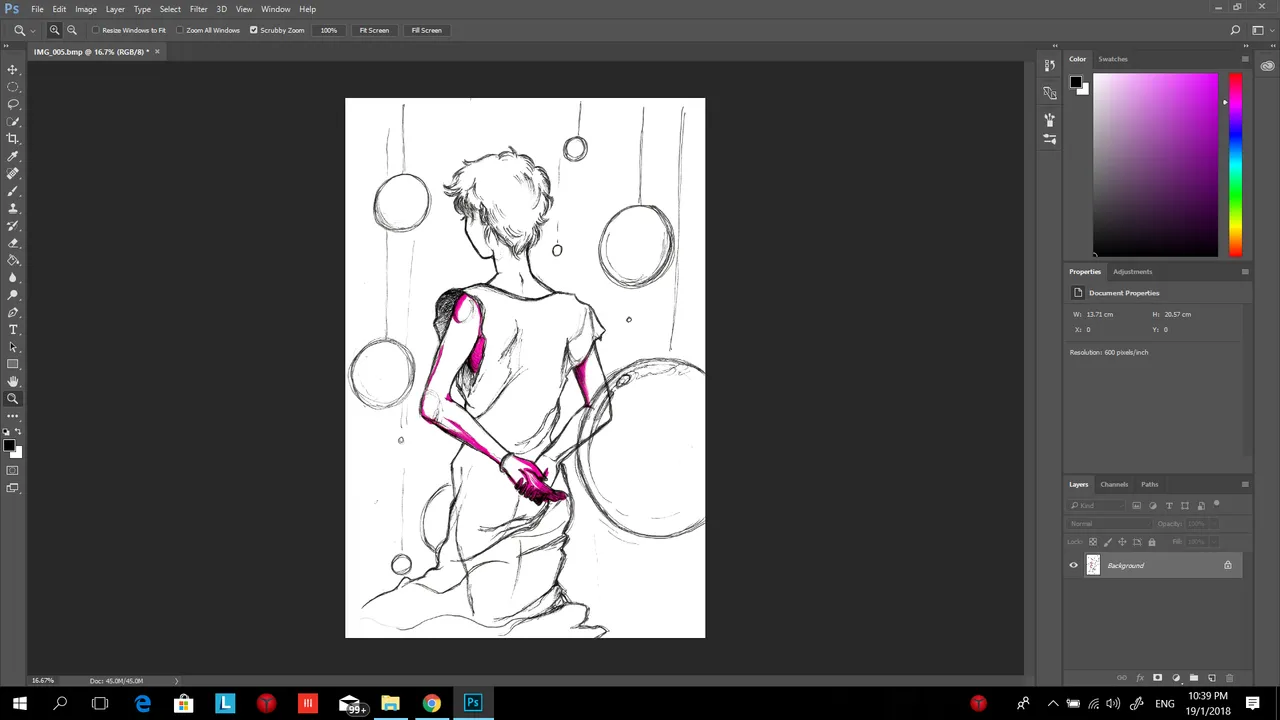
You'll noticed some changes that made the image less washed up. Continue to play with levels until satisfied, then go ahead and save it.
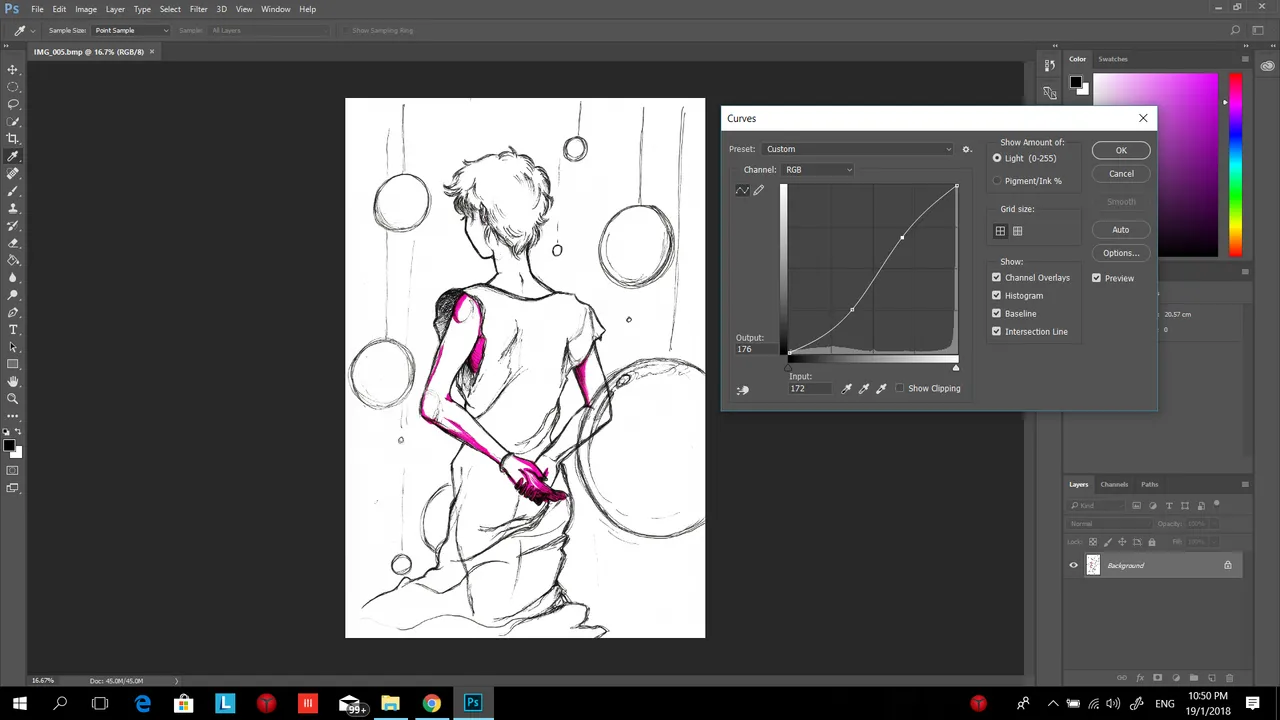
Another way to improve image is by using Curves. Simply go to Image> Adjustments> Curves...
You'll see this window pop up.

In Curves, you've gotta be careful to not adjust the image so that it's not too white. Just like Levels, I usually don't adjust it too much. I would do it just enough so the image will look natural.
Step 3
After you're satisfied with editing, then you can save your image.
Simply open File> Export> Export as...
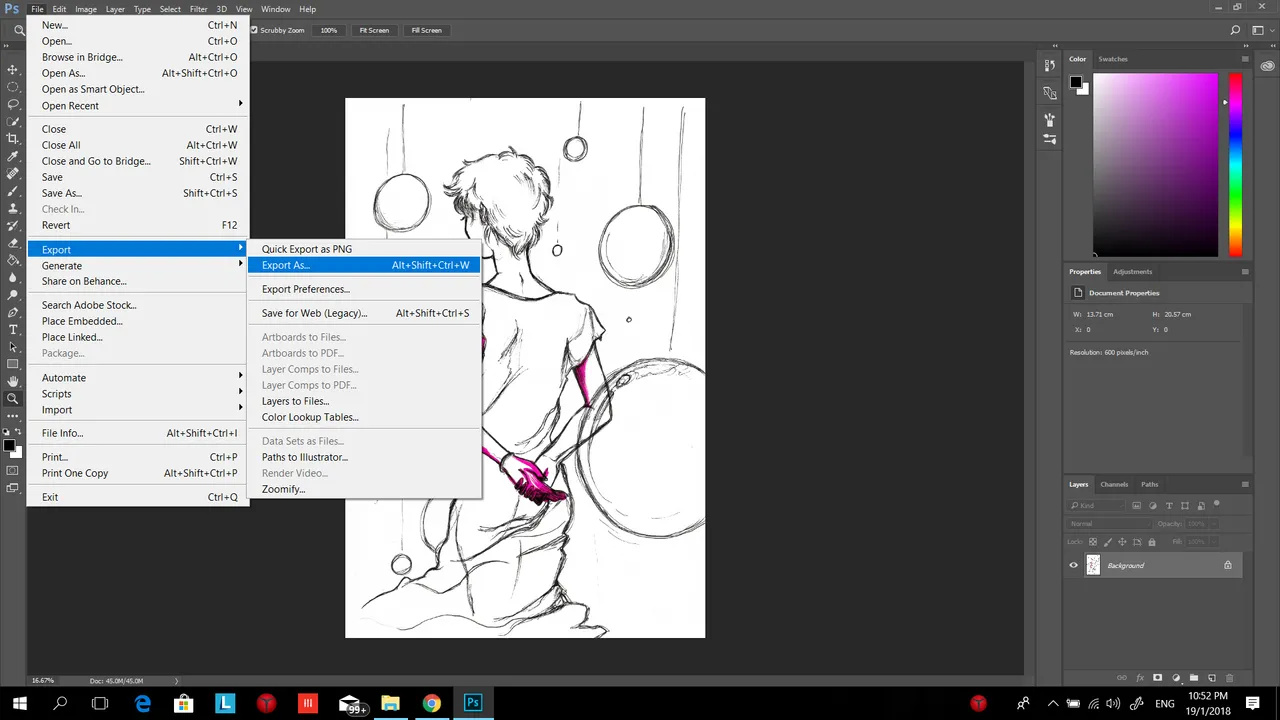
You'll see the save export as... window pop up like this.
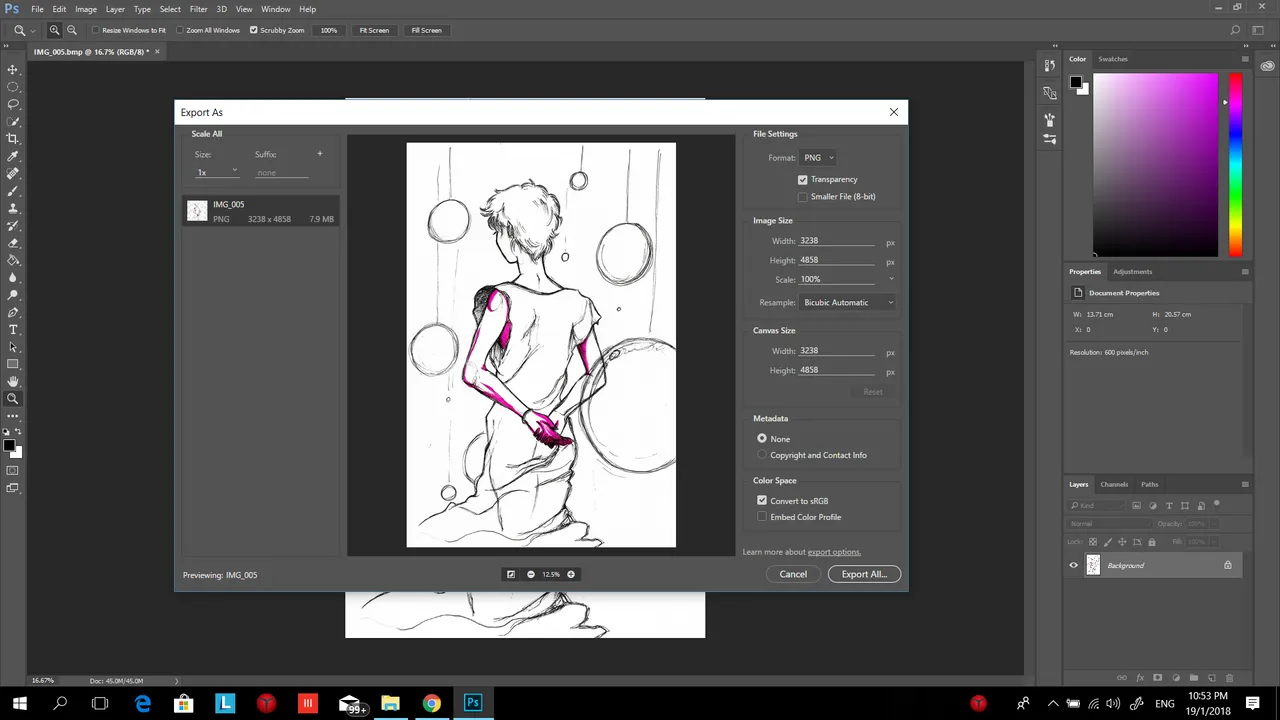
You can see the size of the image on the left corner, and save settings on the right corner. There are four format you can save your image in. I usually save my images as png file. Usually the image size will be uploaded according to the exact amount you can see on the window. Mine right now is at 3238 x 4858 px. This will be a very big image if uploaded on the internet.
Some site, like Deviantart, allows you to change the scale. Some don't however, so keep that in mind. You can re-scale image using the Steemit editor, but I personally would just preferred to scale it straight in Photoshop into 50% or less from the original scale.
Click Export All... once you've finished, and upload your image into Steemit or any other blogging site with ease~
Woot Woot!
Thank you so much for your time~
This is my first tutorial-like post, just in-between to my Sketch series. If you have any suggestions to improve, I'm all ears.