Hello to all steemians!
How are you all doing? I hope everyone are all enjoying his/her week. For me, am a bit really busy trying to get my blog page quite interesting and cool to viewers.
So despite the fact that my beloved CHELSEA FC lose last night to rivals, Arsenal fc, I still have to gather much of my last strength irrespective of my feelings to sketch this cool tutorial post to everyone here in steemit... Smiles.
We all know the famous Frodo in the Lord of the Rings as the main protagonist. He is a hobbit of the shire who inherits the one ring and undertakes the task to destroy it in the fires of Mount Doom. Yea, I do admire Frodo much and as I have promised to embark on sketching some of the Lord of the Rings characters, I have chosen him today.
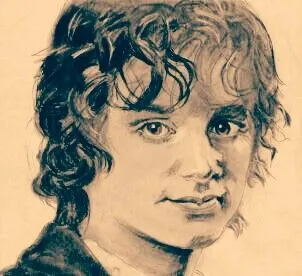
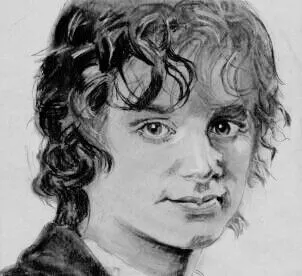
So here is my step by step sketching of Frodo Baggins and this is the final outcome of my work after all the steps.
Step by step sketching of Frodo Baggins face
It is important for all beginners out there to follow the ruler method of sketching a well focused face of a person. That will make it more easy for everyone to arive at whatever artwork he has chosen to embark on.
I have use a 2B, 4B, 9B pencil, a charcoal and a cotton wool for my work here. There are different kind of pencils to used when doing an artwork, mastering them is really cool and important for all beginners. For me, am still mastering all as am still learning to be better.
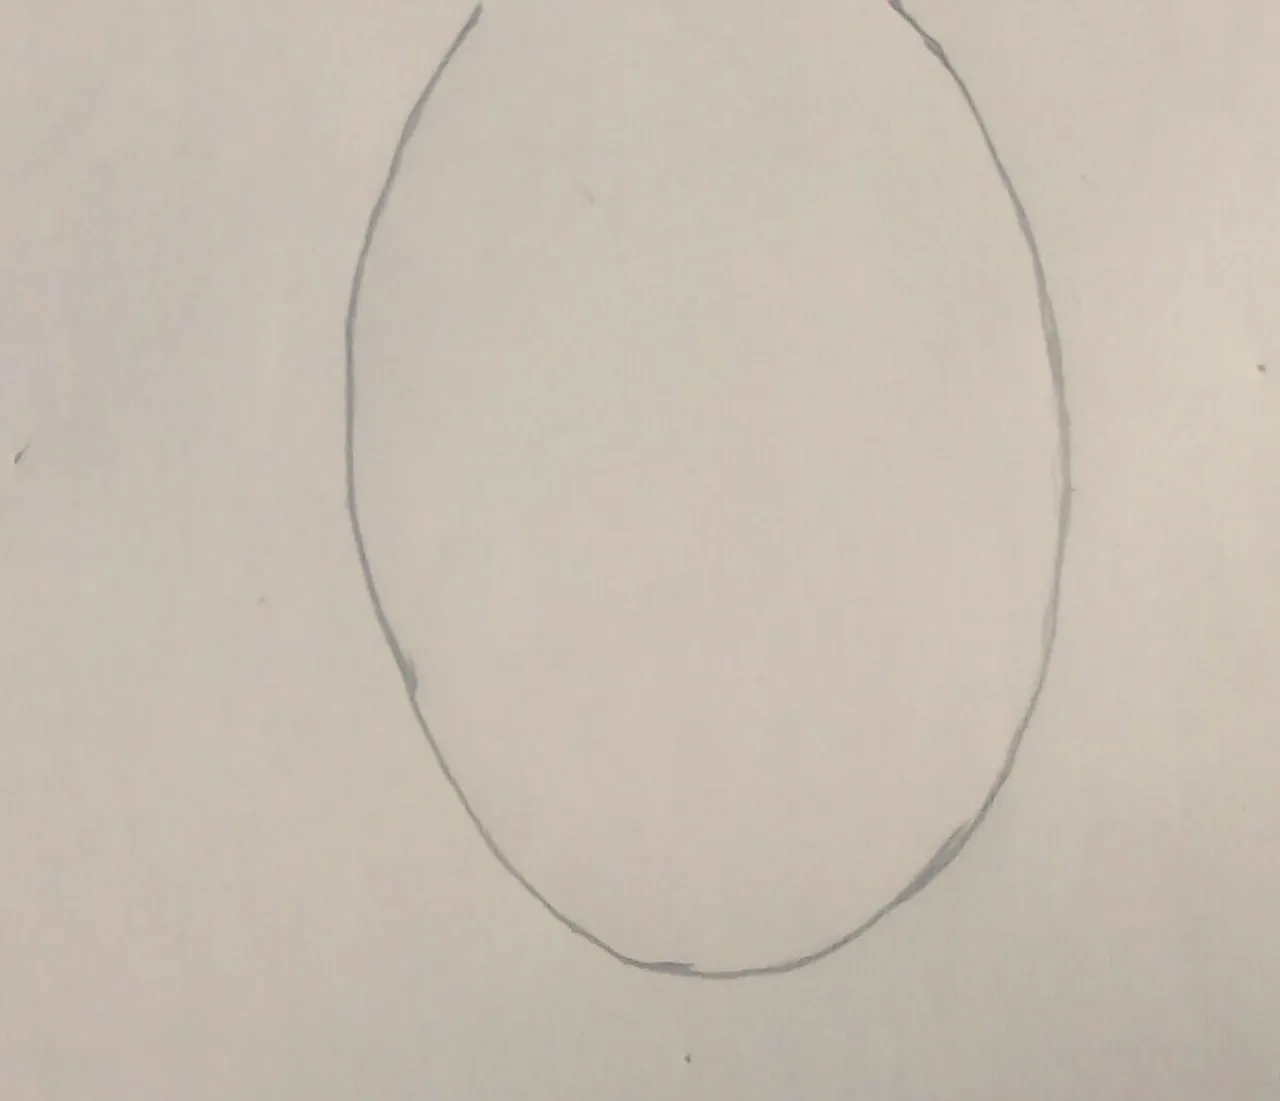
Step 1
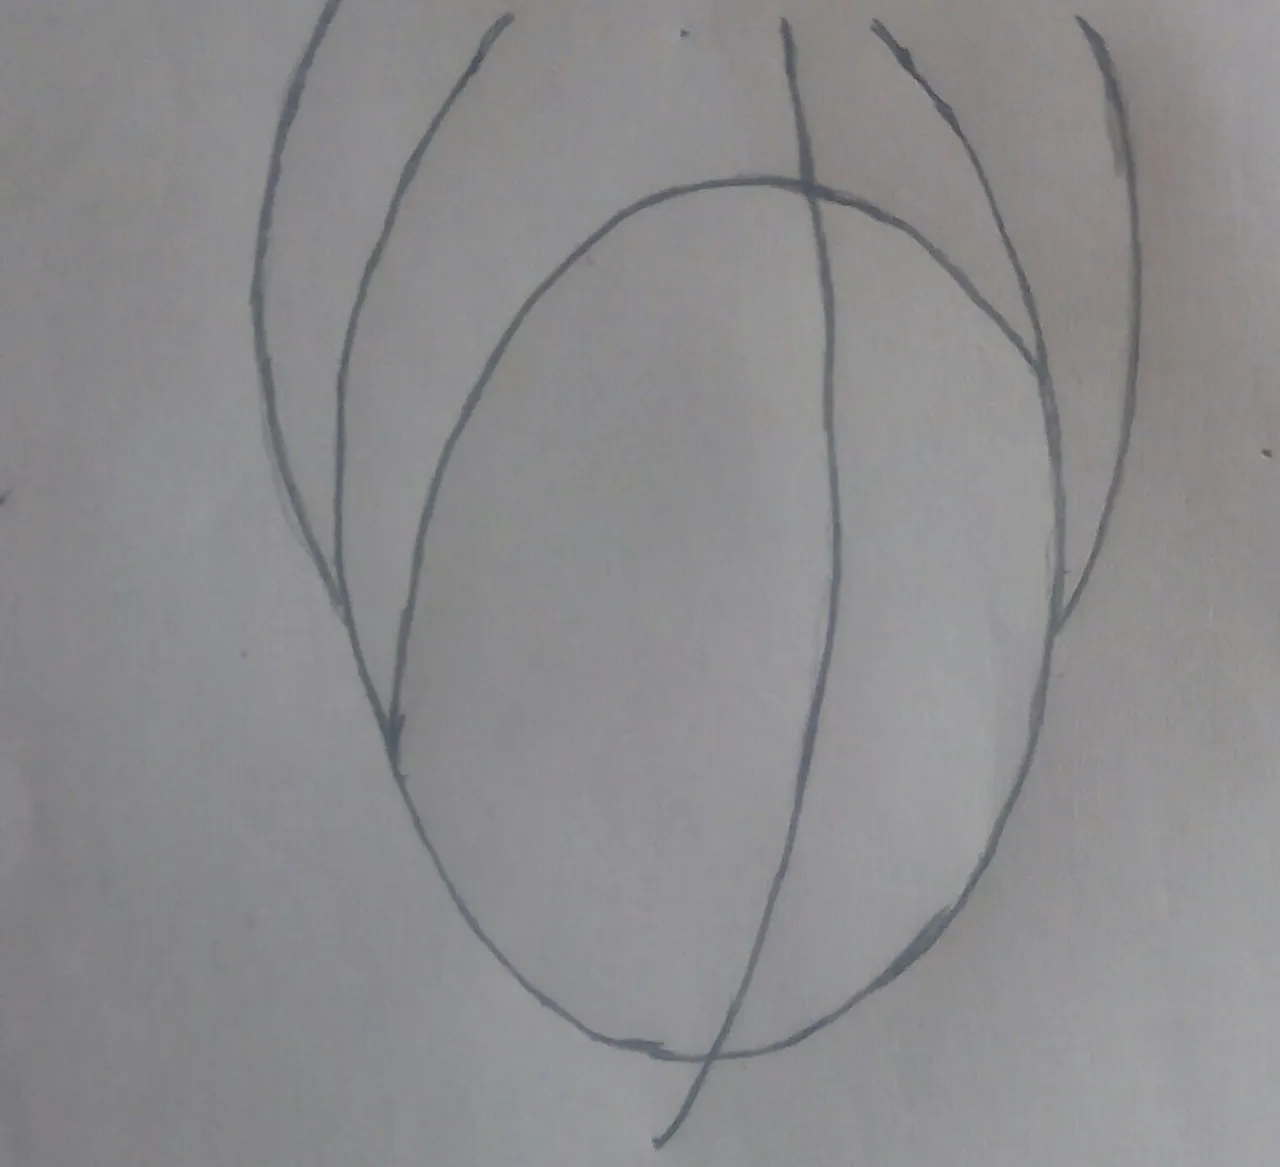
Draw a circle in an oval form lightly using your 2B pencil just like I have done here.
Step 2
Now, make a vertical line or draw a bisecting line to balance Frodo's face features.
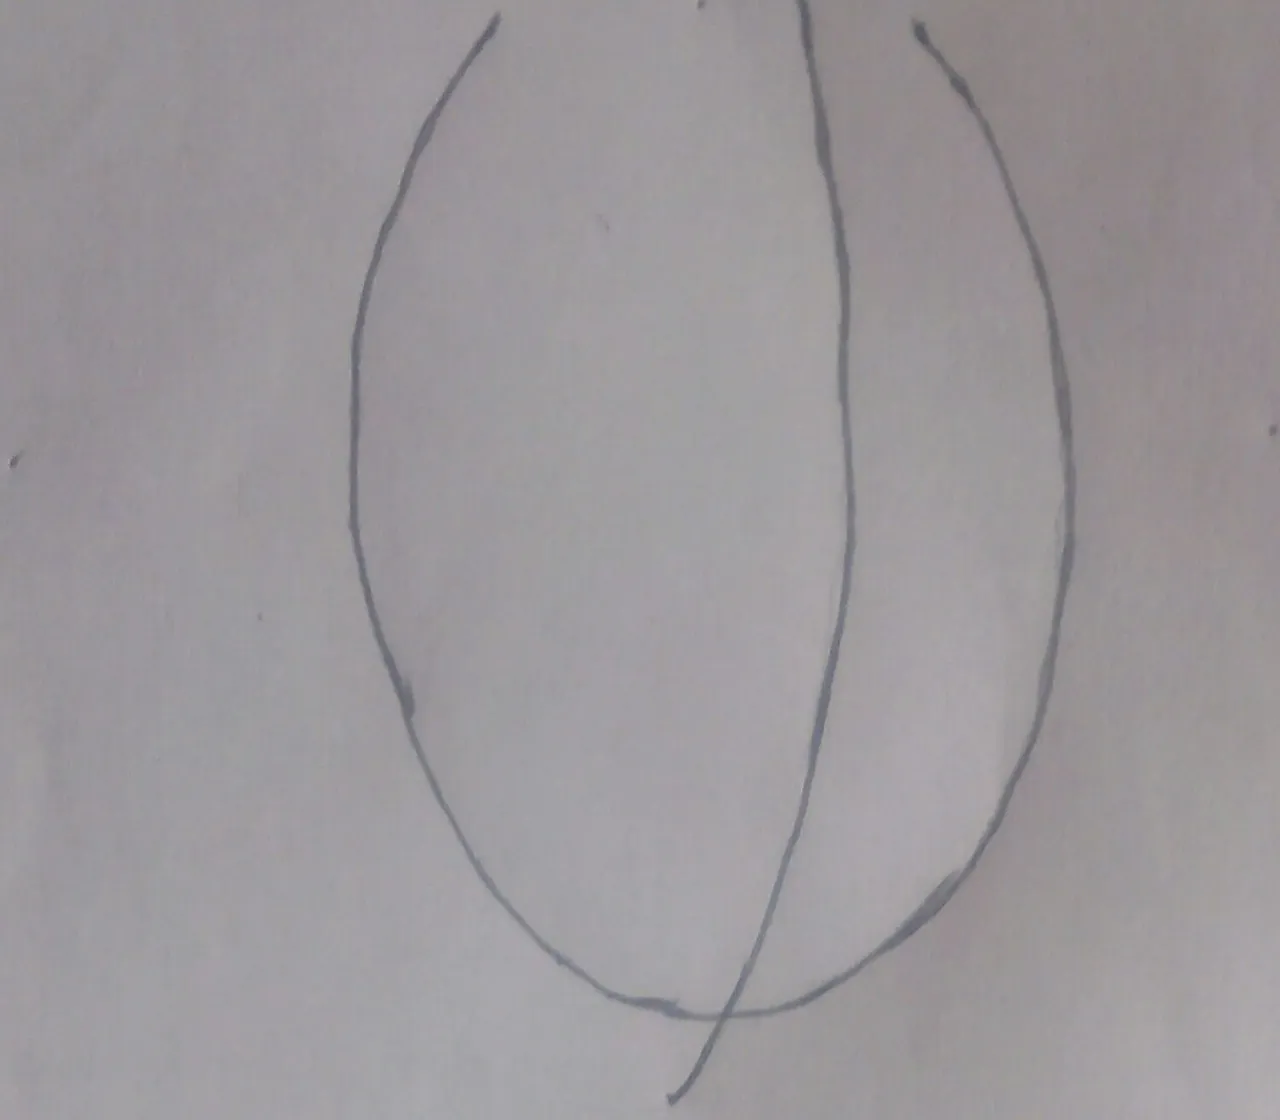
Step 3
Sketch lightly the crescent lines across the circle to represent the hairline and mass.
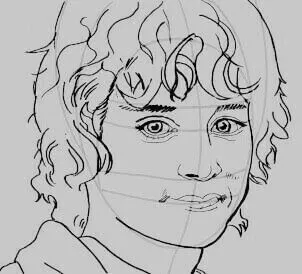
STEP 4
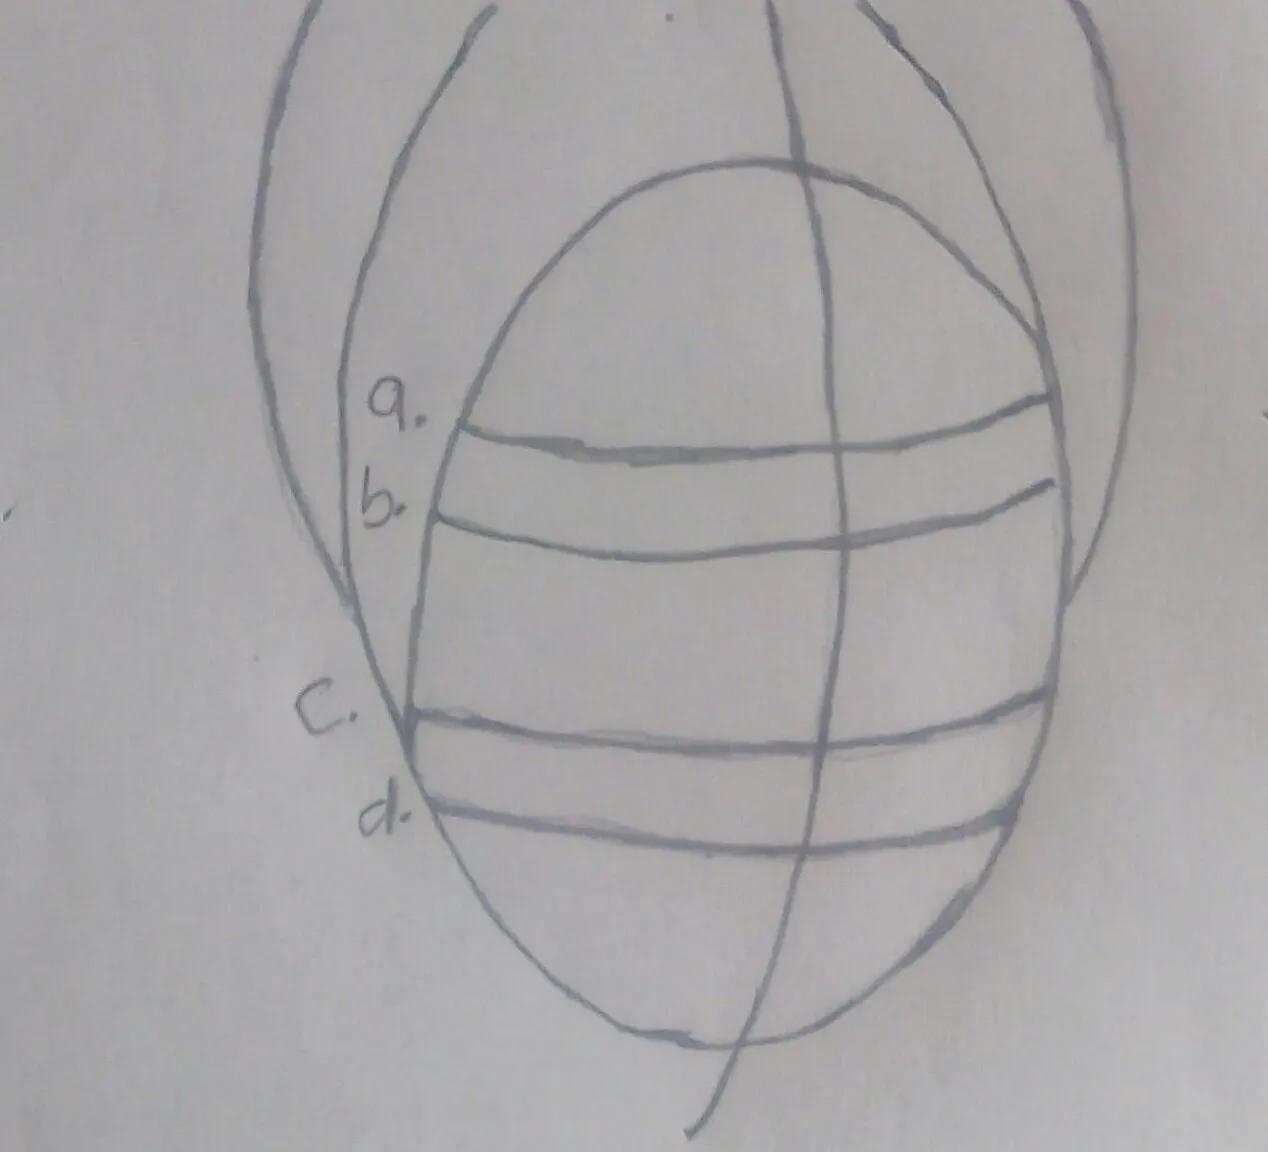
Draw across the lines a, b, c and d as I have shown to represent the eyebrow, eyes, nose and mouth respectively.
STEP 5
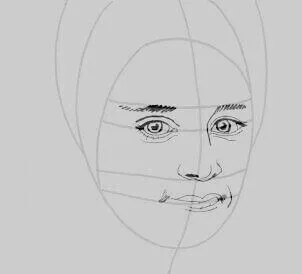
Now, sketch in the eyebrows and eyes using a more darker pencil like 9B pencil to be more clear to view as I have shown, make sure you lightly erase your guidelines to allow other features to be added look clear.

STEP 6
Try to observe his features much better, then sketch or draw his mouth and nose as I have shown.
STEP 7
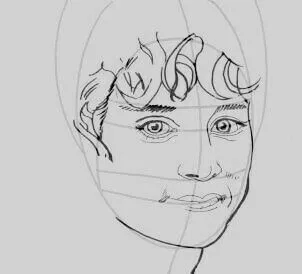
Now, sketch his grin line, neck and chin as shown. Remember here to add a bit of his curl hair.
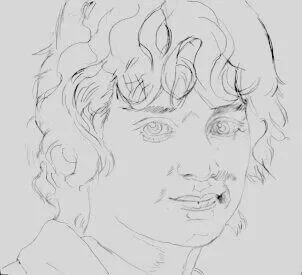
STEP 8
Sketch and add more curls to his hair. Try doing it gradually as I have shown, you will get it perfectly well with more Practice. Also remember to draw back of his neck and collar.
STEP 9
Erase some of the areas that don't line up well like his eyes and nose. And here I use a 0.7mm pencil to actually get the sketching much as I have shown.
STEP 10
In this step, all to do is to gradually used your charcoal to shade it and with the help of your cotton wool, you can dress it up. It's something to be done slowly and with time, it will master you. It can also be done using the 9B pencil depending on what you want. Here I use charcoal.
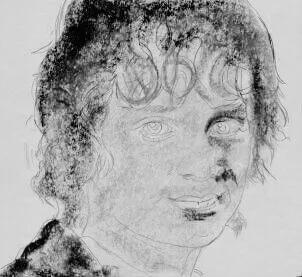
STEP 11
This is the final step and with more shading using charcoal, everything will look perfectly well as I have shown.
So here is my final look of Frodo Baggins.
Practice really matter alot, with more attention to artwork, we can actually be the very best we have dream to be.
Despite the fact that this my artwork may not have been perfectly great, I still hope you find it more interesting.
MORE TO COME FROM ME
follow @messinaldo
Thank you everyone.