Hello, fellow Hivers! This is my third post here. This was supposed to be posted in OnChainArt but it wouldn't go through. I kept getting that damned "Transaction Broadcast Error: Network request failed" error message.
And rather than waste my time trying to get it to post there, I decided to just do it in my usual way via the eSteem app. So, here is my latest blog and it is about making a 3D model of a round brilliant cut diamond.
Making A 3D/CG Diamond 101
Diamonds need no introduction but here are some facts about them. The name diamond is derived from the ancient Greek adamas, which means "invincible" or "unbreakable."
Formed from carbon and forged by extreme heat and tremendous pressure deep in the Earth, it has a hardness level of 10 in the Mohs scale, making it the hardest naturally-occuring substance known to man.
Indestructible, it will not shatter and crumble to pieces in the passage of time. Immortal, it "lives" in its near-perfect state forever. For that reason, it is also known as the symbol of enduring love.
Also, diamonds that have made it to the surface of the Earth are between 1 to 3.3 billion years old. So, if you have one on a ring on your finger or any other jewelry on your person, it holds a tale that's as old as time. A large chunk of geologic time, that is.
We've all heard the saying that a diamond is a girl's best friend, or another one, diamonds are forever. Yes, this 3D model is for a lady, and is a part of another 3D artwork I am making for her.
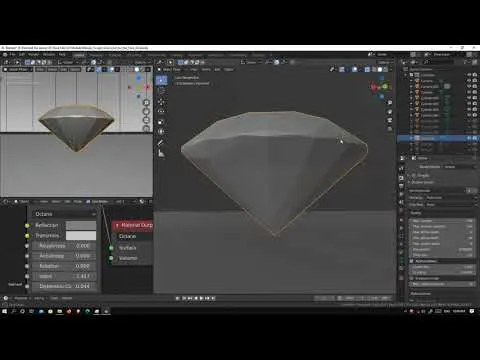
How It Was Modeled (Video)
My demo is based on another tutorial I found in Youtube made by a user named SKYROCKET Films. However my video has some modifications to his procedures. I've added some additional steps to ensure the planarity (the flatness) of the quad polygons on the diamond's crown and pavilion. I suggest you watch his and compare it to mine.
I tried his tutorial but the test renders were showing some ugly artifacts, so I sought to solve that problem by analyzing the diamond model created with his tutorial and looked for the problematic areas that were producing the distorted patterns. I found out some polygons were non-planar, and those were the polygons that were creating the misshapen internal light reflections that made up the patterns.
Here is the link to SKYROCKET FILM's tutorial.
An Accidental Discovery
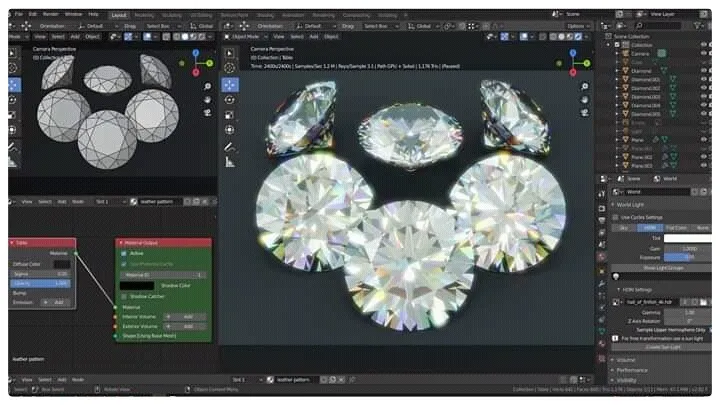
While doing research on diamond caustics and dispersion effects, I would often see images of diamonds showing patterns of uniform shape and symmetry, somewhat like snowflakes. Those patterns are called "hearts and arrows", and are the hallmark of round brilliant cut diamonds.
The Arrows
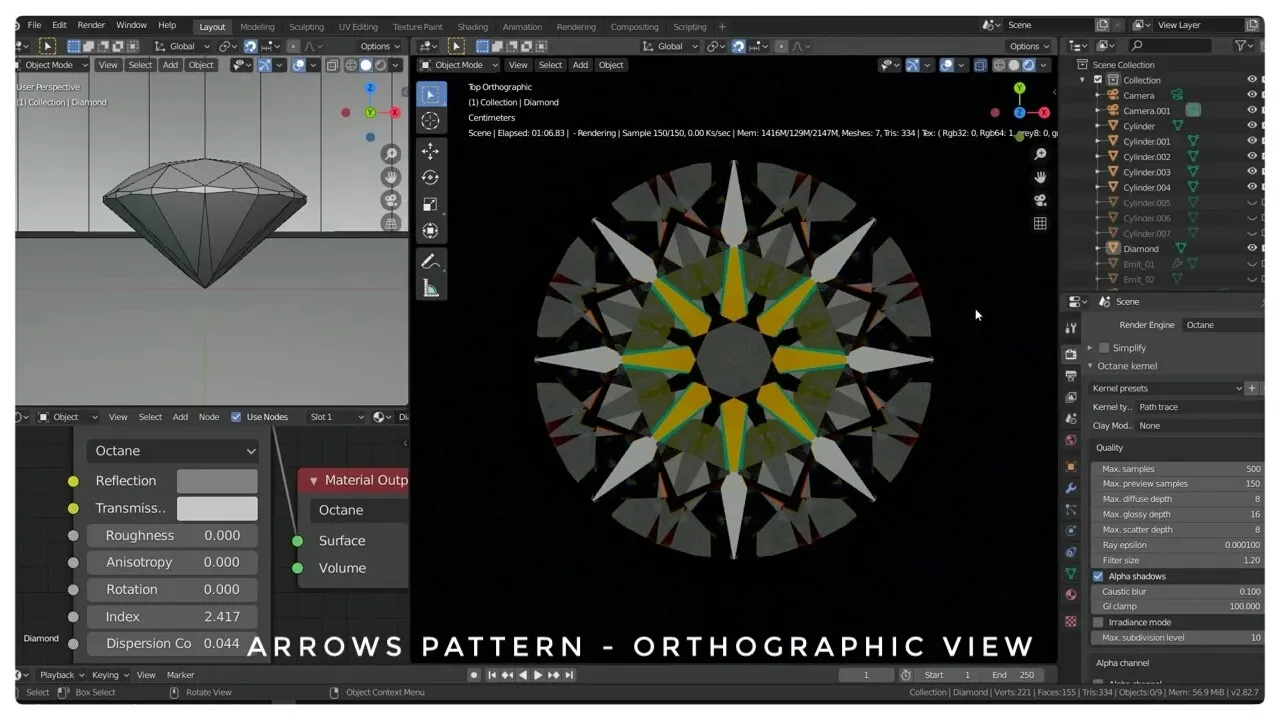
The arrows are the 8 pointed-tip long patterns that radiate from the center
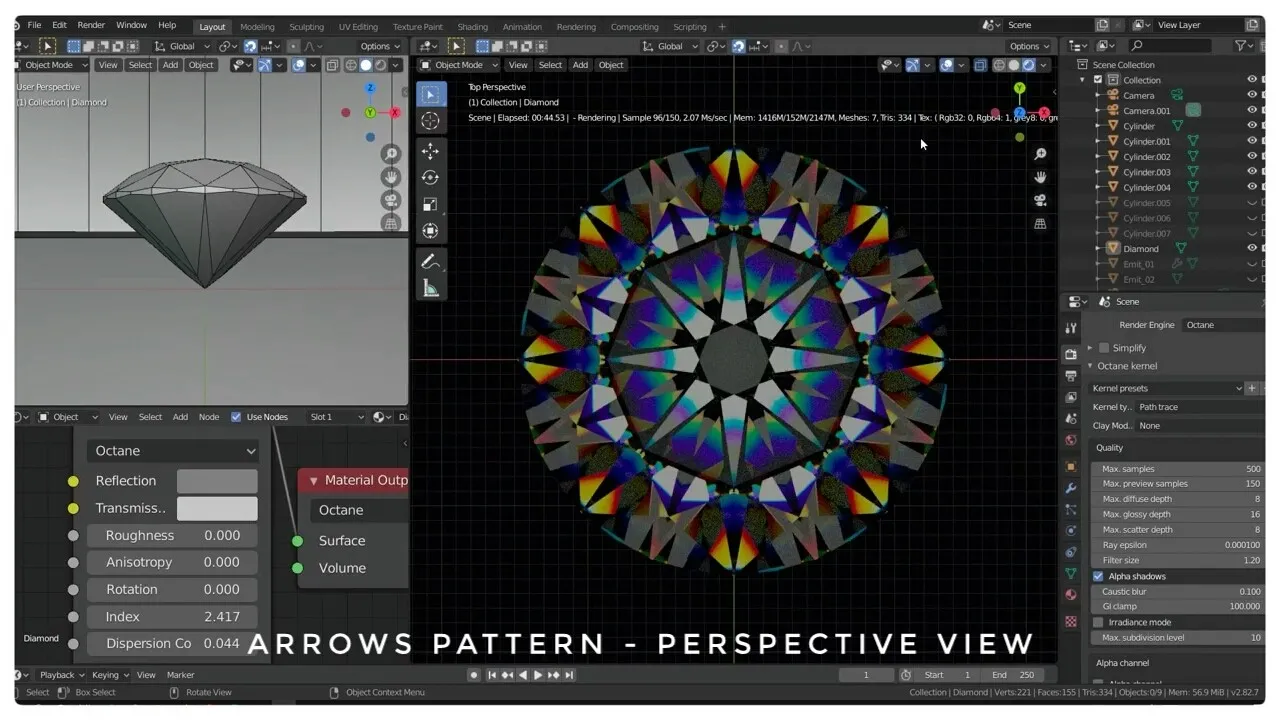
Now, I don't know why the perspective view versions are more colorful than those viewed in orthographic camera projection.
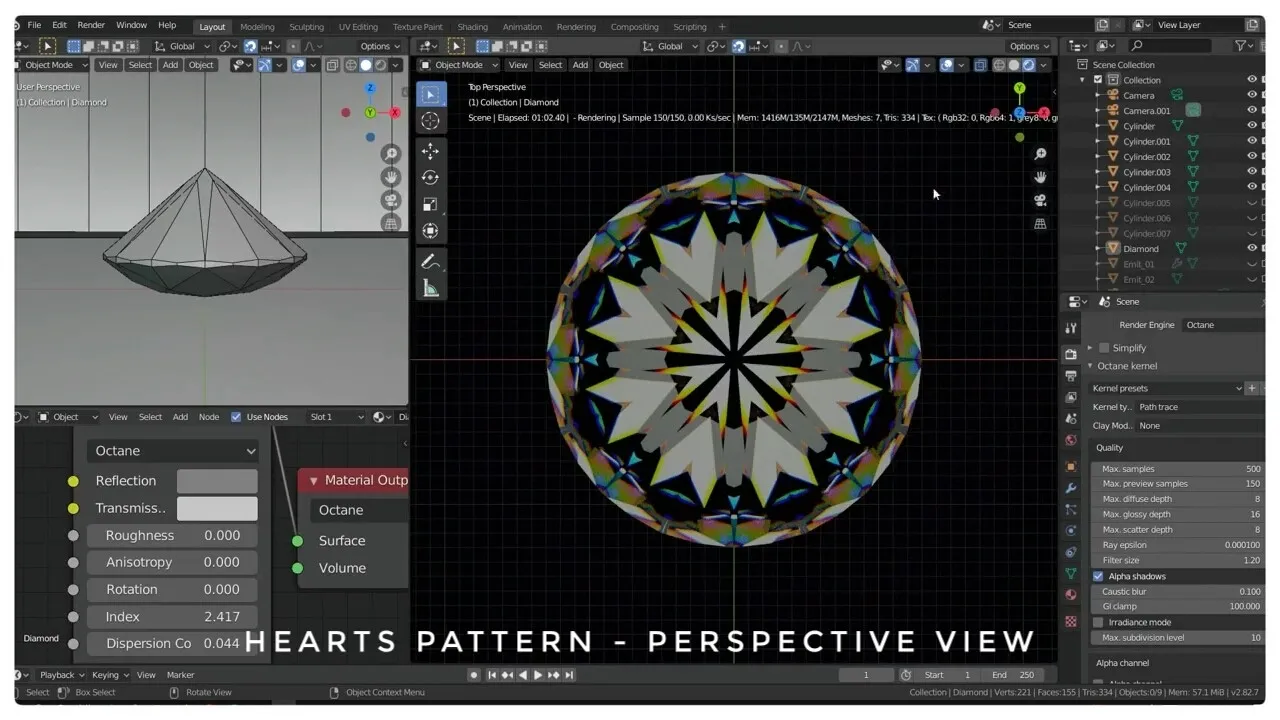
The Hearts
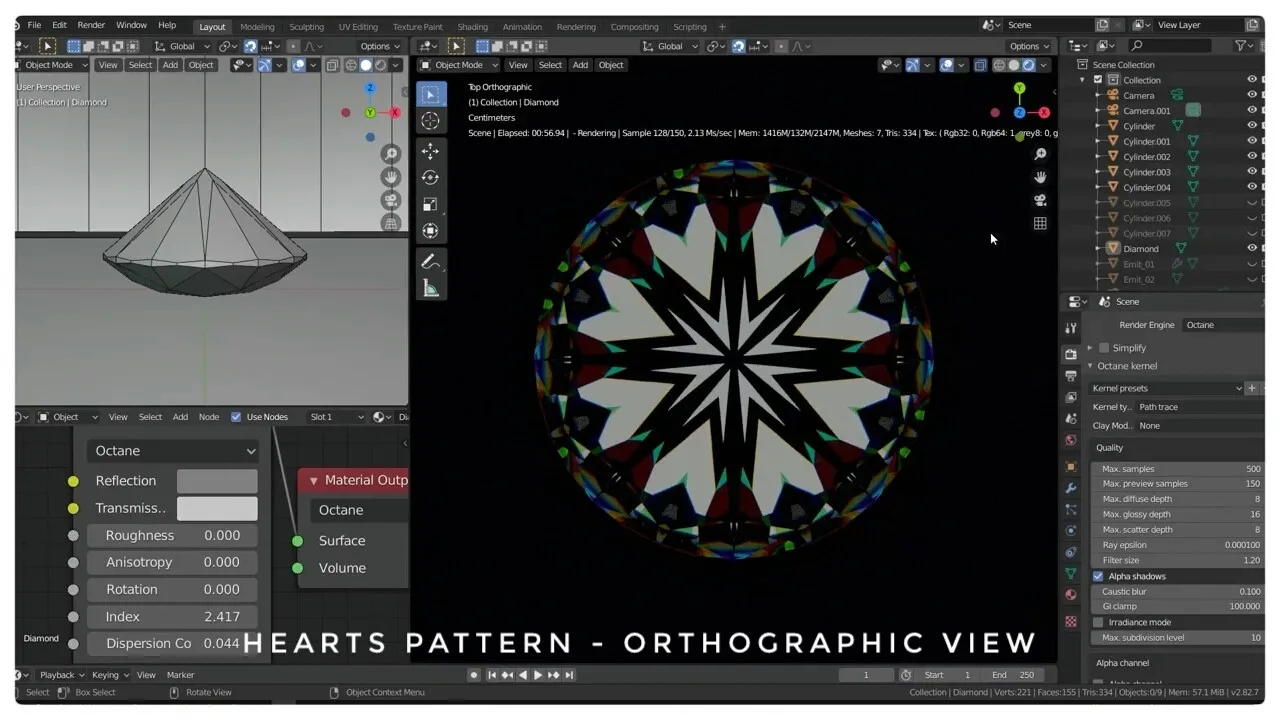
The hearts are [obviously] those white patterns after the V's.
I also don't know if these are exactly the colors of what jewelers and gemologists see when they check diamonds for the quality of these patterns.
You can compare my results with those from pictures in a Google search I made, and see for yourselves.
Hearts and Arrows Video
This is the last video I was able to make before my computer died. It shows the patterns appearing immediately after starting the render. Luckily, I was able to upload it and some of the pictures here to Facebook before I turned off my computer, or this blog wouldn't have been possible.
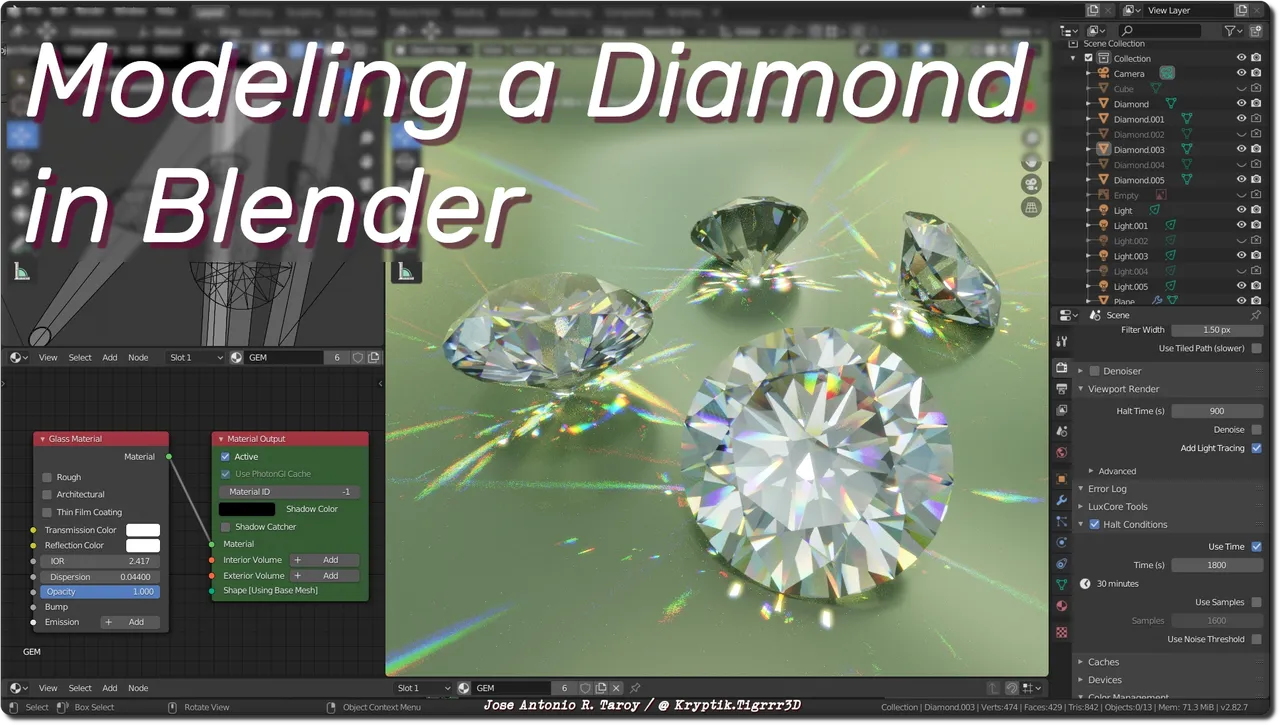
Here is one full HD render I was able to upload before my computer suddenly decided to rest in peace for good. To create the prism effect, I pointed a narrow-beamed spotlight at each diamond.

With my computer out of commission this will be my last 3D graphics blog until I get a new workstation. And since the long-awaited Ryzen 4000-series processors from AMD are about to come out soon, I've decided to wait for them instead of settling for the currently available Ryzen 3000-series.
And that's it for now, folks. Typing this blog on my phone was such a pain, and this is the longest typing job I've done on a mobile device. More will be done this way. It's hard, but a man's got to do what a man's got to do.
This personal project will be resumed when I have built my new desktop workstation. And since I don't have a computer, the next artworks I post here will be graphite or color pencil drawings.
So, thank you for reading and I hope you liked this latest piece from me. Please upvote, comment, and reblog. Take care, stay safe, and God Bless.
References:
https://yourdiamondteacher.com/diamond-grading/hearts-arrows-diamonds/
https://www.whiteflash.com/diamond-education/benefits-of-hearts-and-arrows-diamonds
Blender, OctaneRender, LuxCore Render, GIMP, and Snapseed.