Today I'll continue my Art lessons, No. 5, and show you the tiny house we're building.
I thought I'd have time to post a lesson everyday but with my schedule it seems some days life gets away with me. If I miss a day I'll post the next.
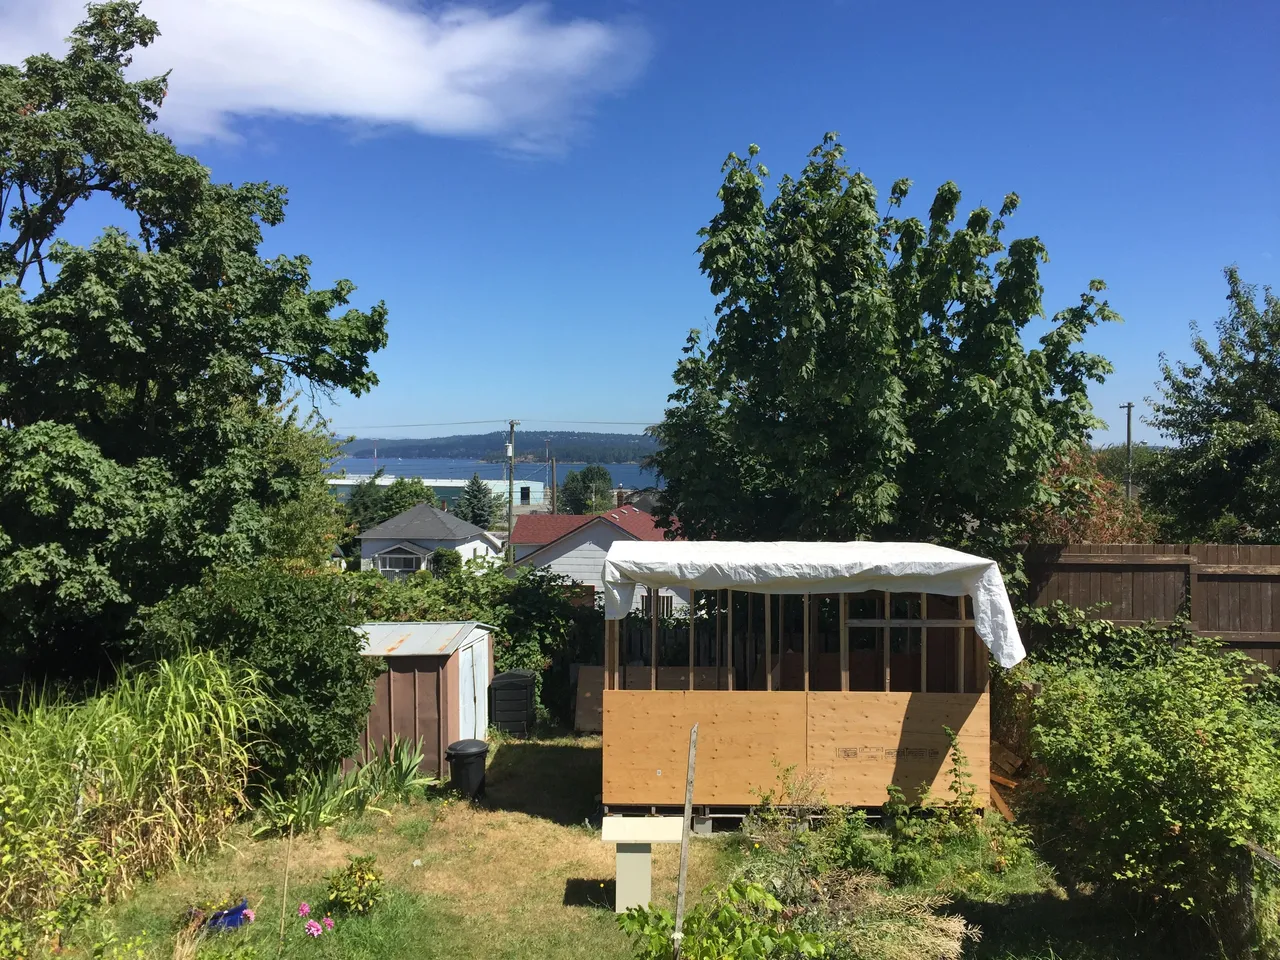
I have an on going art practice and my husband and I are building a tiny house in our back yard. I really want to finish it soon. I'm not sure if it will be a studio for me, a writing room for my husband, an Air BNB, or a guest room for friends. I love to collect things and find things for free so I thought we could start with pallets for the base of the house (they're free). This was a challenge getting the foundation straight. Building the walls was a little more difficult than we thought but we did it. We have a palletfoundation. Our tiny building is just under 107 square feet (the limit for a building in Nanaimo without a permit).
We started this building last fall. I can't believe it isn't finished but by October, after we got the studs up, it started to rain and it rained practically every day until the Spring. It rains in the Pacific North West but not usually this much. So, we covered the open structure and waited until Summer. We now have plywood on the roof and some of the plywood sheathing started. This is a photo of it today. We're hoping to do some work on it this afternoon and I may be able to post an update tomorrow.
I'm committed to completing this little building before the end of summer. I thought if I shared this process with the Steemit community it may get completed even sooner. Anyone that wants to build a Tiny House can do it too.
Art Lesson No. 5
The last class was filling in your stick figure. Today I thought I'd show you the measurements for
the face.
Materials: Your drawing of your filled in stick figure, a new piece of computer paper, a pencil, a ruler and eraser (if needed)
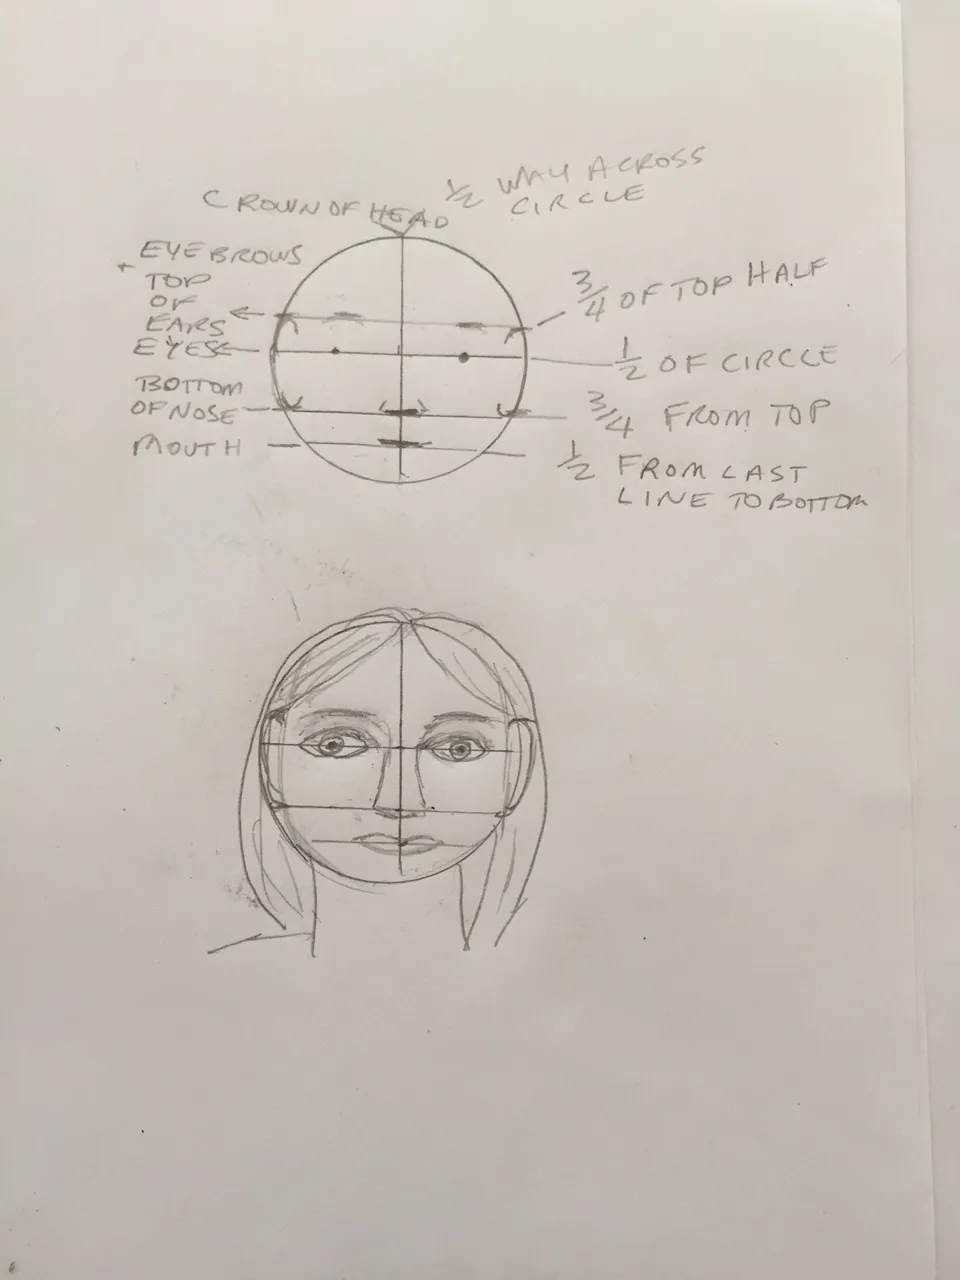
On your clean page draw a circle. You can make it any size and you can make two or three circles to practice.
Take your ruler and draw a line down the center of your circle and a line across the center of your circle.
On the line going across put two dots in the middle of the lines going out from the center line.
These dots will be be where the eye balls are.Draw a line across the circle three quarters of the way down from the top of the circle.
This will be the bottom of the nose and the bottom of the ears.Draw another line across the circle half way between the bottom of the circle and the last line you drew. Draw a short dark line in the middle of this new line. This will be the mouth.
Now draw a line across, three quarters from the top of the circle.
This is the level of the eye brows and the top of the ears.
This is the structure of a face. People often look at a face and they think that the eyes are a third
the way down from the top of the head, but they are actually half way down.
All faces are a little different but this is the basic structure of the face for all people.
The drawing link below is a sample of a drawing you can draw today.
Have fun and let me know if this works for you or if you have any questions. I'm always happy
to help!