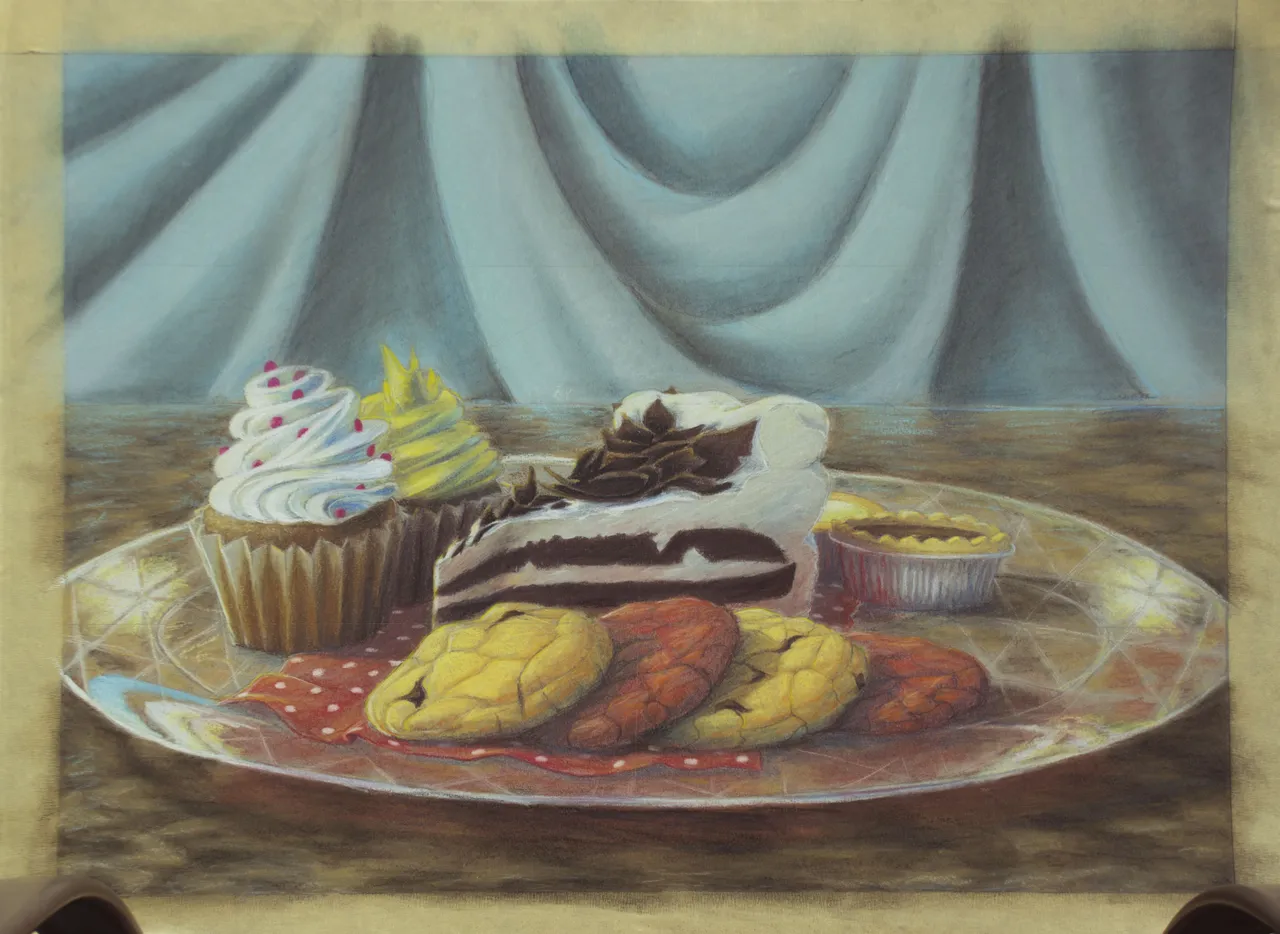
Hey everyone! Long time no see! I'm back again with another drawing breakdown. This time, we're going to be breaking down a colored piece I did for my drawing class. The assignment was to draw a plate of pastries using pastels. First we were required to do a smaller gray-toned version in charcoal as a tone study, then we had to mimic those tones in our colors for the final piece. This is my result:
So, let's get started!
STAGE 1 - COLOR AND TONE STUDIES

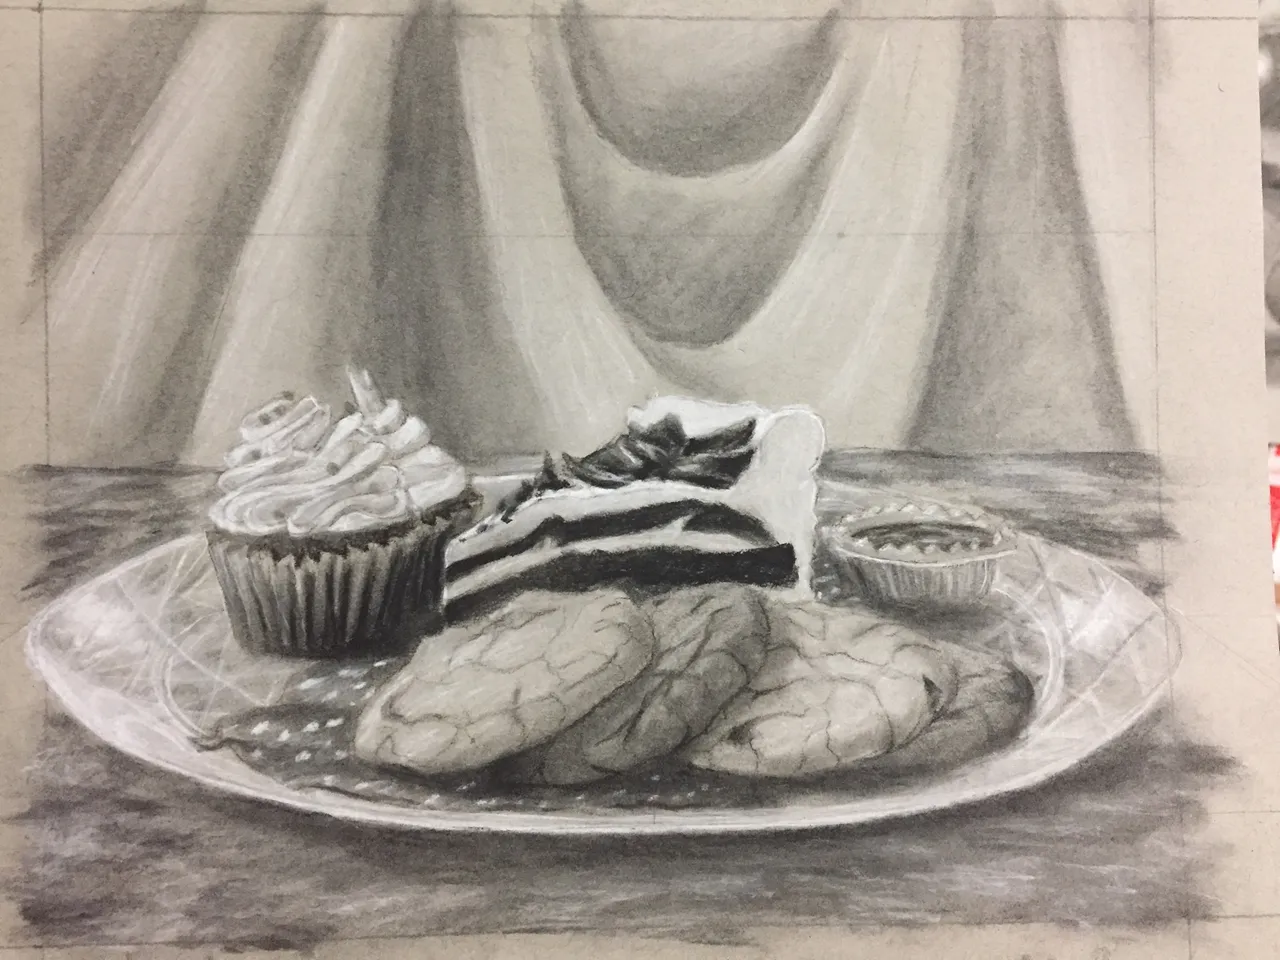
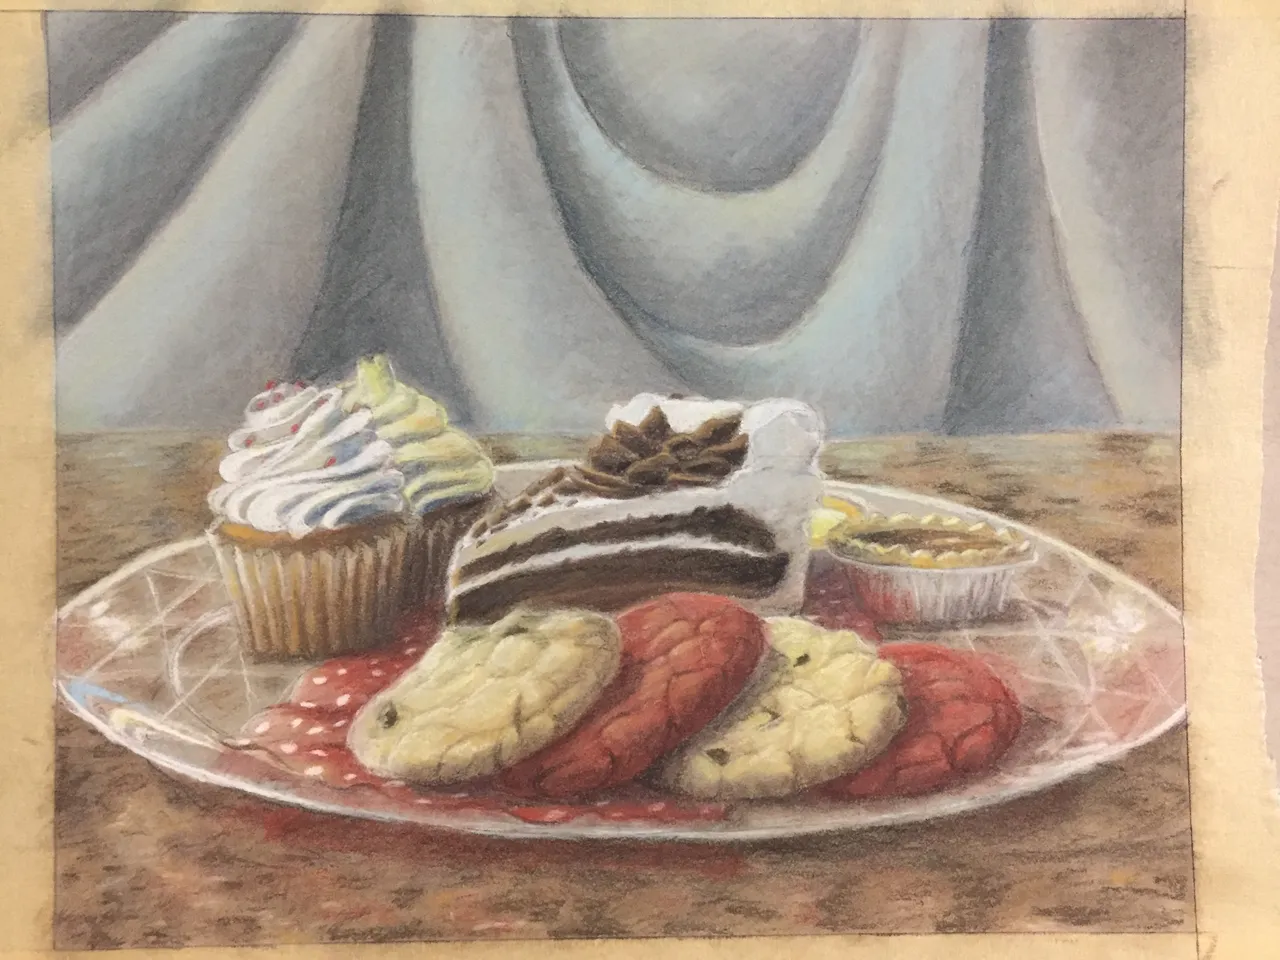
Before starting on the actual piece, we were instructed to make miniature earth-toned color and tone studies for our drawings. Above is the original reference photo, plus two different studies done on 10 x 12 inch gray-toned paper with a 1 inch boarder. These studies didn't have to be exact, but the idea was to first do a black and white charcoal tone study and then mimic those tones using earth-toned pastels. This would help us better plan out and visualize what colors should be used in the final full-colored piece.
STAGE 2 - BEGINNING
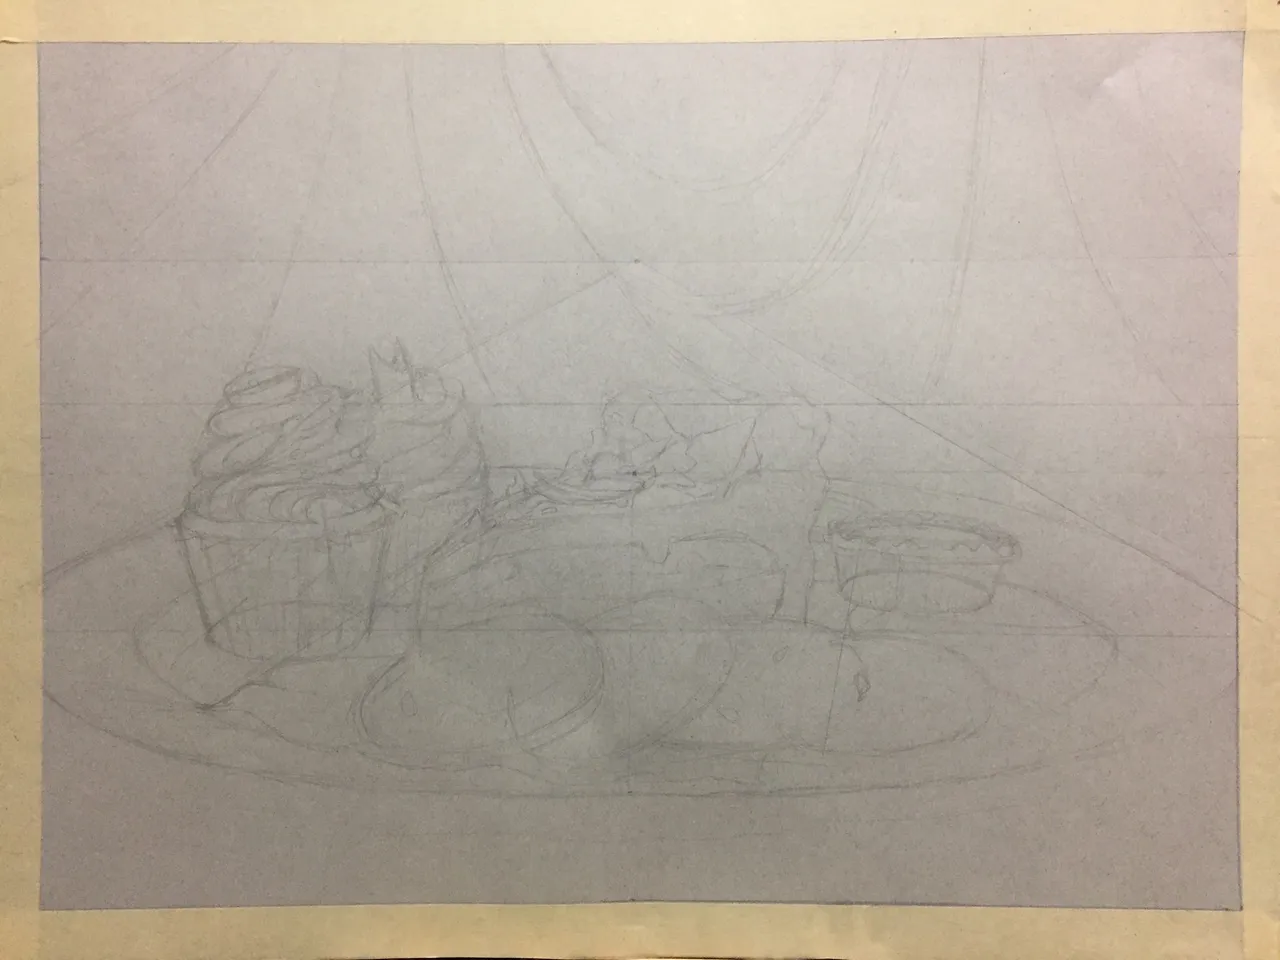
Here is where the real drawing begins! Using 18 x 24 inch gray-toned paper, I began drawing out the basic shapes of everything in the piece, making precise measurements to ensure everything is in its accurate scale and proportions. I even included a horizon line as reference to make sure my perspective was accurate. Much like my "Spheres and Cylinders" breakdown I did previously, I used the following technique to draw ellipses like the cupcakes, pies, and plate in this 3D space:

STAGE 3 - FORMULATING
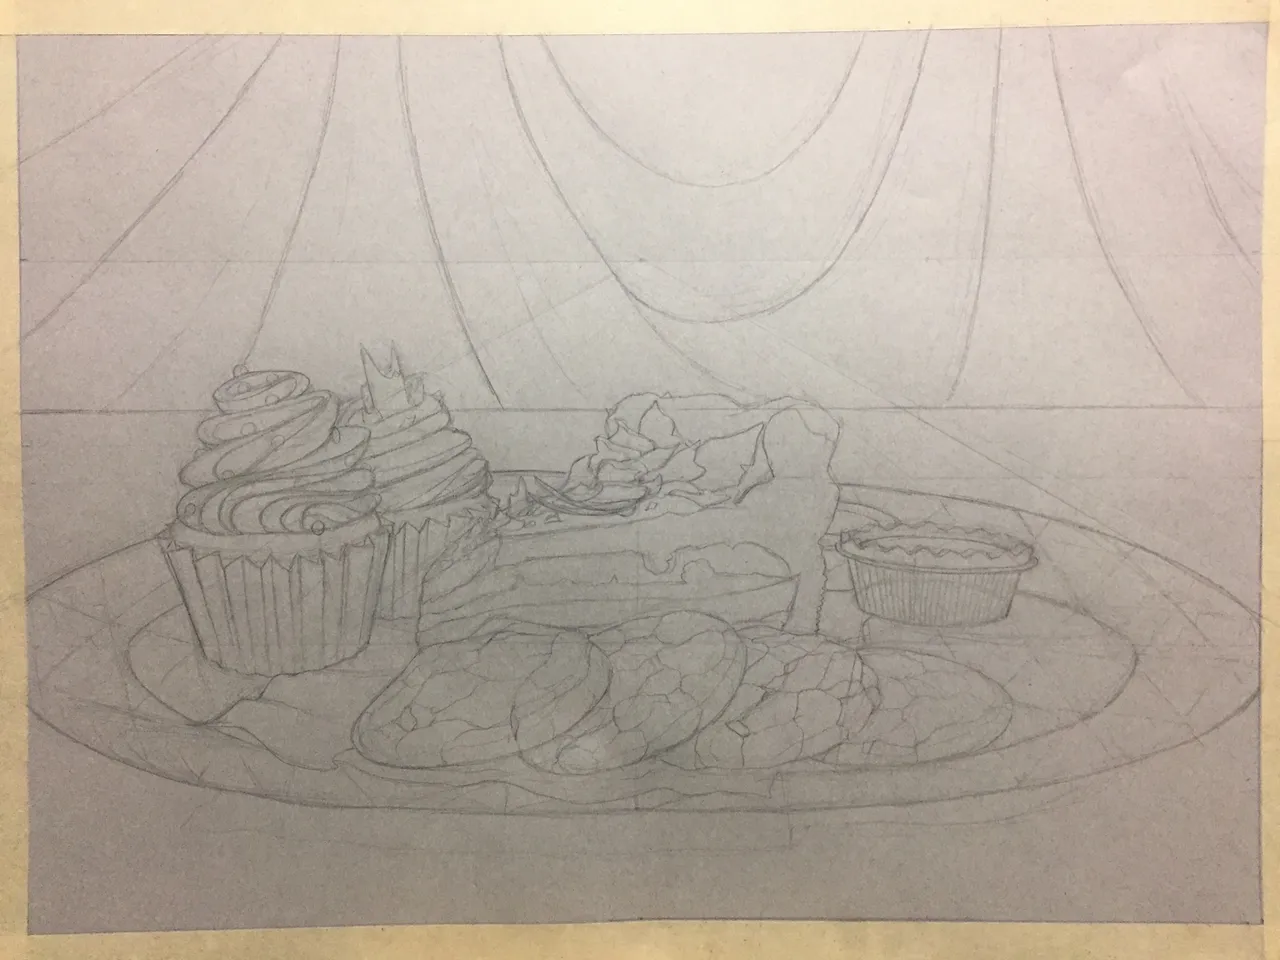
After planning out all of my basic structures and measurements, I began going in and detailing and refining my sketch to be clean and ready for coloring and shading.
STAGE 4 - DEFINING

This is the stage where I started laying out my base colors. The defining stage starts to give the objects more dimension, but texturing is limited. The main idea is to get your basic colors and structures into a 3D and colored form. You can worry about details in the next step!
STAGE 5 - REFINING
Refining is the final step of the process. it's exactly as it sounds. After defining my 3D shapes to have the colors and lighting I was looking for, I went in and began adding smaller details, like textures, highlights, and small color adjustments. This also includes darkening shadows, exaggerating lighting, and making any minor adjustments wherever they're due. This is the longest step of the process, because an artist can find theirself continuously detailing a piece for hours! It all depends on when you feel you're ready to stop.
Anyway, that's it for this blog entry. If you enjoyed it, don't forget to toss me an upvote, and feel free to follow me for more content like this! If you have any questions, ask below and I'll answer as soon as I can.
See ya! <3