Hello everyone! Welcome to my blog. Today I am going to guide you to draw a portrait. So before I start I want to tell you guys. I was not a good artist and I am not the best artist now but I always practice to make myself better. Practice is what makes us perfect. No matter if you are an adult or a kid if you try then you will able to draw.**
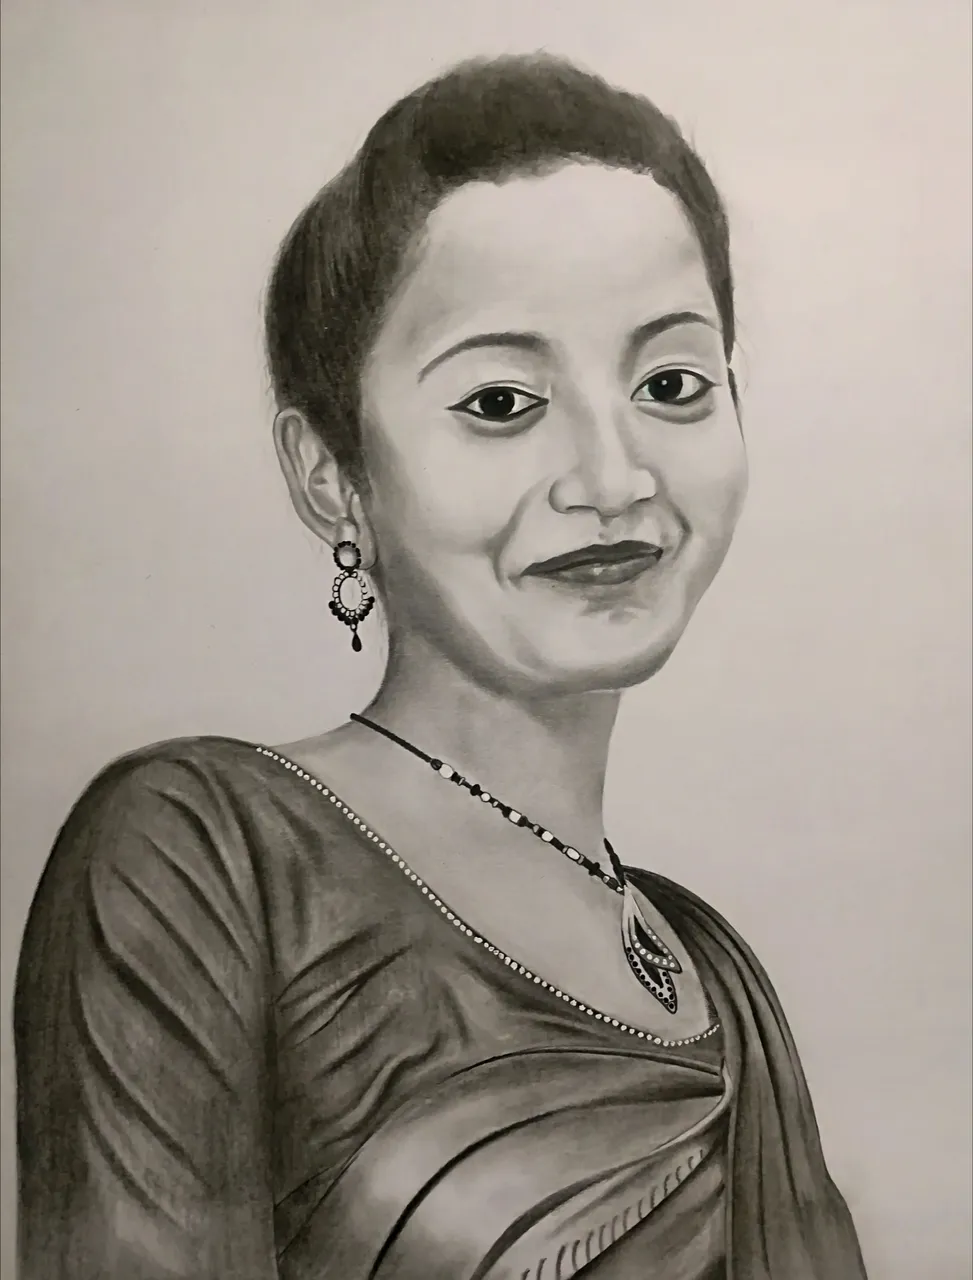
So, Now I am presenting you the final art.
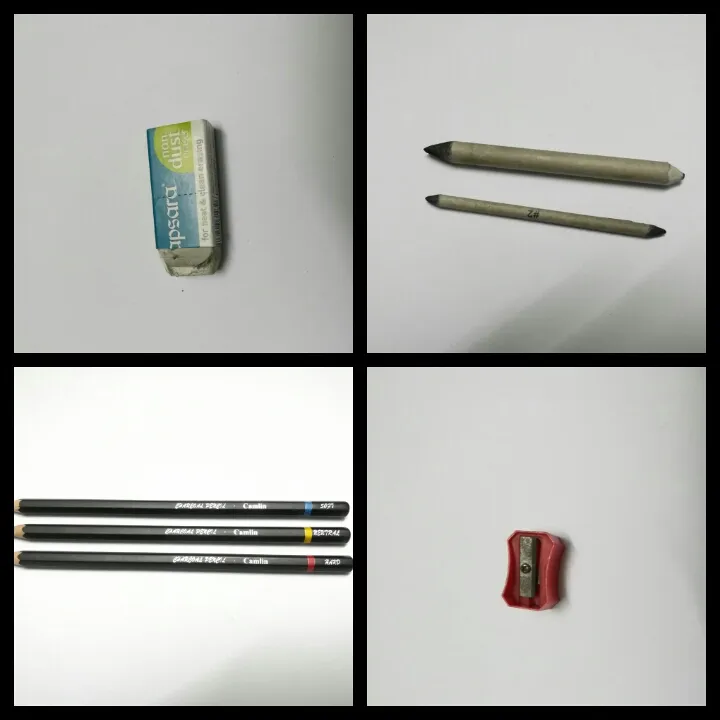
Materials Used:
1. Pencil: I used both charcoal and graphite pencil.
2. Rubber
3. Sharpener
4. Blending Sticks: It is used for blending
5. Art Paper
Now let's start the tutorial.
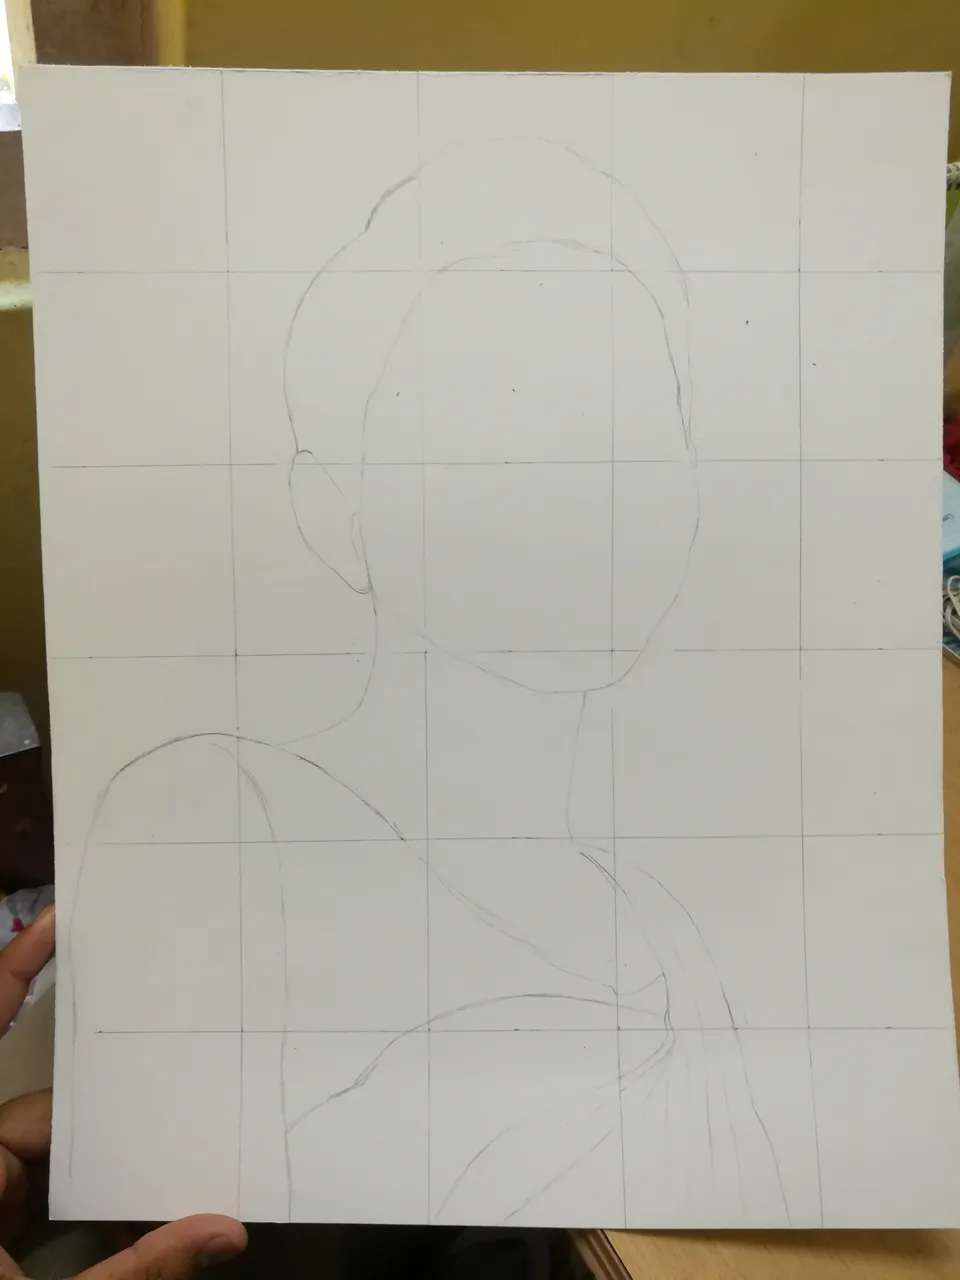
Step 1: First of all, take the art paper and make some squares all over the chart paper. Try to make the squares medium sized. If you make them very small or too large then it will be difficult to draw. One more important thing to keep in mind is not to make the squares darker. Because we have to rub those squares off after completion of our art. These squares help a lot while drawing a portrait.
After making the squares we will draw the complete outline of the image. Try to make the outline in the middle of the art paper. In my case, the portrait will look good in the middle. The position can change with different portraits.
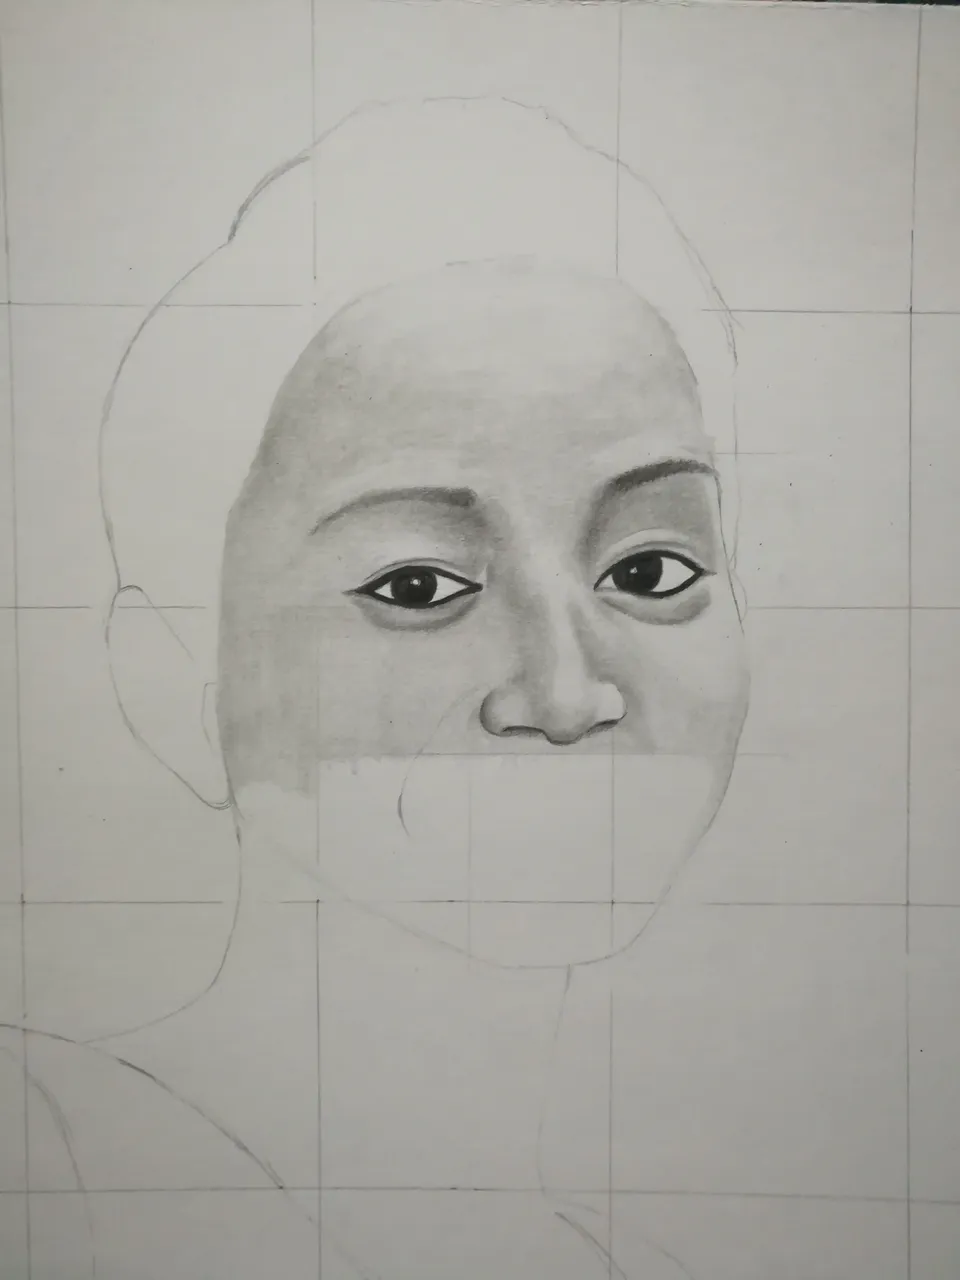
Step 2: After drawing the outline start with the eyes and then the nose. Many beginners fail in this step. Many beginners first draw other stuff and then draw the eyes. Eyes are the main part of a portrait. If we can place the eyes in perfect place then 50% work is already completed. Use the squares to draw the eyes in perfect place.

Step 3: After drawing the eyes and nose. Start shading at the same time. Use HB or 2B pencils to shade because if we use darker pencils then it will be very difficult to do shading. Use blending sticks to blend the portrait after shading.
Step 4: After completing the eyes and nose we will move to the lips. Try to put lips in the perfect position. This thing I can't teach you. You have to figure out where to put the lips according to your portrait. While drawing the lips try to highlight the cheek as well. After that do the shading and use blending stick to blend.
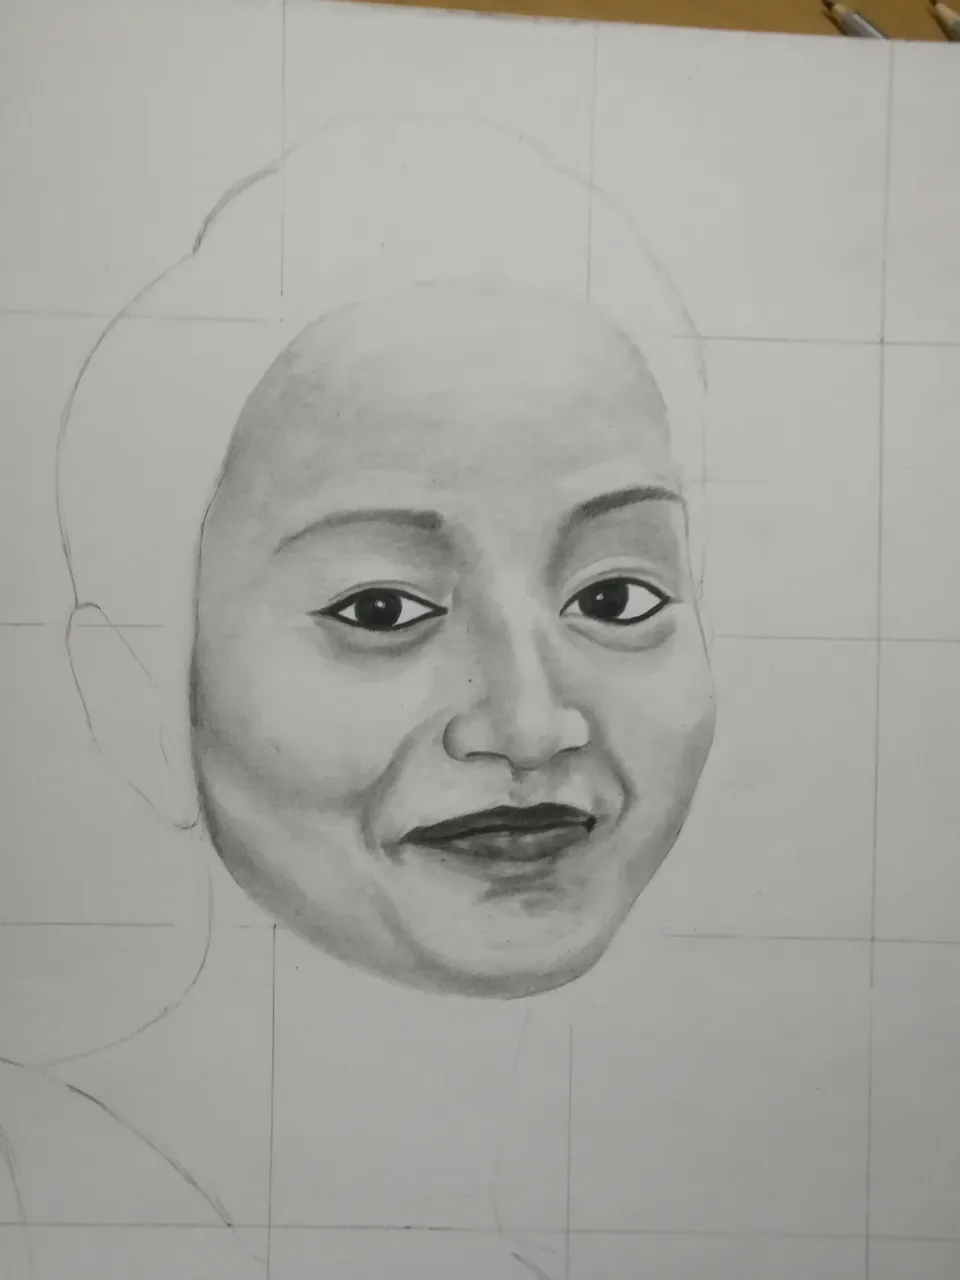
**Step 5: After drawing the above parts we will start shading the neck. After shading the neck the face part will be completed. If you can draw the face part than 90% work of the portrait will be done.
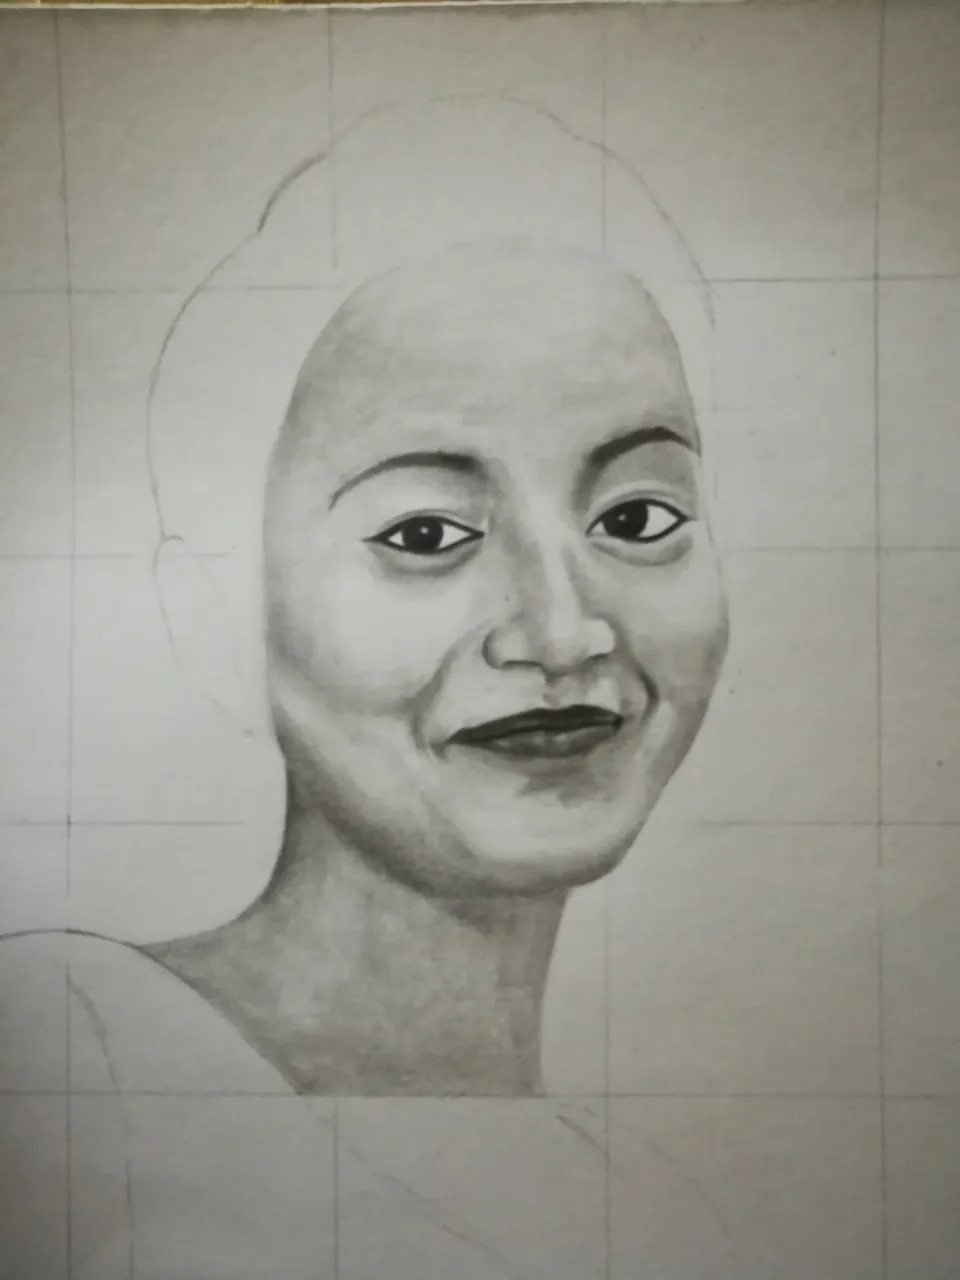
Step 6: In this step we will draw the hair. In my art the hair part is simple. I used the charcoal pencil to draw the hair. After drawing the hair I added an earring. But it is optional you can add anything as you want to your portrait. After completing the hair and earring, I started to draw the dress. I used a charcoal pencil on the dress too. Now the charcoal pencil has three different types; soft, neutral and hard. The darkness will increase from soft to hard.
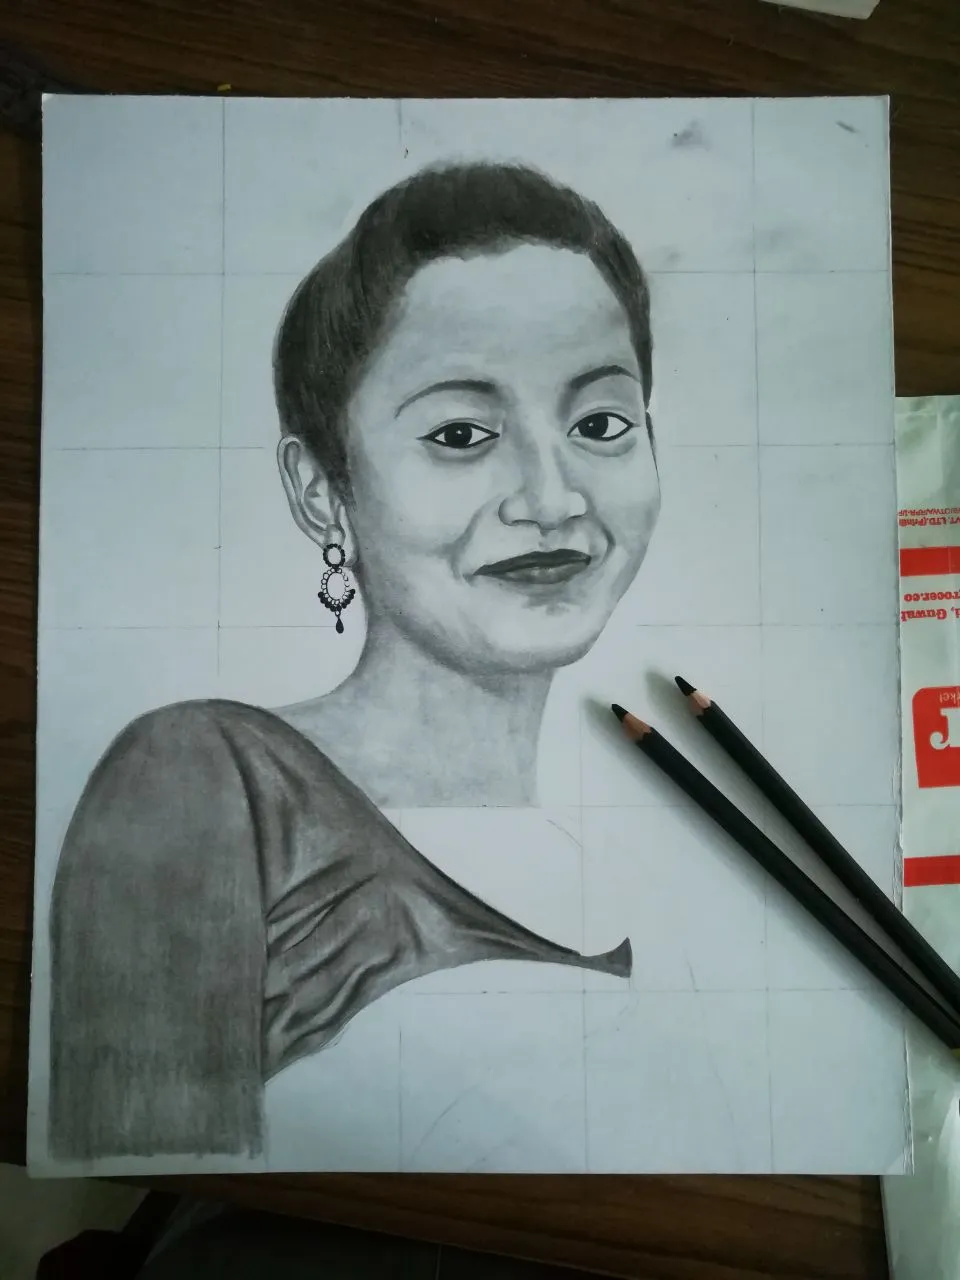
Step 7: This is the final step of the portrait. In this step, I added a necklace and gave it some good and simple style. You can give any type of necklace or you can just skip it. After that, complete the dress and highlight the folds of the dress using different shades of graphite pencil and use blending sticks to blend and remove the squares using a rubber. After completion of the above step, your portrait will be ready.