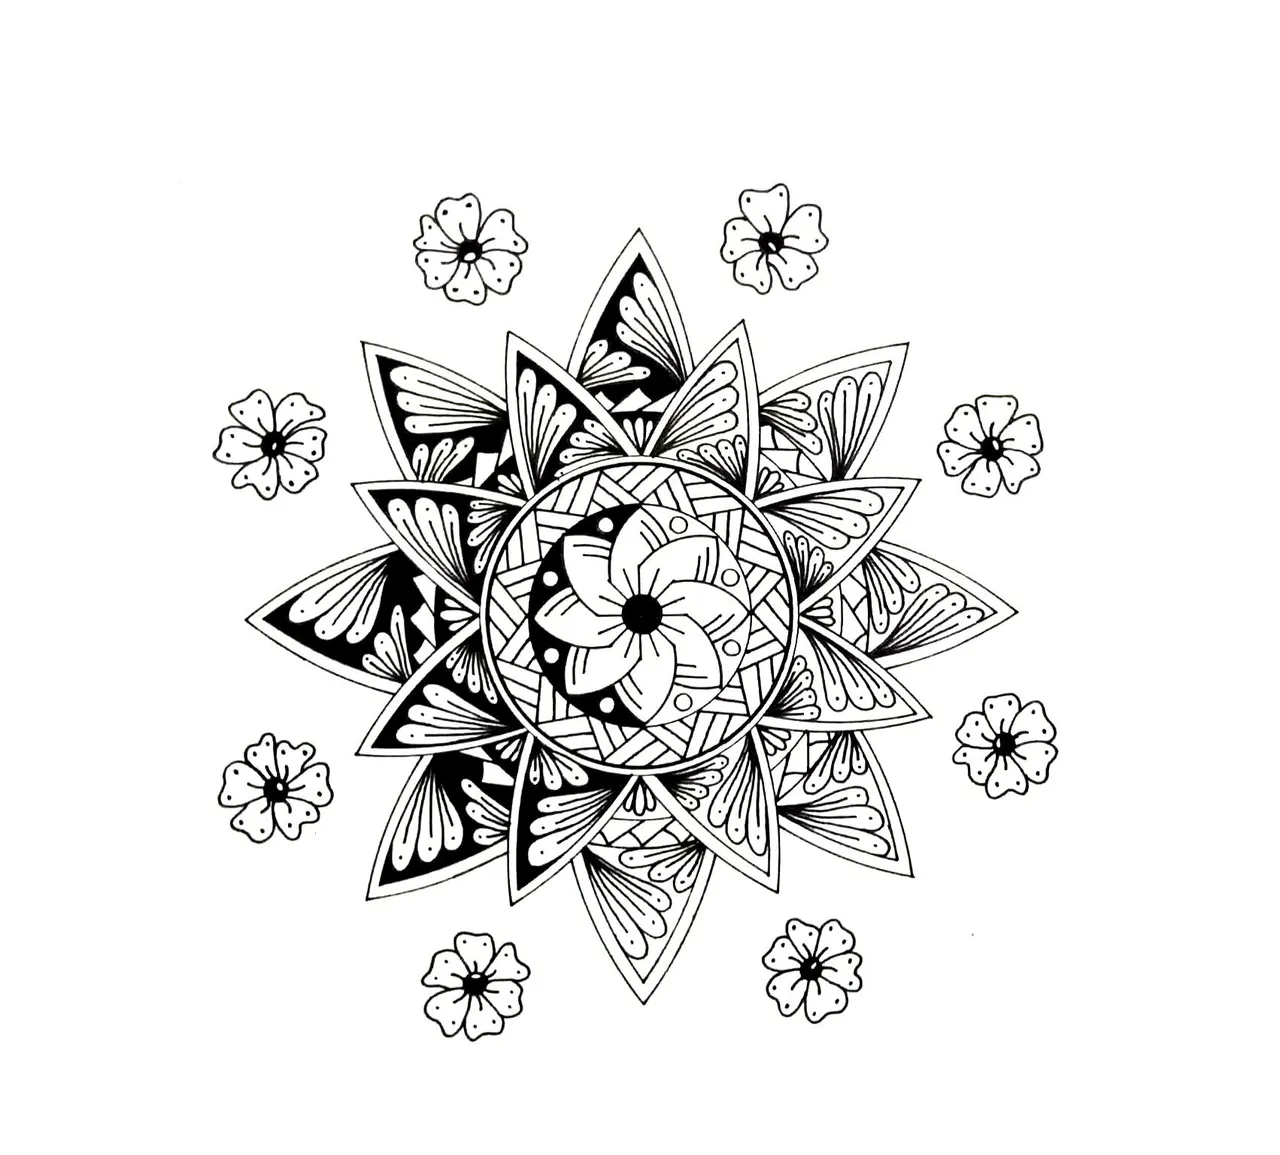
Beautiful Sunshine Steemit Community! Another breathtaking Mandala Floral @originalworks . Learn with these easy procedures.
Materials:
• Sketch Pad
• Pencil
• Gel pen
• Compass
• Protractor
• Ruler
• Eraser
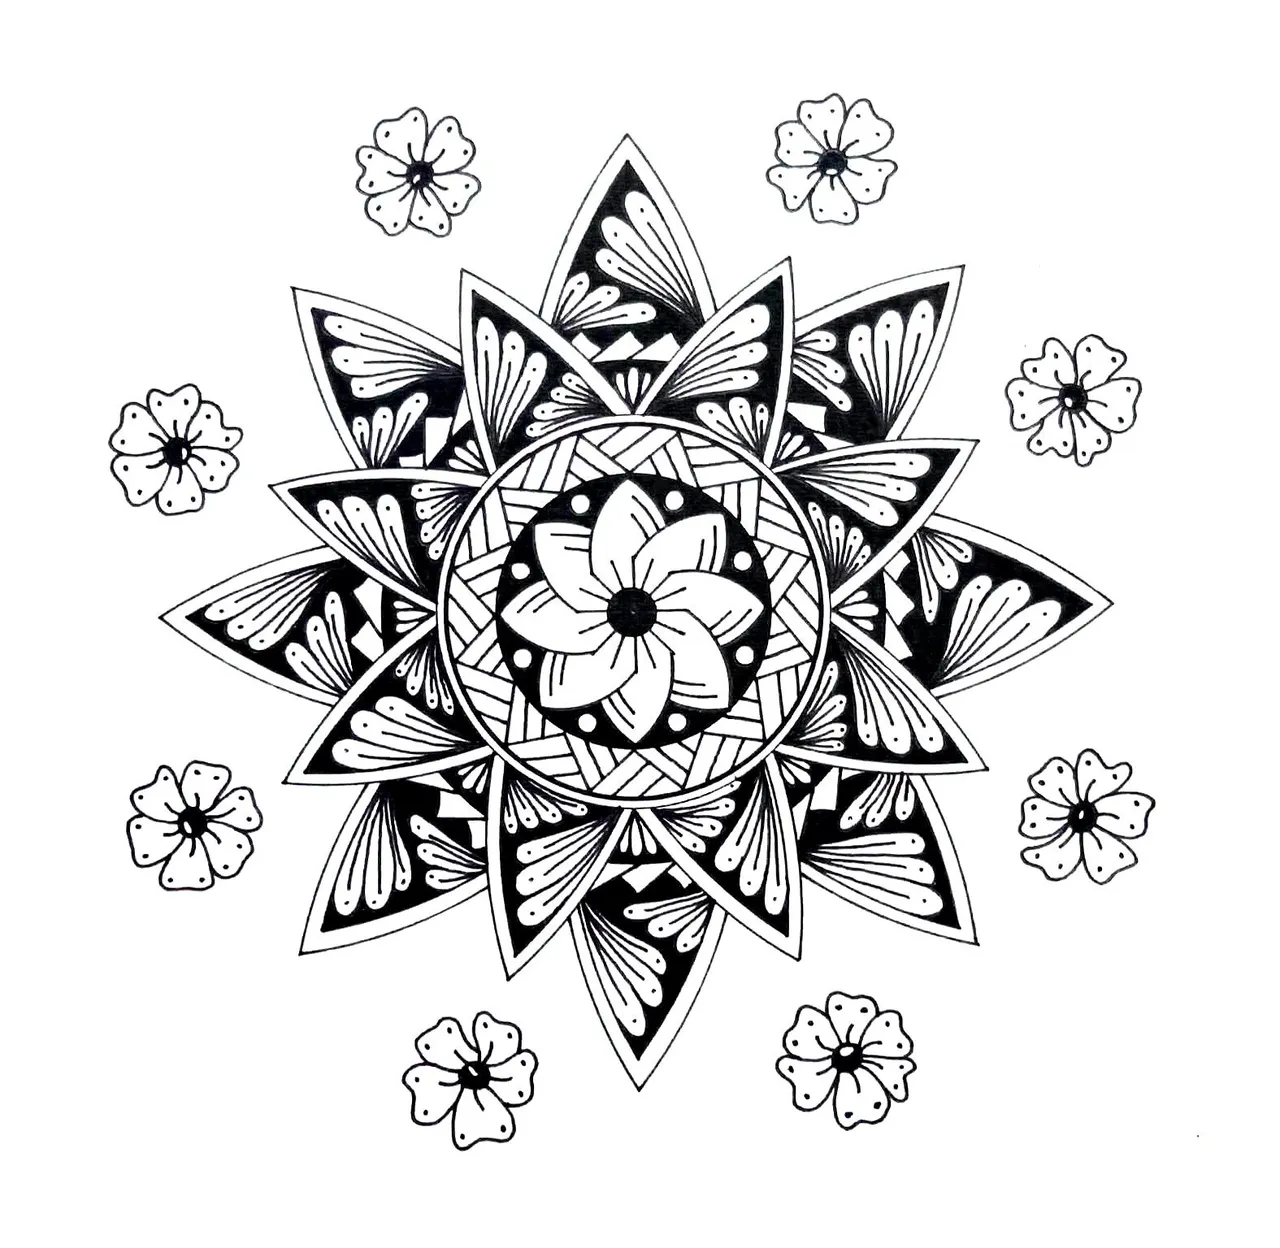
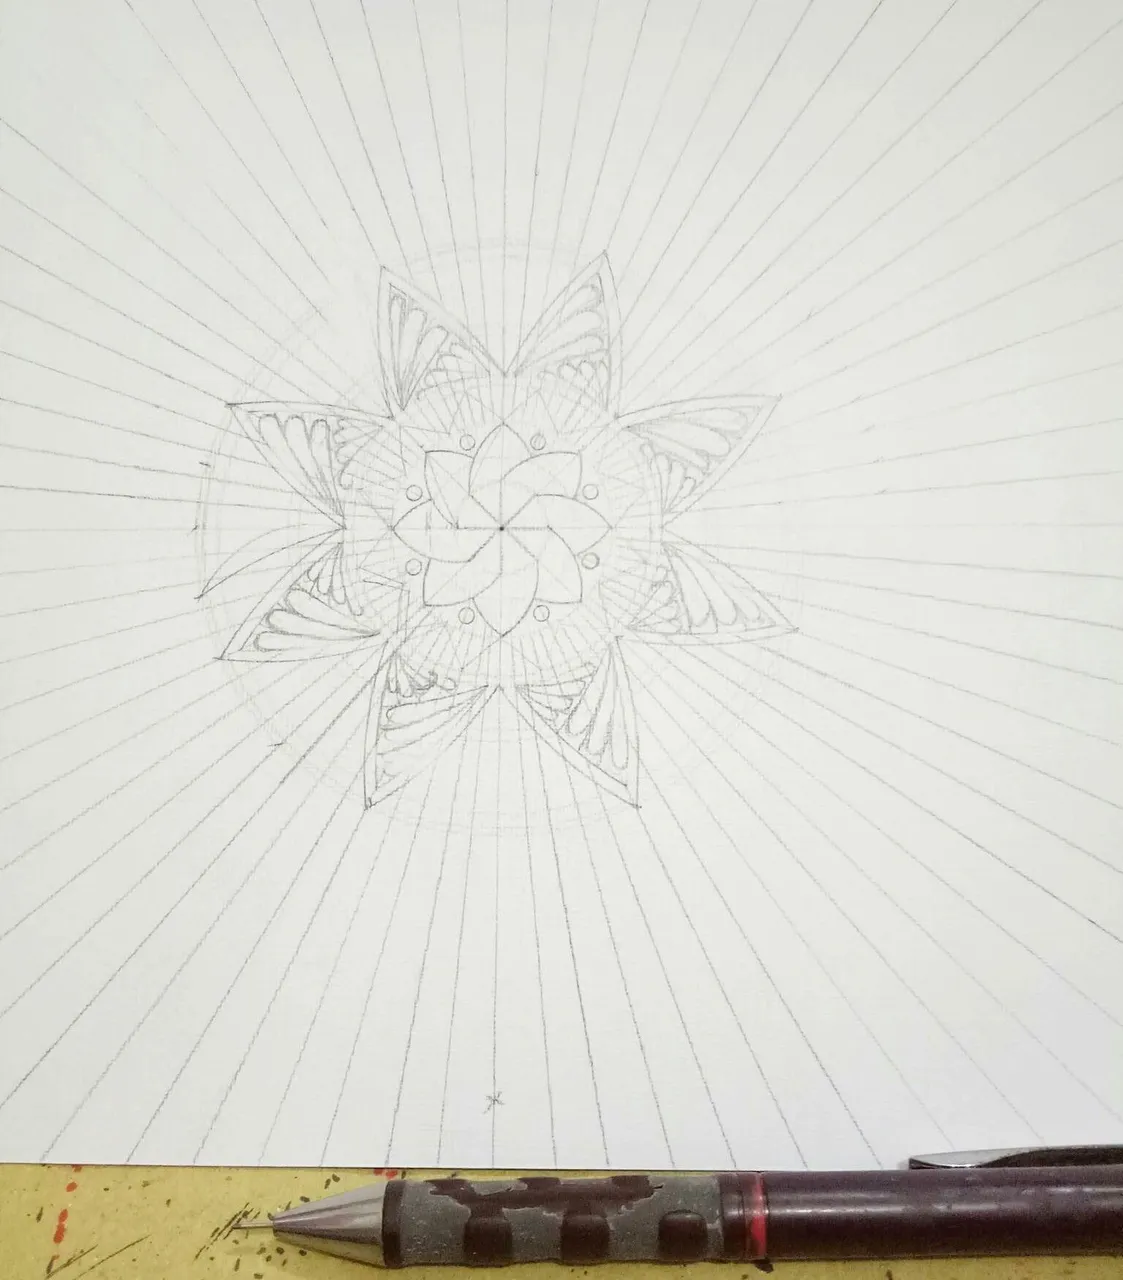
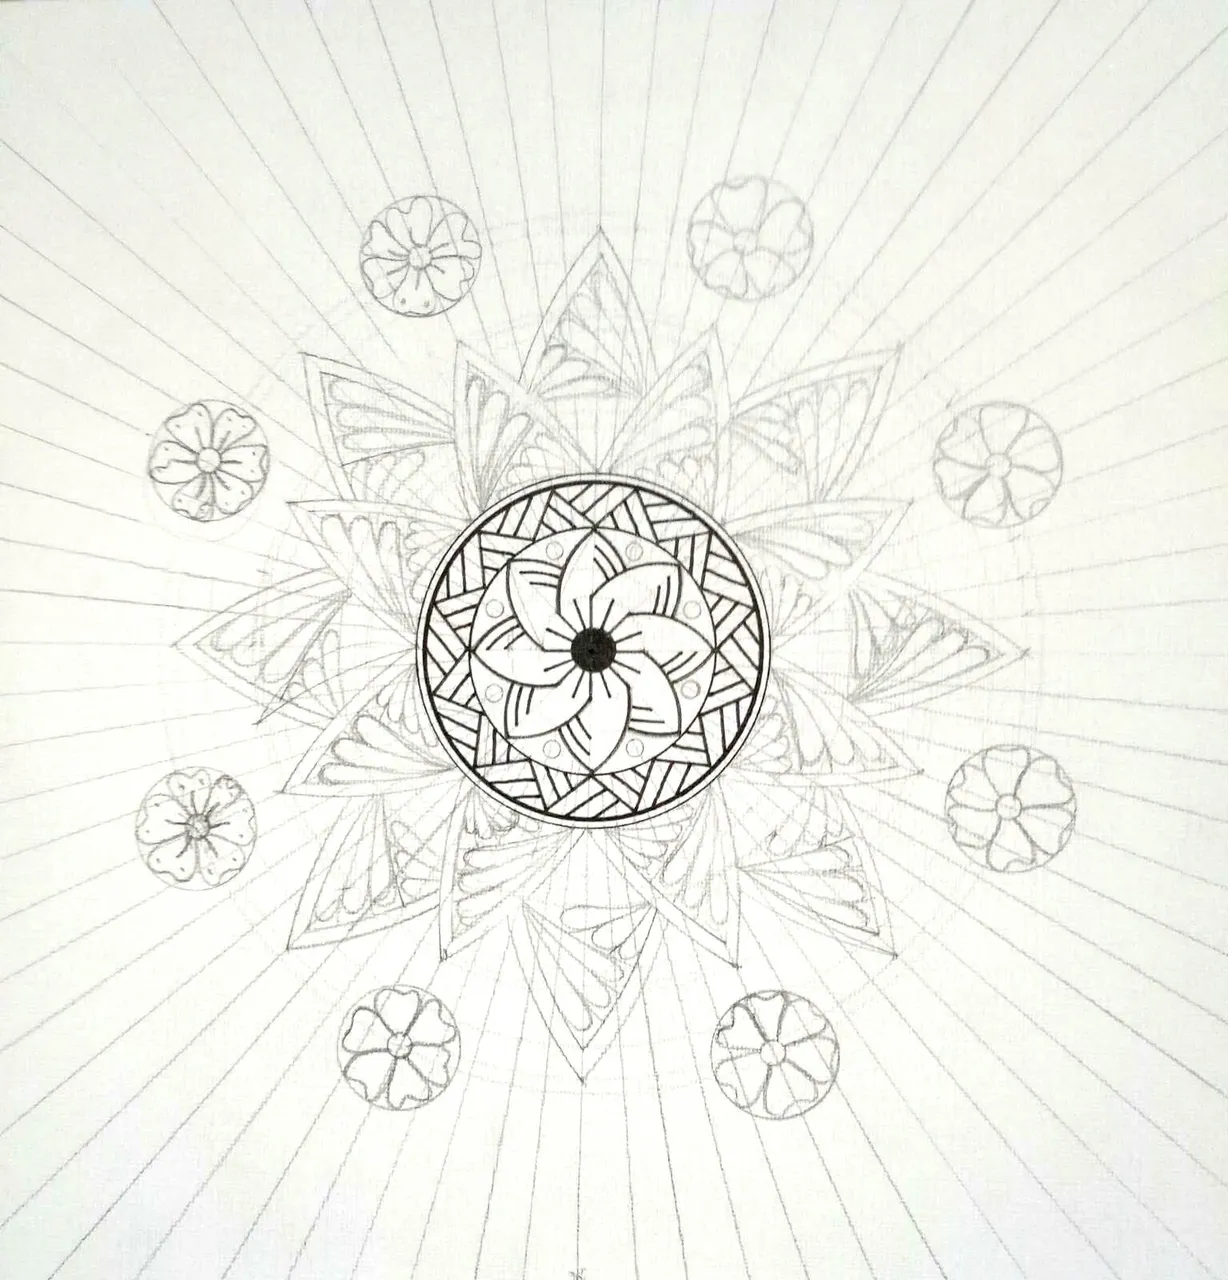
Step 1
Draw your guidelines using protractor (Note: must be in rays measuring approximately 0.5 cm distances from each) and circles (Note: 4 circles in ascending order based from the photo). Start making your floral outline design, in petal form leaving a space for more designs.
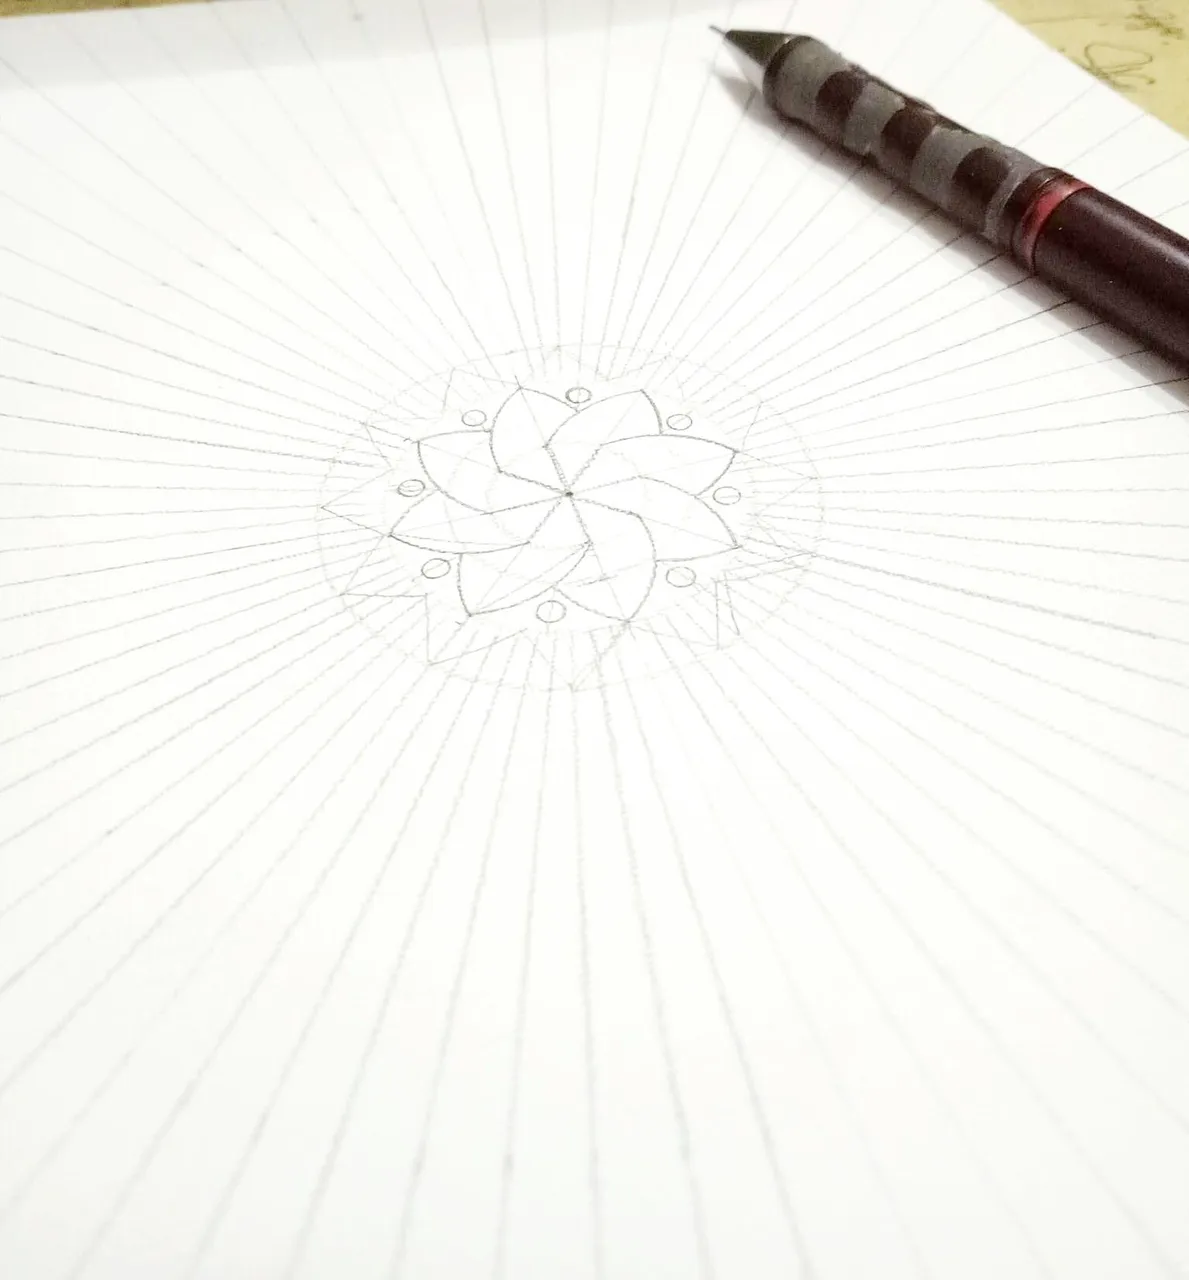
Add two ascending big circles for another design .
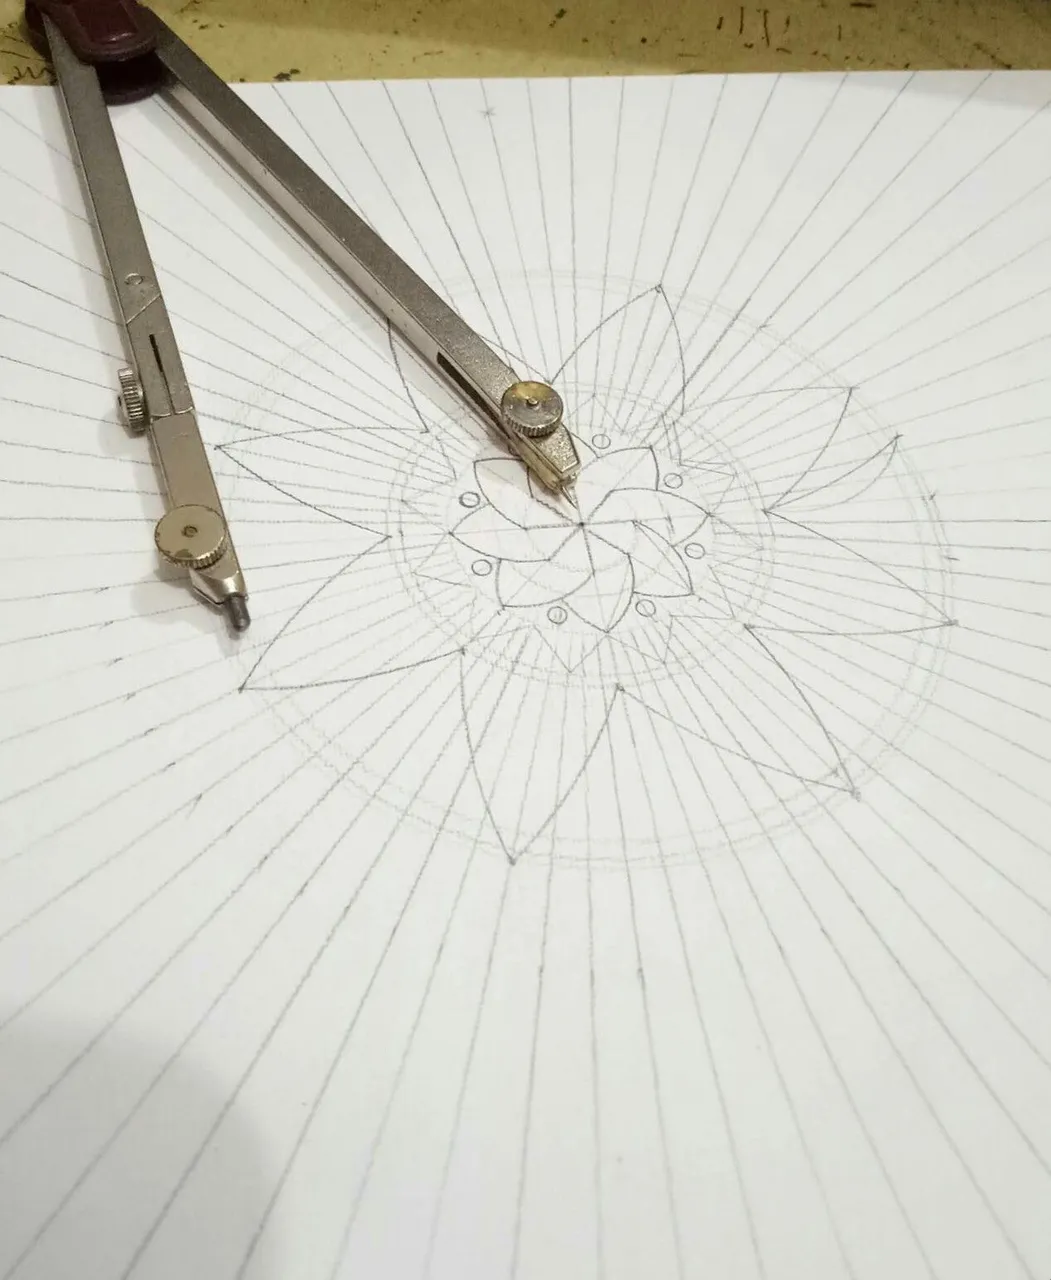
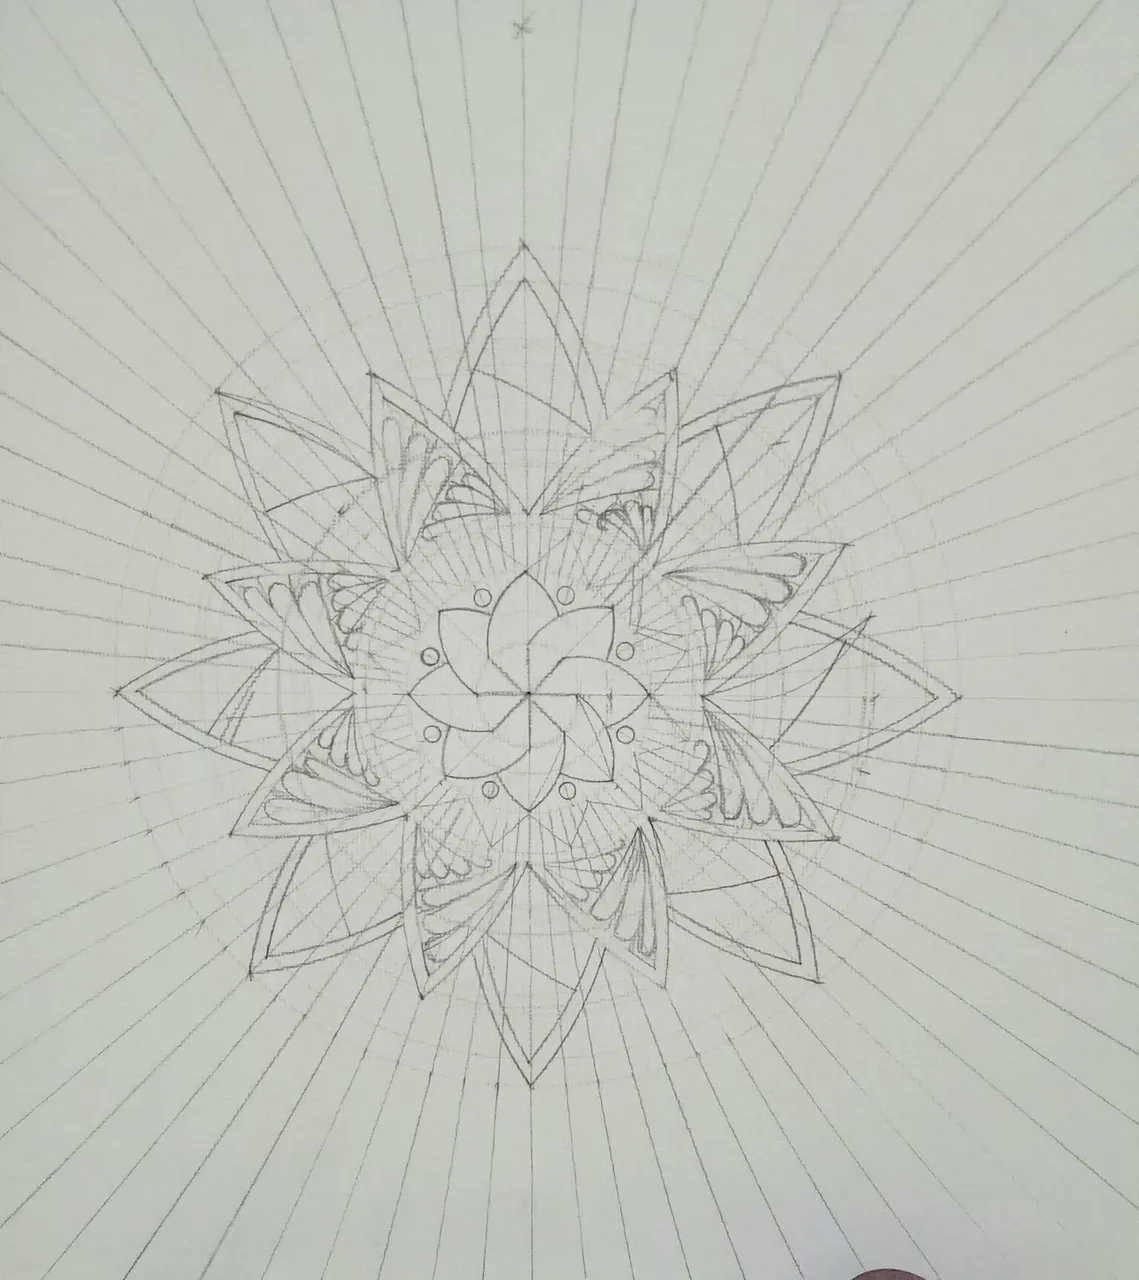
Step 2
Draw your inside designs from your outlined big petals.
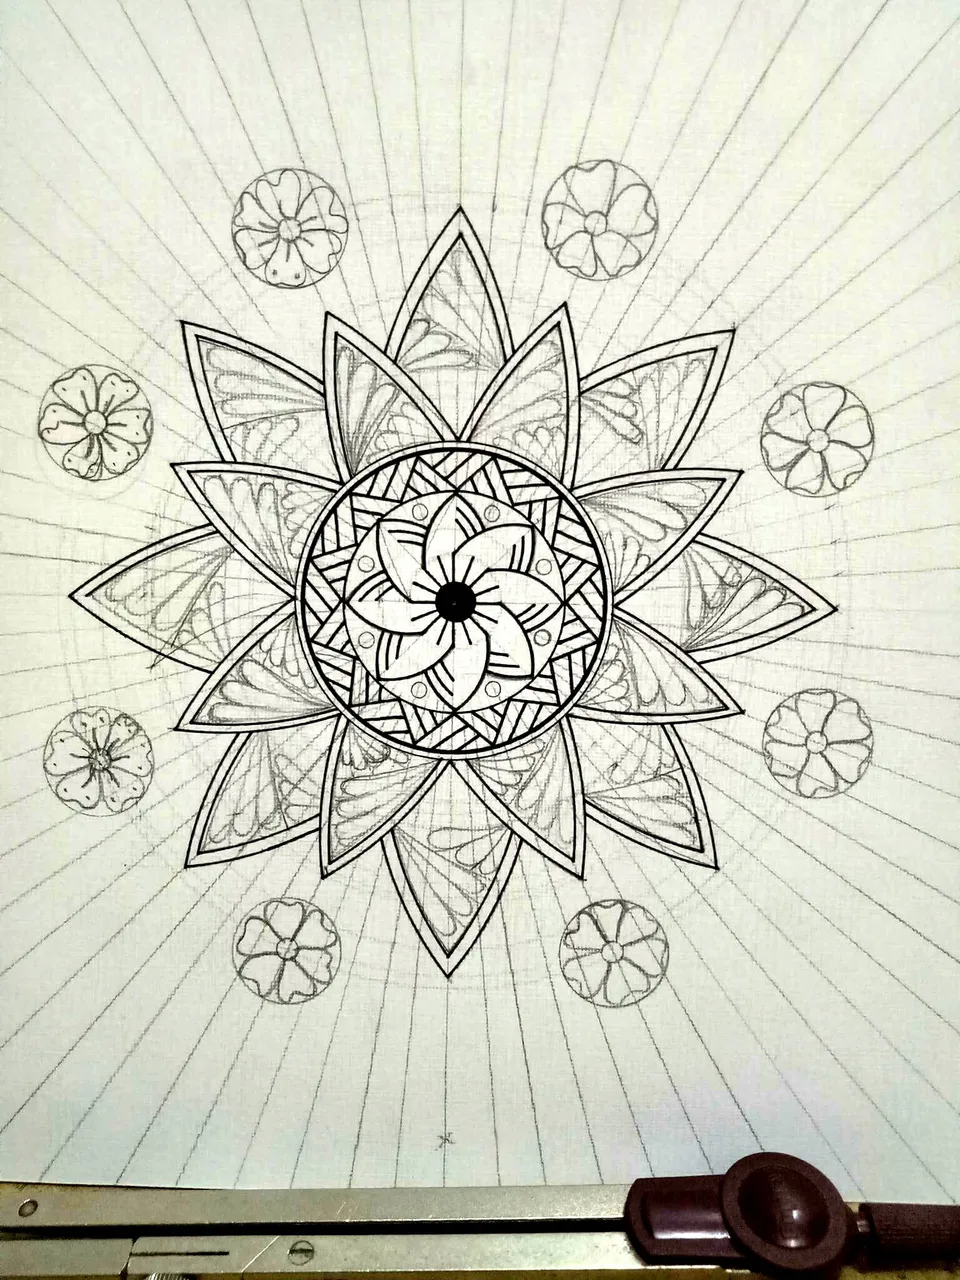
Step 3
Add another petals on your biggest circle. (Note: try your best to make it accurate.
Step 4
Same inside designs. Draw your surrounding flowers at least 8 pieces with exact distance measurement.
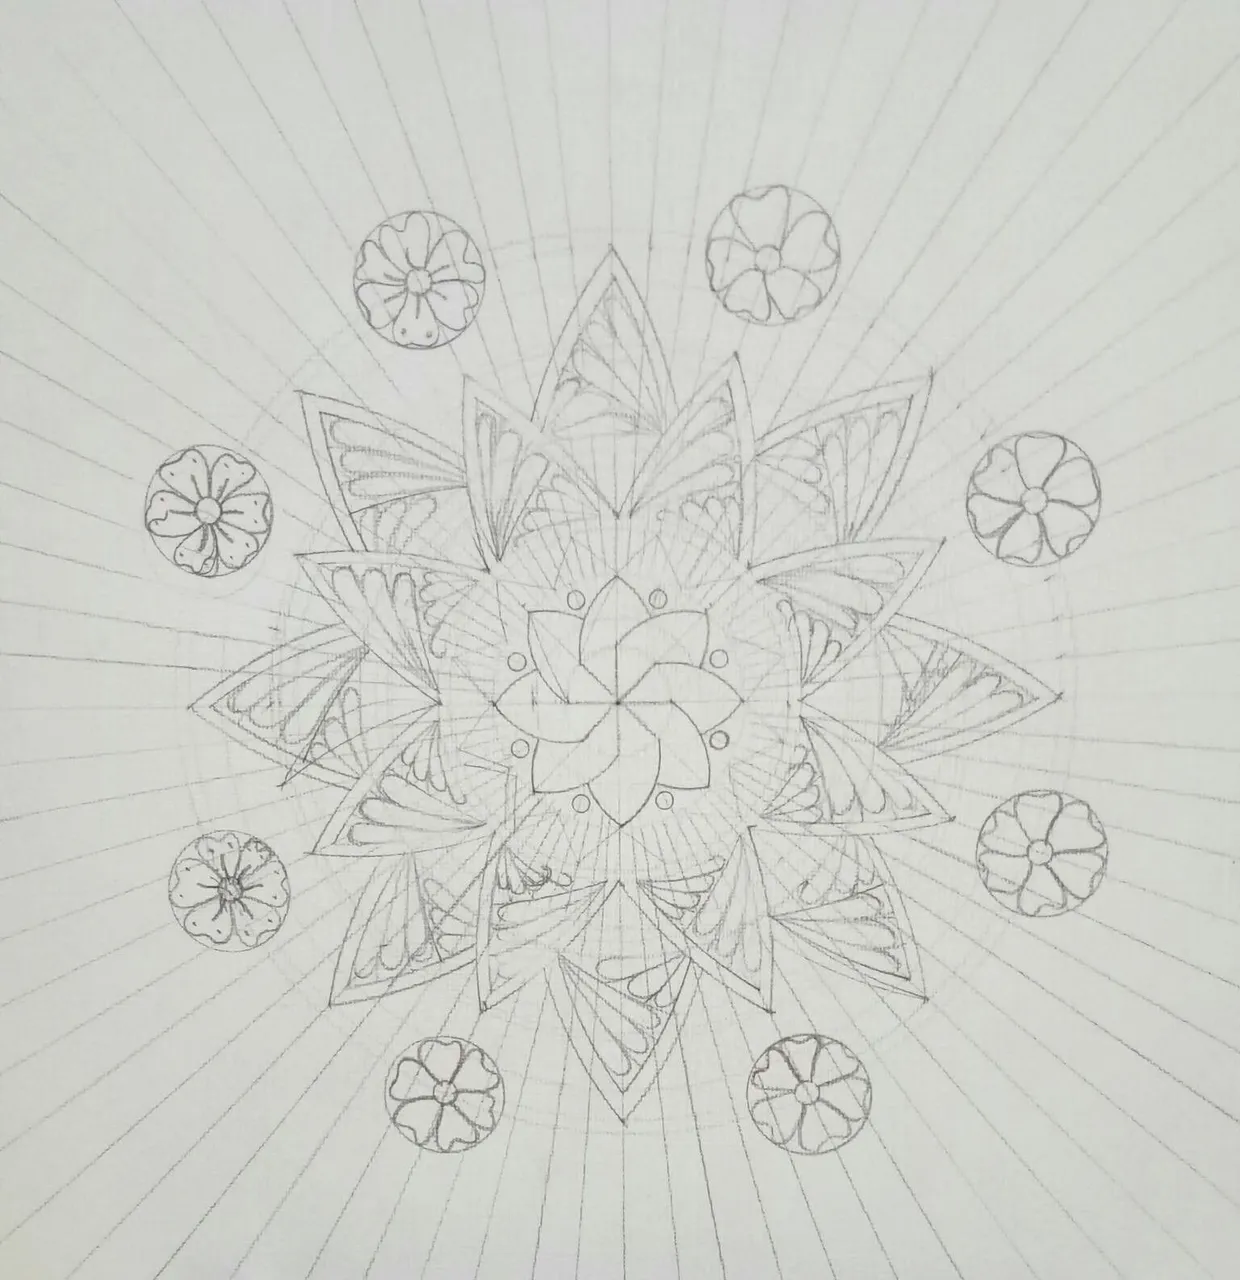
Surrounding Flowers should be drawn inside a circle for accuration.
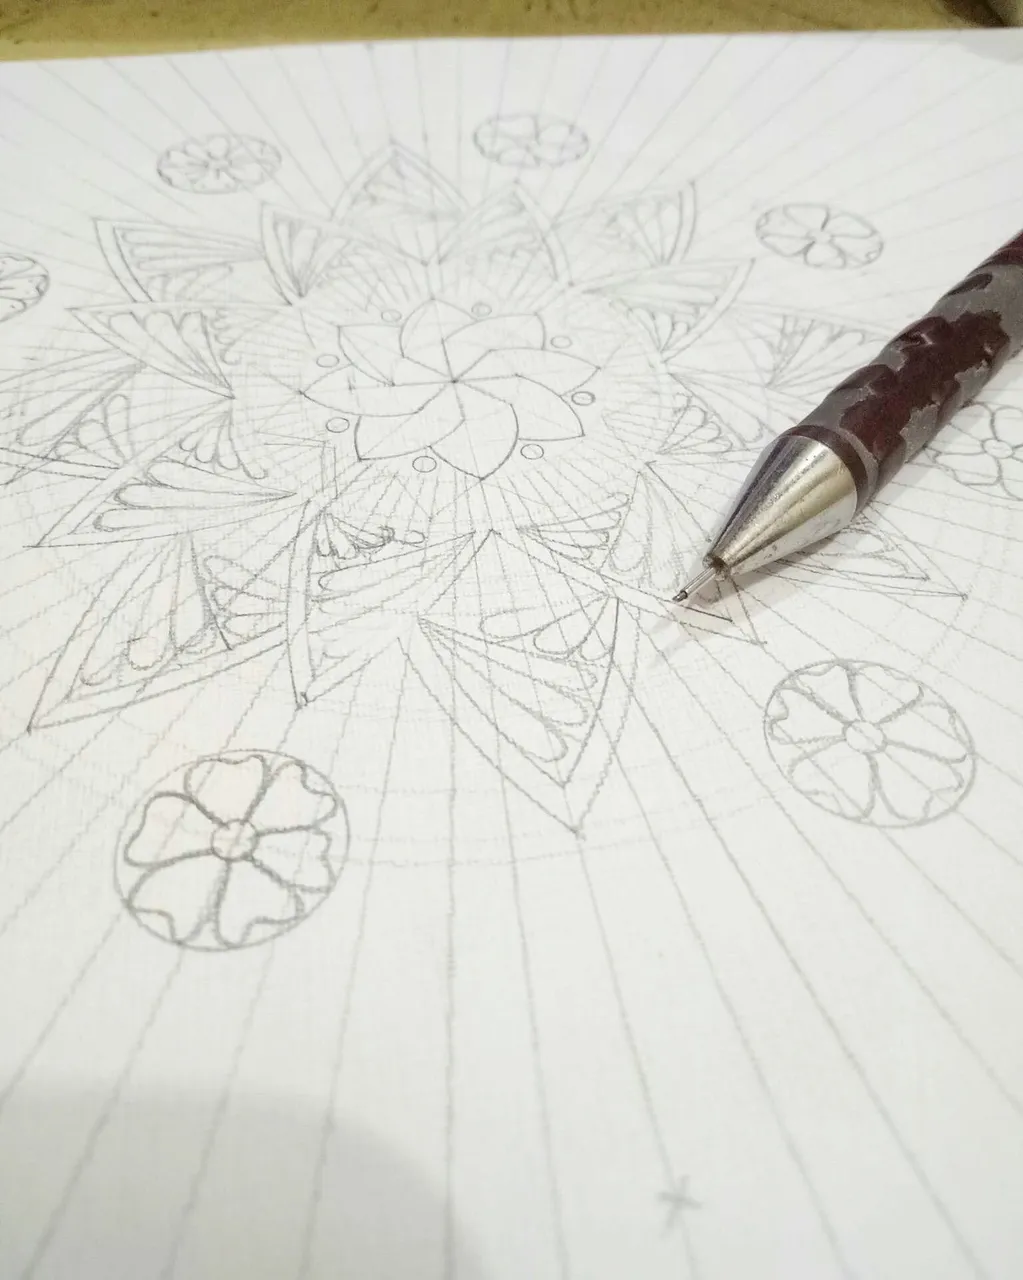
Step 5
Trace your designs gently and carefully by using your gel pen. (Note: Start tracing from the smallest design you may have.
Trace your inside designs on each petals.
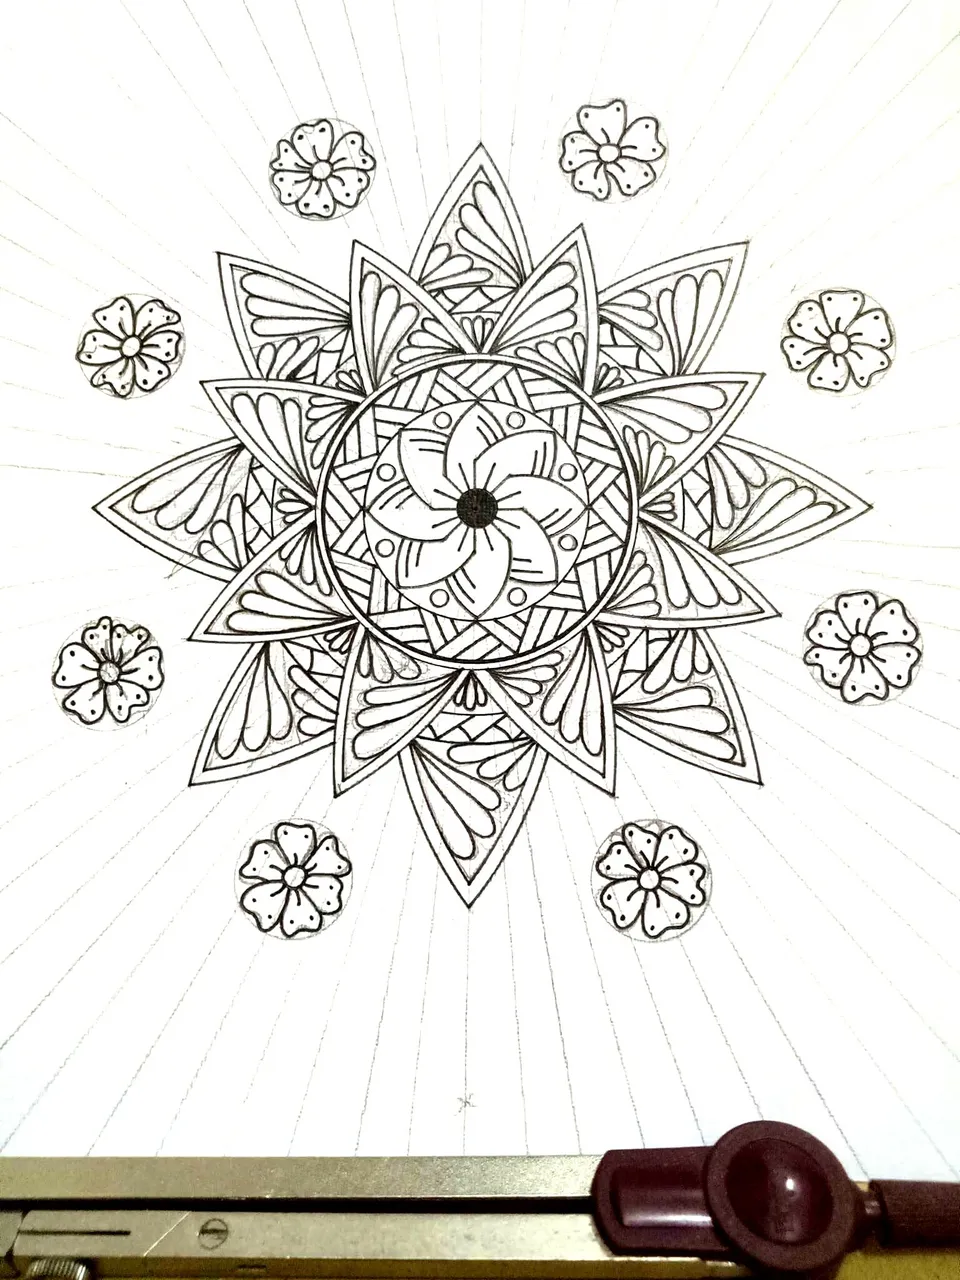
Step 6
Lastly, blackening some parts of your artwork. (Note : follow photo below 👇)