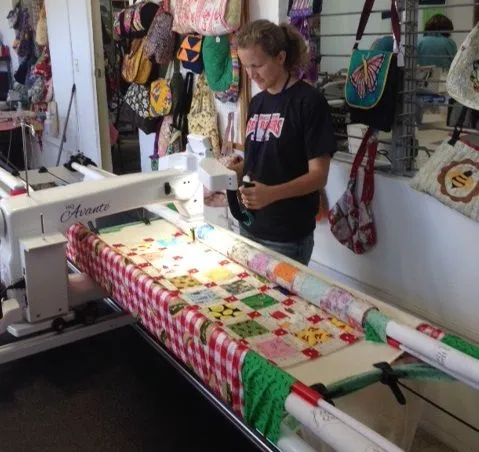
Last week, I was super excited to finish Gwen's quilt top so I could get started on quilting it. I made an appointment with our local quilt shop (in our tiny mountain town in Panama) to use their $14,000 quilting machine! I was able to talk to the owner and get everything together in time to get a few hour lesson in on Wednesday. Here is my review of the process.
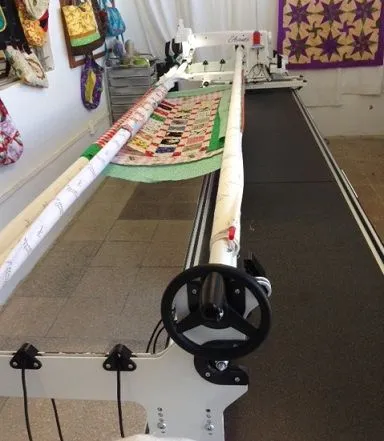
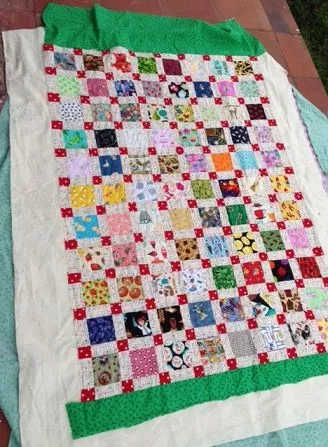
I was super excited to try out the HQ Avante 14 foot quilting machine and whip together some quilts. The owner told me to bring in a quilt top that I had previously made and not finished or just some fabric to learn on. I had just the perfect thing, but I had to alter it a little bit. I had made an ispy quilt top years ago as well as a picnic blanket...and neither one had ever been finished. So I added some length to the quilt top and took them in.
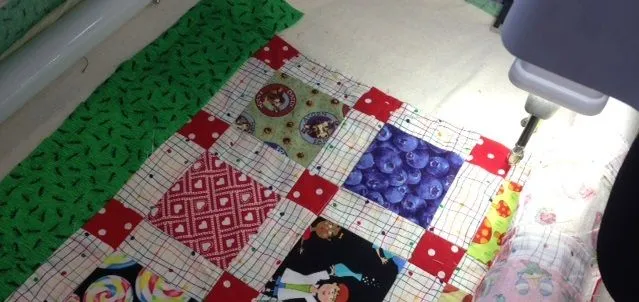
I was told that ironing was very important for using this machine. I do not iron my pieces usually, so this was kind of annoying to the owner. I had to iron the top, but she later told me I still didn't press it good enough. The top, batting and back were loaded on to the machine. This whole process took about 15 minutes, which isn't bad. I can't make a quilt sandwich and pin it together that quickly. The thing I didn't realize at the time was that the extra (green) ant fabric I had sewn on like she told me to would mess up how the pieces lined up.
The first thing you must do is baste the quilt together on all three sides when you start off. Then, as you roll the quilt to the next part, you just have to baste one side and go from there. After that, you just go for it. I decided to start out with all over stippling which is my usual go-to method for quilting. It was a breeze on the machine...although I was concentrating hard and making a funny face!
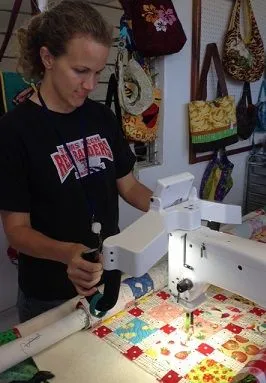
The machine was set to sew when the handles were moved and stop when it was still. There is also a start/stop button and up/down button for the needle. The thread broke about 3 times while sewing and I ran out of bobbin. Each of these things takes a few minutes to be fixed and a helper is needed to walk you through the process.
.
I did some all over free motion quilting as well as other patterns. I tried writing all of my kids' names in there (even though the quilt top was on upside down) and used a pattern that I followed on the machine with a laser beam. It was a lot harder to do that than it looked! The machine stitches something like 1700 stitches per minute, so it goes through needles quickly!
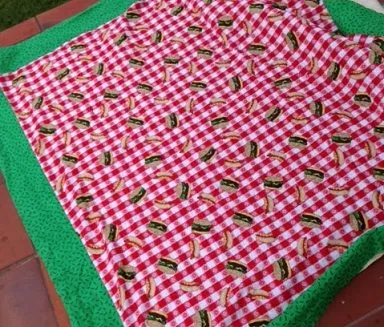
Hotdogs and hamburgers
I am happy that I learned to use the machine. I was in the quilt shop for around 3 hours and almost completed the top. I have to move some fabric from one side of the back to the other side so that the back is long enough to cover the front. I haven't felt like doing that this week. I had grand hopes that this would be my new way of quilting everything, but I'm just not sure. I guess I'm more used to doing it on my little machine where I have a little more control and everything doesn't have to be 100% perfect. It was definitely easier to do free motion on this machine and a fraction of the time. One other concern is once it is on the machine, you can't stop and then pick it up another day. You have to start and finish all quilting that day...and sometimes I just don't have that kind of time!
It cost me $5 to pay for the helper and she charged me $2 for the thread I used. Since it was my first time, I did not have to pay the $2.50 an hour rental for the machine. This is an insanely cheap price to use this machine. You can buy fabric and batting at the quilt shop, but for this project, I had my own. I hope to use it in the future on larger projects and possibly practice some more, but I don't think it will become my regular method for sewing quilts. I'm glad I took the time to learn to use it though!
!steemitworldmap 9.059013 lat -79.471001 long David District D3SCR
Check this out on the steemit World Map
#NeedleworkMonday by @crosheille