
Hola mis amigos de Hive Diy, estoy muy contenta de pasar por aquí y compartir mi participación en el concurso. Se trata de una cajita de bombones artesanales hecha a mano, especialmente diseñada para mamá.
Antes que nada, quiero contarles que hace un mes y medio comencé un nuevo emprendimiento junto a mi hijo @demoad, creando bombones artesanales. Más adelante les hablaré en detalle sobre esta emocionante colaboración, pero ahora quiero mostrarles las cajitas de bombones que hemos diseñado juntos, las cuales han causado sensación en los últimos días y me han mantenido muy ocupada. En un principio, pensé que no tendría tiempo para participar en esta iniciativa, pero aquí estoy, emocionada por compartir mi creación.
Hello my friends from Hive Diy, I am very happy to stop by and share my participation in the contest. It is a handmade box of handmade chocolates, specially designed for mom.
First of all, I want to tell you that a month and a half ago I started a new venture with my son @demoad, creating handmade chocolates. Later I will tell you in detail about this exciting collaboration, but now I want to show you the little boxes of chocolates that we have designed together, which have caused a sensation in the last few days and have kept me very busy. At first, I thought I wouldn't have time to participate in this initiative, but here I am, excited to share my creation.

Sin más preámbulos, les presento los materiales y el proceso creativo.
Materiales:
- Cartulinna laqueado en blanco
- Cartabón
- Lápiz
- Silicona líquida
- Tijeras
- Cintas de colores
- Perla
- Cartulina plateada
- Foami de diferentes colores
- Cola blanca
- Escarcha de colores
Without further ado, I present to you the materials and the creative process.
Materials:
- Blank lacquered cardboard
- Cardboard
- Pencil
- Liquid silicone
- Scissors
- Colored ribbons
- Bead
- Silver cardboard
- Foami of different colors
- White glue
- Colored frosting

Comencé marcando dos rectángulos en la cartulina, uno de 13 cm de ancho por 16 cm de largo, y otro de 13.5 cm de ancho por 16.5 cm de largo. El rectángulo más grande será la tapa de la caja, mientras que el más pequeño formará la base.
I started by marking two rectangles on the cardstock, one 13 cm wide by 16 cm long, and the other 13.5 cm wide by 16.5 cm long. The larger rectangle will be the lid of the box, while the smaller one will form the base.
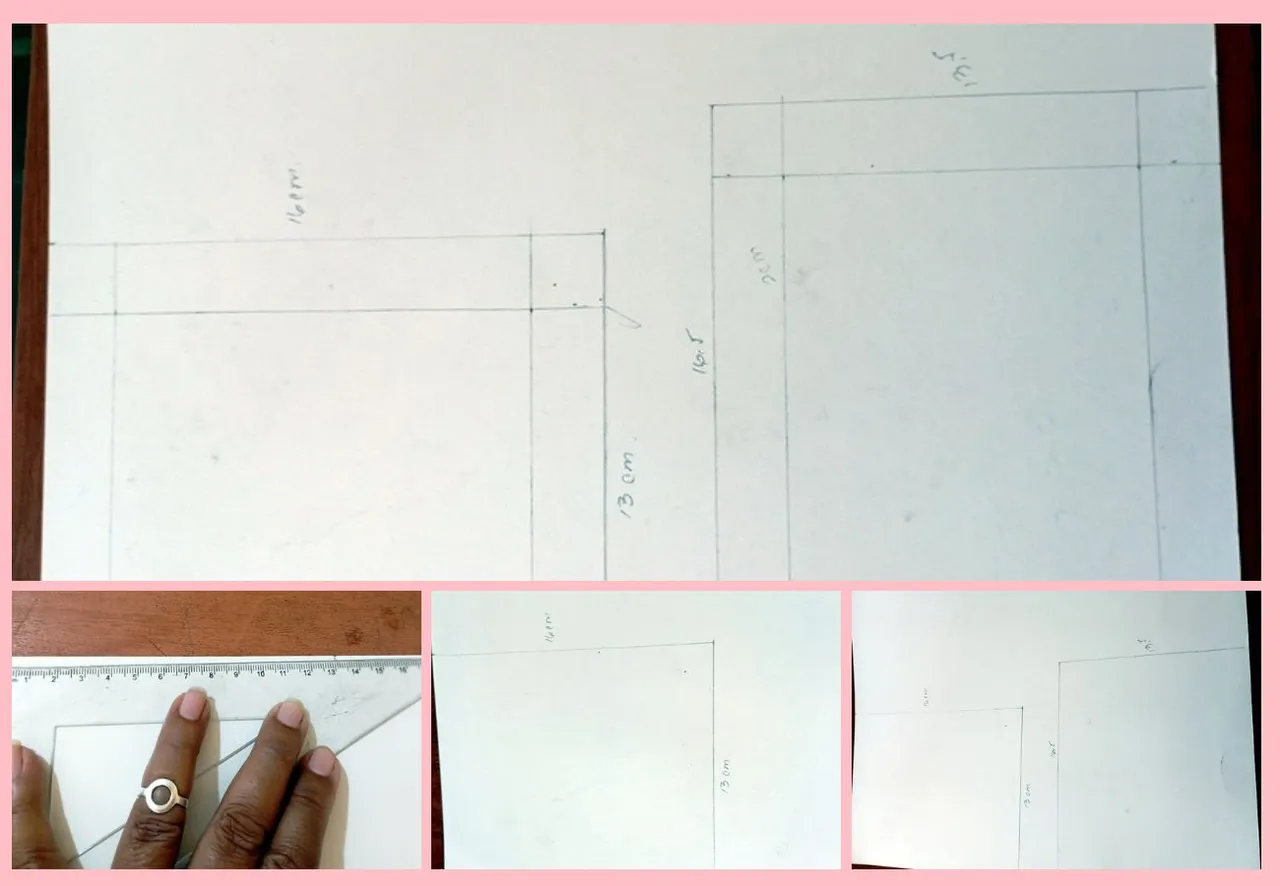
Luego, marcamos 2 cm hacia adentro en cada uno de los cuatro lados de los rectángulos, trazando rectas para formar un rectangulo más pequeño en el centro.
Next, we mark 2 cm inward on each of the four sides of the rectangles, tracing straight lines to form a smaller rectangle in the center.

A continuación, doblamos por las marcas realizadas anteriormente y, en las intersecciones de las esquinas, introducimos hacia adentro los remanentes y los pegamos en una de las paredes de la caja. Es importante asegurarnos de que los pliegues vayan en la misma dirección para que la apariencia sea uniforme. De esta manera, queda elaborada la base y tapa de nuestras cajitas.
Next, we fold along the marks previously made and, at the intersections of the corners, we insert the remnants inward and glue them to one of the walls of the box. It is important to make sure that the folds go in the same direction so that the appearance is uniform. In this way, the base and lid of our boxes are ready.


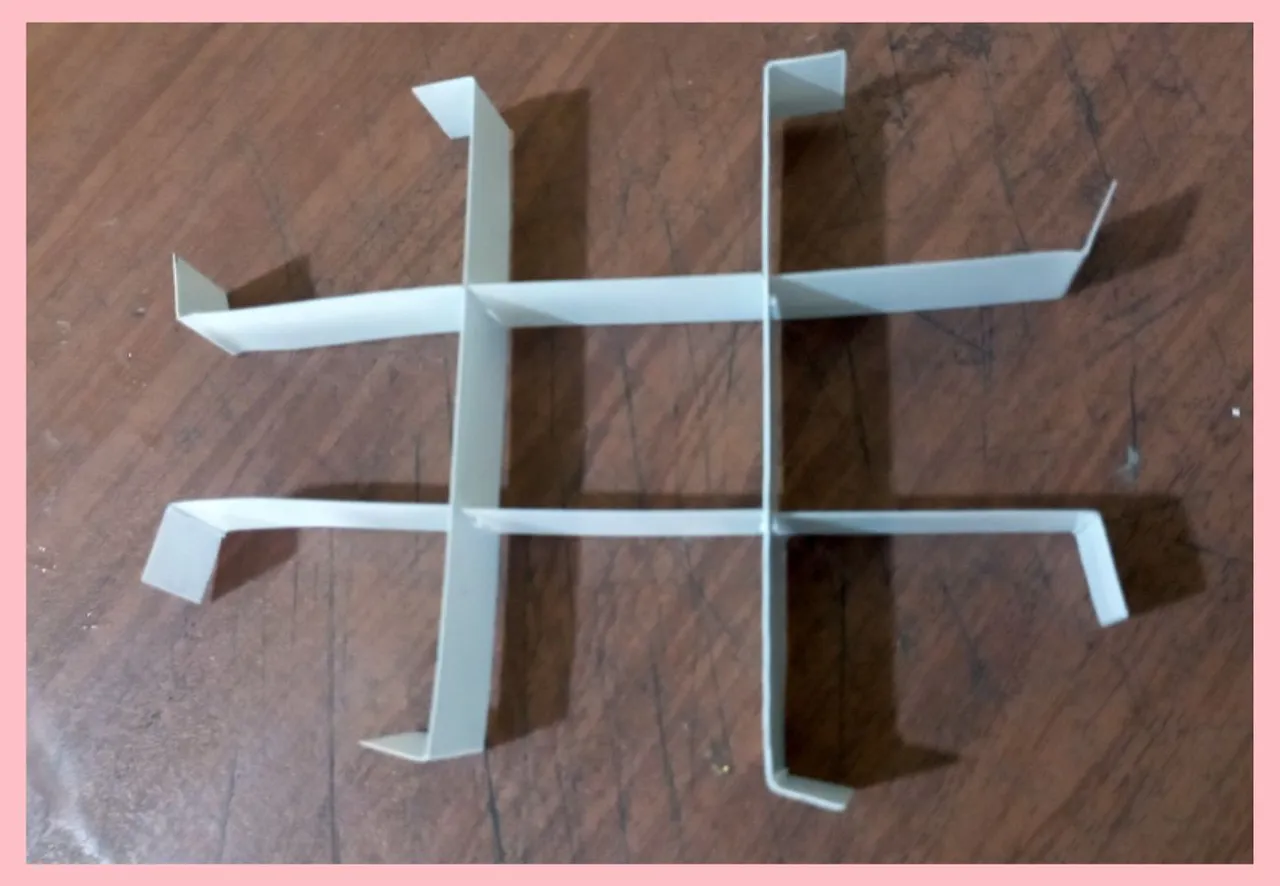
Mi hijo tuvo la genial idea de hacer divisiones dentro de la caja para que cada bombón tenga su propio espacio. Al principio, me pareció un poco complicado, pero debo admitir que le da un aspecto muy bonito a la cajita y los bombones quedan perfectamente organizados.
Para ello, realicé cuatro tiras de 1.5 cm de ancho. Dos de ellas midieron 14 cm de largo, mientras que las otras dos tuvieron una longitud de 11 cm. Siempre dejé 1 cm en cada extremo de las tiras para poder pegarlas a la cajita y a las tiras les realicé 2 ranuras acada una, a las de 11 cm de 3 cm de separacion y a la de 14 cm de 4cm.
My son had the great idea of making divisions inside the box so that each chocolate has its own space. At first, it seemed a bit complicated, but I must admit that it gives a very nice look to the box and the chocolates are perfectly organized.
To do this, I made four 1.5 cm wide strips. Two of them were 14 cm long, while the other two were 11 cm long. I always left 1 cm at each end of the strips to be able to glue them to the box and I made 2 grooves in each one, the 11 cm strips were 3 cm apart and the 14 cm strips were 4 cm apart.

Una vez bien pegadas las piezas a la base de la caja para formar los cuadrantes donde iría cada bombón, procedimos a decorarla.
Once the pieces were well glued to the base of the box to form the quadrants where each bonbon would go, we proceeded to decorate it.

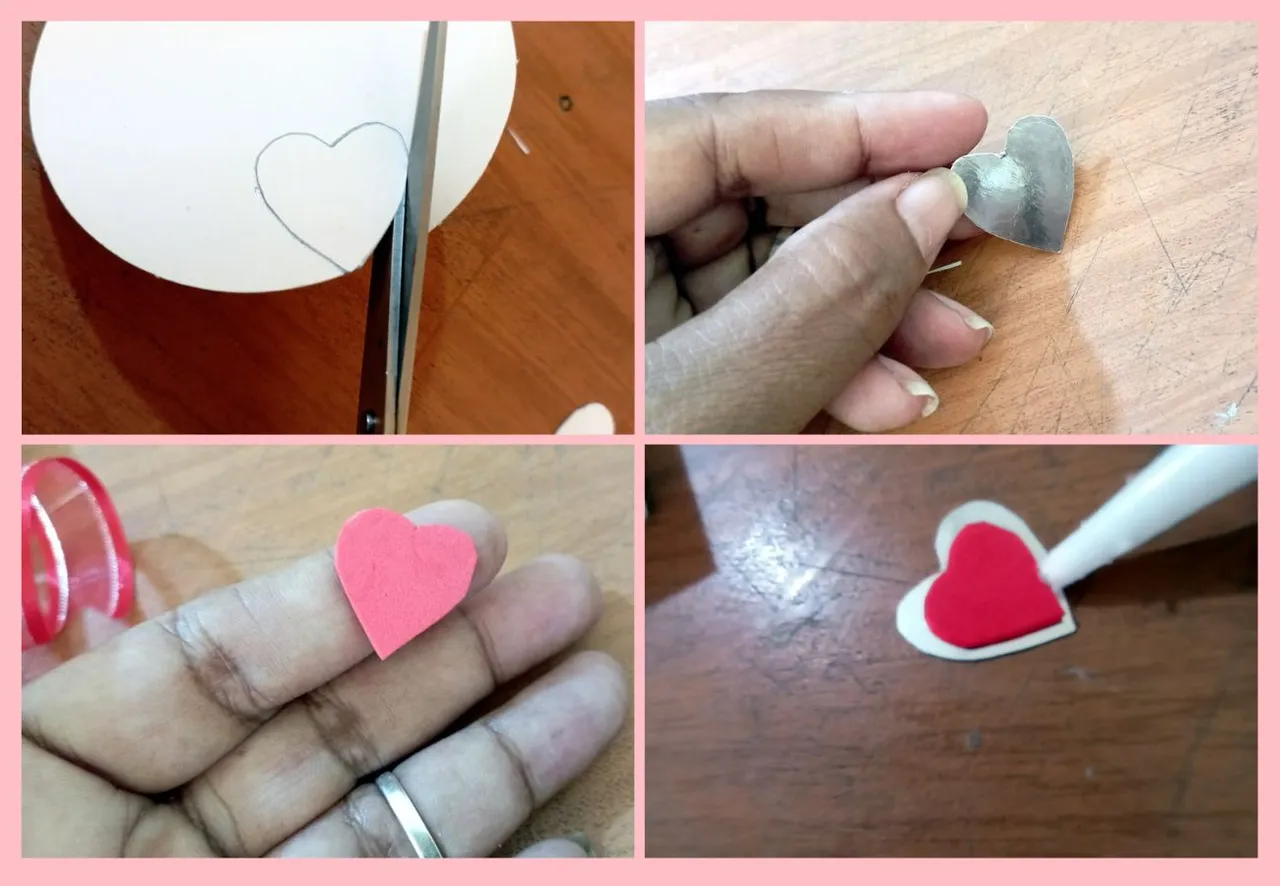
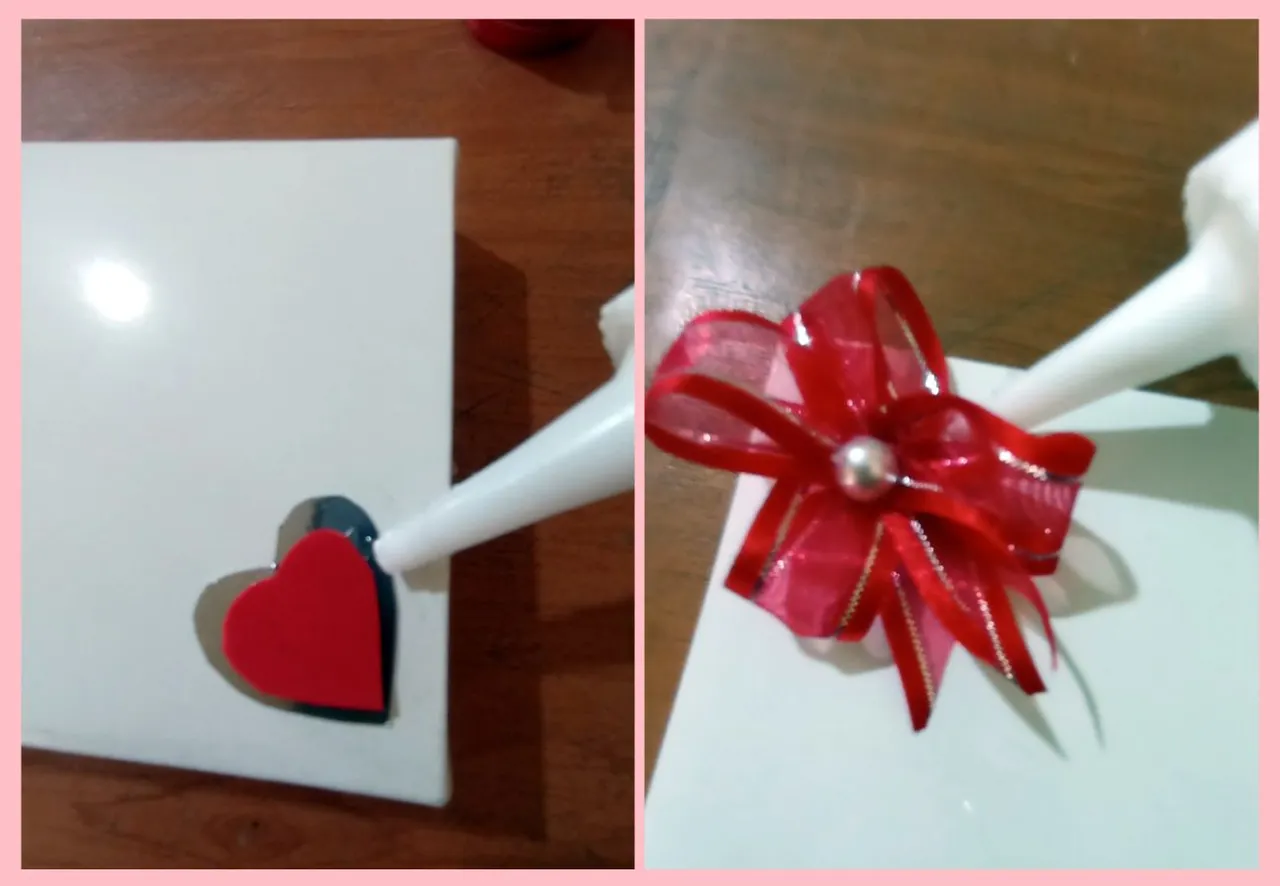
Con unos moldes de corazones que había hecho anteriormente de otras manualidades marqué un corazón en la cartulina plateado para un molde más grande y con el más pequeño lo recorté de foami rojo, pegué los dos corazones con silicona líquida.
With some heart molds that I had previously made from other crafts I marked a heart on the silver cardboard for a larger mold and with the smaller one I cut it out of red foami, glued the two hearts together with liquid silicone.
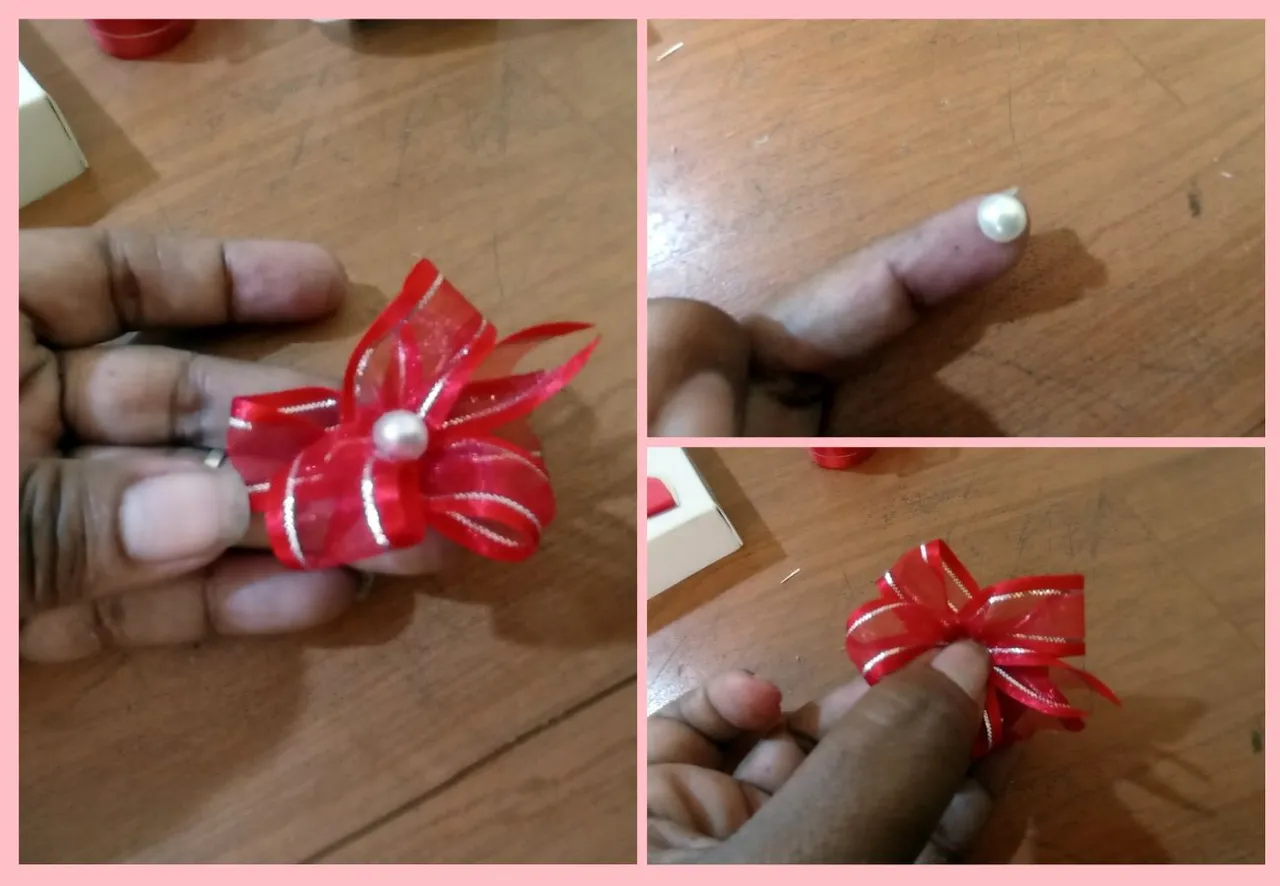
Con una cinta roja hice dos lazos juntos y en el centro pegué una perla blanca. Ambos adornos fueron pegados a la cajita en cada extremo
With a red ribbon I made two bows together and in the center I glued a white pearl. Both ornaments were glued to the box at each end.
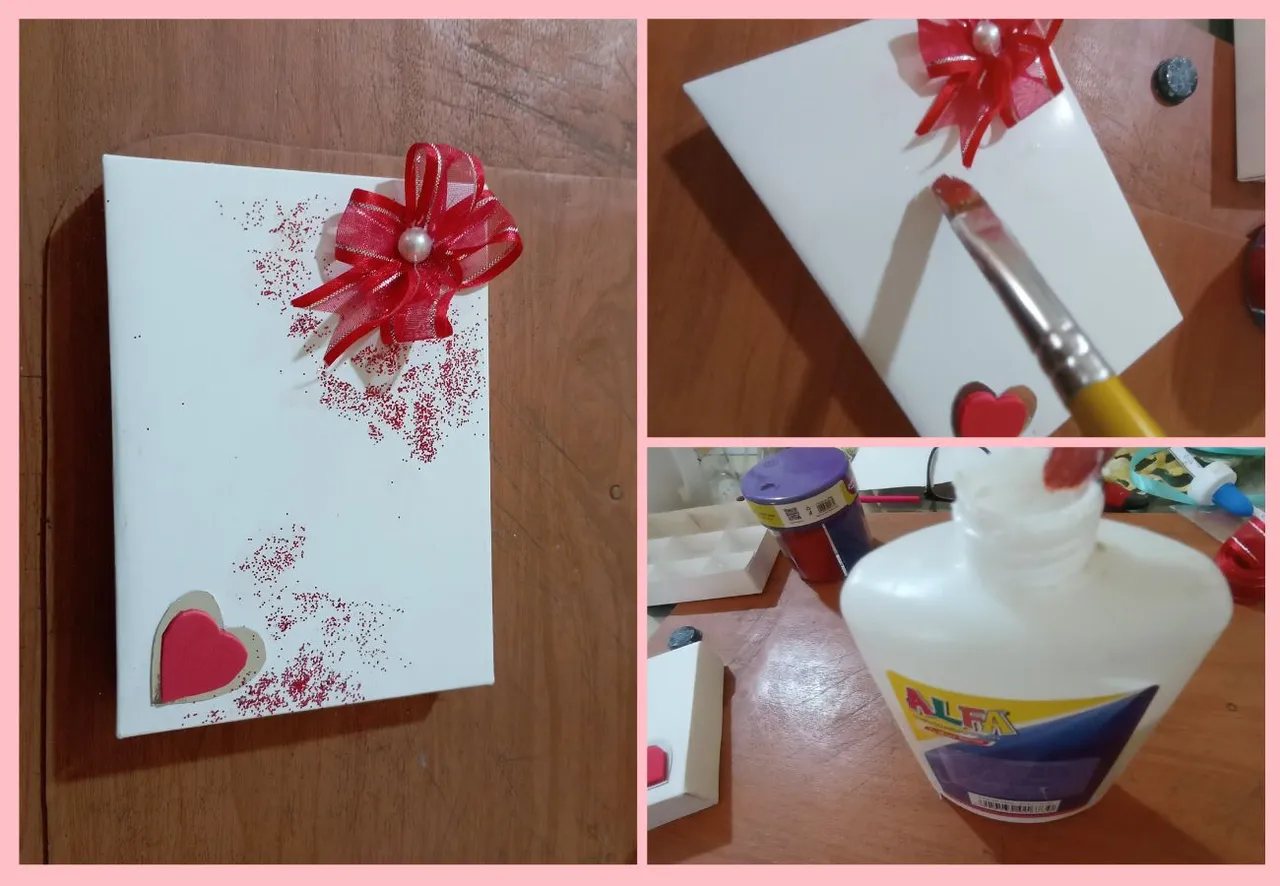
Luego con cola blanca le puse escarcha rojo para darle un poco más de visibilidad, como pueden ver a continuación.
Then with white glue I put red icing to give it a little more visibility, as you can see below.
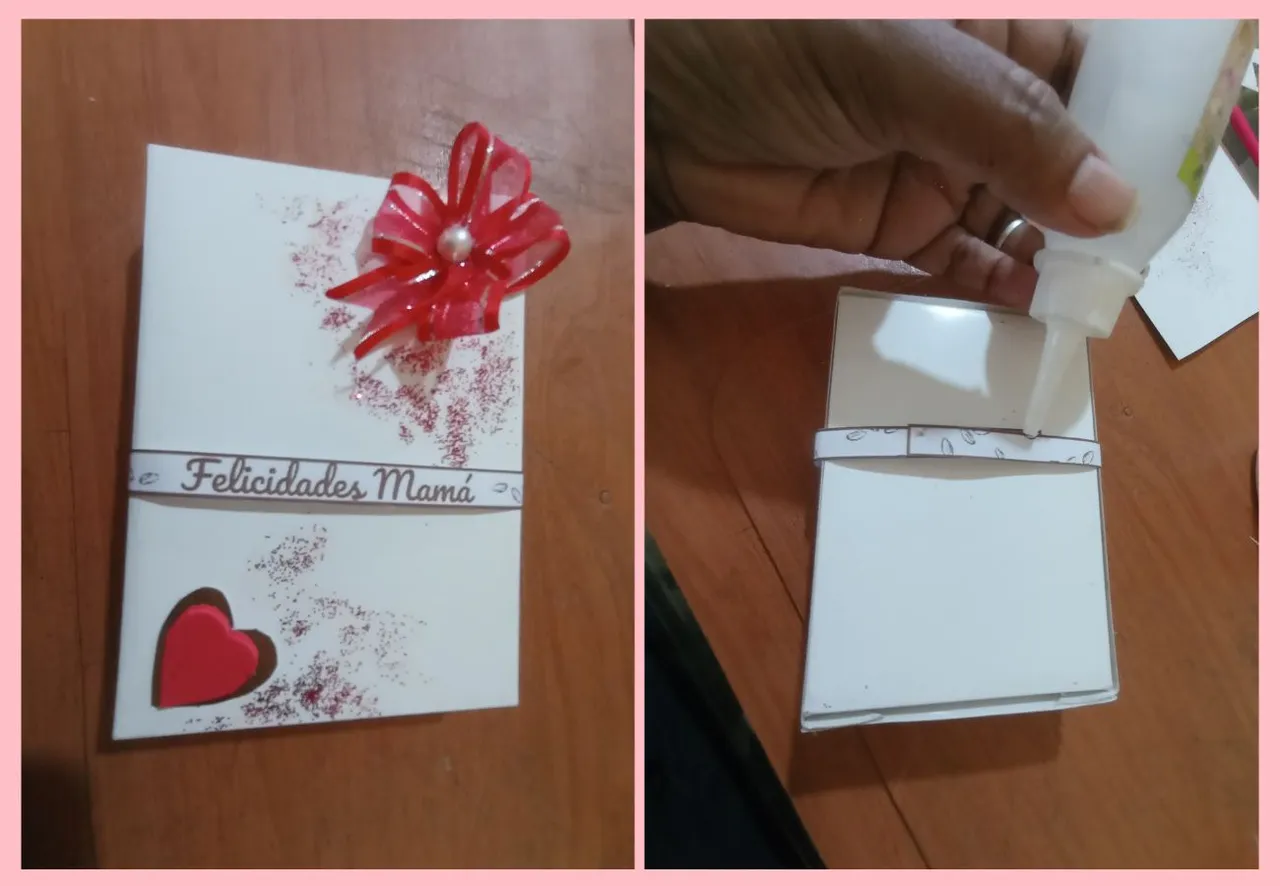
Por último colocamos una cinta de papel impresa que dice «Felicidades Mamá, que funciona como cierre de la caja, creemos que es un bonito detalle para ese día especial.
Finally we put a printed paper ribbon that says “Congratulations Mom, which works as a closure of the box, we think it is a nice detail for that special day.
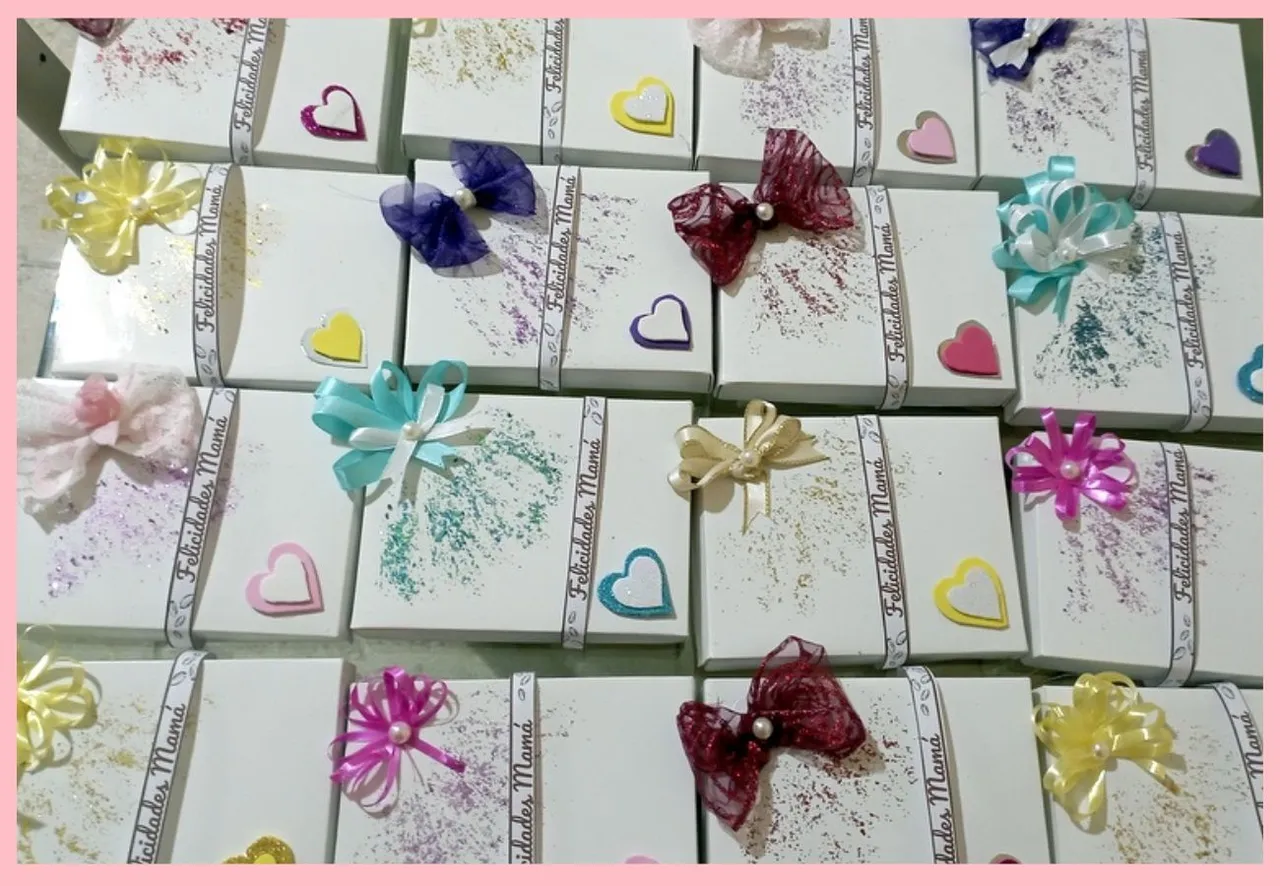
He hecho muchas de estas cajitas de regalo, me ha llevado mucho tiempo y he estado alejada de Hive por ello, pero siento una satisfacción infinita cada vez que una caja como esta llega a manos de una clienta, para mí es un detalle súper delicado y especial donde todo fue hecho a mano y con mucho cariño para complacer a la mayor cantidad de Mamis posibles.
I have made many of these little gift boxes, it has taken me a long time and I have been away from Hive because of it, but I feel an infinite satisfaction every time a box like this reaches the hands of a customer, for me it is a super delicate and special detail where everything was handmade and with love to please as many moms as possible.
Un saludo a todas y espero que les haya gustado este detalle que hicimos en exclusiva para mamá. Aprovecho para invitar a unirse a esta iniciativa a mi hermana @taniagonzalez. Hasta pronto!
Greetings to all of you and I hope you liked this detail that we made exclusively for Mom. I take this opportunity to invite my sister @taniagonzalez to join this initiative. See you soon!

Las fotos fueron tomadas con mi teléfono Xiaomi Note 11, unidas y recreadas en canva.
Usar Traductor DeepL
The photos were taken with my Xiaomi Note 11 phone, joined and recreated in canva.
Use Translator DeepL