English
Since I moved into my house, I have been planting in my back yard. Although I have only planted a few bananas and yuccas, plants that are annuals, I made some beds of soil to plant in the garage, a concrete area where nothing can grow.
Well, I harvested what I had planted in these beds. Lots of cilantro and chives. I was recently preparing the ground for the new planting season, but since I will be very short on time, I thought I would plant something less time consuming but still worthwhile.
That day I got up early to work, but here in my town it rains too much, but as soon as it stopped raining, I continued working.
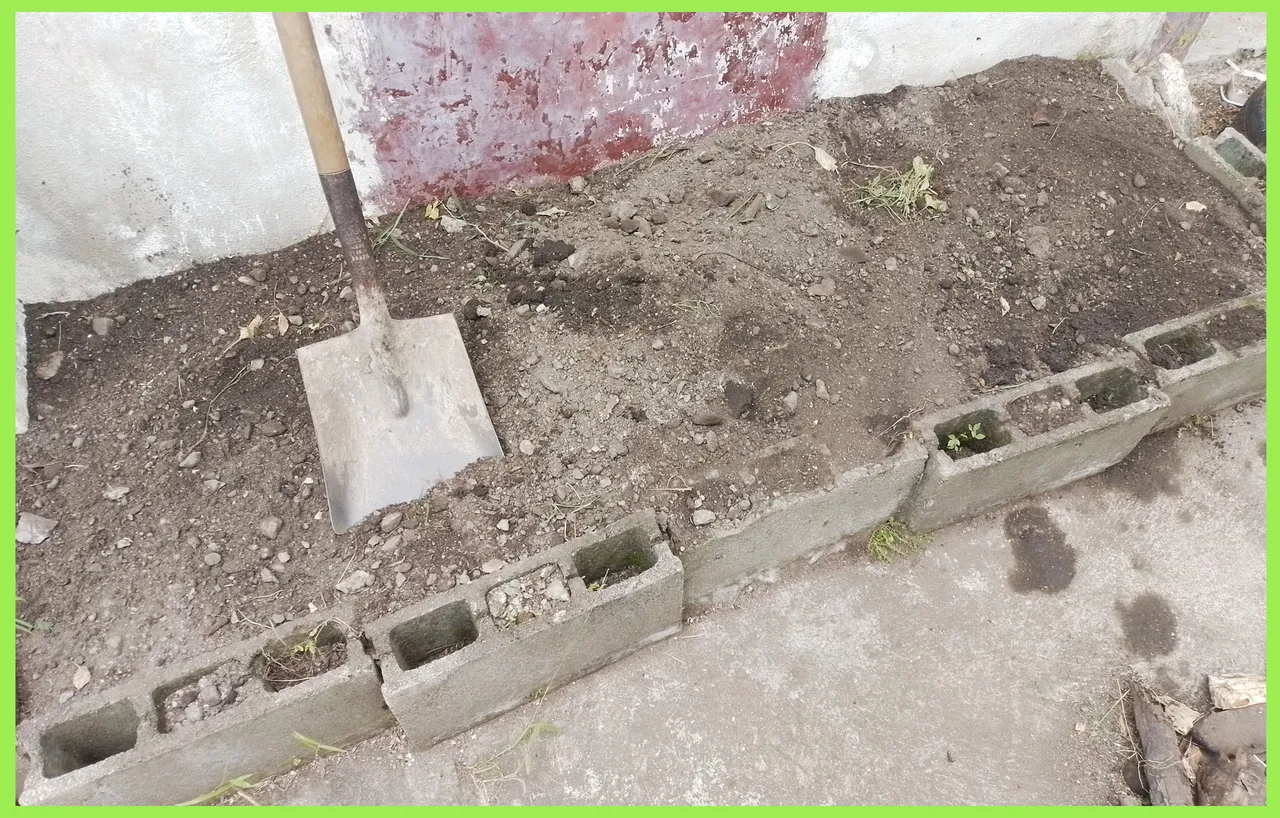
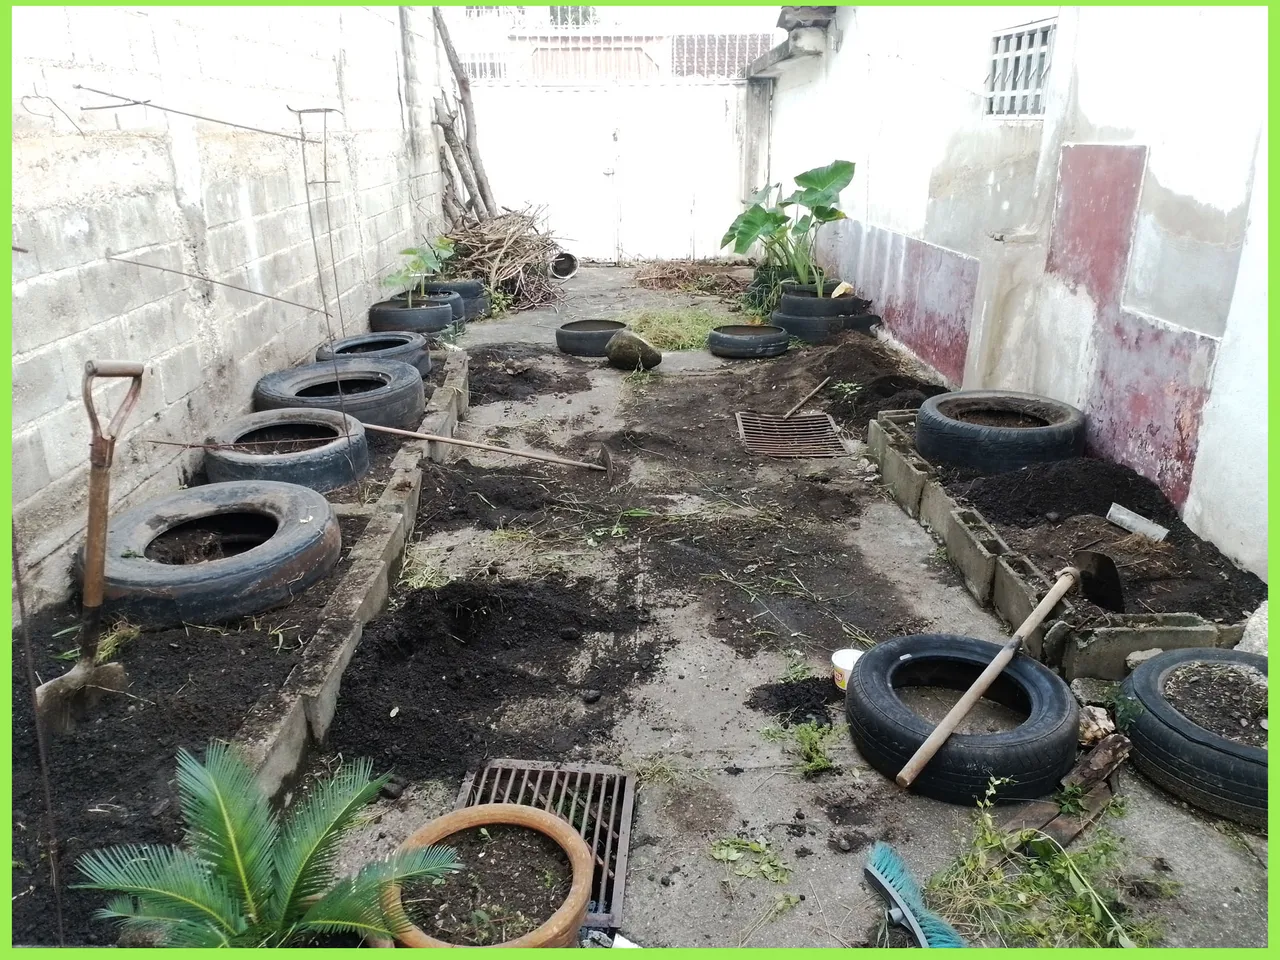
Notice that one of the first things I did was to gather all the weeds in piles. These same weeds I would use to mix with the soil to add more organic matter.
The idea was that these beds of soil, made with blocks on either side of the garage, would have very good nutrient content for what I planned to plant.
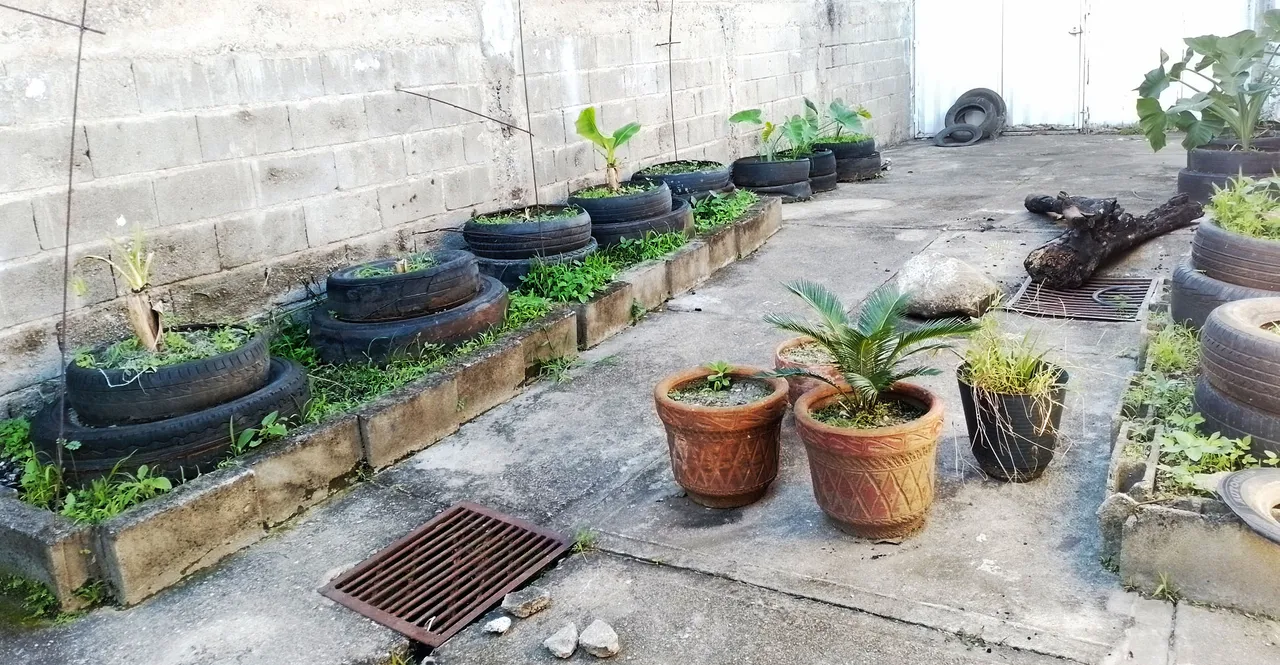
Notice that there are old tires in different parts of the yard. I have used these tires in the past to make soil towers for planting small things. I usually stack two tires for a relatively small plant, such as a potato, okra, or sweet potato plant.
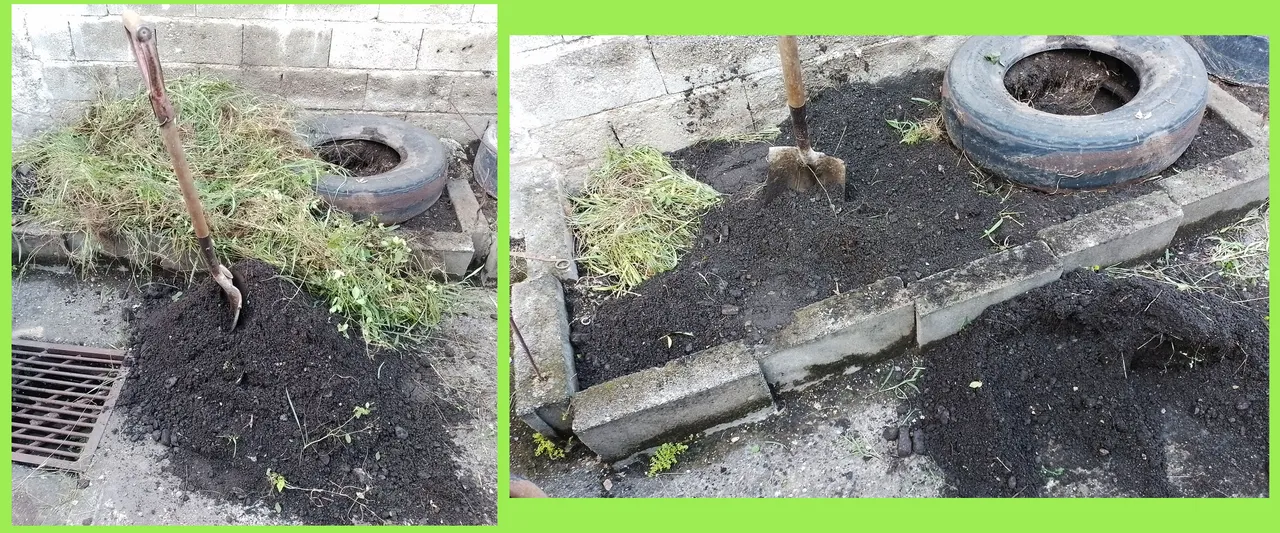
I planned to stack the tires on top of the soil beds to plant something larger; however, I first mixed the organic matter with all the soil, how? Well, by opening a space in each soil bed, then I add the weeds in piles and finally cover with soil. It is as if I were burying the weeds, this way they decompose in the beds.
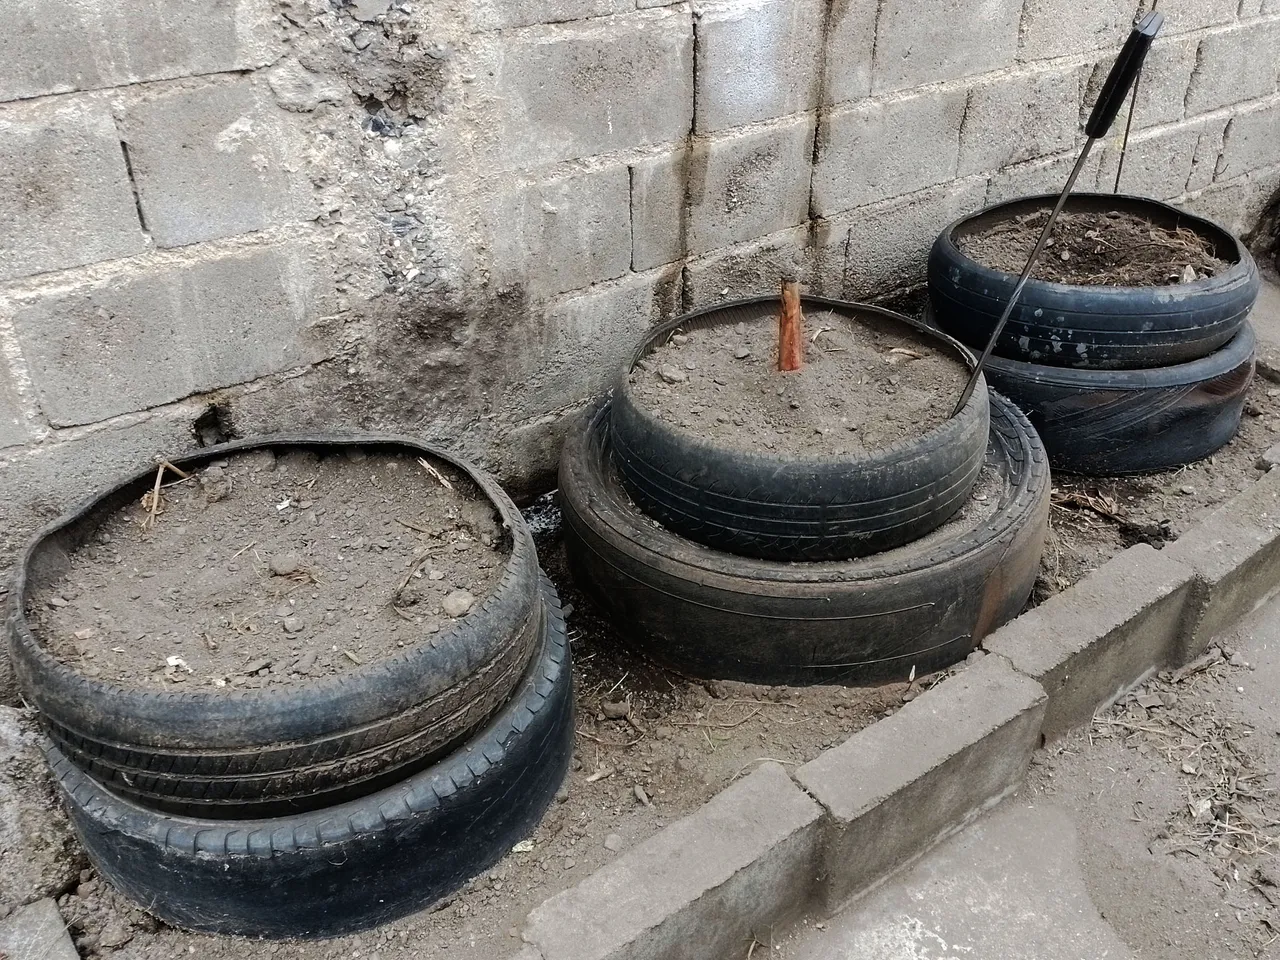
In the photo below, you can see how one of the dirt beds looked like with the 3 tires on top...

It's not an easy job, but the idea was to get everything just right. I had previously used these tires for other towers, so they already had dirt on them, so first I had to remove the dirt, then put them in their final place and then fill them again with dirt.
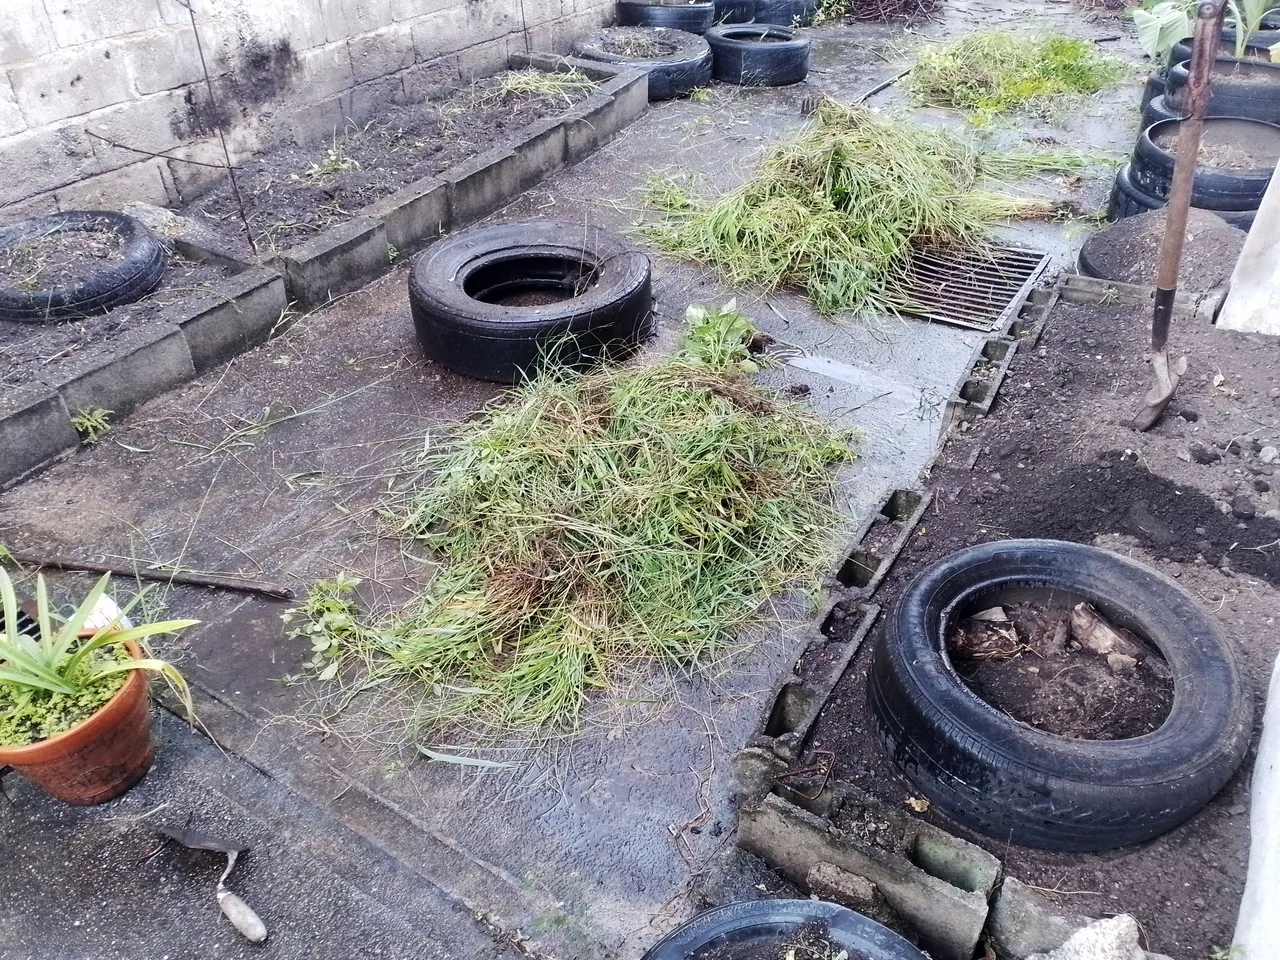
While one is working, everything looks ugly and dirty, just look how the garage looks in the next picture, a mess:
After many hours of work, I managed to get everything ready to start planting. What would I plant this time? Well, something that worked very well here were the different kinds of plantains that I planted. So I decided to plant the same but in these tire towers.
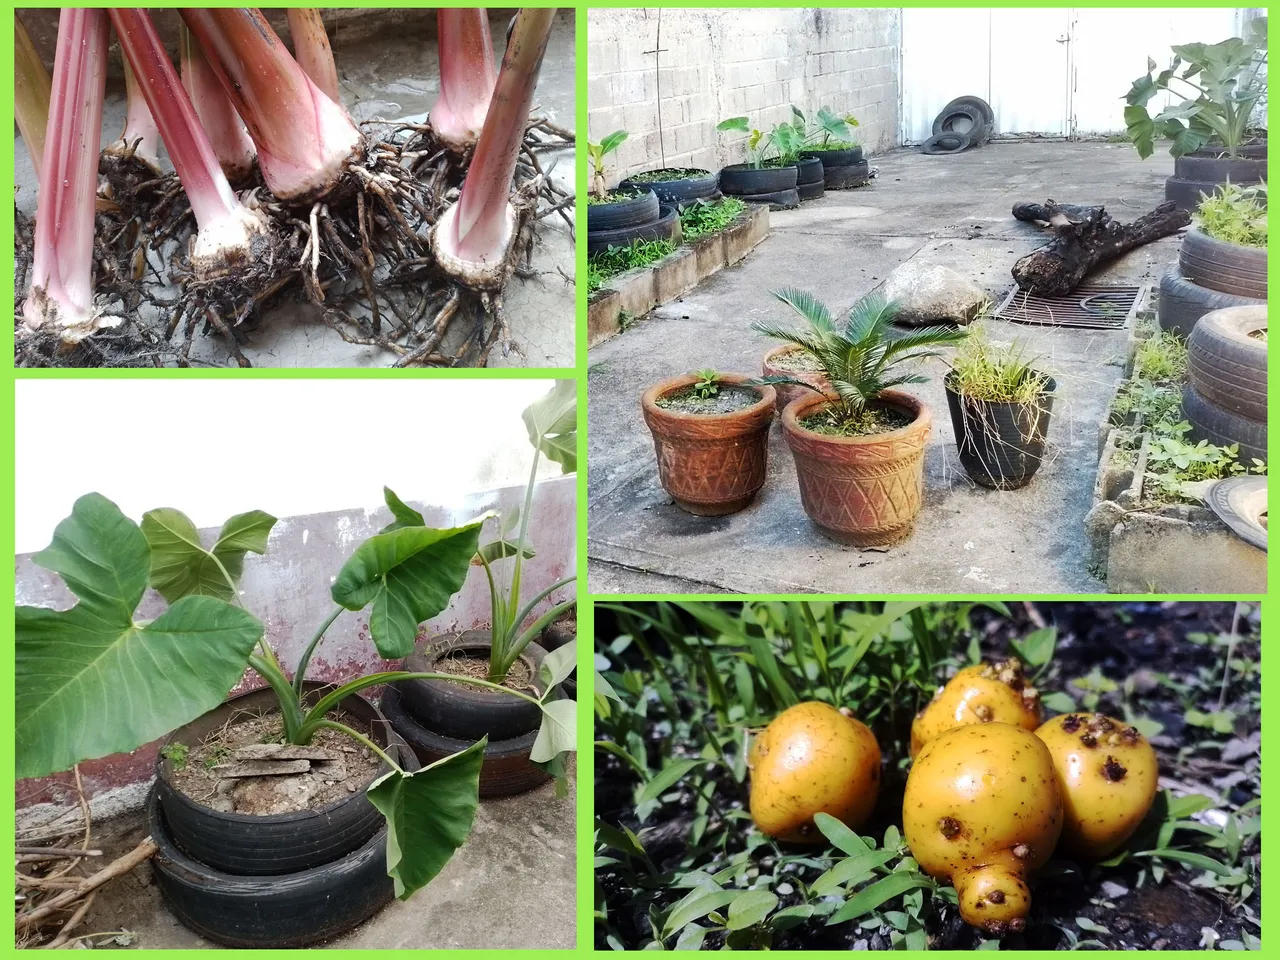
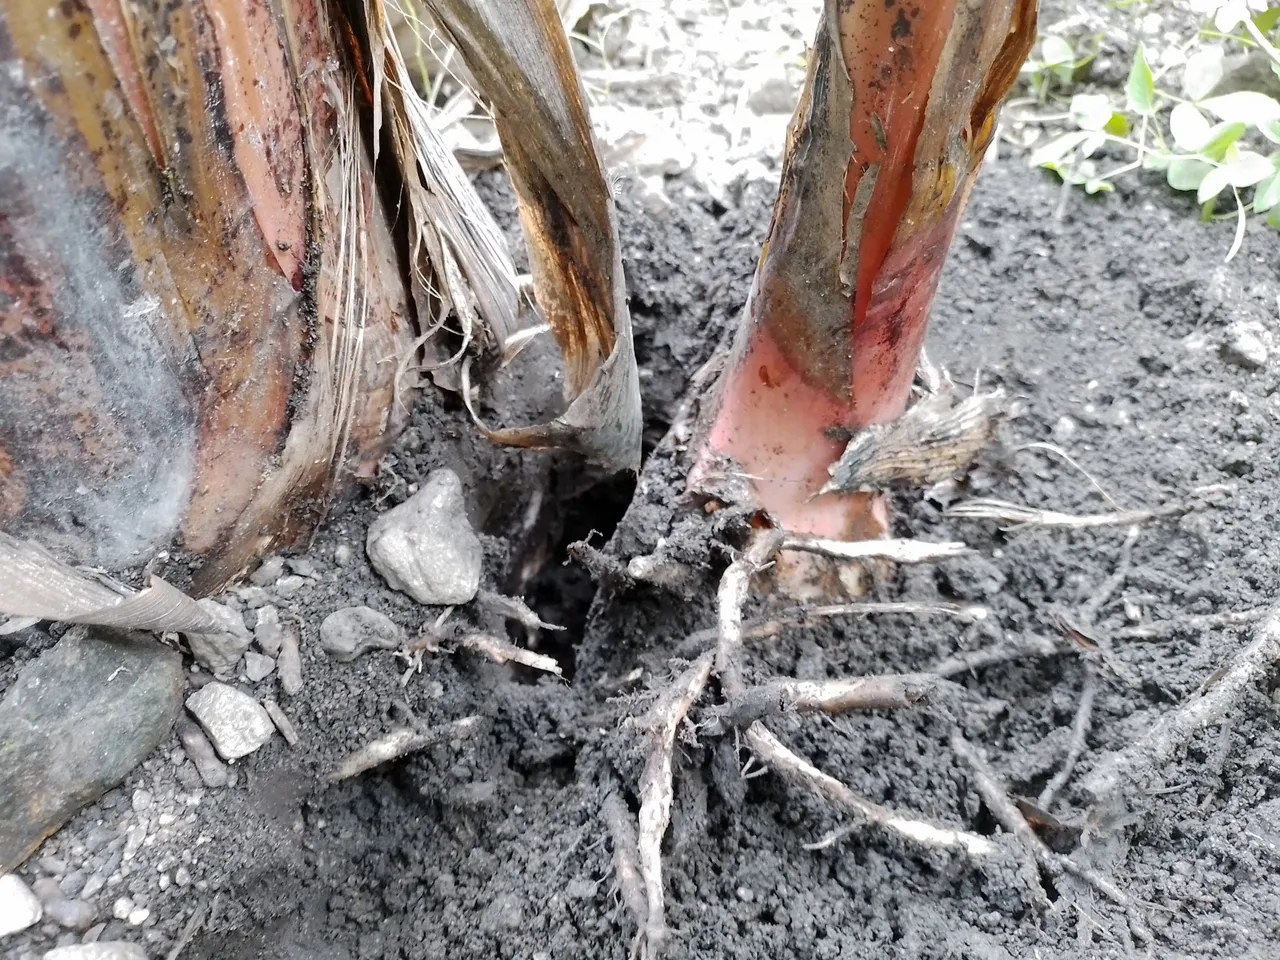
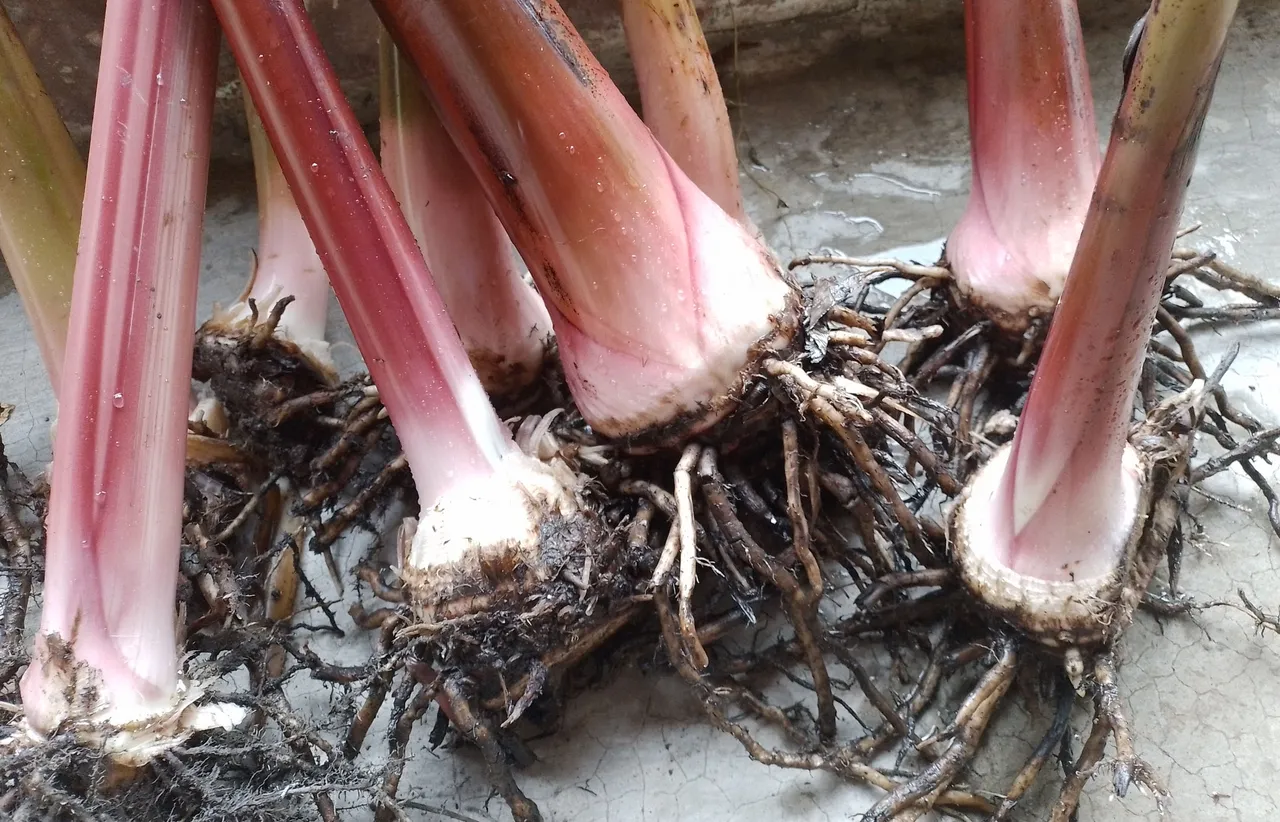
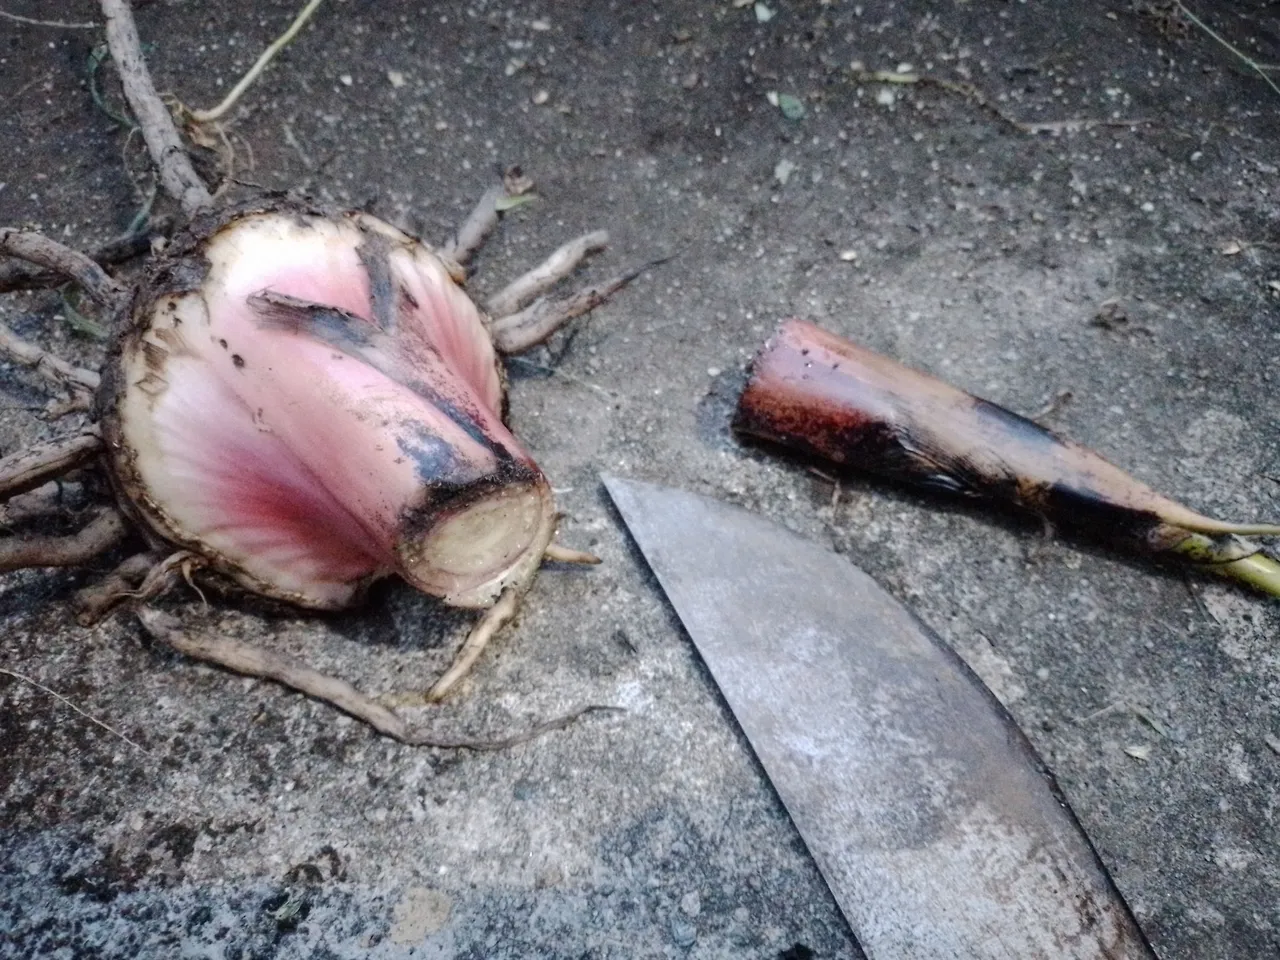
How do you plant plantains? Well, it is not by seed, like other fruits. In the root of the stem of this plant, children grow that can be cut and transplanted in other areas.
Because I have other banana plants in the yard, I had other banana offspring that I later cut and cleaned up. Here are a couple of photos of this process:
 |  |
|---|
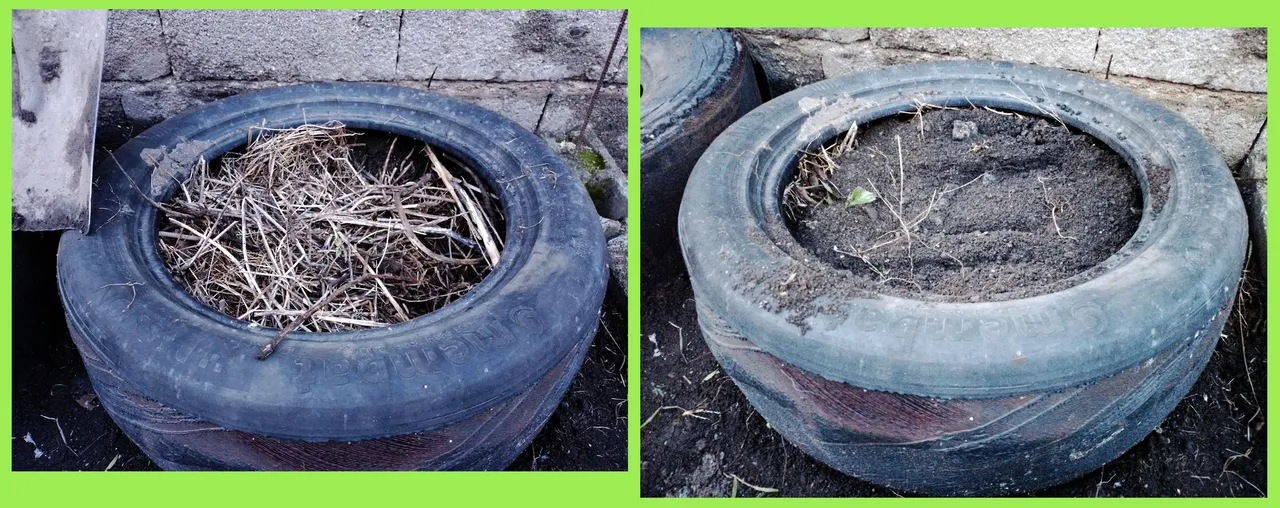
As I told you, I emptied each tire that I would use for planting so that I could place it in its new position, that is, on top of the soil beds.
To fill it with soil again, I placed a layer of soil, then a layer of weeds, then another layer of soil and so on until the tire was completely filled, as shown in these two pictures:
Already at this point, you could start planting the plantain seedlings. Before planting, it is customary to cut the tip and leave as clean as possible the part of the root. From there the new banana plant will be born.
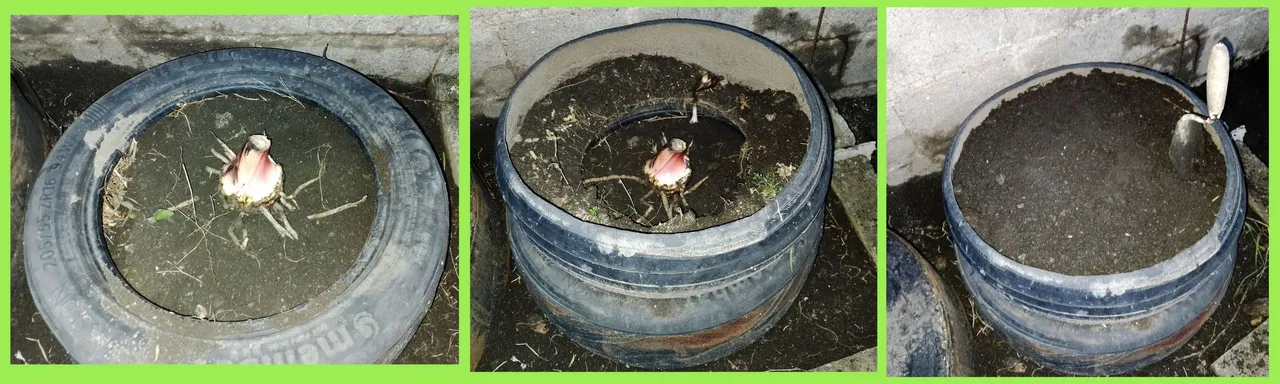
Look at this sequence of images below. In the first image you can see how I placed the son of banana on the ground, with the roots downwards. On top of the first tire I placed another tire, as shown in the middle image. Finally, I filled this second tire with more soil.
In total there are 3 levels of soil where the roots will be able to expand and grow. These specific banana plants do not grow too much, so these 3 levels of soil will be more than enough.
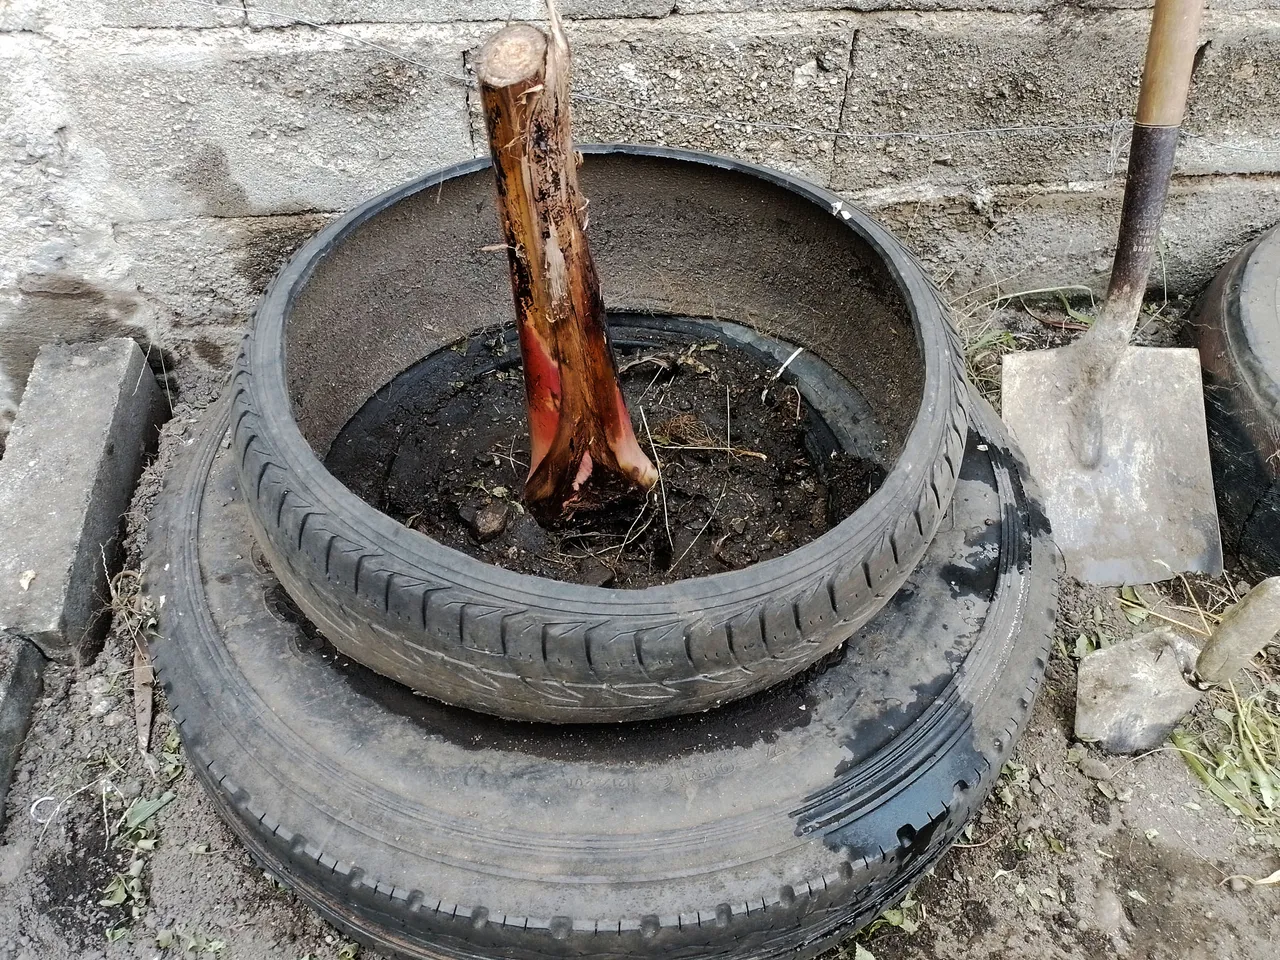
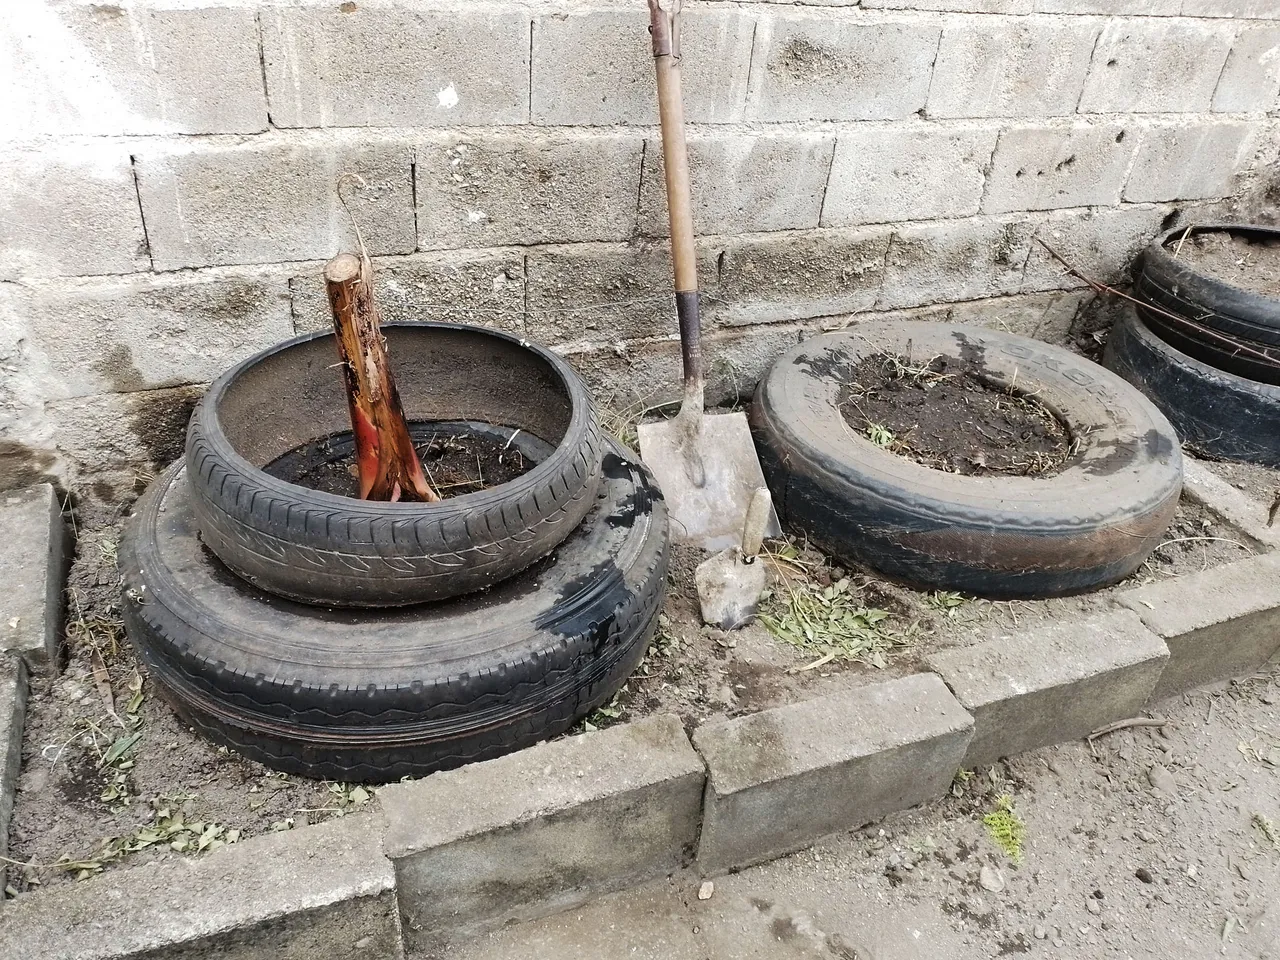
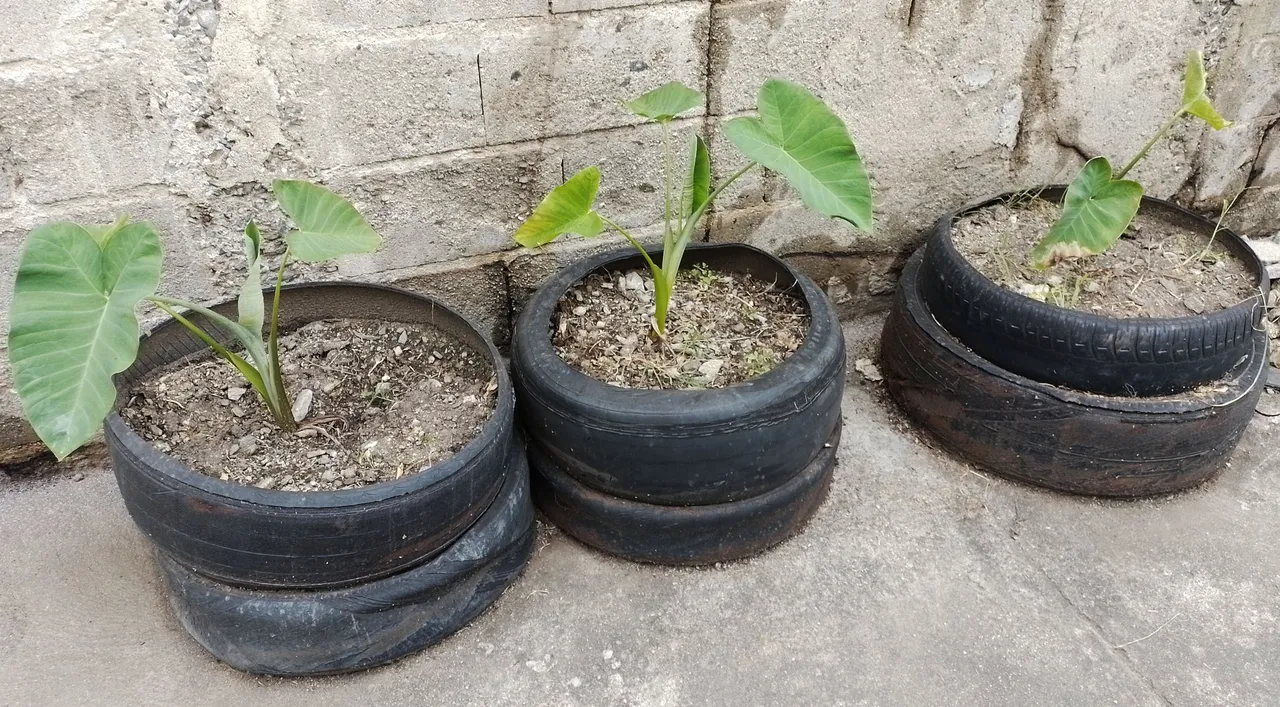
Here is another example of how some of the tire towers look with the banana plants planted. In each tower there will be a future banana plant.
 |  |  |
|---|
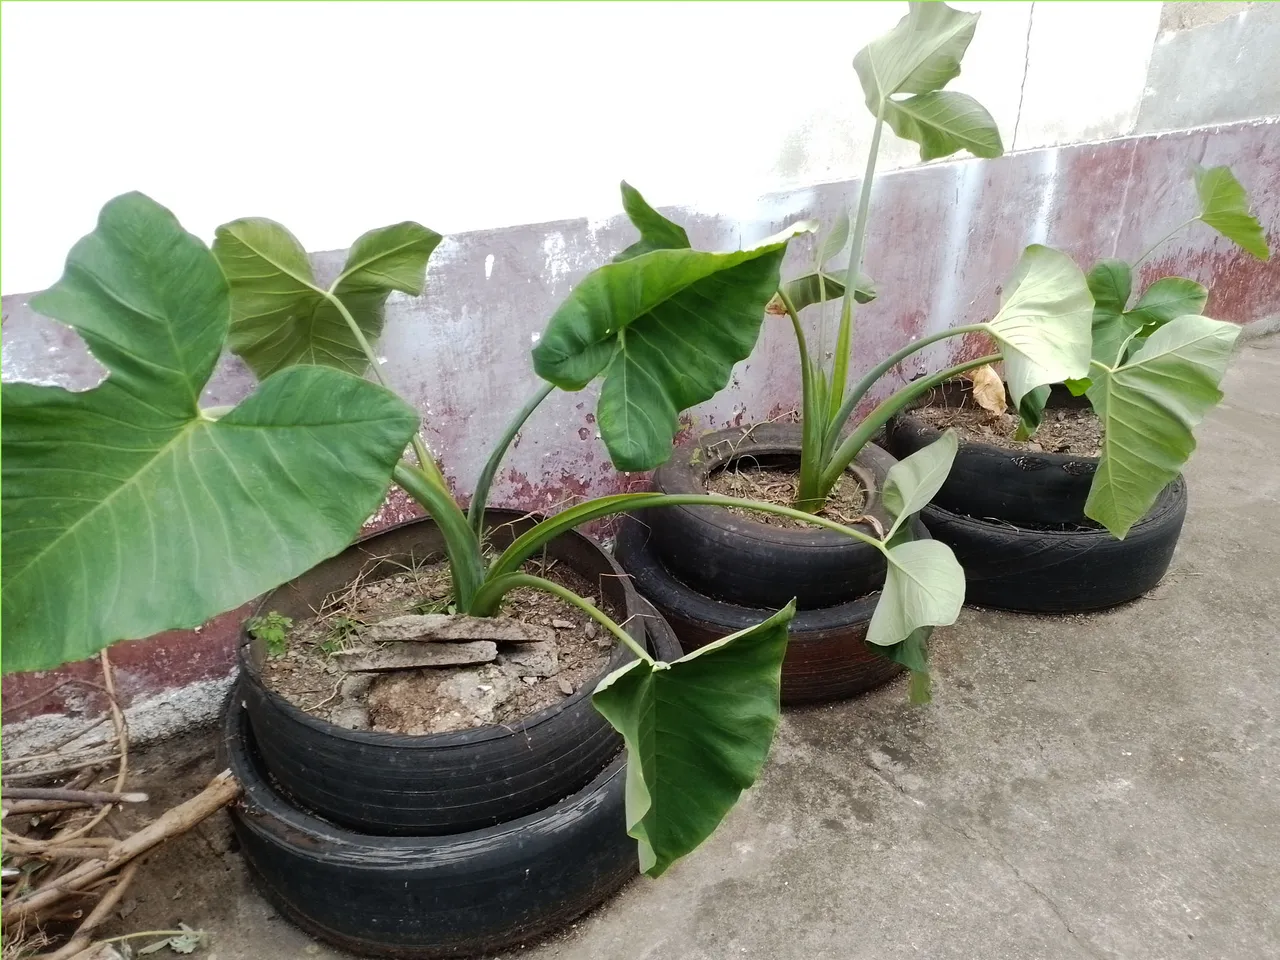
Another example of the things that can be planted in tires, are these six towers that I had already prepared some time ago, where I have planted six ocumo plants.
Normally in each tower one plant should be planted, if it is a big plant, because if more are planted they will not have space to grow both; neither space nor nutrients, so one plant per tower is enough, unless they are small plants but that is another story.
 |  |
|---|
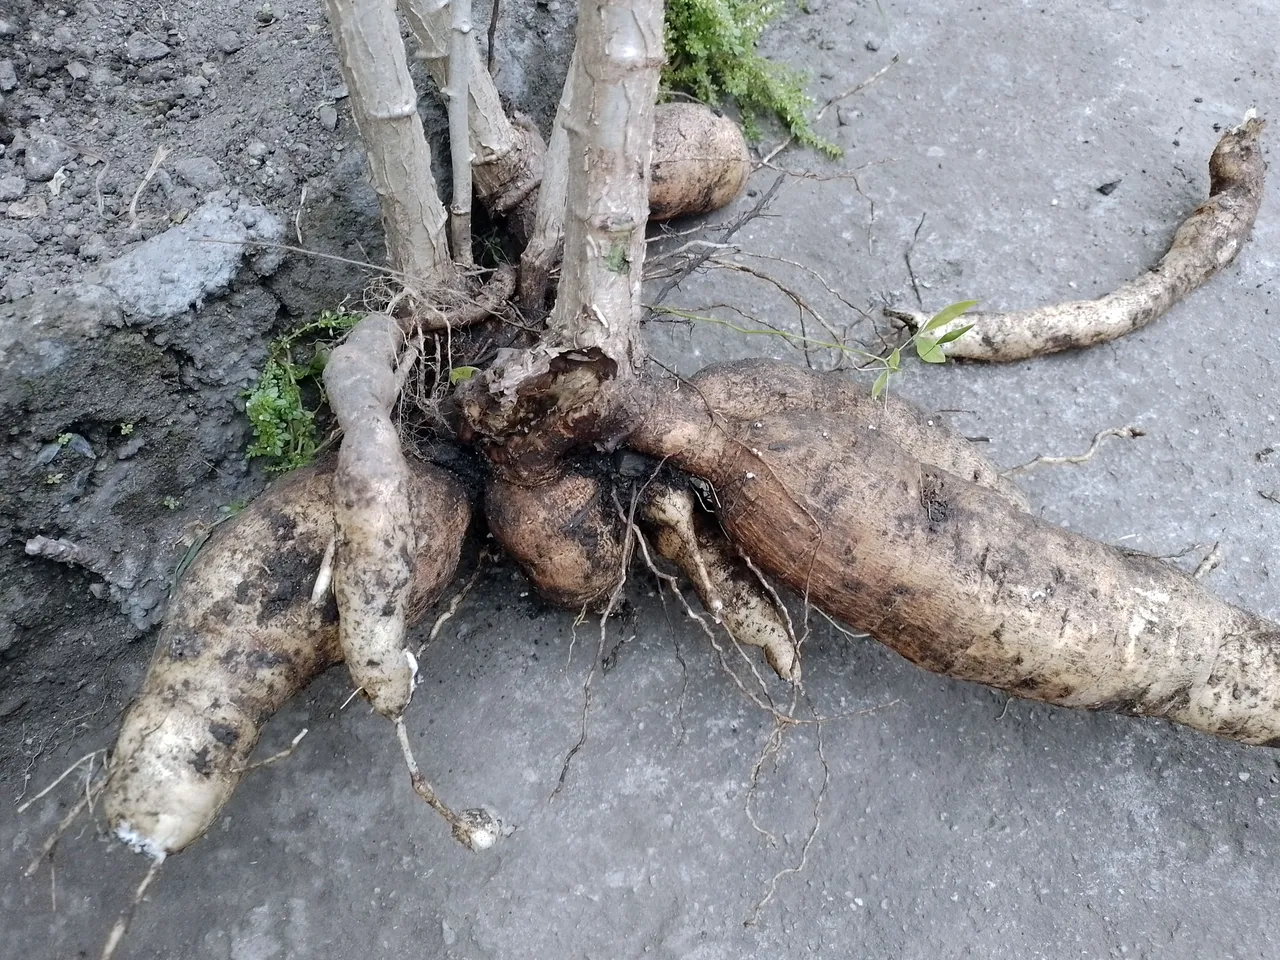
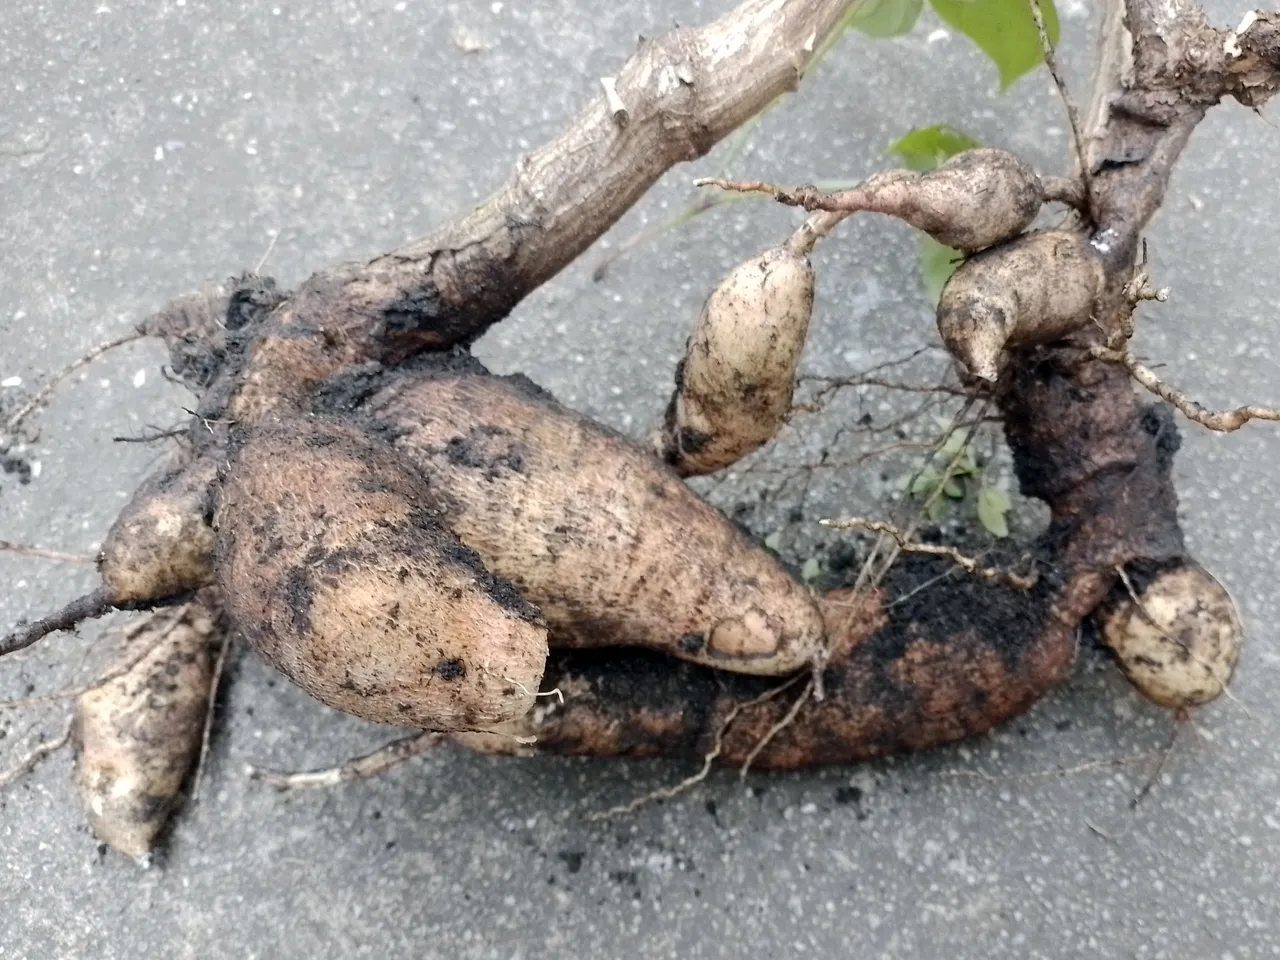
In parenthesis, while clearing the land I found two Yucca (or cassava) plants that were ready to be harvested. They did not do very well, but I did manage to harvest these roots with which numerous recipes can be made.
As I mentioned, these are annual plants, which are harvested once a year. I have to wait about 9 months for the next harvest.
 |  |
|---|
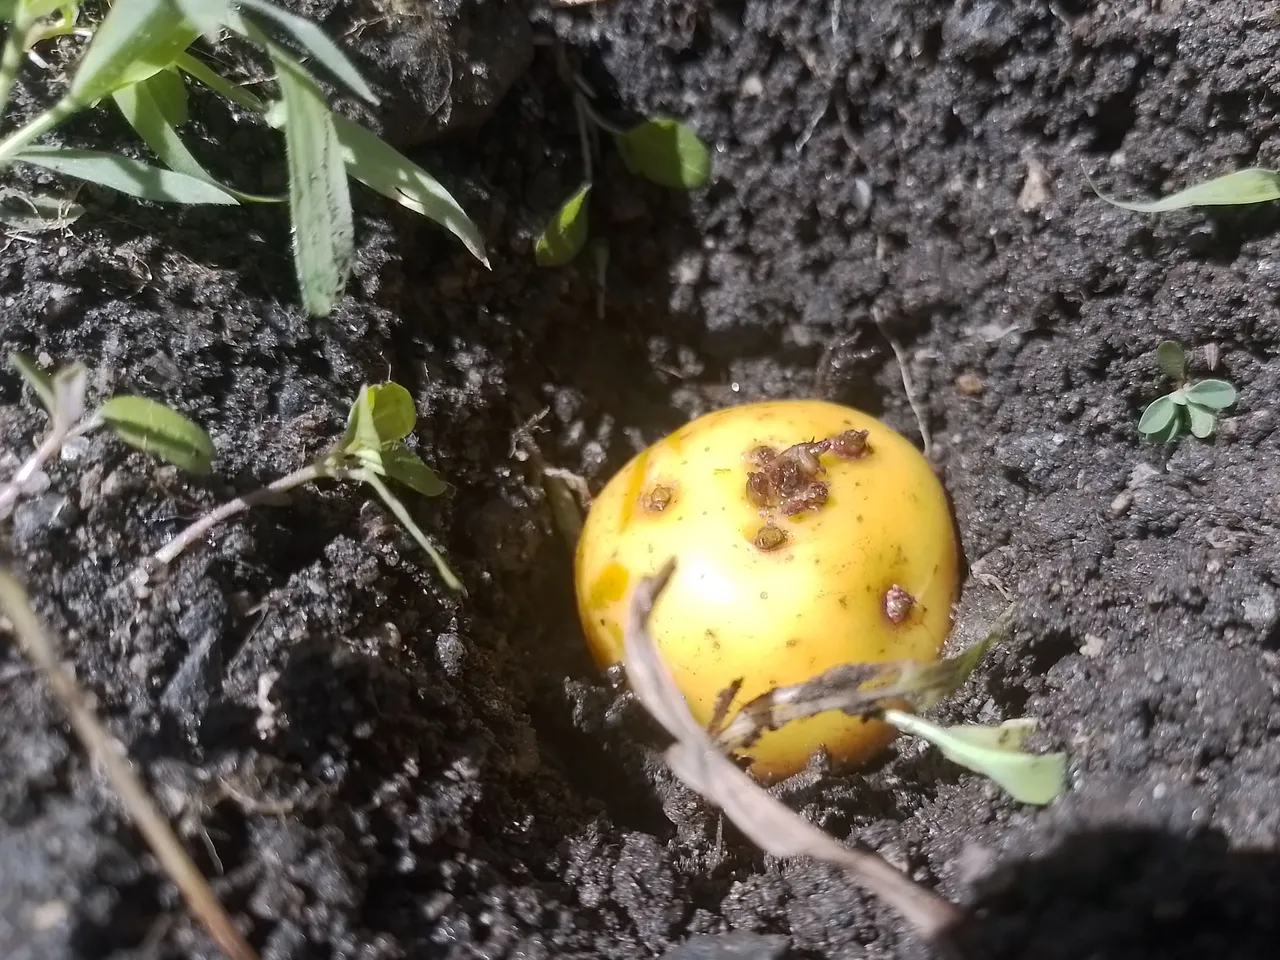
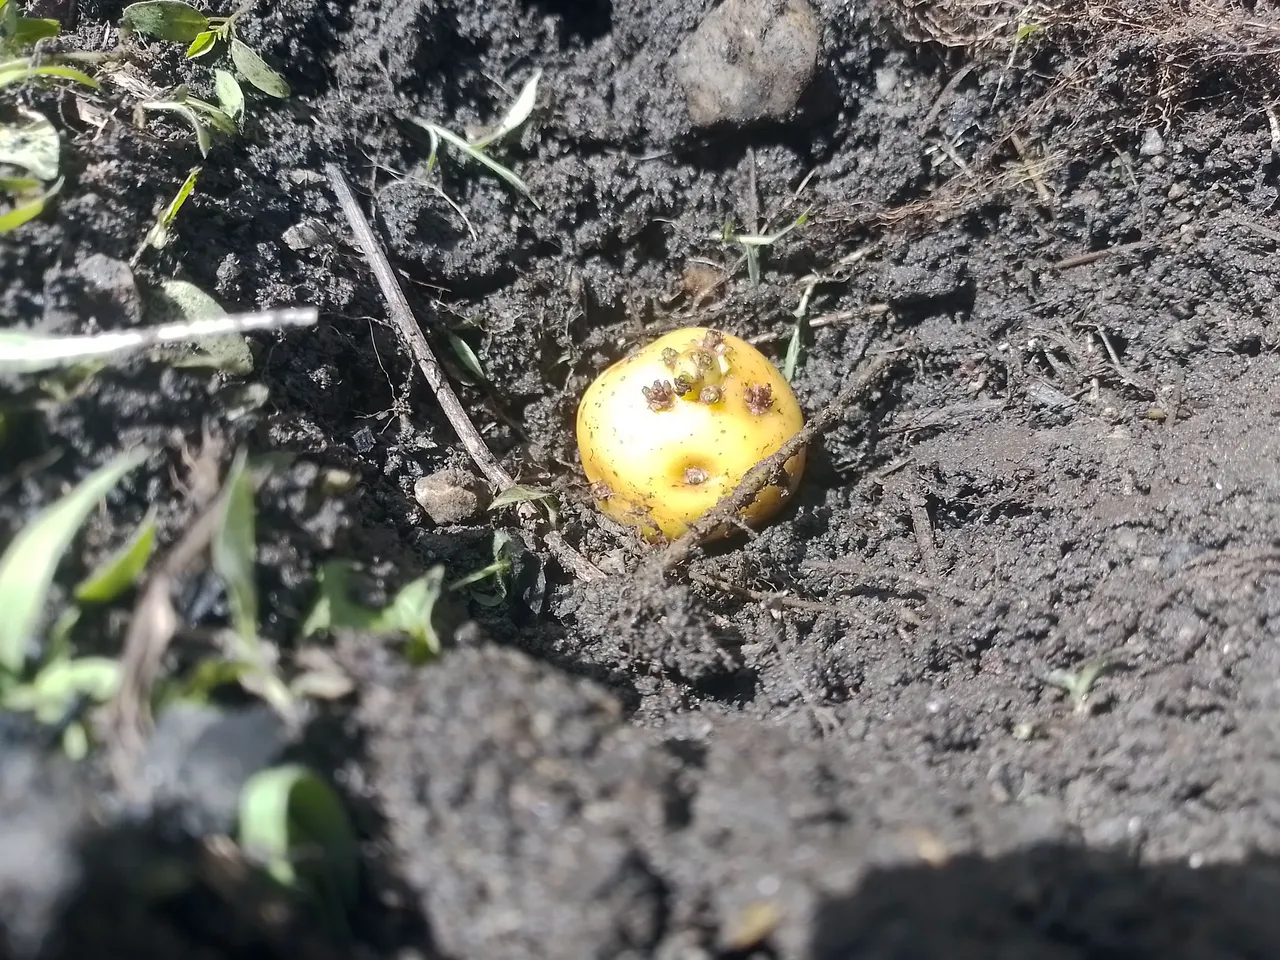
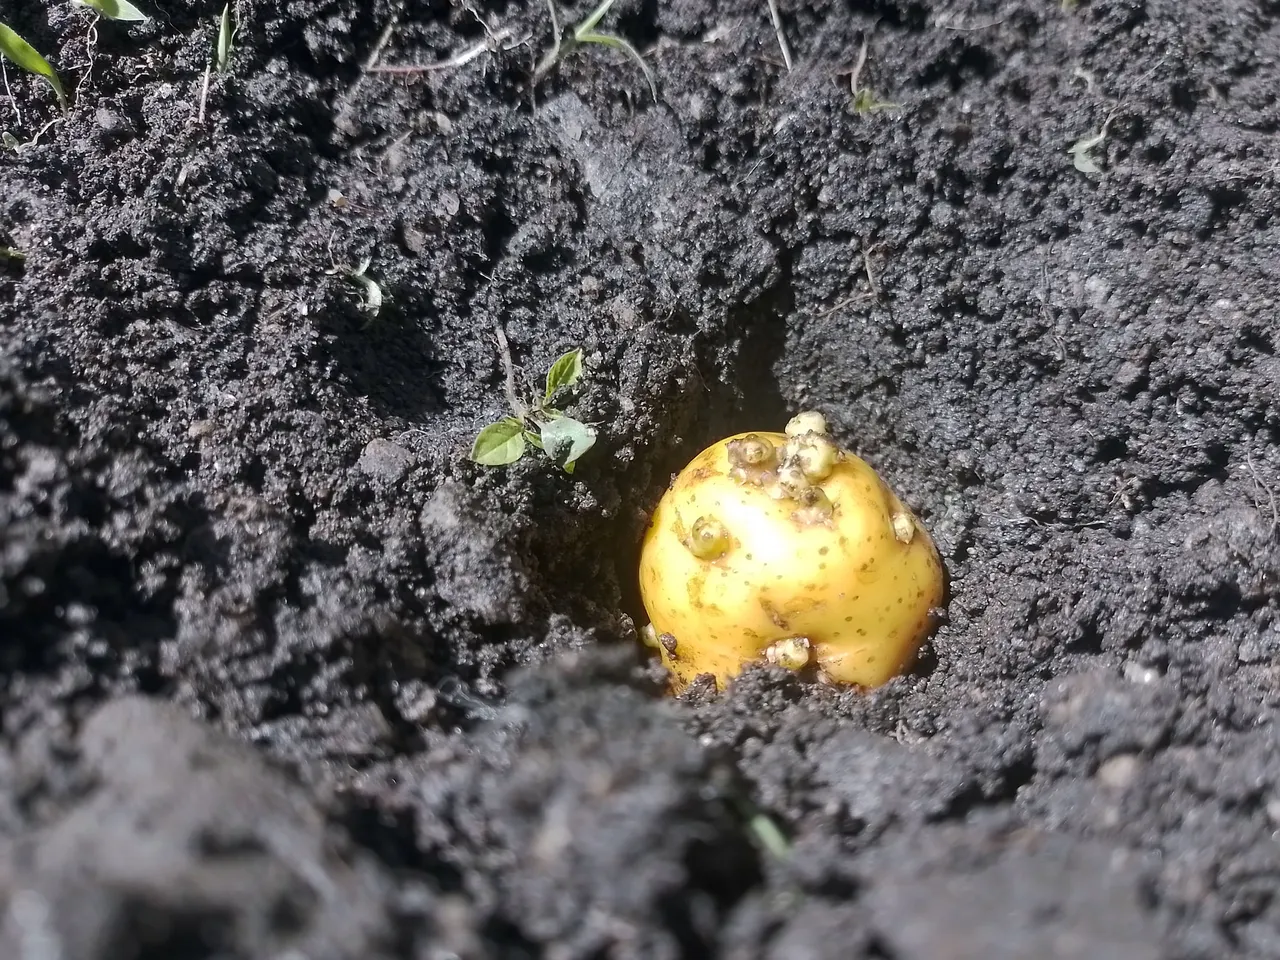
Returning to the subject of planting, I came across a few tiny potatoes that are very tasty. I had already planted a plant of this potato and didn't think it would grow, but surprisingly it did grow and gave these four potatoes. I let them germinate until they sprouted all those little sprouts that you can see in the picture.
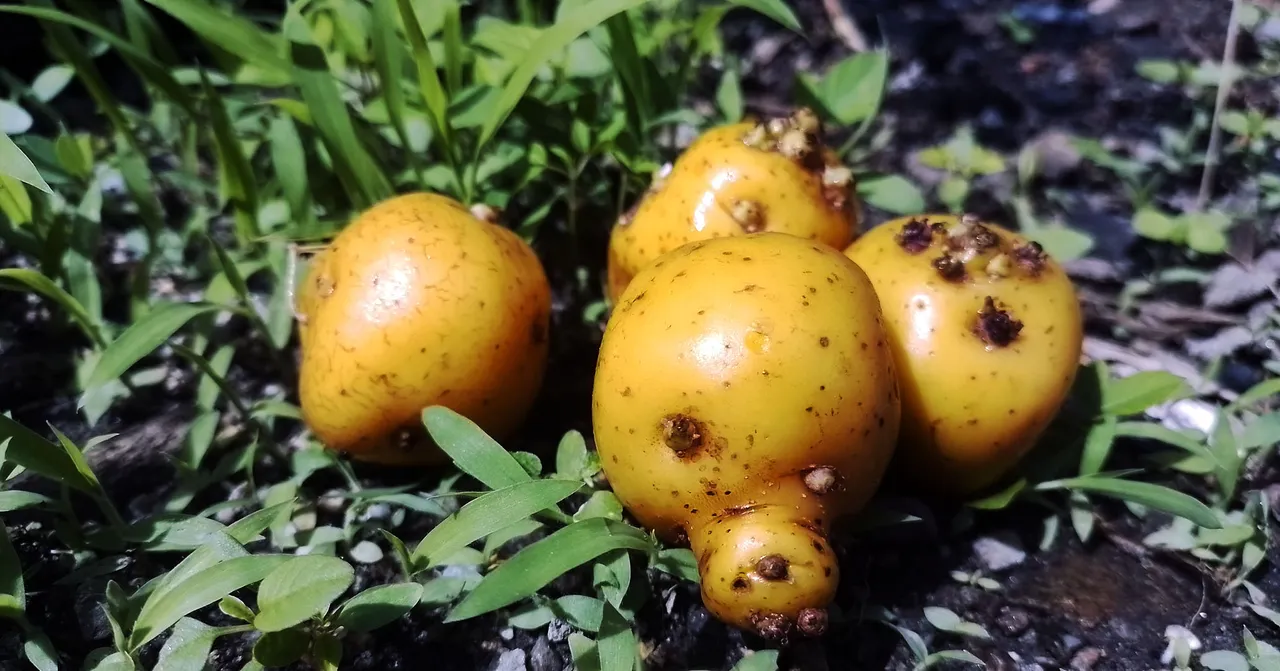
As soon as the sprouts grew, I moistened them again and made a space for planting. The plant is not too big, but with 3 or 4 potatoes per plant, growth and seed production is exponential.
 |  |  |
|---|
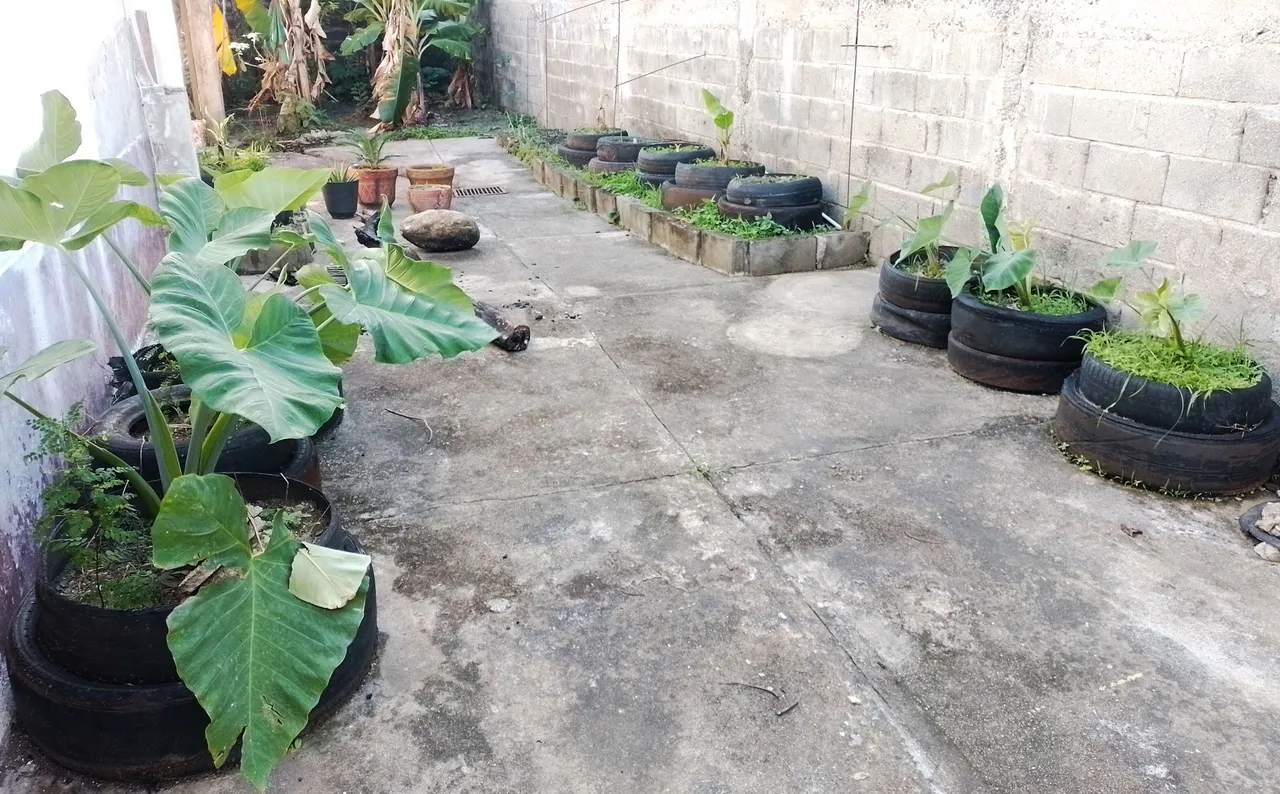
And that was the end of my work day. Below you can see how the patio looked like after organizing and planting everything. This was several days later, so you can see how some plants have grown in the soil beds and even how some banana plants have sprouted. They look great.
Well friends, that's all for now. I invite you to leave your opinions below in the comments, as always I will be happy to read them. With nothing more to add, I'll say goodbye then....
See you next time!
Español
Desde que me mudé a mi casa, he sembrado en el patio que tengo en la parte trasera. Aunque solo tengo sembrados unos cuantos plátanos y yucas, plantas que son de períodos anuales, hice unas camas de tierra para sembrar en el garaje, un área de concreto en donde nada puede crecer.
Pues bien, ya coseché lo que había sembrado en estas camas. Un montón de cilantro y cebollin. Hace poco estuve preparando el terreno para la nueva temporada de siembra, pero como estaré muy corto de tiempo, pensé en sembrar algo que requiriera menos tiempo pero que igual valiese la pena.
Ese día me levanté temprano para trabajar, pero aquí en mi pueblo llueve demasiado, pero tan pronto dejó de llover, continué trabajando.
Fíjense que una de las primeras cosas que hice fue agrupar toda la maleza a montones. Esta misma maleza la usaría para mezclarla con la tierra para sumar más materia orgánica.
La idea era que estas camas de tierra, hecha con bloques a cada lado del garage, tuviese muy buen contenido de nutrientes para lo que planeaba sembrar.
Fíjense que hay neumáticos viejos en diferentes partes del patio. Estos neumáticos los he utilizado anteriormente para hacer torres de tierra para sembrar cosas pequeñas. Normalmente apilo dos neumáticos para una planta relativamente pequeña, como una planta de papa, ocumo, o batata.
Planeaba apilar los neumáticos sobre las camas de tierra para sembrar algo más grande; sin embargo, primero mezclé la materia orgánica con toda la tierra, ¿cómo? Pues abriendo un espacio en cada cama de tierra, luego le agrego la maleza a montones y finalmente tapo con tierra. Es como si enterrase la maleza, de esta manera se va descomponiendo en los bancales.
En la foto que está más abajo, pueden ver cómo quedó una de las camas de tierra con los 3 neumáticos encima...
No es un trabajo fácil, pero la idea era que todo quedara bien. Estos neumáticos los había usado anteriormente para otras torres, así que ya tenían tierra, así que primero tuve que sacarles la tierra, luego colocarlos en su lugar final y después volver a llenarlos con tierra.
Mientras uno está trabajando, todo se ve feo y sucio, solo vean cómo se ve el garage en la siguiente fotografía, un desastre:
Luego de muchas horas de trabajo, logré preparar todo para comenzar a sembrar. ¿Qué sembraría en esta ocasión? Pues bien, algo que se dio muy bien aquí fueron las distintas clases de plátano que sembré. Por eso decidí sembrar lo mismo pero en estas torres de neumático.
¿Cómo se siembra el plátano? Pues no es por semilla, como otros frutos. En la raíz del tallo de esta planta, crecen hijos que se pueden cortar y trasplantar en otras áreas.
Gracias a que tengo otras plantas de plátano en el patio, contaba con otros hijos de platano que luego corté y limpié. A continuación un par de fotos de este proceso:
| |
|---|
Como ya les dije, a cada neumático que usaría para sembrar lo vacié para poder colocarlo en su nueva posición, es decir, encima de las camas de tierra.
Para volver a llenarlo de tierra, les colocaba una capa de tierra, luego una capa de maleza, después otra capa de tierra y así hasta llenar por completo el neumático, tal como se ve en este par de fotografías:
Ya en este punto podía comenzar a sembrar los hijos de plátano. Antes de sembrarlos, se acostumbra a cortar la punta y dejar lo más limpia posible la parte de la raiz. De ahí nacerá la nueva planta de plástano.
Fíjense en esta secuencia de imágenes que está abajo. En la primera imagen se ve cómo coloqué el hijo de platano sobre la tierra, con las raíces hacia abajo. Encima del primer neumático coloqué otro neumático, como se ve en la imagen del medio. Finalmente, llené este segundo neumático con más tierra.
En total son 3 niveles de tierra en donde las raíces podrán expandirse y crecer. Estas plantas de plátano en específico no crecen demasiado, así que estos 3 niveles de tierra serán más que suficiente.
Aquí les dejo otro ejemplo de cómo quedaron algunas torres de neumáticos con los hijos de plátano sembrados. En cada torre habrá una futura planta de plátano.
| | |
|---|
Otro ejemplo de las cosas que se pueden sembrar en neumáticos, son estas seis torres que ya había preparado hace tiempo, en donde tengo sembradas seis plantas de ocumo.
Normalmente en cada torre se debe sembrar una planta, si es una planta grande, ya que si se siembran más no tendrán espacio para crecer las dos; ni espacio, ni nutrientes, así que una planta por torre es suficiente, a menos que sean plantas pequeñas pero esa es otra historia.
| |
|---|
Haciéndo paréntesis, mientras limpiaba el terreno me encontré con dos plantas de Yuca (o mandioca) que ya estaban listas para cosechar. No se dieron del todo bien, pero sí logré cosechar estas raíces con las que se pueden hacer numerosas recetas.
Como ya les mencioné, son plantas anuales, que se cosechan una vez al año. Tengo que esperar aproximadamente 9 meses para la próxima cosecha.
| |
|---|
Volviendo al tema de la siembra, me encontré con unas cuántas papas de diminuto tamaño que son muy ricas. Ya había sembrado una planta de esta papa y no pensé que crecería, pero sorpresivamente sí creció y dio estas cuatro papas. Estas las dejé germinar hasta que le salieron todos esos pequeños brotes que pueden ver en la fotografía.
Tan proto crecieron los brotes, las humedecí otra vez y les hice un espacio para sembrarlas. La planta no es demasiado grande, pero con 3 o 4 papas que se de por cada planta, el crecimiento y la obtención de semilla es exponencial.
| | |
|---|
Y con esto di por finalizada mi jornada de trabajo. A continuación pueden ver cómo quedó el patio después de organizar y sembrar todo. Esto fue a varios días después, así que se ven cómo han crecido unas plantas en las camas de tierra e incluso cómo han brotado unos hijos de plátano. Se ven geniales.
Bien amigos, esto ha sido todo por ahora. Los invito a dejar sus opiniones abajo en los comentarios, como siempre estaré encantado de leerlos. Sin más que agregar, me despido entonces...