
I always see some redraw versions of older illustrations, so this is a sort of re-animation of my 3d sculpt Katara. My problem is, that I start sculpting or modeling objects, then stop and start other projects.
So I decided to bring Katara to life. I sculpted this character for an older reimagined character contest and decided to animate the character, instead of just doing a camera turnaround. Here is a side by side of before and after.
In the first version, I used a hdri-map for the background, but I prefer sleeker simple looks, so changed that up and also changed the lighting. I already rigged the character in the first version for a pose, but didn‘t use it further more, so what‘s new?
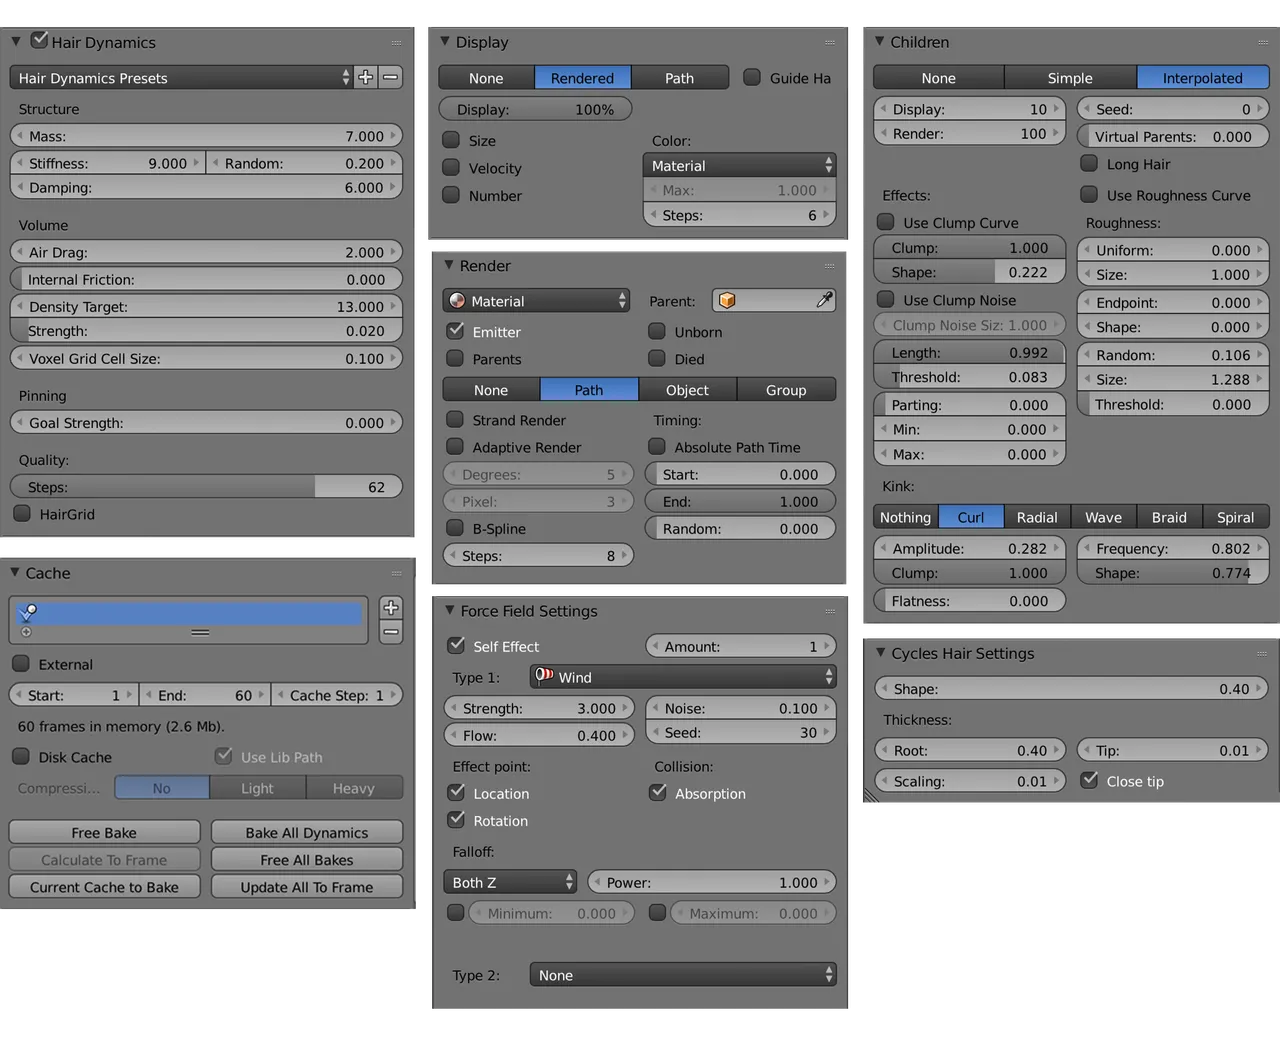
I animated the hands and knees, to simulate a balancing surf movement, added eyelids for the eye blinking and the Hair Dynamics settings of the Particle System for a smooth hair simulation. This was the most challenging part, because the hair collided with the face or body, so I had to change the hairstyle, get rid of the braids in the front and added a collision object to try to keep the hair out the the face. To make sure, that the roots don‘t move around as much as the rest of the hair, I weight painted them in the Particle Edit-Mode. I mostly played around with the settings, which you can look up here:
Rigging & Skinning
I already rigged the character to give her a surfer pose, but didn‘t set different keyframes for a balancing movement. The rigg is the skeleton you set up for a character and skinning means the adjustment of the "skin" moving with a certain joint/bone. So you bind the skin to the rigg (armature) with automatic weights and change up the weight in the Weight-Paint-Mode, until you are satisfied with the result.
Animation
At first I wanted to add Shape Keys to animate the eyelids, which you can add under the Properties Panel in Object Data. Shape Keys are used to deform objects into new shapes, by changing the position of vertices (points) of an object. The Keys you create have different values. 0 for the basis, meaning the starting position and 1 for the changed position. You can set a keyframe by using the the shortcut i while hovering over the Value-Setting, which will turn yellow. Sadly, I could‘t figure out how to move the vertices smoothly with the eye lashes parented to the face. It was a little messy, so in the end I modeled additional eye lids, parented the eyelashes to the new lids and rotated them to achieve the eye blinking.

So stay tuned and hope you like it:)!
Thanks for reading!
xxx.
▶️ DTube
▶️ IPFS