最近闲着无事和朋友做个小应用,需要开发网页,虽然以前团队都用过VUE、React等框架,但自己却没有写过一行前端网页代码,个人觉得也是应该提高的,正好借机练练手。
做一个“我的训练”页面
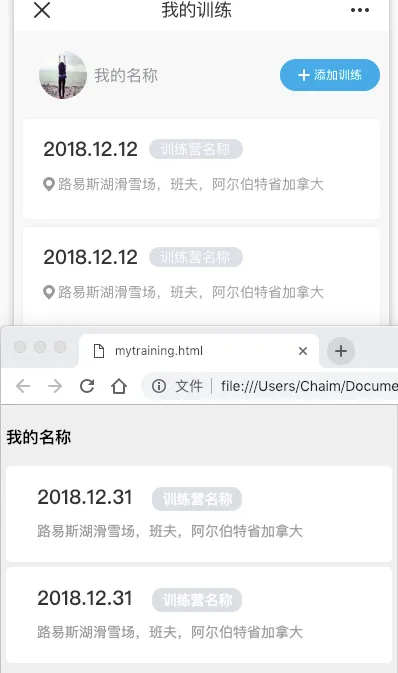
需要做的页面效果图如下:

布局
几种布局方法:
- 直接手写,适合对HTML和CSS都比较熟悉的人
- 找类似网页进行修改
- 用网页软件制作类似页面后修改
我对CSS并不太熟悉,用的是第2种方法,找到一个类似页面来修改
第一版
<!DOCTYPE html>
<html>
<head>
    <meta charset="UTF-8">
    <title></title>
    <style>
        body{font-family: "微软雅黑";font-size: 14px;background: #eeeeee}
        input{font-size: 14px;}
        body,ul,div,html{padding: 0;margin: 0;}
        .hidden{display: none;}
        .main{margin: 0 auto;padding:5px;}
        li{list-style-type: none;position: relative;border: 1px solid transparent;padding: 0 20px;background:#fff;border-radius:5px;margin-bottom: 5px}
        li:hover{border: 1px solid #09f;}
        li:hover .close{display: block;}
        li div{display: block;}

        .date {font-family: PingFangSC-Medium;font-size: 20px;color: #333333;letter-spacing: 0;line-height: 20px;float:left;margin-left: 10px;margin-right: 10px;margin-top: 20px;margin-bottom: 10px}
        .name {font-family: PingFangSC-Regular;font-size: 14px;color: #FFFFFF;line-height: 14px;}
        .name_bk {background: #DCDFE6;border-radius: 10px;float:left;line-height: 20px;margin-left: 10px;margin-right: 10px;margin-top: 20px;margin-bottom: 10px;padding-left: 10px;padding-right: 10px;padding-top: 2px;padding-bottom: 2px;}
        .div_title {clear:both;margin-bottom: 20px;}
        .title {font-family: PingFangSC-Regular;font-size: 14px;color: #999999;line-height: 14px;margin-left:10px;}
    </style>
</head>
<body>
<div id="app" class="main">
    <div class="myinfo">
        <h3>我的名称</h3>
    </div>
    <ul>
        <li >
            <div>
                <div>
                <span class="date">2018.12.31</span>
                </div>

                <div class="name_bk">
                <span class="name">训练营名称</span>
                </div>

                <div class="div_title">
                <span class="title">路易斯湖滑雪场,班夫,阿尔伯特省加拿大</span>
                </div>
            </div>
        </li>
    </ul>
</div>
</body>
<script src="https://cdn.jsdelivr.net/npm/vue/dist/vue.js"></script>
<script type="text/javascript">
    new Vue({
        el: "#app",
        data: {
        },
        computed:{
        },
        methods:{
        },
        mounted(){
        },
        directives:{
        }
    });
</script>
</html>
div等布局不熟悉,查找不少资料来看怎么在同一行怎么换行,margin、padding、border-radius等属性,CSS属性也直接用的全局的,先测试一下怎么用吧。
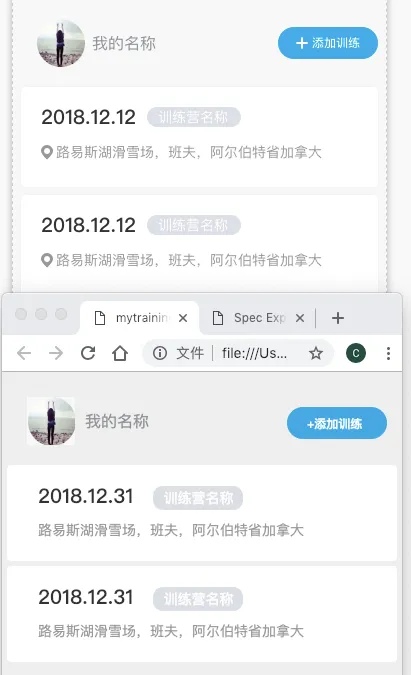
通过以上代码把列表显示出来和效果图差不多了。
页面最上面部分是一张图片、一个名字、一个按钮,试着加下图片和按钮。
第二版
<!DOCTYPE html>
<html>
<head>
    <meta charset="UTF-8">
    <title></title>
    <style>
        body{font-family: "微软雅黑";font-size: 14px;background: #eeeeee}
        input{font-size: 14px;}
        body,ul,div,html{padding: 0;margin: 0;}
        .hidden{display: none;}
        .main{margin: 0 auto;padding:5px;}
        li{list-style-type: none;position: relative;border: 1px solid transparent;padding: 0 20px;background:#fff;border-radius:4px;margin-bottom: 5px}
        li:hover{border: 1px solid #09f;}
        li:hover .close{display: block;}
        li div{display: block;}

        .myinfo {padding-top: 20px; padding-bottom: 20px; padding-left: 20px;height: 48px;}
        .date {font-family: PingFangSC-Medium;font-size: 20px;color: #333333;letter-spacing: 0;line-height: 20px;float:left;margin-left: 10px;margin-right: 10px;margin-top: 20px;margin-bottom: 10px}
        .name {font-family: PingFangSC-Regular;font-size: 14px;color: #FFFFFF;line-height: 14px;}
        .name_bk {background: #DCDFE6;border-radius: 10px;float:left;line-height: 20px;margin-left: 10px;margin-right: 10px;margin-top: 20px;margin-bottom: 10px;padding-left: 10px;padding-right: 10px;padding-top: 2px;padding-bottom: 2px;}
        .div_title {clear:both;margin-bottom: 20px;}
        .title {font-family: PingFangSC-Regular;font-size: 14px;color: #999999;line-height: 14px;margin-left:10px;}

        .addtraining_bk {background: #03A8E7;border-radius: 16px;float:left;width:100px;height: 32px;line-height:32px;margin-right: 10px;margin-top:10px;}
        .div_title {clear:both;margin-bottom: 20px;}
    </style>
</head>
<body>
<div id="app" class="main">
    <div class="myinfo">
        <div style="float:left;height:48px;margin-right: 10px;">
        <im g src="assets/head.jpg" width=48px height=48px/>
        </div>
        <div style="float:left;line-height:48px;">
        <span style="font-family: PingFangSC-Regular;font-size: 16px;color: #909399;">我的名称</span>
        </div>
        <div style="float:right;line-height:48px">
        <div class="addtraining_bk">
        <span style="font-family: PingFangSC-Medium;font-size: 12px;color: #FFFFFF;letter-spacing: 0;line-height: 32px;margin:0 20px;">+添加训练</span>
        </div>
        </div>
    </div>

    <ul>
        <li >
            <div>
                <div>
                <span class="date">2018.12.31</span>
                </div>

                <div class="name_bk">
                <span class="name">训练营名称</span>
                </div>

                <div class="div_title">
                <span class="title">路易斯湖滑雪场,班夫,阿尔伯特省加拿大</span>
                </div>
            </div>
        </li>
        <li >
            <div>
                <div>
                <span class="date">2018.12.31</span>
                </div>

                <div class="name_bk">
                <span class="name">训练营名称</span>
                </div>

                <div class="div_title">
                <span class="title">路易斯湖滑雪场,班夫,阿尔伯特省加拿大</span>
                </div>
            </div>
        </li>
    </ul>
</div>
</body>
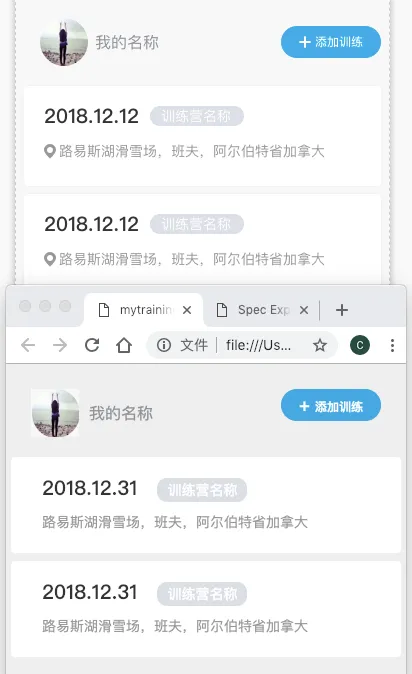
增加图片、名称、按钮后,与设计稿更接近了,效果如下:
测试图片没用带透明色的图片,因为正式以后都是读用户设置的图片,“+添加训练”前面的“+”号用的是文字,显示效果有些差异,细化时再修改。
该整理下CSS了,以上两版CSS用得比较乱,虽然不熟悉也可以整理得更舒服一些,我先看看CSS去。
第三版
<!DOCTYPE html>
<html>
<head>
<meta charset="UTF-8">
<title></title>
<style>
body{font-family: "微软雅黑";font-size: 14px;background: #eeeeee}
body,ul,div,html{padding: 0;margin: 0;}
#app {margin: 0 auto;padding:5px;}
li{list-style-type: none;position: relative;border: 1px solid transparent;padding: 0 20px;background:#fff;border-radius:4px;margin-bottom: 8px;}
li:hover{border: 1px solid #09f;}
.myinfo {padding-top: 20px; padding-bottom: 20px; padding-left: 20px;height: 48px;}
.myinfo div {float:left;height:48px;margin-right: 10px;}
.myinfo .myinfo_name {font-family: PingFangSC-Regular;font-size: 16px;color: #909399;line-height: 48px;}
.myinfo .myinfo_action {background: #03A8E7;border-radius: 16px;width:100px;height: 32px;line-height:32px;margin-right: 10px;margin-top:10px;font-family: PingFangSC-Medium;font-size: 12px;color: #FFFFFF;letter-spacing: 0;line-height: 32px;margin:0 20px;float:right;text-align:center;}
.myinfo .myinfo_plus {font-size: 18px;margin-right: 5px;}
.item_date {font-family: PingFangSC-Medium;font-size: 20px;color: #333333;letter-spacing: 0;line-height: 20px;float:left;margin-left: 10px;margin-right: 10px;margin-top: 20px;margin-bottom: 10px}
.item_name {font-family: PingFangSC-Regular;color: #FFFFFF;line-height: 14px;background: #DCDFE6;border-radius: 10px;float:left;line-height: 20px;margin-left: 10px;margin-right: 10px;margin-top: 20px;margin-bottom: 10px;padding-left: 10px;padding-right: 10px;padding-top: 2px;padding-bottom: 2px;}
.item_position {clear:both;margin-bottom: 20px;font-family: PingFangSC-Regular;font-size: 14px;color: #999999;line-height: 20px;margin-left:10px;}
</style>
</head>
<body>
<div id="app">
<div class="myinfo">
<div><im g src="assets/head.jpg" width=48px height=48px/></div>
<div class="myinfo_name">我的名称</div>
<div class="myinfo_action"><sapn class="myinfo_plus">+</sapn>添加训练div>
</div>
<ul>
<li >
<div>
<div class="item_date">2018.12.31</div>
<div class="item_name">训练营名称</div>
<div class="item_position">路易斯湖滑雪场,班夫,阿尔伯特省加拿大</div>
</div>
</li>
<li >
<div>
<div class="item_date">2018.12.31</div>
<div class="item_name">训练营名称</div>
<div class="item_position">路易斯湖滑雪场,班夫,阿尔伯特省加拿大</div>
</div>
</li>
</ul>
</div>
</body>
熟悉了下CSS和HTML,把一些不需要的span、div元素干掉,整理下css属性,代码清晰多了,效果如下:
VUE支持
Vue简单看过一些,对我来说编程代码比布局代码要简单一些
先在页面增加脚本,引用vue,如下:
<script src="https://cdn.jsdelivr.net/npm/vue/dist/vue.js"></script>
<script type="text/javascript">
new Vue({
el: "#app",
data: {
},
computed:{
},
methods:{
},
mounted(){
},
directives:{
}
});
</script>
增加名字变量、按钮响应、列表,图片先不处理,增加Vue代码后完整代码如下:
<!DOCTYPE html>
<html>
<head>
<meta charset="UTF-8">
<title></title>
<style>
body{font-family: "微软雅黑";font-size: 14px;background: #eeeeee}
body,ul,div,html{padding: 0;margin: 0;}
#app {margin: 0 auto;padding:5px;}
li{list-style-type: none;position: relative;border: 1px solid transparent;padding: 0 20px;background:#fff;border-radius:4px;margin-bottom: 8px;}
li:hover{border: 1px solid #09f;}
.myinfo {padding-top: 20px; padding-bottom: 20px; padding-left: 20px;height: 48px;}
.myinfo div {float:left;height:48px;margin-right: 10px;}
.myinfo .myinfo_name {font-family: PingFangSC-Regular;font-size: 16px;color: #909399;line-height: 48px;}
.myinfo .myinfo_action {background: #03A8E7;border-radius: 16px;width:100px;height: 32px;line-height:32px;margin-right: 10px;margin-top:10px;font-family: PingFangSC-Medium;font-size: 12px;color: #FFFFFF;letter-spacing: 0;line-height: 32px;margin:0 20px;float:right;text-align:center;}
.myinfo .myinfo_plus {font-size: 18px;margin-right: 5px;}
.item_date {font-family: PingFangSC-Medium;font-size: 20px;color: #333333;letter-spacing: 0;line-height: 20px;float:left;margin-left: 10px;margin-right: 10px;margin-top: 20px;margin-bottom: 10px}
.item_name {font-family: PingFangSC-Regular;color: #FFFFFF;line-height: 14px;background: #DCDFE6;border-radius: 10px;float:left;line-height: 20px;margin-left: 10px;margin-right: 10px;margin-top: 20px;margin-bottom: 10px;padding-left: 10px;padding-right: 10px;padding-top: 2px;padding-bottom: 2px;}
.item_position {clear:both;margin-bottom: 20px;font-family: PingFangSC-Regular;font-size: 14px;color: #999999;line-height: 20px;margin-left:10px;}
</style>
</head>
<body>
<div id="app">
<div class="myinfo">
<div><im g src="assets/head.jpg" width=48px height=48px/></div>
<div class="myinfo_name">{{myName}}</div>
<div class="myinfo_action" @click='addTraining()'><sapn class="myinfo_plus">+</sapn>添加训练div>
</div>
<ul>
<li v-for="item in training_list">
<div>
<div class="item_date">{{item.date}}</div>
<div class="item_name">{{item.name}}</div>
<div class="item_position">{{item.pos}}</div>
</div>
</li>
</ul>
</div>
</body>
<script src="https://cdn.jsdelivr.net/npm/vue/dist/vue.js"></script>
<script type="text/javascript">
new Vue({
el: "#app",
data: {
myName: "单板八级",
training_list:[
{date:"2019.01.01", name:"瑞士专业训练营", pos:"路易斯湖滑雪场,班夫,阿尔伯特省加拿大"},
{date:"2018.12.12", name:"万龙预备营", pos:"万龙滑雪场,中国"}
],
},
computed:{
},
methods:{
addTraining() {
this.training_list.push({
date: "2019.1.2",
name: "北京vue测试营",
pos: "朝阳,北京,中国"
});
}
},
mounted(){
},
directives:{
}
});
</script>
</html>
显示效果如下:
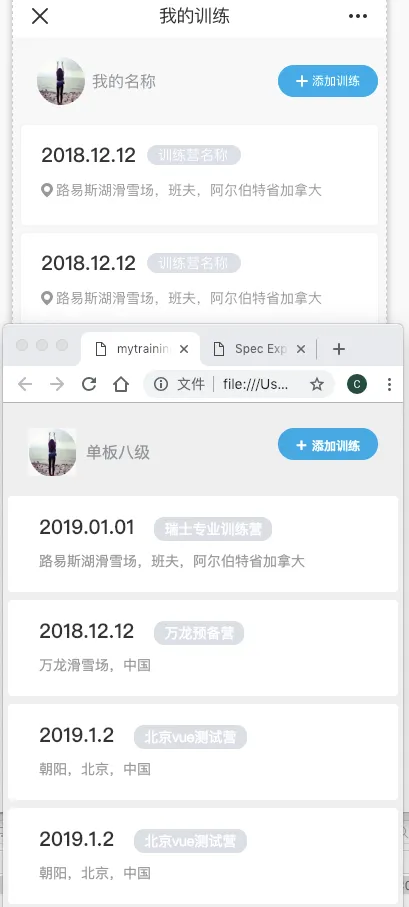
这样名称、列表都是从Vue数据中获取,也可以改成从服务端获取。
“添加训练”也能响应了,只是没有做响应效果处理。
结论
Vue的双向绑定,建立好DOM和数据的关系后,只需要对数据进行操作,能减少界面交互的一些干扰,开发起来还是比较顺手。
对于没有WEB开发经验的开发者来说,使用Vue难处主要在以下几个方面,需要重点突破:
- HTML、CSS相关语法和使用,这点决定了页面的布局;
- Vue的理解和用法,熟悉下Vue的实现原理对理解各处分开的代码、数据与DOM关系很有帮助。
- js的语法和使用,一些复杂的实现可能对js要求更高;
参考
https://baijiahao.baidu.com/s?id=1610567847045674577&wfr=spider&for=pc
http://www.w3school.com.cn/tags/tag_div.asp